Winter Interior Refresh
Discussion


Hi All
I thought i'd post a few pictures of my winter project work. Sadly nothing compared to some of the work people are doing, but I thought it might be of interest to someone in a similar position to me.
Plus it will hopefully go to show that all the good advice on this forum is being put to use!
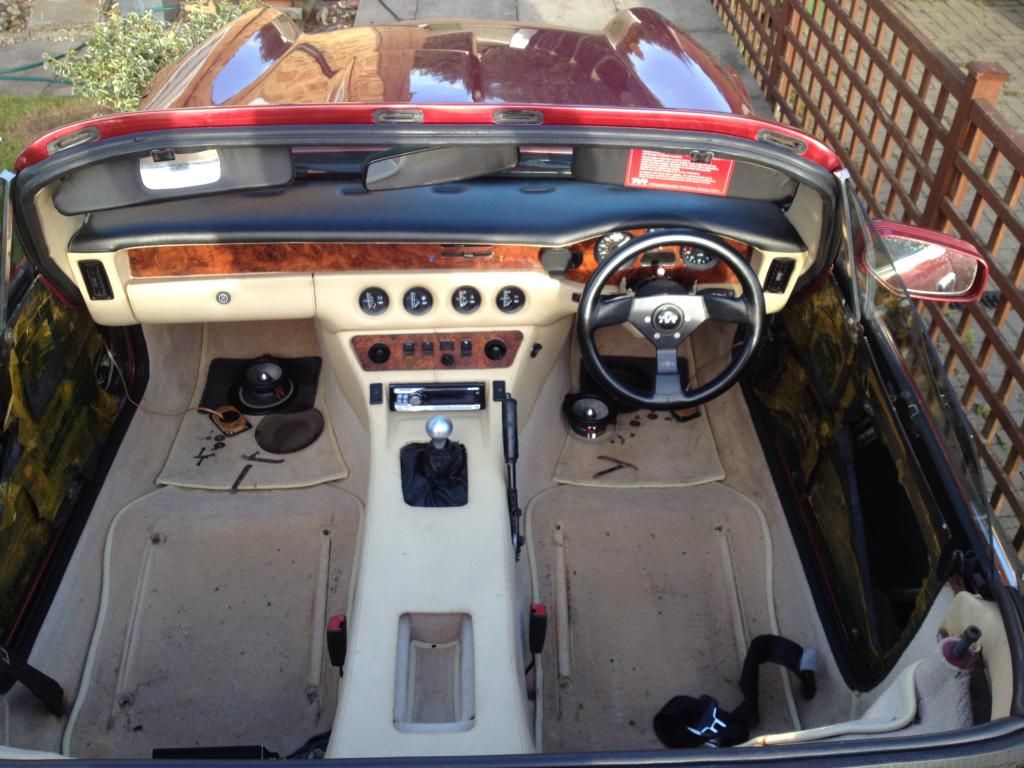
I bought my S3 around this time last year. It needed some chassis paint, but was very solid and pretty clean. But the interior did let it down a bit.

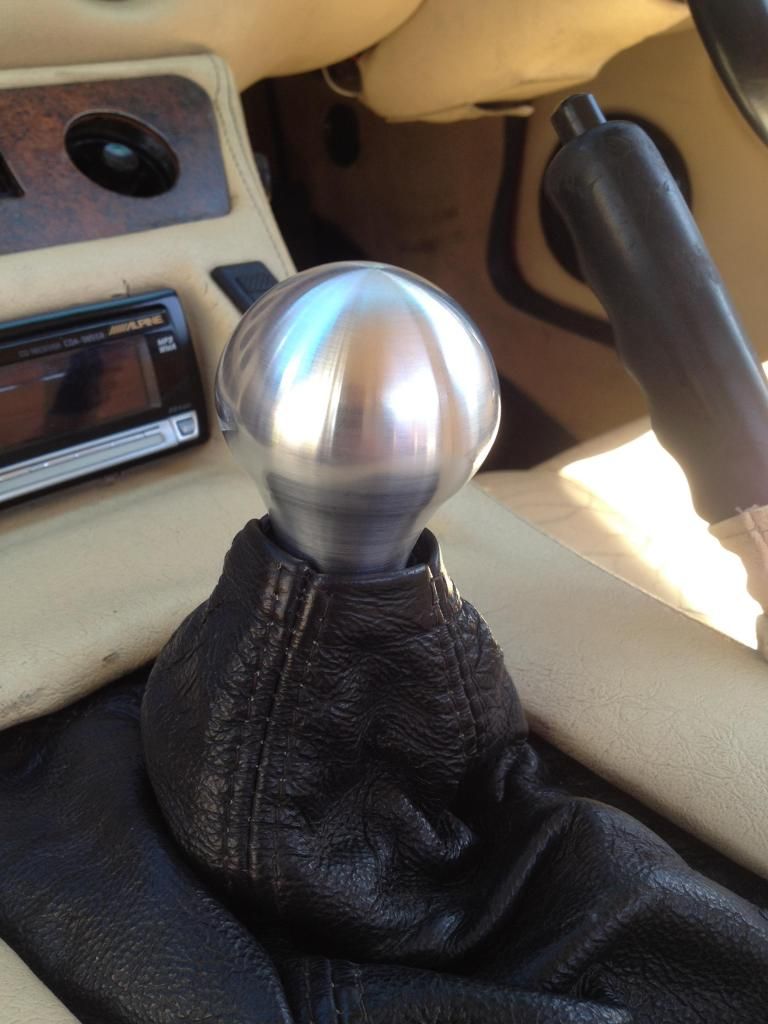
I have already changed some things. It now has Fiat Punto seatbelt buckles, a new gear knob and door speakers (ideas shamelessly stolen from mohitos speaker install - with his blessing)!
speakers:

As you can see though, the leather was far from perfect, and the wood veneer was a bit rough. A mate of mine had previously resprayed his Jag XJR leather and it had come up very nicely so I started to strip the interior on the drive (no garage alas).
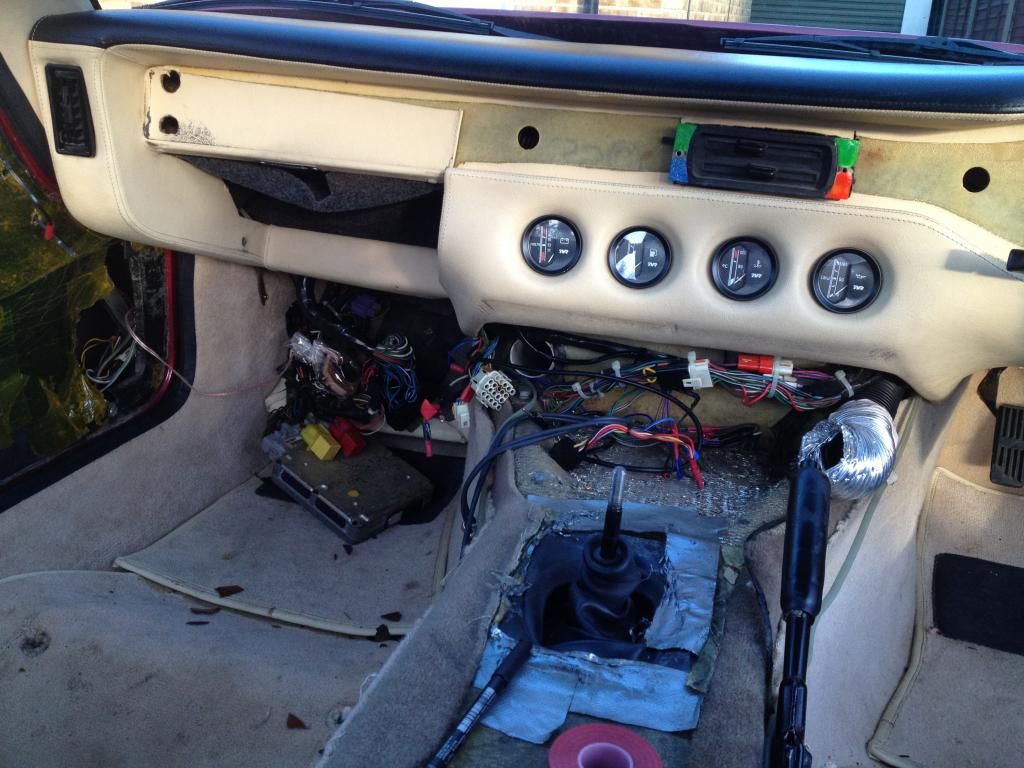
This actually took me ages as I was taking individual bits of interior off and repairing/spraying them as I went to practice for the drivers seat and centre console as they were quite grubby.
This is the difference between the original leather and resprayed (with poor camera work and dodgy lighting!):
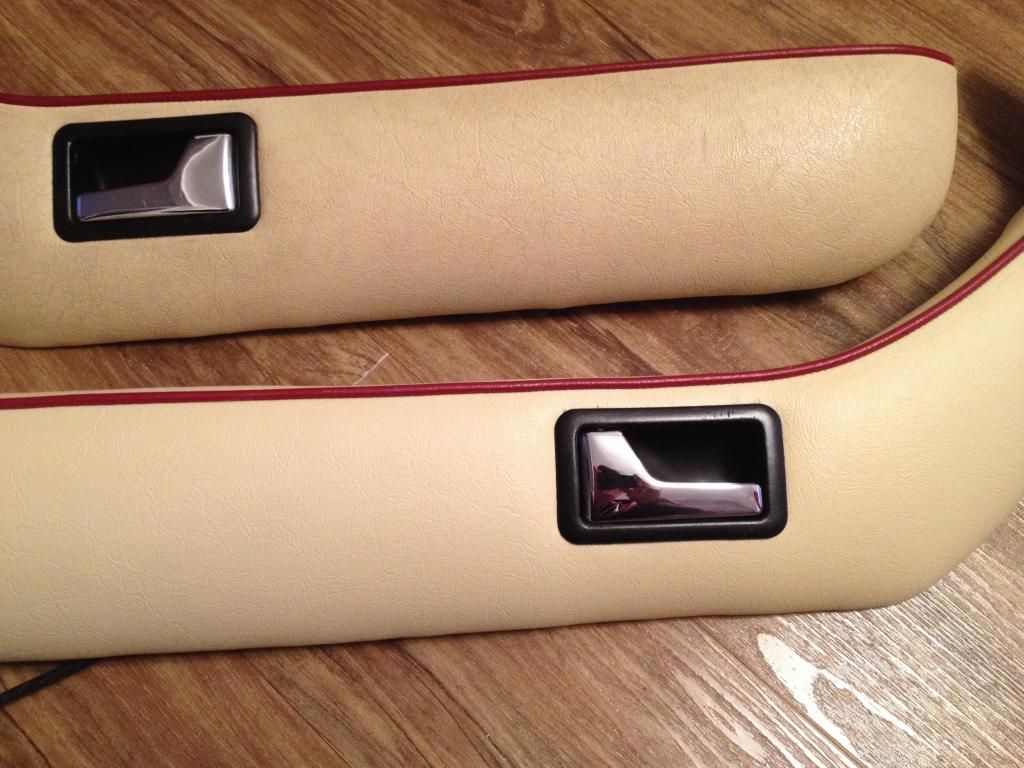
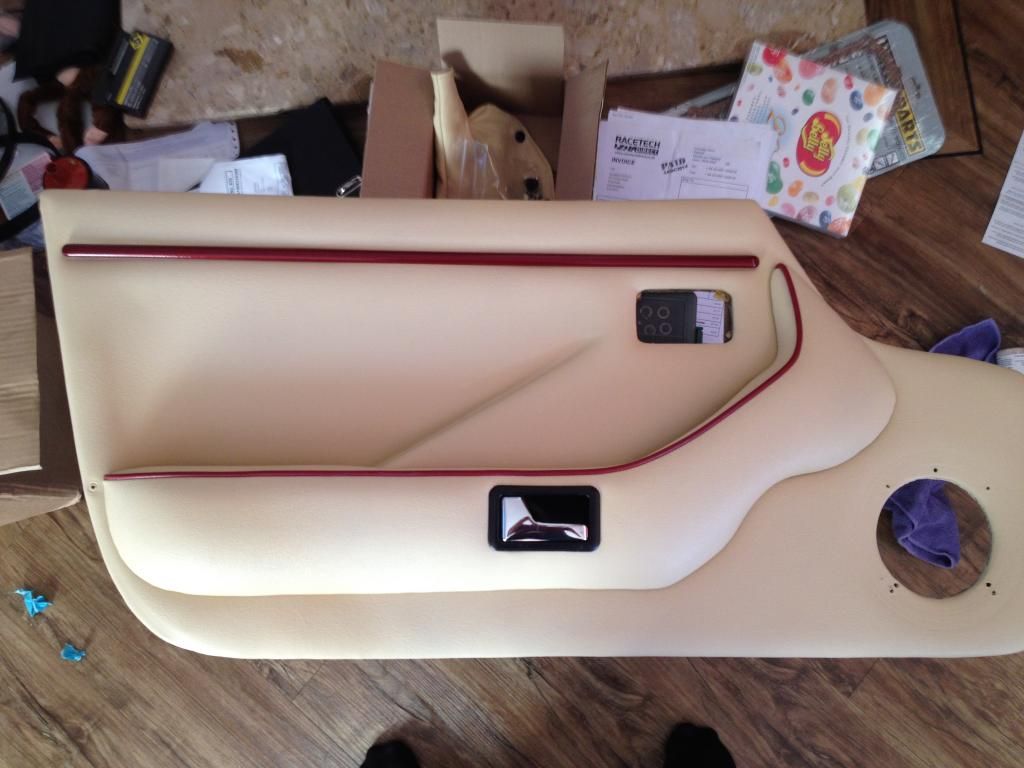
And a finished door card:
I now have finished pieces of TVR interior secreted throughout the whole house waiting to go back in!
I'm now at the stage where I have finished spraying all of the leather on the car, and now have to start ripping all the old carpets out to fit a new Lakewell set.
If people are interested, I will keep this updated. I've been very grateful for all the help and knowledge people have shared on this forum so hopefully this will be of interest.
All comments welcome!
I thought i'd post a few pictures of my winter project work. Sadly nothing compared to some of the work people are doing, but I thought it might be of interest to someone in a similar position to me.
Plus it will hopefully go to show that all the good advice on this forum is being put to use!
I bought my S3 around this time last year. It needed some chassis paint, but was very solid and pretty clean. But the interior did let it down a bit.
I have already changed some things. It now has Fiat Punto seatbelt buckles, a new gear knob and door speakers (ideas shamelessly stolen from mohitos speaker install - with his blessing)!
speakers:
As you can see though, the leather was far from perfect, and the wood veneer was a bit rough. A mate of mine had previously resprayed his Jag XJR leather and it had come up very nicely so I started to strip the interior on the drive (no garage alas).
This actually took me ages as I was taking individual bits of interior off and repairing/spraying them as I went to practice for the drivers seat and centre console as they were quite grubby.
This is the difference between the original leather and resprayed (with poor camera work and dodgy lighting!):
And a finished door card:
I now have finished pieces of TVR interior secreted throughout the whole house waiting to go back in!
I'm now at the stage where I have finished spraying all of the leather on the car, and now have to start ripping all the old carpets out to fit a new Lakewell set.
If people are interested, I will keep this updated. I've been very grateful for all the help and knowledge people have shared on this forum so hopefully this will be of interest.
All comments welcome!
An excellent bit of work! 
Particularly like the leather renovation it looks new! Parts of my interior are a bit more 'aged' than I'd like and plan to do some refurbishing at some point next year when my garage is finished (although your managing remarkably well without one it seems).
Can I ask how you managed to re-apply colour to the red piping? Just masking or something?
Keep up the good work it does look great.

Thanks for all the kind comments. I used the furniture clinic colour kit on the leather. I can't recommend it enough so far. Very impressed
TVR-Stu said:
Can I ask how you managed to re-apply colour to the red piping? Just masking or something?
I used pinstripe tape to mask the piping. I think the key is to use good quality tape otherwise it doesn't stick properly and is a nightmare. 
I think both Jon's & Barry's look excellent, but the contrasting piping definitely looks good. I guess proper masking only works if the piping is in good condition, otherwise it requires filling and respraying itself.
Jon, did you use the airbrush supplied with your kit?
I'd like to know how you got on with using it, did you use aerosol cans of propellant, or a compressor?
Jon, did you use the airbrush supplied with your kit?
I'd like to know how you got on with using it, did you use aerosol cans of propellant, or a compressor?
glenrobbo said:
Jon, did you use the airbrush supplied with your kit?
I'd like to know how you got on with using it, did you use aerosol cans of propellant, or a compressor?
I used the normal airbrush which I've found is fine but as the paint regulation is pretty coarse you end up spraying in a mushroom cloud!I'd like to know how you got on with using it, did you use aerosol cans of propellant, or a compressor?
I started using the aerosol cans, and they are ok but tend to freeze up and lose pressure, especially in the cold. Luckily I have a modelling compressor from years ago which was much better. Doing the seats etc with cans would have been annoying I think.
Barry S1 said:
Hi Jon
I found a fine brush works well on seats, I used a brush for all of mine, not had good reports about the gas cans and not having a better way of doing it.came out ok
Happily I had a compressor as you're right - cans aren't ideal. The first coat that is applied with a sponge came out well, so I imagine with care a brush finish would be spot on.I found a fine brush works well on seats, I used a brush for all of mine, not had good reports about the gas cans and not having a better way of doing it.came out ok
The paint and finish is very forgiving stuff I've found.
XK140 said:
As others have said,great job!
Can I ask where you got the alloy gear knob from?
.
Thanks very much.Can I ask where you got the alloy gear knob from?
.
The gear knob is custom as I couldn't get an off-the-shelf one to look right with my gaiter.
A local machine shop made it up for me from my drawing (I can try and look it out if you like). I based it on the original sierra dimensions.
To carry on the refresh...
Some bits of the interior I sprayed in situ, which meant masking off everything I didn't want to turn cream.


I then sprayed it over a period of about 10 days. This is because where the temperature has been so cold, it can take an hour for a layer to go off enough to spray over instead of the 10mins it would usually.
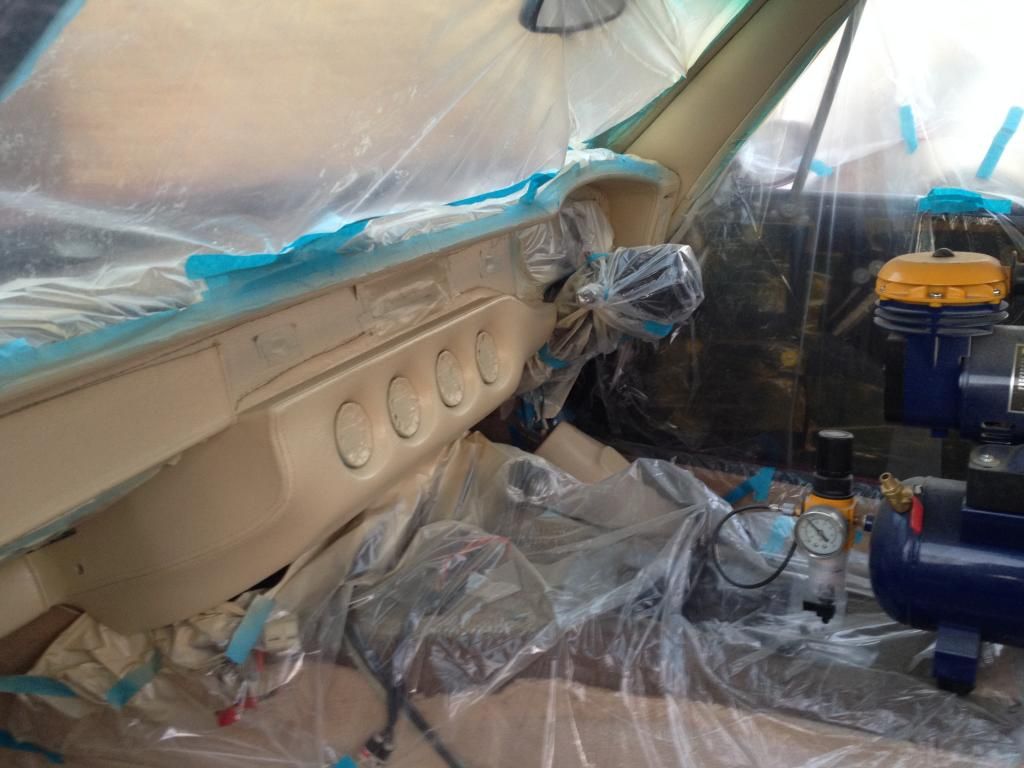
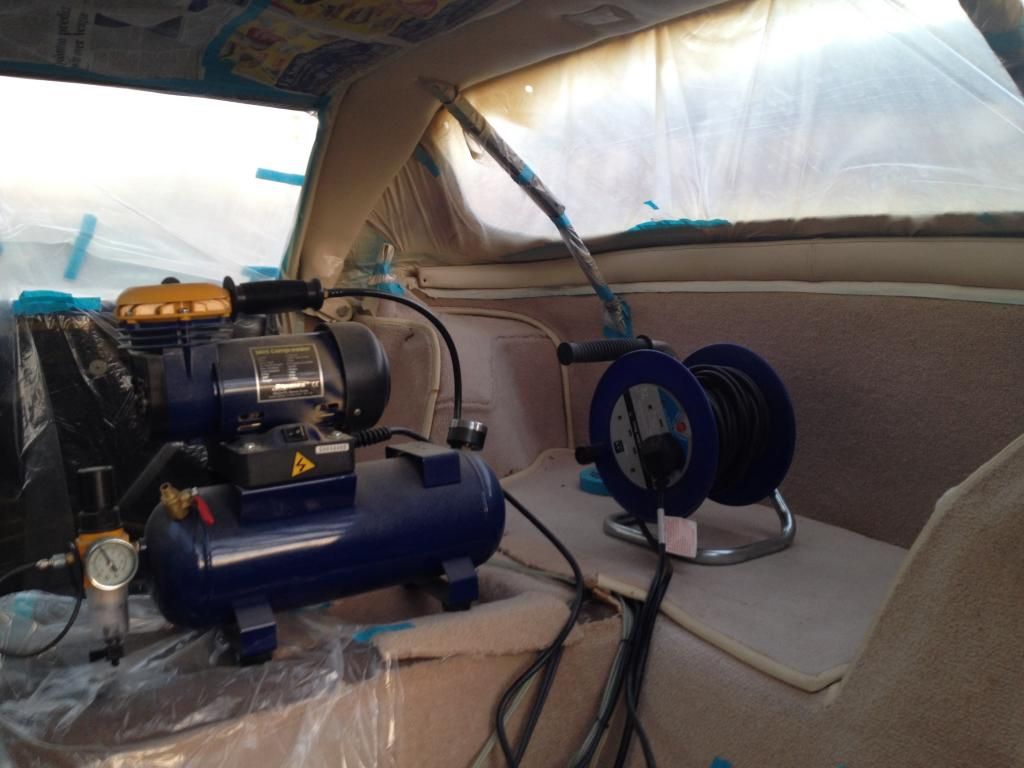
This is where I currently am with the leather. I have been doing some other bits too though, like stainless brake pipes etc.
Some bits of the interior I sprayed in situ, which meant masking off everything I didn't want to turn cream.
I then sprayed it over a period of about 10 days. This is because where the temperature has been so cold, it can take an hour for a layer to go off enough to spray over instead of the 10mins it would usually.
This is where I currently am with the leather. I have been doing some other bits too though, like stainless brake pipes etc.
Looks like a 'major' interior refurb rather than refresh. I salute your undoubted patience with all that masking off but I'm sure your end result will look worthy of the effort.
Thanks for the tip about the pinstripe tape for protecting the coloured piping by the way. I'll have to give it try as my first attempt with masking tape was a little unsatisfactory to say the least.
Keep the pictures coming as the job proceeds, nothing better than seeing the results of someones hard work.
TVR-Stu said:
Looks like a 'major' interior refurb rather than refresh. I salute your undoubted patience with all that masking off but I'm sure your end result will look worthy of the effort.
Thanks for the tip about the pinstripe tape for protecting the coloured piping by the way. I'll have to give it try as my first attempt with masking tape was a little unsatisfactory to say the least.
Keep the pictures coming as the job proceeds, nothing better than seeing the results of someones hard work.
Thanks - today was going to be the great unmasking but it raining heavily now... Always tomorrow!Thanks for the tip about the pinstripe tape for protecting the coloured piping by the way. I'll have to give it try as my first attempt with masking tape was a little unsatisfactory to say the least.
Keep the pictures coming as the job proceeds, nothing better than seeing the results of someones hard work.
For masking the piping, I found a run of pinstriping tape down each edge, then fill the gap down the middle with masking tape worked well.
Quick update...
I have unmasked the interior and I'm happy with how it has come out. I've just got to keep it looking nice while I do the carpets...
This is unmasked:

All the carpets out, pre hoover out

And with the first (and by all accounts, the most annoying) bits of carpet laid.

I probably won't post many carpeting pics up, as others have already done very useful guides on this. I'm just hoping for good weather now!
I have unmasked the interior and I'm happy with how it has come out. I've just got to keep it looking nice while I do the carpets...
This is unmasked:
All the carpets out, pre hoover out
And with the first (and by all accounts, the most annoying) bits of carpet laid.
I probably won't post many carpeting pics up, as others have already done very useful guides on this. I'm just hoping for good weather now!
Gassing Station | S Series | Top of Page | What's New | My Stuff