Alan461's Targa Roof Stowage - A Brilliant Cunning Plan
Discussion


After seeing Alan's clever roof stowage solution at our last Wellesbourne breakfast meet, we were all impressed by his lateral thinking and the simplicity of execution of the plan.
In fact, the solution was so blindingly obvious, how come nobody had thought of it before?
Barry, suitably inspired & armed with his new dangerously oscillating saw, almost immediately set about carving chunks out of his S, and successfully replicated the stowage mod. He then started looking round for other things to attack and mutilate
Enter poor Austin on an innocent topless quest for fish 'n' chips.
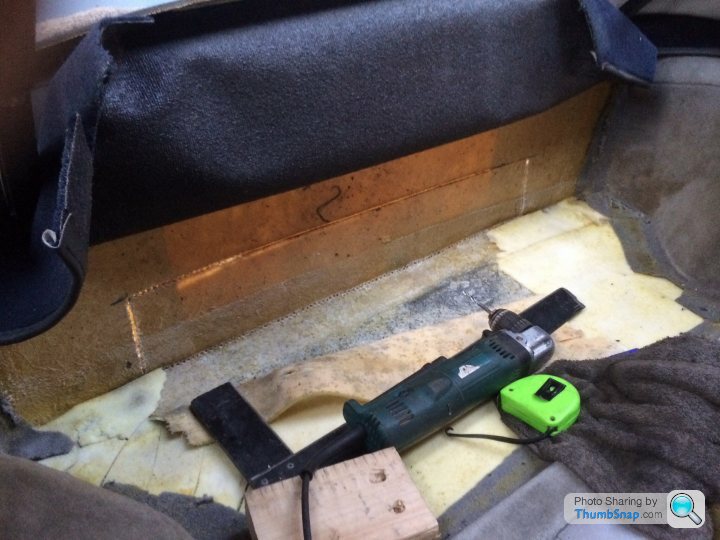
Next thing I knew, Austin was sporting a gaping 660mm x 125mm aperture in the bulkhead between the cabin & boot. I was so profoundly stunned at this that I turned metric!! .
A plank of severed fibreglass was just lying there, mercilessly slashed from it's natural place after 27 years of sterling service as an integral part of Austin's very being.
.
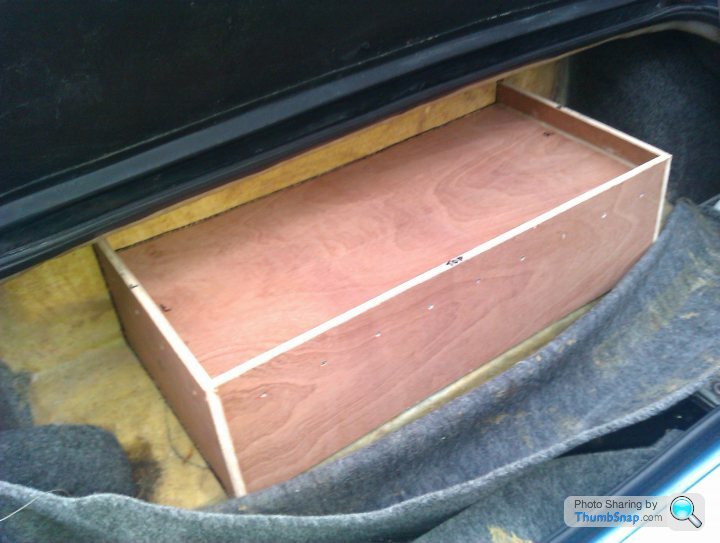
This was the result, viewed from inside the boot:
Note: It is best to peel back the carpets on both sides of the bulkhead before letting Barry anywhere near your S.
After this traumatic experience, upon returning home, I waited for the snows to clear, then set about creating some sort of stowage box to mitigate and conceal the gaping aperture.
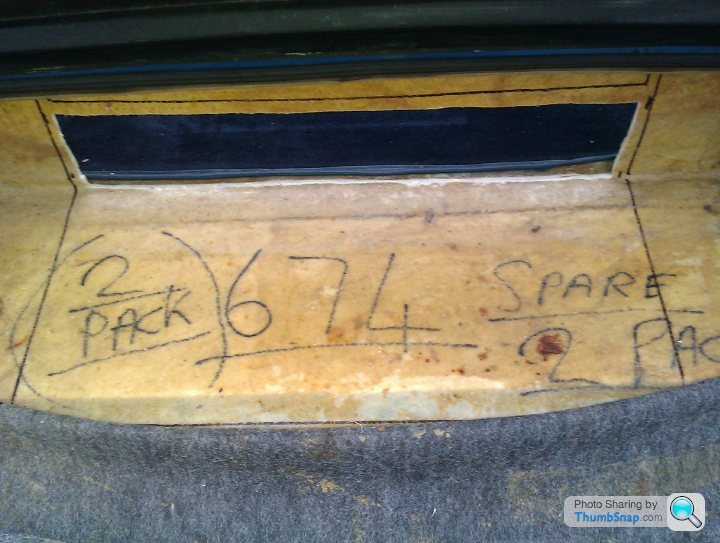
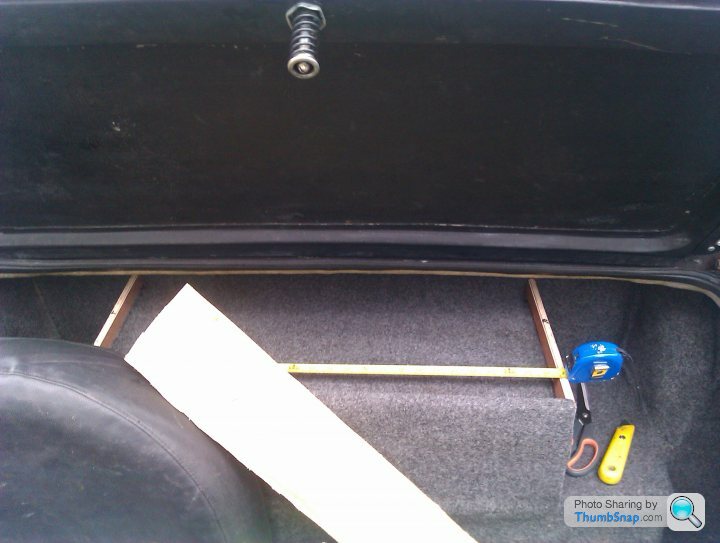
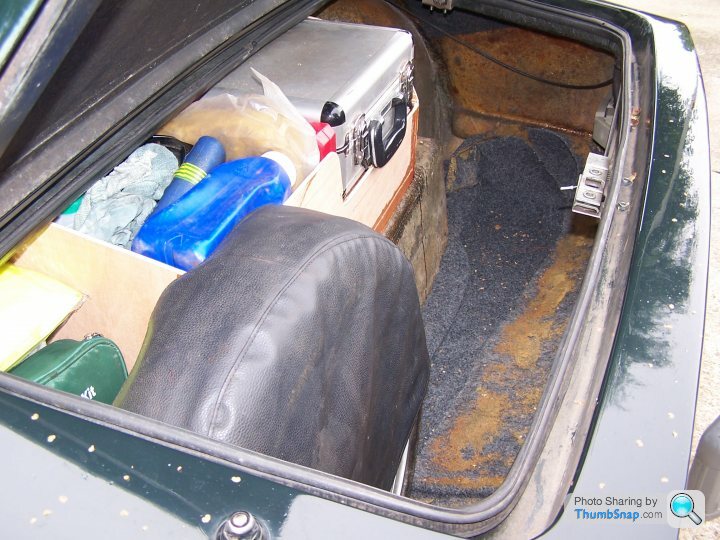
To assess the required dimensions, I placed the targa panels and also some essential items of equipment in position and measured up:
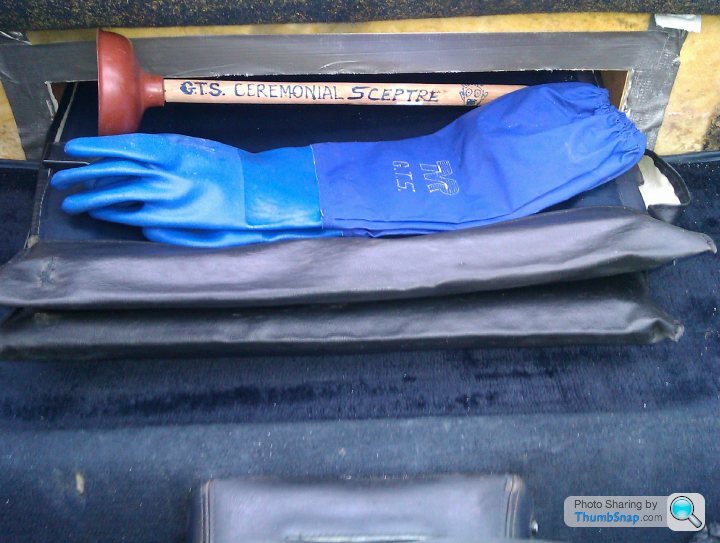
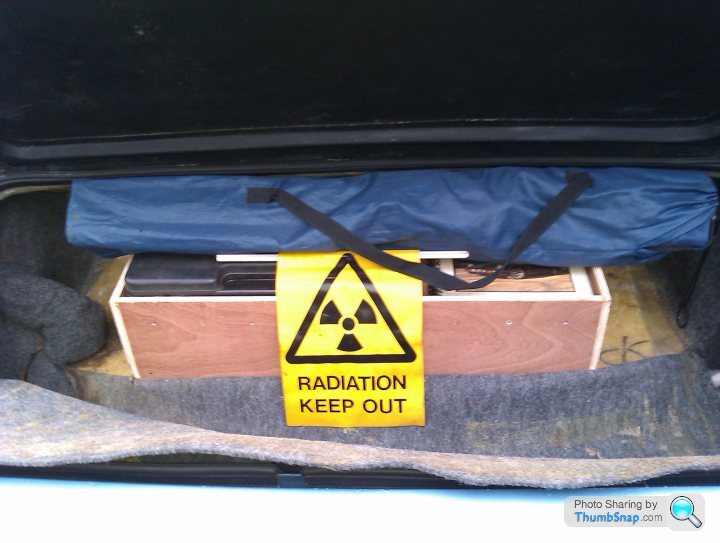
I decided on a box-cum-shelf with a raised lip on 3 sides so items could be stowed without sliding about, with enough space above to stow the all-important camping chair:
I constructed the box from 12mm exterior grade ply, custom fitted to suit the cut-out. The shelf was 665mm x 305mm, the rear panel was 665mm x 180mm, & the side panels were 180mm high x 330mm along the bottom, 315mm along the top, giving a tapered rear to the box assembly corresponding to and flush with the slope of the forward face of the boot where the space-saver spare resides.
It is best to mark these dimensions in situ, as S's may just possibly vary.…...a bit. Mine did, quite a lot as it happened. A bit more early Tudor than modern Bauhaus when it comes to square corners
The box was assembled with screws & liquid nails adhesive. ( I'd got no more no more nails left. )
Then the bulkhead was drilled for fixing screws and the box cemented in place with the same adhesive: Well, I mean some more from the same tube, not the stuff I'd used already. That would be silly.
Then the previously drilled bulkhead holes were back drilled from inside the cabin and screws fitted.
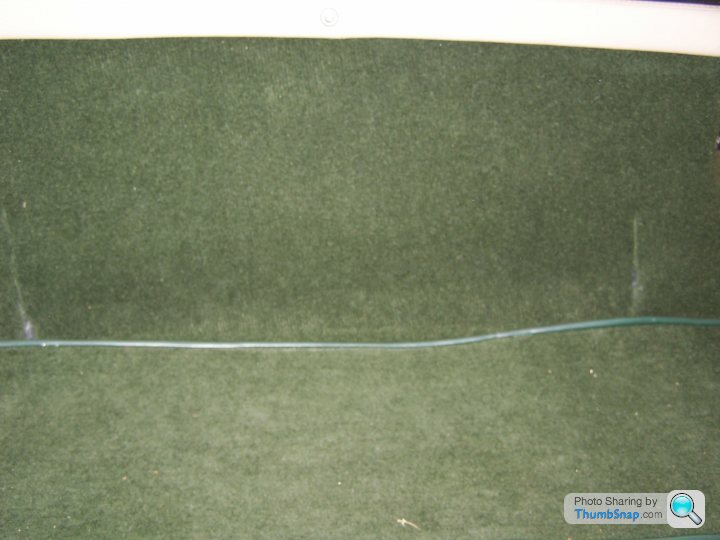
Then by carefully cutting the existing carpets to the box's dimensions, the box just needs extra carpet for the two sides, and a piece for the inside base and rear:
So as soon as my procurement executive comes up with the goods,
the job's a goodun'.
The roof panels can be stowed either way up, and this frees up loads of boot space and obviates the need to unpack everything from the boot every time a hurricane force storm hits.
Alan has also fitted restraint straps to stop the panels sliding forward under heavy braking.
I am thinking of fitting some restraint straps as well....... to Barry
Thanks to Alan, and Barry and my local DIY shop on the corner, the makers of the adhesive, and those nice people in charge of the weather for keeping the drizzle at bay whilst I was out there faffing about.
Please can we have nice topless weather for Wellesbourne?
Note: I accept no responsibility for any damage to property or person should you choose to emulate my actions.
And stay well clear of Barry if you don't want anything severed
Oh, and don't trust express courier companies.
In fact, the solution was so blindingly obvious, how come nobody had thought of it before?
Barry, suitably inspired & armed with his new dangerously oscillating saw, almost immediately set about carving chunks out of his S, and successfully replicated the stowage mod. He then started looking round for other things to attack and mutilate
Enter poor Austin on an innocent topless quest for fish 'n' chips.
Next thing I knew, Austin was sporting a gaping 660mm x 125mm aperture in the bulkhead between the cabin & boot. I was so profoundly stunned at this that I turned metric!! .
A plank of severed fibreglass was just lying there, mercilessly slashed from it's natural place after 27 years of sterling service as an integral part of Austin's very being.
.
This was the result, viewed from inside the boot:
Note: It is best to peel back the carpets on both sides of the bulkhead before letting Barry anywhere near your S.
After this traumatic experience, upon returning home, I waited for the snows to clear, then set about creating some sort of stowage box to mitigate and conceal the gaping aperture.
To assess the required dimensions, I placed the targa panels and also some essential items of equipment in position and measured up:
I decided on a box-cum-shelf with a raised lip on 3 sides so items could be stowed without sliding about, with enough space above to stow the all-important camping chair:
I constructed the box from 12mm exterior grade ply, custom fitted to suit the cut-out. The shelf was 665mm x 305mm, the rear panel was 665mm x 180mm, & the side panels were 180mm high x 330mm along the bottom, 315mm along the top, giving a tapered rear to the box assembly corresponding to and flush with the slope of the forward face of the boot where the space-saver spare resides.
It is best to mark these dimensions in situ, as S's may just possibly vary.…...a bit. Mine did, quite a lot as it happened. A bit more early Tudor than modern Bauhaus when it comes to square corners
The box was assembled with screws & liquid nails adhesive. ( I'd got no more no more nails left. )
Then the bulkhead was drilled for fixing screws and the box cemented in place with the same adhesive: Well, I mean some more from the same tube, not the stuff I'd used already. That would be silly.
Then the previously drilled bulkhead holes were back drilled from inside the cabin and screws fitted.
Then by carefully cutting the existing carpets to the box's dimensions, the box just needs extra carpet for the two sides, and a piece for the inside base and rear:
So as soon as my procurement executive comes up with the goods,
the job's a goodun'.
The roof panels can be stowed either way up, and this frees up loads of boot space and obviates the need to unpack everything from the boot every time a hurricane force storm hits.
Alan has also fitted restraint straps to stop the panels sliding forward under heavy braking.
I am thinking of fitting some restraint straps as well....... to Barry
Thanks to Alan, and Barry and my local DIY shop on the corner, the makers of the adhesive, and those nice people in charge of the weather for keeping the drizzle at bay whilst I was out there faffing about.
Please can we have nice topless weather for Wellesbourne?
Note: I accept no responsibility for any damage to property or person should you choose to emulate my actions.
And stay well clear of Barry if you don't want anything severed
Oh, and don't trust express courier companies.
Edited by glenrobbo on Sunday 15th February 01:02
AutoAndy said:
Good work Glen....how long did it take you? And where did you put your sub-woofer?
Hi Andy, It took longer to think about it than to actually do it.
Story of my life really
And even though I have done quite a bit of work on Nimrods, now that I have retired, I no longer feel the need to go woofing subs.
I'll leave that to our Anti-Submarine Warfare experts in the armed forces. They are far better equipped for the role.
Although I'm still quite keen on going topless underwater......

Edited by glenrobbo on Sunday 15th February 09:33
Hi , Glen . Congrats on some first class butchery from Barry , or Barry the Butcher , with the skills of a Kray twins henchmen ..This makes more sense , as sometimes I can't be bothered to faff about trying to squeeze the panels in the boot ,with all the crap and spare parts in there ... , especially on short journeys , then have to put roof on , to lock up the car .
So often use another full convertable which folds away in seconds ...
So I see where Joe's heroic Herculean effort for this ease of use quest ..for the S roof ...
So the butcher cut mod option is brilliant , like your first ever shag , all dropped, done and dusted and put away in 30 seconds ... Glen I take it , you can do this in that time ?
Looks great well done .....
Kie
Edited by Kie s2 on Sunday 15th February 09:47
Kie s2 said:
Hi , Glen . Congrats on some first class butchery from Barry , or Barry the Butcher , with the skills of a Kray twins henchmen ..This makes more sense , as sometimes I can't be bothered to faff about trying to squeeze the panels in the boot ,with all the crap and spare parts in there ... , especially on short journeys , then have to put roof on , to lock up the car .
So often use another full convertable which folds away in seconds ...
So I see where Joe's heroic Herculean effort for this ease of use quest ..for the S roof ...
So the butcher cut mod option is brilliant , like your first ever shag , all dropped, done and dusted and put away in 30 seconds* ... Glen I take it , you can do this in that time ?
Looks great well done , what can you call this mod?
Kie
Hello Kie. So often use another full convertable which folds away in seconds ...
So I see where Joe's heroic Herculean effort for this ease of use quest ..for the S roof ...
So the butcher cut mod option is brilliant , like your first ever shag , all dropped, done and dusted and put away in 30 seconds* ... Glen I take it , you can do this in that time ?
Looks great well done , what can you call this mod?
Kie

Watch out for Barry in the movie "SAW IV"
...... In fact, just watch out for Barry!As for the time it takes, it's been that long I can't remember
 I think last time I had it down to about 20 seconds, so on a par with Alan B'stard.
 I shall call the mod "the Alan461 TRS ( Targa Roof Stowage ) MkIII", so due recognition is given to the brilliant innovator and hopefully he won't sue my a
 se off for breach of copyright and patent infringement.
Edit: or how about simply the "Alan Roof Stowage Enclosure"? You have to admit, it does have a certain ring to it.
- Kie, Shirley you are far too young to have been around watching me that long ago?
Edited by glenrobbo on Sunday 15th February 10:33


steve j said:
glenrobbo said:
Apparently a lot quicker than it takes Phillpot to get it down
Come along to Wellesbourne and I'll show you in the car park!.....
Glen, you ole dog, offering to show folks in the carpark how you get it up could get you a reputation Come along to Wellesbourne and I'll show you in the car park!.....

Yes. I've seen the pics of you with that scraggy blonde dog in the December Sprint mag.
Personally, I prefer them clean shaven.
Edit.
Nice figure though....... 
Edited by glenrobbo on Monday 16th February 14:07
glenrobbo said:
You mean a reputation like yours Jonesy?
Yes. I've seen the pics of you with that scraggy blonde dog in the December Sprint mag.
Personally, I prefer them clean shaven.
Edit. Nice figure though.......
I know, I know Yes. I've seen the pics of you with that scraggy blonde dog in the December Sprint mag.
Personally, I prefer them clean shaven.
Edit.
Nice figure though....... Edited by glenrobbo on Monday 16th February 14:07
She`s a real beaut`, I`m trying to figure out if it`s my nephew or my niece 
Bumped again for folks on the Eurotour who expressed an interest in Alan's neat solution.
I place my targa panels upside down in the stowage slot with the cover bags lapped between & over them, and wedge a patriotic Union Flag cushion on top, which keeps them nicely in place. I can also place a holdall on top when I go away on an extended trip. The upturned lip of the Targa panels keeps it from sliding forward.
I place my targa panels upside down in the stowage slot with the cover bags lapped between & over them, and wedge a patriotic Union Flag cushion on top, which keeps them nicely in place. I can also place a holdall on top when I go away on an extended trip. The upturned lip of the Targa panels keeps it from sliding forward.
this targa panel storage solution is brilliant! i am definitely doing this to mine! i usually only take the roof of it i am confident it will stay dry and just stick the panels in the hall just inside the front door of the house before setting off as it is such a pain trying to get them in the boot! love it!
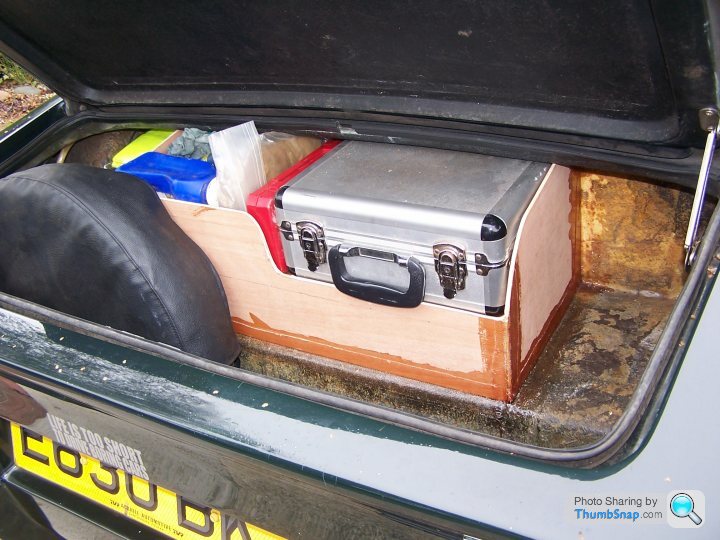
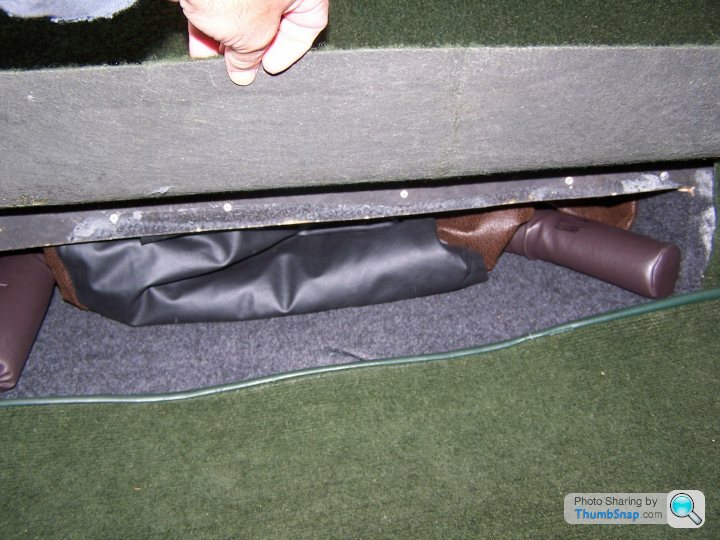
Just came across couple of pics of mine. Used the same basic approach but adapted mine to fit my very special TVR S specific tool kit! At this stage the structure is done (6mm ply g.r.p. bonded and seams coated, interior of box lined with thin boot type carpet, carpetting of boot yet to do)
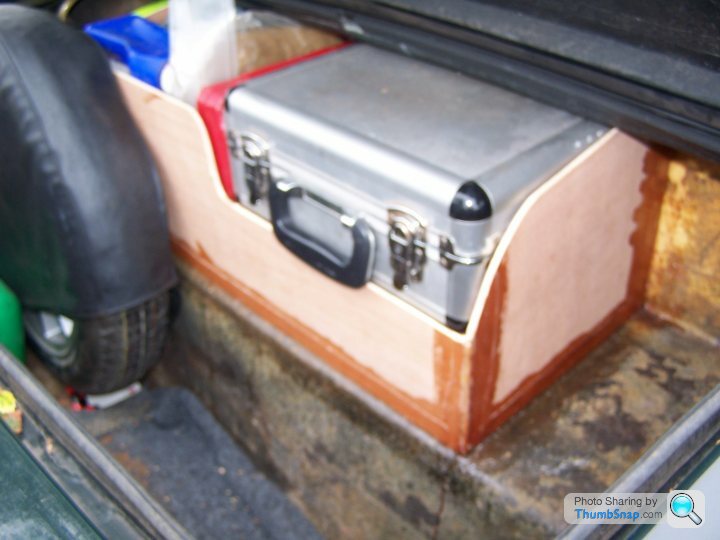
The box, from inside the car, has inside it the hood bags and the 'sausage' to be used to protect the rear screen when the hood is down. With the hood up it is invisible. When the hood is down (cant find a pic at the mo) the smaller panel is on top nested into the larger panel with the outer side of the panels down (both in their bags)(Alan fixed his with the outer upwards). The curved 'front' of the panels is then just up to the lip in the 'parcel shelf' behind the seats.
You do lose some depth on the parcel shelf with the hood off but we sorted out two bags to fit perfectly above the panels and all is very well. Made a MASSIVE difference to the useability of the car for touring.
Ah, the sausage!
 It's undoubtely a good idea to protect that vital membrane at the rear.
You could use a common or garden "snake" or "sausage dog" type draught excluder that dear old granny knitted for you as a birthday/ Christmas/ wedding present, or a length of that split tubular foam pipe insulation, or a colourful "noodle" swimming float, or one of Phillpot's sister's beautifully hand-crafted purpose made dedicated TVR S Series rear window anti-crease jobbies.
Personally, I use a rolled-up colour-coded Versace bath towel with gold embossed thread borders in an ancient Greek style pattern. This also comes in handy after the event of a sudden downpour: Dripping wet??? Just whip out your sausage! Dual-purpose you see!
HTH
Edit: I would not recommend the use of Han's sausage. ( See my S-Club Eurotour 2015 write up in the current ( August ) issue of Sprint Magazine. )
It's undoubtely a good idea to protect that vital membrane at the rear. You could use a common or garden "snake" or "sausage dog" type draught excluder that dear old granny knitted for you as a birthday/ Christmas/ wedding present, or a length of that split tubular foam pipe insulation, or a colourful "noodle" swimming float, or one of Phillpot's sister's beautifully hand-crafted purpose made dedicated TVR S Series rear window anti-crease jobbies.
Personally, I use a rolled-up colour-coded Versace bath towel with gold embossed thread borders in an ancient Greek style pattern. This also comes in handy after the event of a sudden downpour: Dripping wet??? Just whip out your sausage! Dual-purpose you see!
HTH
Edit: I would not recommend the use of Han's sausage.
( See my S-Club Eurotour 2015 write up in the current ( August ) issue of Sprint Magazine. )Edited by glenrobbo on Tuesday 6th September 09:50
Gassing Station | S Series | Top of Page | What's New | My Stuff