Terry's tale. (S3 resto ++)
Discussion


This is where things start to slow down.
Plus if I drag it out too much it will appear boring. But if its too short it might appear too matter of fact.
I'll just do my best....
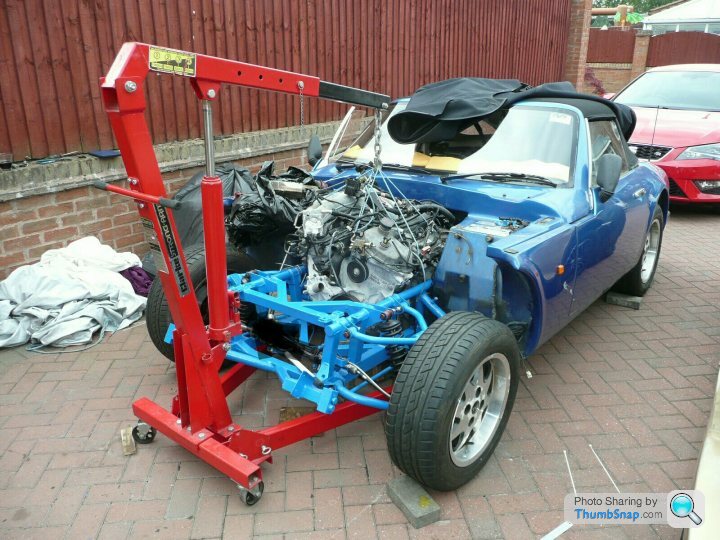
Obviously it would be so good if one could install the new engine/box with the body off. But as you need reference points, like using the body & bonnet to give those limits, it becomes more of a challenge, as those who have removed/fitted their own standard engines, will know !
The AJ30, AJV6, Duratec V6 (what ever you want to call it) engines have their original layout prioritised for FWD. So the RWD versions are adapted to suit such. The cam chain timing cover comes in at least x3 designs to suit where & what bolts onto it. So depending what ones doner unit comes from, will dictate somewhat how one goes about the installation. My unit was from a X350 rwd Jaguar, so in theory it has engine mounts to suit rwd... And it does !
However those Jaguar mounts do not suit the Tvr S chassis.
They are way to big & wide.
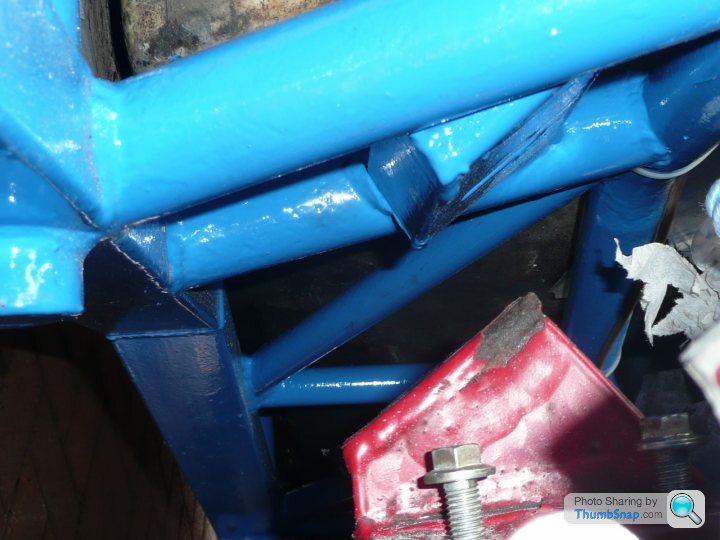
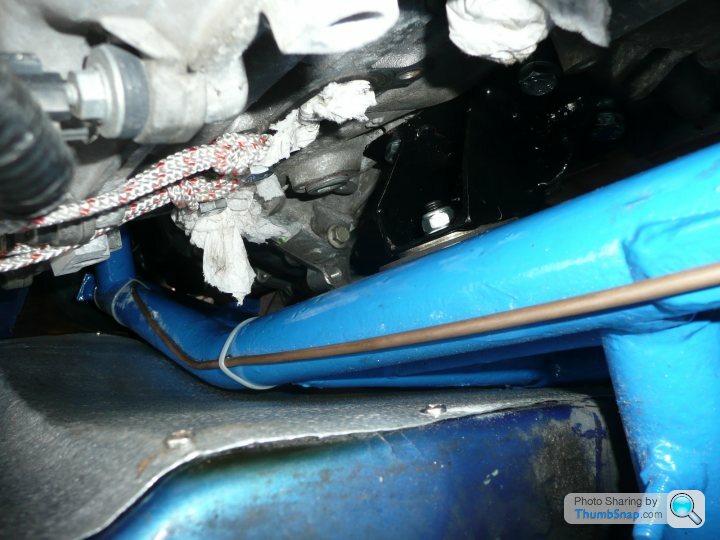
Blocking the engine up into a position I think is okay in both fore/aft & height terms I can just about fit the original 2.9 offside engine mount to the AJ block (but by only x2 bolts). Its so difficult to see anything down there let alone to see if it lines up.... It doesn't, but not by much.
I can now fabricate a new offside mount based on the original one.
TerryB
Here's the only decent image showing the misalignment between the original engine mount, and the chassis side mount.
Plus if I drag it out too much it will appear boring. But if its too short it might appear too matter of fact.
I'll just do my best....
Obviously it would be so good if one could install the new engine/box with the body off. But as you need reference points, like using the body & bonnet to give those limits, it becomes more of a challenge, as those who have removed/fitted their own standard engines, will know !
The AJ30, AJV6, Duratec V6 (what ever you want to call it) engines have their original layout prioritised for FWD. So the RWD versions are adapted to suit such. The cam chain timing cover comes in at least x3 designs to suit where & what bolts onto it. So depending what ones doner unit comes from, will dictate somewhat how one goes about the installation. My unit was from a X350 rwd Jaguar, so in theory it has engine mounts to suit rwd... And it does !
However those Jaguar mounts do not suit the Tvr S chassis.
They are way to big & wide.
Blocking the engine up into a position I think is okay in both fore/aft & height terms I can just about fit the original 2.9 offside engine mount to the AJ block (but by only x2 bolts). Its so difficult to see anything down there let alone to see if it lines up.... It doesn't, but not by much.
I can now fabricate a new offside mount based on the original one.
TerryB
Here's the only decent image showing the misalignment between the original engine mount, and the chassis side mount.
Oh, I am going use bobbin (original style) engine mounts.
And I did also centre the engine using the crank through the centre line of the car.
Now then, the nearside is a whole different story.
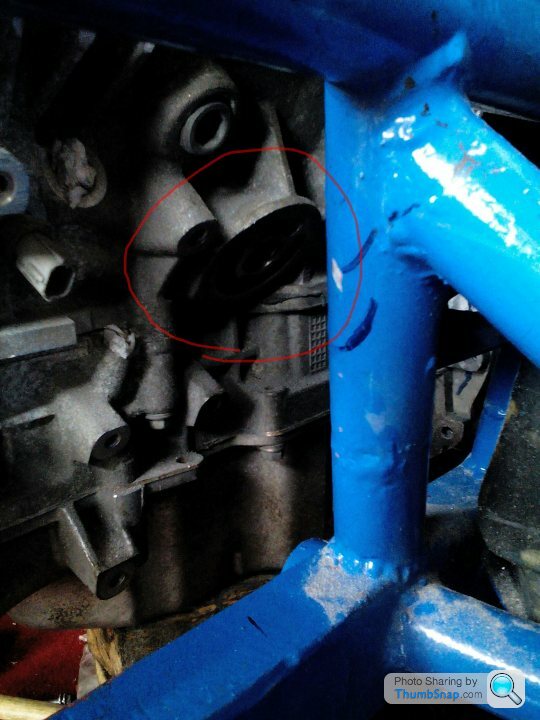
The first thing to note is that on the rwd AJ engines, the oil filter doesn't attach directly the the cylinder block. As there is a big alloy casting that attaches to the block oil filter aperture. This casting does 3 things.
1. Allows a remote oil filter position
2. Has a oil cooler attached
3. This casting is the offside engine mount.
So, being as this casting has to go, that means there isn't a nearside mount !!
And there are no threaded holes in the block anywhere close to the existing chassis side mount. There are threaded holes in the block at the front of the nearside, and those can be used if you want to create a new chassis mounting. I didn't, because that's where my alternator is going.
After much cardboard cutting and origami skills, & then converting that into steel, I created a workable mount. This wasn't a quick or easy process.
Hence why the engine eventually knew its own way into the car.
Not forgetting that because of the engine belt driven ancillaries I cannot have forward facing exhaust manifolds (I never liked those anyway). So the exhaust manifold design & route away from the engine will have to be mm perfect, as the space between head exhaust ports, the new engine mounts, and the chassis is pretty tight...
And its a this point, that I had a summer break from it...
TerryB.
And I did also centre the engine using the crank through the centre line of the car.
Now then, the nearside is a whole different story.
The first thing to note is that on the rwd AJ engines, the oil filter doesn't attach directly the the cylinder block. As there is a big alloy casting that attaches to the block oil filter aperture. This casting does 3 things.
1. Allows a remote oil filter position
2. Has a oil cooler attached
3. This casting is the offside engine mount.
So, being as this casting has to go, that means there isn't a nearside mount !!
And there are no threaded holes in the block anywhere close to the existing chassis side mount. There are threaded holes in the block at the front of the nearside, and those can be used if you want to create a new chassis mounting. I didn't, because that's where my alternator is going.
After much cardboard cutting and origami skills, & then converting that into steel, I created a workable mount. This wasn't a quick or easy process.
Hence why the engine eventually knew its own way into the car.
Not forgetting that because of the engine belt driven ancillaries I cannot have forward facing exhaust manifolds (I never liked those anyway). So the exhaust manifold design & route away from the engine will have to be mm perfect, as the space between head exhaust ports, the new engine mounts, and the chassis is pretty tight...
And its a this point, that I had a summer break from it...
TerryB.

CAD, I like it 
Sorry, but the cardboard mounts were cut up, then taped to the steel to create the 'real' mount. Plus the metal Mount was only tack welded at first to check fit, which bits ground off as required. So the card pieces ended up I the bin.
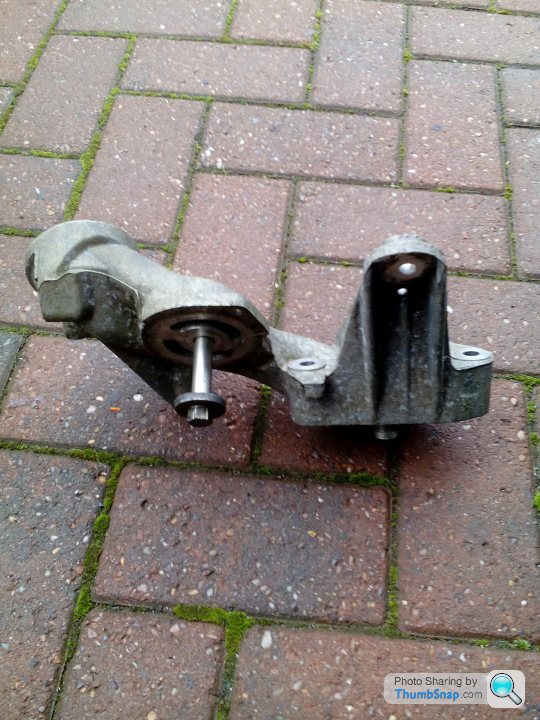
Oh, spot the deliberate mistake in my posting above about the N/side mount. As I also referred to it as the offside, sorry again.
Here's a piccy of the original Jag N/side mount, and of the area where it used to fit. As you can see, totally unusable on the S.
I'll go into detail about the exhausts soon...
TerryB
Sorry, but the cardboard mounts were cut up, then taped to the steel to create the 'real' mount. Plus the metal Mount was only tack welded at first to check fit, which bits ground off as required. So the card pieces ended up I the bin.
Oh, spot the deliberate mistake in my posting above about the N/side mount. As I also referred to it as the offside, sorry again.
Here's a piccy of the original Jag N/side mount, and of the area where it used to fit. As you can see, totally unusable on the S.
I'll go into detail about the exhausts soon...
TerryB
Before I shut the garage door before my summer break (which never really happened). I removed the engine yet again, I bolted on both the clutch assembly & the g-box. Then reinstalled the whole unit. Nothing to see, but it all looks good. I hadn't donre the g-box mount at that stage, so it was just blocked up.
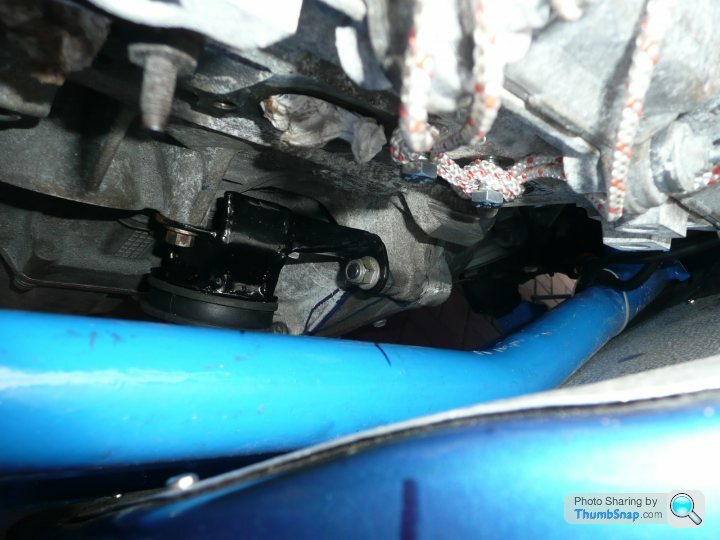
Here are the O/side & N/side engine mounts in situ.
The exhaust ports are there if you look carefully, currently blocked up with paper towel !
So the manifolds have to go in there somehow.
Lots of thinking to do...
TerryB
O/side
N/side
Here are the O/side & N/side engine mounts in situ.
The exhaust ports are there if you look carefully, currently blocked up with paper towel !
So the manifolds have to go in there somehow.
Lots of thinking to do...
TerryB
O/side
N/side
Heads you win, tails I loose on that one. As if I had done that, it would have meant...
Remove 2.9 units first with the body in place, then do all of the AJ mod-ing with other mech things still in situ etc.
So I chose to strip & repair the chassis, brakes, suspension etc first. But yes, the newly painted chassis does need a bit of touching up now ! I have kept the original 2.9 chassis mounting points in place, just in case the car outlives my ownership & someone else wants to revert it back.
TerryB
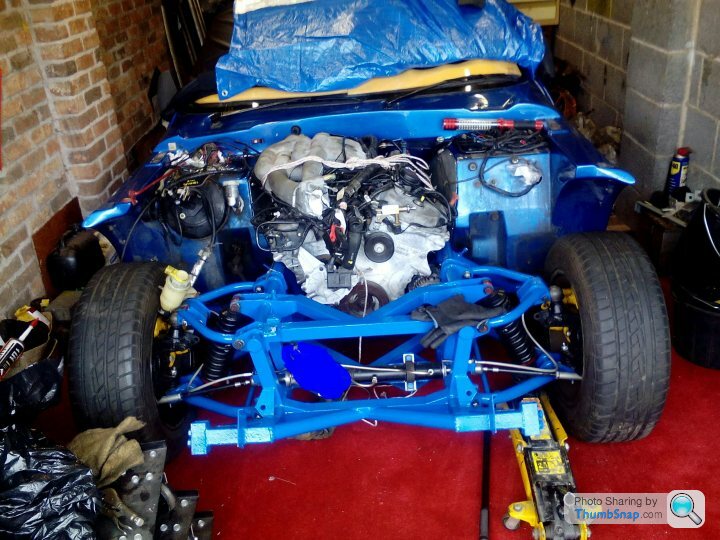
So, for the purposes of this thread, its now July 2016 (as that's when it was !).
I've reversed the car ( I think I can call it that again) into the garage, & put it up on x4 axle stands, so that I can crawl underneath as & when required.
And like most of you guys I'll guess, all of my projects have been done around that four lettered word called 'work' ! However as its near enough 42yrs working for that Ex national telecoms company with my initials in reverse. I'm starting to think about retirement. And just as I do, the company announce one of their infrequent 'early release' schemes. So I apply for it, thinking I wouldn't get it. But I did, and when you do, you're finished PDQ. So by the end of August I'm at home full time....
And no, I'm not in my garage full time, as it doesn't seem to be important to do that anymore.
But I do continue...
TerryB
So far I have totally worked on my own, but there are times when one does need the help from professional services. I think the exhaust manifolds come under that heading...
Having previously made purchases from a local-ish custom exhaust manufacturer, I called in to have a chat. My first thoughts was to give them the car, & let them do it 100%.
(To be cont'd).
TerryB
Having previously made purchases from a local-ish custom exhaust manufacturer, I called in to have a chat. My first thoughts was to give them the car, & let them do it 100%.
(To be cont'd).
TerryB
Barkychoc said:
I converted a V8S to power steering using a Chim rack. There are a few threads kicking about relating to it, I'll try to find one or two and add them to this.
Don't the Chimp lads now use an Imprezza power rack?http://www.pistonheads.com/gassing/topic.asp?h=0&a...
Edited by magpies on Tuesday 6th December 15:13
Exhaust manifolds cont'd...
Our conversation obviously came onto the cost of taking on that work. Where a fair percentage of that would be for labour, especially if they also had to remove the engine.
I don't know what a pair of standard design 2.9 manifolds would cost in stainless steel, but I'll bet their best estimate (for my manifolds) as suggested to me, was at least twice that !!!!
I think my face might have suggested that I wasn't so happy spending that amount. But I think their guy could see that I was keen on being involved. He asked if I could make drawings, or even mockups of what I wanted. As if I could, he would make up the manifolds only tack welded together to allow Some adjustments.
We shook hands, not on a price, but with a verbal agreement that I would go home & give it my best shot at doing the design work.
TerryB.
Gassing Station | S Series | Top of Page | What's New | My Stuff