I'm getting too old for this ^$(%
Discussion


voltage_maxx said:

Looks like my garage!
Since this picture was taken I've now got the diff out too. Mine didn't leave the factory with an LSD, so I've got a 3.54 LSD
to go in.
Lots of work ahead, but glad I did it. It's shown up loads of hidden nightmares: Knackered trailing arm bushes, bent trailing arm pins, a crack in the chassis etc etc
She'll be a good 'un when I've finished though! Good luck with yours!


It looks as though your car has remained fluids-tight unlike mine... diff oil, gearbox oil, PAS fluid, coolant...

At least my chassis can't rust too fast! Haven't found any cracks yet but need to clean up the tubes and get in there with a brighter light than my ATEX headtorch. Certainly the paint has flaked off around many of the welds, that's common. The main spine tubes are fine, most of the surface rust is confined to the rear end where the diff mounts.
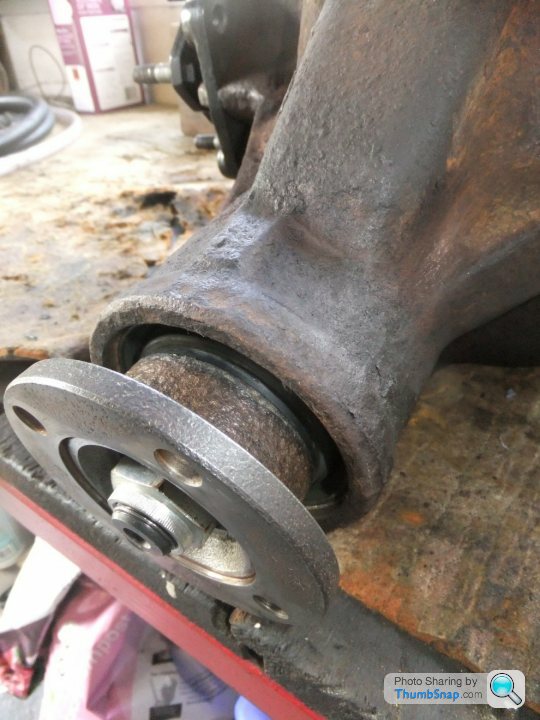
You must have to go some to bend the trailing arm front mounting pins: I recall doing the bushes on my Tasmin, they were Kerry Packer-ed but the pins were OK.
I've spent the evening sandblasting, also busting my buns getting the various bushes out. Bent the handle on my bench vice!
The joy of Wedges eh
Wedg1e said:
Thanks, and to you too
It looks as though your car has remained fluids-tight unlike mine... diff oil, gearbox oil, PAS fluid, coolant...
At least my chassis can't rust too fast! Haven't found any cracks yet but need to clean up the tubes and get in there with a brighter light than my ATEX headtorch. Certainly the paint has flaked off around many of the welds, that's common. The main spine tubes are fine, most of the surface rust is confined to the rear end where the diff mounts.
You must have to go some to bend the trailing arm front mounting pins: I recall doing the bushes on my Tasmin, they were Kerry Packer-ed but the pins were OK.
I've spent the evening sandblasting, also busting my buns getting the various bushes out. Bent the handle on my bench vice!
The joy of Wedges eh
Mine was caked in oil from front to back - probably the only reason it wasn't rotten!It looks as though your car has remained fluids-tight unlike mine... diff oil, gearbox oil, PAS fluid, coolant...
At least my chassis can't rust too fast! Haven't found any cracks yet but need to clean up the tubes and get in there with a brighter light than my ATEX headtorch. Certainly the paint has flaked off around many of the welds, that's common. The main spine tubes are fine, most of the surface rust is confined to the rear end where the diff mounts.
You must have to go some to bend the trailing arm front mounting pins: I recall doing the bushes on my Tasmin, they were Kerry Packer-ed but the pins were OK.
I've spent the evening sandblasting, also busting my buns getting the various bushes out. Bent the handle on my bench vice!
The joy of Wedges eh
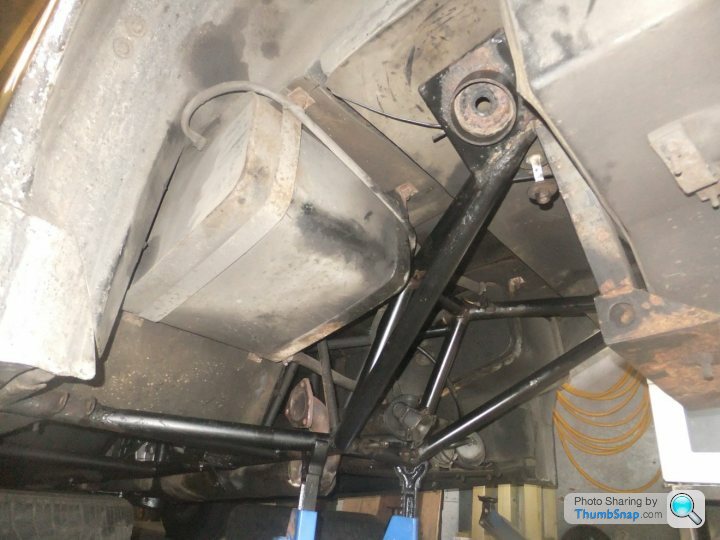
If you look VERY closely at that photo, towards the bottom right hand corner, you'll see where the chassis outrigger tubing has become separated from the chassis!
The trailing arm bushes/pins were hilarious! On the side in the photo, once I took the shock off the hub, I could grab hold of the trailing arm and push and pull it around in the bush maybe an inch?!
With that kind of slack, I can see how the pin got bent! Somewhat glad I've never driven it as it was, must have been shocking!

voltage_maxx said:
If you look VERY closely at that photo, towards the bottom right hand corner, you'll see where the chassis outrigger tubing has become separated from the chassis!
Yes I can see that - it's a classic perennial problem, when I was doing 30k miles a year one side or other would snap just there every year or two.Just weld it up again and carry on. Incidentally when it happens on the driver's side you do get a nice comfy ride for a while until it's fixed, the tube must transmit the bumps right up your arse!
adam quantrill said:
voltage_maxx said:
If you look VERY closely at that photo, towards the bottom right hand corner, you'll see where the chassis outrigger tubing has become separated from the chassis!
Yes I can see that - it's a classic perennial problem, when I was doing 30k miles a year one side or other would snap just there every year or two.Just weld it up again and carry on. Incidentally when it happens on the driver's side you do get a nice comfy ride for a while until it's fixed, the tube must transmit the bumps right up your arse!
Do they normally go like that?
I assume it's just the weld itself that has failed?
It honestly looks like someone's just put a hacksaw through it. Is it possible it was never welded in the first place???
[quote=adam quantrill
Incidentally when it happens on the driver's side you do get a nice comfy ride for a while until it's fixed, the tube must transmit the bumps right up your arse!
[/quote]
And how does this develope when the strain has shown all too much for the front weld,surely a commode styley seat with a discreet catch tank suspended under body,wedg1e a development opening perhaps!
Yes you do get a clean break - but it seems to be not at the weld itself but appears just next to it. The weld is usually stronger anyway due to being thicker.
I think it comes about because of vibration transmitted from the diff - possibly...
I just kept welding mine up from time to time, putting ever more gobs of weld onto the tube, and found that after it was about 10mm wider than the original weld it took much longer to reappear, or didn't at all.
I think it comes about because of vibration transmitted from the diff - possibly...
I just kept welding mine up from time to time, putting ever more gobs of weld onto the tube, and found that after it was about 10mm wider than the original weld it took much longer to reappear, or didn't at all.
Not much progress to report. Most of the bits I've sandblasted are going rusty due to the damp weather; I didn't want to send them to the powdercoaters until I had all the bits prepped, maybe I should have sent them as I did them. Oh well.
Here's one of the hub carriers... there was naff-all on telly worth watching this evening so I took a ruler and caliper to the carrier and now have a set of CAD drawings, 'just in case'
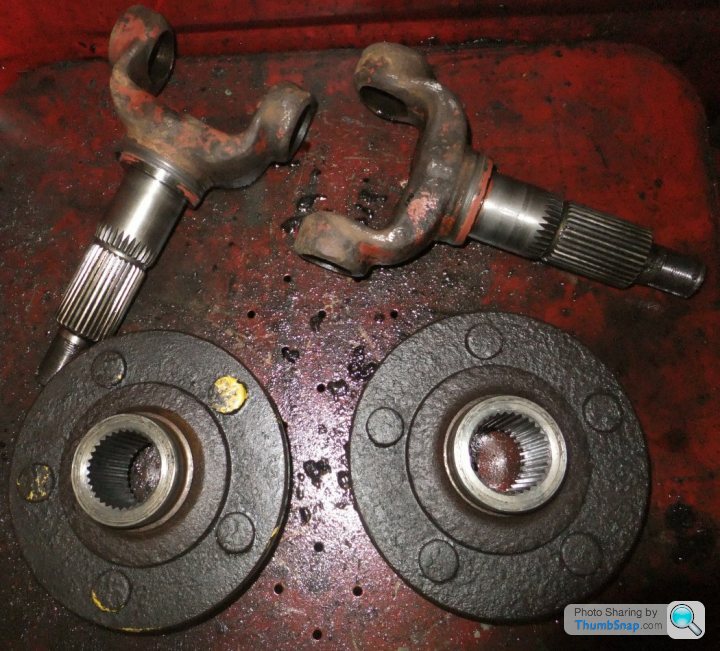
On the parts washer conveyor tonight Bruce: stub axles and hubs. Splines and threads are fantastic: I'm going to stamp them to ID as matched pairs so that when I put them back together I can reuse the nuts and get the spit pin holes to line up.
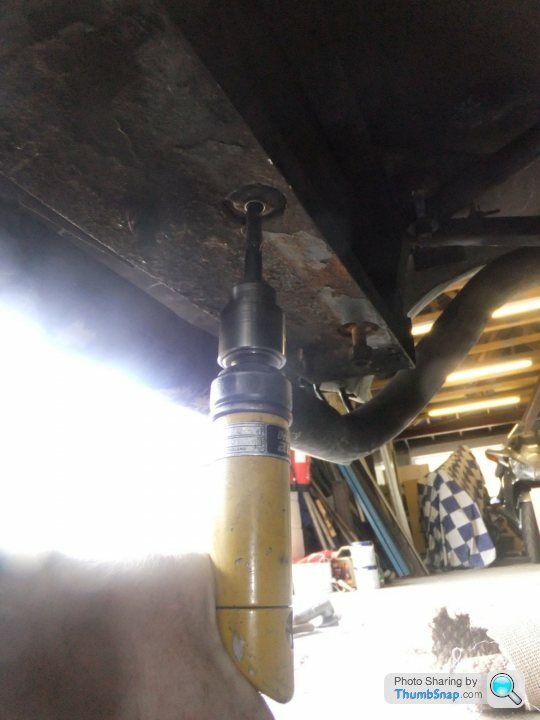
Drilling-out the rusted diff carrier bolt: no amount of Plusgas, 4-pounder or swearing was moving it. The joy of air tools is they're lighter, quieter and more compact for situations like this:
To improve access for cleaning and painting the chassis rails I took the exhaust off. You wouldn't think this was stainless...
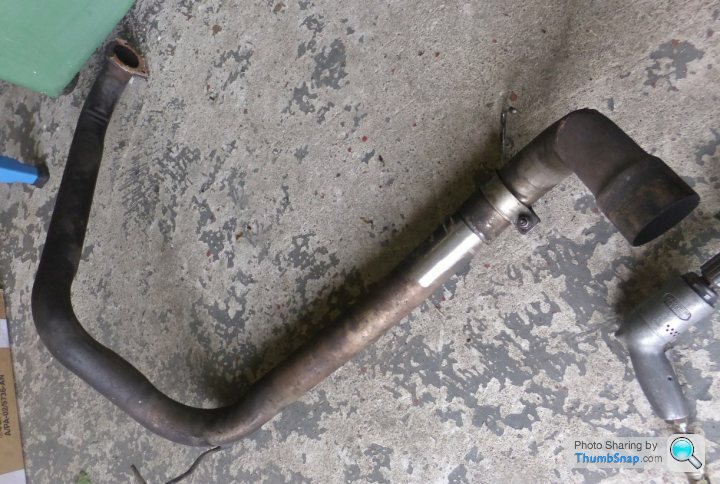
...but it is, albeit probably cheap 406. It cleaned up quite well with a mild abrasive disc in the grinder (used for polishing welds on stainless) but you can still see some areas of pitting. It's only an exhaust system, even I'm not THAT anal!
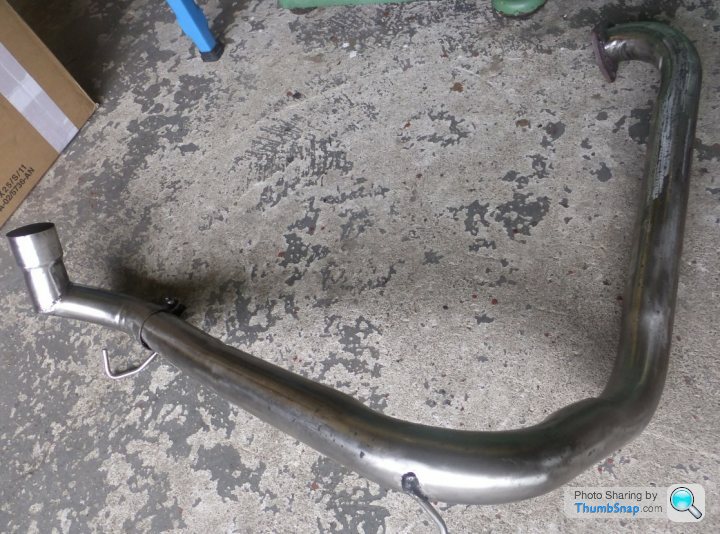
It hasn't been off in at least a dozen years, there wasn't a lot left of the three bolts through that coupling flange! Anyway, with more room to swing a diesel-soaked rag I got in there and cleaned a lot of the crap off the frame rails, even if only to make it a bit easier on my hairdo
I'm now thinking that for the sake of 8 bolts and some fuel-pipe clips, I may as well drop the tanks and tart them up while I'm at it...
Here's one of the hub carriers... there was naff-all on telly worth watching this evening
so I took a ruler and caliper to the carrier and now have a set of CAD drawings, 'just in case' On the parts washer conveyor tonight Bruce: stub axles and hubs. Splines and threads are fantastic: I'm going to stamp them to ID as matched pairs so that when I put them back together I can reuse the nuts and get the spit pin holes to line up.
Drilling-out the rusted diff carrier bolt: no amount of Plusgas, 4-pounder or swearing was moving it. The joy of air tools is they're lighter, quieter and more compact for situations like this:
To improve access for cleaning and painting the chassis rails I took the exhaust off. You wouldn't think this was stainless...
...but it is, albeit probably cheap 406. It cleaned up quite well with a mild abrasive disc in the grinder (used for polishing welds on stainless) but you can still see some areas of pitting. It's only an exhaust system, even I'm not THAT anal!
It hasn't been off in at least a dozen years, there wasn't a lot left of the three bolts through that coupling flange! Anyway, with more room to swing a diesel-soaked rag I got in there and cleaned a lot of the crap off the frame rails, even if only to make it a bit easier on my hairdo
I'm now thinking that for the sake of 8 bolts and some fuel-pipe clips, I may as well drop the tanks and tart them up while I'm at it...
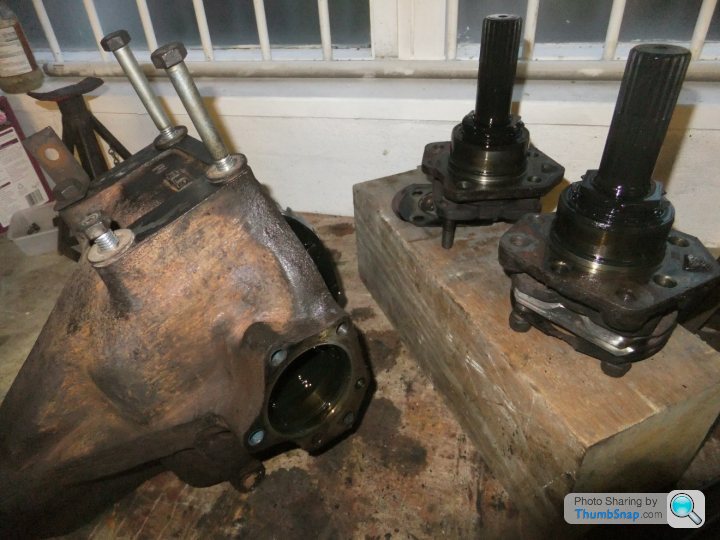
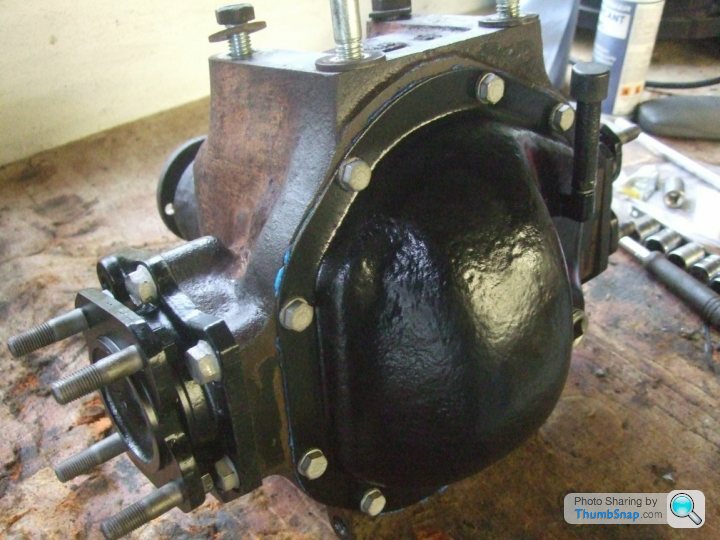
So, you take your freshly-shaved diff...
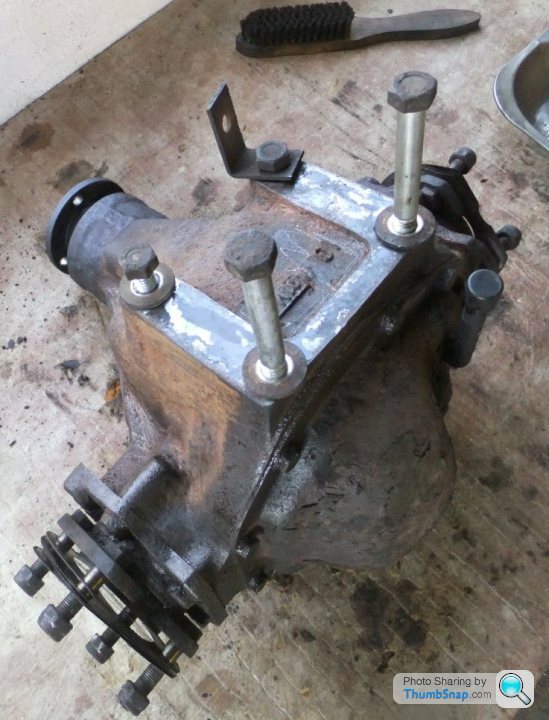
...and you prop it up precariously on axle stands and blocks of timber:
so that you can get a drain tray underneath it. Did I mention the diff weighs 30Kg? Apply a spanner to the drain plug:
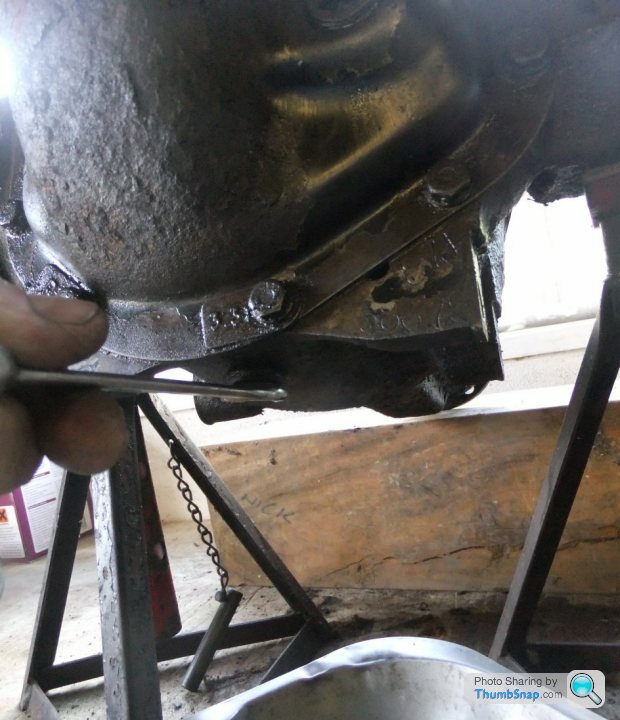
only to discover that the plug is so tight that if you get enough weight behind the spanner, the diff will be on your toes.
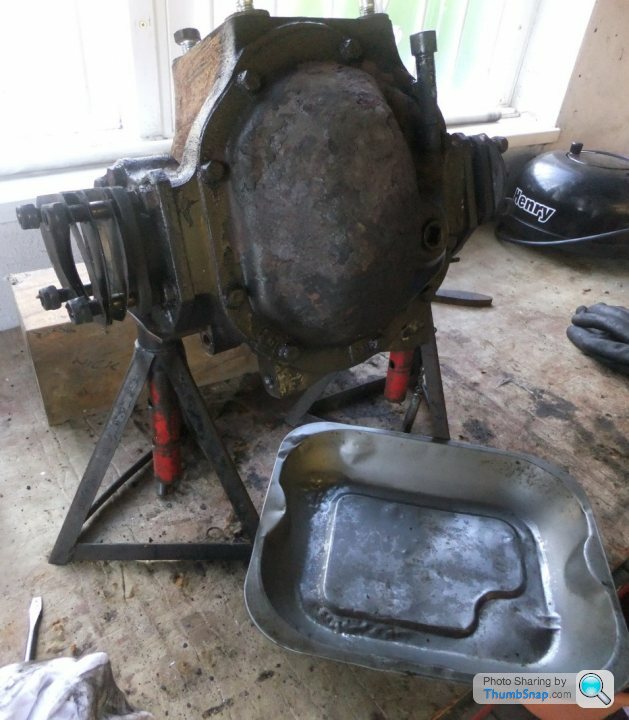
Instead, clean around the rear cover joint and remove all the cover bolts. The oil will descend into your drain tray. Or down your leg as appropriate. Note bench covered in old carpet underlay. Soft, strong and thoroughly absorbent.

I was relieved to see there was that much oil in there: with all three seals weeping I thought it could have been drier than a nun's whatsit. Next, reposition the diff nose-down on the stands. This makes it less wobbly while you apply a socket...
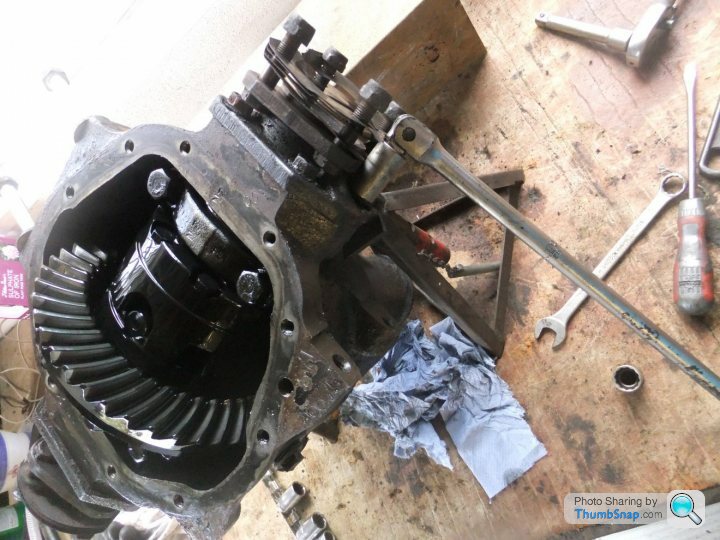
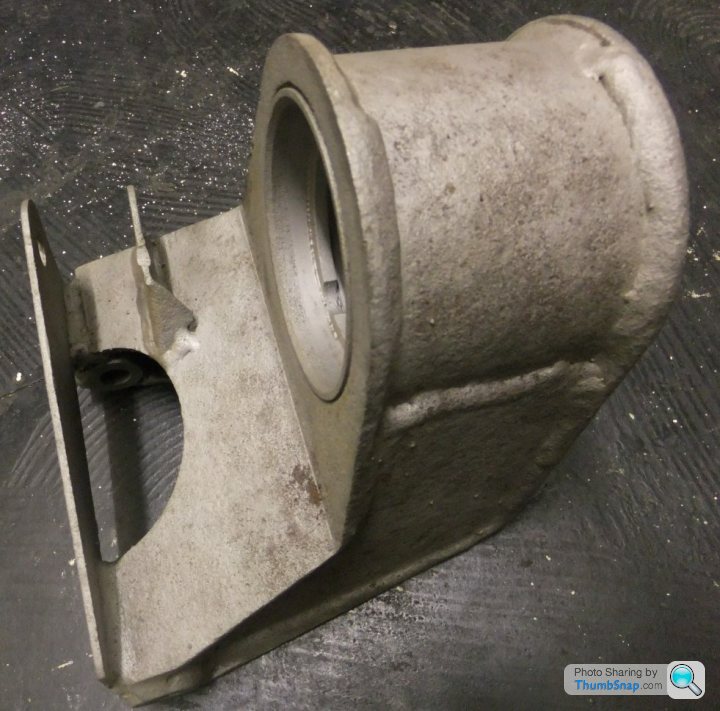
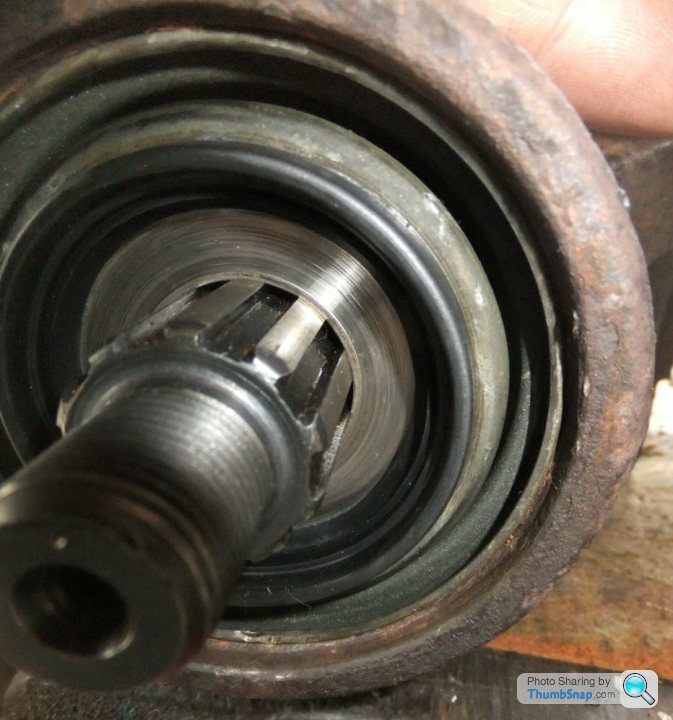
and remove the 5 bolts that hold each side bearing retainer (which doubles as the caliper mounting bracket of course). With the bolts out (they're stiff due to threadlock) you can pull the output shaft assembly free:
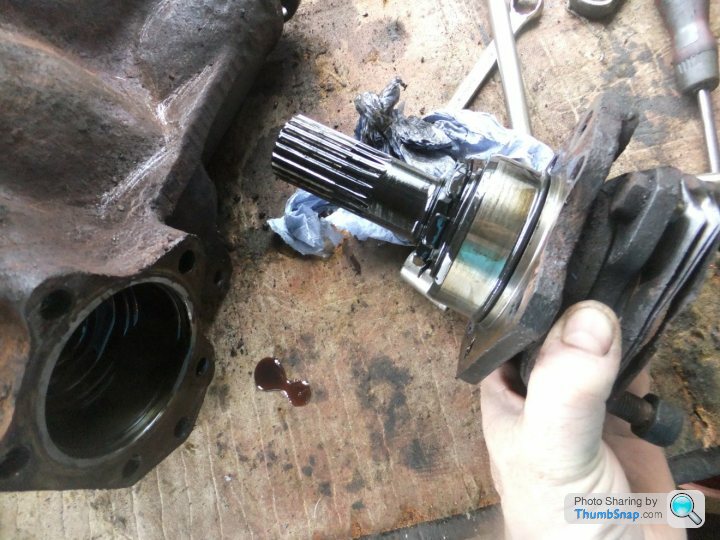
The large nut is secured by the bent-up locking tabs: these will be prised back to allow removal of the nut so that the splined shaft can be withdrawn to allow access to the seal. The O-ring around the bearing housing will also be replaced.
Once both seals have been renewed I'll reassemble the diff and attack the pinion shaft seal - the tricky bit! The rear cover is currently in parts wash and will be sandblasted and painted before refitting. Once the diff's rebuilt I'll show it some abrasives and a coat of paint. Well that's the plan at any rate
Edited for typos...
...and you prop it up precariously on axle stands and blocks of timber:
so that you can get a drain tray underneath it. Did I mention the diff weighs 30Kg? Apply a spanner to the drain plug:
only to discover that the plug is so tight that if you get enough weight behind the spanner, the diff will be on your toes.
Instead, clean around the rear cover joint and remove all the cover bolts. The oil will descend into your drain tray. Or down your leg as appropriate. Note bench covered in old carpet underlay. Soft, strong and thoroughly absorbent.
I was relieved to see there was that much oil in there: with all three seals weeping I thought it could have been drier than a nun's whatsit. Next, reposition the diff nose-down on the stands. This makes it less wobbly while you apply a socket...
and remove the 5 bolts that hold each side bearing retainer (which doubles as the caliper mounting bracket of course). With the bolts out (they're stiff due to threadlock) you can pull the output shaft assembly free:
The large nut is secured by the bent-up locking tabs: these will be prised back to allow removal of the nut so that the splined shaft can be withdrawn to allow access to the seal. The O-ring around the bearing housing will also be replaced.
Once both seals have been renewed I'll reassemble the diff and attack the pinion shaft seal - the tricky bit! The rear cover is currently in parts wash and will be sandblasted and painted before refitting. Once the diff's rebuilt I'll show it some abrasives and a coat of paint. Well that's the plan at any rate
Edited for typos...
Edited by Wedg1e on Thursday 28th June 00:22
Hmmm, losing momentum a bit here... stripped down the output shaft assemblies in order to replace the seals. Whilst I was at it I took a long hard look at the bearings themselves but couldn't detect any wear that would suggest they needed replacing - not bad for a 120,000 mile unit!
Some might say it'd be wise to replace them as the diff's already in bits but I reckon there's more chance of getting some Chinese chocolate ones that don't last 5 minutes so I'm happy to keep these going.
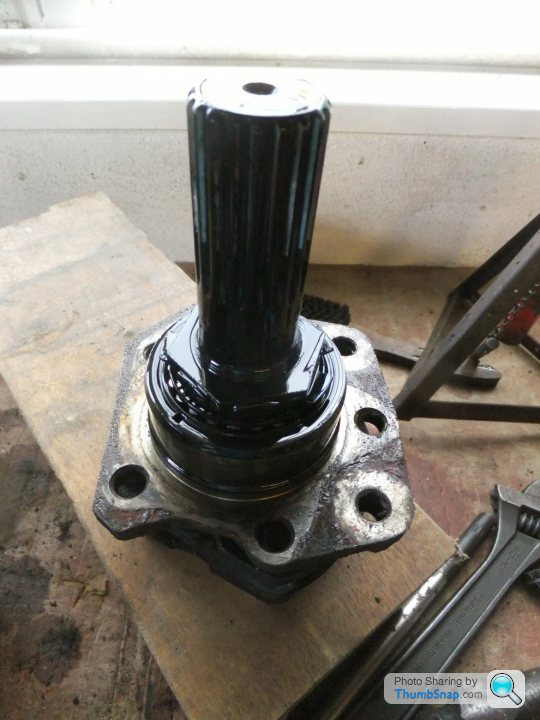
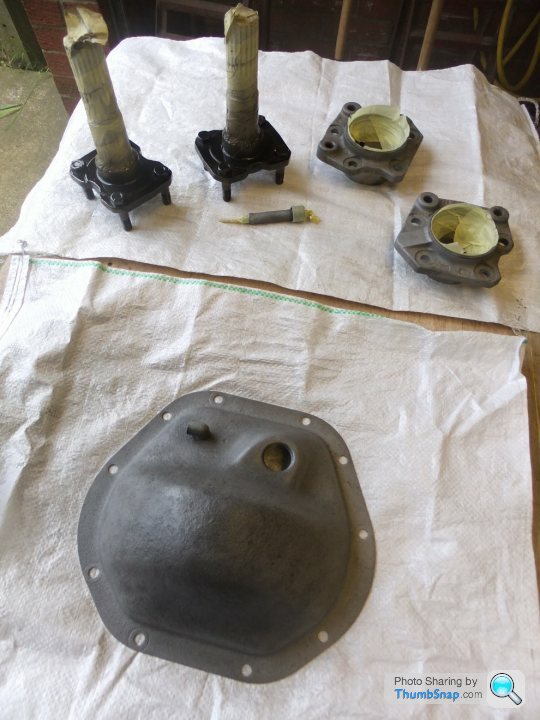
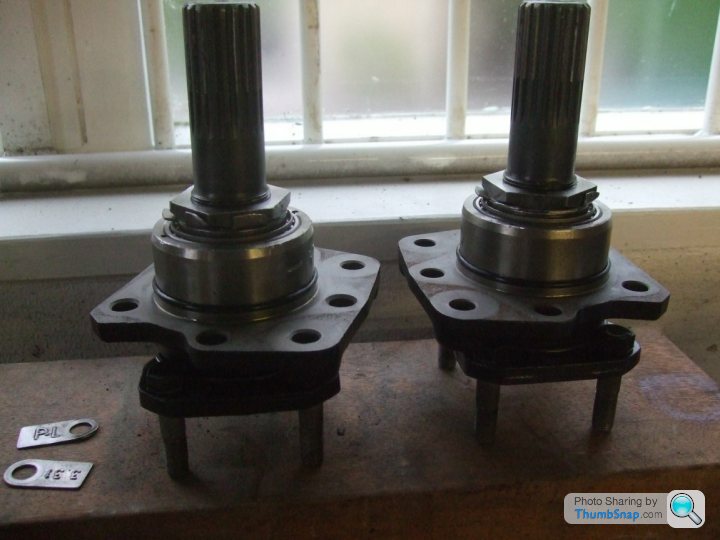
Bearing housings, output shafts and the rear cover sandblasted and ready for paint:
... blinging!
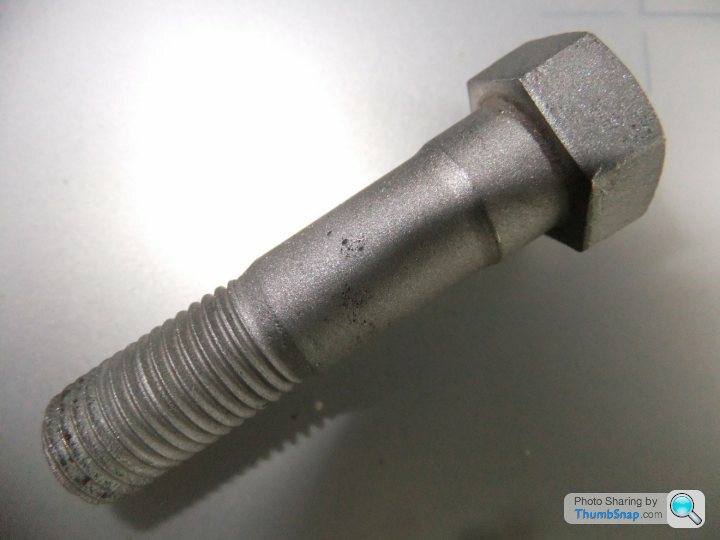
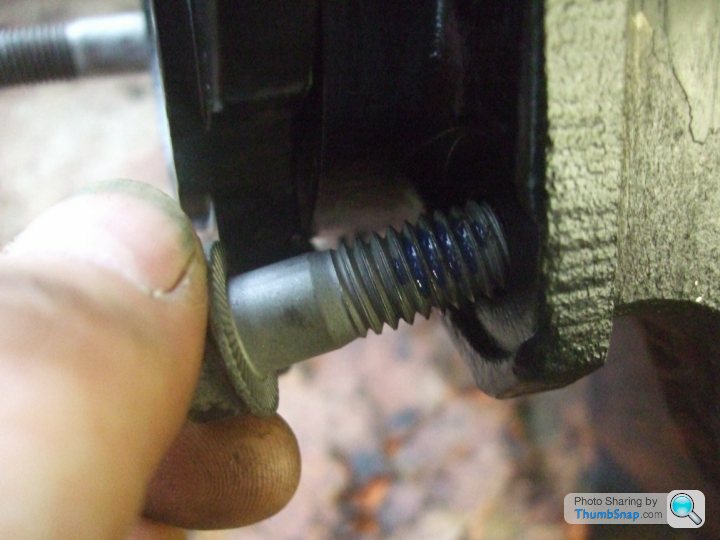
This is one of the special bolts that retain the brake discs and propshafts (note the wider section just below the head that makes them an interference fit in the output flange):
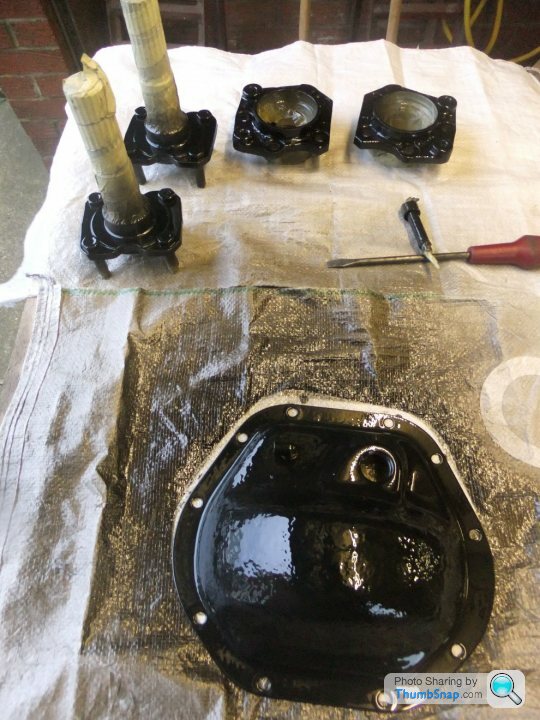
Reassembled output shaft units (filled with oil, no leaks after 24 hours) - note new O-rings:
When reinstalling them, remember to use threadlock on the 5 securing bolts:
...and although the original rear cover gasket had been fitted dry, I used blue Hylomar just for extra sealing (excess will be trimmed off!):
Next up: the pinion shaft seal...
Some might say it'd be wise to replace them as the diff's already in bits but I reckon there's more chance of getting some Chinese chocolate ones that don't last 5 minutes so I'm happy to keep these going.
Bearing housings, output shafts and the rear cover sandblasted and ready for paint:
... blinging!
This is one of the special bolts that retain the brake discs and propshafts (note the wider section just below the head that makes them an interference fit in the output flange):
Reassembled output shaft units (filled with oil, no leaks after 24 hours) - note new O-rings:
When reinstalling them, remember to use threadlock on the 5 securing bolts:
...and although the original rear cover gasket had been fitted dry, I used blue Hylomar just for extra sealing (excess will be trimmed off!):
Next up: the pinion shaft seal...
ralph350i said:
Hi Wedge1
interesting does the diff not fall apart if you take both output shalf's out? and nice work mate, cheers Ralph
No, the internals are held in place by two big sod-off bearings, you can see the caps either side of the crownwheel assembly:interesting does the diff not fall apart if you take both output shalf's out? and nice work mate, cheers Ralph
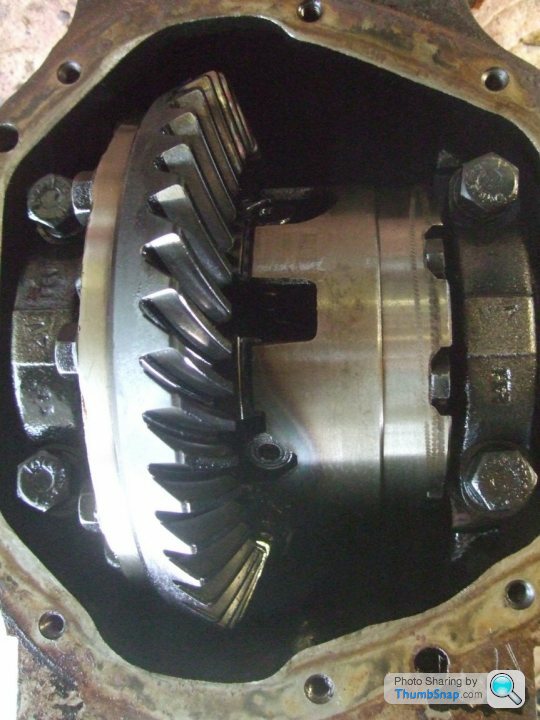
Interestingly, the caps and the main housing adjacent to them are stamped with a series of matching numbers (like 00 or 2N) which suggests to me they're like bike engine main bearings and are selected or adjusted to be matched on assembly... which would make sense really.
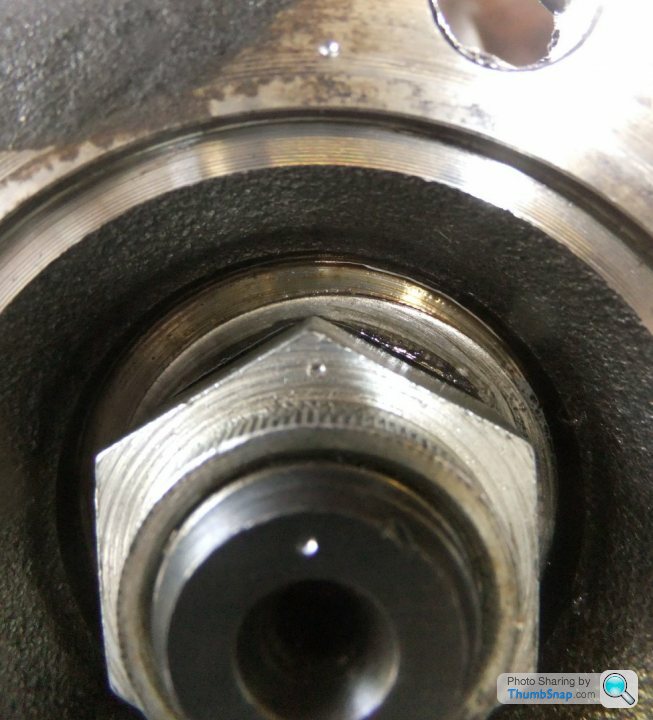
So, to the pinion shaft seal. First I centre-punched the shaft end, the nut and the flange to give me a datum for reassembly:
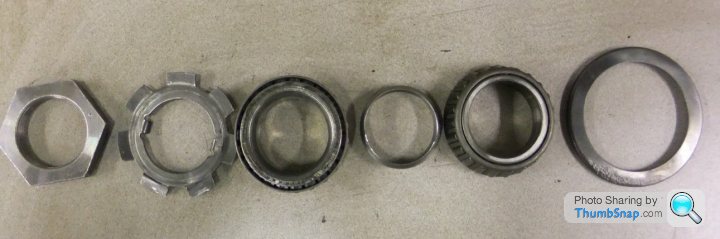
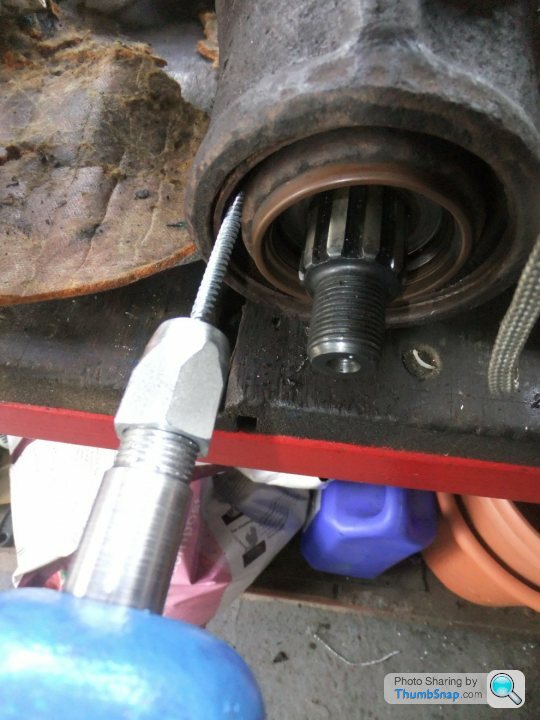
Then I drilled a length of flat bar that was bolted to the drive flange to hold it whilst I cracked the nut loose (didn't take a pic of a length of bar with two holes in it, sorry!). I counted the number of turns it took to remove the flange then used a slide hammer to pull the old seal out:
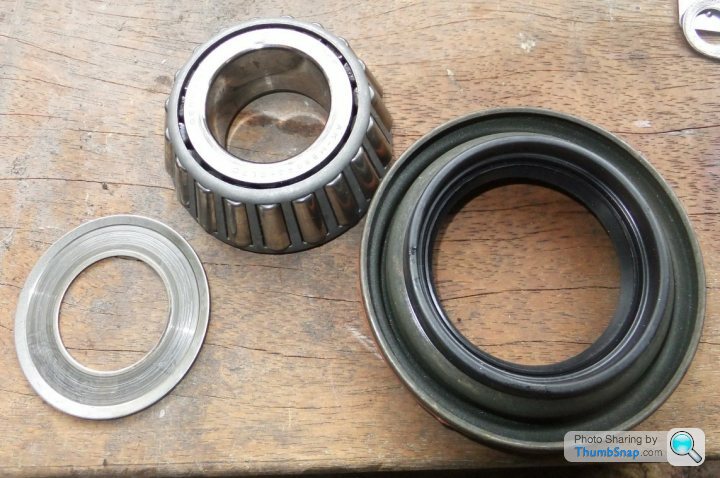
The bearing was slidout and thorougly washed in petrol so I could check it for damage; none was evident and the outer race was in superb condition. Here's the bearing with its oil flinger and the new seal, ready to go in:
New seal fitted:
and with the drive flange refited in its original attitude the nut was tightened down until the three punch marks aligned:
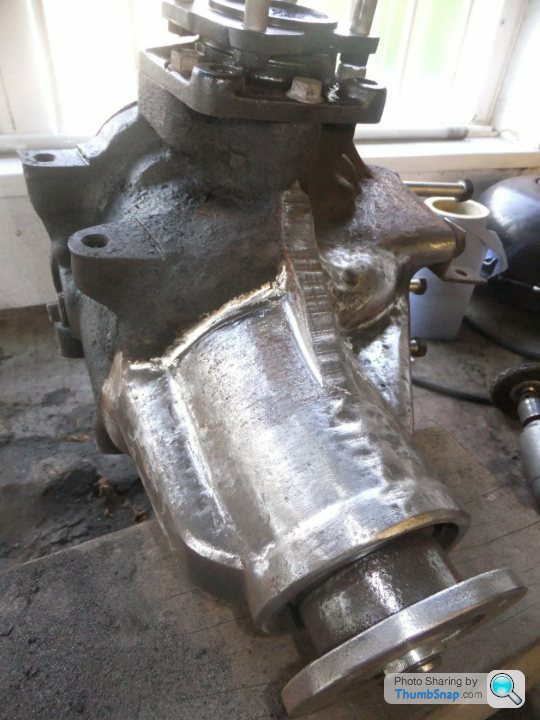
There's no way I'm slapping paint on over the amount of rust and stray oil on the diff., so it was time to get jiggy with the abrasives:
Then I drilled a length of flat bar that was bolted to the drive flange to hold it whilst I cracked the nut loose (didn't take a pic of a length of bar with two holes in it, sorry!). I counted the number of turns it took to remove the flange then used a slide hammer to pull the old seal out:
The bearing was slidout and thorougly washed in petrol so I could check it for damage; none was evident and the outer race was in superb condition. Here's the bearing with its oil flinger and the new seal, ready to go in:
New seal fitted:
and with the drive flange refited in its original attitude the nut was tightened down until the three punch marks aligned:
There's no way I'm slapping paint on over the amount of rust and stray oil on the diff., so it was time to get jiggy with the abrasives:
Gassing Station | Wedges | Top of Page | What's New | My Stuff