Repairable? Or am I looking for a donor body?
Discussion


mrzigazaga said:
Good call...I totally forgot about that..I did use a leak fix plumbers 2 part epoxy putty on my expansion tank and it worked for ages and could be sanded and painted..The JB cold weld is good stuff too..If i had to compare then i would say the putty would be better as it can get into any tiny cracks so would be better for air....JB is excellent and is better for joining stuff together....Rather than patching over...The main reason i did it on mine was to give a cold feed to the air inlet and it did make a difference..At least 5bhp...It can still be done however with a 3" 90 degree soil stack plastic fitting, A heat gun, Some cold air intake hose and a K&N air filter cone....
Thanks guys, yes glueing is the last resort, but the other side of the unit shows a corner missing and part of the air filter lip so I don't thinks it will be successful. Zig your solution sounds interesting would love to see some pics.Or I can just leave it for a few years and get a new one 3D printed!
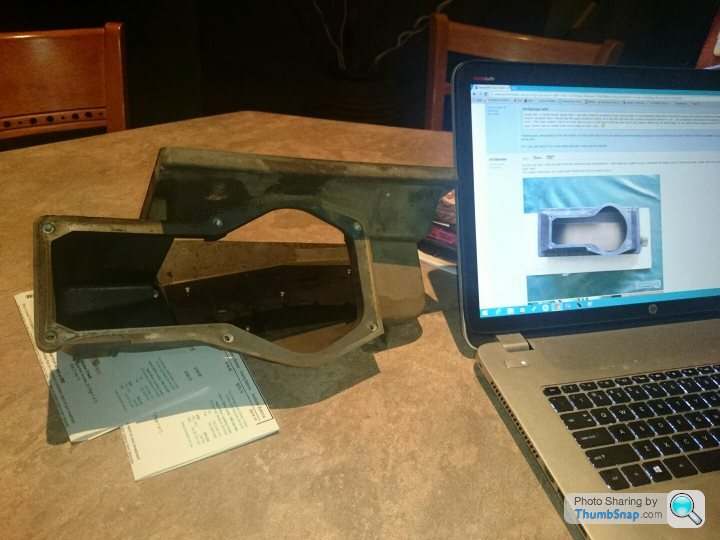
As you can see i used the part that the metering unit was bolted to, I did make up a gasket to go in-between the plastic and the metering head...I also used some sealant on the plastic to metal box just to make an air tight seal.
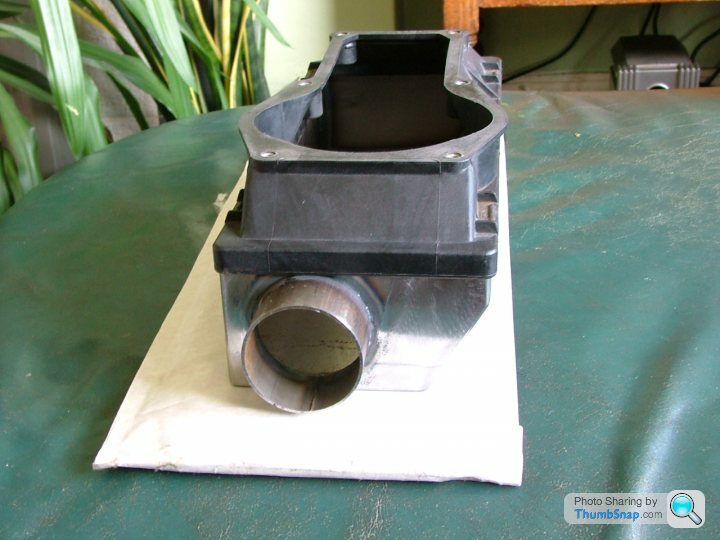
The plastic base has a lip underneath where the old box used to sit in.
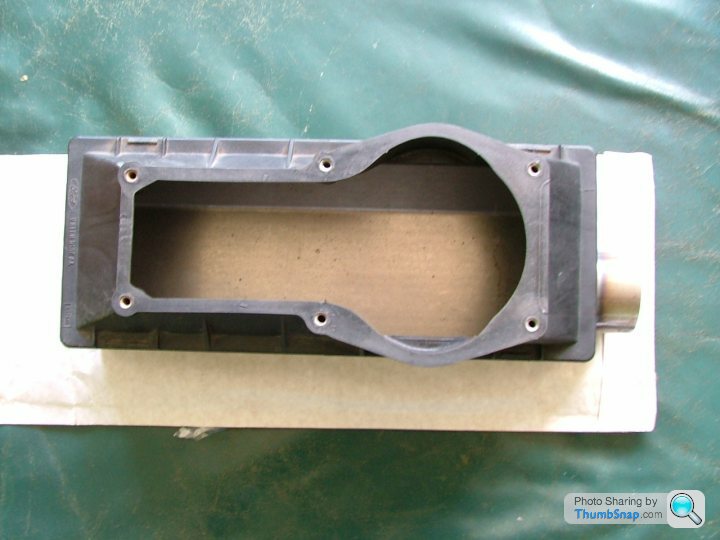
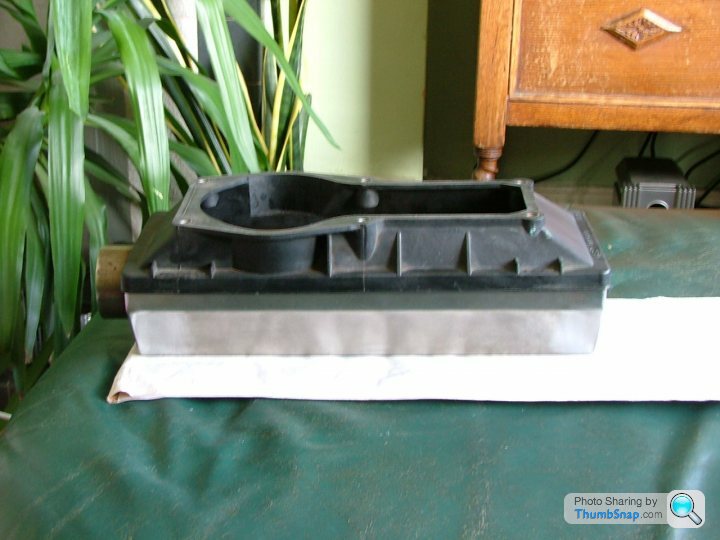
Make sure the diameter of the air inlet is 3"...Mine was a little under and had to be modified accordingly, Especially with the blower.
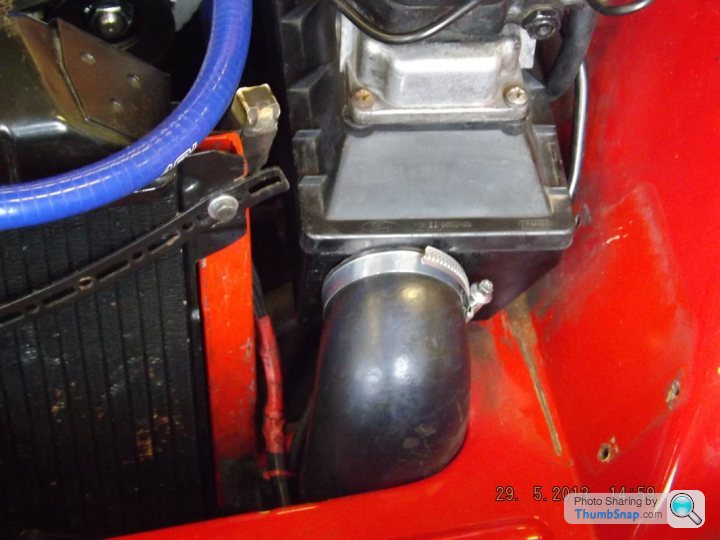
Fitted...The air feed is going to the nosecone.
The plastic base has a lip underneath where the old box used to sit in.
Make sure the diameter of the air inlet is 3"...Mine was a little under and had to be modified accordingly, Especially with the blower.
Fitted...The air feed is going to the nosecone.
For the airbox, depending on the type of plastic, you might be able to join the cracks back together with plumber's pipe cement (otherwise known as PVC solvent). This takes a few days to set really hard, then you can reinforce the back with cold weld or liquid metal.
I used this quite successfully on a Jeep driving light last week.
I used this quite successfully on a Jeep driving light last week.
Too far gone Adam, but thanks. Zig that looks a LOT better. Pulling mine to bits tonight and we'll see what can be salvaged.
Rocket, thanks but yes, a tad too late, my TET panels are ready to be shipped, hence the running around (figuratively speaking) to get other stuff to throw in the box.
Rocket, thanks but yes, a tad too late, my TET panels are ready to be shipped, hence the running around (figuratively speaking) to get other stuff to throw in the box.
Wow, where did 3 months go? A steady stream of goodies has been coming in, including, all my TET panels, 4 new gaz shocks, all bushes on the car, new swirl pot, ball joints, tie rod ends, drop links, airbox(es), and I can't remember what else.
Repairer has the body and the new panels and is preparing to graft the new nose on. I must get him to take some pics. I have a new front and rear bumper BUT the old ones are not on the car (smashed) so the repairer is asking how they go on. From memory there is a rubber seal that goes around each and then they bolt through the body. Is that right? Does anyone have a close up photo of this that I could show him please? Does the seal go all the way around the bumpers and what is its profile? Sorry but none over here to compare with.
Unless I am mistaken, the bumpers will need painting before the seal is added and they are fitted to the car, right? If that's the case, I need to start thinking about paint (been putting that off as long as possible). I am tempted to change the colour but with a cream vinyl and black carpet/seat facings I have limited options.
Thanks, Toby
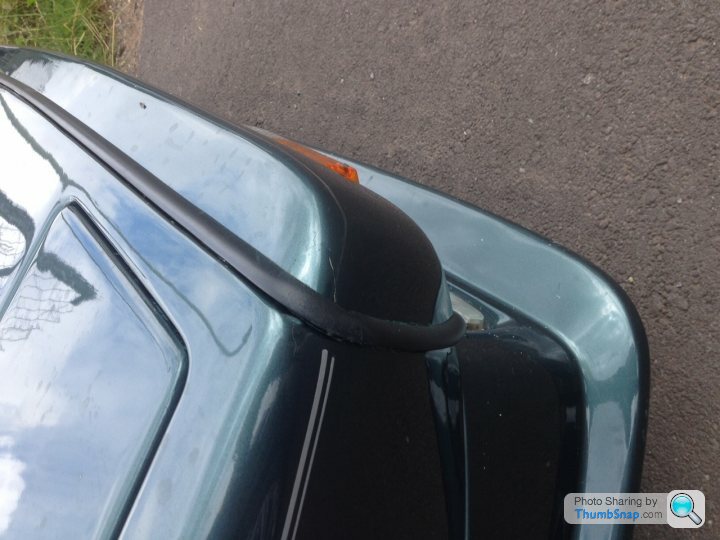
Hi Toby...The early Tasmins had a different profile rubber quadrant/Seal but the 350i one should be sufficient...Some people have done away with it but I'm more to the belief that it does help to keep water away from the indicators..At least from above...
Here is the seal
Part No. SRS1913
https://www.google.co.uk/url?sa=t&rct=j&q=...
Here is the seal
Part No. SRS1913
https://www.google.co.uk/url?sa=t&rct=j&q=...
440Interceptor said:
Gotta love TVR. Same car, same engine, same fuel injection, different AIRBOX!
Tasmin200 said:
On the ribbed bumpers the seal goes onto the bumper then the bumper goes into the body.
I'm not touching that! Looks like it will need painting before fitting them, Cr@p. Also probably means I can tell the repairer to leave the back and front bumpers off and I can fit them later once they and the body are all painted. I would just have to fit the front lights, add the trim and bolt up. Rear bumper even easier as no lights to worry about.  Found some 10 year old trim off the back bumper. Here 'tis.
Gassing Station | Wedges | Top of Page | What's New | My Stuff