Discussion


Toby Tram said:
Thanks guys.
I had a look at the drive shafts this evening and it looks like a fairly major bit of work to remove one in respect of the fact that the lower shock bolt on the hub mounting needs to come out and the other similar bolt on the front side of the hub mounting.Only 2 bolts, I know. But the spring will need clamping etc and I suspect that the bolts are a wotsit to remove.
I did remove the nuts which hold the inner end of the shaft to the disc. They were easy enough.
I have also attempted to measure the cup diameter and the overall length. So I will check that against the spec of the 2 parts that have been mentioned.
The factors were expressing concern over accurate measurement of the UJ stating that some are very close in dimension to others so if yoiu get it just a bit wrong you could be stuffed. But, I guess, they're not that expensive so if I order them tomorrow I will have them for the weekend (rain or not!!)
Any of you guys actually taken the half shaft off before? Is it fairly straight forward?
A.
The spring on mine doesn't need clamping (when maximum hanging down) and as you said it is just two bolts. I had a look at the drive shafts this evening and it looks like a fairly major bit of work to remove one in respect of the fact that the lower shock bolt on the hub mounting needs to come out and the other similar bolt on the front side of the hub mounting.Only 2 bolts, I know. But the spring will need clamping etc and I suspect that the bolts are a wotsit to remove.
I did remove the nuts which hold the inner end of the shaft to the disc. They were easy enough.
I have also attempted to measure the cup diameter and the overall length. So I will check that against the spec of the 2 parts that have been mentioned.
The factors were expressing concern over accurate measurement of the UJ stating that some are very close in dimension to others so if yoiu get it just a bit wrong you could be stuffed. But, I guess, they're not that expensive so if I order them tomorrow I will have them for the weekend (rain or not!!)
Any of you guys actually taken the half shaft off before? Is it fairly straight forward?
A.
Perhaps you need a jack (just a little bit to help alignment, nothing serious) to put the bolt back in, but that is all.
Takes me 20min from start to take the first drive shaft off.
Very often it is: once done, second time no issue.
Rob
I did make the pre-emptive strike and WD40 the bolts and also the circlips on the UJ.
The nuts on the inner end came off fairly easily.
Fingers crossed! Wish me luck!!
I had intended to start this evening but didn't get back from work 'til after 8. It's not on really!
UJ's have been ordered. They're not Hardy Spicer but have been cross referenced to HS163. They have grease nipples too.
It's going to be a busy weekend.
Adi

Job done!
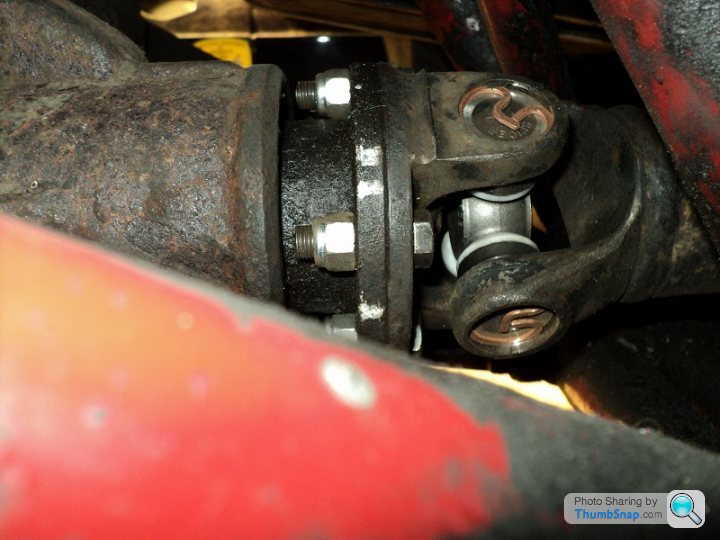
What a job though! My first problem was that the bolt which runs through the bottom of the shock didn't want to budge. Also the short bolt which holds a tie rod to the hub carrier was proving difficult because it's impossible to get a ring spanner on it, let alone a socket.
In the end I ground off the nut on the end of the short bolt and the bolt pushed out quite easily. I then attempted to undo the hub nut. Once I had got hold of a 3/4" drive 38mm socket and chunky bar plus a scaffold pole as an extension that undid OK.
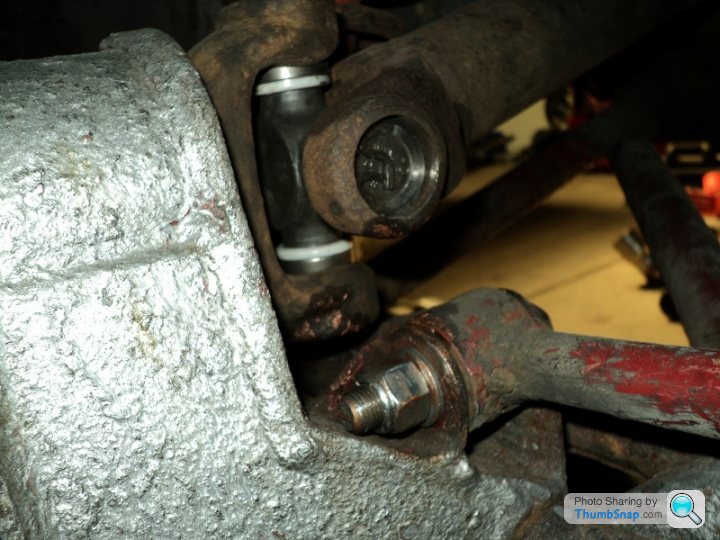
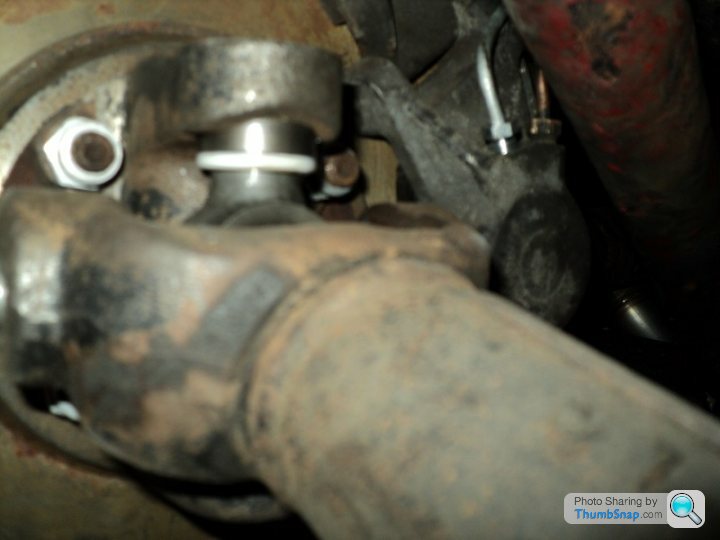
Next job was to undo the inner flange of the drive shaft from the disc, fold down the hub carrier by pivoting it on the lower hub carrier bolts. I was then able me to pull the drive shaft out of the hub carrier and away from the car.
Surprisingly the circlips were a lot more straight forward to remove than I had expected. But the cups didn't want to move so I ground the cruciform out and then hammered each cup out invidually with a socket whilst making sure that the yoke was fully supported so that it didn't crack.
Assembly was relatively straight forward although I was surprised at how tight some of those cups were.
But haven taken the car for a test drive all seems fine. The only thing I have to do before the off is to get the rear hub nut torque checked.
Does anyone know what the thread is for the hub nut. I saw a forum thread which showed that someone had used a castellated nut to hold the hub on and that seemed like a very good idea.
A.
What a job though! My first problem was that the bolt which runs through the bottom of the shock didn't want to budge. Also the short bolt which holds a tie rod to the hub carrier was proving difficult because it's impossible to get a ring spanner on it, let alone a socket.
In the end I ground off the nut on the end of the short bolt and the bolt pushed out quite easily. I then attempted to undo the hub nut. Once I had got hold of a 3/4" drive 38mm socket and chunky bar plus a scaffold pole as an extension that undid OK.
Next job was to undo the inner flange of the drive shaft from the disc, fold down the hub carrier by pivoting it on the lower hub carrier bolts. I was then able me to pull the drive shaft out of the hub carrier and away from the car.
Surprisingly the circlips were a lot more straight forward to remove than I had expected. But the cups didn't want to move so I ground the cruciform out and then hammered each cup out invidually with a socket whilst making sure that the yoke was fully supported so that it didn't crack.
Assembly was relatively straight forward although I was surprised at how tight some of those cups were.
But haven taken the car for a test drive all seems fine. The only thing I have to do before the off is to get the rear hub nut torque checked.
Does anyone know what the thread is for the hub nut. I saw a forum thread which showed that someone had used a castellated nut to hold the hub on and that seemed like a very good idea.
A.
There is one last tip I don't know if it was in the other thread which is after assembly whack the driveshaft all 4 ways with a club hammer to get the cups seated back on the circlips, which is doubly important if after first assembly it feels very tight. Give 'em a good greasing too....
TBH I struggled with the circlips and still need to revisit one of them to check that it has seated properly. I'm not sure if someone had previously deformed the yoke fractionally so that the when the caps are pressed into place they are tight on the cruciform almost before they have fully passed the circlip groove.
It seems OK but I don't want to chance it so having done a few miles I shall check everything over again.
A.
It seems OK but I don't want to chance it so having done a few miles I shall check everything over again.
A.
Hello
Too late for those who have doen the job, but here some tricksl that helped me.
Getring the UJ's out without grinding the yoke with the chance to damage the fork, just tap on the yoke with a woorden or brase hammer while holding joint in the other hand.
It takes Some time but the cup will come out slowly without any force.
When remplaçant a new cup put Some copper grease on the cup so it will come out later easier. You better use copper grease on all bolts like those of the damper to prevent water to get in and rust.
Put extra Grease inside the cup with the needles so they won't fall out.
NEVER put too much grease through the nipple when installed because it can damage the rubber seal that holds the grease in.
Try to find a UJ with the grease nipple "out of line" (do you understand?) than it is easier to get the grease gun on the nipple when all is in situe.
Hopes it helps a little to get live easier when working on your car.
Hans
Hansoplast said:
Hello
Too late for those who have doen the job, but here some tricksl that helped me.
Getring the UJ's out without grinding the yoke with the chance to damage the fork, just tap on the yoke with a woorden or brase hammer while holding joint in the other hand.
It takes Some time but the cup will come out slowly without any force.
When remplaçant a new cup put Some copper grease on the cup so it will come out later easier. You better use copper grease on all bolts like those of the damper to prevent water to get in and rust.
Put extra Grease inside the cup with the needles so they won't fall out.
NEVER put too much grease through the nipple when installed because it can damage the rubber seal that holds the grease in.
Try to find a UJ with the grease nipple "out of line" (do you understand?) than it is easier to get the grease gun on the nipple when all is in situe.
Hopes it helps a little to get live easier when working on your car.
Hans
Thanks Hans.Too late for those who have doen the job, but here some tricksl that helped me.
Getring the UJ's out without grinding the yoke with the chance to damage the fork, just tap on the yoke with a woorden or brase hammer while holding joint in the other hand.
It takes Some time but the cup will come out slowly without any force.
When remplaçant a new cup put Some copper grease on the cup so it will come out later easier. You better use copper grease on all bolts like those of the damper to prevent water to get in and rust.
Put extra Grease inside the cup with the needles so they won't fall out.
NEVER put too much grease through the nipple when installed because it can damage the rubber seal that holds the grease in.
Try to find a UJ with the grease nipple "out of line" (do you understand?) than it is easier to get the grease gun on the nipple when all is in situe.
Hopes it helps a little to get live easier when working on your car.
Hans
I think I pretty much covered what you suggested. The grease nipple is offset but unlike the previous installer I have fitted it inboard so that I can get the grease gun onto it!!
I reckon that using a grinder with a thin disc on it to cut teh cruciform out is a pretty good method because then it is easy to put each fork of the yoke onto the top of the vise with the vice open enough to tap the cups out between the vice jaws. The only proviso here is that you really need someone to hold the yoke or drive shaft in position whilst you knock the cups out. But it works very well and I shall use it again when I replace the other 3 universal joints. I've only replaced one at the moment to enable be to get to Le Mans at the end of this week. I didn't want to tempt fate and try to replace any others. In fact I will probably leave that job until after the Le Mans Classic. That way I know I don't have any pressing engagements with the car until the Wilton Classic Supercar.
Overall I'm pretty pleased with the way it went though. I was even able to quickly drop the drive shaft out this afternoon to double check the seating of the circlips. It all came apart and went back together very straight forwardly.
Cheers
Adi
I replaced one of my outer uj's last week without removing any of the suspension and although a bit fiddly it is possible using the techniques mentioned. The main issue I had was I couldn't undo the nuts holding the driveshaft onto the disc so just did the outer one for now. When I replaced the uj I couldn't get the circlips back into the wheel bearing side so guess the yolk is a touch distorted. I used a micrometer to measure the various circlips and found they varied between 1.22 and 1.55 mm. So I picked the two thinnest and it was enough to get them in properly. I filled the cups with grease to stop the needles moving and left the grease nipple off so when you put it together it doesn't pressurise and stop it going together.
I bought my UJs off e-bay last year - gkn / hardy spicer 82mm x 27mm for series 2/3 landrover. The needles are slightly smaller than the originals but overall are effectively the same. I believe I bought them as Hs179 but the GKN number on the box is 18100.
Forgot to say it was for an 89 350i
I bought my UJs off e-bay last year - gkn / hardy spicer 82mm x 27mm for series 2/3 landrover. The needles are slightly smaller than the originals but overall are effectively the same. I believe I bought them as Hs179 but the GKN number on the box is 18100.
Forgot to say it was for an 89 350i
Edited by SLB on Monday 9th June 21:16
Edited by SLB on Monday 9th June 21:18
Gassing Station | Wedges | Top of Page | What's New | My Stuff