Diff output flange bolts...
Discussion


Having already stripped and rebuilt my diff with new seals, gasket, oil and paint, I remembered I'd intended to change the bolts on the output flanges. After all, they keep the brake discs and half-shafts (hence the wheels!) in place, so it's worth having them in good order.
Now somebody in the past (let's hope not TVR themselves, but you never know
 ) had decided to secure the half-shafts to the diff with Nyloc nuts. Which, like sticking your head in a gas oven or listening to a railway track to see if there's a train coming, is Not A Good Idea.
Why? Because the heat from the brake discs melts the nylon in the Nylocs, turning them into Nonlocs. Luckily, in my case, the bolts had corroded and it was the rust, not the nylon that was keeping the nuts (and thus the rotatey bits) in place.
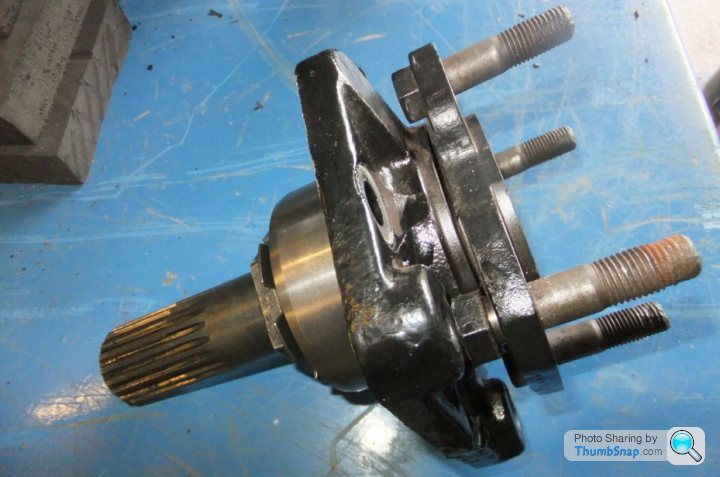
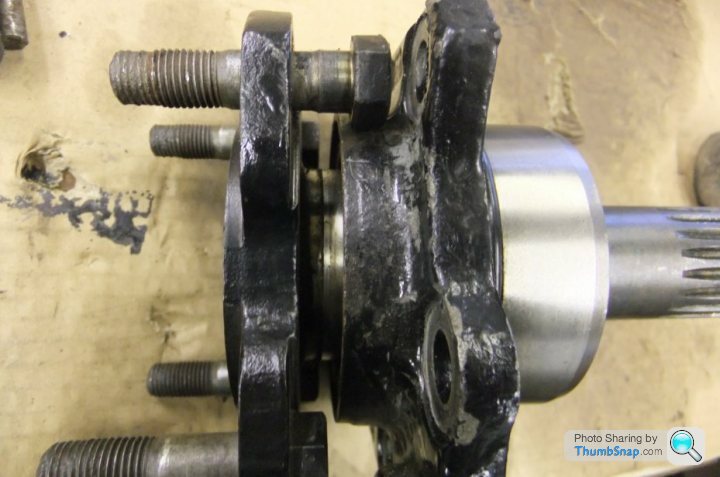
So I found some new bolts (which was a bit of a saga in its own right), tipped the diff to one side to save having to drain the oil and whipped out the five bolts that secure the flange stub and bearing assembly to the diff.
The assembly looks like this:
You can see the condition of the threads on the bolts! The correct nuts are Philidas ‘stiff nuts’ and, rather like the bolts, are not the easiest of things to track down. Oh, you can find people listing them but they either have no stock or want you to buy 100. Even Jaguar dealers themselves don’t necessarily carry them – the XJ6/ XJS are a bit old hat now, after all.
Anyway, there’s no way to extract the bolts from the flange without dismantling the stub assembly, but to do so fully means wrecking the outer oil seal… which of course I’d already replaced. I reckoned that if I stripped the inboard bearing off the stub, the shaft could be pulled outwards and tilted far enough to allow the bolts to be removed. The bolts, incidentally, aren’t ordinary bolts; they have a wider section of the shank just below the head which makes them an interference fit in the flange holes – so you have to drift them in and out.
The stub bearings are a pair of taper rollers which are set up at the factory using a spacer tube between them; as the securing nut is torqued to a specific setting the tube gets crushed, maintaining the bearing preload. If you dismantle the assembly fully you’re supposed to use a new ‘crush tube’ and follow the factory procedure for setting up the preload. However, learned internet experts convinced me that it’s OK to strip and rebuild using the original parts if the outer bearing isn’t disturbed and you refit the nut to EXACTLY the right point.
So I started by centre-punching the nut and a point adjacent to it on the shaft:
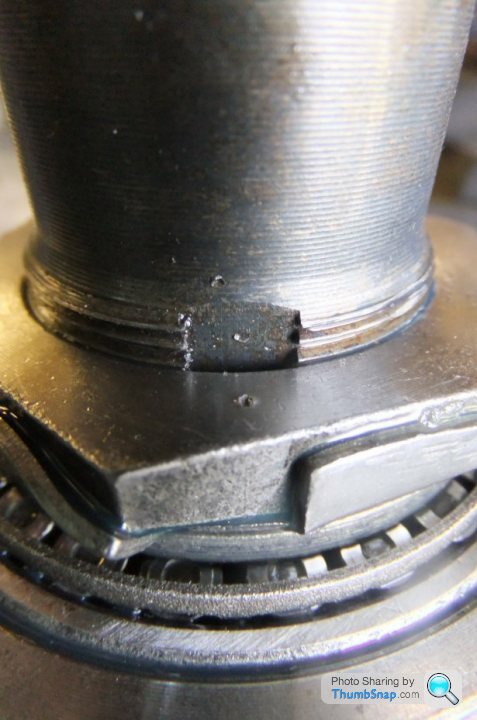
The tab washer below the nut then has any tabs that have been knocked-up to secure the nut (as in the pic above), knocked back down again with a brass drift…
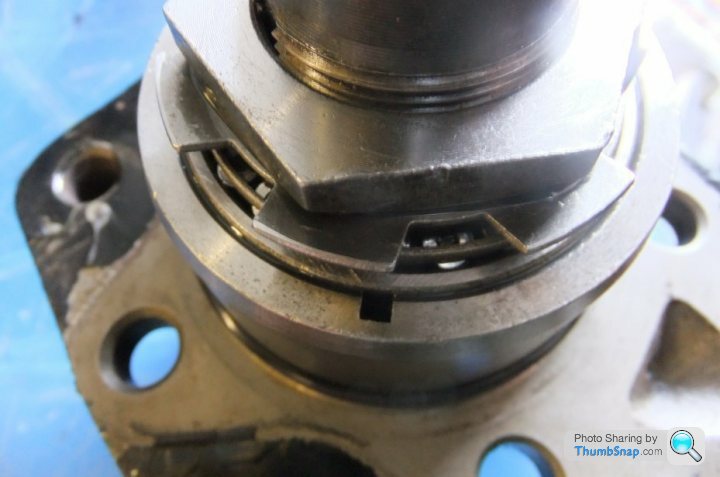
and the nut is then unscrewed, carefully counting the number of turns (including fractions if necessary) until the threads disengage and the nut can be lifted away, along with the tab washer.
It’d probably be a good idea to note which way round the tab washer comes off as well, just to satisfy anyone’s engineering OCD

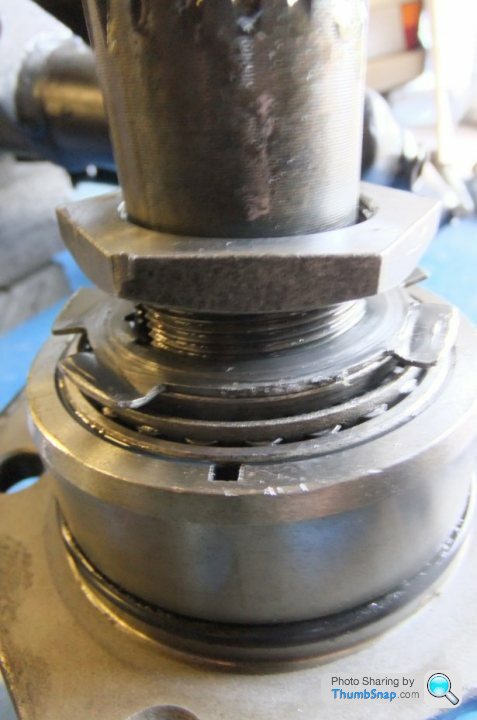
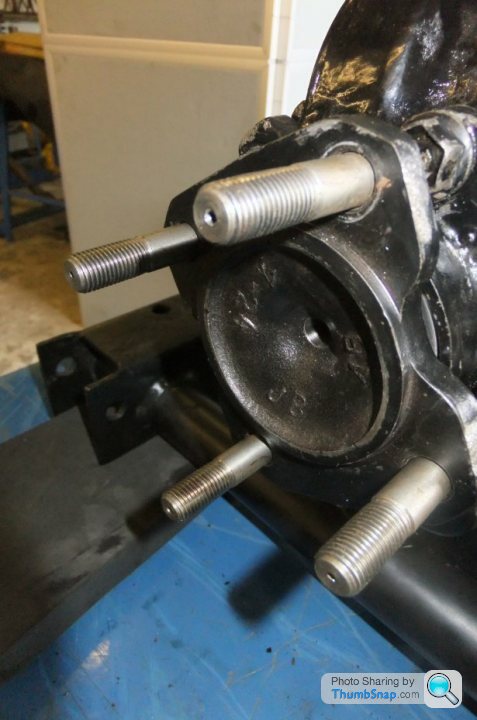
It is then a simple matter of pushing the stub outwards to disengage the outer taper roller, allowing the flange to be tilted, the old bolts extracted and the new ones fitted:
You may need octopus limbs to hold all the bits, a big vice is a must to keep hold of the flange while you drive the new bolts in.
Then, in the fashion of all the best car manuals, simply reassemble in reverse order

I did it by clamping the flange in a vice with the bearing housing upwards, tapping the inner taper roller down the shaft until it seated, then refitting the tab washer and nut. The nut was wound down by hand until it nipped, then the bearing housing is rotated (to let the rollers find their positions) whilst the nut is gradually tightened until the centre-punch marks are correctly aligned.
At this point the shaft should turn smoothly with minimal force but no slack in any direction. If it binds or flops about, something is not kosher and must be sorted.
I should say that to make sure I hadn’t damaged the outer oil seal, prior to refitting the inner bearing I left the assembly in the vice and filled the housing with diff oil, rotating the housing from time to time to make sure no oil was seeping past the seal. I would have been a bit of a bu99er to have rebuilt it all and found it leaked once back in the car!
Purists might like to consider that when reusing a tab washer, it’s considered prudent to snip off any tabs that have already been bent up and down in case they come adrift and end up in the diff gears or bearings.
New bolts fitted and the assembly refitted to the diff:
Just waiting for my stiff nuts to arrive, then I can crack on getting the drivetrain back together...
Nice - one for the FAQ.
Yeas I reckon that's what TVR counted on... some corrosion building up, so by the time the nylon melted, the nuts wouldn't go anywhere anyway.
An alternative might be to drill the nyloc flanges before installation, then wirelock them all together? Anyhow those stiff ones should do the trick.
Yeas I reckon that's what TVR counted on... some corrosion building up, so by the time the nylon melted, the nuts wouldn't go anywhere anyway.
An alternative might be to drill the nyloc flanges before installation, then wirelock them all together? Anyhow those stiff ones should do the trick.
Gassing Station | Wedges | Top of Page | What's New | My Stuff