The 280i rebuilding is about to commence !!
Discussion


Thanks for that Adam.
Approx 50 miles before the oil loss incident, I did replace all the head gaskets ( with head skim ) and rocker cover gaskets with the help of a good matey.. we didnt touch the bottom end at all so they would still be the original seals we reckon..
on another note, just popped into the garage next door during a ciggy break and they have supplied me with suitable bolts to get the block attached to the stand I know what I'm now planning to do tonight.
Approx 50 miles before the oil loss incident, I did replace all the head gaskets ( with head skim ) and rocker cover gaskets with the help of a good matey.. we didnt touch the bottom end at all so they would still be the original seals we reckon..
on another note, just popped into the garage next door during a ciggy break and they have supplied me with suitable bolts to get the block attached to the stand
I know what I'm now planning to do tonight. Hi Sirealalot.I've just finished a complete rebuild of a 2.8i engine literally from a pile of parts in various boxes, not necessarily from the same engine! Long story. Anyway you've obviously solved the problem of mounting the engine in the stand with longer bolts? A real bonus having a stand you can rotate the engine in. On mine unfortunately you couldn't fit the flywheel whilst in the stand. The rest was basic engine reassembly except for the various head gaskets available. Some matched most of the waterways; modification to divert coolant to hot spots? Good luck. J C.
John042 said:
Hi Sirealalot.I've just finished a complete rebuild of a 2.8i engine literally from a pile of parts in various boxes, not necessarily from the same engine! Long story. Anyway you've obviously solved the problem of mounting the engine in the stand with longer bolts? A real bonus having a stand you can rotate the engine in. On mine unfortunately you couldn't fit the flywheel whilst in the stand. The rest was basic engine reassembly except for the various head gaskets available. Some matched most of the waterways; modification to divert coolant to hot spots? Good luck. J C.
Thanks John. Yup, the longer bolts should now do the job of mounting the engine to the stand, I took the clutch and flywheel off last night.
After putting the rebuld off for years, literally, i'm now itching to get stuck in and see what happens..
I will be frequently updating this thread so watch this space.
Cheers
Dom
Morning all.
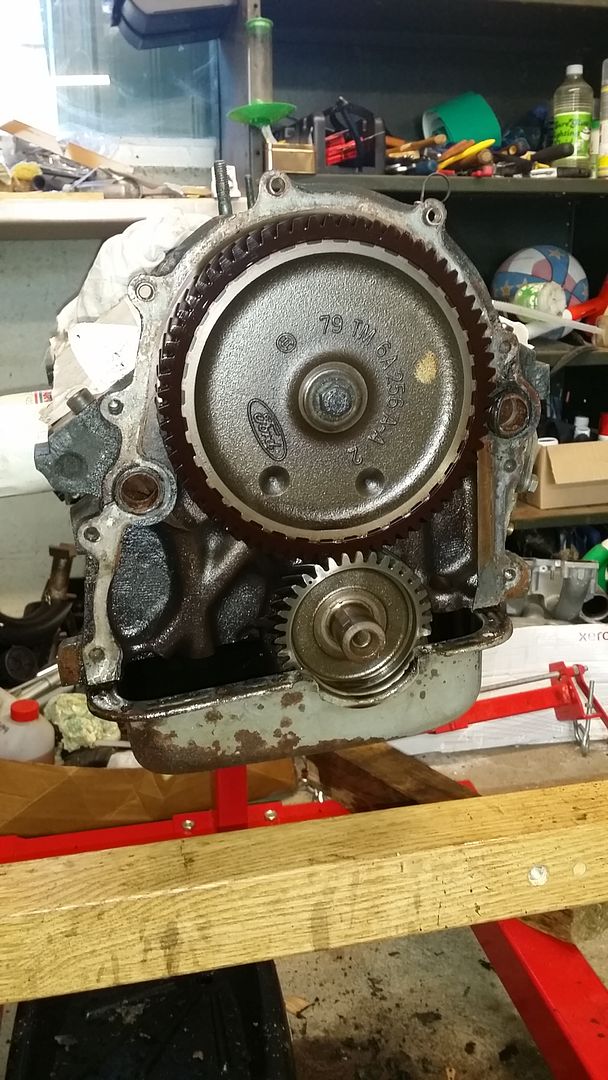
Well, an interesting night yesterday, managed to get the water pump off, had some congealed coolent within the impeller - could have been a sympton for past overheating but more likely its just because it has been sat for so long.
Also removed the Plenum to reveal a pretty much brand new gasket below.. we did replace this when the head gasket was done so not many miles covered since !!
Also cleaned up the front of the block, removed all remanents of the water pump gaskets.
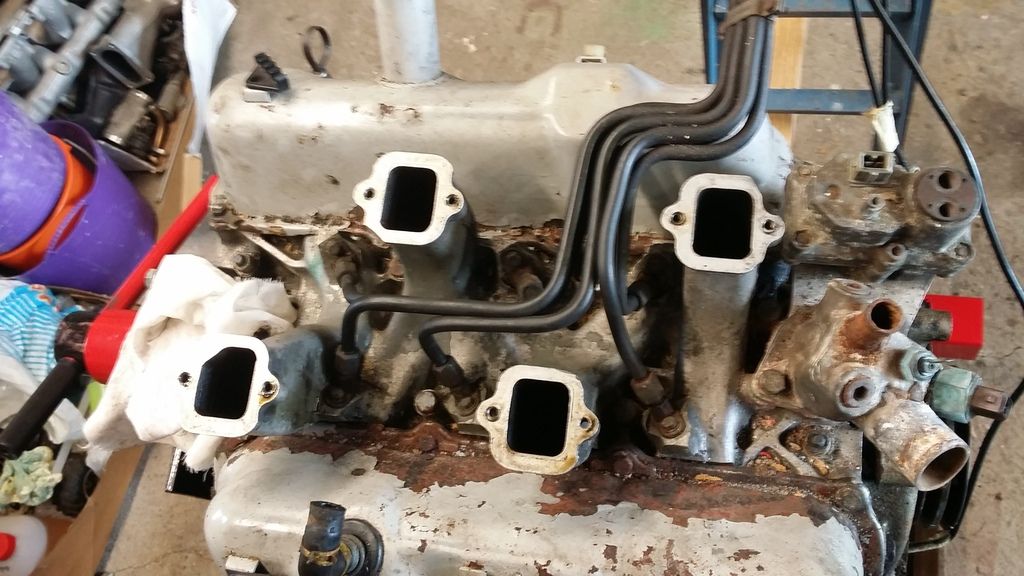
as you can see from pic two, the rocker covers are looking pretty nasty, what is the best way to stop any crap going into the block when things like the covers or intake manifold are removed ? I've masking taped all the exposed places.
Also, the front crank pulley is properly stuck on.. tried a few things to try and remove but it's having none of it.. any suggestions ?
Having a look at the rest of car, the major things I reckon will need replacing or refurb are mainly the Brakes/ Suspension and complete fuel system from tanks through to injectors.
smaller things like the brake pipes - going to be making these up and routing to suit.
The rad will need to be recored or replaced - going to be fitting an electric fan and do away with the viscous one.
And in my head I have an idea for a headlight mod to do away with the pop ups.. wont say much more at mo.
Well, an interesting night yesterday, managed to get the water pump off, had some congealed coolent within the impeller - could have been a sympton for past overheating but more likely its just because it has been sat for so long.
Also removed the Plenum to reveal a pretty much brand new gasket below.. we did replace this when the head gasket was done so not many miles covered since !!
Also cleaned up the front of the block, removed all remanents of the water pump gaskets.
as you can see from pic two, the rocker covers are looking pretty nasty, what is the best way to stop any crap going into the block when things like the covers or intake manifold are removed ? I've masking taped all the exposed places.
Also, the front crank pulley is properly stuck on.. tried a few things to try and remove but it's having none of it.. any suggestions ?
Having a look at the rest of car, the major things I reckon will need replacing or refurb are mainly the Brakes/ Suspension and complete fuel system from tanks through to injectors.
smaller things like the brake pipes - going to be making these up and routing to suit.
The rad will need to be recored or replaced - going to be fitting an electric fan and do away with the viscous one.
And in my head I have an idea for a headlight mod to do away with the pop ups.. wont say much more at mo.

Doah..
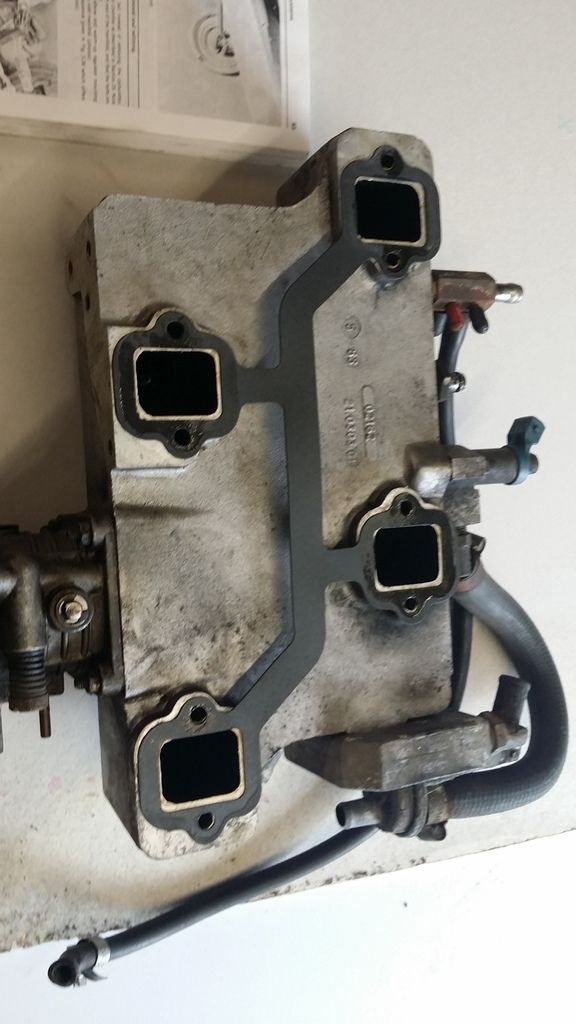
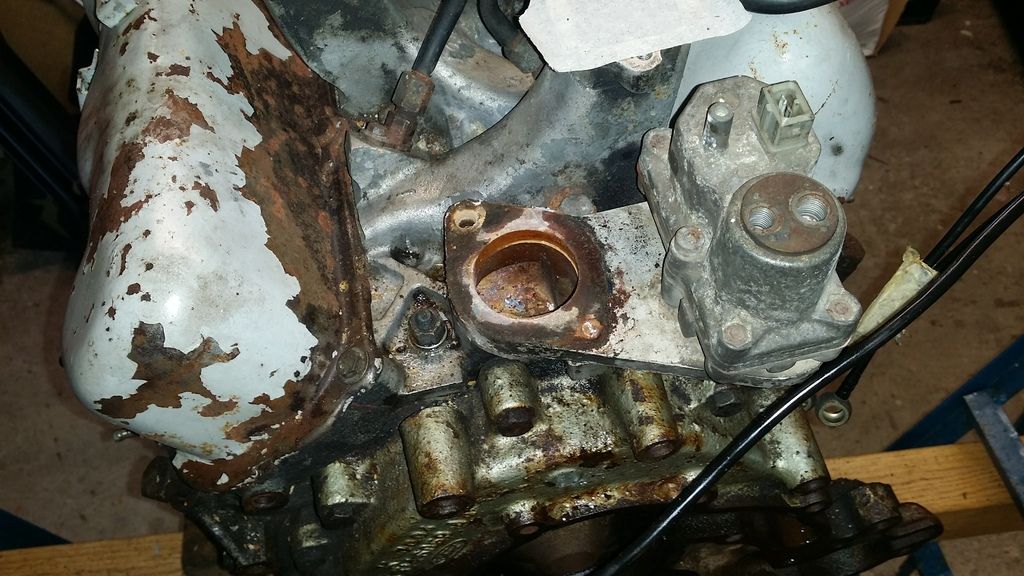
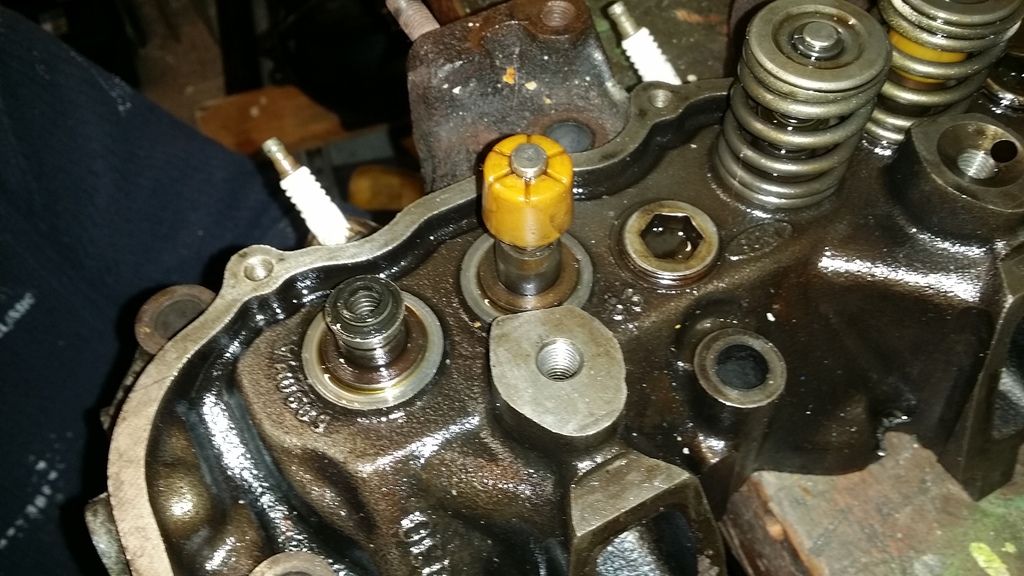
Need ideas guys... snapped a bolt last night taking the warm up regulator off, it must have been weak to start with as didnt use any force with my ratchet.
It's the lower one of the two in pic
The bolt has sheared within the hole so its not possible to grip with anything.
Looking on the net for suggestions they seem to be..
1, weld another thinner bolt onto it to then unscrew.
2, grind flat and weld a nut onto it to unscrew.
3, centrepunch the bolt, drill into it starting thin dia and working up until most removed, then clean hole and thread up.
4, use an 'easy screw extractor'
I think options 1 and 2 are out as the bolt isnt protruding out of the hole.
What ideas would you all suggest to remove it ?
Cheers
Dom
edit to add, not sure if any use but noticed in the end picture of last update, you can see the bolt protruding slightly out of the bottom.
Edited by Sireatalot on Friday 5th August 09:41
Personally Dom I would go for the driling out option seeing as you've got a straight position to start drilling. Never had much luck with easy-outs, they either chew the stud up and don't grip or worse break. I had quite a few studs to drill out especially around the water pump area. Good excuse to buy decent drills and a tap/dye set. Good luck. J C.
I had quite a few studs to drill out especially around the water pump area. Good excuse to buy decent drills and a tap/dye set. Good luck. J C.Morning all.
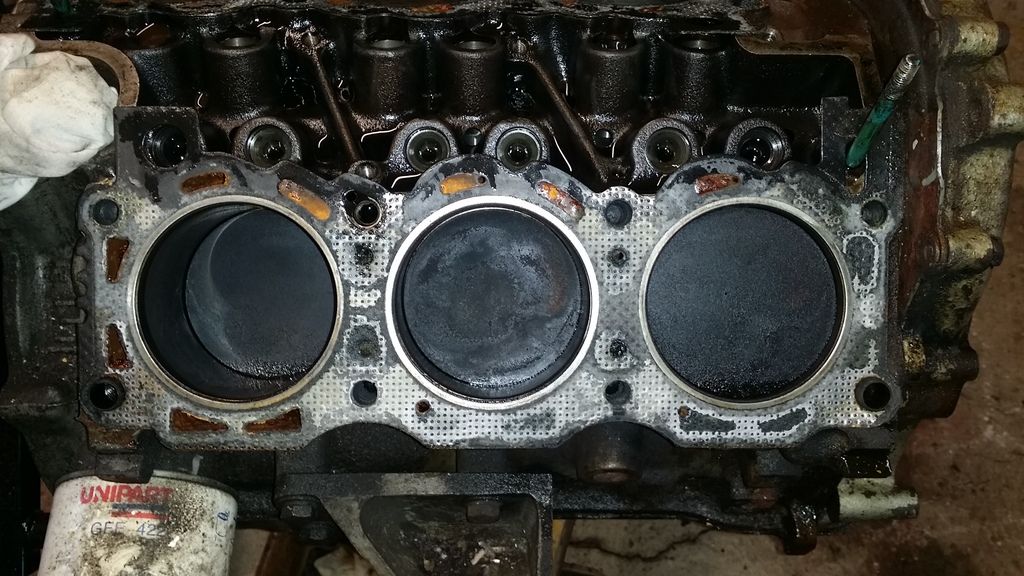
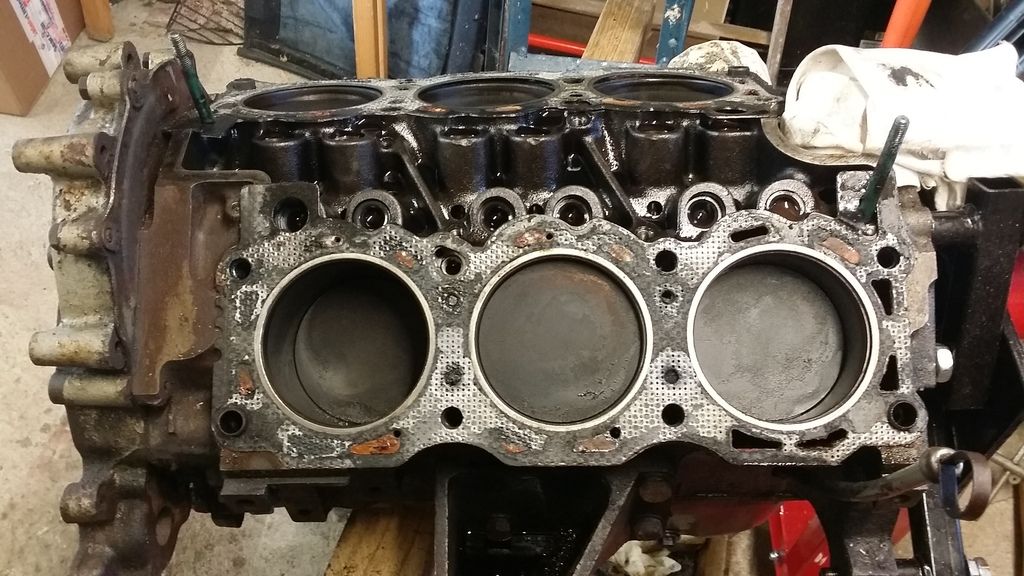
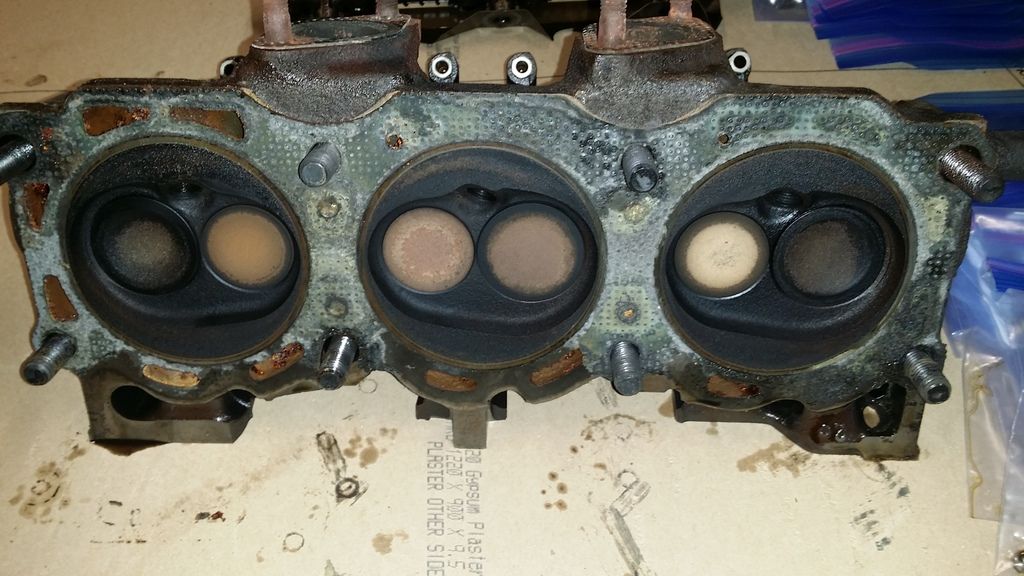
Last night I took off the heads, this is what it looked like.
Drivers side
Passenger side
Drivers side
Passenger side
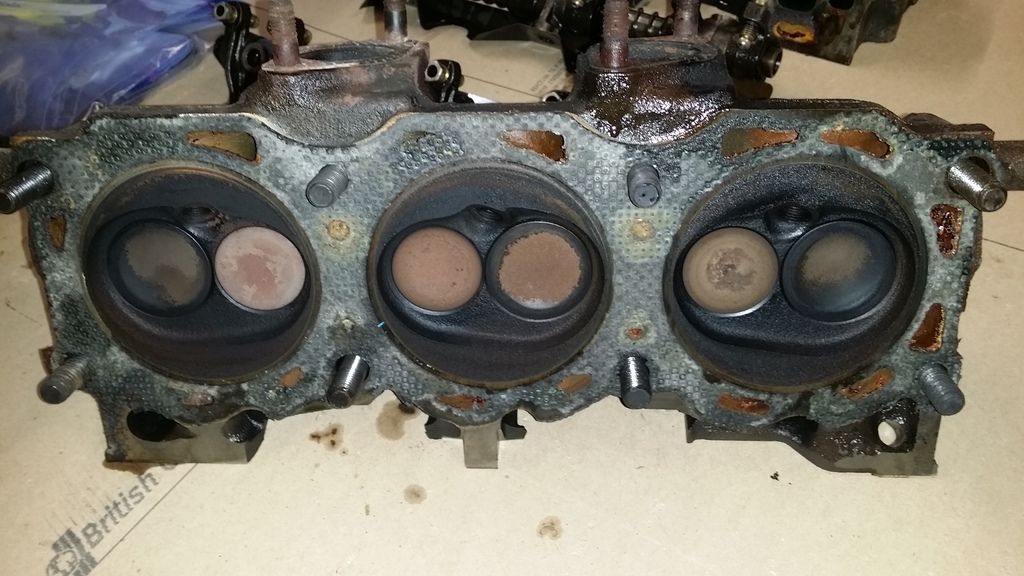
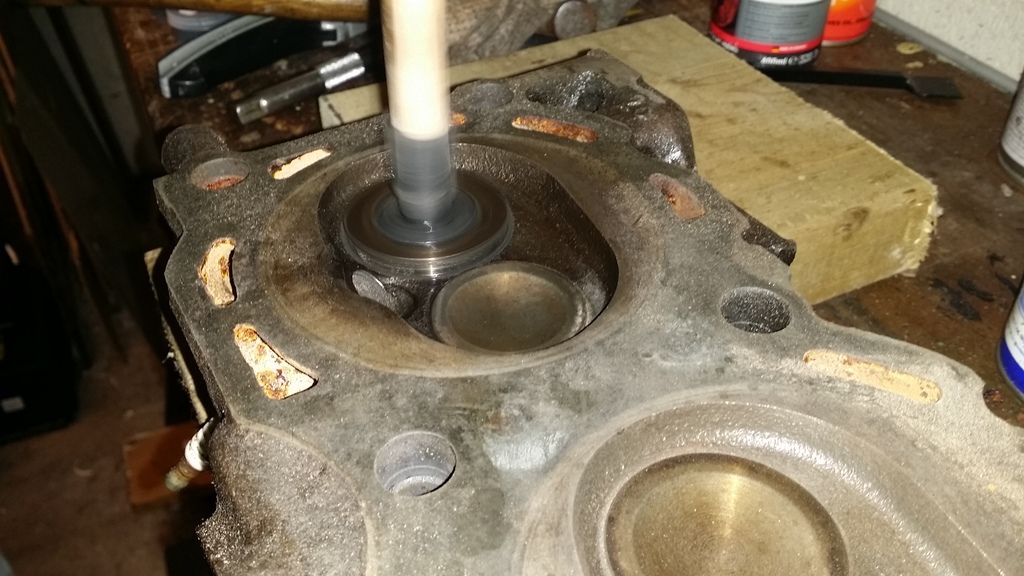
Looks like it needs a good clean all round.
I was thinking of just cleaning the valves up but now think that replacements are in order. Even though the pistons look quite a little cruddy, the bores look to be fine - no scores or marks down them.
It's only been a approx 50 miles of driving since the head gasket was done so not planning on getting the heads skimmed.
So, tonights job will be to remove the sump and start work on the bottom half of block.
Last night I took off the heads, this is what it looked like.
Drivers side
Passenger side
Drivers side
Passenger side
Looks like it needs a good clean all round.
I was thinking of just cleaning the valves up but now think that replacements are in order. Even though the pistons look quite a little cruddy, the bores look to be fine - no scores or marks down them.
It's only been a approx 50 miles of driving since the head gasket was done so not planning on getting the heads skimmed.
So, tonights job will be to remove the sump and start work on the bottom half of block.
Morning all.
Thought I've give a small update.
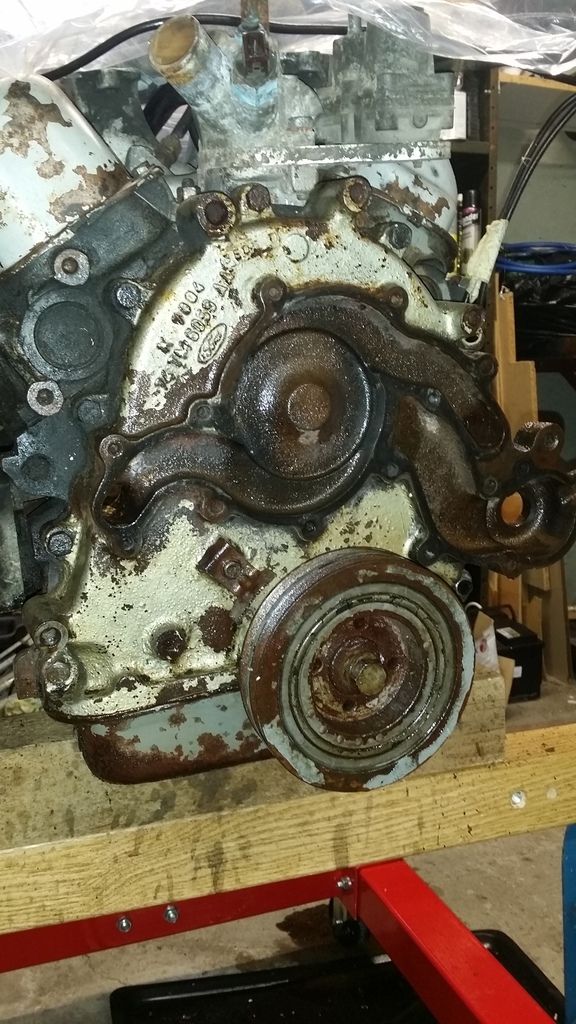
Everything on the top half of block has now been removed, the broken snapped bolts have been removed form the inlet manifold and the crank pulley / timing cover removed.
Next on my list was to get the various parts all degreased and cleaned ( professionally ) and then look at painting and reassembling it with new gaskets / seals etc..
however. Been speaking to a chap who has suggested also doing the piston rings and crank bearings whilst the engine is stripped down. This wasnt on my list of jobs but starting to wonder if I should.. there is no piston slap and the crank seems to be in pretty much new condition.
What do you all think - would it be wise to do ?
also, if I did replace the crank bearings ( big end bearings ?) would the crank need to be reground to suit ?
In the above pic, the timing gear has a outer plastic section with the teeth - I have seen all alloy / steel replacements but again, not sure if this is something I should replace as the existing looks 100% condition.
Cheers all. comments welcome as always
Dom
ps. one more thing... is powdercoating suitable for an engine block / heads / rocker covers etc... or would the temps be too high ? would you just think of painting with a high temp engine paint ?
Thought I've give a small update.
Everything on the top half of block has now been removed, the broken snapped bolts have been removed form the inlet manifold and the crank pulley / timing cover removed.
Next on my list was to get the various parts all degreased and cleaned ( professionally ) and then look at painting and reassembling it with new gaskets / seals etc..
however. Been speaking to a chap who has suggested also doing the piston rings and crank bearings whilst the engine is stripped down. This wasnt on my list of jobs but starting to wonder if I should.. there is no piston slap and the crank seems to be in pretty much new condition.
What do you all think - would it be wise to do ?
also, if I did replace the crank bearings ( big end bearings ?) would the crank need to be reground to suit ?
In the above pic, the timing gear has a outer plastic section with the teeth - I have seen all alloy / steel replacements but again, not sure if this is something I should replace as the existing looks 100% condition.
Cheers all. comments welcome as always
Dom
ps. one more thing... is powdercoating suitable for an engine block / heads / rocker covers etc... or would the temps be too high ? would you just think of painting with a high temp engine paint ?
Hi Dom
The timing chain and gear was a question i asked when we were supercharging but there hadn't been that many reports of them disintegrating, However while its all off it might be something to consider.
Not sure about the rings etc.....If the engine was healthy and pulling good power with no smoke or mis-fire then maybe not..I would change the front and rear crank seals and core plugs and generally clean the internals as much as possible.
VHT paint should be fine as long as you use the VHT primer..
mrzigazaga said:
Hi Dom
The timing chain and gear was a question i asked when we were supercharging but there hadn't been that many reports of them disintegrating, However while its all off it might be something to consider.
Not sure about the rings etc.....If the engine was healthy and pulling good power with no smoke or mis-fire then maybe not..I would change the front and rear crank seals and core plugs and generally clean the internals as much as possible.
VHT paint should be fine as long as you use the VHT primer..
Nice one. The timing chain and gear was a question i asked when we were supercharging but there hadn't been that many reports of them disintegrating, However while its all off it might be something to consider.
Not sure about the rings etc.....If the engine was healthy and pulling good power with no smoke or mis-fire then maybe not..I would change the front and rear crank seals and core plugs and generally clean the internals as much as possible.
VHT paint should be fine as long as you use the VHT primer..
I would have said that the engine was very healthy before it was taken off the road with good power / compression figures.
However.. the last drive did end with an awful lot of white smoke from the rear of the car. Now, it is hard to tell exactly where this smoke was coming from - the exhausts which would suggest the piston rings or whether it was the rear seal failed and oil just hit the exhausts by the gearbox..
My educated guess would be it came from the rear seal failing but this is at best a very edjumacated guess.
By the crank seals, you mean the round rubber bungs - one at front sealing the crank pulley and the one at rear before the flywheel ? if so, these are being done.
The core plugs look to be ok.. how are they removed if I decide to change
I have got some VHT paint ( 280i colour with the VHT primer to suit.) so will most likely use that.
Should of done a leakdown test before you stripped it...Doh!...
If the core plugs are leaking then pop a screwdriver through them and prise them out...If they are okay then leave them..
If the bores are worn enough to be effecting the rings then best to change them...Might be worth getting someone to measure the bore to see...
If the core plugs are leaking then pop a screwdriver through them and prise them out...If they are okay then leave them..
If the bores are worn enough to be effecting the rings then best to change them...Might be worth getting someone to measure the bore to see...
Morning all.
Sorry I havent updated this for a while, busy with work.
Well, its been a busy time on the engine rebuild and the finishing stages are starting to appear at the end of the tunnel - not there just yet but its all coming together.
Have shipped a few parts off to the powder coaters for them to work there magic..
2x rocker covers
the rocker cover fastening clips
timing cover
2x engine mounts
sump cover
inlet manifold
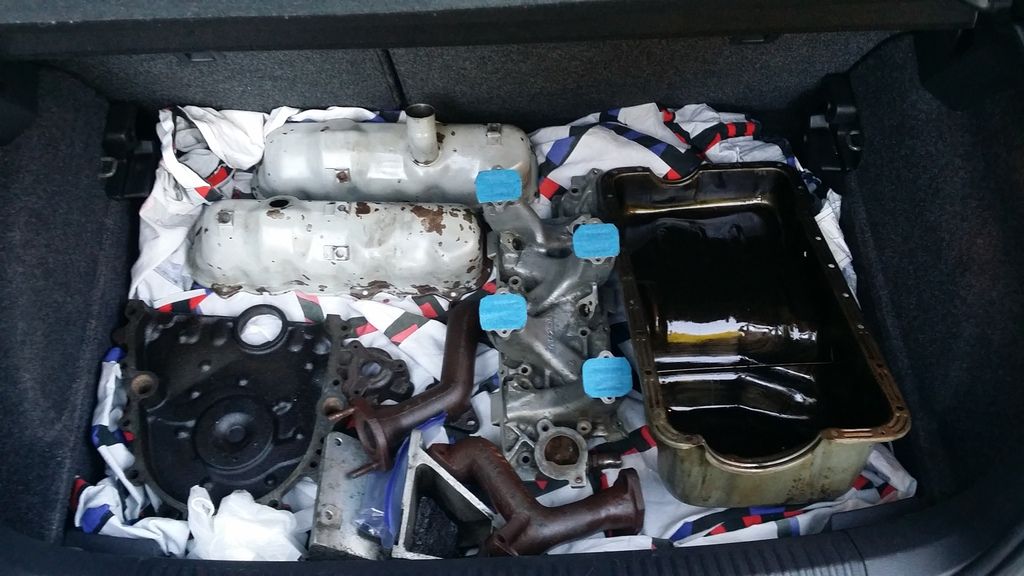
I did ask him about getting the exhaust manifold done but he advised not to..
Whilst they are at the powder coaters, I thought I'd start on removing the valves and cleaning the heads up a little.
taking the valve out, the oil seals are different between the inlet and exhaust valves - anybody know how the yellow seals in next pic acutally seal ? as they seemed to be quite loose.
Once all the valves had been removed, dicided to lap them to ensure all seating properly, had a friend over to help with this and he commented how good they were for an engine that had been sat idle for so long.
When the valve lapping had been finished, removed them and cleaned the heads up, spent about 1 hour per head to mask - onto the priming. Have used VHT primer here.
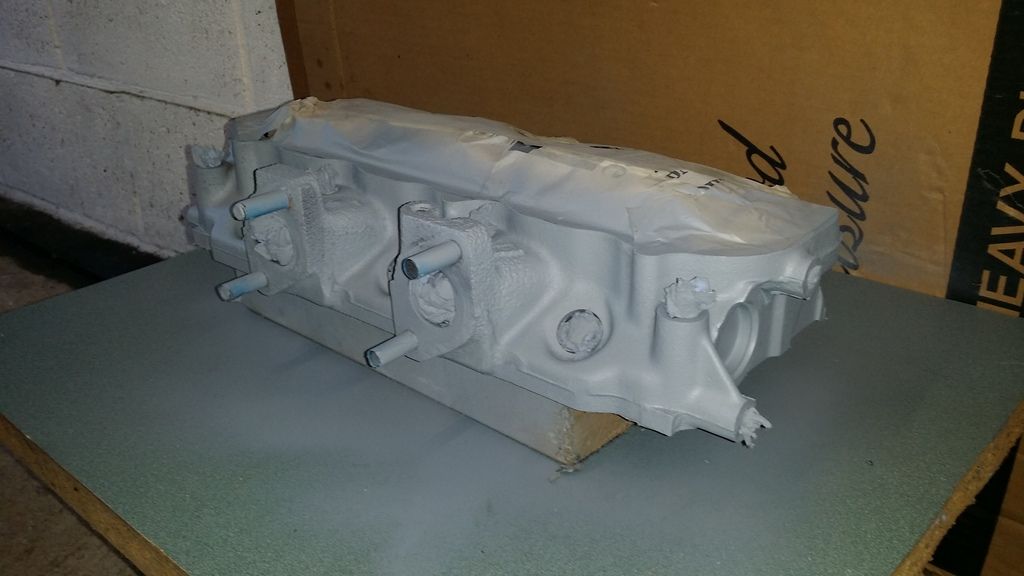
The finish of just the primer is really nice - looks so much better than the 'before' head.
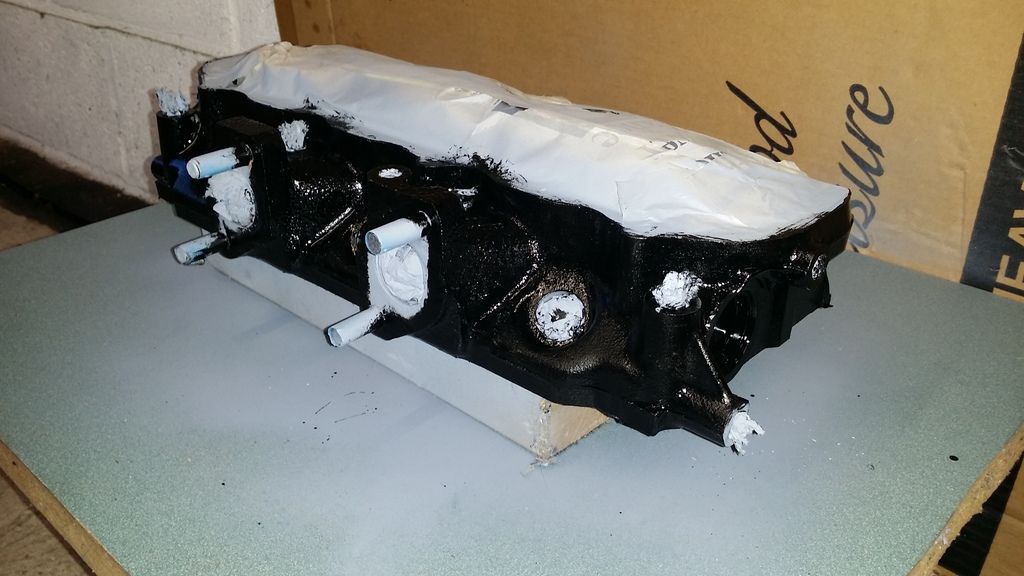
Once dry, first coat of VHT satin black. This pic was taken as soon as first coat was applied, it has dryed to proper finish now, not gloss
I now have the 2nd head, water pump, engine block and all the ancillerys to mask, prime and paint before the parts arrive back from the powder coaters end of next week. busy few hours ahead me thinks.
Sorry I havent updated this for a while, busy with work.
Well, its been a busy time on the engine rebuild and the finishing stages are starting to appear at the end of the tunnel - not there just yet but its all coming together.
Have shipped a few parts off to the powder coaters for them to work there magic..
2x rocker covers
the rocker cover fastening clips
timing cover
2x engine mounts
sump cover
inlet manifold
I did ask him about getting the exhaust manifold done but he advised not to..
Whilst they are at the powder coaters, I thought I'd start on removing the valves and cleaning the heads up a little.
taking the valve out, the oil seals are different between the inlet and exhaust valves - anybody know how the yellow seals in next pic acutally seal ? as they seemed to be quite loose.
Once all the valves had been removed, dicided to lap them to ensure all seating properly, had a friend over to help with this and he commented how good they were for an engine that had been sat idle for so long.
When the valve lapping had been finished, removed them and cleaned the heads up, spent about 1 hour per head to mask - onto the priming. Have used VHT primer here.
The finish of just the primer is really nice - looks so much better than the 'before' head.
Once dry, first coat of VHT satin black. This pic was taken as soon as first coat was applied, it has dryed to proper finish now, not gloss
I now have the 2nd head, water pump, engine block and all the ancillerys to mask, prime and paint before the parts arrive back from the powder coaters end of next week. busy few hours ahead me thinks.
Blingin' 
When I replaced the engine in my Tasmin (1996/7?) I used an ex-XR4i unit as that was all I could find, but it turned out that it had unleaded-ready heads which was handy because about 6 months later leaded petrol was phased out
Anyway, to make the XR engine look more up-to-date (for 1984, that is ) Ford replaced the rocker covers with cast alloy ones that were finned along the top and were 'squarer'. I ground the Ford logos off and had the covers powder-coated fire engine red to match the car.
I imagine there must still be some out there if you wanted to go that route, it adds a certain 'aggression' to the engine
Looks like you fitted new valves? You can clean carbon off valves by clamping the stem in a drill chuck and spinning up while you hold a bit of emery against the valve head - steering clear of the stem for obvious reasons. The stems are case-hardened so the drill won't hurt it but carborundum particles embedded in the valve would certainly not do the guides any good!
When I replaced the engine in my Tasmin (1996/7?) I used an ex-XR4i unit as that was all I could find, but it turned out that it had unleaded-ready heads which was handy because about 6 months later leaded petrol was phased out
Anyway, to make the XR engine look more up-to-date (for 1984, that is
) Ford replaced the rocker covers with cast alloy ones that were finned along the top and were 'squarer'. I ground the Ford logos off and had the covers powder-coated fire engine red to match the car.I imagine there must still be some out there if you wanted to go that route, it adds a certain 'aggression' to the engine
Looks like you fitted new valves? You can clean carbon off valves by clamping the stem in a drill chuck and spinning up while you hold a bit of emery against the valve head - steering clear of the stem for obvious reasons. The stems are case-hardened so the drill won't hurt it but carborundum particles embedded in the valve would certainly not do the guides any good!
Wedg1e said:
Looks like you fitted new valves?
Morning Ian.Nope, original valves, just cleaned up. I was toying with the idea of getting new ones based on the look of them after removing the heads but after a bit of a clean, they came up rather well.
I was a little suprized the amount of oily fluff that had collected around the top of them by the collets but again, after this was cleaned off, they looked top notch.
Morning all.
Well, the engine is very nearly finished... spent last night fitting the inlet manifold and rocker covers.
Next jobs on the list are
1- getting the injectors looked at and then fit them.
2- get a new Thermostat and then fit that and the housing. ( what temp should i be looking for ?)
3- fit the plenum
4- get the AFM refurbed
5- get new water hoses - prob go for the same blue as engine - as it is samco hose blue
6- get the exhaust manifolds ceramic coated and fitted.
7- fit the dizzy
8- start on the rest of the car !!! haha.
Must say I'm rather happy with the look of the blue and black.. considering what it looked like at the start of the rebuild !!
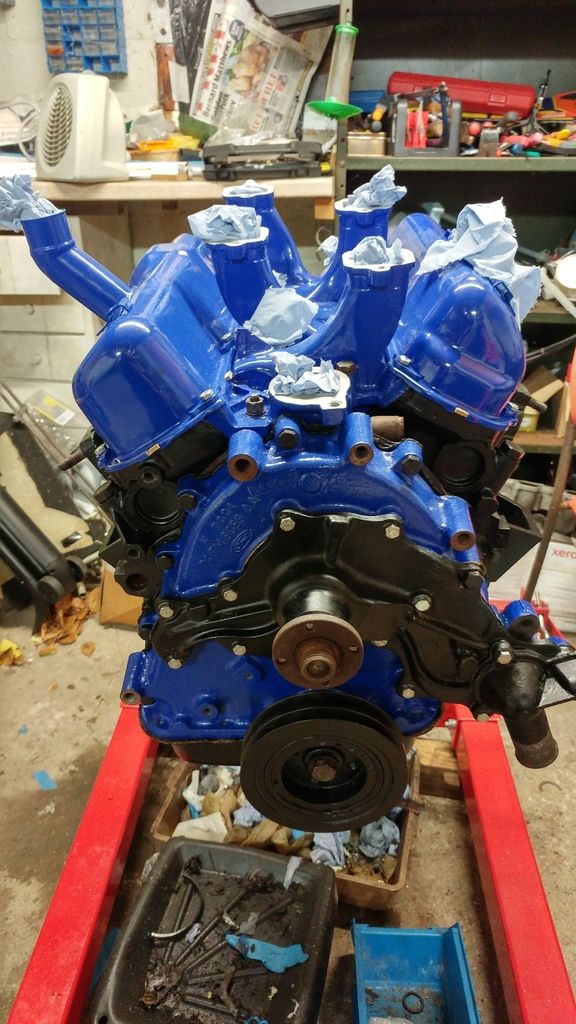
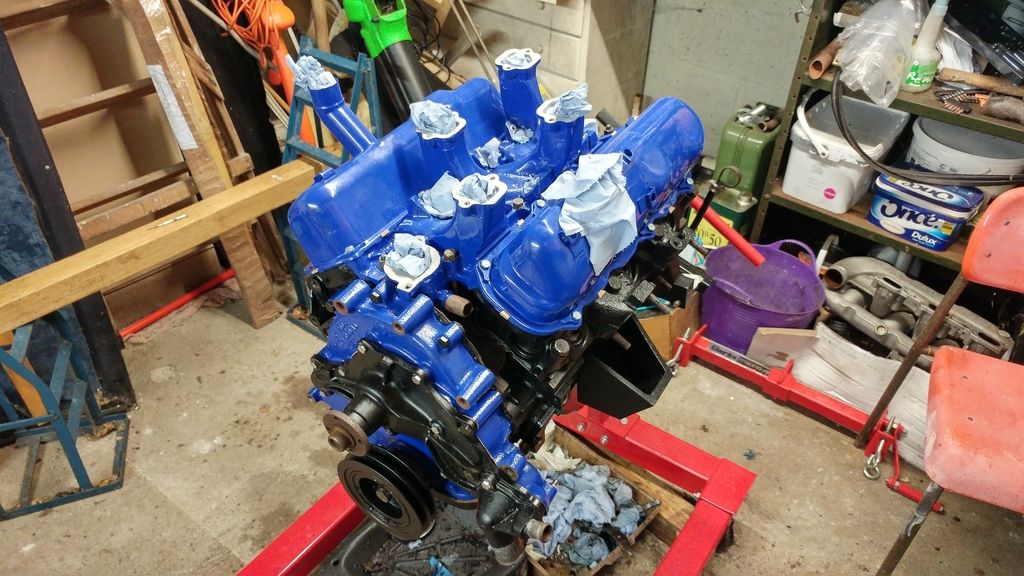

Gassing Station | Wedges | Top of Page | What's New | My Stuff