What's happening in your garage this weekend ?
Discussion


mrzigazaga said:
Hi mate..Cool video...Your engine bay looks awesome..The installation is very tidy..I take it thats a Rotrex centrifugal blower..Much more compact..What psi is it pushing...Cheers...Ziga
PS: Whats the pink stuff?...
Thanks Mark!PS: Whats the pink stuff?...
This is a Procharger P-1SC centrifugal, a bit larger than any of the Rotrex range. Maximum boost with a current pulley is appr. 5psi. I needed to use low boost in order to be able to get it approved at MOT. Actually there is no room for a larger pulley. Time permitting I will fit a smaller pulley and see how it goes. Currently it is a bit lame in my opinion (max at 324hp).
Pink stuff is coolant for intercooler. You can see the intercooler between the throttlebody and blower. Pink stuff is circulated with a pump thru the intercooler, which heats up the water and cools the air going into the engine. Then, in the nose there is an extra radiator where the coolant cools near ambient temperature. Seems to be working pretty well, as intake temperature measured at the throttle body is around 26 Celsius when cruising.

SporttiJanne said:
Thanks Mark!
This is a Procharger P-1SC centrifugal, a bit larger than any of the Rotrex range. Maximum boost with a current pulley is appr. 5psi. I needed to use low boost in order to be able to get it approved at MOT. Actually there is no room for a larger pulley. Time permitting I will fit a smaller pulley and see how it goes. Currently it is a bit lame in my opinion (max at 324hp).
Pink stuff is coolant for intercooler. You can see the intercooler between the throttlebody and blower. Pink stuff is circulated with a pump thru the intercooler, which heats up the water and cools the air going into the engine. Then, in the nose there is an extra radiator where the coolant cools near ambient temperature. Seems to be working pretty well, as intake temperature measured at the throttle body is around 26 Celsius when cruising.
Hi Janne...All sounds good...324hp doesn't sound that lame..(I would be more than happy..This is a Procharger P-1SC centrifugal, a bit larger than any of the Rotrex range. Maximum boost with a current pulley is appr. 5psi. I needed to use low boost in order to be able to get it approved at MOT. Actually there is no room for a larger pulley. Time permitting I will fit a smaller pulley and see how it goes. Currently it is a bit lame in my opinion (max at 324hp).
Pink stuff is coolant for intercooler. You can see the intercooler between the throttlebody and blower. Pink stuff is circulated with a pump thru the intercooler, which heats up the water and cools the air going into the engine. Then, in the nose there is an extra radiator where the coolant cools near ambient temperature. Seems to be working pretty well, as intake temperature measured at the throttle body is around 26 Celsius when cruising.
 )What are you aiming for..350?..Thats an impressive air temp...I think mine was easily double that if not more!...Look forward to an onboard video of you driving it...
  ...Cheers...Ziga


SporttiJanne said:
Had a spin with my supercharged 350i and made a short video:
http://youtu.be/7IbjsXYGFd8
Loved the video .. I can see how you got the damage to the front spoiler http://youtu.be/7IbjsXYGFd8

5 minutes fitting my new screenwash pump - including fettling an adapter pipe.
If you want one for £3 it's ebay item 291032760452. You need to add a 2" length of 6mm plastic pipe on the inlet, then the usual thinner pipe is a push fit into that. Outlet is standard. Nice pressure. Time will tell if it will withstand frost....
If you want one for £3 it's ebay item 291032760452. You need to add a 2" length of 6mm plastic pipe on the inlet, then the usual thinner pipe is a push fit into that. Outlet is standard. Nice pressure. Time will tell if it will withstand frost....
rev-erend said:
SporttiJanne said:
Had a spin with my supercharged 350i and made a short video:
http://youtu.be/7IbjsXYGFd8
Loved the video .. I can see how you got the damage to the front spoiler http://youtu.be/7IbjsXYGFd8
Not me! I am a careful driver. Damage was there from the previous owner. I have not yet got the bodywork fixed, but will get there...
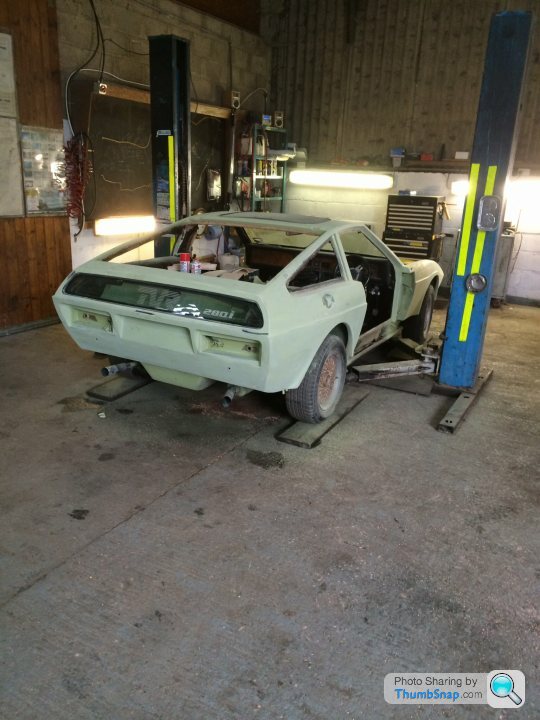
Woohoo! Finally starting to put bits back onto my car, rather than pulling them off
Both fuel tanks in, diff mounted back on its cradle... new fuel hoses and clips, all new UNC bolts (and copperslip!) holding it all together.
Local fasteners place did me a cash deal for all the bolts they had: they were only missing the 6" ones for the A-frame-shock-hub carrier and those two alone cost me more from an online supplier than all the others put together
The guy in the fasteners place did say that UNC stuff is asked for less and less these days and were these by any chance for some old car?
The fuel hose is marine spec. so should remain barnacle-free
I think I've found the correct rear brake flexi hose, have emailed supplier to confirm threads are 3/8"-24 UNF and if so that'll be another tenner into the bottomless money pit.
When I put the diff. cradle back in I'm hoping I can put the bolts in from underneath so the nuts are on top of the chassis rail: that way if the bolts ever get chance to seize again it'll be easier to get a nut splitter on and knock them out from above.
Once I'd fitted the new boot floor to chassis bolts and nipped them up I found that the doors don't open/close as well so I suspect the packing rubbers have compressed allowing the rear end to droop; will have to remove the bolts and slip a bit more packing in there. I did think the door gaps looked better when the bolts were out!
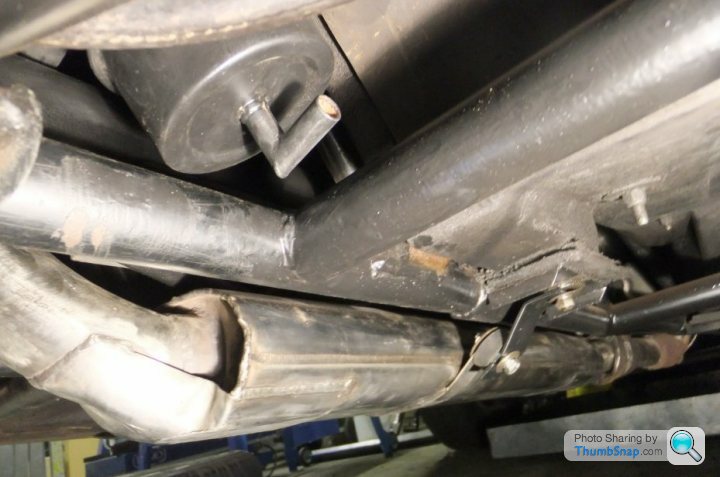
Have now attached the stainless flange to the right hand manifold - seals well!
Will post up some pics on the flange thread. It took about 7 hours in the end - it was a bit tight fitting and I didn't want to chop too much pipe off! I noticed a few other leaks that got welded and the manifold nuts got nipped up too. Plus the main box has taken a battering and trashed one of the mounting bobbins which had to be replaced (drilled a hole in the rubber and stuck an M8 bolt right through.)
Will post up some pics on the flange thread. It took about 7 hours in the end - it was a bit tight fitting and I didn't want to chop too much pipe off! I noticed a few other leaks that got welded and the manifold nuts got nipped up too. Plus the main box has taken a battering and trashed one of the mounting bobbins which had to be replaced (drilled a hole in the rubber and stuck an M8 bolt right through.)
Edited by adam quantrill on Sunday 12th October 18:40
Things happening in my workshop too...
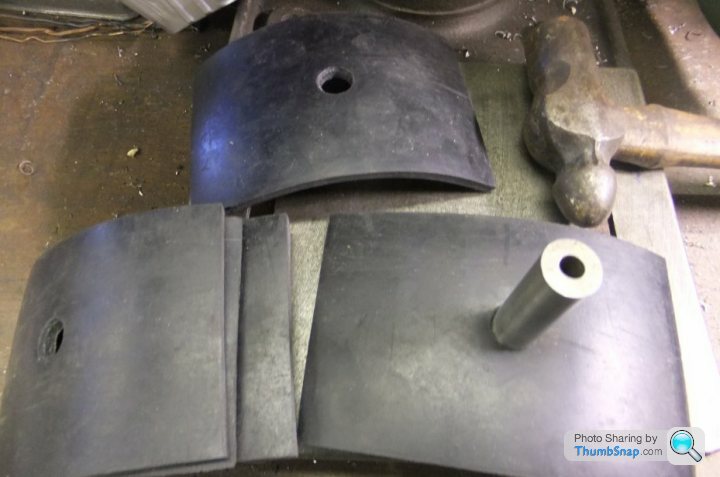
I decided the rubber packing pieces at the rear of the car needed beefing up so I bought some 6mm rubber mat... and then decided to bin the whole lot of original packers and start again.
Now I've never found it too easy to drill holes in rubber so I rummaged in the scrap bin and found an offcut of stainless bar which was drilled and bored to create a wad punch; a few whacks with a hammer later and...

Once I'd proved that worked I sliced a dozen pieces from the rubber sheet (I bought enough to last several lifetimes, it was cheaper that way!), worked out where they needed punching...
..then slipped the old packers out and the new ones in:
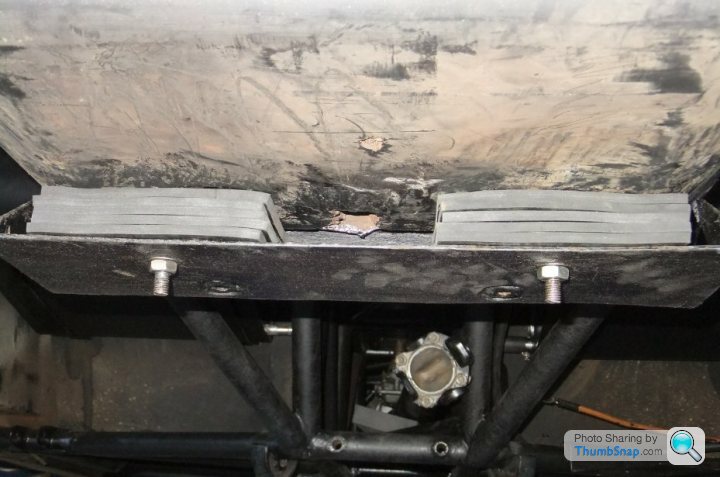
Yes, I know those nuts should be Nylocs, I'll pinch some tomorrow...
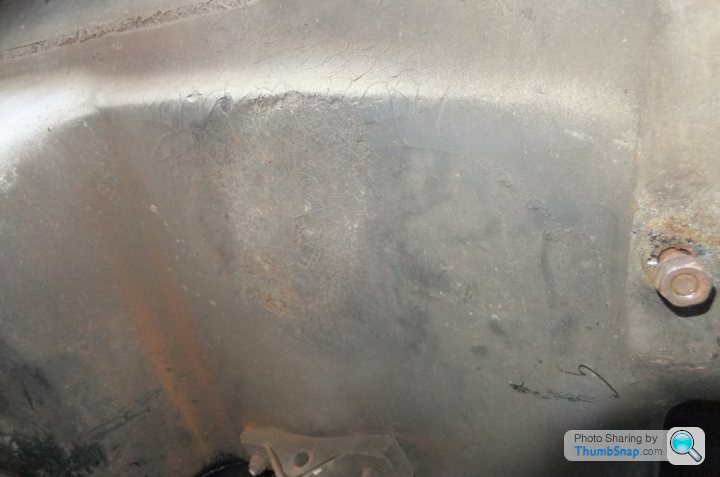
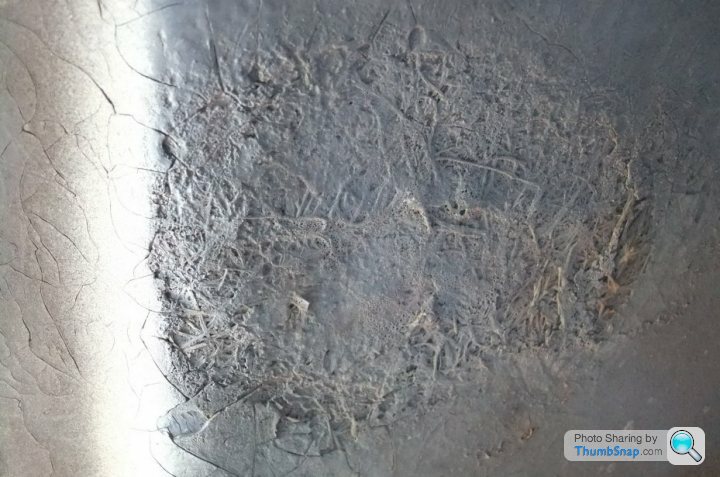
While I was down there (ooer missus) I noticed an area of GRP just above the tailpipe location from which the gelcoat has leached due to heat:
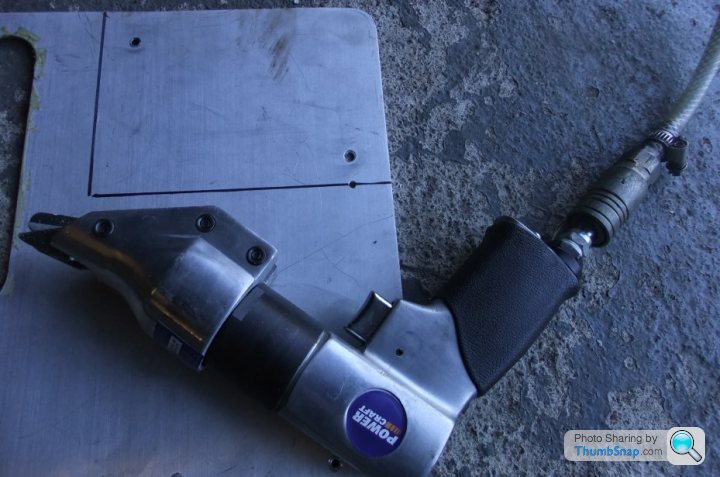
I can't do much about the damage now but reasoning that I can try to stop it getting worse by fitting a heat shield, some buckshee alloy plate was found and attacked with the nibbler:
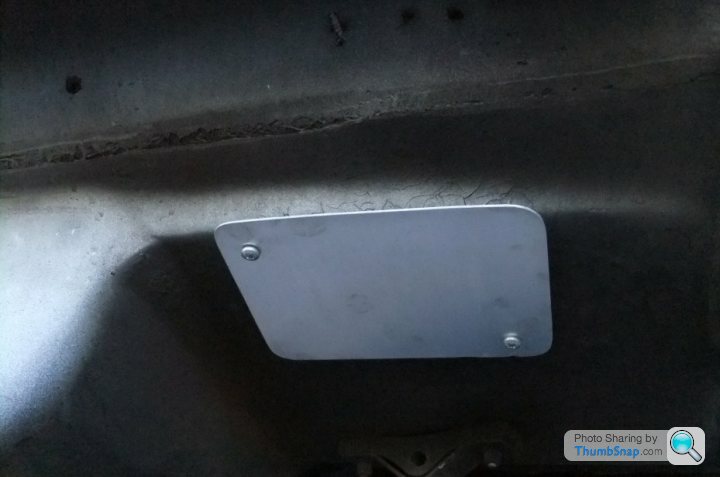
then screwed up with a couple of thick washers acting as spacers...
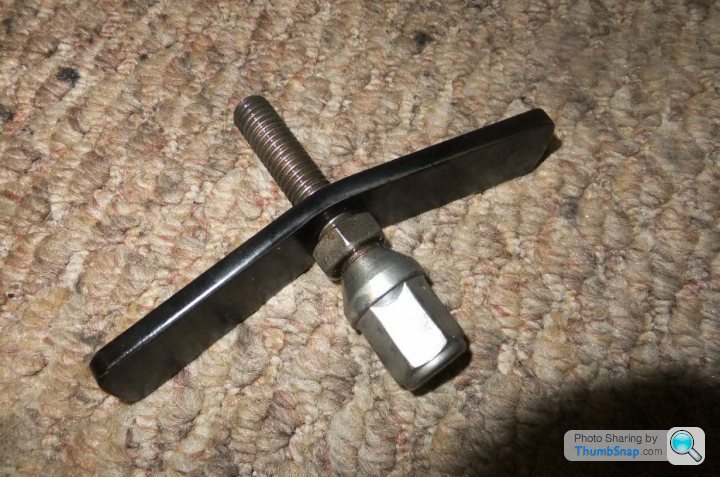
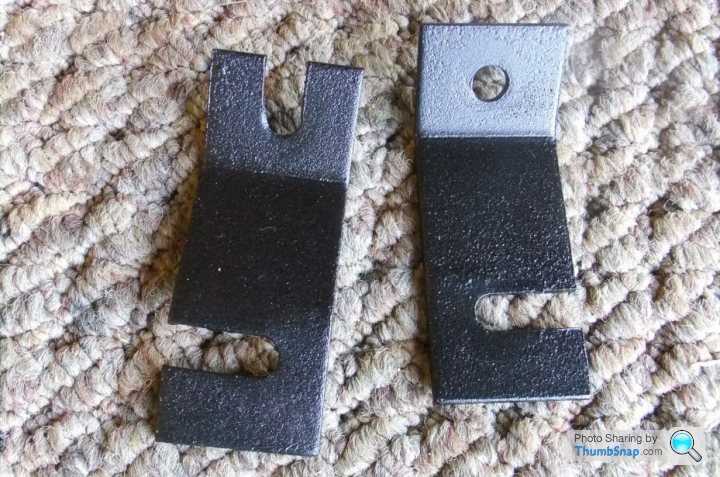
Meanwhile the spare wheel clamp had been cleaned up, painted and copperslipped:
The silencer was next... it would have been last week but the old bobbins were Kerry Packered from oil leaks and the ones I had that I thought would fit were as thick as an Essex girl so I went online and found some nice ones - alas, the size I wanted couldn't be found in the UK but a German Ebay seller had just the thing.
I cleaned up the brackets and was going to paint them but then decided to get the powdercoat kit out and do them that way; here they are cooling down after curing in the oven:
Ready to be fitted...
... and in situ. I can't do much about the silencer still being the lowest point on the car, however
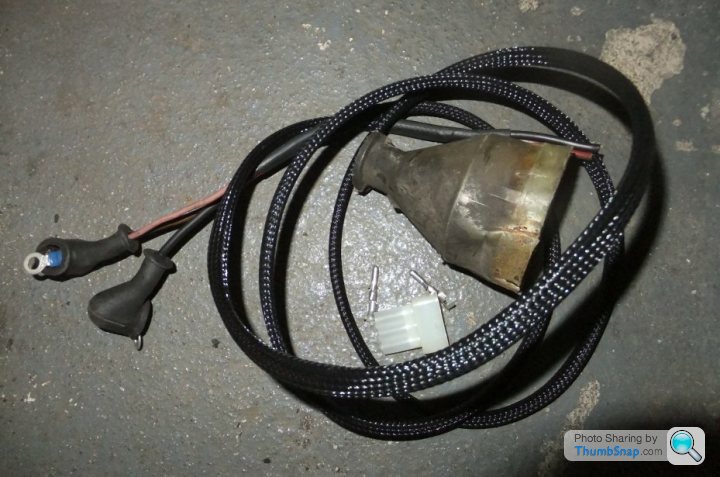
That done, I installed a few more lengths of fuel hose, fitted new crimps to the fuel tank sender unit and then set about making a new sub-loom for the fuel pump as the old wiring has hardened and gone brittle in places. I didn't have any heavy-gauge yellow so substituted brown/red wire, I doubt that even the most hardened purist is going to whinge about that. The old wiring:
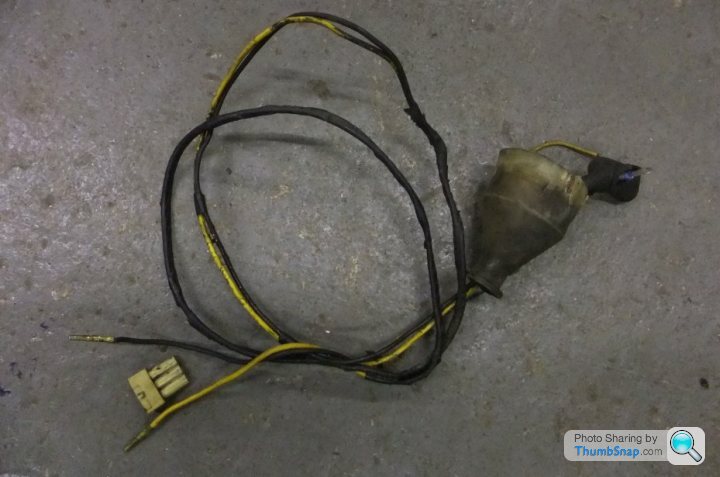
...and the new, prior to threading it through the floor. Of course you have to leave the 2-pin connector off until the loom's through the GRP. I used some nice braided sleeving to... well, just to look nice, really
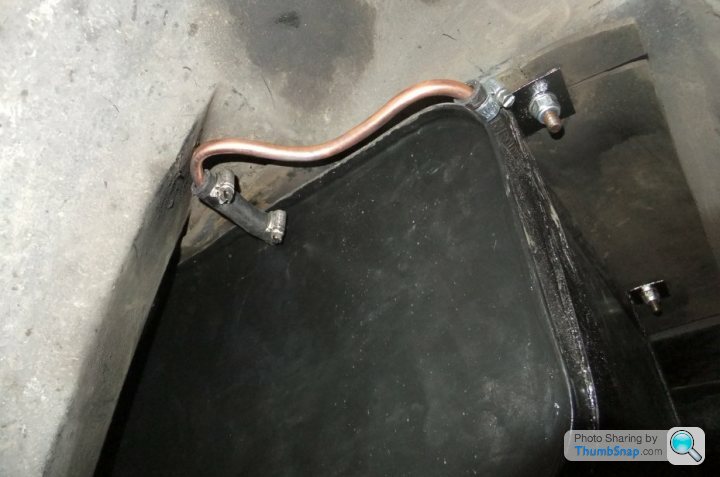
Finally for the moment, I was never impressed with the orignal meandering length of rubber hose acting as the low-pressure return line from the injection system; it had been scuffed by the tyre so by way of keeping the new line out of harm's way I came up with this meandering length of copper instead:
Next up, fuel pump and filter to fit, along with brake flexi hose and another set of rear brake caliper seals. Then it'll be almost time to hoist the diff back in!
Nice selection of UNC bolts standing by (and some of the old ones awaiting the scrapman):

I decided the rubber packing pieces at the rear of the car needed beefing up so I bought some 6mm rubber mat... and then decided to bin the whole lot of original packers and start again.
Now I've never found it too easy to drill holes in rubber so I rummaged in the scrap bin and found an offcut of stainless bar which was drilled and bored to create a wad punch; a few whacks with a hammer later and...
Once I'd proved that worked I sliced a dozen pieces from the rubber sheet (I bought enough to last several lifetimes, it was cheaper that way!), worked out where they needed punching...
..then slipped the old packers out and the new ones in:
Yes, I know those nuts should be Nylocs, I'll pinch some tomorrow...
While I was down there (ooer missus) I noticed an area of GRP just above the tailpipe location from which the gelcoat has leached due to heat:
I can't do much about the damage now but reasoning that I can try to stop it getting worse by fitting a heat shield, some buckshee alloy plate was found and attacked with the nibbler:
then screwed up with a couple of thick washers acting as spacers...
Meanwhile the spare wheel clamp had been cleaned up, painted and copperslipped:
The silencer was next... it would have been last week but the old bobbins were Kerry Packered from oil leaks and the ones I had that I thought would fit were as thick as an Essex girl so I went online and found some nice ones - alas, the size I wanted couldn't be found in the UK but a German Ebay seller had just the thing.
I cleaned up the brackets and was going to paint them but then decided to get the powdercoat kit out and do them that way; here they are cooling down after curing in the oven:
Ready to be fitted...
... and in situ. I can't do much about the silencer still being the lowest point on the car, however
That done, I installed a few more lengths of fuel hose, fitted new crimps to the fuel tank sender unit and then set about making a new sub-loom for the fuel pump as the old wiring has hardened and gone brittle in places. I didn't have any heavy-gauge yellow so substituted brown/red wire, I doubt that even the most hardened purist is going to whinge about that
. The old wiring:...and the new, prior to threading it through the floor. Of course you have to leave the 2-pin connector off until the loom's through the GRP. I used some nice braided sleeving to... well, just to look nice, really
Finally for the moment, I was never impressed with the orignal meandering length of rubber hose acting as the low-pressure return line from the injection system; it had been scuffed by the tyre so by way of keeping the new line out of harm's way I came up with this meandering length of copper instead:
Next up, fuel pump and filter to fit, along with brake flexi hose and another set of rear brake caliper seals. Then it'll be almost time to hoist the diff back in!
Nice selection of UNC bolts standing by (and some of the old ones awaiting the scrapman):
"Buckshee" - now there's a word I haven't seen in a while!
Nice job but I would he been more impressed if your Sunday Roast was in there with those exhaust brackets.... ;^) I have given up on bobbins personally as they keep splitting so I just stick a bolt through with something rubber as a spacer.
On the subject of drilling rubber I have found that wood drills work pretty well - the type that look like standard twist drills but with the sharp pointy end. And if you don't want to buy rubber sheet, cut up some old tyres!
Gassing Station | Wedges | Top of Page | What's New | My Stuff