What's happening in your garage this weekend ?
Discussion


Replaced the boot lid hinge grub screws, nyloc nuts and washers with stainless ones. In hindsight, normal bolts would have been cheaper than the grub screw + nyloc nut approach.
I didn't know UNF was still in use in late 80's, but the grub screws/nuts were 1/4" thread UNF. Found this after buying metric ones first.
I got lazy and used stainless M8 washers I had around from the coil bracket redo, didn't bother getting the proper sized washers. Close enough.
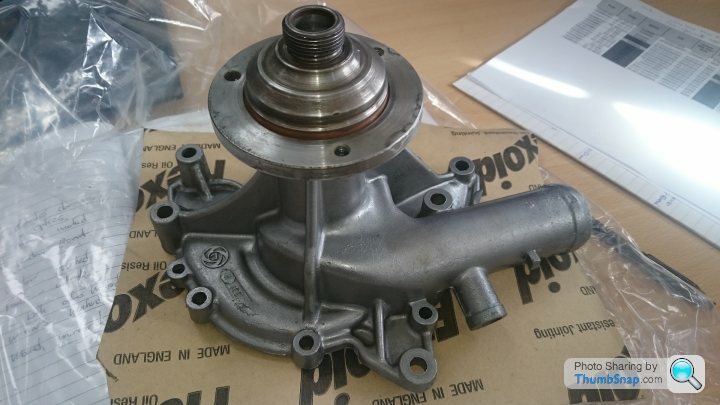
Speaking of coil bracker redo, installed a lucas kit to move the ign module to coil bracket, new ign module, new coil, and plenty of new wiring.
Fun fact - the coil bracket mounting bolt holes are too close to each other in the wheelwell side in (my) 350i. The official Lucas kit won't fit without drilling new holes to wheelwell side (booo!) or the bracket (yay). Hand-made etc.
Dash is off and has had almost all instrument lights replaced with LEDs. Noticed I f'd up and bought negative earth LEDs for the warning lights, which are all between 12V and sensor (meaning they should use positive earth LEDs) with the 12V at the outer rim of the holder.
Bought more Lucas bulb holders with dual spade connectors for the BA7S's (or whatever the warning light bulbs are) so that I can switch the 12V wire to the central connector.
Up next - wire up the new holders, install last LEDs, bolt the dash back to car.
I didn't know UNF was still in use in late 80's, but the grub screws/nuts were 1/4" thread UNF. Found this after buying metric ones first.
I got lazy and used stainless M8 washers I had around from the coil bracket redo, didn't bother getting the proper sized washers. Close enough.
Speaking of coil bracker redo, installed a lucas kit to move the ign module to coil bracket, new ign module, new coil, and plenty of new wiring.
Fun fact - the coil bracket mounting bolt holes are too close to each other in the wheelwell side in (my) 350i. The official Lucas kit won't fit without drilling new holes to wheelwell side (booo!) or the bracket (yay). Hand-made etc.
Dash is off and has had almost all instrument lights replaced with LEDs. Noticed I f'd up and bought negative earth LEDs for the warning lights, which are all between 12V and sensor (meaning they should use positive earth LEDs) with the 12V at the outer rim of the holder.
Bought more Lucas bulb holders with dual spade connectors for the BA7S's (or whatever the warning light bulbs are) so that I can switch the 12V wire to the central connector.
Up next - wire up the new holders, install last LEDs, bolt the dash back to car.
hrepo said:
Dash is off and has had almost all instrument lights replaced with LEDs.
Hi, I've got an issue with the dash on my 390SE - the top RHS (offside) is loose. I've tried tightening the lower bracket that sits close to the door courtesy light switch but there must be another bracket underneath the dash but high up towards the windscreen. Have you got yours apart so far that you could take a photo of the bracket locations. I've tried getting my big fat hand up behind the dash but with the steering column support steelwork and rats nest of cables I can't feel where the top bracket/fastener should go. Thanks.rev-erend said:
I found the Emerald poor response issue - the TPS was incorrectly set. It started at load site 15 and went backwards when you rev'ed it.
Lol! Sounds like an interesting manoeuvre you should perform at BBWF - reverse donuts!I made a new TPS for the 350i which was an electronic one with 10,000,000 operations, unfortunately it went the wrong way too, so I had to make a circuit to invert the direction of the voltage change.
KKson said:
Hi, I've got an issue with the dash on my 390SE - the top RHS (offside) is loose. I've tried tightening the lower bracket that sits close to the door courtesy light switch but there must be another bracket underneath the dash but high up towards the windscreen. Have you got yours apart so far that you could take a photo of the bracket locations. I've tried getting my big fat hand up behind the dash but with the steering column support steelwork and rats nest of cables I can't feel where the top bracket/fastener should go. Thanks.
There's a captive bolt in the dash top, corner-ish. 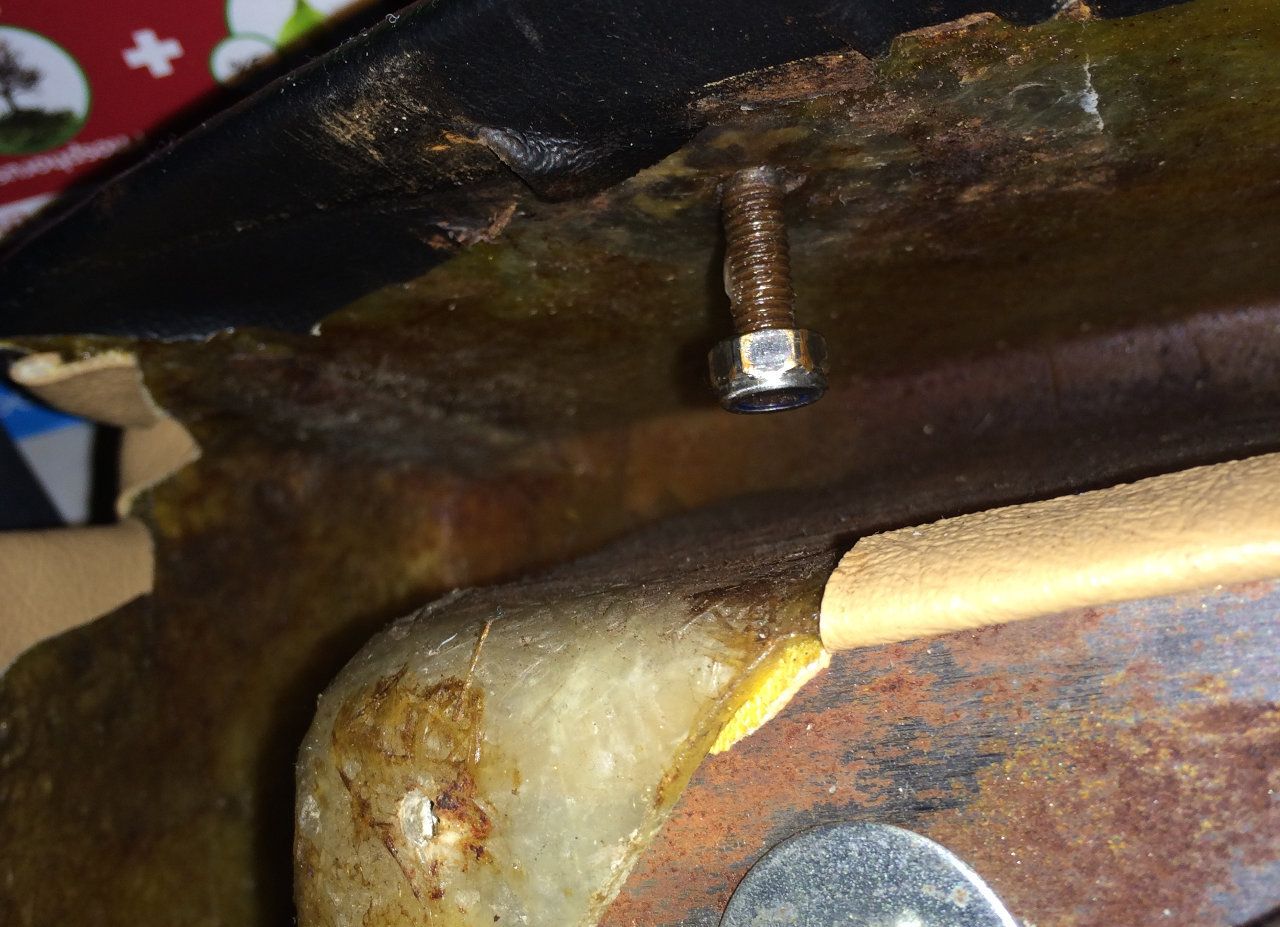
By using that bolt, a big rectangular (and rusty) "washer" is squeezing a portion of dash fixed to the body. The fixed portion of the dash has a slot cut to it through which the bolt can go, but the way bigger "washer" is too big and thus grips the dash.
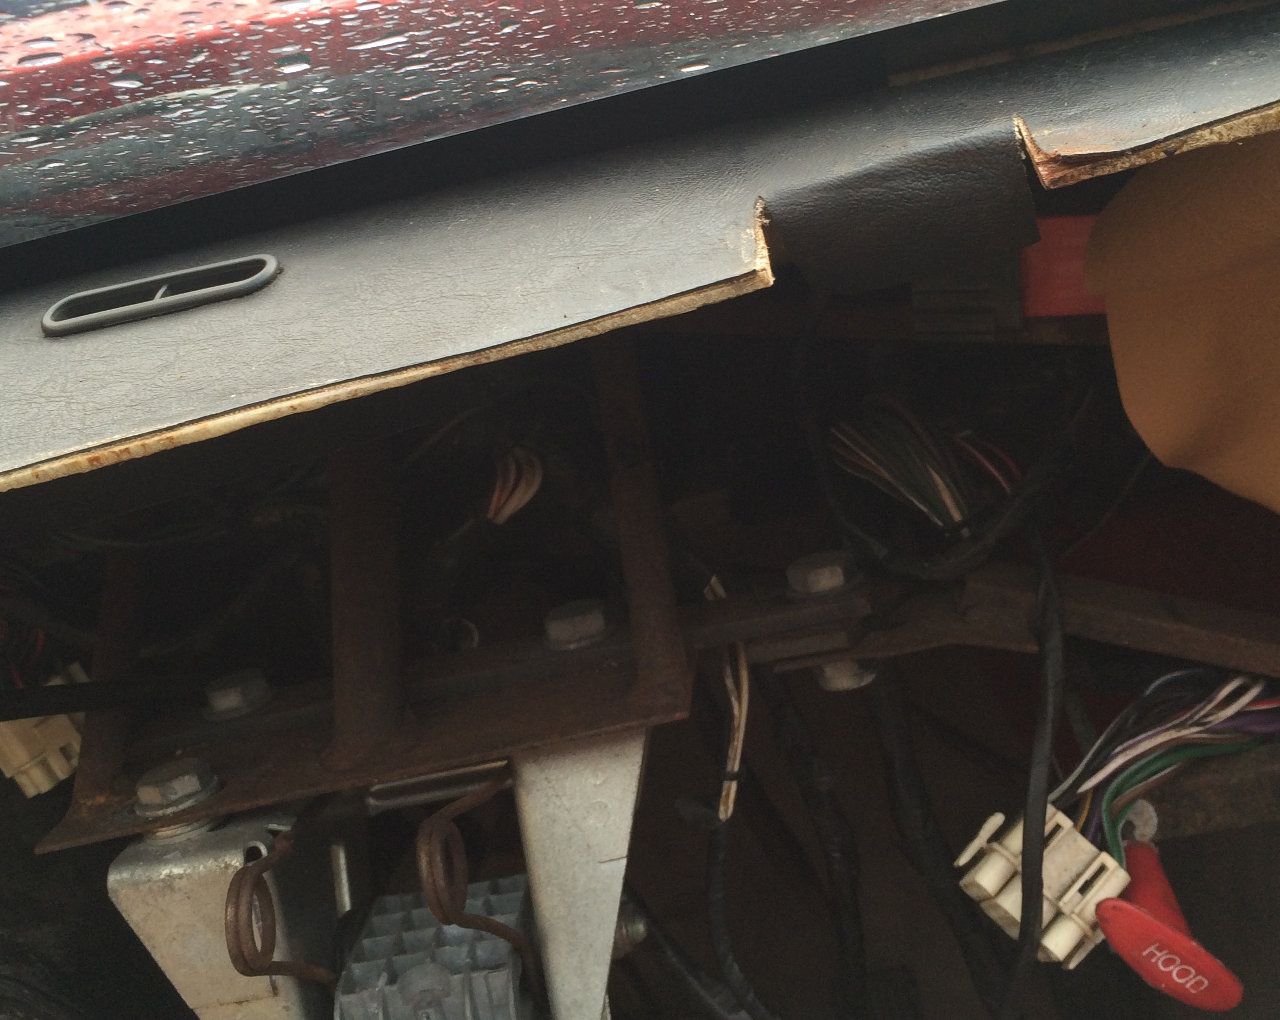
On mine both corner top mounts (both are similar) were left untightened and the dash was fine, but was really easy (5min) to disconnect. The nuts are in so annoying places that to do them up would take either an octopus or saint - my hands wouldn't bend that many times and I'd get annoyed way before the nuts would be on/off.
I am considering letting them remain not-tightened, or then just learn to flex my arm. I did replace the nut with stainless one, and did grease the threads (nyloc will grip enough even with grease). But I am not looking forwards to doing them up.
This is how it is in my 1989 350i - ymmv.
mrzigazaga said:
I keep putting off my dash removal...Trust me its no fun if you leave it loose mate..Do you have a part number for the dash bulbs please...
There are 3 different types. Turn signal indicators and all warning lights use Lucas 281 (also known as BA7S) types.
if using LEDs, You need 3 red "positive earth" and one blue "positive earth" types (or need to do wiring hackery) for the warning lights. I got this wrong the first time, I bought negative earth ones and will resort to wiring hackery.
2 green "negative earth" types will do for turn signals. No need to hack the wiring, the polarity should be fine.
The Lucas fiber optic thingamabob and the clock use BA9S types. I got a green LED for the clock, and 1W (super bright) white one for the fiber lamp thingy.
All gauges apart from the clock use W5W (also known by various other codes) white bulbs - I was considering getting green LEDs for these also but decided on white ones instead.
I have unused BA7S filament bulbs since my 9 bulb holders all came with new filament bulbs, and I didn't use them for anything.
If You want LED links, let me see that they all work and then I can point You to the ones I used - but the types are all listed above so You can search Amazon / ebay if You want...
Note that this was for my 1989 (late) 350i. YMMV.
hrepo said:
1W (super bright) white one for the fiber lamp thingy.
Thanks for the info...This is an area of previous discussion...How much brighter is that?...I was sent some pre-wired 3mm LED's with a 1 red & 1 black wire...These i believe were for the switch illuminator...(Octopus).
I don't normally use my Wedge at night but when i did i noticed i had no speedo illumination but then noticed a light on my knee...Ha...Its fallen out of the socket at the back but i have tried in vain to wiggle it back in with forceps ...The inevitable is always reminding me..."Remove dash".....Wah....Knowing my luck ill probably fix that one and disturb all the others...

hrepo said:
There's a captive bolt in the dash top, corner-ish.
By using that bolt, a big rectangular (and rusty) "washer" is squeezing a portion of dash fixed to the body. The fixed portion of the dash has a slot cut to it through which the bolt can go, but the way bigger "washer" is too big and thus grips the dash.
On mine both corner top mounts (both are similar) were left untightened and the dash was fine, but was really easy (5min) to disconnect. The nuts are in so annoying places that to do them up would take either an octopus or saint - my hands wouldn't bend that many times and I'd get annoyed way before the nuts would be on/off.
I am considering letting them remain not-tightened, or then just learn to flex my arm. I did replace the nut with stainless one, and did grease the threads (nyloc will grip enough even with grease). But I am not looking forwards to doing them up.
This is how it is in my 1989 350i - ymmv.
Thanks Mark, I'll have a ganders to see if I can locate it. The issue I have is that every bump in the road makes the dash kick up an inch and also the steering column steel support is also loose which doesn't inspire confidence. Car only has three wheels at the moment as I'm still waiting to get the refurbished A frame back from RT Racing. I did fit new boot hinges tonight and removed the SEAC spoiler so I could give the boot paintwork underneath a good polish. Also slackened off the coil overs as they were set to "rock hard" and reset the shock settings so that they are matched. By using that bolt, a big rectangular (and rusty) "washer" is squeezing a portion of dash fixed to the body. The fixed portion of the dash has a slot cut to it through which the bolt can go, but the way bigger "washer" is too big and thus grips the dash.
On mine both corner top mounts (both are similar) were left untightened and the dash was fine, but was really easy (5min) to disconnect. The nuts are in so annoying places that to do them up would take either an octopus or saint - my hands wouldn't bend that many times and I'd get annoyed way before the nuts would be on/off.
I am considering letting them remain not-tightened, or then just learn to flex my arm. I did replace the nut with stainless one, and did grease the threads (nyloc will grip enough even with grease). But I am not looking forwards to doing them up.
This is how it is in my 1989 350i - ymmv.
hrepo said:
I didn't know UNF was still in use in late 80's...
It wasn't, generally, but the boot lid hinges were robbed from the 1960s Hillman Imp, when it was.Most of the engine bay fasteners are UNC or UNF. The correct diff to driveshaft bolts are UNF (not Metric, as on my car
 ). The rear stub axles are UNEF...!
KKson said:
I've tried getting my big fat hand up behind the dash but with the steering column support steelwork and rats nest of cables I can't feel where the top bracket/fastener should go. Thanks.
Yep, you need Hands Like A Paedophile (tm). The nearside top fastener is hidden by the glovebox and the offside is up above the speedo. Either disconnect the speedo cable or drop the stering column for better access... either of which is a pain in the parts. Having the driver's seat out makes it a bit easier when you're laid on your back... I think I once made up a two foot socket extension with 1/2" to 3/8" to 1/4" adapters but it still won't get you into the nearside one. A surgeon's touch with a short spanner is what's called for there.Wedg1e said:
Yep, you need Hands Like A Paedophile (tm). The nearside top fastener is hidden by the glovebox and the offside is up above the speedo. Either disconnect the speedo cable or drop the stering column for better access... either of which is a pain in the parts. Having the driver's seat out makes it a bit easier when you're laid on your back... I think I once made up a two foot socket extension with 1/2" to 3/8" to 1/4" adapters but it still won't get you into the nearside one. A surgeon's touch with a short spanner is what's called for there.
Thanks for the response - I was thinking that maybe removing the seat would be the easier way to go so once I've got four wheels back on the car and I can get it out of the garage I'll do that and drop the steering column to see if I can get things tightened up. Currently if I try pulling the dash up and down on the drivers side corner I get a good 2" of movement. The lower bracket on mine is paper thin and flexes so I'm also going to fabricate a stronger one.

chapperssx said:
Video video video please Howard I've not had the pleasure of meeting this beast yet so a little snippet of her doing her thing would be great ! 
Here's a snippet that Marcus posted on YouTube last year: Saturday lunch stopShe's quite a refined old lady really...

Well its more of "Whats happening on your street this weekend" for me... Well i planned to meet up with Chris and the Gredge this morning...Left out...All fine...5 mins later..."Cough...Splutter"..."Moo Moo"..."Gnung..Gnung"....Pah...Pulled over and checked the plug to the ECU...Connections to coil...Plug leads...Resistor connection...Distributor cap...Rotor arm...Battery connections...Engine earth..I did notice that my fuel pressure was exceedingly high 60psi...So turned it down a bit...Started her up and "Bang" backfire in the AFM area...She cleared her throat...Continued on my journey then about 15 mins later.."Cough...Splutter"..."Moo Moo"..."Gnung..Gnung"...Noticed fuel pressure was too low..21psi WOT...Turned it up a bit...Everything seemed fine...Another 15 mins later..."Cough...Splutter"..."Moo Moo"..."Gnung..Gnung"....Nearly turned on to the A2 to meet with Chris...Decided to go to my mums house which was close by...Pulled up outside and called Chris to see if he had any idea...Chris suggested the fuel pump could be playing up...So whilst ticking over i wiggled the fuel pump wires..."Cough...Splutter"..."Moo Moo"..."Gnung..Gnung"...Flat as a fart..wouldn't even fire...So knocked on two separate neighbours doors who luckily had trolley jacks...One was too big to get under the car so i used the smaller one to lift her up enough to get the other under...Bit of faffing about...Sorted.
After a rollicking from Chris...Deserved i must say as i was supposed to sort this ages ago.....So i will make a extension for the wires as they are pulling tight...
After a rollicking from Chris...Deserved i must say as i was supposed to sort this ages ago...
..So i will make a extension for the wires as they are pulling tight...
Gassing Station | Wedges | Top of Page | What's New | My Stuff