What's happening in your garage this weekend ?
Discussion


General Zod said:
Maybe a silly question, but if the bearing is 3/4 inch and the steering column is 3/4 inch, is the reducer bush necessary?
It's been a few years since I did the job on my car but as I recall I couldn't get a bearing with a bore of exactly the right diameter for whatever reason so I used the next size up and turned up a brass bush to suit... it may be that the column was 17mm which IIRC is not a preferred bore size for bearing makers. As I say, it was a good while ago 
Wedg1e said:
It's been a few years since I did the job on my car but as I recall I couldn't get a bearing with a bore of exactly the right diameter for whatever reason so I used the next size up and turned up a brass bush to suit... it may be that the column was 17mm which IIRC is not a preferred bore size for bearing makers. As I say, it was a good while ago
The kit I bought had an internal bearing size of 3/4" but the lower end of the steering column was slightly smaller. It was either 19MM or 17mm. The brass bush was the correct size to fit between column and inner bearing face.
Got the head off, all studs came out easily apart from one which needed a little persuading, cleaned up the head, and the block deck, new Elring gasket on, studs back in, all torqued up.
Ratchets are set to "do up" and it's just a matter of fitting all the other stuff back on after I put on a new valley gasket.
The old gasket showed a similar failure that the previous composite (non-Elring) gasket had experienced on the other side a few years ago, the left-most cylinder (No 1 in this case) had blown the ring out towards the water passage and the intervening gasket material had broken down.
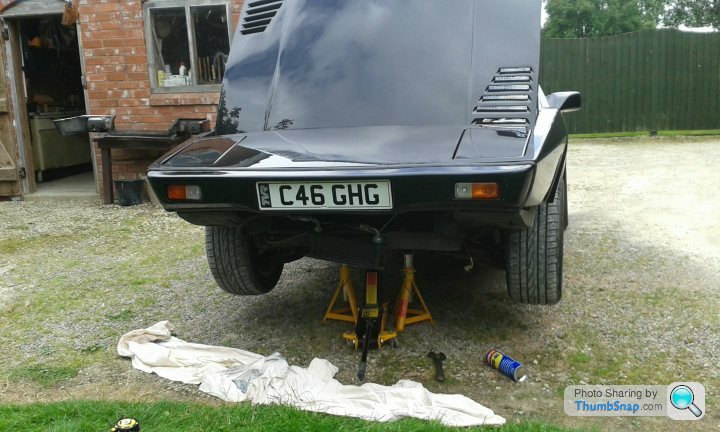
A somewhat frustrating day. First job of the morning was to get the 390SE up on the ramps to inspect the gearbox remote bushes following some issues with noise from the gearbox.
The good news is that it is the bushes that are shot, rather than the box. The remote was pretty much sitting on the gearbox output flange so that's the source of the odd vibration noise, so new bushes have been order. I could waggle the back of the remote a good 25mm in all directions.
Other good news is that I think I've found the reason for the vagueness in the steering. The car seems to wander along the road a little compared to the lovely steering on the 350i. Anyway I found that the front near side tie bar was only finger tight with several millimeters of movement so that's now all tight plus the near side wheel bearing has a fair bit (a good 5mm at the edge of the rim) of play so I'll inspect the bearing next weekend - tighten it up a little if it looks okay or replace if it looks worn.
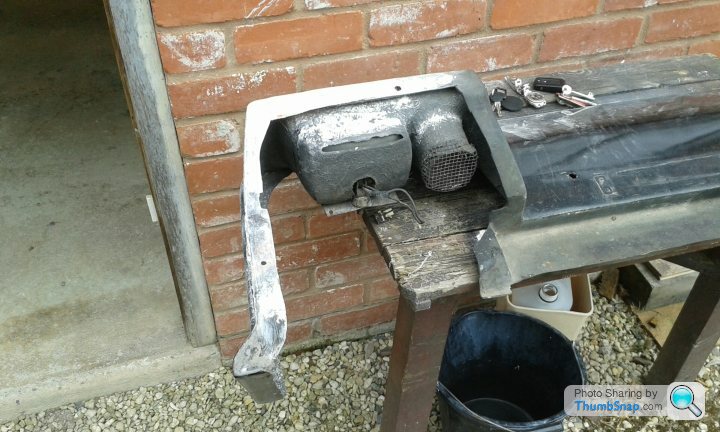
And the bad news was that the front spoiler caught on the ramps, despite having extenders and two sets of 1" floor board to ease the angle. The last remaining top section of the spoiler broke off leaving the thing dangling in the breeze. Anyway the front spoiler had been damaged previously and was held on with a fine selection of small self tapers so I've taken it off and will rebuild the top flange completely and glass in a full set of retained bolts just to make life easier in unbolting it in the future.
The good news is that it is the bushes that are shot, rather than the box. The remote was pretty much sitting on the gearbox output flange so that's the source of the odd vibration noise, so new bushes have been order. I could waggle the back of the remote a good 25mm in all directions.
Other good news is that I think I've found the reason for the vagueness in the steering. The car seems to wander along the road a little compared to the lovely steering on the 350i. Anyway I found that the front near side tie bar was only finger tight with several millimeters of movement so that's now all tight plus the near side wheel bearing has a fair bit (a good 5mm at the edge of the rim) of play so I'll inspect the bearing next weekend - tighten it up a little if it looks okay or replace if it looks worn.
And the bad news was that the front spoiler caught on the ramps, despite having extenders and two sets of 1" floor board to ease the angle. The last remaining top section of the spoiler broke off leaving the thing dangling in the breeze. Anyway the front spoiler had been damaged previously and was held on with a fine selection of small self tapers so I've taken it off and will rebuild the top flange completely and glass in a full set of retained bolts just to make life easier in unbolting it in the future.
Yeah self-tappers are not enough to hold one of these on, you're lucky it didn't depart under the car at speed!
Better if you can use stainless M6 bolts as they get a good dose of crud under there, and any corrosion makes them a bugger to undo later. I used to use some strips of aly in there too to spread the load, with slightly slotted holes in the fibreglass to allow some adjustment fore/aft.
Better if you can use stainless M6 bolts as they get a good dose of crud under there, and any corrosion makes them a bugger to undo later. I used to use some strips of aly in there too to spread the load, with slightly slotted holes in the fibreglass to allow some adjustment fore/aft.
adam quantrill said:
Yeah self-tappers are not enough to hold one of these on, you're lucky it didn't depart under the car at speed!
Better if you can use stainless M6 bolts as they get a good dose of crud under there, and any corrosion makes them a bugger to undo later. I used to use some strips of aly in there too to spread the load, with slightly slotted holes in the fibreglass to allow some adjustment fore/aft.
Thanks Adam. I've got a sheet of thin stainless so was thinking of bonding a bit of that in with suitably slotted holes. The thing was botched previously so about time it was properly sorted. Cheers.Better if you can use stainless M6 bolts as they get a good dose of crud under there, and any corrosion makes them a bugger to undo later. I used to use some strips of aly in there too to spread the load, with slightly slotted holes in the fibreglass to allow some adjustment fore/aft.
A busy weekend. Finished repairing the front spoiler, painted and now fitted with a sturdy set of proper bolts. Also made a nice shiny black aluminium grill to sit in front of the oil cooler and radiator to prevent stone damage, very pleased with results. Front nearside wheel bearing checked, all okay, so adjusted and now no slack. And big job of the weekend was changing the gearbox remote bushes. The rear old ones were nonexistent. A bit of a fiddle but straight forward enough. Time for a coffee n my BBWF stein I think.

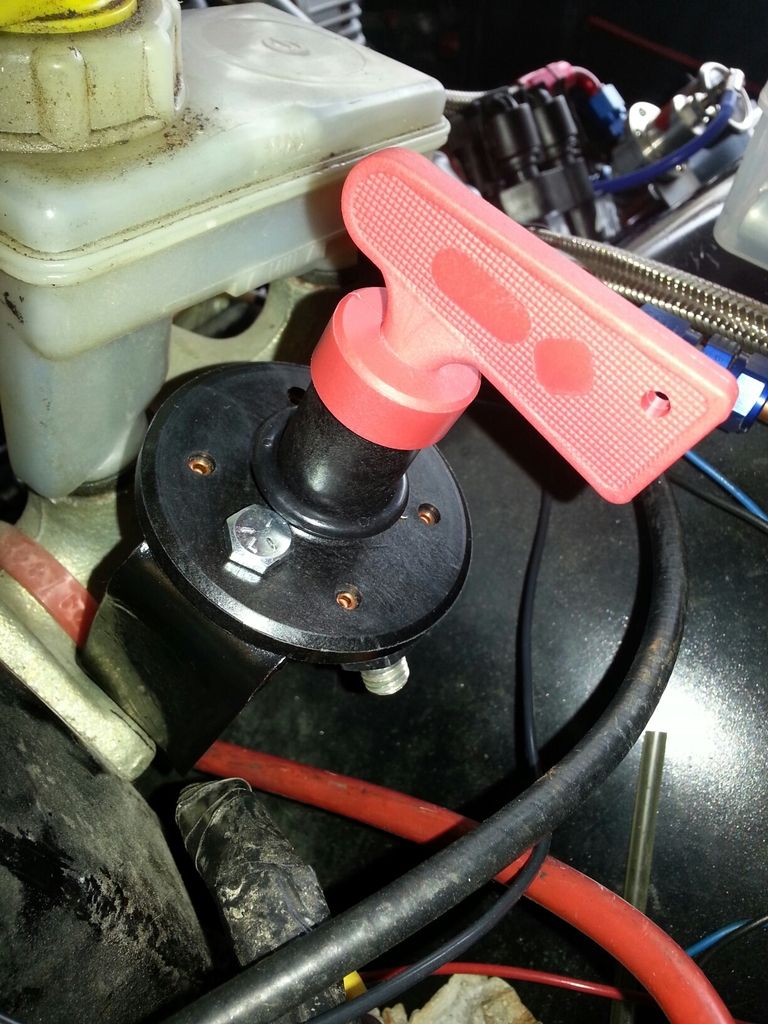
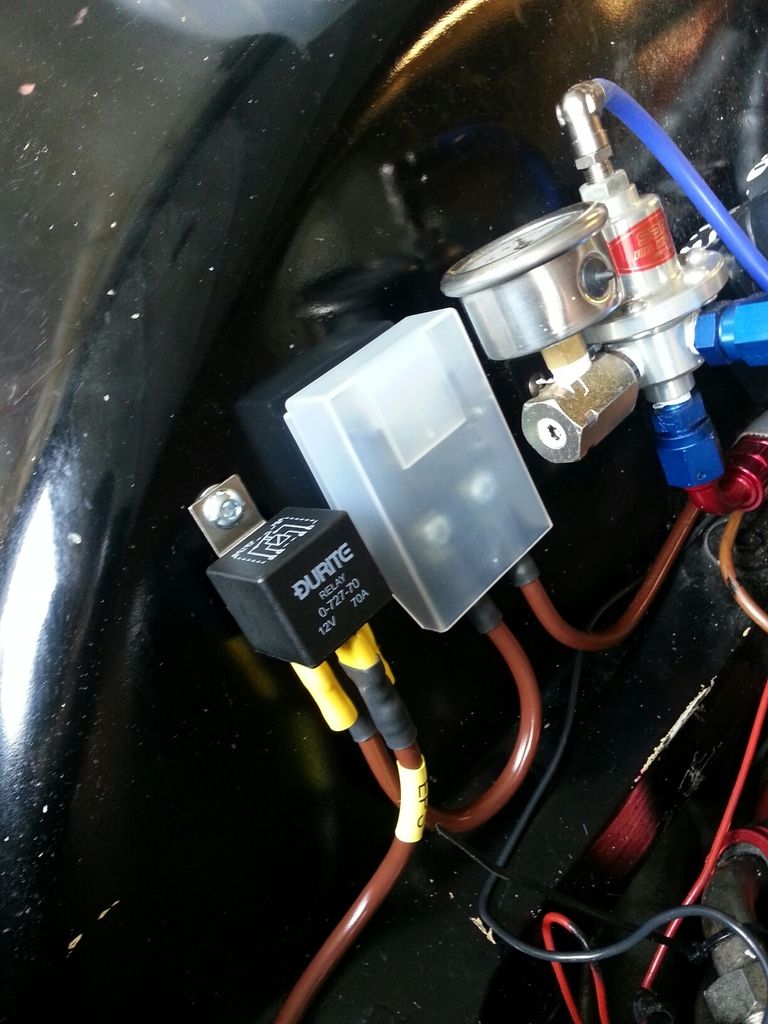
Nice electrickery Alan ;^)
yesterday finished making another 4-off copper exhaust gaskets, so I now have all 8 copper, they are brilliant, last forever with multiple reuse.
One day I'll start making batches on CNC, and flog 'em.
Just got mine back together, quick test drive, all seems well. Let's see what happens for the daily commute.
Although the street is my garage here is what i did today.
I have had a fuel leak from the top of the small hoses on the fuel rail that i paid a so called TVR specialist to sort a couple of years ago.
It got to the point where every time i start the car and pull away there is a small puddle of fuel left behind....Not good...
Last week i had to stop a spirt of fuel that was coming out of one hose by opening a clip up fully and then wrapping around the hose to try to clamp it...If you have ever tried this its a real PITA!
So as it was a bit cloudy today and i had all the hose and correct JCS clips that have a rolled edge so as not to cut in to the hose...And you can tightening them down a fair bit.
So off with the shyte hose and alloy crap clips.....
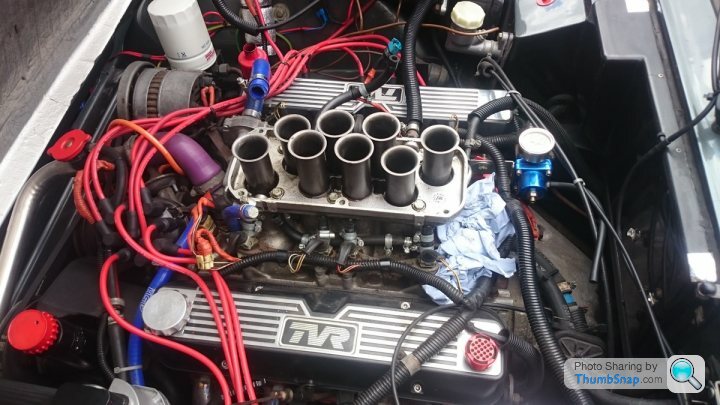
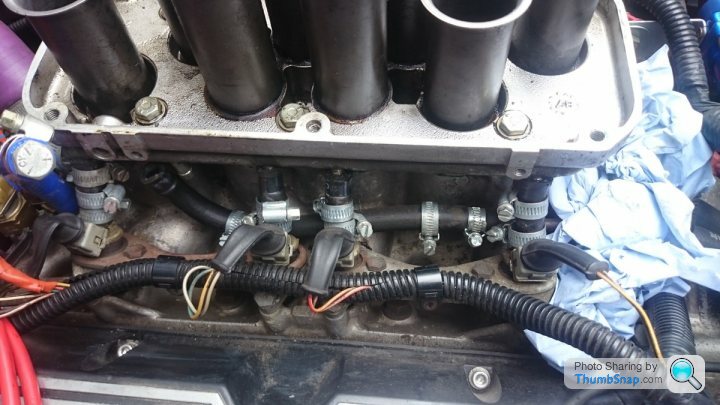
And on with the new stainless steel JCS and fresh bio-fuel rated hose.
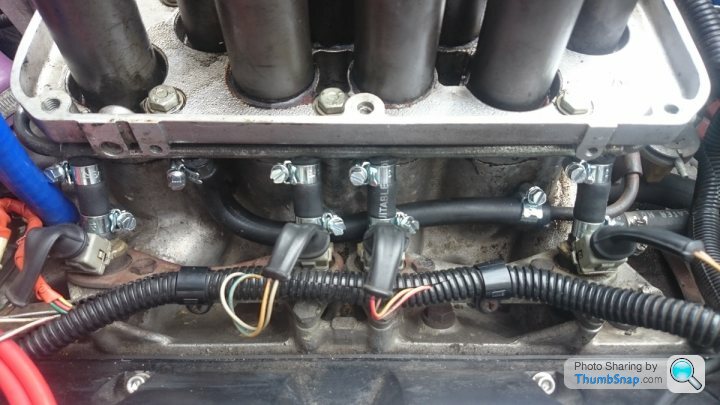
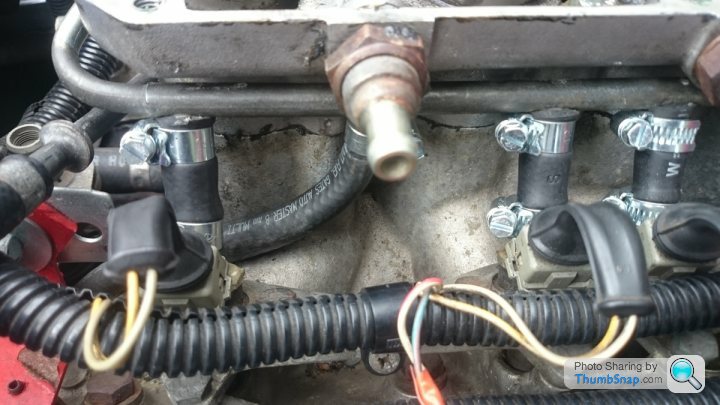
In hindsight i would of removed the trumpet base as it would of made the job a lot easier...
Plenum resealed with blue hylomar..Where it had hardly any when i too it off.
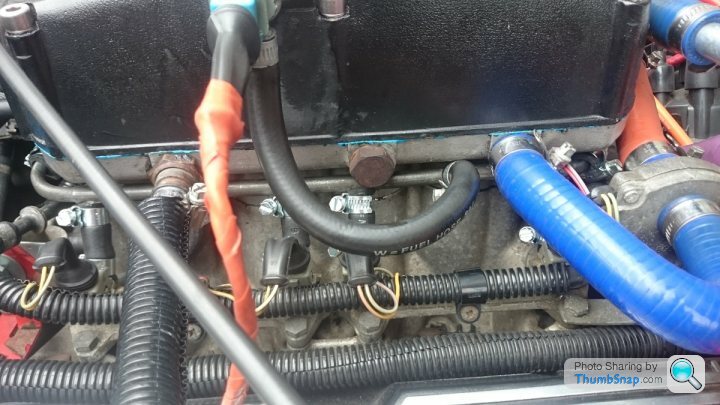
Let it go off....Then warmed the car up...
I then noticed fuel was pi55ing from the FPR hose to the copper so replaced that...
The pressure had to be dropped by 2psi so shows how much i was losing....
The idle is much smoother now and drops nicely to base rpm whereas before it would drop below and hunt a tad before rising back...
Hopefully happy days...
Running sweet...
https://youtu.be/HRcP7cupek0
Cheers
Ziga
I have had a fuel leak from the top of the small hoses on the fuel rail that i paid a so called TVR specialist to sort a couple of years ago.
It got to the point where every time i start the car and pull away there is a small puddle of fuel left behind....Not good...
Last week i had to stop a spirt of fuel that was coming out of one hose by opening a clip up fully and then wrapping around the hose to try to clamp it...If you have ever tried this its a real PITA!
So as it was a bit cloudy today and i had all the hose and correct JCS clips that have a rolled edge so as not to cut in to the hose...And you can tightening them down a fair bit.
So off with the shyte hose and alloy crap clips.....
And on with the new stainless steel JCS and fresh bio-fuel rated hose.
In hindsight i would of removed the trumpet base as it would of made the job a lot easier...
Plenum resealed with blue hylomar..Where it had hardly any when i too it off.
Let it go off....Then warmed the car up...
I then noticed fuel was pi55ing from the FPR hose to the copper so replaced that...
The pressure had to be dropped by 2psi so shows how much i was losing....
The idle is much smoother now and drops nicely to base rpm whereas before it would drop below and hunt a tad before rising back...
Hopefully happy days...
Running sweet...
https://youtu.be/HRcP7cupek0
Cheers
Ziga


Had both doors open and everything pretty much dismantled. Driver side was fine - one day of fettling and it is OK (minus the window channels/frames - they're getting wire wheel and citric acid). Fun fact - the window holds steady even without channels if the door is closed. Any would-be thief is going to get a surprise of his life if he tries to open that door...
Both locks were fine, but the grease was dry and the locks dirty. After a bit of solvent and WD40 the locks are A-OK.
Passenger side door, which was supposed to be the better one, is annoyingly giving me hell. Frame (the door frame, not window frames) is rusty and will need to come out for a bit of TLC. The window frames also, but they were better than expected. The door frame blasting and painting is a surprise need, dangit. Caught it early enough that welding _should_ not be needed.
And all this started with needing to fix one (1) screw on the driver side external door handle.
Ended with about full rebuild. Never peek inside anýthing.
Gassing Station | Wedges | Top of Page | What's New | My Stuff