Discussion


Investigated the oil tank today. The installation means that I can't get the roof panel into the boot, so it needs a rethink.
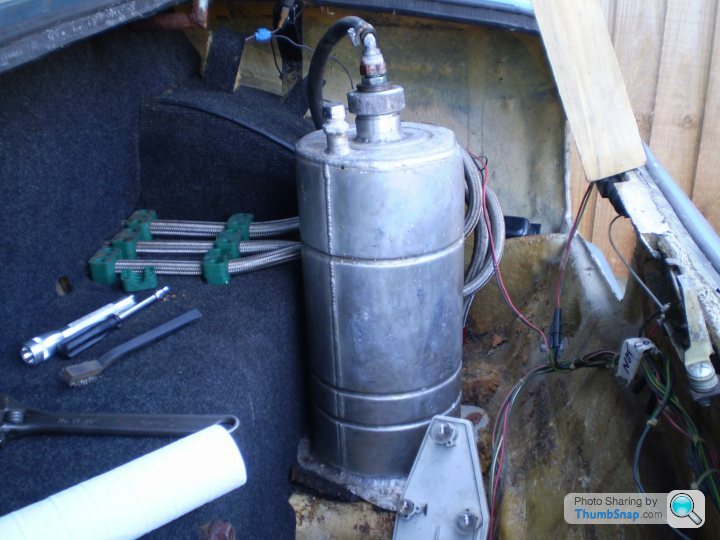
There's only a couple of inches of oil in the bottom of the tank, but at least the oil's fairly clean...
Anyone know what level of oil there should be in the tank? Also, there's no drain plug in the bottom so I'll have to dream up a way of emptying it.
There's only a couple of inches of oil in the bottom of the tank, but at least the oil's fairly clean...
Anyone know what level of oil there should be in the tank? Also, there's no drain plug in the bottom so I'll have to dream up a way of emptying it.
I've never tried to get the roof behind the seats, it looks too small a space. I'll try it on my 350.
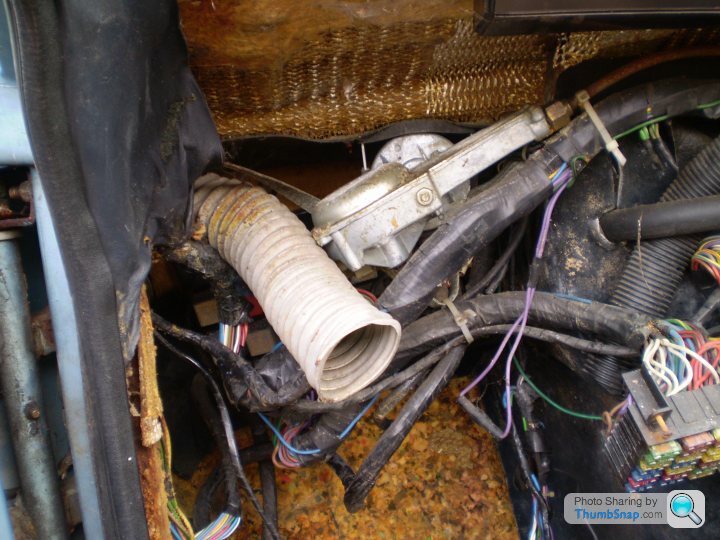
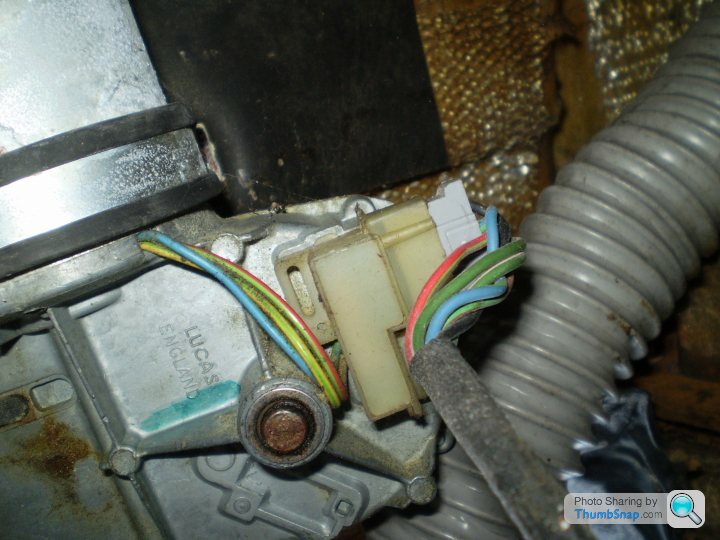
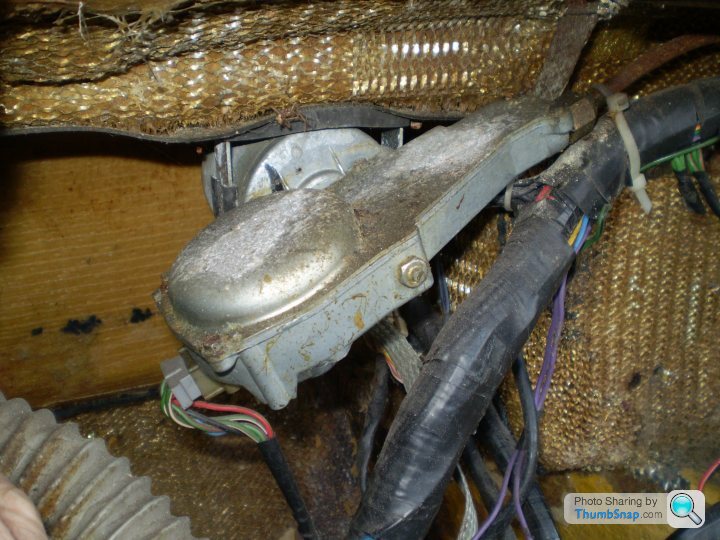
Here's the wiper motor as I was taking things apart... good luck with getting access to that with the dash in place mate! I'll take some photos from underneath as it is now; all the wiring's out of the way now.
I think there's enough slack in the oil tank pipes to turn the tank over in the boot; it'll come out in the rebuild anyway so I can clean it properly then, then the problem won't come back for a while!
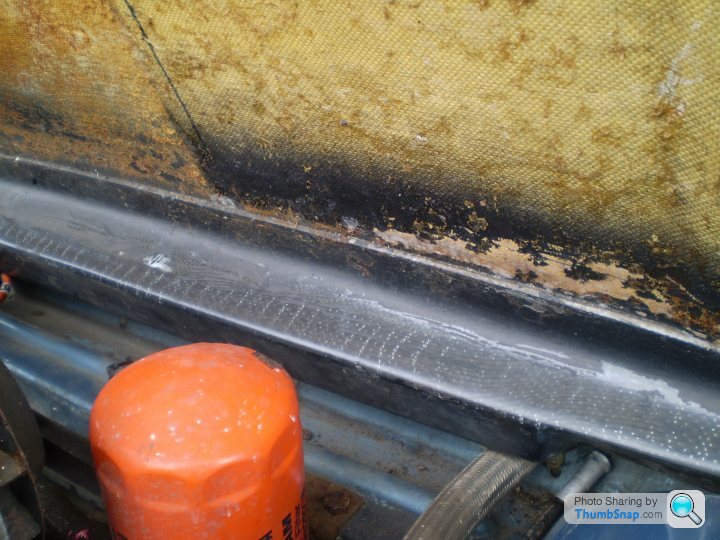
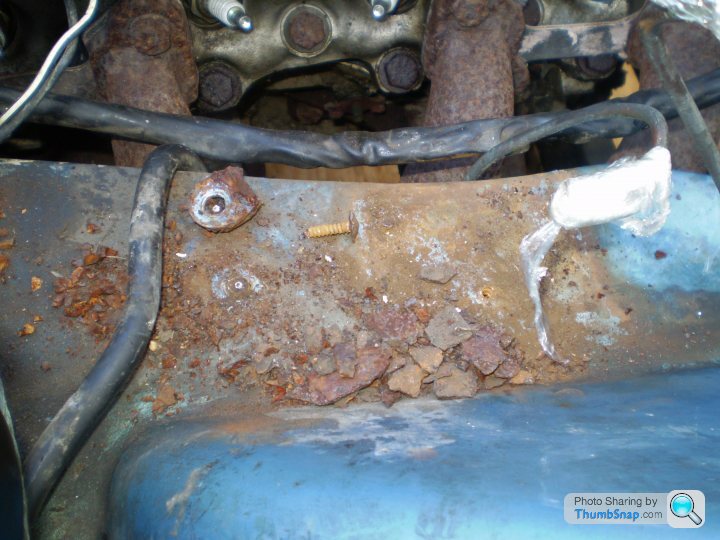
I attacked the area around the seat belt reel mount on the passenger side today; it was in a sorry state! This is what happened when I tried to turn the one remaining bolt:
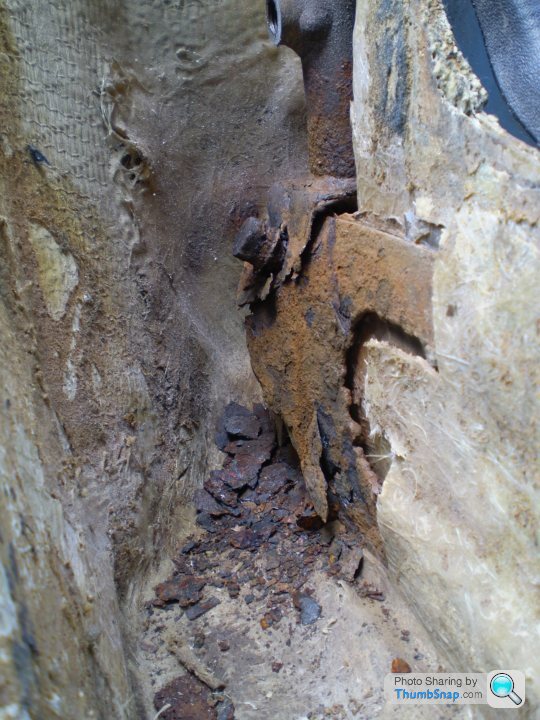
There's a curious steel sheet shape formed with flame cutting. The steelwork did go back to the chassis through a very tortuous route with a piece of steel approx 1.5mm thick and 25mm wide; plus a double bent piece that appears to go to lap harness strap positions - not enough strength there I think.
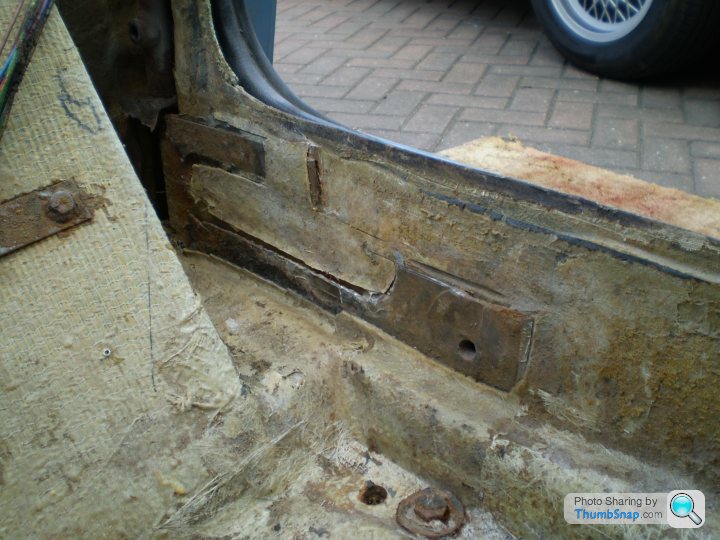
I cut all the rotten metal out (very slowly and carefully making sure the door gap wasn't going to be lost). I'll get some more plates made up and glass them in, making bolt on brackets as necessary. I need to dream up a way of tying them back to the chassis; Dave Barrington's photos of his chassis have shown mine is very different and is missing the 'normal' seat belt mounting plates.
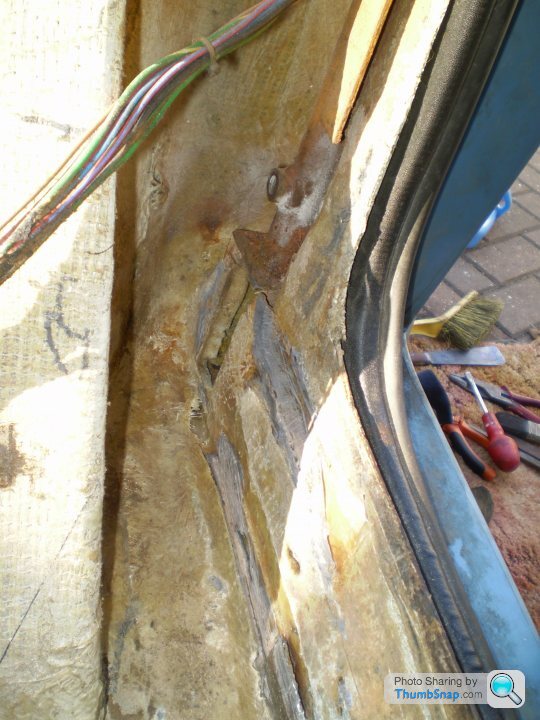
This is how it is now; you can see chunks of foam within the sills where the plates have exposed the insides. What's the foam all about?
There's a curious steel sheet shape formed with flame cutting. The steelwork did go back to the chassis through a very tortuous route with a piece of steel approx 1.5mm thick and 25mm wide; plus a double bent piece that appears to go to lap harness strap positions - not enough strength there I think.
I cut all the rotten metal out (very slowly and carefully making sure the door gap wasn't going to be lost). I'll get some more plates made up and glass them in, making bolt on brackets as necessary. I need to dream up a way of tying them back to the chassis; Dave Barrington's photos of his chassis have shown mine is very different and is missing the 'normal' seat belt mounting plates.
This is how it is now; you can see chunks of foam within the sills where the plates have exposed the insides. What's the foam all about?
Mike,
The wiper motor cover appears to be on the top side, so It's not clear how you'll get to it with the dash in place.
Bottom view:
Top side:
Mine appears to park in the middle of the screen and that'll annoy me so I'll have to connect up the power while I have access and see what I can do to get back to the original park position.
It may be easier to replace the motor - anyone know what it's from?
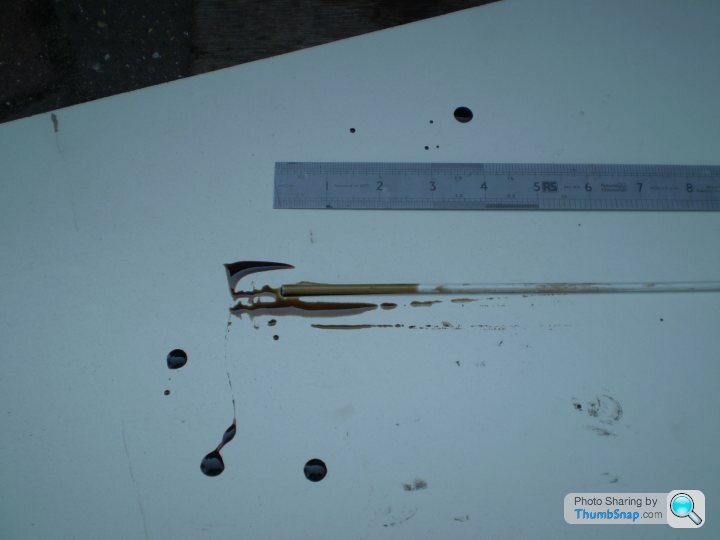
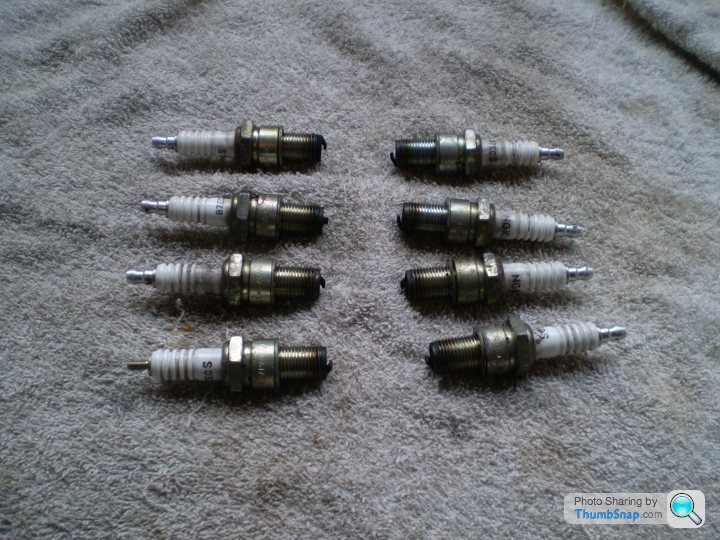
Got it in the garage now so time to take the bonnet off and take a long awaited look at the engine. All the plugs came out cleanly after soaking in oil for a while, looking in good condition; all the same shade of black... and no condensation/rust.
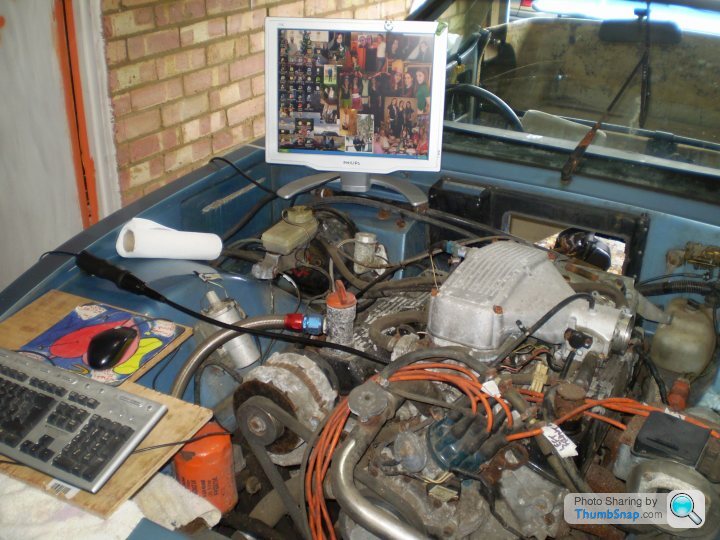
Set up an endoscope; it disagreed with the two laptops in the house so I had to resort to setting up an office in the garage...
Excellent news, no corrosion in the bores... positvely shiney!!
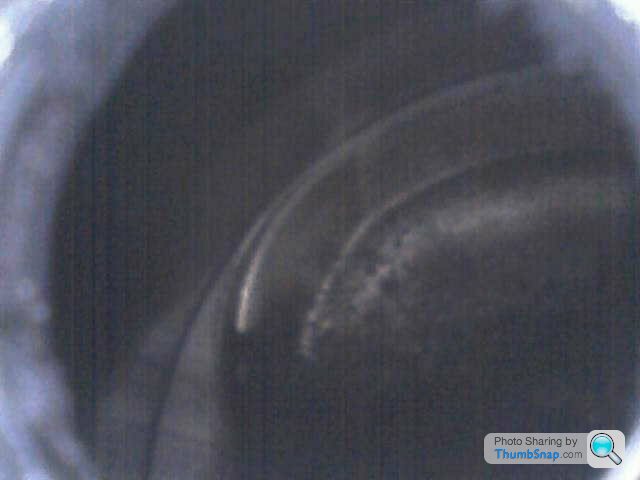
...Anyone recognise the pistons?
I put some oil down the bores and then tried turning it over... nice and smooth with no nasty noises, all's well it appears - thank god!!
Set up an endoscope; it disagreed with the two laptops in the house so I had to resort to setting up an office in the garage...
Excellent news, no corrosion in the bores... positvely shiney!!
...Anyone recognise the pistons?
I put some oil down the bores and then tried turning it over... nice and smooth with no nasty noises, all's well it appears - thank god!!
I've got a replacement wiper motor... thanks Phil!
Leigh, next step on the engine will be stripping it to the valley gasket so I can check all the rockers/pushrods/cam. I can do that in the garage when the weather's bad so it'll have to wait while the weather's good; at the moment I can push it outside so that I can open the doors and work on the interior.
Today I took the pedal box out; you wouldn't believe how awkward it was. The handbrake is very fragile and was siezed to the pedal box, the clutch and brake master cyl push rods were siezed solid including the clevis pins, even the bonnet release put up a fight. Got there in the end though:
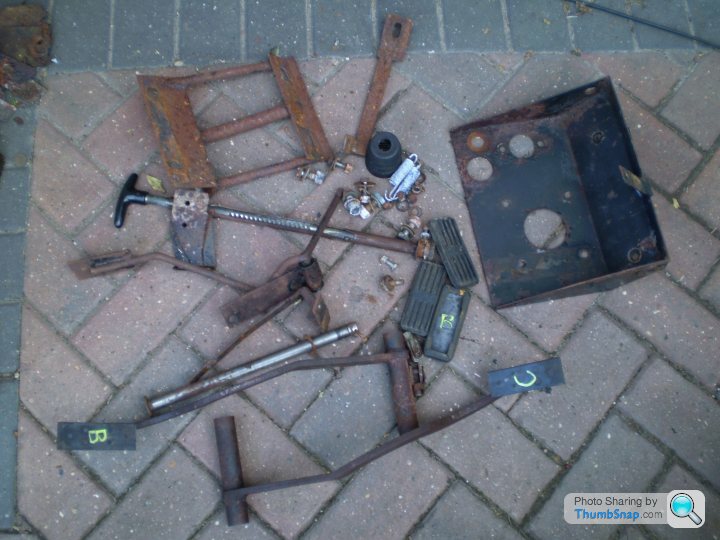
Even the bulkhead's Kevlar...
I'm going to keep the pedal box standard assuming I can get the bits I need; namely clutch and brake master cylinders. The rest looks like it'll clean up OK. New pedal rubbers would be good though, anyone know where to get them?
The accelerator cable was about the only thing that came out easily... but predicably enough it's frayed at the pedal end and the nut where it passes through the bulkhead was almost cut through by the cable running over it - that's why it came out easily. I'm hoping new cables are available; anyone know where from or even if it's off another vehicle (SD1?). I'll de-burr the new one...
I feel there's going to alot of 'anyone know where to get ....' questions coming from me!!
Martin.
Hi Leigh, It was a pleasure to meet you and to go over to your workshop. I'm very envious of the space and equipment you have! Good luck with the race car next weekend at Snetterton... I'm hoping to make it to Brands in a few weeks time.
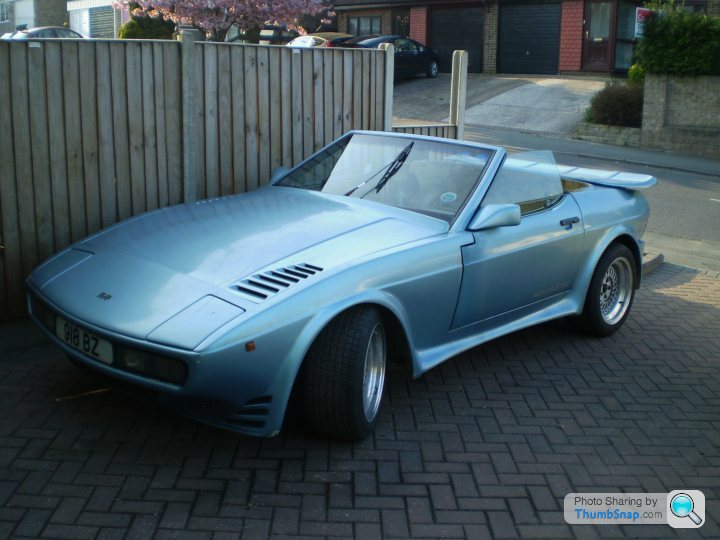
I do think my car is some kind of development car, it seems to bridge the design gap between the race car (84 ish?) and the production SEACs in 86; it has features from both plus some peculiarities of it's own.
I do think my car is some kind of development car, it seems to bridge the design gap between the race car (84 ish?) and the production SEACs in 86; it has features from both plus some peculiarities of it's own.
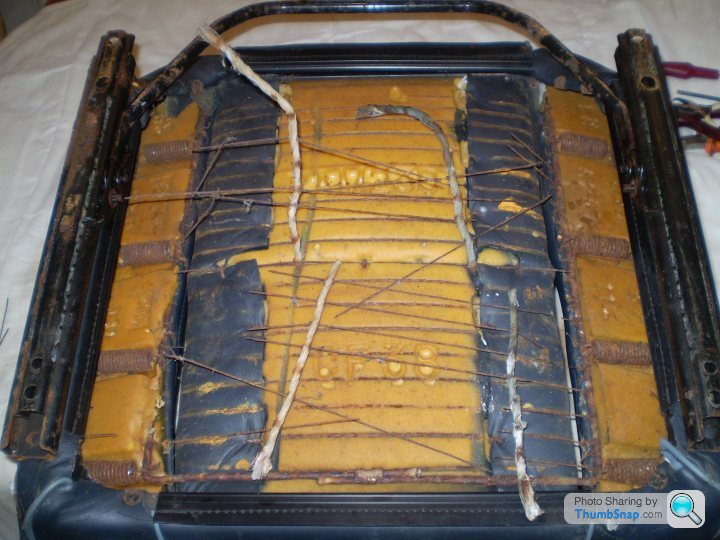
Made more progress; seats are savable, I've freed all the adjuster mechanisms and replaced the rusted support wires with nylon tie wraps - not perfect but it does the job. The leather's very tight but I'm hoping it'll loosen with feed and time.
Centre instrument panel was very corroded, heater sliders were jammed by rusted expanded steel
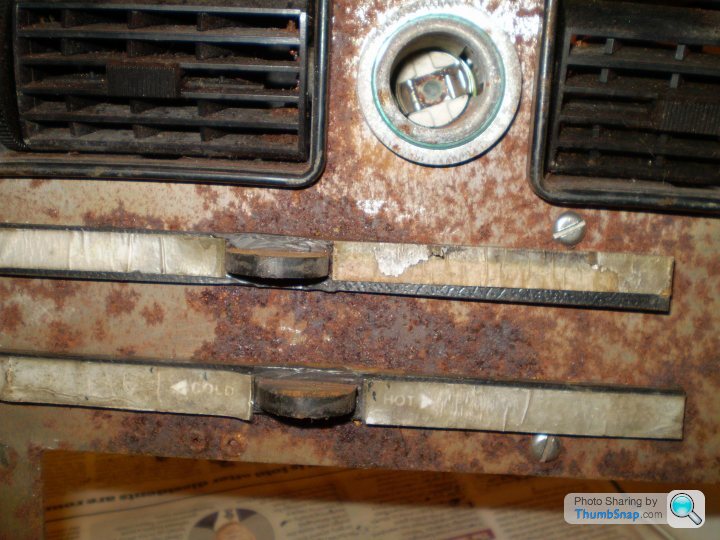
I'm getting there though... instruments are next.
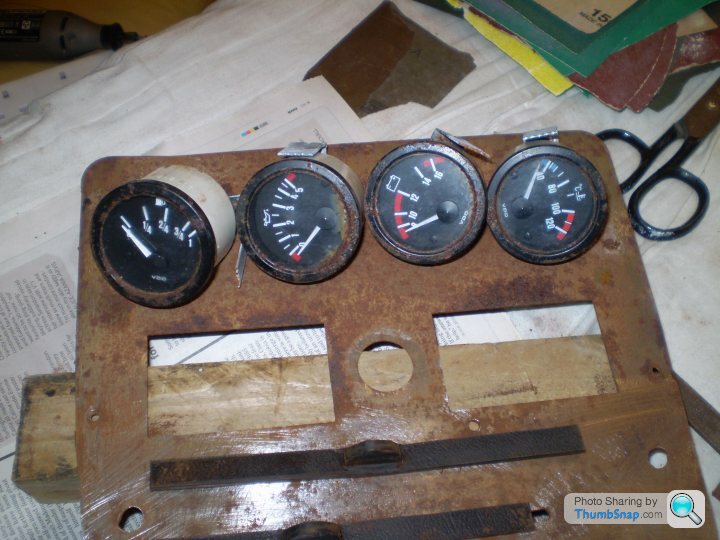
I've settled on a general approach to the car; for example I could have got a new centre console panel cut and replaced the instruments but my feeling is that I should repair and rejuvenate as much as possible and try and keep the car original. More work perhaps but I think it'll preserve the car's character - It'll never be concours but it'll be usable and fun in my book.
Centre instrument panel was very corroded, heater sliders were jammed by rusted expanded steel
I'm getting there though... instruments are next.
I've settled on a general approach to the car; for example I could have got a new centre console panel cut and replaced the instruments but my feeling is that I should repair and rejuvenate as much as possible and try and keep the car original. More work perhaps but I think it'll preserve the car's character - It'll never be concours but it'll be usable and fun in my book.
The Seats are MG Montego/Maestro and are wider than the normal TVR fit; the narrower centre spine of the SEACs makes this possible. I guess that's the whole reason for the narower spine? You can see on my car where the body has been hacked around to fit the narrower chassis, I'm not sure if later SEACs had a body mould that fitted the chassis or if they were all hacked about.
It also forces the handbrake away from the between seats position and under the dash, I'll see how effective it is when I put it all back together...
It also forces the handbrake away from the between seats position and under the dash, I'll see how effective it is when I put it all back together...
I've tried Adam's idea of running some solder into the cable to stop the fraying; it appears to have worked but it remains to be seen how durable it'll be. I'll get a better idea when I re-assemble the pedal box... if it doesn't look good then speedy-cables it may be.
Handbrake's cleaned up and working cleanly
I had to cut through the nut and angled spacer to get it off the car, now I can't find a replacement nut; it's 16tpi and standard conduit fittings are now 18tpi - bugger. I may have to try and put a blob of weld on it and file it smooth; the danger being it'll muck up the thread.
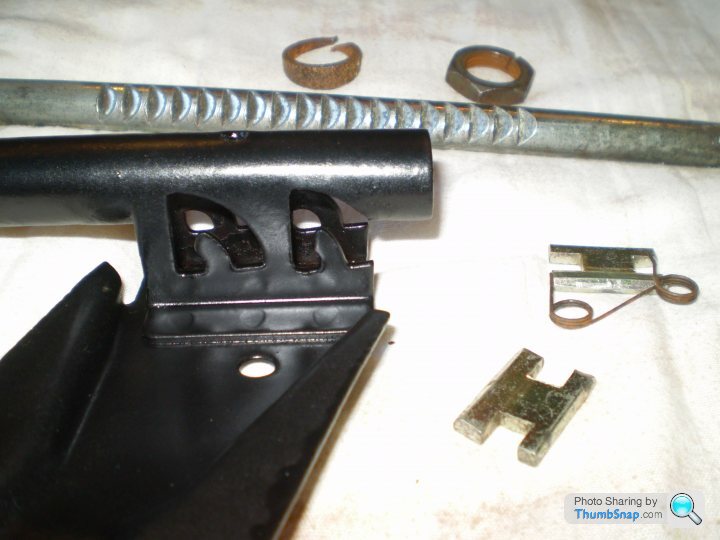
It's a masterpiece of stamping/fabrication, it looks too good for TVR production volumes so I guess it's sourced from another vehicle, no idea what though.
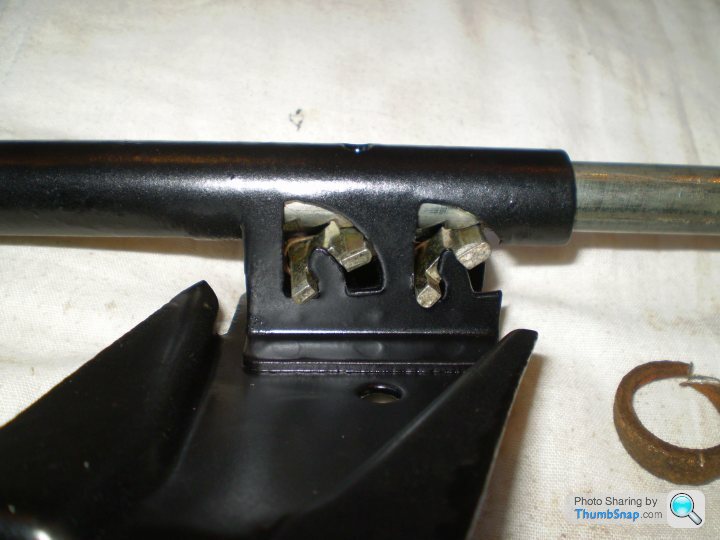
It acts on a lever mechanism inside the transmission tunnel before it goes though to the calipers at the back so I need to clean up that mechanism too.
There's two cables, one of which runs over the RH rocker cover and close to the exhaust so I suspect that's full of cooked grease - another reason for the thing to be ineffective! Hopefully when it's all cleaned up it'll work well; I'll need it at BBWF to stop it rolling off the trailer and hitting something...
Handbrake's cleaned up and working cleanly
I had to cut through the nut and angled spacer to get it off the car, now I can't find a replacement nut; it's 16tpi and standard conduit fittings are now 18tpi - bugger. I may have to try and put a blob of weld on it and file it smooth; the danger being it'll muck up the thread.
It's a masterpiece of stamping/fabrication, it looks too good for TVR production volumes so I guess it's sourced from another vehicle, no idea what though.
It acts on a lever mechanism inside the transmission tunnel before it goes though to the calipers at the back so I need to clean up that mechanism too.
There's two cables, one of which runs over the RH rocker cover and close to the exhaust so I suspect that's full of cooked grease - another reason for the thing to be ineffective! Hopefully when it's all cleaned up it'll work well; I'll need it at BBWF to stop it rolling off the trailer and hitting something...
Strong feelings about roll bars - I'm very conscious of safety so I'll consider my options carefully.
The handbrake is now back in and functioning, my drive's flat so I can't get a feel for how good it is yet. The steering column's back in too so it can be manouvered at BBWF. Interesting to see the Jag handbrake pics; it's definitely based on that but has a TVR mod to eliminate the Jag part that holds the outer cable, that probably explains it's ineffectiveness as on my car the cable outer is free to float around. It sits at a strange angle too so the driver can't get a decent pull on it, I may have to re-visit it...
It's got a hood on it too now (thanks Phil!), but it pi**ed down with rain today so I couldn't get any decent pics. Very nerve-wracking drilling the hood clamp bar that holds it to the rear deck but it's worked out OK with the holes in the right place, the tension on the hood seems OK.
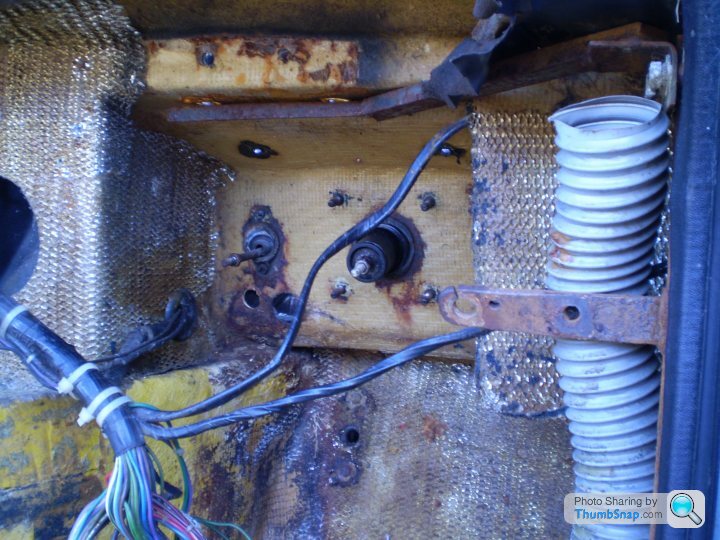
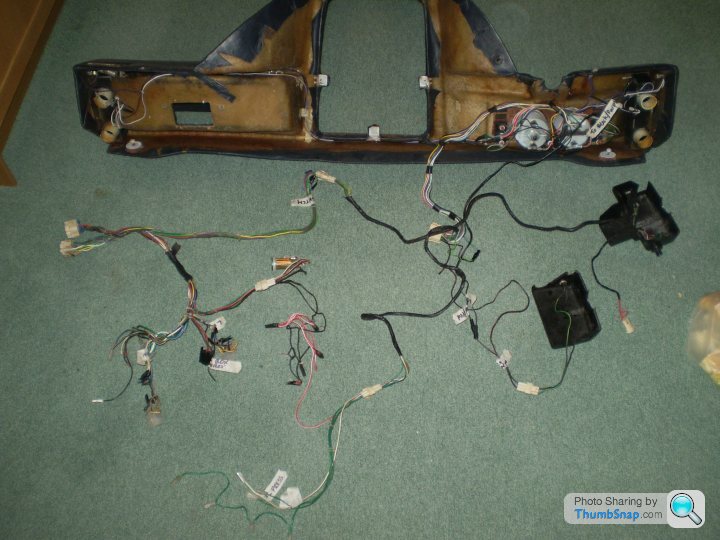
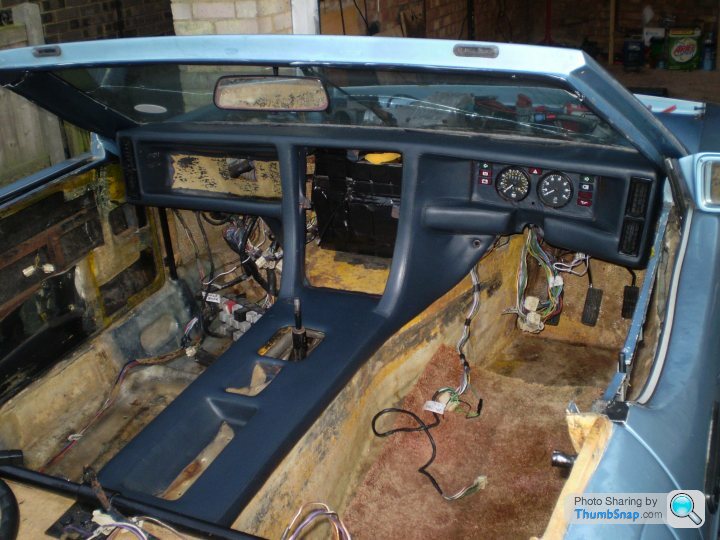
Getting there with the wiring; it's very confusing as the wiring codes don't correspond with the bible and there's multi-block connections with one colour wire on one side connecting to a different colour on the other! One problem is that the centre console wires have been ripped out at some point presumably in an attempt to steal the car; plus there's loads of unused wires and others that relate to the alarms. I suspect this'll take several iterations once it's back on the car.
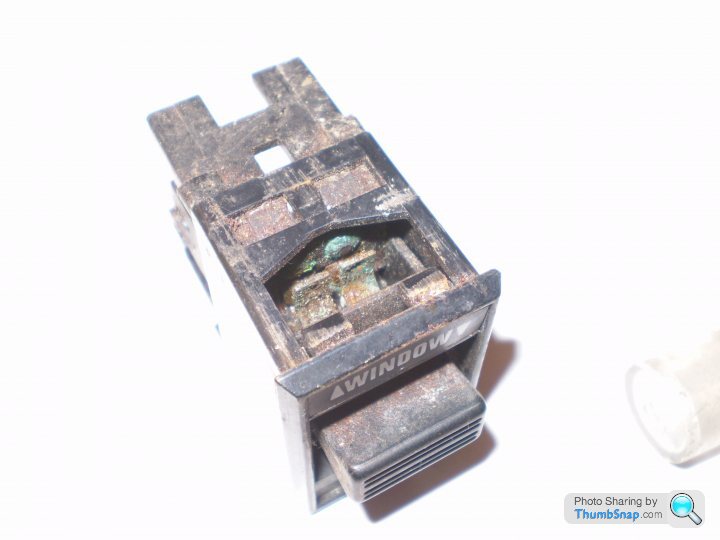
The switches are in a sorry state too and need replacing.
The handbrake is now back in and functioning, my drive's flat so I can't get a feel for how good it is yet. The steering column's back in too so it can be manouvered at BBWF. Interesting to see the Jag handbrake pics; it's definitely based on that but has a TVR mod to eliminate the Jag part that holds the outer cable, that probably explains it's ineffectiveness as on my car the cable outer is free to float around. It sits at a strange angle too so the driver can't get a decent pull on it, I may have to re-visit it...
It's got a hood on it too now (thanks Phil!), but it pi**ed down with rain today so I couldn't get any decent pics. Very nerve-wracking drilling the hood clamp bar that holds it to the rear deck but it's worked out OK with the holes in the right place, the tension on the hood seems OK.
Getting there with the wiring; it's very confusing as the wiring codes don't correspond with the bible and there's multi-block connections with one colour wire on one side connecting to a different colour on the other! One problem is that the centre console wires have been ripped out at some point presumably in an attempt to steal the car; plus there's loads of unused wires and others that relate to the alarms. I suspect this'll take several iterations once it's back on the car.
The switches are in a sorry state too and need replacing.
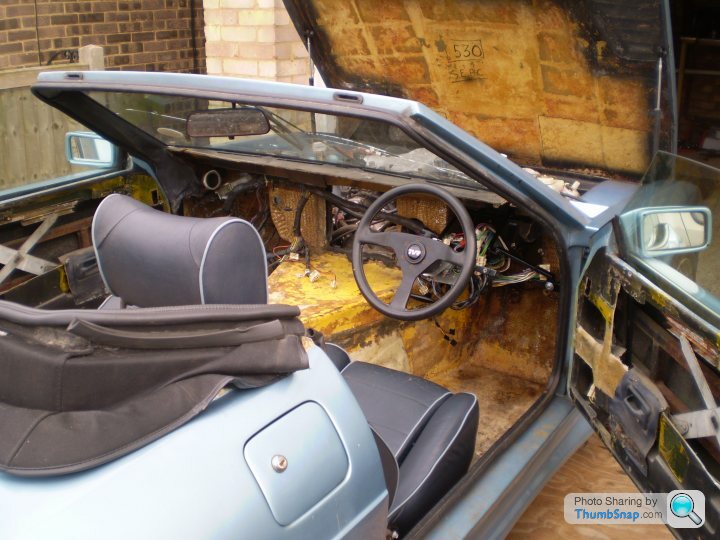
Getting the car ready for BBWF; trailer borrowed...
Bonnet back on, surrogate roof on, steering column back in, handbrake functioning, seat rejuvenated and in place... all I need is for people to push the car around while I make brum brum noises!
The bonnet's interesting; different Kevlar weave to the rest of the car with carbon fibre re-enforcement - Quite advanced for 1986? It's sagged badly though and the paint finish is pretty bad so it needs some serious work.
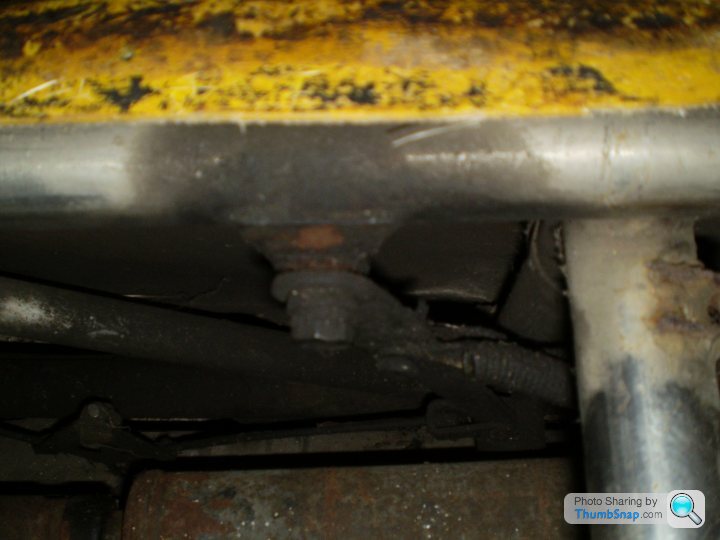
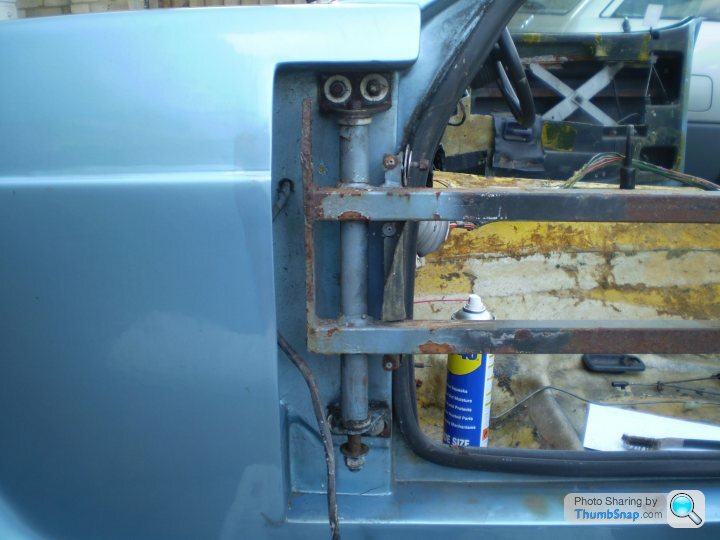
Back from BBWF and time to rip the car apart again... Passenger door off in an attempt to try and sort out the slack in the hinge tube and make the door open/close properly. It seems like the nylon bushes are actually functioning OK (even though one is split) but the movement is between the long vertical hinge bolt (which was not tight, it turned easily before I touched the nuts) and the 90 Degree brackets that go back to the body. The holes are not ovalised in the 90 Deg brackets so I assume the long bolt should be tightened until there's no movement? Anyone know? Seems a pretty odd design but I can't see how else TVR expected it to work!
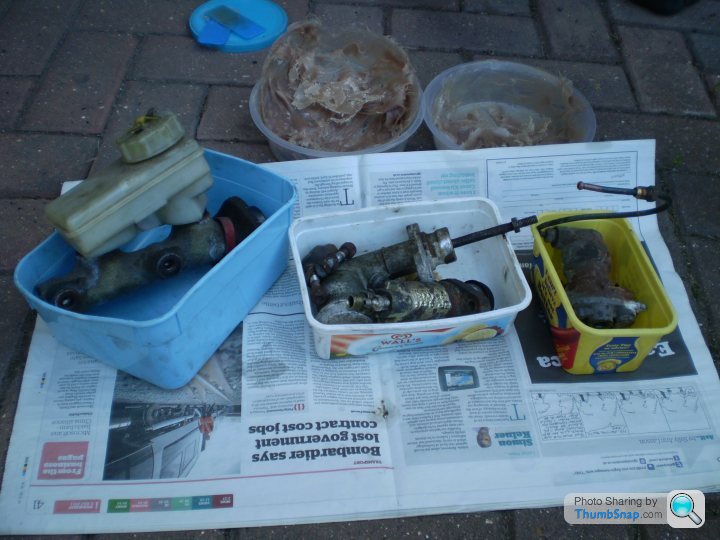
Clutch and brake hydraulics came off without too much of a fight, now I need to source replacements.
The clutch release fork in the gearbox is free so I'll try and get the engine running and then see if the clutch plate is free... I'm hoping even if it is stuck to the flywheel it'll give up the unequal battle with the engine and free off under power. Otherwise the engine's got to come out.
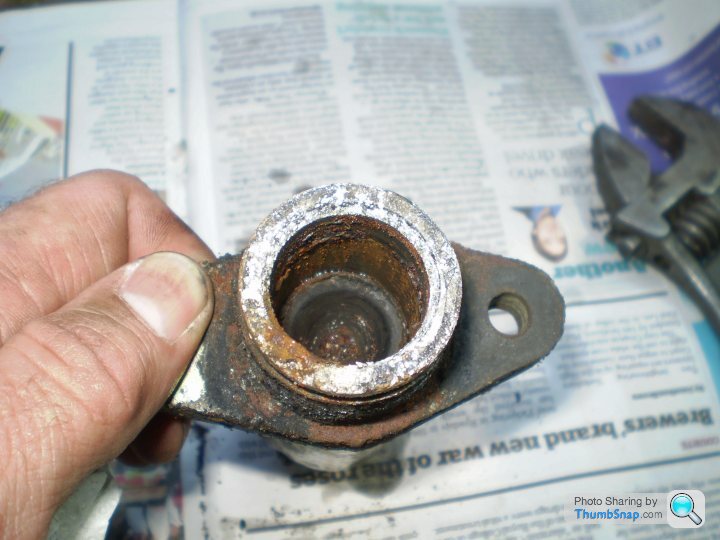
Sea of rust and carnage under the brake rear G-valve... I only got one screw out of four out. I'll have to drill out the remains or reposition them.
Clutch and brake hydraulics came off without too much of a fight, now I need to source replacements.
The clutch release fork in the gearbox is free so I'll try and get the engine running and then see if the clutch plate is free... I'm hoping even if it is stuck to the flywheel it'll give up the unequal battle with the engine and free off under power. Otherwise the engine's got to come out.
Sea of rust and carnage under the brake rear G-valve... I only got one screw out of four out. I'll have to drill out the remains or reposition them.
Thanks guys... I do have the bible but it doesn't cover the hinge in enough detail. I think you're right Wedgie, and the hinge pin shouldn't turn, thanks for that. I'll have to take out some washers so that the long hinge bolt doesn't clamp the door frame tube and then tighten it so that it doesn't rotate; hopefully the vertical bar on the inside of the body can take that.
Getting the door off wasn't particularly difficult; I suspect getting it back on and lined up won't be so easy. You have to be methodical to get it off, plus mark the positions of everything so you can get it back in the same position,plus count all the washers at each fixing... so:
-leave the window fully up
-Remove the door trim and all the plastic sheeting
-remove the interior door release (good luck with not breaking the plastic screw cap) and actuation rods
-disconnect the wiring connectors
-disconnect the window upper limit cable at the bottom (9mm spanner on the nut)
-unbolt the electric window motor, and then push it towards the front of the car while holding the window up; wedge the window up with a block of wood and remove the mechanism from the door
-remove the block of wood, slide the window half way down then tip it forwards, then remove it from the top
-remove the rear window runner
-remove the door latch mechanism, having unclipped the actuator rods. The exterior handle can stay in place
-remove the front window runner with the mirror and binnacle attached (you'll have to cut the wires, TVR in their infinite wisdom apear to have put the connector on after assembling the door-doh!)
-now you can remove the four bolts that hold the door to the frame and slide the door off; two on the leading edge and two on the trailing edge.
I never said it was easy!!! Expect siezed bolts and rounded/rusted screw/bolt heads along the way too.
A bit of fibreglassing today... plates in position
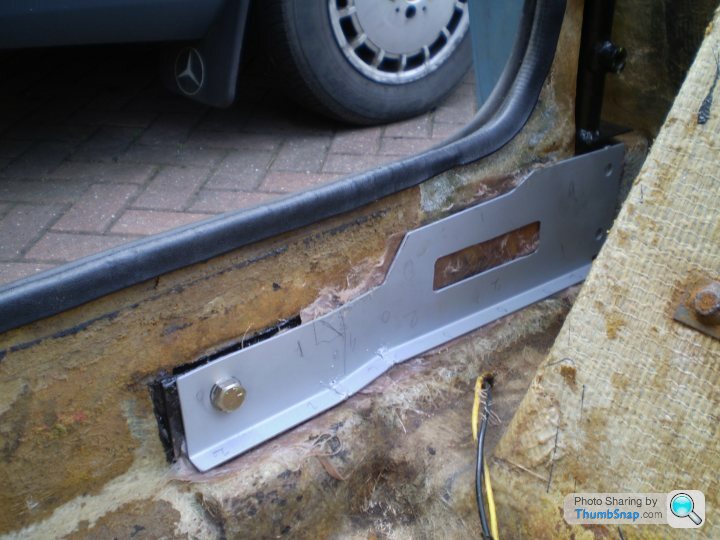
and glassed over...
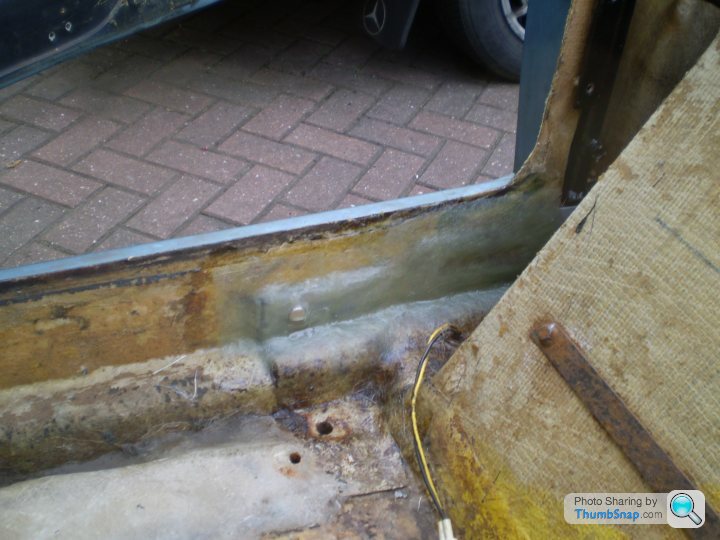
I was dreading doing this but it was surprisingly straightforward and very satisfying... I could grow to like the smell of the resin! It feels like I'm actually starting to put things back together; still a hell of a long way to go though.
and glassed over...
I was dreading doing this but it was surprisingly straightforward and very satisfying... I could grow to like the smell of the resin! It feels like I'm actually starting to put things back together; still a hell of a long way to go though.
Thanks for the scans Andy I've not seen that stuff before.
Played with the electrics all day today; it's a bit of a struggle. Lots of dodgy connections and the relays are very tempramental if they work at all. Still, I didn't set fire to anything!
I spent ages trying to figure out the relays that should operate the headlamps, there appears to be 8 of them! I can't get the headlights to come on or the pods to go up. The sidelights work (on the first switch position) but there's very little current drain when I operate the light switch, so I don't think the pods are getting power. One of the driving lights works on flash/main beam but nothing from the headlights/pods. All the fuses are OK.
I have the wiring diagrams but it's not clear how the power flows from one relay to the next to bring the pods up. Should the lights come on without the pods being up; or do the pods have to raise before the lights get power? What's the function of the 'headlight control relay' (no. 78 on the wiring diags)? And what's the function of the diodes, and how do I check them?
Thanks for any help folks!
Gassing Station | Wedges | Top of Page | What's New | My Stuff