Discussion


Moving on from the Azores... Another minor victory, managed to get the light pods up.
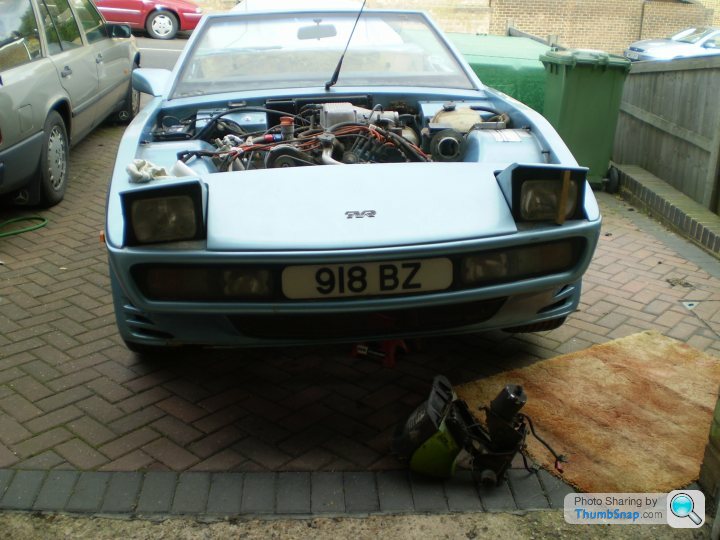
Drivers side responded to hot-wiring the motor relay; passenger side was open circuit and the knob on the motor (and therefore the armature) was jammed solid. I eventually managed to get the nut on the end of the gearbox spindle undone after struggling for ages through the aperture next to the radiator and the access hole underneath the pod, I could then raise the pod by hand hence the matchstick in the photo! The access hole underneath was obstructed by some air ducting so that didn't help.
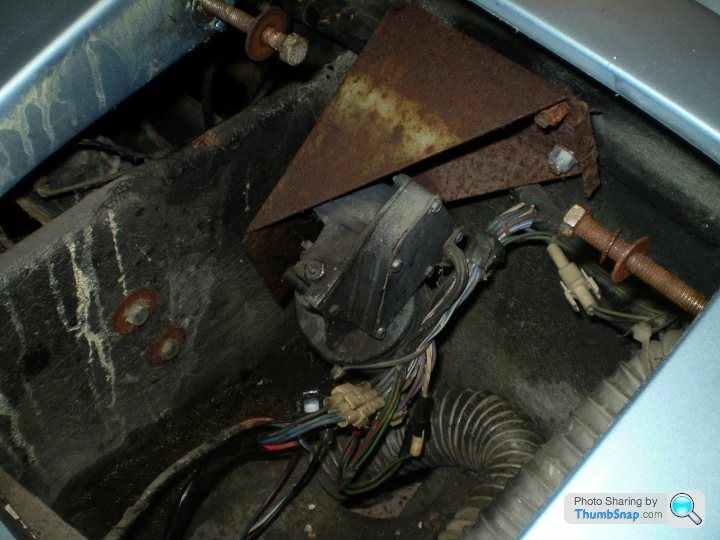
The driver's side motor was not responding to the light lift relay due to dirty contacts on the diode strip; thanks to Wedgie for the motor stripdown info on the Wedgeneering pages!
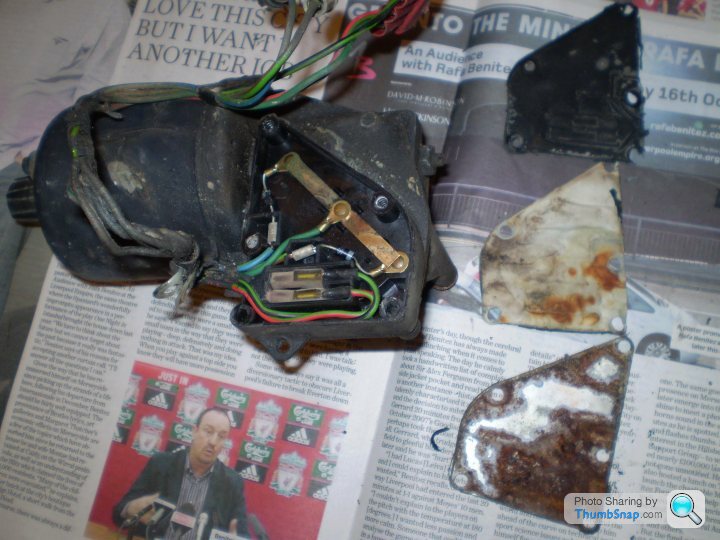
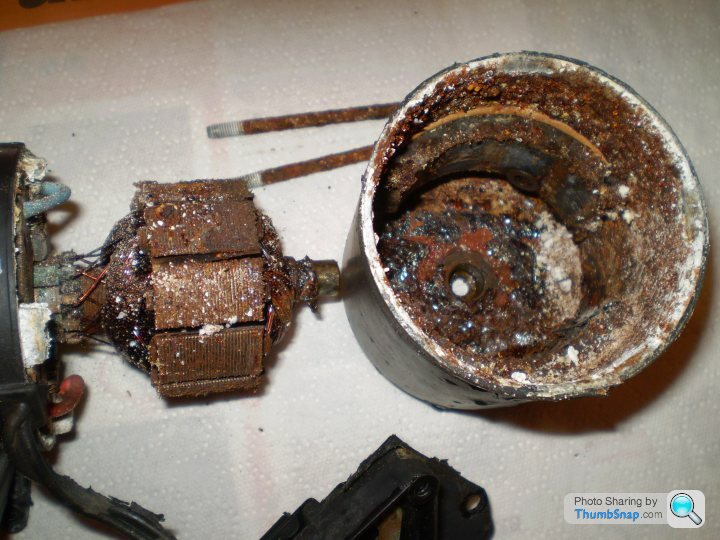
I'll strip the passenger side motor tomorrow... hopefully it won't be siezed too badly.
Drivers side responded to hot-wiring the motor relay; passenger side was open circuit and the knob on the motor (and therefore the armature) was jammed solid. I eventually managed to get the nut on the end of the gearbox spindle undone after struggling for ages through the aperture next to the radiator and the access hole underneath the pod, I could then raise the pod by hand hence the matchstick in the photo! The access hole underneath was obstructed by some air ducting so that didn't help.
The driver's side motor was not responding to the light lift relay due to dirty contacts on the diode strip; thanks to Wedgie for the motor stripdown info on the Wedgeneering pages!
I'll strip the passenger side motor tomorrow... hopefully it won't be siezed too badly.
It is indeed a TR7 unit, at that stage I was using it for reference whilst trying to undo stuff by feel with my arm stuffed through the access hole. It's now donating parts to the passenger side lift mechanism.
I've got the diode strips to connect and make the lift relays work - but the motors are now blowing fuses...
I've got the diode strips to connect and make the lift relays work - but the motors are now blowing fuses...
The headlights are now sorted; dingo brain here had fitted the wrong type of relays to the pod motors hence the fuse blowing antics.
On to the radiator fans:
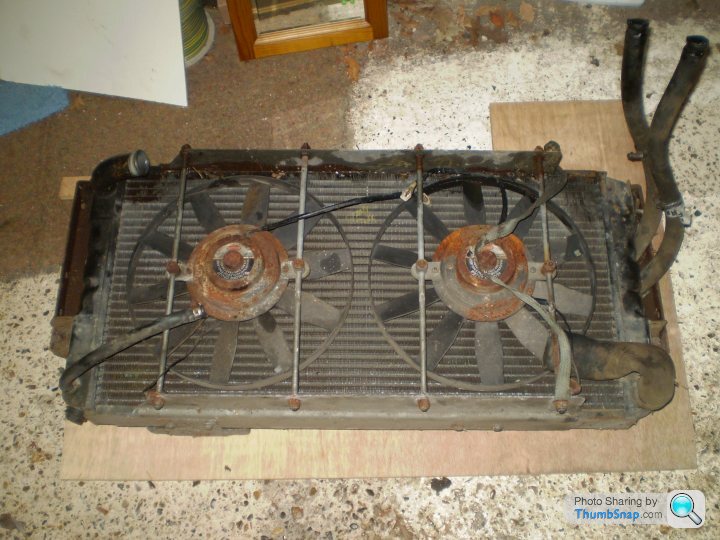
Twin Kenlowes, both siezed solid. I've tried to get the motors apart but haven't managed it; not helped by the plastic fan hub holding fast to the rusted spindle. New fans required.
The other side of the rad is confusing me, the oil cooler is mounted to the face of the coolant radiator.
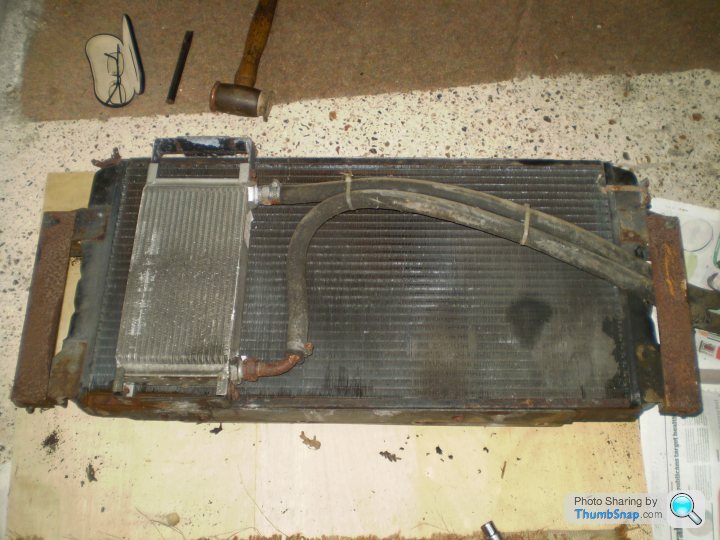
I'd have thought that the oil cooler would prevent the coolant radiator from doing it's job properly, especially with the rubber hoses in front of the rad too. The oil temp is likely to be 100+ DegC so that would heat up the coolant running through the main rad behind it.
Do any other wedges have oil coolers, if so where are they?
On to the radiator fans:
Twin Kenlowes, both siezed solid. I've tried to get the motors apart but haven't managed it; not helped by the plastic fan hub holding fast to the rusted spindle. New fans required.
The other side of the rad is confusing me, the oil cooler is mounted to the face of the coolant radiator.
I'd have thought that the oil cooler would prevent the coolant radiator from doing it's job properly, especially with the rubber hoses in front of the rad too. The oil temp is likely to be 100+ DegC so that would heat up the coolant running through the main rad behind it.
Do any other wedges have oil coolers, if so where are they?
Sounds like the oil cooler position is standard so I'll keep it there for the time being.
The existing fans are 12" Kenlowes, I'm trying to get replacements of the same type - but unfortunately the modern Kenlowes are a different design so it might take a while to find a pair in the 'old' style.
The existing fans are 12" Kenlowes, I'm trying to get replacements of the same type - but unfortunately the modern Kenlowes are a different design so it might take a while to find a pair in the 'old' style.
Good position fot the oil cooler Henry, I don't have power steering but I do have the dry sump pump there.
I found some old Kenlowes; I'm pleased that I'll be able to keep the original look.
I got the clutch hydraulics on today, much to my relief the clutch release fork is not siezed and the pressure plate is making the correct creaking noises(!); so it is moving. It remains to be seen if the driven plate is siezed to the flywheel... perhaps I should say it remains to be seen how badly it's siezed to the flywheel.
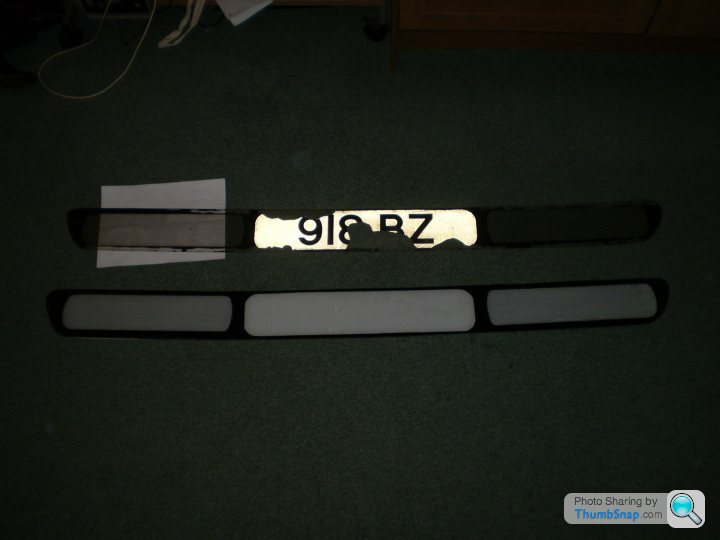
I've got the front panel off too, I'm not sure what the holes under the numberplate are doing there; but it would help cooling if they were left open.
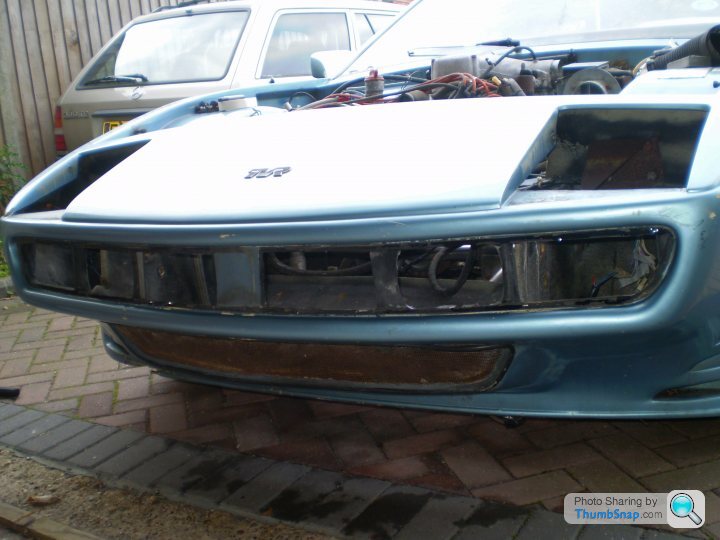
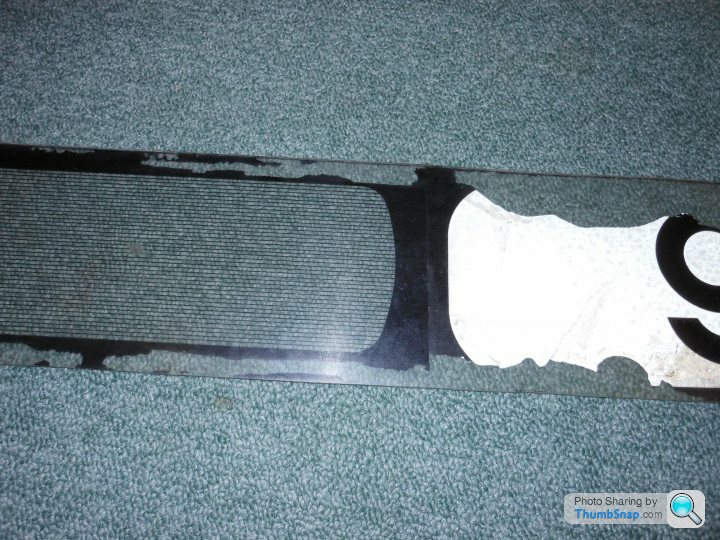
I'm not sure how the perspex/plastic panel was painted/stickered or whatever. Theres lots of fine lines and a solid border. It was stuck in place with mastic so the solid border is in a sorry state; anyone got any ideas for repairing it?
I found some old Kenlowes; I'm pleased that I'll be able to keep the original look.
I got the clutch hydraulics on today, much to my relief the clutch release fork is not siezed and the pressure plate is making the correct creaking noises(!); so it is moving. It remains to be seen if the driven plate is siezed to the flywheel... perhaps I should say it remains to be seen how badly it's siezed to the flywheel.
I've got the front panel off too, I'm not sure what the holes under the numberplate are doing there; but it would help cooling if they were left open.
I'm not sure how the perspex/plastic panel was painted/stickered or whatever. Theres lots of fine lines and a solid border. It was stuck in place with mastic so the solid border is in a sorry state; anyone got any ideas for repairing it?
Thanks guys, Neil at TVRcarparts is investigating his stock for me to find some decent front panels; plan B will be to make my own...
I'm moving on to the brakes now, master cylinder and pedal box are now replaced/freed-up and doing what was originally intended. Step two was to remove the nearside fuel tank to get access to the rear brakes. Experience gained from my 350i said to just cut the fuel pipes; so removing it was fairly easy to do, plus all the fuel was long gone so the system was dry.
The condition of the chassis still amazes me, and I haven't cleaned it up yet:
I've been wrestling with the dancing light pod syndrome; one was not stopping at the right place and they were doing a mexican wave. RH pod was stopping 1/2 inch from the fully up position then when tuned off would carry on the the top and then come down. Turned out to be one of the light pod motors had been wired up the wrong way round, so one motor arm was turning clockwise and the other anti-clockwise! Must have been like that since it left the factory as the connector on the loom was wired the wrong way around, doesn't say much for TVR quality control...
Sods law strikes. I can't get the offside exhaust manifold off because one of the bolts on the bottom row is stuck solid and I can't get a ring spanner onto it... and one of the bolts holding the starter on (the awkward to get at top one of course) will not undo and will only turn with a breaker bar so it feels like the thread's mullered - so I can't get to the manifold bolt. Bugger! Spent a whole day on it and got nowhere.
Anyone got any advice for undoing bolts threaded into Aluminium that won't crack off?
Anyone got any advice for undoing bolts threaded into Aluminium that won't crack off?
Thanks for the tips, I've been leaving the bolts to soak and have bought a high quality spanner to grind down to fit around the bolt head - I'm hoping the higher quality one will be good fit on the bolt head and will still be strong enough not to break after having a load of material removed.
Much to my amazement TVRCarParts have come up trumps with a new front panel:
Unfortunately it doesn't fit as it's a little bit too big... the white one behind is the new one (the white bit is a protective sheet):
Not too much of a problem, at least I can shave it down to fit - it would have been more of an issue if it was too small!
It's got me thinking though; the early SEACs have flat nosecones around the TVR badge whereas the later ones have a recessed badge. It appears from my front panel that the light aperture on the front is different too, and I've also noticed differences in the front spoiler and the windscreen pilars between early and late cars. You can see the two types of windscreen pilars on 350s and 400s; the 350 pilar is narrower, the 400 one fattens out at it's base where it joins the front wing (***TVR Wedge nerd alert***).
I know the early cars have seperate rear bumpers so the rear part of the body is different, but it appears to me that the whole body is actually different on the early cars. It makes me wonder why - it looks like they produced a few cars from the first set of body moulds and then moved on to a new set of moulds. I wonder if this is normal TVR practice, or if there was a specific reason for re-making the moulds.
Phil, the price was quite reasonable but I specifically asked for a damaged one as I'm expecting to replace it again when I get the respray done (which may be some time!). It seems Neil has several but they've been knocked around a bit, not sure what he'd charge for the best one.
Cheers, Martin
Cheers, Martin
I've got the exhaust manifolds off now with a little butchery of spanners and brute force. They are substantially different from my 350i (that's also in pieces at the moment...). The SEAC one is on the left:
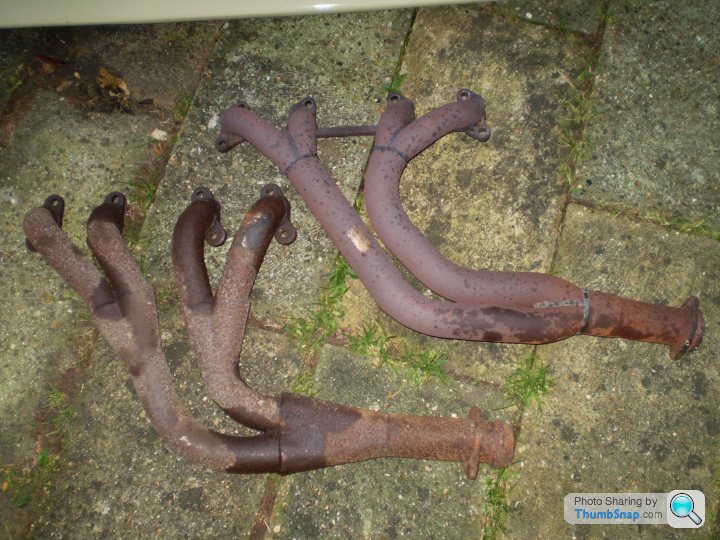

Compared to the 350, the exhaust ports on the head are ported to a larger size and the exhaust manifolds have larger ports to match. The primary and secondary lengths are different, and the 4:2 and 2:1 collectors are much more gradual. The general shape is different too, the starter motor solenoid is in a different place to my 350 to help this.
The manifolds are wafer thin, holed in places and need replacing; I suspect I'll have to have some made if I want the same pattern (which I do!). Can anyone confirm if they have similar manifolds on their car? From all the pics on here the 390s and 400s seem to have manifolds similar to my 350; but I'd be really pleased if I could buy some off-the-shelf manifolds for another model.
Looks like it's going to be Hayward and Scott for the exhaust then. The exhaust was in hard contact with the chassis in places so It'll be worth getting the whole car to them on a trailer and getting it built to fit. This will be the first big expense on the car since buying it; although I haven't totted up all the little bills so far!
The exhaust will now have to wait until I've sorted the front suspension and brakes and got it rolling again. I've just sorted the steering rack - the rack gaitors were past their best...

The exhaust will now have to wait until I've sorted the front suspension and brakes and got it rolling again. I've just sorted the steering rack - the rack gaitors were past their best...
I think this all lines up with my exhaust thoughts. If you have 180 Degree firing intervals on the four cylinders then a tuned length exhaust is good; in our case we have a firing order of 18436572 with 90 degree firing intervals, so:
Left bank manifold sees 1xx3x57x
Right bank manifold sees x84x6xx2
(with the 'x' being the 'missing' 90 Degree firing event that occurs on the other bank)
So, the exhaust collectors on each side of the engine will see an unevenly spaced set of pressure pulses so an equal length exhaust will not give you pulse supercharging/scavenging.
With the cross bank pipes I think you can pulse tune with cylinder pairs 1/6,8/5,4/7 and 3/2; this will entail very long pipes with large pressure drops (unless the pipe diameter is large, as is seen in the above photos).
I think the main design concern on a 90 Deg V8 manifold pair is back pressure, but I know this is a very specialised field and I'm not an expert in it! I hope whoever originally designed the manifolds on the SEAC knew what they were doing; they would have had 350/390 manifolds on the shelf and they chose to redesign them for some reason (although E Ponym has a 390 with the same style). I think I'll stick with the plan to get the original manifolds copied.
Thanks for the spot on the seats too; although I've got a whole interior from another car so I already have a spare set of regular TVR seats.
I've found one small crack at the front so far; it's on the thin (1mm ish) folded sheet sections re-enforcing the sides of the spring mount. The direction of the crack is confusing as it doesn't appear to be in the direction of the load path, and it's on the edge of a weld; so I wonder if it's a shrinkage crack from when the chassis was built. I've studied the front in detail but I've only just started on the back so I'm not certain if there's any cracks there, although a quick check didn't identify any. The suspension is rock hard so I won't be surprised to see something; I know Adrian had problems with his.
Time for a bit of reflection; it was this time last year that I first spotted a Wedge shaped thing in a field looking exceptionally sorry for itself. It was 100 yards from the road and I flashed past it on my way to work. I originally thought it was a TR7 and didn't think much of it; then next time (several weeks later) I slowed down a little and thought it was an MR2... Then I remembered it again in the end of February and slowed down properly for a look. That's when I realised it was a Wedge; but I assumed it was an abandoned 280. A couple of days after that I drove into the yard it was in to check it out - that's when I realised it was badged 420 SEAC (but not with the usual side stripes so I still wasn't convinced!) and started this thread...
http://www.pistonheads.com/gassing/topic.asp?h=0&a...
... and as the story developed I needed more information...
http://www.pistonheads.com/gassing/topic.asp?h=0&a...
http://www.pistonheads.com/gassing/topic.asp?h=0&a...
http://www.pistonheads.com/gassing/topic.asp?h=0&a...
http://www.pistonheads.com/gassing/topic.asp?h=0&a...
http://www.pistonheads.com/gassing/topic.asp?h=0&a...
All the time hoping the seller wasn't watching. If he was he never owned up to it!
I thought I'd stick the links in here to hold the threads together. My target is to drive it to BBWF this year, that'll depend upon the engine firing up properly and the clutch/drivetrain playing ball... though it won't have much of an interior by then and the body 'needs attention', as they say!
http://www.pistonheads.com/gassing/topic.asp?h=0&a...
http://www.pistonheads.com/gassing/topic.asp?h=0&a...
http://www.pistonheads.com/gassing/topic.asp?h=0&a...
http://www.pistonheads.com/gassing/topic.asp?h=0&a...
http://www.pistonheads.com/gassing/topic.asp?h=0&a...
All the time hoping the seller wasn't watching. If he was he never owned up to it!
I thought I'd stick the links in here to hold the threads together. My target is to drive it to BBWF this year, that'll depend upon the engine firing up properly and the clutch/drivetrain playing ball... though it won't have much of an interior by then and the body 'needs attention', as they say!
This is the front end crack; I had another look at the back of the chassis last night and I'm pretty sure it's OK, although there's some seriously large weld beads under there which may be previous crack repairs. I'll post some pics of those when I've cleaned it up a bit.
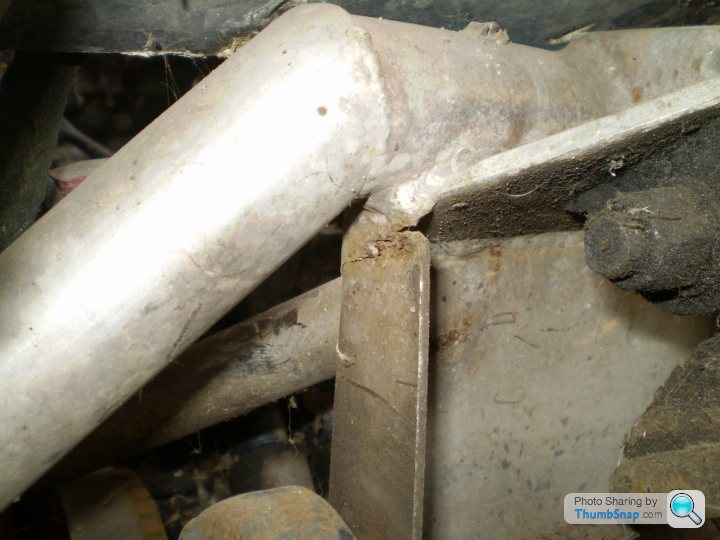
On looking at the picture again, I think I'll have to retract my statement above that it's not a stress crack. It appears that the top coil over mount has been twisting the chassis tube. You can also see a suspension cross brace that is welded to the back of the folded section that isn't there on my 350i; I'm not sure if that helped or hindered the cracked area.
Any ideas for repairing it?
I've got the rear calipers off now; that was a bit of a game.
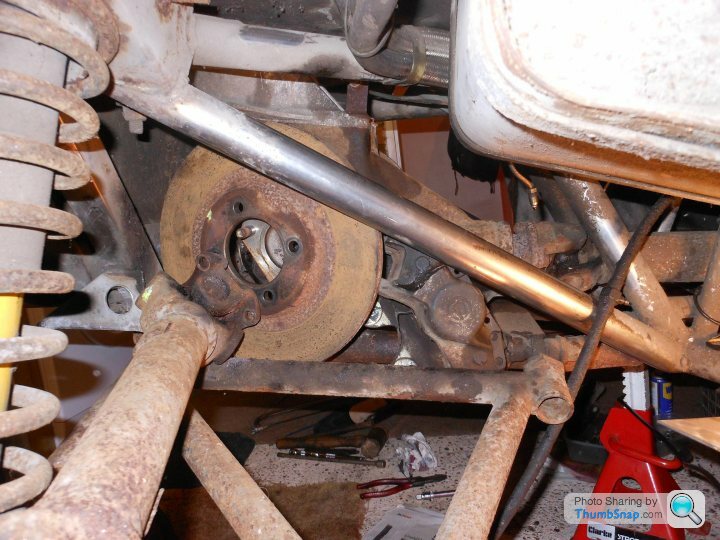
On the driver's side it seemed impossible to get the caliper out without removing the brake disc, and even with the brake disc removed it seemed to put up a fight. It was Christmas puzzle time all over again! Amazingly the caliper pistons are not siezed, only sticky, so I can get them apart and rebuild them.
I had to cut the driveshaft nuts off the diff studs. All in all, a horrible job! Although I did manage to get away without removing the other end of the driveshaft (and all the siezed bolts that would have entailed) so it could have been worse... getting the hub off can be a job for another day.
Gassing Station | Wedges | Top of Page | What's New | My Stuff