SEAC dash / instrument panel removal
Discussion


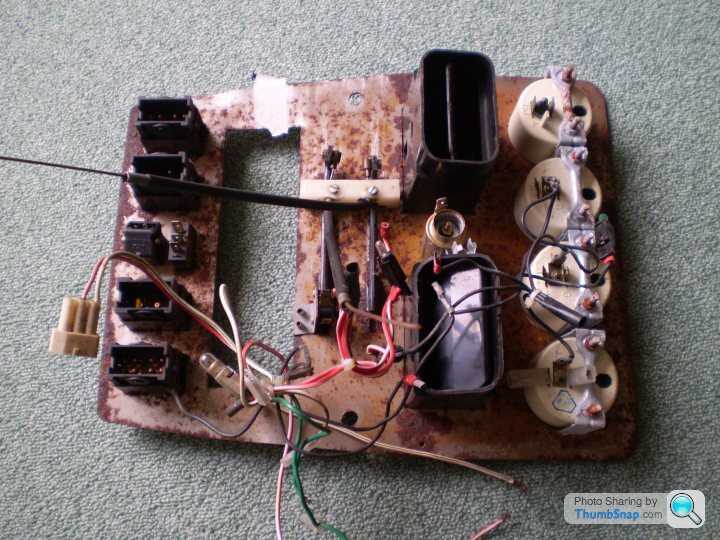
I said I'd write a piece about how I got the dash panel out of my car; it's only half a story as putting it back is likely to be much more difficult! My centre intrument/switch panel had been got at before by someone and all the wires/heater cables were ripped off the back - so easy to get off, not so easy when I come to put it back!
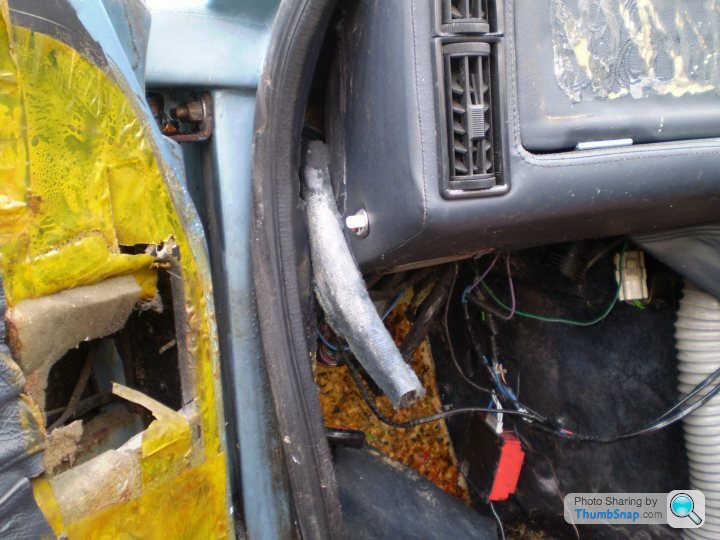
My heater cables have ripped out of the heater box; I'll have to disect the heater to get them back on. I'd recommend taking them off the back of the instrument/switch panel and leaving them on the car but that doesn't look easy. You can see the grommets on the heater box that should have cables going through them... you don't want to be in this position!
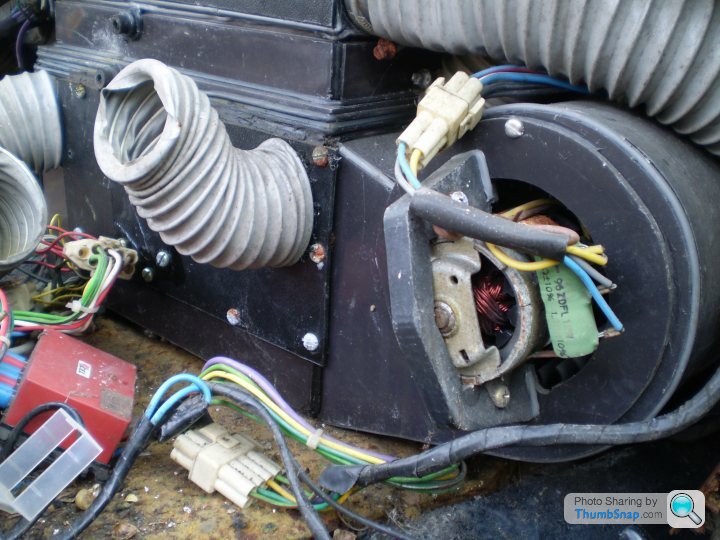
The air hoses to the vents just pull off. Or in my case they weren't connected.
I forgot to mention the veneer panel on the centre instrument/switch panel. You have to remove the radio first; then there's two nuts on studs close to the top corners of the radio aperture. Remove the nuts, then the veneer panel can be eased out. There's then two or three screws holding the actual intrument/switch panel in.
Next instalment; the steering column. I took my seats out first; easy to do and much better access to the dash afterwards. Simple nuts/bolts under/in the car.
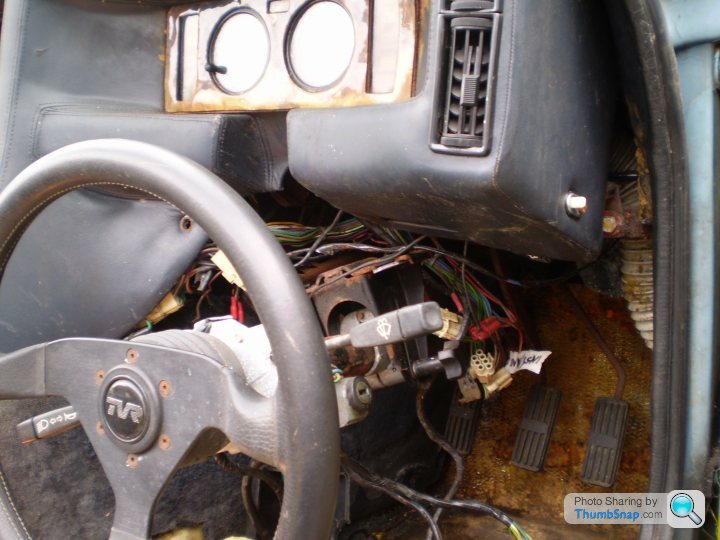
You don't need to take the steering wheel off or the column completely out, just get to the top bolts and lower the top end of the column.
Take off the column cowl halves, one screw on each half. Slacken the column reach/rake adjuster to make space.
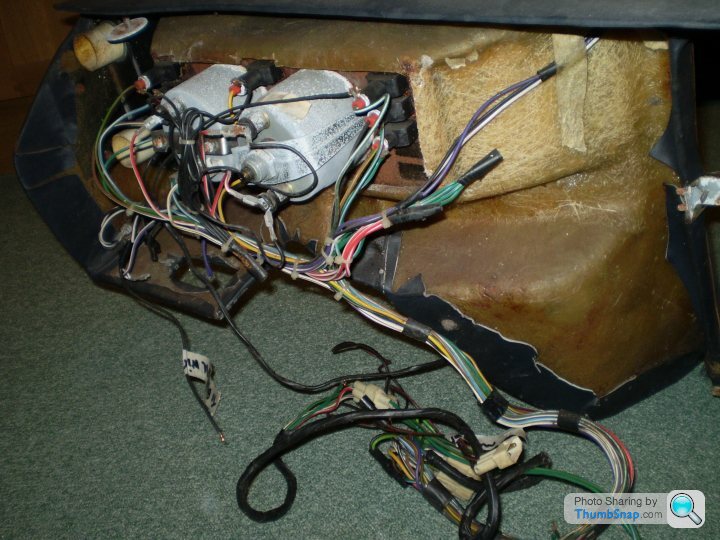
Cut off all the tie wraps holding the wiring, then trace all the wiring back to the nearest connection blocks; they all have connecting blocks reasonably close by and so all the wiring can be got out of the way.

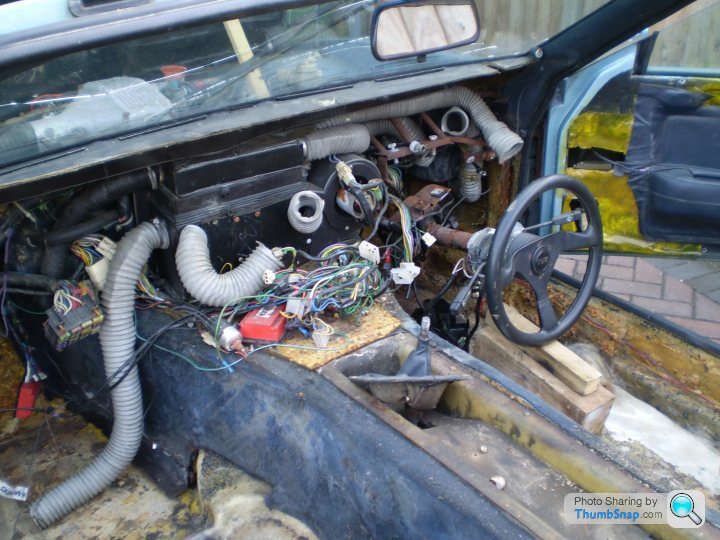
There's two vertical bolts that hold the top of the column that you can see in the above pic. You can get to the top through the centre instrument/switch panel hole, it's fiddly but they can be undone. You can then drop the top of the column low enough to get the dash out over the top; support it on blocks to avoid stressing the bulkhead bush too much.
Next instalment; the steering column. I took my seats out first; easy to do and much better access to the dash afterwards. Simple nuts/bolts under/in the car.
You don't need to take the steering wheel off or the column completely out, just get to the top bolts and lower the top end of the column.
Take off the column cowl halves, one screw on each half. Slacken the column reach/rake adjuster to make space.
Cut off all the tie wraps holding the wiring, then trace all the wiring back to the nearest connection blocks; they all have connecting blocks reasonably close by and so all the wiring can be got out of the way.
There's two vertical bolts that hold the top of the column that you can see in the above pic. You can get to the top through the centre instrument/switch panel hole, it's fiddly but they can be undone. You can then drop the top of the column low enough to get the dash out over the top; support it on blocks to avoid stressing the bulkhead bush too much.
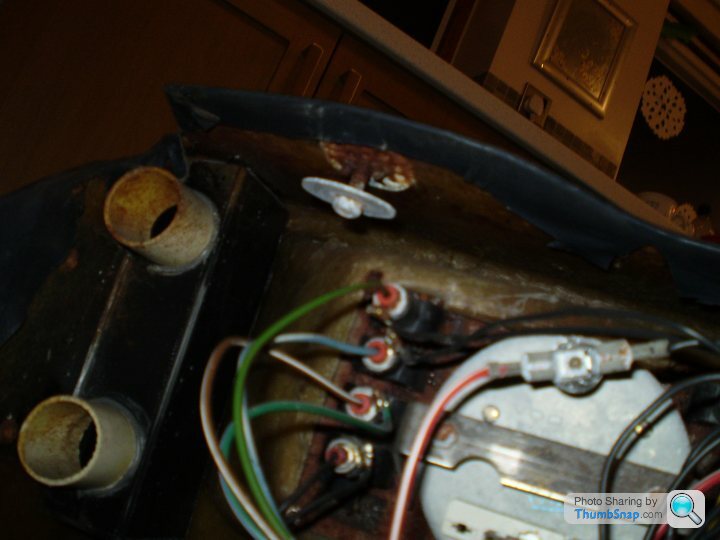
The main instrument panel (speedo, revs, warning lights) can stay in the dash and be removed with it. There's wiring connector blocks to be found and eased apart but it's not too difficult. The door light switches and interior lights under the dash can also stay in place.
The speedo cable needs to be removed too; I was able to do that as the dash was coming out so I had more space. The gearknob needs to come off too.
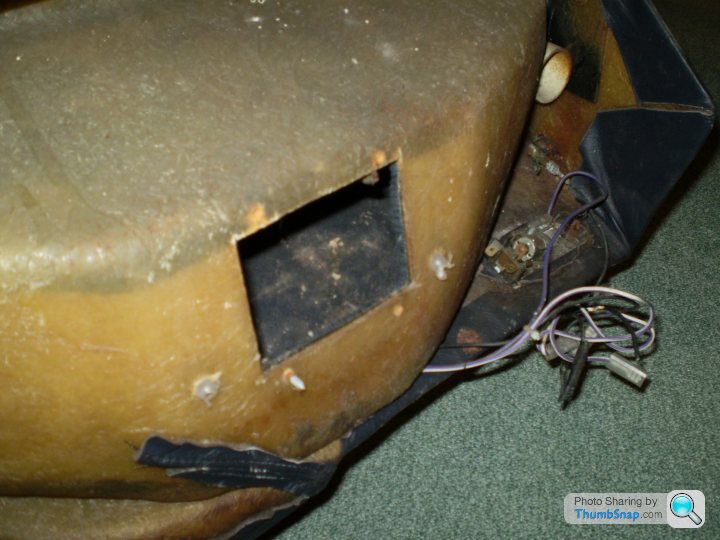
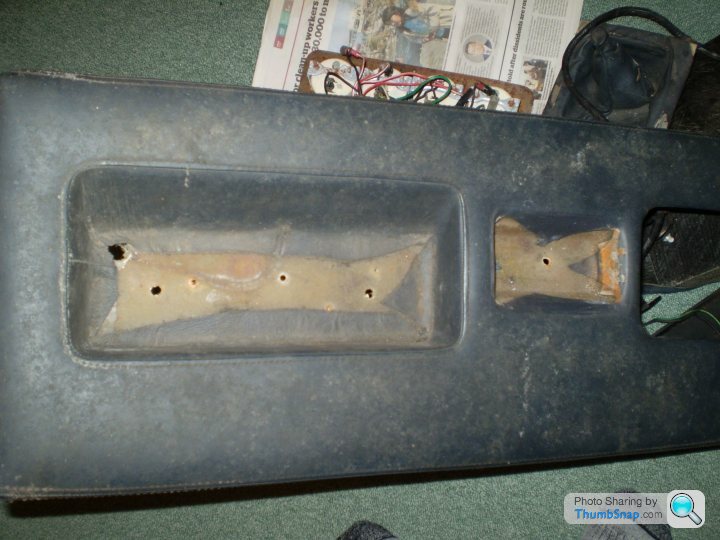
After that lot, ease up the rear of the centre console then swing the dash up and out, looking for anything you've forgotten to disconnect as you go! Then find somewhere to put the unwieldy thing! It's in my lounge at the moment...
Then re-assemble in the reverse order.... Ha ha ha! Ask me about that in a few months time!!
The speedo cable needs to be removed too; I was able to do that as the dash was coming out so I had more space. The gearknob needs to come off too.
After that lot, ease up the rear of the centre console then swing the dash up and out, looking for anything you've forgotten to disconnect as you go! Then find somewhere to put the unwieldy thing! It's in my lounge at the moment...
Then re-assemble in the reverse order.... Ha ha ha! Ask me about that in a few months time!!
Hello mate..This is one of those projects that will be worth every minute of time spent taking it all apart, Replacing whats needed and then putting it all back together..The before and after will be the best bit..You will look back in a years time and feel well proud of yourself..And probably be the envy of many..Keep up the good work..Ziga
Thanks buddy thats pretty much what I thought it involved - job well done though. Are there any rubber gaitors under the gearstick leather to stop fumes getting into the car? dosen't look like? I nearly got gassed last time Dickie drove the car!
MikeyB
MikeyB
Edited by mikeb on Thursday 7th April 23:05
No rubber gaitor, but there's a thick rubber sheet wedged into the long box like fibreglass tray around the gearshift with a largish hole in it; and then a thin rubber sheet that's a tight fit around the gearlever. I think the idea is that the thin bit slides around as you change gear and seals against the thick bit. TVR optimism again!!
cuneus said:
Mine has a gaitor (the part is from a Ford Transit)
I think mine's ex-Sierra; the upright bit that fits around the lever is offset one way and the base is marked to indicate which way round it was fitted for a petrol or diesel application. Ironically it fits the 390 better with 'Diesel' forward... 
Very useful article shows a few nuts and bolts that aren't obvious also pics of the naked underside of the whole thing. I have to take mine out soon so I can swap over to a leather one, there's nothing in the Bible and the parts manual doesn't cover 400SE style dashes.
Some differences for the SE:
- Handbrake levelr bolt removed allows the handbrake to go vertical and out of the way of the dash surround.
- The SE has three bolts holding up the steering column, and a bunch of washers to shim the angle.
Some differences for the SE:
- Handbrake levelr bolt removed allows the handbrake to go vertical and out of the way of the dash surround.
- The SE has three bolts holding up the steering column, and a bunch of washers to shim the angle.
Edited by adam quantrill on Thursday 3rd January 23:27
Gassing Station | Wedges | Top of Page | What's New | My Stuff