Dissassembly of Tuscan is complete... what now????
Discussion


Hi guys,
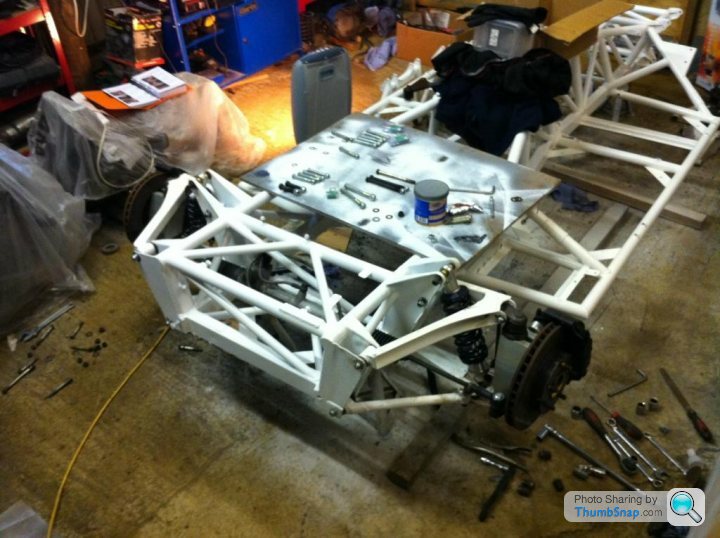
Quick update. Had to make a snap decision and decided to go for the careful measurement and repair route. Having checked the undamaged side and compared it to the accident damaged and repaired side, I concluded that the pick up points were within circa 2mm and that with some metal work a few bits of new plate with bolt holes in them and welded onto the outside of the pick ups, that I would be back in business. Having not had the chance to familiarise myself with my new welder, the welds weren't pretty (always a problem if working against gravity), but they have penetrated properly and will do the job. I've also decided to order standard bushes, rose joint drop links and all new ball joints/track rod ends.
The front lower wishbone mount (front)
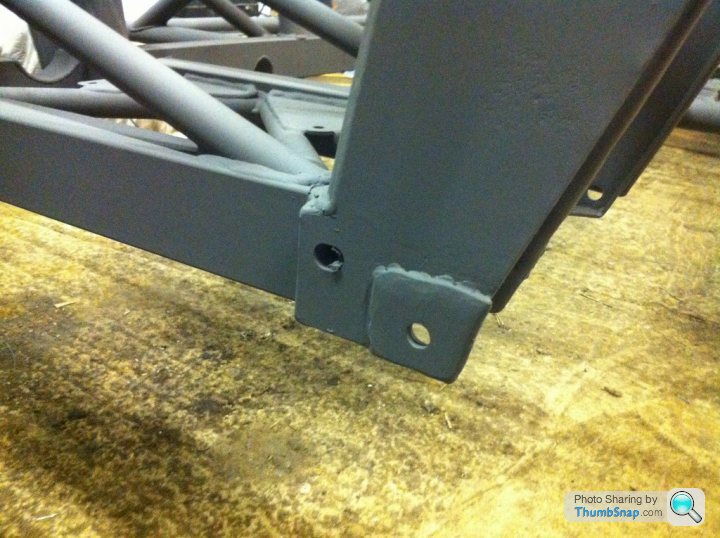
The front lower wishbone mount (rear)

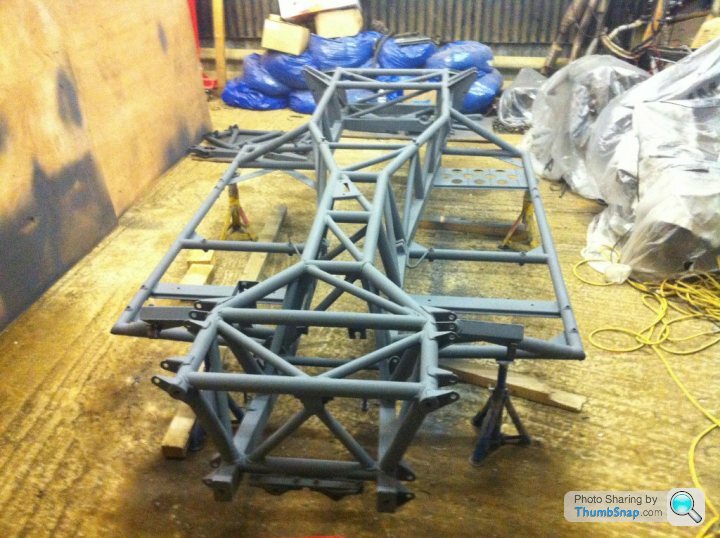
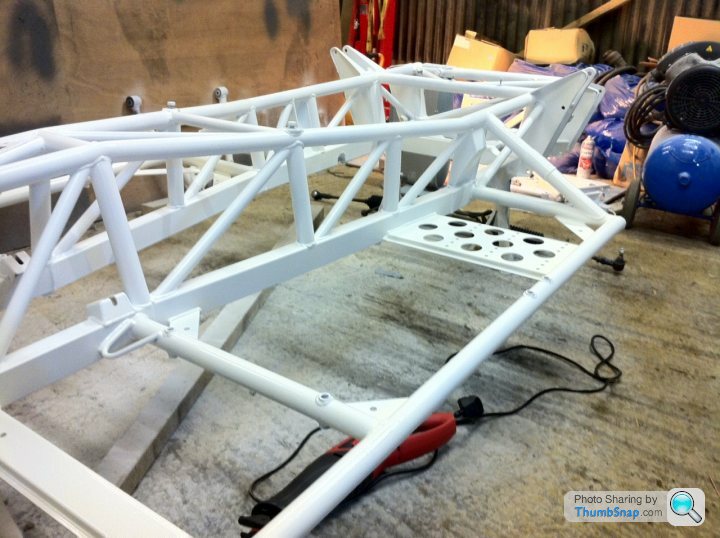
For the chassis protection I was recommended the MIPA range of paints and treatments. The corrosion sealer apparently pulls out any moisture and then seals the metal in a solid coat. I'm then using their 1k etch primer with a normal white top coat. I went on and on about using a Zinc primer, but the chap at the paint shop said that was old hat. Fingers crossed he's right. I don't fancy rebuilding her again for another 15 years! Top coat goes on tomorrow.
Current status:
I've been enquiring about suspension geometry and from what I have read on here and got out of Dom at TVR Power, the standard suspension is just fine if set up right. I had an 04 Tuscan before with the SP spacers. If I can get that level of handling I'll be happy. From what I understand/have been told, the wishbones never changed but they did move the upper ball joint outboard by 10mm and put some extra caster on the uprights. I'm going to get the suspension installed loosely and hang some plub lines from the roof so I can do some static tests to see if my steering rack causes bump steer. There are a number of solutions I've seen/heard of but I suppose it will come down to what I have and how well the rack and wishbone pick up points line up.
I've sent my Protech shocks off for rebuilding. The adjusters had seized on 2 of them, the height adjuster ring had seized on another, requiring a very careful grinding operation, the bodies are fluffy with aluminium oxide and most of the rose joints are corroded. Having said that the shafts looked clean and there was no weeping from the seals, so fingers crossed the £35 per shock quote is accurate!
Quick update. Had to make a snap decision and decided to go for the careful measurement and repair route. Having checked the undamaged side and compared it to the accident damaged and repaired side, I concluded that the pick up points were within circa 2mm and that with some metal work a few bits of new plate with bolt holes in them and welded onto the outside of the pick ups, that I would be back in business. Having not had the chance to familiarise myself with my new welder, the welds weren't pretty (always a problem if working against gravity), but they have penetrated properly and will do the job. I've also decided to order standard bushes, rose joint drop links and all new ball joints/track rod ends.
The front lower wishbone mount (front)
The front lower wishbone mount (rear)
For the chassis protection I was recommended the MIPA range of paints and treatments. The corrosion sealer apparently pulls out any moisture and then seals the metal in a solid coat. I'm then using their 1k etch primer with a normal white top coat. I went on and on about using a Zinc primer, but the chap at the paint shop said that was old hat. Fingers crossed he's right. I don't fancy rebuilding her again for another 15 years! Top coat goes on tomorrow.
Current status:
I've been enquiring about suspension geometry and from what I have read on here and got out of Dom at TVR Power, the standard suspension is just fine if set up right. I had an 04 Tuscan before with the SP spacers. If I can get that level of handling I'll be happy. From what I understand/have been told, the wishbones never changed but they did move the upper ball joint outboard by 10mm and put some extra caster on the uprights. I'm going to get the suspension installed loosely and hang some plub lines from the roof so I can do some static tests to see if my steering rack causes bump steer. There are a number of solutions I've seen/heard of but I suppose it will come down to what I have and how well the rack and wishbone pick up points line up.
I've sent my Protech shocks off for rebuilding. The adjusters had seized on 2 of them, the height adjuster ring had seized on another, requiring a very careful grinding operation, the bodies are fluffy with aluminium oxide and most of the rose joints are corroded. Having said that the shafts looked clean and there was no weeping from the seals, so fingers crossed the £35 per shock quote is accurate!
Just done a quick tot up for the work planned in the next 2 months and I wished I'd not worked it out. I sold my mint 2004 Tuscan for £17,750.
Cat D Tuscan: £7000
Engine Rebuild: £4500 (self fitting)
Clutch: £500
Bushes and chassis rebuild/paint: £1000
Reconditioned shocks: £360
Paint: £2000 est
Carpets: £500
Bodywork repair: £800
Bodywork race car mod: £800
Total= £17460
Awe BOLL*CKS! I've forgot a set of 4 tyres and I haven't even started thinking about the electronic gysmos I wanted to put in!
Any ideas how I can save some cash?? I could try and paint it myself,but that's the bit everyone sees and if that looks pants....
The one thing you should never do it add up the total costs 
Have you had the £2k quote for the respray already? You may be able to save a little on this by doing all of the prep yourself, but you'll have to find a paintshop who you trust, and one who trusts you (as bad prep could mean issues down the line).
Apart from that then the only consolation is that if you sold your 2004 car for the same amount, did it have a rebuilt engine and a new clutch? If not then "technically" you could say it would have been worth (to you) £22k
At least this way you have a car that you know inside out, and you shouldn't have any sudden suprise bills in the future as you can check most things as you put it all back together.
Good luck with the project though, and keep up the updates
MrChips said:
At least this way you have a car that you know inside out, and you shouldn't have any sudden suprise bills in the future as you can check most things as you put it all back together.
 For most of us it cost a little more than £17,460 to get at that stage (at least if we're being honest to ourselves)...
What about if you went to RND and had their bottom end rebuild for £995 plus the stage two cylinder head approx 1500.. (they do a head refresh for even less) and you put them together and back in the car. Your obviously pretty competent and this would mean the engines been inspected by someone familair with standard issues..That would save you 2k.
Edited by m4tti on Monday 14th November 12:10
All good points lads. Will have to be careful and save where it makes sense to save and spend where the cost bs. Tome benefit allows. Not sure about rnd rebuild. I know Dom and that warrantee is a BIG draw to his offering. No one else offers this and it's reliability is proven.
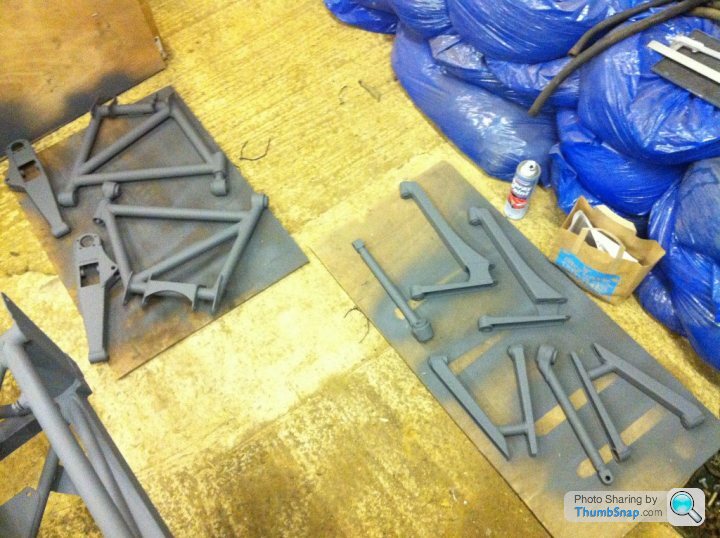
Just been getting the bushes out if the wishbones. Of course in my keenest to get paint on the bare sandblasted metal I have now got to sand down the scratched caused by the battle with the bushes and repaint. I have however found a technique that I will share with everyone on another post that hopefully I will have fully mastered before I fininsh the job resulting in a few non scratched wishbones!
Finally got done more paint so I can finish off painting the chassis! Pics to follow


Walford said:
Would be easy to sort out camber caster KPI bump steer,
I built a 2001 Tuscan (back to its origanal geo) from a salvage car, and was very disapointed when i got it on the road
had to take it back into workshop and sort it out
So What did you do to it? I was thinking about rasiing the rack by 10mm and exchanging the track rod ends for rose joints and artificially rasing the steering arm pivot point. I'm not sure if this would be cheaper than buying and fitting a Straight6 steering arms?I built a 2001 Tuscan (back to its origanal geo) from a salvage car, and was very disapointed when i got it on the road
had to take it back into workshop and sort it out
Any thoguhts welcomed!
First thing i would do is find out which hubs, top wishbone and rack lengh you have got
also would take a springs off set in around 5 deg castor and 1 deg of camber tracking to zero, at ride hieght
and move the hubs up and down 40mm from ride hight and measure track and camber
first with the steering straight ahead and then 10 and 20 deg of lock
also would take a springs off set in around 5 deg castor and 1 deg of camber tracking to zero, at ride hieght
and move the hubs up and down 40mm from ride hight and measure track and camber
first with the steering straight ahead and then 10 and 20 deg of lock
Walford said:
First thing i would do is find out which hubs, top wishbone and rack lengh you have got
also would take a springs off set in around 5 deg castor and 1 deg of camber tracking to zero, at ride hieght
and move the hubs up and down 40mm from ride hight and measure track and camber
first with the steering straight ahead and then 10 and 20 deg of lock
Hi Grant,also would take a springs off set in around 5 deg castor and 1 deg of camber tracking to zero, at ride hieght
and move the hubs up and down 40mm from ride hight and measure track and camber
first with the steering straight ahead and then 10 and 20 deg of lock
I think I follow but perhaps a phone call would make this clearer. The floor in my barn ain't that flat so would need some straight edges/angle iron sections.
I'll pm you my number and perhaps we could discuss tonight?
Cheers,
Martin
This is a fantastic video on bump steer measurement - I swear I never really understood it fully until watching this through.
http://youtu.be/LO07qmJ9zkk
http://youtu.be/LO07qmJ9zkk

Gassing Station | General TVR Stuff & Gossip | Top of Page | What's New | My Stuff