is there anybody there
Discussion


In
CV boots split,
Front discs below minimum,
Steering rack gaiter,
Brake pads all round
Wiper blades,
Chassis showing signs of corrosion,
Offside front headlight out of alignment due to wing damage,
So not much really however that was October 2009 so car has been stood a while since, plus the paintwork needs seeing to plus some body work, new rear window, offside boot hinge, all service items ect, so it will be a while before its on the road, my aim is to try and do anything I can on the engine while the chassis is being soda blasted and re powder coated £300 quote, once that's done replace wishbones, clean up the springs and dampers if poss, once the chassis is sorted I will mount the engine back onto the chassis then lower the body back onto it, whilst in between each job I will tackle all the jobs that I am able to do myself, if all this makes sense then that is my plan, Will do my best to get some pics on over the weekend, I may even try and do a short video and put it on YouTube. Jim. PS I forgot the clear coat is smoke damaged so needs taking back to remove the soot, also the carpets are shot due to the soot, I am going to make my own dashboard too,
J400GED said:
Best of luck with the lift Jim, just take it nice and steady. Double check that you have disconnected everything before you lift:
Carbon return - LH side at the rear
Fuel feed to pump - LH side at the rear
Wiring loom to pump - LH side at the rear
Fuel Return - RH side at the rear
Speed Transducer cable - Centre above diff, through the body
Reverse switch loom - Centre tunnel through near gear lever
Handbrake switch - Centre tunnel through near gear lever
Bolts/Earth points on centre tunnel top
All engine electrical connections including earth point at LH rear of engine and loom moved out of the way
AFM to plenum
Cooling system - radiator to engine
Brake and Clutch pipe unions on the RH side of engine bay
Heater hoses at the top rear of the engine
Throttle cable
Carbon return hose in the front of the engine bay
Brake servo hose - RH side of plenum
Carbon canister hose - RH side of plenum
Lower steering column
Make sure the handbrake is as near vertical as possible and keep an eye on it as you lift the body.
That's as much as I can remember off the top of my head.
Hope this helps
Ged
P.S. pics are always good
Oops looks like I missed a couple of bits, thanks for the heads up Ged, I think I'll concentrate on the engine lift this weekend and body lift next weekend, I struggle a bit having a disability, however I am in no rush as the rebuild will be done on cost per job, so pay for one job then save for the next if you know what I mean, I am hoping I can save the outriggers as these are the dearest item, I know the front wishbones are gonner's, the springs and coilovers are rusty but not leaking it may be enough to grit blast them and recoat hopefully, the cars original fail sheet consisted of, Carbon return - LH side at the rear
Fuel feed to pump - LH side at the rear
Wiring loom to pump - LH side at the rear
Fuel Return - RH side at the rear
Speed Transducer cable - Centre above diff, through the body
Reverse switch loom - Centre tunnel through near gear lever
Handbrake switch - Centre tunnel through near gear lever
Bolts/Earth points on centre tunnel top
All engine electrical connections including earth point at LH rear of engine and loom moved out of the way
AFM to plenum
Cooling system - radiator to engine
Brake and Clutch pipe unions on the RH side of engine bay
Heater hoses at the top rear of the engine
Throttle cable
Carbon return hose in the front of the engine bay
Brake servo hose - RH side of plenum
Carbon canister hose - RH side of plenum
Lower steering column
Make sure the handbrake is as near vertical as possible and keep an eye on it as you lift the body.
That's as much as I can remember off the top of my head.
Hope this helps
Ged
P.S. pics are always good
CV boots split,
Front discs below minimum,
Steering rack gaiter,
Brake pads all round
Wiper blades,
Chassis showing signs of corrosion,
Offside front headlight out of alignment due to wing damage,
So not much really however that was October 2009 so car has been stood a while since, plus the paintwork needs seeing to plus some body work, new rear window, offside boot hinge, all service items ect, so it will be a while before its on the road, my aim is to try and do anything I can on the engine while the chassis is being soda blasted and re powder coated £300 quote, once that's done replace wishbones, clean up the springs and dampers if poss, once the chassis is sorted I will mount the engine back onto the chassis then lower the body back onto it, whilst in between each job I will tackle all the jobs that I am able to do myself, if all this makes sense then that is my plan, Will do my best to get some pics on over the weekend, I may even try and do a short video and put it on YouTube. Jim. PS I forgot the clear coat is smoke damaged so needs taking back to remove the soot, also the carpets are shot due to the soot, I am going to make my own dashboard too,
J400GED said:
If you're lifting the engine before the body, don't forget:
The earth strap to the RH outrigger through the RH wheel arch
The main exhaust and Y-piece.
Fuel feed and return hoses at the RH top rear of the engine (near the Heater hoses area)
Front removable cross brace in front of the engine
Rear removable cross brace (under the gearbox but across the chassis back bone
Engine mounts - once you have taken the weight of the engine! these will make things easier if you can remove them completely, leaving the engine mounted portion of the bracket in situ (if you see what I mean)
Gearbox mounts
Prop shaft should slide out as you lift the engine - just protect it from hitting too much
Gearbox remote lever - on top of the gearbox accessed from inside the car.
Bear in mind it is very "snug" and will take some jiggling to get the engine and gearbox through and out.
Probably best to remove the radiator as well
Hope this helps
Ged
Hi GED the only thing holding the engine in now is the four siezed engine mounting bolts, I have soaked them every night this week with penetrating oil and will make another attempt at removing them tonight, thanks for the info, .jim
J400GED said:
Jim, do you mean the ones that go through the chassis?
Hiya GED no I've removed the nuts from the ones in the chassis, its the ones that go through the rubber part of the mounts, hoiw do I part the steering column I've removed the bolts from the bottom knuckle but can't see how it comes apart. Jim.Cheers GED will let you know how it goes tomorrow night, Jim.
J400GED said:
For the steering column shaft you need to also remove the lower bolt from the upper UJ at the bulkhead end, then the shaft can be moved towards the bulkhead and the lower UJ will come off the rack. To ease movement of the shaft, use a large flat blade screwdriver to open the slot in the UJ end.
Make sure you mark the relative position of the UJs to the splines on the shaft and the rack before you remove it. Also, make sure the steering is straight ahead before removal and that the rack is also centred before refitting the shaft.
As for the engine mounts, if you are referring to the two nuts that go behind the engine bracket to secure the engine mount, you may be able to remove the three bolts that secure the engine brackets to the block - be aware that the 100 amp fuse is mounted on the right hand bracket - otherwise I'm afraid it is a case of brute force on the nuts.
Hope this helps
Ged
Edited by J400GED on Thursday 18th June 23:13
J400GED said:
Good luck mate, keep us updated. 
Hi Ged I've just had a result, I was looking around a local car boot and spotted a couple of books about tvr, one is Tvr griffith & chimaera service manual Ian Truelove 2006, and the tvr griffith & chimaera second edition by Steve heath, the second one is a pretty comprehensive book, got both for £20.J400GED said:
That's a result! 
How did you get on today? Any progress?
Hi Ged unfortunately I was let down again with the engine hoist, also my generator decided to pack up and I can't see a dot without it it runs but does not produce electric I'm going to have a look at it today, altogether there is six nuts between the engine out and the body off, I've been promised an engine hoist for wednesday, I tried to hire one but they were booked up for the next three weeks, I guarantee it will all be sorted this week I'm off round to the garage shortly to take some pics and hopefully upload em this afternoon, prepare for a shock lol, Jim.How did you get on today? Any progress?
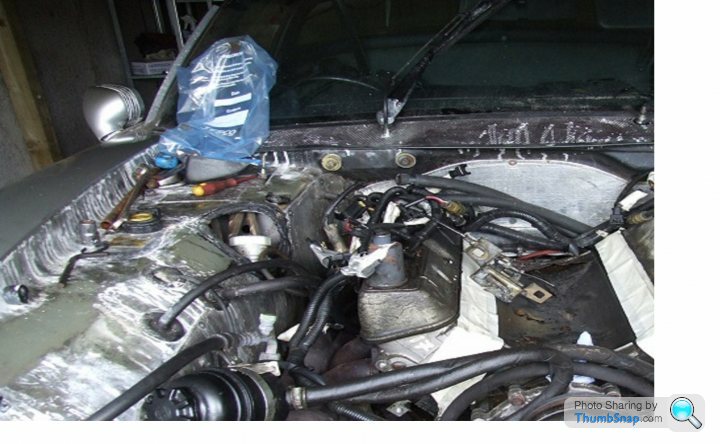
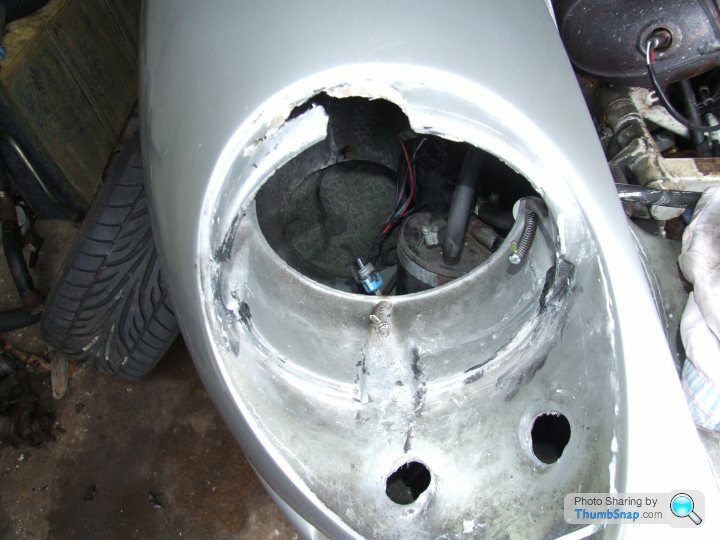
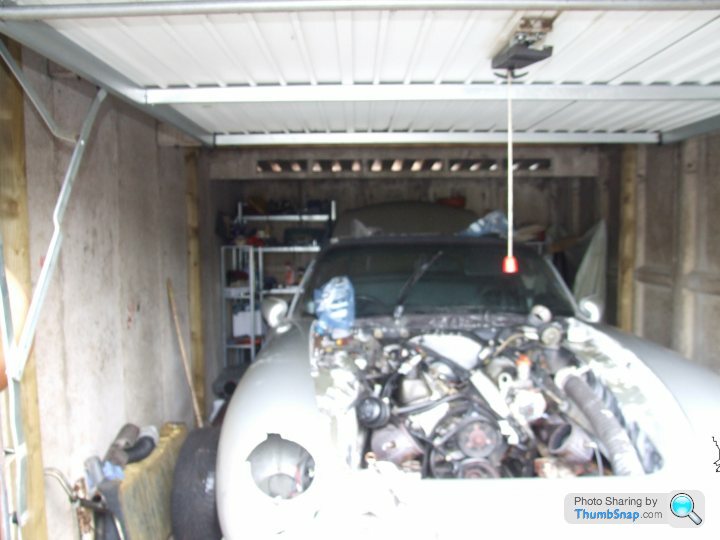
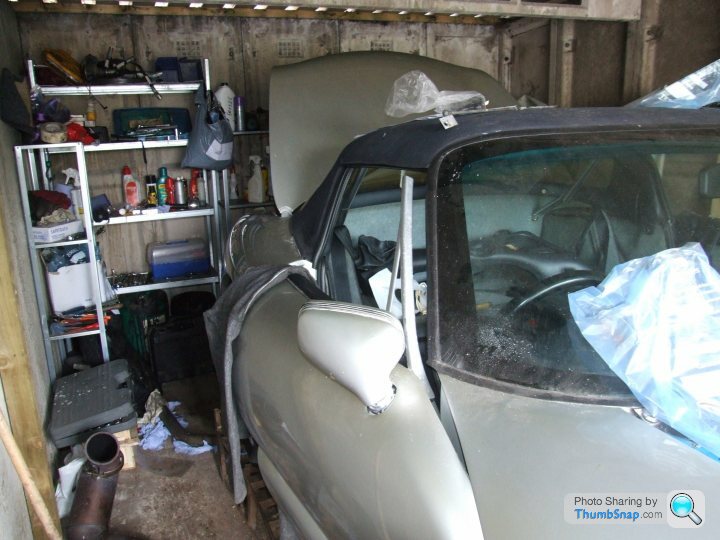
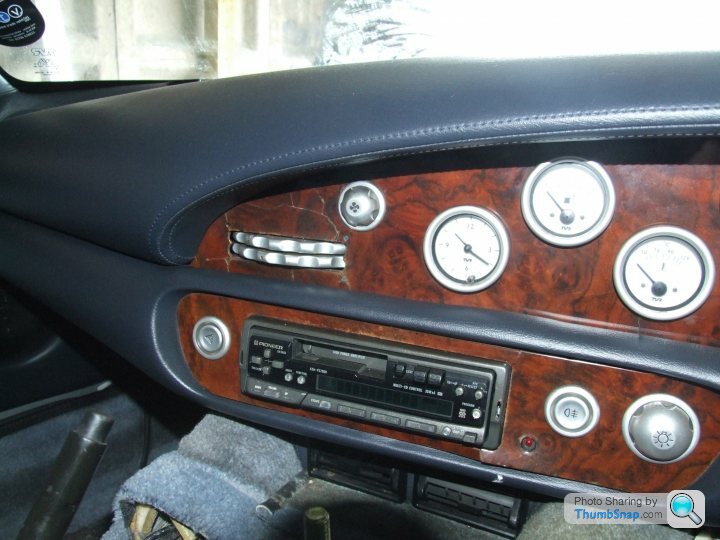
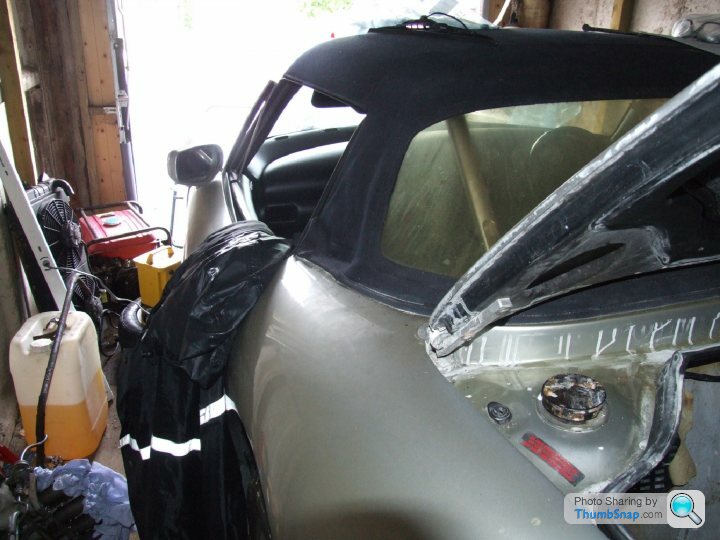
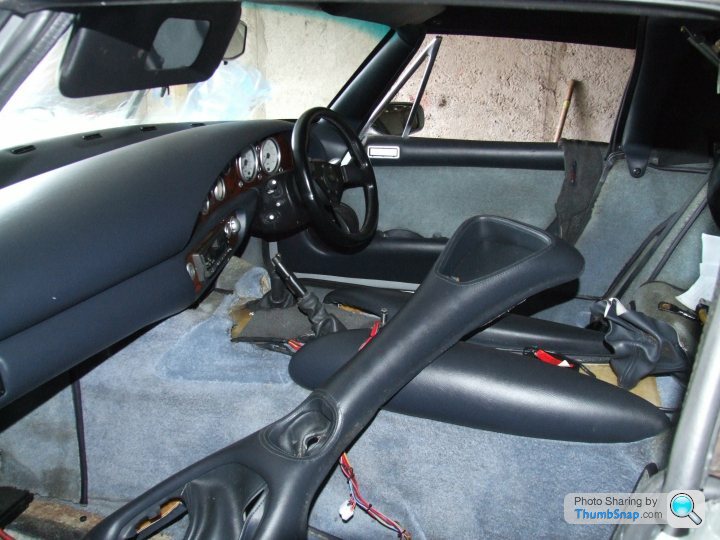
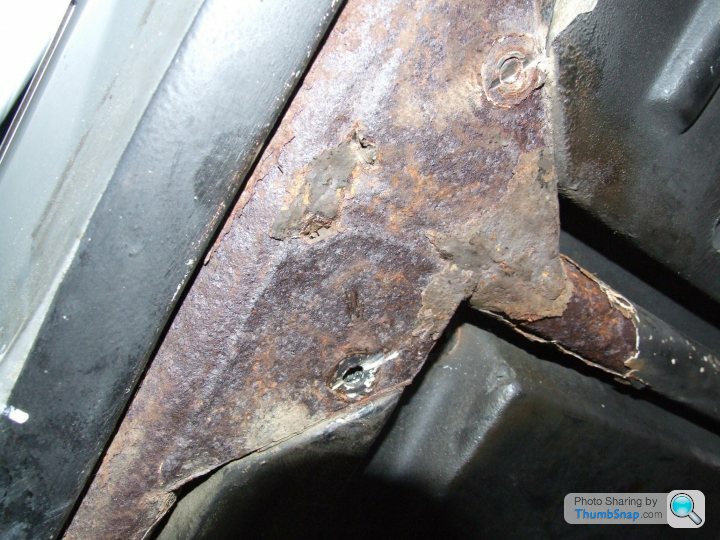
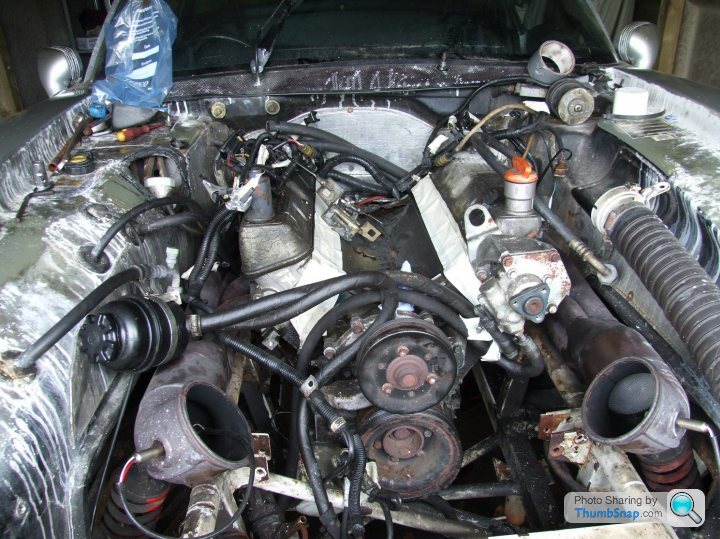 , ok these are the first images of my car i will try and take some better pics of the exterior next week when i pull it out of the garage to remove the engine, as of yesterday i have managed to remove all engine mounting bolts and all body bolts so it will be a case of wednesday Engine out, and saturday i will remove the body.


 |http://thumbsnap.com/NWm61JwG[/ukorl]
Gassing Station | General TVR Stuff & Gossip | Top of Page | What's New | My Stuff