Outrigger help
Discussion


Does anyone have any tricks or tips for tidying up the upper surfaces of the outermost outriggers that run the length of the car under the fibreglass of the doors etc. I'd like to be able to get rid of flaking powdercoat and apply rust inhibitor without having to do a body lift. Is this even possible?
Thanks
Thanks

I think you will struggle to do a decent job and fully inspect the condition of your out riggers without raising the body.
There are some very good body lift guides for info. I had not done anything like it before, but also did mine on the drive with a basic tool kit. Actually still doing it. Once you start, you end up doing other bits whilst you have the access. Be warned!
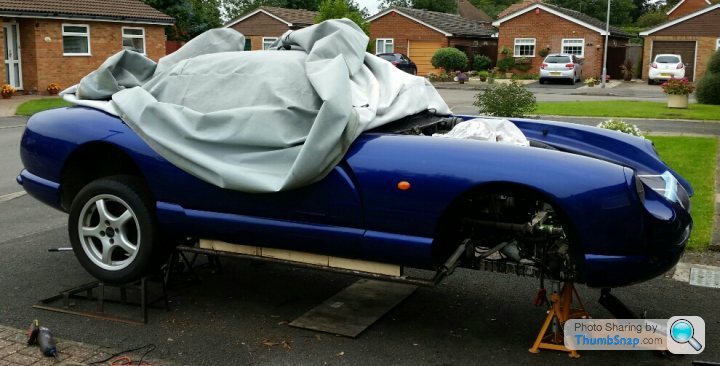
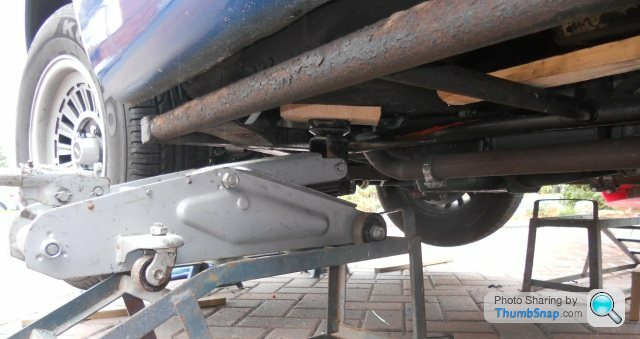
There are a few variations on the theme, but all seem to require a couple of pairs of axle stands, wheel ramps and a trolley jack or two.
I was doing a pre cat removal as well so had the manifolds off which allowed the body to be raised higher for better access.
There are some very good body lift guides for info. I had not done anything like it before, but also did mine on the drive with a basic tool kit. Actually still doing it. Once you start, you end up doing other bits whilst you have the access. Be warned!
There are a few variations on the theme, but all seem to require a couple of pairs of axle stands, wheel ramps and a trolley jack or two.
I was doing a pre cat removal as well so had the manifolds off which allowed the body to be raised higher for better access.
Badgerchim said:
I think you will struggle to do a decent job and fully inspect the condition of your out riggers without raising the body.
There are some very good body lift guides for info. I had not done anything like it before, but also did mine on the drive with a basic tool kit. Actually still doing it. Once you start, you end up doing other bits whilst you have the access. Be warned!
There are a few variations on the theme, but all seem to require a couple of pairs of axle stands, wheel ramps and a trolley jack or two.
I was doing a pre cat removal as well so had the manifolds off which allowed the body to be raised higher for better access.
Thanks for this info. To body lift a chim by 3-4 inches how many parts need removing/disconnecting as a bare minimum? There are some very good body lift guides for info. I had not done anything like it before, but also did mine on the drive with a basic tool kit. Actually still doing it. Once you start, you end up doing other bits whilst you have the access. Be warned!
There are a few variations on the theme, but all seem to require a couple of pairs of axle stands, wheel ramps and a trolley jack or two.
I was doing a pre cat removal as well so had the manifolds off which allowed the body to be raised higher for better access.
Not difficult on Griff and Chim. Thumbe size hole under wheel arches on outer corners of out riggers. Use extension tube to pump a 50/50 mix of waxoil/white spirit to soak upper surface of outriggers and corner plates. Do this after using the emery strips and anti rust converting fluid. Lots of waxoil dripping on newspapers on the floor indicates a good protective SOAKING of the outriggers top surface. Best done in Summer. Now getting too cold for waxoil to flow easily. Can be done without a time consuming body lift. However, body lift required for new outriggers.
May be possible to use use enamel paint or Weathershield paint In the same way after the anti rust fluid but before finishing with waxoil. A good practice also even with new outriggers. New Galvanised outriggers even better, no more rusting ever!
May be possible to use use enamel paint or Weathershield paint In the same way after the anti rust fluid but before finishing with waxoil. A good practice also even with new outriggers. New Galvanised outriggers even better, no more rusting ever!
Edited by EGB on Sunday 22 November 00:53
phillpot said:
nice if you have access to a fully equipped workshop but can be done on a driveway with a few basic tools.
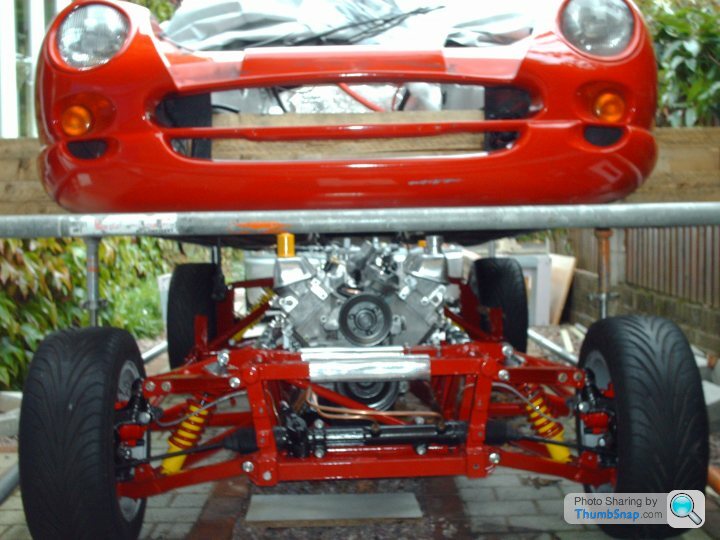
Not a Chimaera but same effect..........
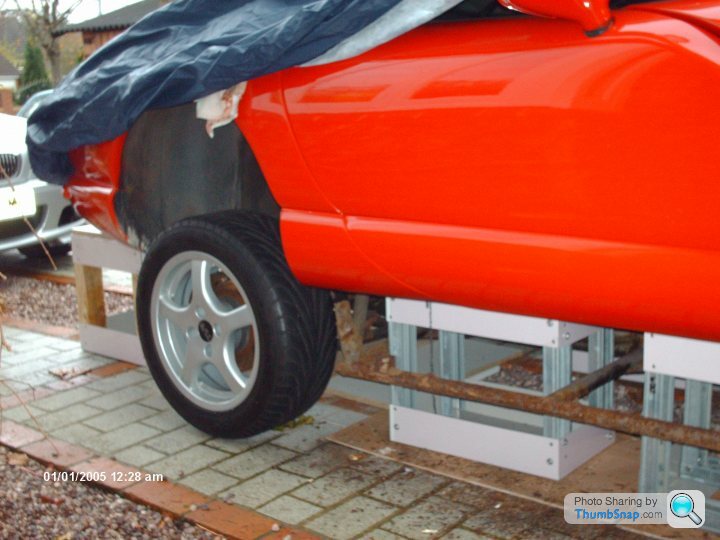
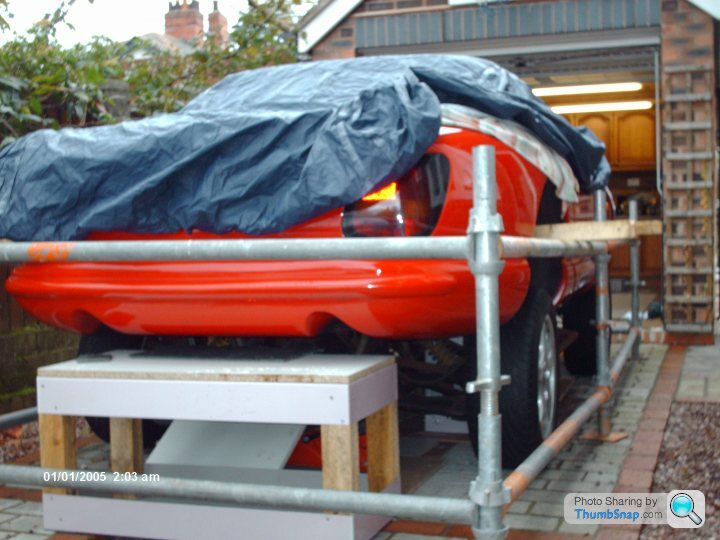
On the driveway but with some "adapted scaffold" and home made box supports to support the body until you can lift it high enough on the scaffold.Not a Chimaera but same effect..........
The corners are threaded so even on your own, you turn the screw on each corner, a few turns at a time and raise the body high enough to roll out the chassis.
The body was then lowered and sat on the homemade supports under a cover, for 6 months or so whilst i worked on the chassis in the garage.
[url]
 |http://thumbsnap.com/radD3C5F[/url
 ]

All going back together.
EGB said:
Not difficult on Griff and Chim. Thumbe size hole under wheel arches on outer corners of out riggers. Use extension tube to pump a 50/50 mix of waxoil/white spirit to soak upper surface of outriggers and corner plates. Do this after using the emery strips and anti rust converting fluid. Lots of waxoil dripping on newspapers on the floor indicates a good protective SOAKING of the outriggers top surface. Best done in Summer. Now getting too cold for waxoil to flow easily. Can be done without a time consuming body lift. However, body lift required for new outriggers.
May be possible to use use enamel paint or Weathershield paint In the same way after the anti rust fluid but before finishing with waxoil. A good practice also even with new outriggers. New Galvanised outriggers even better, no more rusting ever!
Thanks EGB; this is the kind of advice I'm after at the current time. I've ordered a cheapo USB boroscope to inspect the tops of the outriggers for holes before I go any further. Will post these here if interesting. If in a shocking state, then new outriggers it is.May be possible to use use enamel paint or Weathershield paint In the same way after the anti rust fluid but before finishing with waxoil. A good practice also even with new outriggers. New Galvanised outriggers even better, no more rusting ever!
Edited by EGB on Sunday 22 November 00:53
TJC46 said:
phillpot said:
nice if you have access to a fully equipped workshop but can be done on a driveway with a few basic tools.
Not a Chimaera but same effect..........
On the driveway but with some "adapted scaffold" and home made box supports to support the body until you can lift it high enough on the scaffold.Not a Chimaera but same effect..........
The corners are threaded so even on your own, you turn the screw on each corner, a few turns at a time and raise the body high enough to roll out the chassis.
The body was then lowered and sat on the homemade supports under a cover, for 6 months or so whilst i worked on the chassis in the garage.
[url]
|http://thumbsnap.com/radD3C5F[/url ]
All going back together.
TJC46 said:
On the driveway but with some "adapted scaffold" and home made box supports to support the body until you can lift it high enough on the scaffold.
The corners are threaded so even on your own, you turn the screw on each corner, a few turns at a time and raise the body high enough to roll out the chassis.
The body was then lowered and sat on the homemade supports under a cover, for 6 months or so whilst i worked on the chassis in the garage.
[url]|http://thumbsnap.com/radD3C5F[/url
]
All going back together.
Wow - impressive work! + great resultsThe corners are threaded so even on your own, you turn the screw on each corner, a few turns at a time and raise the body high enough to roll out the chassis.
The body was then lowered and sat on the homemade supports under a cover, for 6 months or so whilst i worked on the chassis in the garage.
[url]
|http://thumbsnap.com/radD3C5F[/url ]
All going back together.
OP - I've 'tidied' outriggers before using a 'shaped' hack saw blade (good for stuck stones and debris out) and strips of emry / lions tongue to clean off surface rust, etc. As has been stated its then coating and painting that an be tricky - I used kurust to neutralise the rust followed by a few coats of paint using a syringe and tube to liberally squirt paint everywhere! This is not ideal and no substitute for the body lift approach.
As stated this was a tidy up and may not be applicable if your chassis is too far gone? There are some real horror shows on the net on what appear to be really nice, sound cars.
Hopefully this won't be the case with yours - What year and general condition is your car?
Worst case you need to be prepared to replace them depending on what you find? Fingers crossed for you.
peteA said:
There are some real horror shows on the net on what appear to be really nice, sound cars.
Worst case you need to be prepared to replace them depending on what you find? Fingers crossed for you.
The above is very true. I had my outriggers inspected and poked, prodded etc. in all the normal areas where they start to decay and they were very solid and had never picked up an MOT advisory in the 5+ years I have owned the car. I then bit the bullet and had Dan Taylor take the body off and saw the top of the outriggers were terrible and the top of the chassis needed a little attention with flaking paint and some small rust spots. Neither of these areas would have been visible with the body on the car and I made the decision to have Dan replace the outriggers and rub down the chassis and make a few small repairs to the minor rust spots and repaint it all for me. I am now certain that when the car is returned to me it will be solid and good for another 20+years Worst case you need to be prepared to replace them depending on what you find? Fingers crossed for you.

The only downside to having the body off is being able to see other things...........so a fully refurbished steering rack is in progress with a local firm and a brand new alloy radiator will be complimented with new hoses and a new metal u bend

peteA said:
Wow - impressive work! + great results
OP - I've 'tidied' outriggers before using a 'shaped' hack saw blade (good for stuck stones and debris out) and strips of emry / lions tongue to clean off surface rust, etc. As has been stated its then coating and painting that an be tricky - I used kurust to neutralise the rust followed by a few coats of paint using a syringe and tube to liberally squirt paint everywhere! This is not ideal and no substitute for the body lift approach.
As stated this was a tidy up and may not be applicable if your chassis is too far gone? There are some real horror shows on the net on what appear to be really nice, sound cars.
Hopefully this won't be the case with yours - What year and general condition is your car?
Worst case you need to be prepared to replace them depending on what you find? Fingers crossed for you.
Thanks. Need to fashion something with a curve to get at the tops. Like the shaped hacksaw blade idea, and the syringe and tube for the paint. Was thinking of running a Kurust soaked thin sponge along the length of the hidden outrigger tops after first sanding and de-greasing them. The overall condition of my car is pretty good in most areas thanks to Waxoyl but powdercoating coming off in huge flakes on the hidden outrigger tops along with much rust.OP - I've 'tidied' outriggers before using a 'shaped' hack saw blade (good for stuck stones and debris out) and strips of emry / lions tongue to clean off surface rust, etc. As has been stated its then coating and painting that an be tricky - I used kurust to neutralise the rust followed by a few coats of paint using a syringe and tube to liberally squirt paint everywhere! This is not ideal and no substitute for the body lift approach.
As stated this was a tidy up and may not be applicable if your chassis is too far gone? There are some real horror shows on the net on what appear to be really nice, sound cars.
Hopefully this won't be the case with yours - What year and general condition is your car?
Worst case you need to be prepared to replace them depending on what you find? Fingers crossed for you.
andy43 said:
/hijack 
Anyone ever used a boroscope to run along the outrigger tops from the wheelarches?
I reckon I might gamble a tenner on an ebay jobbie just to see if it works. A 7mm diameter camera might fit?
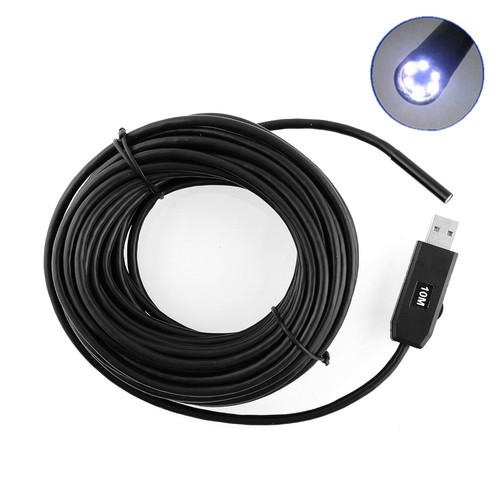
Just ordered one yesterday. Will post the pictures if any good. Would be great if it had a working channel through which you could spray rust inhibitor, paint or waxoyl. Dream on...........Anyone ever used a boroscope to run along the outrigger tops from the wheelarches?
I reckon I might gamble a tenner on an ebay jobbie just to see if it works. A 7mm diameter camera might fit?
GasDoc said:
Just ordered one yesterday. Will post the pictures if any good. Would be great if it had a working channel through which you could spray rust inhibitor, paint or waxoyl. Dream on...........
Good stuff - be interesting to see if it gives a clear enough picture to work with Gassing Station | General TVR Stuff & Gossip | Top of Page | What's New | My Stuff