Chipex kit results
Discussion


So I got the chipex kit a few weeks ago and only just got round to giving it a go, I wanted to post the results for everyone to see just how impressive these kits are.
I concentrated on two points on my car that were worst for before and after results....
This is the kit as it comes..
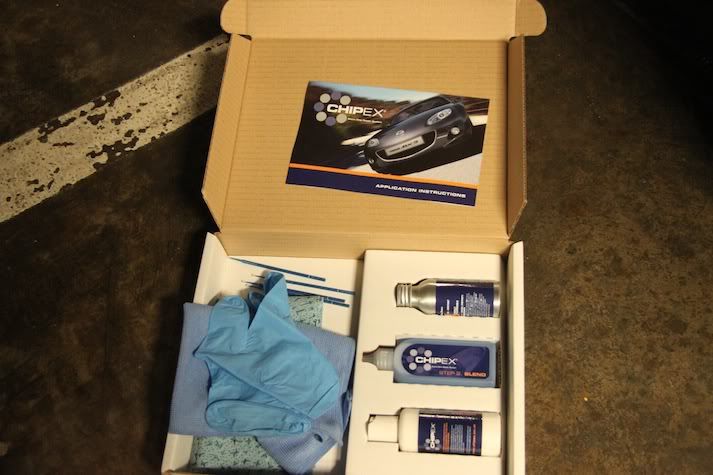
Paintbrushes, gloves, microfibre cloth, blending cloth, paint, blending solution and polish.
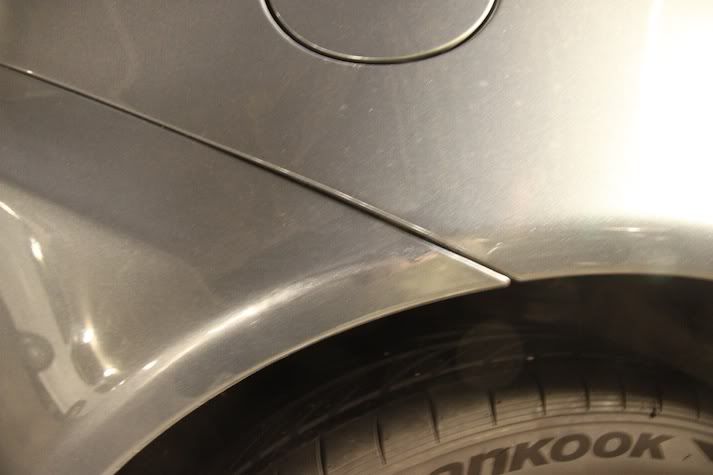
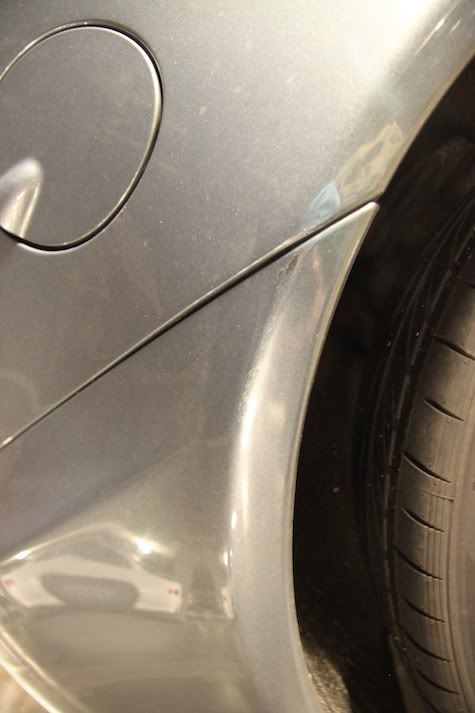
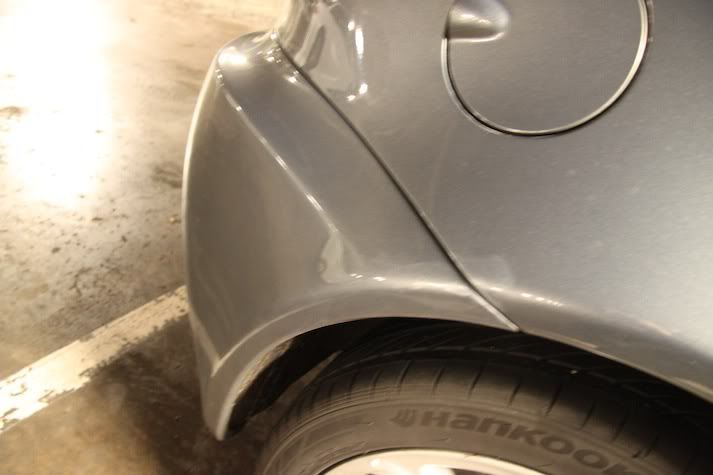
So here is the worst part of my car, just on the rear bumper behind the rear wheel where the car had been scuffed down to the black plastic of the bumper.

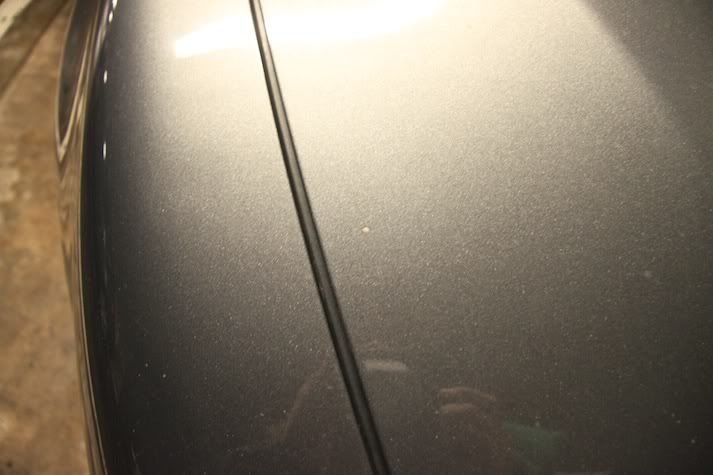
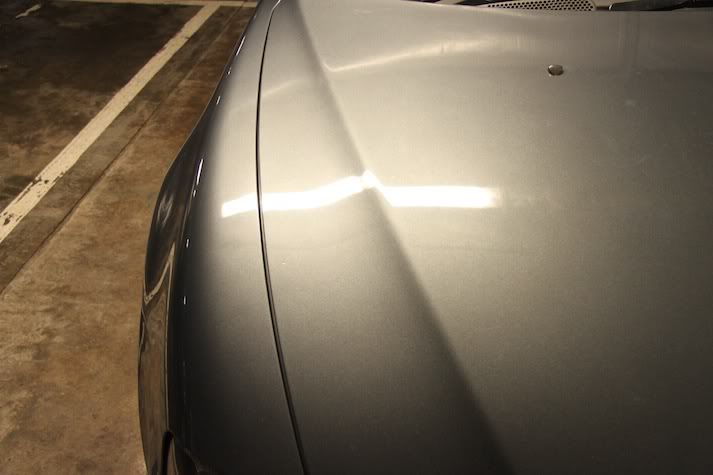
Here is the other part, a very deep chip in the front bonnet. I thought this would be an excellent test for the Chipex kit as its the deepest chip and right down to the metal.
I will add that it is imperative that you thoroughly clean the areas you are going to work on before you start.
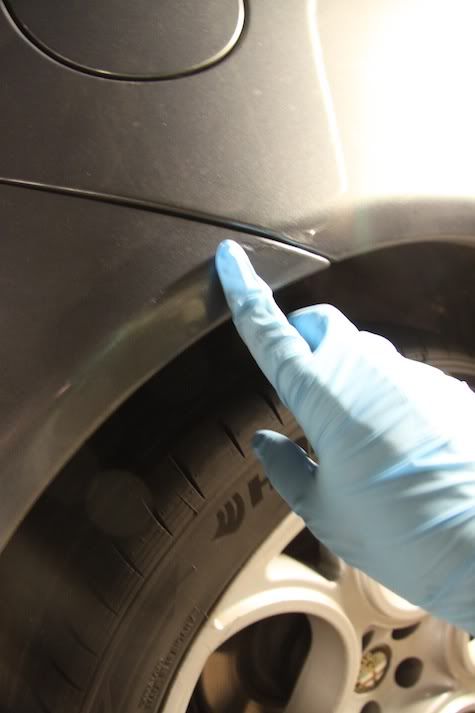
Step 1. - So on the rear arch, liberally apply the paint and then smudge it to a thin layer using your finger in the glove supplied.
Then you leave this to dry which takes between 40 seconds and 5 minutes depending on the amount of paint used and temperature.
Step 2. Then out comes the blending solution, which you put on the cloth supplied and rub very gently over the treatment area.
After my first attempt this is what I ended up with....
Now as you can see there is still an area which is not totally covered.
Repeat steps 1 and 2,
Then I get this
Still better but not quite there so I did steps 1 and 2 again.. and result! You really do need to build up those layers by repeating these steps, especially if you are covering a large area or have a very deep chip.

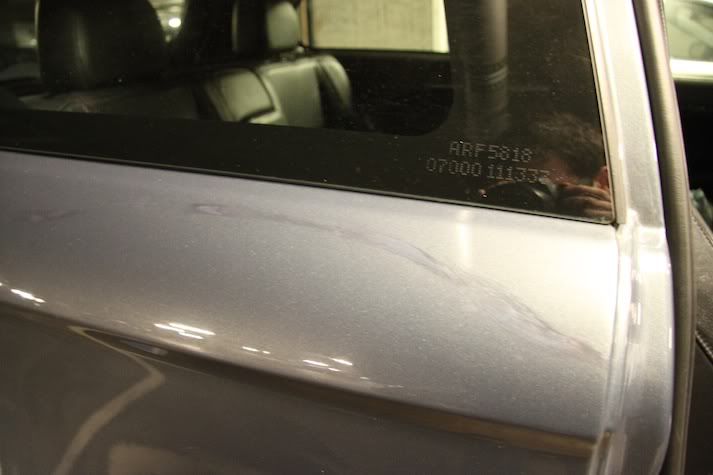
Huge improvement, only if you look very closely can you see where the original blemishes were.
Step 3 , uses the polish which seems to be slightly abrasive and you only need a very small amount over the area to finish...
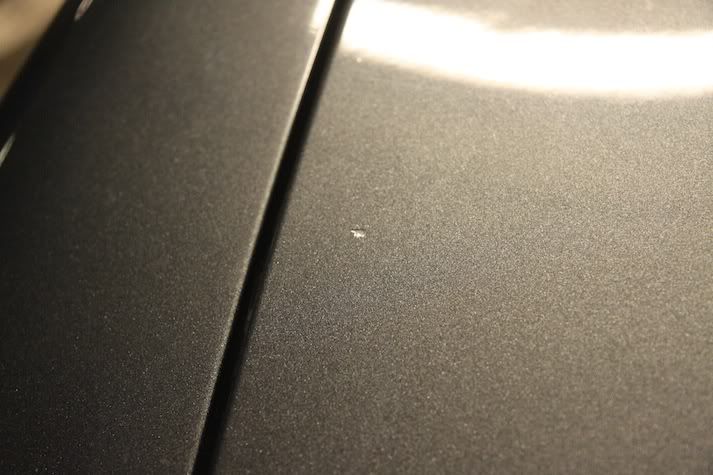
It leaves a haze when dry (this is where my car had been keyed)
Then you just wipe off the polish with the other side of the microfibre cloth...

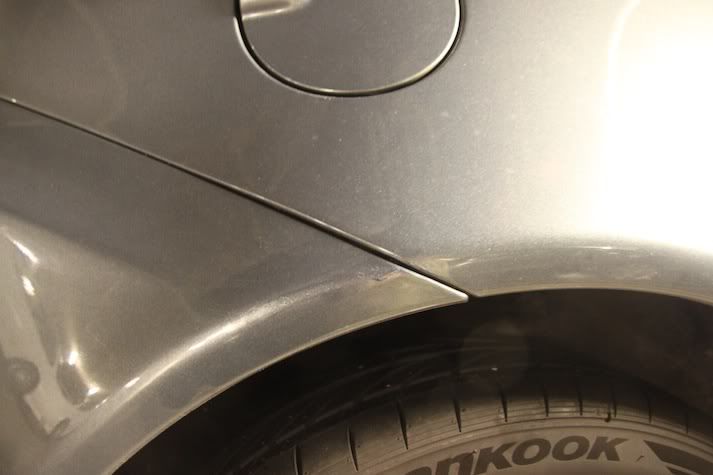
Here is the final image of the bonnet area as shown pre treatment above

Only in artificial light can you see this now (which my car park has haha)
Overally I am well chuffed with the results and highly recommend this kit to all our site members.
I will say however, that if you have large areas and you are concerned that the chipex kit may not help, email the guys with images of the area and they will get straight back to you.
www.chipex.co.uk
I concentrated on two points on my car that were worst for before and after results....
This is the kit as it comes..
Paintbrushes, gloves, microfibre cloth, blending cloth, paint, blending solution and polish.
So here is the worst part of my car, just on the rear bumper behind the rear wheel where the car had been scuffed down to the black plastic of the bumper.
Here is the other part, a very deep chip in the front bonnet. I thought this would be an excellent test for the Chipex kit as its the deepest chip and right down to the metal.
I will add that it is imperative that you thoroughly clean the areas you are going to work on before you start.
Step 1. - So on the rear arch, liberally apply the paint and then smudge it to a thin layer using your finger in the glove supplied.
Then you leave this to dry which takes between 40 seconds and 5 minutes depending on the amount of paint used and temperature.
Step 2. Then out comes the blending solution, which you put on the cloth supplied and rub very gently over the treatment area.
After my first attempt this is what I ended up with....
Now as you can see there is still an area which is not totally covered.
Repeat steps 1 and 2,
Then I get this
Still better but not quite there so I did steps 1 and 2 again.. and result! You really do need to build up those layers by repeating these steps, especially if you are covering a large area or have a very deep chip.
Huge improvement, only if you look very closely can you see where the original blemishes were.
Step 3 , uses the polish which seems to be slightly abrasive and you only need a very small amount over the area to finish...
It leaves a haze when dry (this is where my car had been keyed)
Then you just wipe off the polish with the other side of the microfibre cloth...
Here is the final image of the bonnet area as shown pre treatment above
Only in artificial light can you see this now (which my car park has haha)
Overally I am well chuffed with the results and highly recommend this kit to all our site members.
I will say however, that if you have large areas and you are concerned that the chipex kit may not help, email the guys with images of the area and they will get straight back to you.
www.chipex.co.uk
Edited by V6GT on Thursday 5th September 12:32
nickg123 said:
That last pic looks terrible, I hope that's just the way it looks in the pic but I can see a big smudge of paint from the bumper up to the arch?? Is that just a dodgy pic or is that how it looks??
That's a reflection actually Edited by OperationAlfa on Tuesday 10th January 11:18
Gassing Station | Bodywork & Detailing | Top of Page | What's New | My Stuff