Attempting DIY Bumper Repair........
Discussion


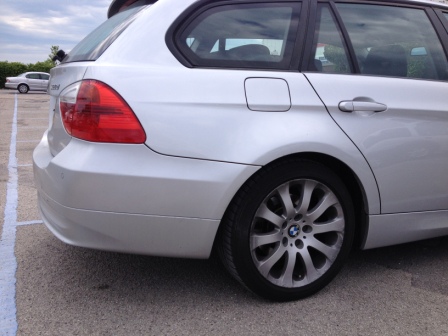
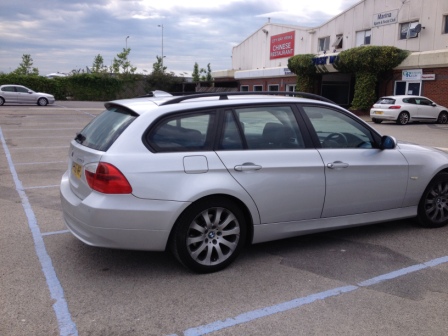
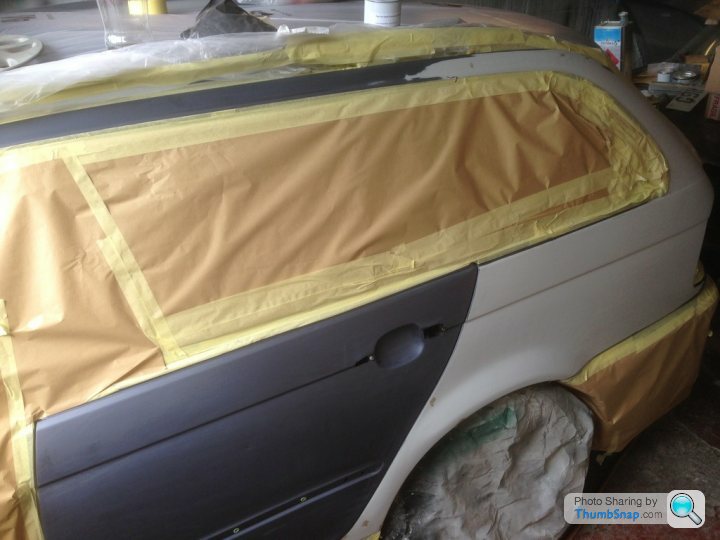
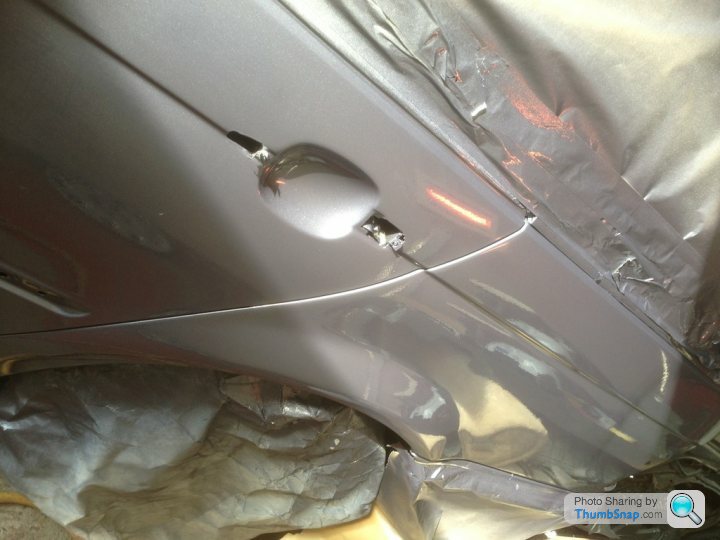
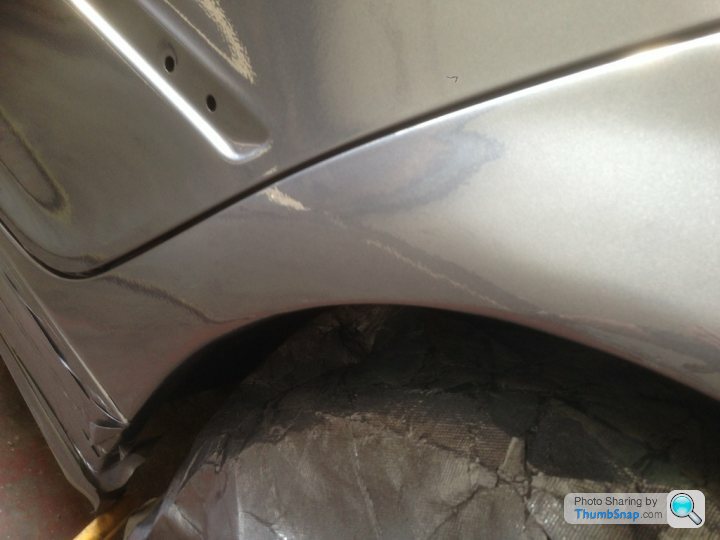
Well, I gave one side a go. I have given it a coat of lacquer but I was having to spray outside and conditions weren't great and I will have to give it another going over.
Given the cars silver, I personally dont think it looks "s t" as people suspected it might look and I think its another case for people giving things a go instead of throwing cash around first. In this instance, time really is not an excuse. I wet and dried, filled, primed, painted lacquered across a number of evenings as and when I could.
Thanks to those who encouraged having a go.
Given the cars silver, I personally dont think it looks "s
t" as people suspected it might look and I think its another case for people giving things a go instead of throwing cash around first. In this instance, time really is not an excuse. I wet and dried, filled, primed, painted lacquered across a number of evenings as and when I could.Thanks to those who encouraged having a go.
Did you lacquer it this time? It's really the key to getting a good match and glossy Finish.
Looks like a good effort though. I've done loads of similar repairs in the past. The most laborious part is the masking I find.
Edit; You did laquer it. I find its best to spray the laquer before the colour coat is fully dry. If you can get some decent coverage you can get away without flatting it back!
Edited by Leptons on Sunday 23 August 08:49
Some good work here but, please forget about the aerosols you need a proper 2k product, it is much cheaper in the long run and will last. A 50l compressor is around £50 second hand off ebay, you need a water trap and filter. A local paint factors will supply you with everything you need forget about Halfords.
I've had no training other than you tube videos, ok have watched a few people do it over the years and did this job on a e36 after two months of messing about... it aint rocket science!
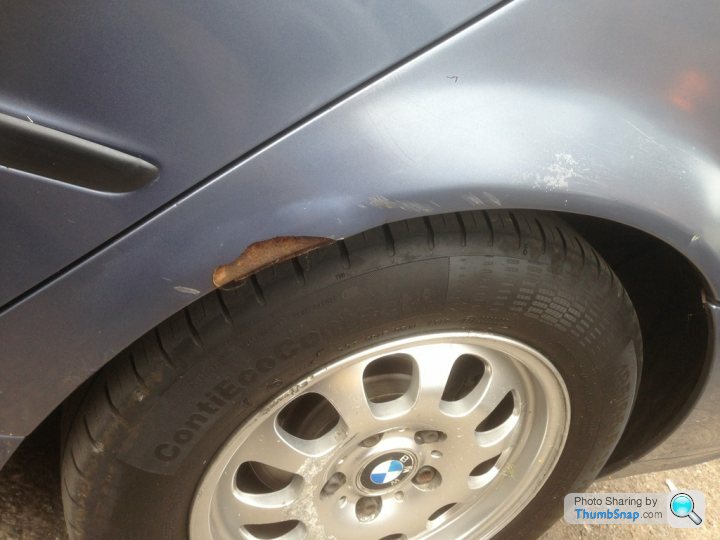
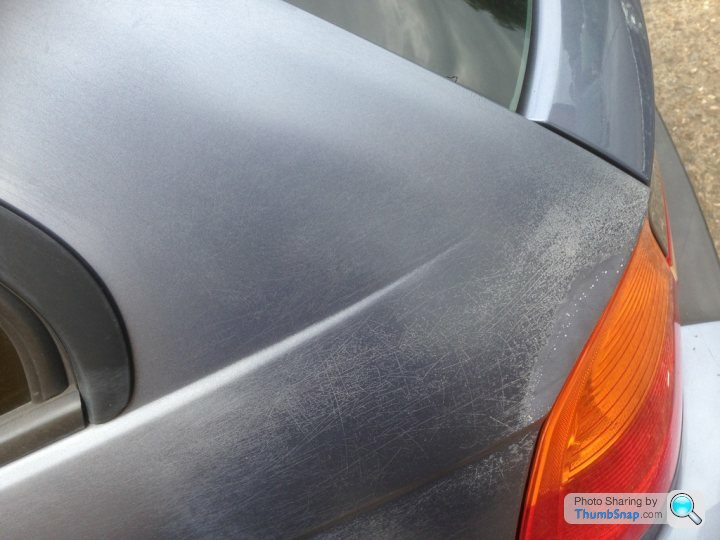


I'm not a car painter and the pictures are gun finish before flatting, but you get the idea.
Learnt everything from
https://www.youtube.com/watch?v=P_9WQmicyJU
and
https://www.youtube.com/watch?v=PnpZM6jmBk0
With these guys there is nothing you cannot learn just by watching and using your brain!
I've had no training other than you tube videos, ok have watched a few people do it over the years and did this job on a e36 after two months of messing about... it aint rocket science!
I'm not a car painter and the pictures are gun finish before flatting, but you get the idea.
Learnt everything from
https://www.youtube.com/watch?v=P_9WQmicyJU
and
https://www.youtube.com/watch?v=PnpZM6jmBk0
With these guys there is nothing you cannot learn just by watching and using your brain!
Thanks for the links. Nice work. Completely agree with everything you say and I look forward to tackling something with a gun and compressor in the future.
For now whilst I currently don't have a garage or a compressor or a gun and anywhere to store a comoressor etc the rattle can has done a reasonable job.
Nice Garage btw.
Thanks
For now whilst I currently don't have a garage or a compressor or a gun and anywhere to store a comoressor etc the rattle can has done a reasonable job.
Nice Garage btw.
Thanks
Fantastic work by bioth people. On the one hand the newer car has been repaired to a really acceptable standard for a small outlay and limited time and probably kept the car useable. The older car has been repaired to a professional standard but requiring much much time and resources.
I think it's horses for courses . Rattle cans can give good results if you are careful and committed. Sourcing and using advanced kit and materials is acheivable too. But it takes longer.
Take your pick.
Personally I have tried to do smart repairs
2 month old silver Focus wheel arch. It was a nightmare to get the colour right ..... Eventually I used an airbrush driven from a small compressor. I always knew it was there but others didn't
18 month old Tiguan. Again silver.....total total nightmare.....scratched on the wing....smart repair man wouldn't touch it despite having done a perfect job on the same car months earlier. I had several goes with rattle cans and the airbrush and a small spray gun. Couldn't live with it and had the wing re sprayed.
I did successfully repair my 6 year old silver cmax. Air brush again
My best was on my 135000 mile Saab 93 in a lovely dark blue metallic. A much better colour to work with and a removed many blemishes by mixing paint and lacquer together and brushing in marks and then buffing.
So for me it's avoid silver if possible.....it's a swine!
33q said:
Fantastic work by bioth people. On the one hand the newer car has been repaired to a really acceptable standard for a small outlay and limited time and probably kept the car useable. The older car has been repaired to a professional standard but requiring much much time and resources.
I think it's horses for courses . Rattle cans can give good results if you are careful and committed. Sourcing and using advanced kit and materials is acheivable too. But it takes longer.
Take your pick.
Personally I have tried to do smart repairs
2 month old silver Focus wheel arch. It was a nightmare to get the colour right ..... Eventually I used an airbrush driven from a small compressor. I always knew it was there but others didn't
18 month old Tiguan. Again silver.....total total nightmare.....scratched on the wing....smart repair man wouldn't touch it despite having done a perfect job on the same car months earlier. I had several goes with rattle cans and the airbrush and a small spray gun. Couldn't live with it and had the wing re sprayed.
I did successfully repair my 6 year old silver cmax. Air brush again
My best was on my 135000 mile Saab 93 in a lovely dark blue metallic. A much better colour to work with and a removed many blemishes by mixing paint and lacquer together and brushing in marks and then buffing.
So for me it's avoid silver if possible.....it's a swine!
Just what did you find hard about silver? Are you sure you got the correct colour as off the shelf cans from main dealers are not really designed for jobs like this.I think it's horses for courses . Rattle cans can give good results if you are careful and committed. Sourcing and using advanced kit and materials is acheivable too. But it takes longer.
Take your pick.
Personally I have tried to do smart repairs
2 month old silver Focus wheel arch. It was a nightmare to get the colour right ..... Eventually I used an airbrush driven from a small compressor. I always knew it was there but others didn't
18 month old Tiguan. Again silver.....total total nightmare.....scratched on the wing....smart repair man wouldn't touch it despite having done a perfect job on the same car months earlier. I had several goes with rattle cans and the airbrush and a small spray gun. Couldn't live with it and had the wing re sprayed.
I did successfully repair my 6 year old silver cmax. Air brush again
My best was on my 135000 mile Saab 93 in a lovely dark blue metallic. A much better colour to work with and a removed many blemishes by mixing paint and lacquer together and brushing in marks and then buffing.
So for me it's avoid silver if possible.....it's a swine!
If anything silver is an easy colour to paint as it is very forgiving with lacquer application and it hides repairs very well as it does not have the depth of say black which you can see the reflection through.
With any repair you only ever put base coat (colour) over the repaired area. You concentrate on just putting colour over this until it is covered and then you flick the colour out with the gun - it is quite difficult to accurately flick or blend colour with rattle cans as they have very little flow - they are just a waste of time.
So if you are painting the bottom of a bumper corner, it would be masking off to where the lacquer blend is and then you flick the colour across part of the area and then the transition is invisible and there is absolutely no evidence of a colour change.
I sounds to me that you were trying to keep the repair area too small, you need enough room to blend the colour through the panel otherwise you will see the colour difference regardless of colour.
nct001 said:
Just what did you find hard about silver? Are you sure you got the correct colour as off the shelf cans from main dealers are not really designed for jobs like this.
If anything silver is an easy colour to paint as it is very forgiving with lacquer application and it hides repairs very well as it does not have the depth of say black which you can see the reflection through.
With any repair you only ever put base coat (colour) over the repaired area. You concentrate on just putting colour over this until it is covered and then you flick the colour out with the gun - it is quite difficult to accurately flick or blend colour with rattle cans as they have very little flow - they are just a waste of time.
So if you are painting the bottom of a bumper corner, it would be masking off to where the lacquer blend is and then you flick the colour across part of the area and then the transition is invisible and there is absolutely no evidence of a colour change.
I sounds to me that you were trying to keep the repair area too small, you need enough room to blend the colour through the panel otherwise you will see the colour difference regardless of colour.
Silver is a notoriously difficult colour to match?If anything silver is an easy colour to paint as it is very forgiving with lacquer application and it hides repairs very well as it does not have the depth of say black which you can see the reflection through.
With any repair you only ever put base coat (colour) over the repaired area. You concentrate on just putting colour over this until it is covered and then you flick the colour out with the gun - it is quite difficult to accurately flick or blend colour with rattle cans as they have very little flow - they are just a waste of time.
So if you are painting the bottom of a bumper corner, it would be masking off to where the lacquer blend is and then you flick the colour across part of the area and then the transition is invisible and there is absolutely no evidence of a colour change.
I sounds to me that you were trying to keep the repair area too small, you need enough room to blend the colour through the panel otherwise you will see the colour difference regardless of colour.
Gassing Station | Bodywork & Detailing | Top of Page | What's New | My Stuff