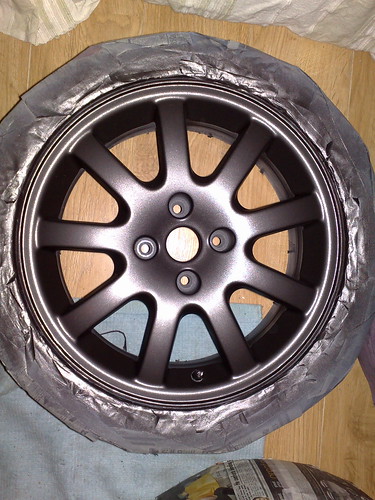
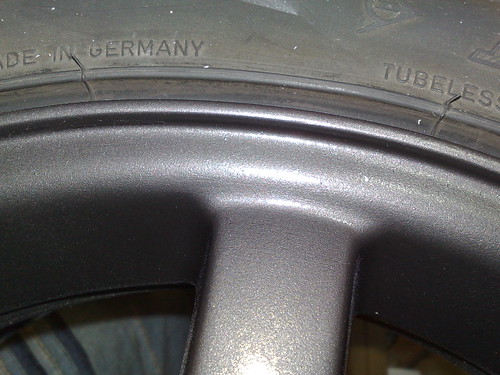
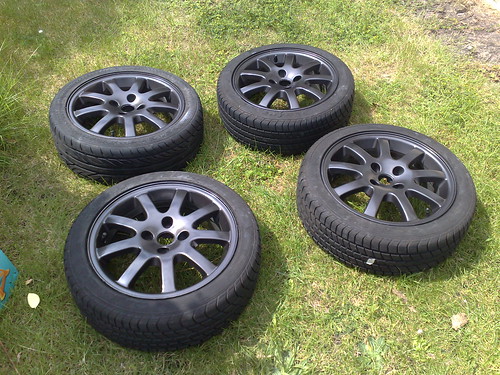
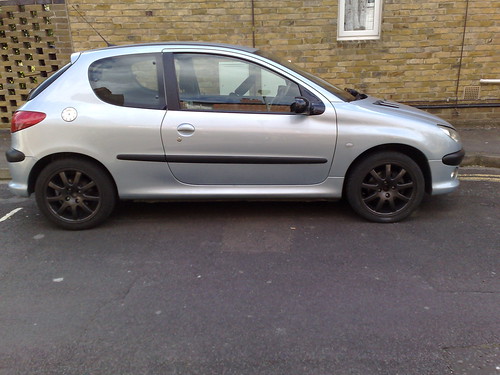
DIY wheel refurb.......
Discussion


Here is a post of mine from the MX5 section, HTH
DIY refurb guide (pasted from my post in another forum, so ignore bits that don't make sense!)
Heres a list of what you need:
- Three large cans of primer
- Three large cans of colour
- Three large cans of lacquer
- Wet and dry sandpaper, range of low to high grits
- Filler e.g. Davids Isopon P38
- Lots of masking tape
- Newspaper
- White spirit
Heres what you do:
1. Clean wheels
- Use your wheel cleaner, then maybe some fairy liquid and warm water
- Wash with plenty of water then dry
2. Mask up tyres
- Obviously this only applies if you are leaving tyres on
- Let some air out
- Apply plenty of masking tape behind the wheel lip
- Mask the rest of the tyre with newspaper

3. Sand down wheels
- Start with a course grit, and sand down the entire wheel
- If the wheel paint is flaking or really corroded, you will need to go down to the metal
- Use less course grit sandpaper until the finish is smooth
4. Fill imperfections, dry and then resand
- Follow filler instructions to get the right consistency - you don't want the filler to set too soon!
- Leave to dry for A LONG time - 48 hours is best
- Sand down using progressively lower course grit, until S-M-O-O-T-H
TIP! This is the most important stage - the more time you spend here, the better the finish. Paint WILL NOT cover up any imperfections!

TIP! Sanding in between coats helps prevent the orange peel effect!
5. Prime wheels
- Clean wheel using white spirit, rinse with water and dry thoroughly
- Leave primer in warm water for half an hour before using, to loosen
- Shake VERY can very well - Apply several thin coats (at least three)
- Do not spray too close
- Leave to dry, and sand in between each coat using a very fine grit

5. Paint wheels
- Leave primer to dry for 48 hours
- Sand lightly, then rinse with water and dry thoroughly
- Again, leave cans in warm water for a while and shake thoroughly
- Aim for lots of very light coats, allow each layer to dry and sand down using a very light grit sandpaper
TIP! When spraying, aim away from the wheel then sweep across. This clears any drips and gives a more misty, fine spray with fewer blobs.
6. Lacquer wheels
- Leave paint to dry for 48 hours
- Same as the other cans, leave in warm water, aim for several thin coats
7. Clean and admire
- Apply some sealant, get the wheels rebalanced and enjoy your hard work


Any questions / corrections let me know!
J
EDIT: I only did the front of the alloys, as I don't think the back of the spokes etc. are painted. However, there is nothing stopping you from doing this, and will probably make the refurb last longer. I think Brian did the whole wheel and it looked ace.
EDIT: By sealant I mean wheel sealant - Poorboys do a good one. However, I used my Nattys paste wax and it did a good job!
EDIT: I put my GTi on steelies whilst working on the refurb, but didn't really drive it!
DIY refurb guide (pasted from my post in another forum, so ignore bits that don't make sense!)
Heres a list of what you need:
- Three large cans of primer
- Three large cans of colour
- Three large cans of lacquer
- Wet and dry sandpaper, range of low to high grits
- Filler e.g. Davids Isopon P38
- Lots of masking tape
- Newspaper
- White spirit
Heres what you do:
1. Clean wheels
- Use your wheel cleaner, then maybe some fairy liquid and warm water
- Wash with plenty of water then dry
2. Mask up tyres
- Obviously this only applies if you are leaving tyres on
- Let some air out
- Apply plenty of masking tape behind the wheel lip
- Mask the rest of the tyre with newspaper
3. Sand down wheels
- Start with a course grit, and sand down the entire wheel
- If the wheel paint is flaking or really corroded, you will need to go down to the metal
- Use less course grit sandpaper until the finish is smooth
4. Fill imperfections, dry and then resand
- Follow filler instructions to get the right consistency - you don't want the filler to set too soon!
- Leave to dry for A LONG time - 48 hours is best
- Sand down using progressively lower course grit, until S-M-O-O-T-H
TIP! This is the most important stage - the more time you spend here, the better the finish. Paint WILL NOT cover up any imperfections!
TIP! Sanding in between coats helps prevent the orange peel effect!
5. Prime wheels
- Clean wheel using white spirit, rinse with water and dry thoroughly
- Leave primer in warm water for half an hour before using, to loosen
- Shake VERY can very well - Apply several thin coats (at least three)
- Do not spray too close
- Leave to dry, and sand in between each coat using a very fine grit
5. Paint wheels
- Leave primer to dry for 48 hours
- Sand lightly, then rinse with water and dry thoroughly
- Again, leave cans in warm water for a while and shake thoroughly
- Aim for lots of very light coats, allow each layer to dry and sand down using a very light grit sandpaper
TIP! When spraying, aim away from the wheel then sweep across. This clears any drips and gives a more misty, fine spray with fewer blobs.
6. Lacquer wheels
- Leave paint to dry for 48 hours
- Same as the other cans, leave in warm water, aim for several thin coats
7. Clean and admire
- Apply some sealant, get the wheels rebalanced and enjoy your hard work
Any questions / corrections let me know!
J
EDIT: I only did the front of the alloys, as I don't think the back of the spokes etc. are painted. However, there is nothing stopping you from doing this, and will probably make the refurb last longer. I think Brian did the whole wheel and it looked ace.
EDIT: By sealant I mean wheel sealant - Poorboys do a good one. However, I used my Nattys paste wax and it did a good job!
EDIT: I put my GTi on steelies whilst working on the refurb, but didn't really drive it!
Edited by JFReturns on Friday 22 October 17:13
Tip. When spraying with rattle cans, do so with the wheel upright - cans have a habit of dripping onto horizontal surfaces.
Cheers
David
www.cardoc-cornwall.co.uk
Cheers
David
www.cardoc-cornwall.co.uk
The topcoats you can buy on the high street shouldn't be exposed to strong chemicals at any point in their life - so if you go DIY, stay away from aggressive cleaners like Wonder Wheels.
Rotate the wheel so that you paint it from several different angles with your colour coats. This will minimise the chance of a spoke side (or similar) not getting properly covered.
Aerosols lose pressure as they start to empty. Warming the can (with warm air or a bucket of warm water) raises the internal pressure and can help compensate and ensure the spray stays consistent as the can empties.
Tol
Not a good idea to use strong acid based cleaners on alloys at all, & on a number of cars if you read the owners handbook it specifically states not to use that type of cleaner.
It can damage iso lacquer, so none iso 2k & single pack lacqers aren't going to last long!
Wonder Wheels contains - amongst other chemicals with 6 foot long names - hydrochloric acid, phosphoric acid and acetic acid. I downloaded the TDS sheet from their website a while ago
That said, if your wheels are THAT bad due to lack of care then you may have no other option.
Edited by paintman on Saturday 23 October 21:19
Tommy Winchester said:
I have just done a set, sanded back to the metal, primed, painted and then clear coat.
It took me about a week of evenings.
I will post some before and after photos when I can.
The wheels are finished, will be refitted tomorrow.It took me about a week of evenings.
I will post some before and after photos when I can.
The work took me a week of evenings, sandpaper from 80-400 grit (80 grit flapwheels), a bloody great drill and a dustmask.
Use the flapwheels to get back to the metal, then the paper to get into any tight spots the flapwheels can not.
Mask off, 2 coats of primer, allow to dry for 24 hours, 2 coats of colour, dry for 24 hours, 2 coats of laquer. Simple!
I didnt pamper them as they will only be winter wheels.
From:

To:


Very handy information and i am tempted to do my own, but i have a problem.
The wheels were damaged at a garage almost 2 years ago now and they had them re-sprayed for me, not a propper job as I knew the guy, but they looked great when first done. Now the paint is starting to chip in the odd spot and it is clear that the surface below wasnt given a key, so will i need to strip the whole wheel back to metal or just back to the original paint and prep the surface properly?
The reason i as is because i think the wheels will be a bit of a pig to strip due to the design.
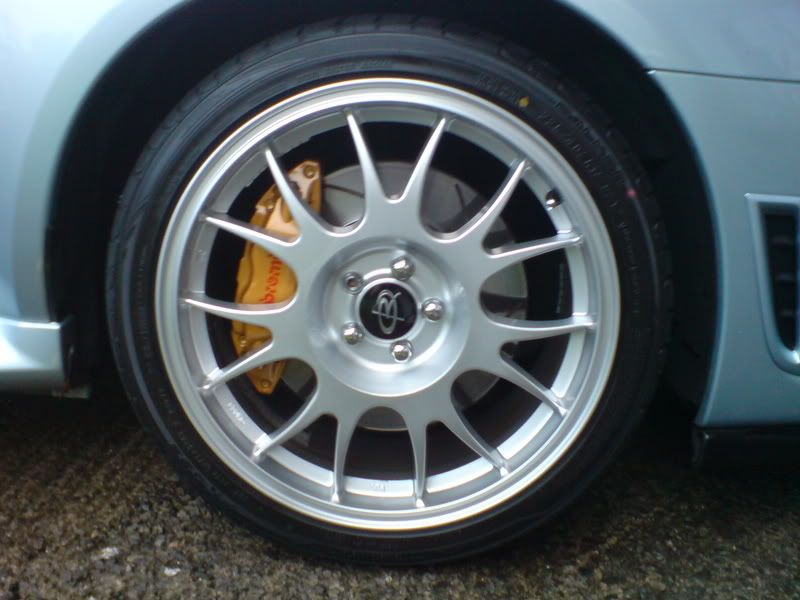
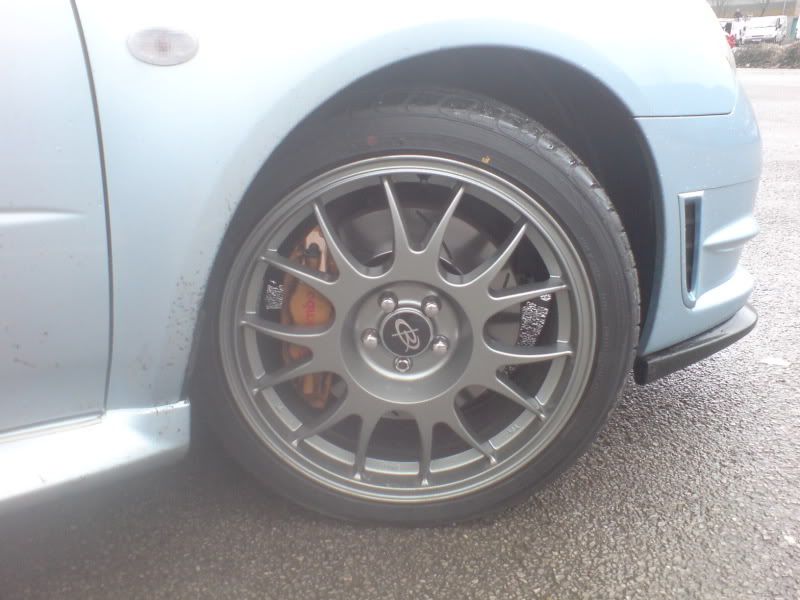
Here they are before and after the last paint went on.
The wheels were damaged at a garage almost 2 years ago now and they had them re-sprayed for me, not a propper job as I knew the guy, but they looked great when first done. Now the paint is starting to chip in the odd spot and it is clear that the surface below wasnt given a key, so will i need to strip the whole wheel back to metal or just back to the original paint and prep the surface properly?
The reason i as is because i think the wheels will be a bit of a pig to strip due to the design.
Here they are before and after the last paint went on.
I'd give the wheels a good blast with a pressure washer to remove any unkeyed paint, then ideally you need to sand as much of the new paint off as you can. If there's just a few odd patches where it wasnt keyed properly, then you'll probably get away with leaving it on & just smoothing the flaking areas. You're better off leaving as much of the original paint on the wheels as you can, this is a much better substrate for the home repairer to paint onto, but if you do go through to bare alloy, always use some sort of acid etch primer, normal stuff wont adhere to the alloy very well & is likely to lift off in time.
As the paintman said, never use any sort of acid based wheel cleaners they even tarnish factory lacquer, so will very quickly attack spray can paints!
As the paintman said, never use any sort of acid based wheel cleaners they even tarnish factory lacquer, so will very quickly attack spray can paints!
TallPaul said:
I'd give the wheels a good blast with a pressure washer to remove any unkeyed paint, then ideally you need to sand as much of the new paint off as you can. If there's just a few odd patches where it wasnt keyed properly, then you'll probably get away with leaving it on & just smoothing the flaking areas. You're better off leaving as much of the original paint on the wheels as you can, this is a much better substrate for the home repairer to paint onto, but if you do go through to bare alloy, always use some sort of acid etch primer, normal stuff wont adhere to the alloy very well & is likely to lift off in time.
As the paintman said, never use any sort of acid based wheel cleaners they even tarnish factory lacquer, so will very quickly attack spray can paints!
Thanks for that, sounds like it could be a go then. Im considering going back to the original colour so that would probably help me too.As the paintman said, never use any sort of acid based wheel cleaners they even tarnish factory lacquer, so will very quickly attack spray can paints!
JFReturns said:
You need to get rid off ALL the paint, it just will not hold for long otherwise. The prep stage is the hardest and most frustrating, but also the most important.
Personally for wheels as nice as yours I would probably take them to a pro and get them powder coated....
Hhmm, was thinking it would be the sensible option, just a matter of cash flow at the moment.Personally for wheels as nice as yours I would probably take them to a pro and get them powder coated....

Hi there
Thanks for the thread on diy alloy restore .
I decided it was time to tidy up my alloys and thought it might be a challenge to have a go myself , so rather than comit myself 100% i have tried a test on my spare wheel which is in a terrible state however the tyre is perfect.
Ive taken some before photos and will randomly take more as l go along
If anyone has any tips for a female attempting this please do post lm sure lll be glad of the tips
please be gentle lm a complete beginner lads
Ta
Kate19660
Hi Guys,
Just in the process of doing my first wheel refurb and I have started with 2 different wheels. An audi one which had a fairly big chunk missing which I have used fibreglass and then filler on top and am fairly happy with so far - I have sanded and now sprayed on spray filler and waiting to sand again.
The other wheel is a a momo corse which had a lot of curb rash on the polished lip. I have sanded back to metal in most places and applied filler. Im not to fussed about making it polished again as I have read that can be quite hard to do. Altho the rest of the wheel is black and has light surface scratches on it. Can I just primer and paint and lacquer to get that shiny black look?
Cheers
Seenan
Gassing Station | Bodywork & Detailing | Top of Page | What's New | My Stuff