Refurbishment of my Maserati Mexico
Discussion


Sunday morning and there is too much snow outside to go out on the mountain bike, so I thought I'd resurrect this thread. The report is that due to a body shop move, the car still isn't painted which is becoming painfully frustrating. On a more positive note, I've been able to look a little deeper into the final paint mix and have the following choices:-
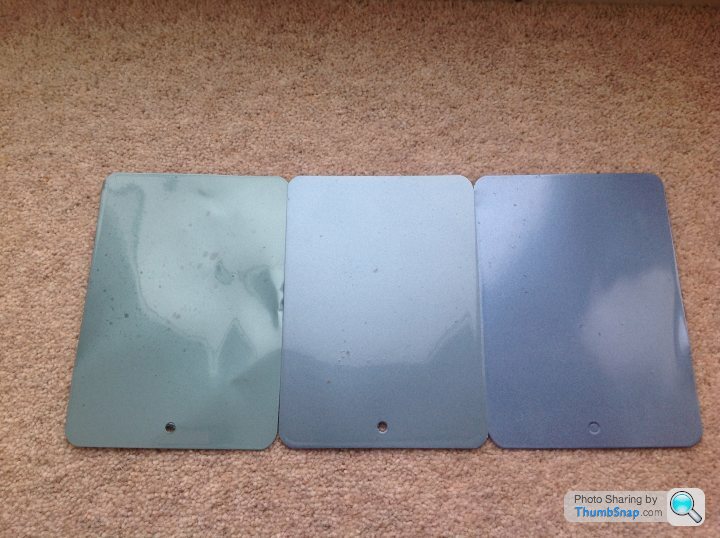
I want a paint that's available via a standard mix from the old charts at the paint shop so have these three samples mixed. The right hand one is a 1980's Maserati colour which is closest to the current (not original) blue. The middle one is a late 1960's Ferrari / Maserati blue ref 106-A-32, with the left hand being another 1970 Ferrari / Maserati blue ref 106-A-38.
I've not been able to find a modern mix reference for the original which I think was Celeste Chiaro Met with a Max Mayer ref of 16.300. But from the research I've done, 106-A-32 (the middle one) is jolly close and my current preference.
Any thoughts?
Paul
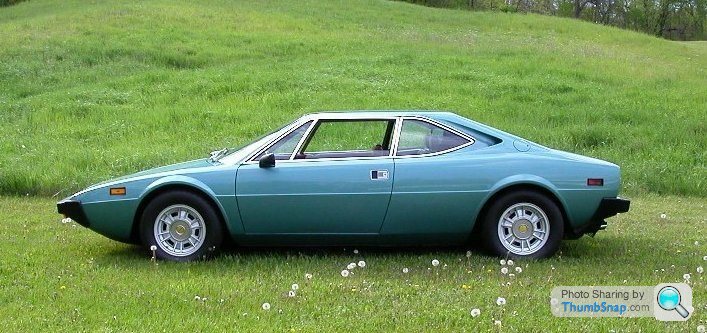
Yes, the 106-A-38 is a lovely period shade, this is it in the flesh:-
As a comparison, here is 106-A-32, paler and again a beautiful period colour, but a little less 'green' and closer to the original.
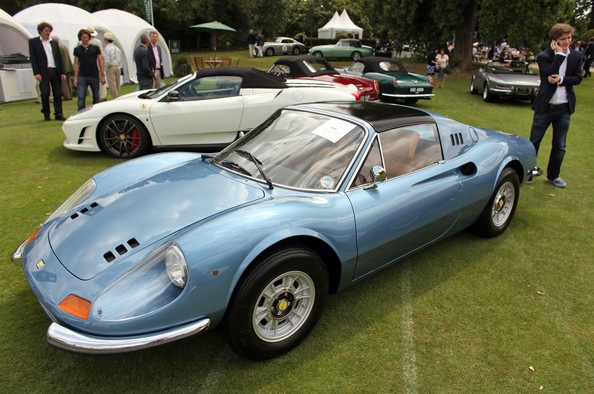
Both would look fantastic..... Pictures copied from Ferrari Dino Uk site which I'll remove if anybody objects.
Paul
As a comparison, here is 106-A-32, paler and again a beautiful period colour, but a little less 'green' and closer to the original.
Both would look fantastic..... Pictures copied from Ferrari Dino Uk site which I'll remove if anybody objects.
Paul
Well after checking out the original Maserati paint chips on the Car Nut site, it's going to be 106-A-32
http://www.thecarnut.com/Manuals/Paint/Paint-chips...
Now to crack the whip with the buggers at the paint shop
Paul
http://www.thecarnut.com/Manuals/Paint/Paint-chips...
Now to crack the whip with the buggers at the paint shop
Paul

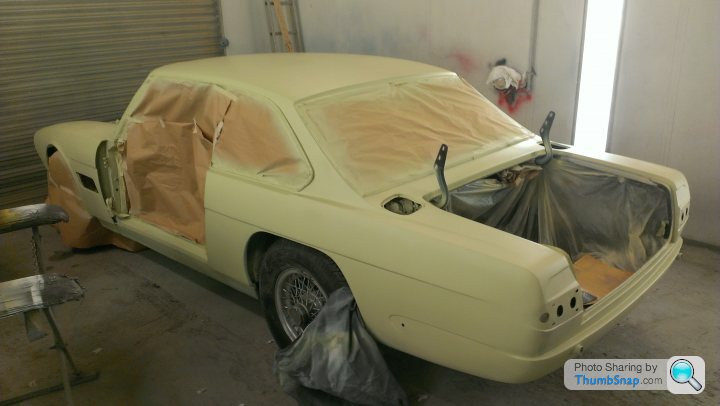
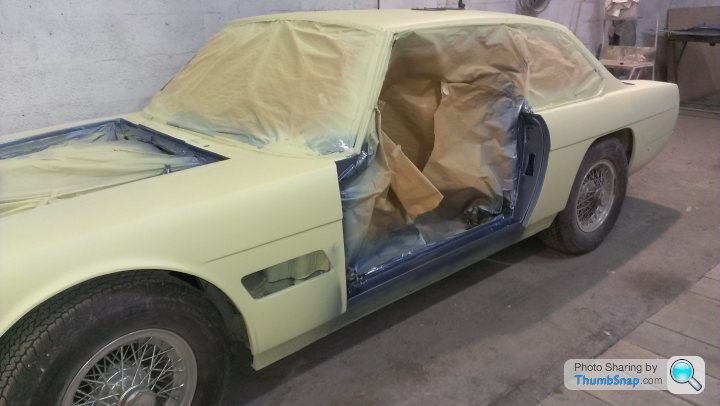
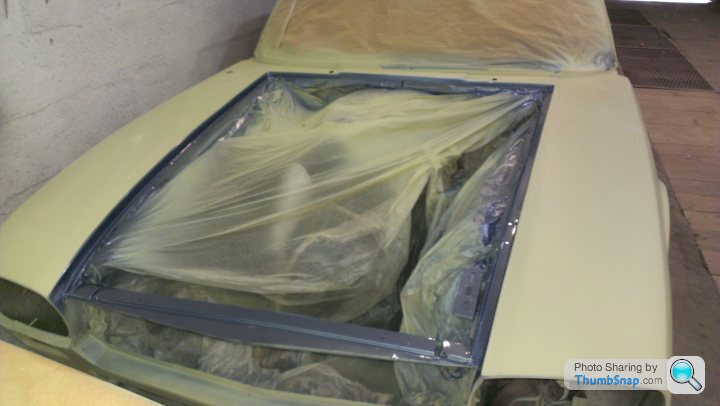
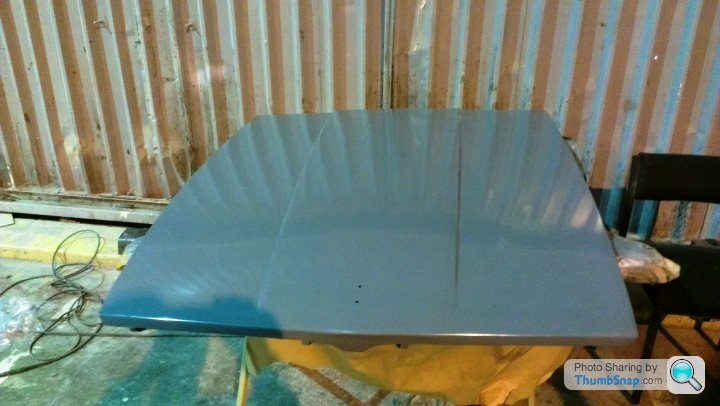
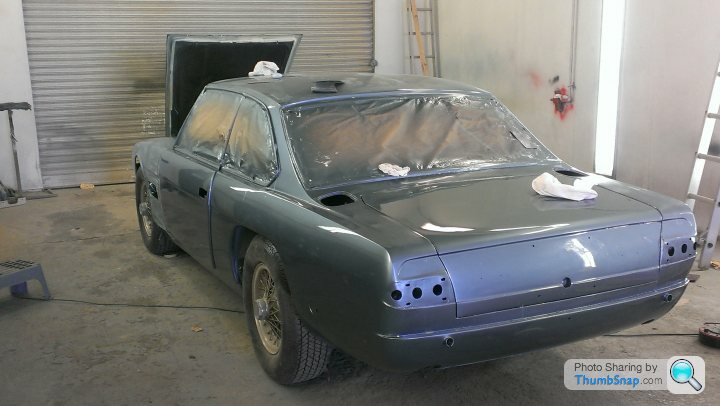
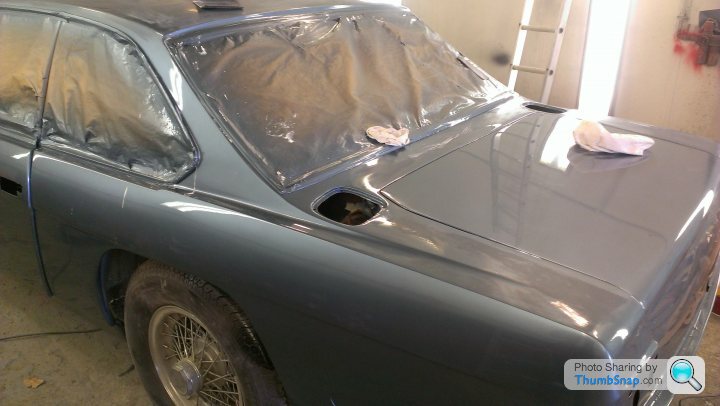
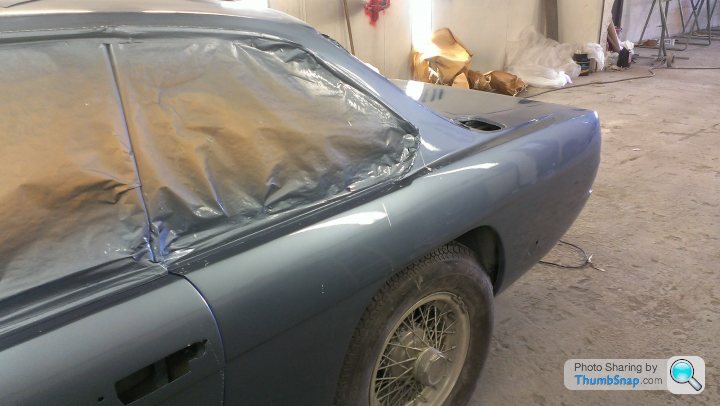
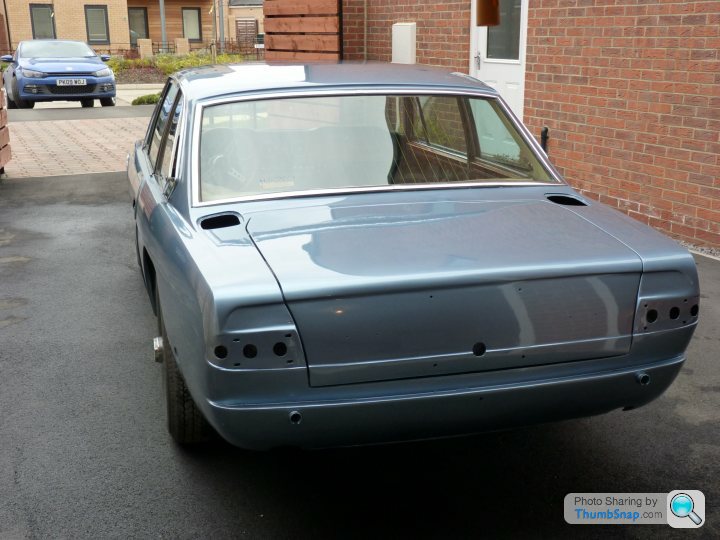
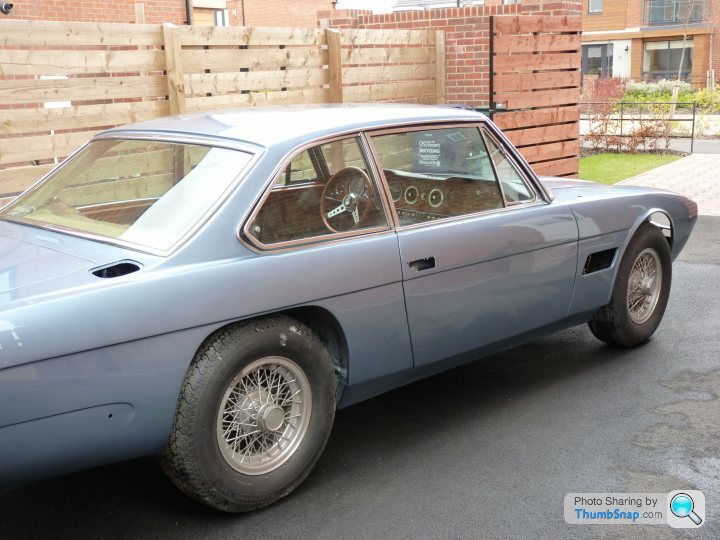
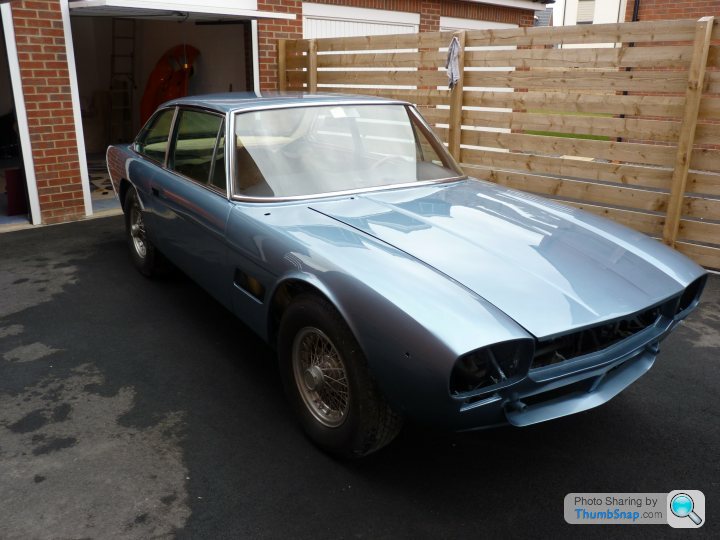
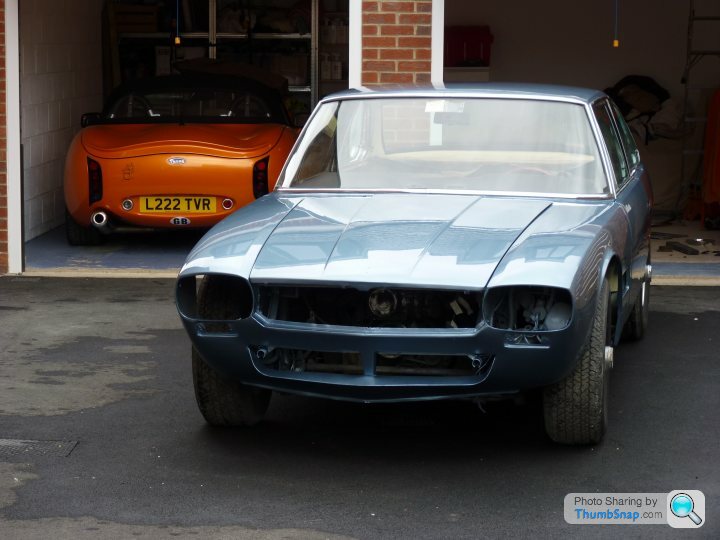
Here are some first little teasers of the colour. The door-shuts and inner edges are now painted and the car's going back into the booth once the panels have been loosly placed. we looked at painting the panels off the car but decided that the doors in particular are so heavy that we'd rather not risk any knocks later. I'm very pleased with the colour, it looks very 'period' and will certainly set-off the chrome and tan leather.
Paul

dbdb said:
Seeing photos of this in the daylight, you made an excellent choice of colour. The Mexico is effortlessly beautiful, something rare in cars and the mark of the truly special. What a magnificent machine.
Cheers David. Much work and much fun before I can properly enjoy it. Paul
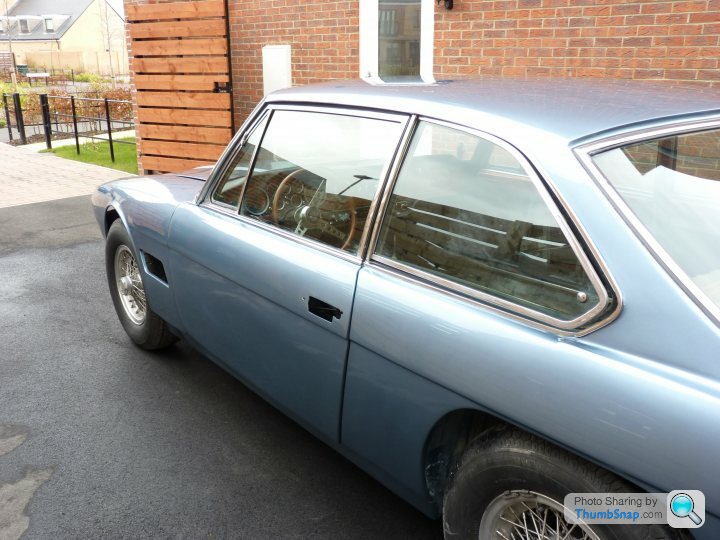
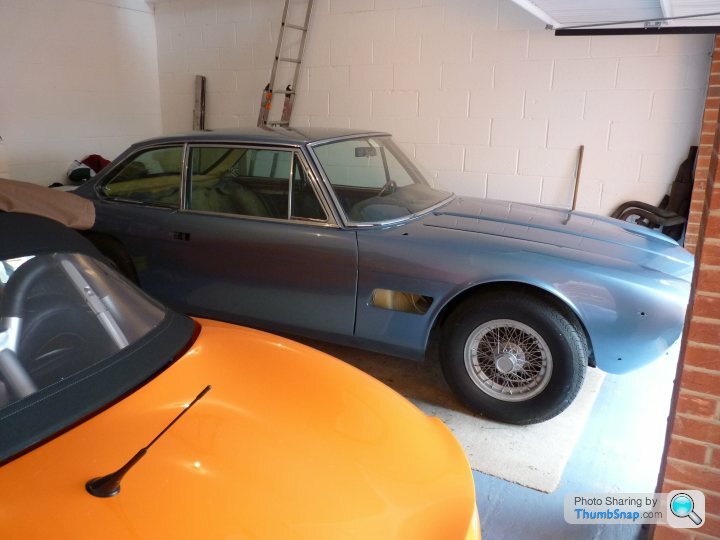
Thanks for taking the time to visit the thread Gents. I've posted the interior pictures as it was when purchased at the start of the thread, the leather has been re-coloured back to the original tan since, and I'll be having some new carpets made in a contrasting dark blue, should look ok when done 
Paul
Paul
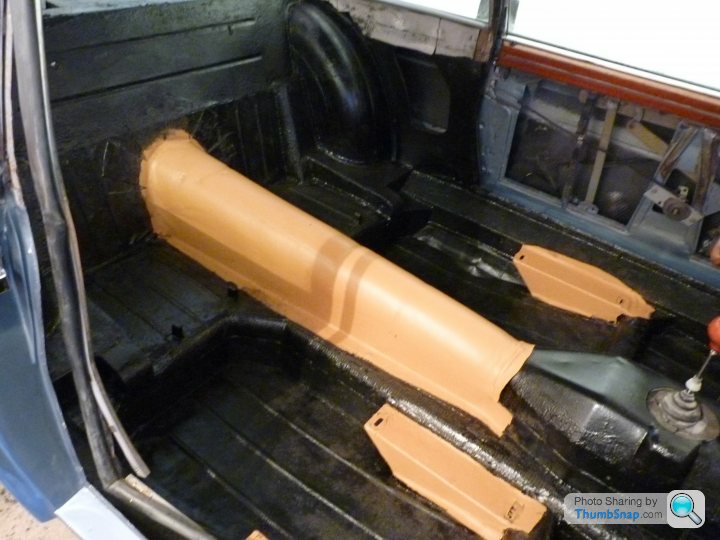
Evening guys, just a little update on the Mexico. Time has been limited but amongst other things, I've cleaned off the old paint and insulation as best I can from the cabin and boot areas and I'm please to say that it's in fantastic condition. Some surface rust has been wire brushed, rust treated, No. 1 primed them painted with satin black smoothrite.
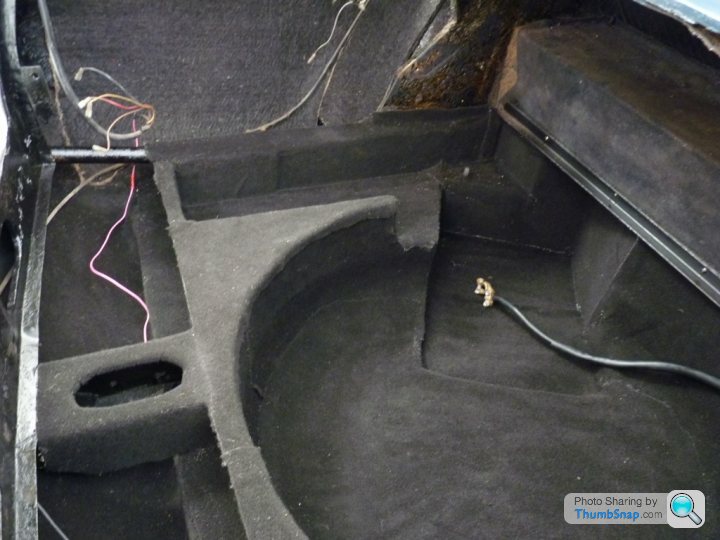
The boot isn't easy to photograph in a dark garage, but it's looking good ready for the new insulation quilt and felt lining.

I'm just looking forward to getting to the point where things can start going back on the car but I'm struggling to strip down the brakes as I just can't shift the calliper bolts.... Time is against me as Jacqui is wanting the seats out of the house as she says they smell...

Paul
The boot isn't easy to photograph in a dark garage, but it's looking good ready for the new insulation quilt and felt lining.
I'm just looking forward to getting to the point where things can start going back on the car but I'm struggling to strip down the brakes as I just can't shift the calliper bolts.... Time is against me as Jacqui is wanting the seats out of the house as she says they smell...
Paul
Yertis said:
Out of interest (because I'm planning a refurb of my Quattro) why did you elect not to remove the side glass? The zealot in me says it should be removed for a 'proper' respray, but the practically minded person says "don't for god sake risk broken glass, window trim clips, damaged rubbers, all of which are more or less impossible to obtain".
Yes, for a full concours job, all the glass should come out, but the side glass trim is clipped, screwed and riveted in place and it would have just been too easy to damage something. Parts are just not available and those that are, are very very expensive. I'm looking to refurbish not restore this beautiful car, make it look presentable, drive and stop safely, then use it.For something like a Quattro where rubber, trim, and glass can be found at reasonable cost, take the glass out for a proper job
Paul
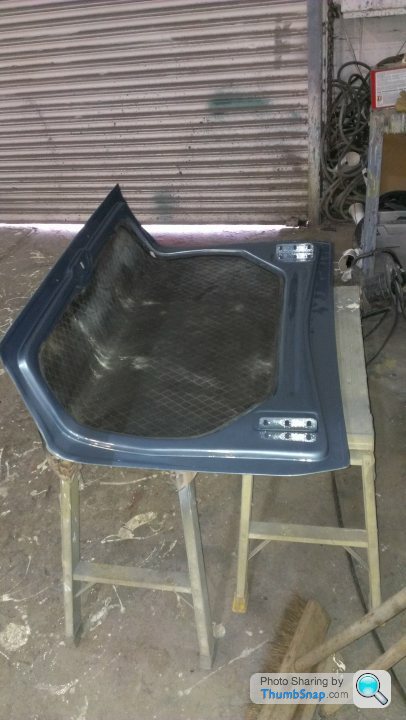
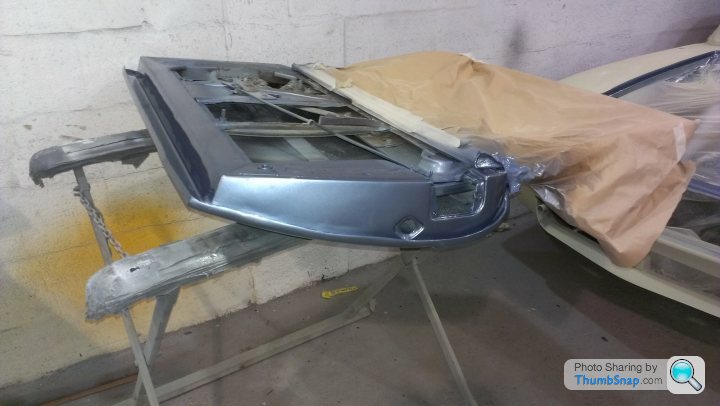
Just a little update, i've almost completed the lining of the boot with felt as original. Next task at the back end is fixing back on the rear lights and getting the bumpers mounted:-
The quilted vinyl on the inside of the boot lid has been retained but refreshed with black vinyl-Kote spray and new edge-trim rubber and once the hinges have been repainted and the brackets plated, it'll be going back on. The twin fuel pumps are now back in the car with new hoses and clips and after that, the fuel tanks themselves.
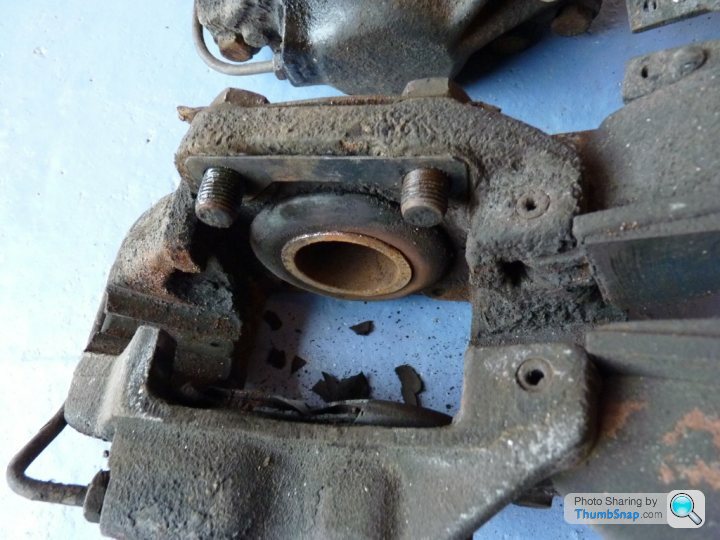
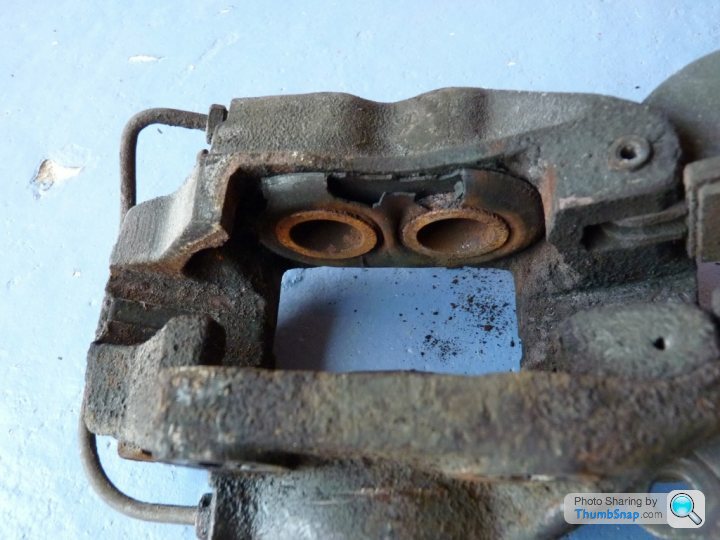
I've finally accepted some help to shift the calliper bolts and they eventually came off with no damage to the threads. A big spanner and weeks worth of creep-up oil helped. The Calliper seals are somewhat 'tired' though...:-
The quilted vinyl on the inside of the boot lid has been retained but refreshed with black vinyl-Kote spray and new edge-trim rubber and once the hinges have been repainted and the brackets plated, it'll be going back on. The twin fuel pumps are now back in the car with new hoses and clips and after that, the fuel tanks themselves.
I've finally accepted some help to shift the calliper bolts and they eventually came off with no damage to the threads. A big spanner and weeks worth of creep-up oil helped. The Calliper seals are somewhat 'tired' though...:-
Cheers Roger, I'm putting off fitting the bumpers and lights until I've finished the underside, little treats after all the dirty oily stuff. Finding it hard to resist putting the new badges on the boot lid though lol.
I hope things get sorted for you soon so we can see an update on your beautiful Ghibli.
Paul
I hope things get sorted for you soon so we can see an update on your beautiful Ghibli.
Paul
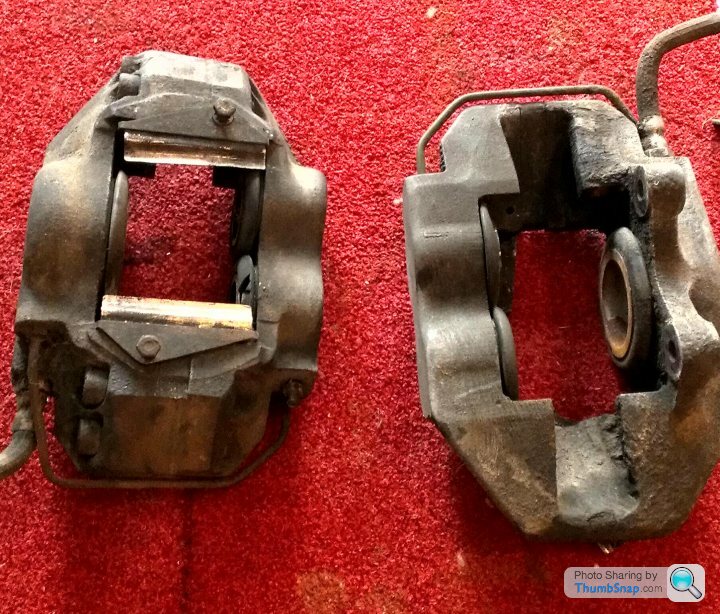
Managed to steal a few hours in the garage this morning and got the rest of the brake system dismantled. 2 large servos removed from the inner wing then shifted the front brake callipers. They are as bad as the rears with knackered seals but are ripe for refurbishment. Yes, they are as huge as they look in the picture...
I hope you have as much fun as I Dirk.
They are beautiful things as you start to get under their skin, sometimes crude but very nice to work on as a relative novice. Post up some pictures and feel free to email me direct if there are any parts you're struggling to find. I've discovered that there are many parts shared with other cars and can often be found cheaper with a little digging.
Stripped down the front hubs tonight and removed the brake disks ready for dropping off at the platers tomorrow.
Also got the brake servos, master cylinders, and all 4 calipers packaged up ready for dispatch to Past Parts for full refurb, pictures to follow.
Paul
Gassing Station | Classic Cars and Yesterday's Heroes | Top of Page | What's New | My Stuff