1969 Maserati Ghibli - The Resurection
Discussion


Hi Mr B
The comments regarding Surface Processing dip 'n' strip came from a good friend who is an epic home classic car restorer (Mercedes 600 Grosser, Maserati Ghibli and Merak, Alfa Giulietta, Innocenti Mini, Citroen H van to name but a few, I think he has over 10 on the go at the moment!) so if I personally were to take someone's word it would be his. Misunderstandings do happen however and wires can get crossed so I'll drop him a line to make sure.
Please start a thread on the M3 and be sure to take a good deal of photo's like I didn't, good luck with the project.
Mr_B said:
Chad speed said:
Hi Mr B
The comments regarding Surface Processing dip 'n' strip came from a good friend who is an epic home classic car restorer (Mercedes 600 Grosser, Maserati Ghibli and Merak, Alfa Giulietta, Innocenti Mini, Citroen H van to name but a few, I think he has over 10 on the go at the moment!) so if I personally were to take someone's word it would be his. Misunderstandings do happen however and wires can get crossed so I'll drop him a line to make sure.
Please start a thread on the M3 and be sure to take a good deal of photo's like I didn't, good luck with the project.
Many thanks. As I say , was pretty much settled on using SP, despite lots of cases were their handling of the shell put dents into some panels. That I could take my chances with if there was no issues that will have a serious impact later on. All info is good info.The comments regarding Surface Processing dip 'n' strip came from a good friend who is an epic home classic car restorer (Mercedes 600 Grosser, Maserati Ghibli and Merak, Alfa Giulietta, Innocenti Mini, Citroen H van to name but a few, I think he has over 10 on the go at the moment!) so if I personally were to take someone's word it would be his. Misunderstandings do happen however and wires can get crossed so I'll drop him a line to make sure.
Please start a thread on the M3 and be sure to take a good deal of photo's like I didn't, good luck with the project.
When, or maybe if, I ever get the M3 restoration started, I will make a thread and try to document it as best I can. Thanks for sharing.
'Surface Processing are good. They did the Ghibli and the Merc which I have had only a minute amount of bleeding on the front chassis legs after i painted it. It hasn't got worse and I will just touch it up. The Ghibli is a different kettle of fish. When they first did it they were a bit raw having started up relatively recently to my enquiry. It slipped on the forklift if you remember and they damaged the nose and rear panel. Since then they have introduced cages into which they strap the cars so this should not happen although they have to get the car into the cage. On the second occasion I delivered the car on a steel frame which stayed with the car for the whole process. This had a couple of steel sections for the forks so they did not touch the body. The first time they did it I had a lot of trouble with bleeding so they did it again free of charge. The trick is to make sure all the chassis tubes are drilled to let the chemical out. The guy should do it to make sure they are symmetrical and of a suitable size to take a grommet for waxing the inside of the tube. I made 10mm holes at each end of all the tubes and also in the rear turrets. They will look over the car and may make more holes which he can then weld up. They are meant to rinse the car very thoroughly which they must have done as the second dipping process did not flare up. I did have it e-coated which itself has a few dipping processes so this may have helped. If the shell is dipped i would definitely recommend it be e-coated as you will never get paint to all the nooks and crannies, but do all the repairs first and then get it dipped. The Merc cost me £2000 for strip and e-coat. I would think the Ghibli would be about the same cost now. If he decides to go ahead tell him not to give them any panels that are ali - they will dissolve! If I were doing another project that would warrant the expense i would use them again.'
neutral 3 said:
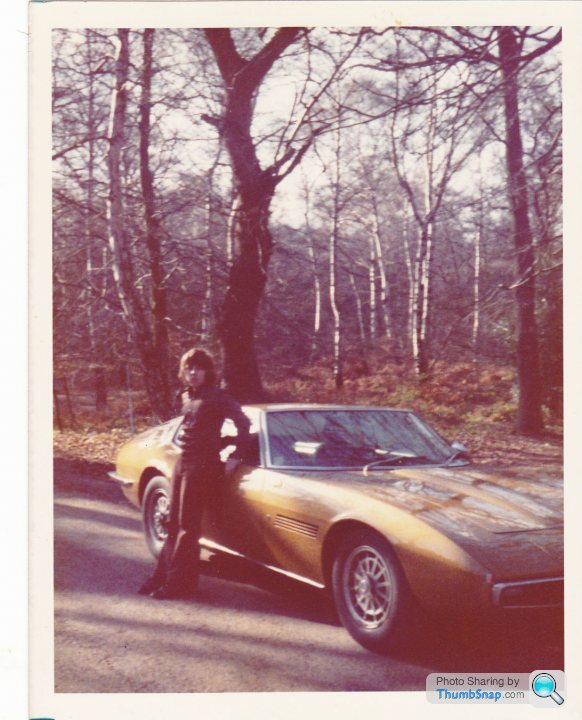
This photo 100 of me with AM 115 100 ( one of several ) was taken at High Beach in Epping forest, i beleive in late 1974. My Mum found this yesterday in an Album, i have others but they are "Somewhere" in her loft.
I drove past this very spot yesterday.
Did you have any problems operating the pedals in those flares
 . Probably one period accessory I wont be seeking out when mines on the road.
The rust continues, this is the bonnet:
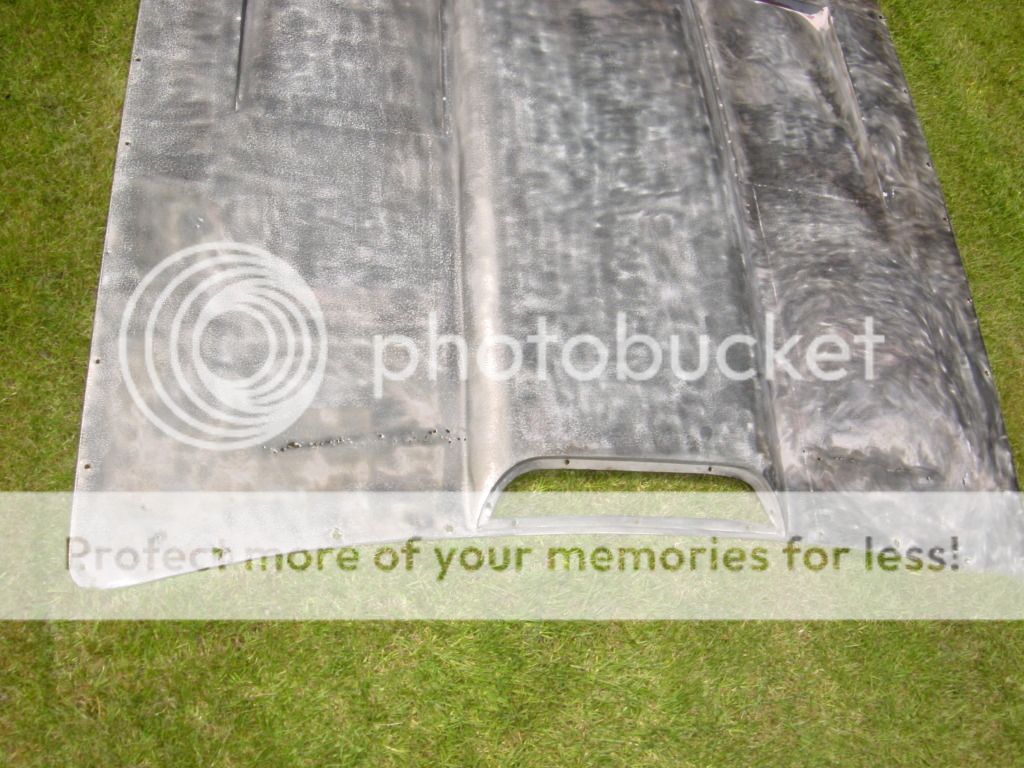
Old filler wire brushed off and skin removed from frame
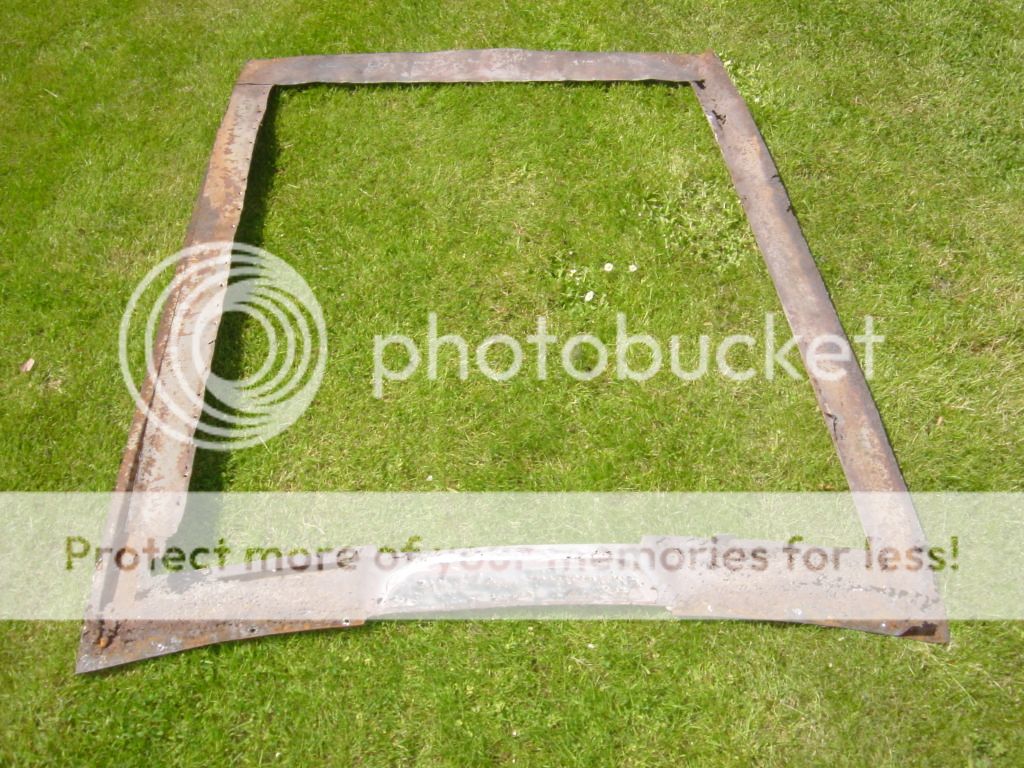
Frame totally shot and was remade

Rust was only where the frame touched the skin and held water between the two

Sections cut out and new ones made and welded in, 5 in total.
Sadly pictures of the new frame and completed skin were lost when transferring from camera to PC but I’ll try and take a picture of the completed panel in primer.

Finished bonnet in primer

Found one of the weld samples, welding the thinned bonnet skin was a bit of a pig, even TIG blew holes in it. Finally achieved it by carefully using MIG in the underside as shown then welding more easily from the top side. That's not silver paint its just been bead blasted to show up weld imperfections.
Old filler wire brushed off and skin removed from frame
Frame totally shot and was remade
Rust was only where the frame touched the skin and held water between the two
Sections cut out and new ones made and welded in, 5 in total.
Sadly pictures of the new frame and completed skin were lost when transferring from camera to PC but I’ll try and take a picture of the completed panel in primer.
Finished bonnet in primer
Found one of the weld samples, welding the thinned bonnet skin was a bit of a pig, even TIG blew holes in it. Finally achieved it by carefully using MIG in the underside as shown then welding more easily from the top side. That's not silver paint its just been bead blasted to show up weld imperfections.
Edited by Chad speed on Friday 28th September 10:49
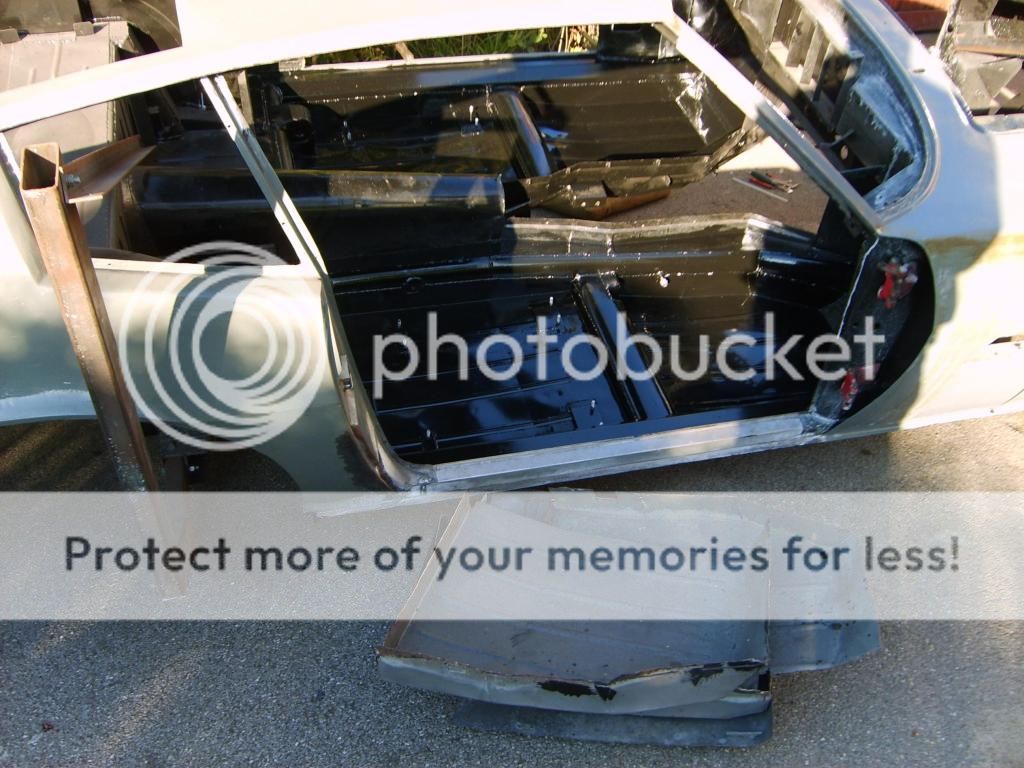
I’d expected to find a few previously unseen holes to appear when the shell came back from blasting but the reality was that the sills, inner, middle and outer were not worth repairing and the four floor pans had thinned out everywhere to a degree where they had lost their stiffness and flexed alarmingly.
So the floors were cut out and bracing tubes welded in to provide some rigidity for when the sills were removed. Each of the sills is a simple folded shape but due to their length manufacture was beyond the capacity of my little bench folder. A local sheet metal shop folded the inner and middle sills from 16swg Zintec steel and 20swg for the curved outers. A 3ft long 28mm tube with 45 degree bends each end runs through the offside sill to carry the wiring loom from the front to the rear of the car. This had rusted through completely in one place and sagged, allowing the loom to touch the inside bottom of the sill so the loom tube was replicated in 28mm copper and silver soldered into place. To aid future drainage, inspection, ventilation and wax injection of the sills, threaded bosses were welded into each end which will be fitted with brass plugs when finished. A series of drain holes in the bottom of each sill were also incorporated which should allow any water that does find its way in to escape.
The floor pans are again a simple folded shape but have fore and aft ridges swaged into the bases to add stiffness. My mate Richard who is also restoring a Ghibli (RHD too) had already turned up the correct profile wheels for his hand swaging machine to form the ridges. Keeping the swaged ridges straight was no mean task but nothing compared to flattening back the twisted floor pan base after the ridges had been formed. This was when I stumped up the readies to buy a spiral shrinking hammer, a wonder tool that actually does work – with a bit of practice. In all I think we scrapped two floor pans but two sets were made in the course of a weekend. I should mention that each floor pan was unique, not only front to back and side to side but for each car as well!

Floors out and inner and mid sills welded in
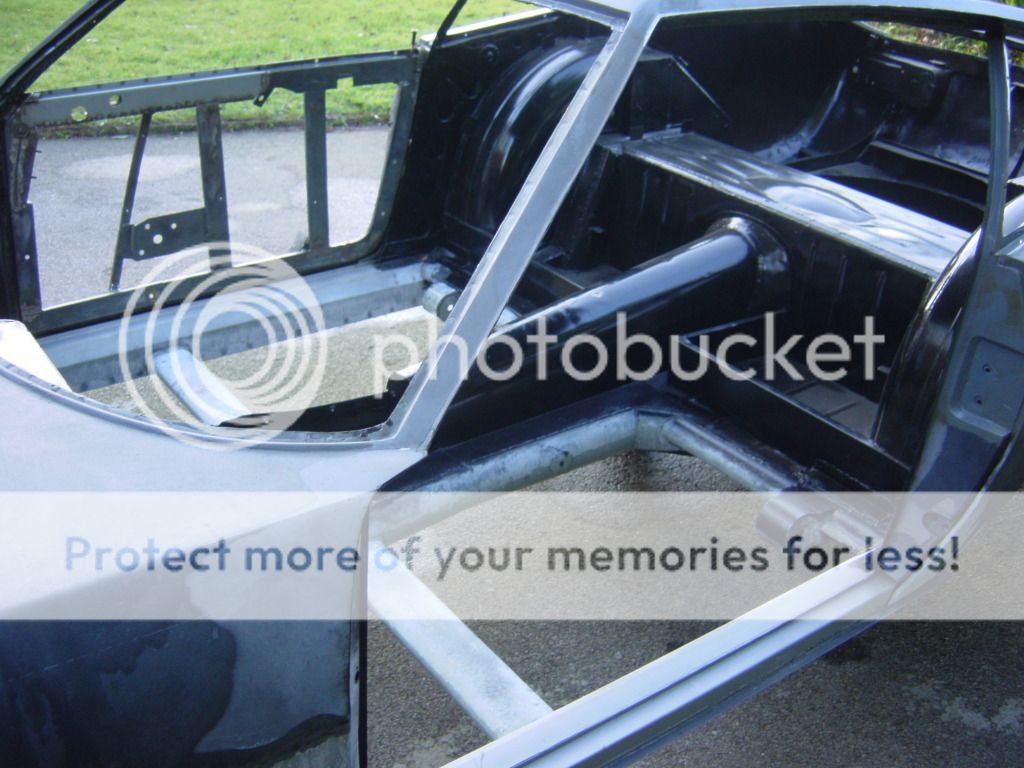
Stiffeners removed waiting for new floor pans. Note factory lead loading on rear edge of front wing and rebuilt door frame being fettled for fit.
Floor pans in with seat fixings in place. So that’s what Marigold’s are for.
Out with the old in with the new.
Nearly there, just jacking points to weld in
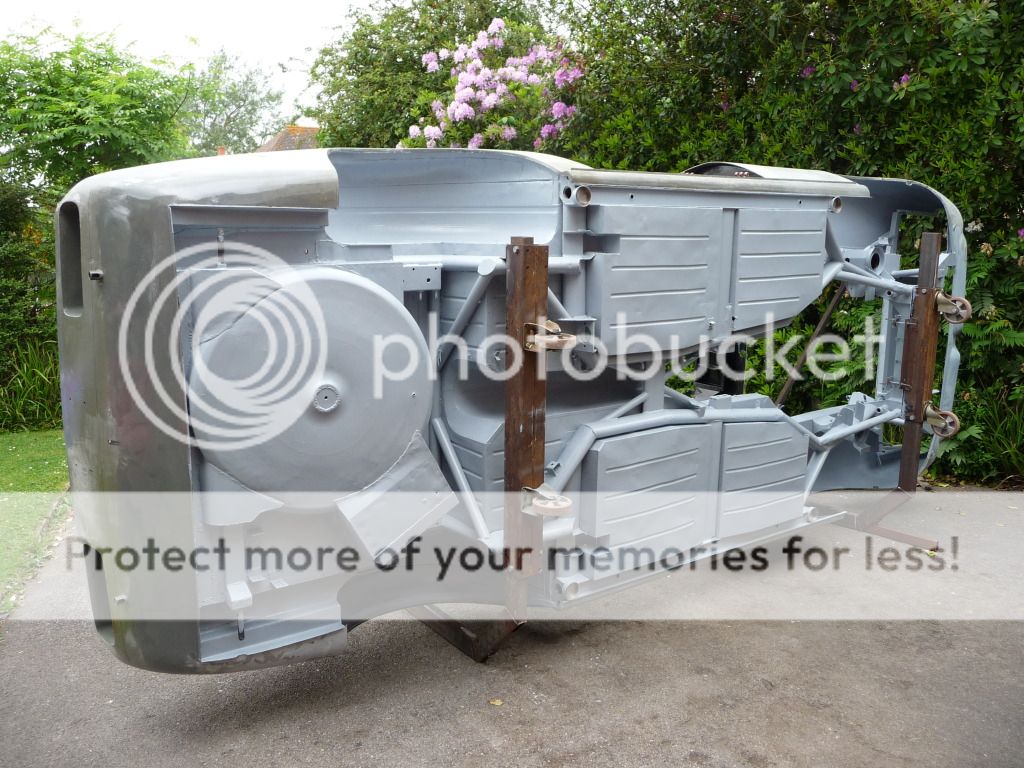
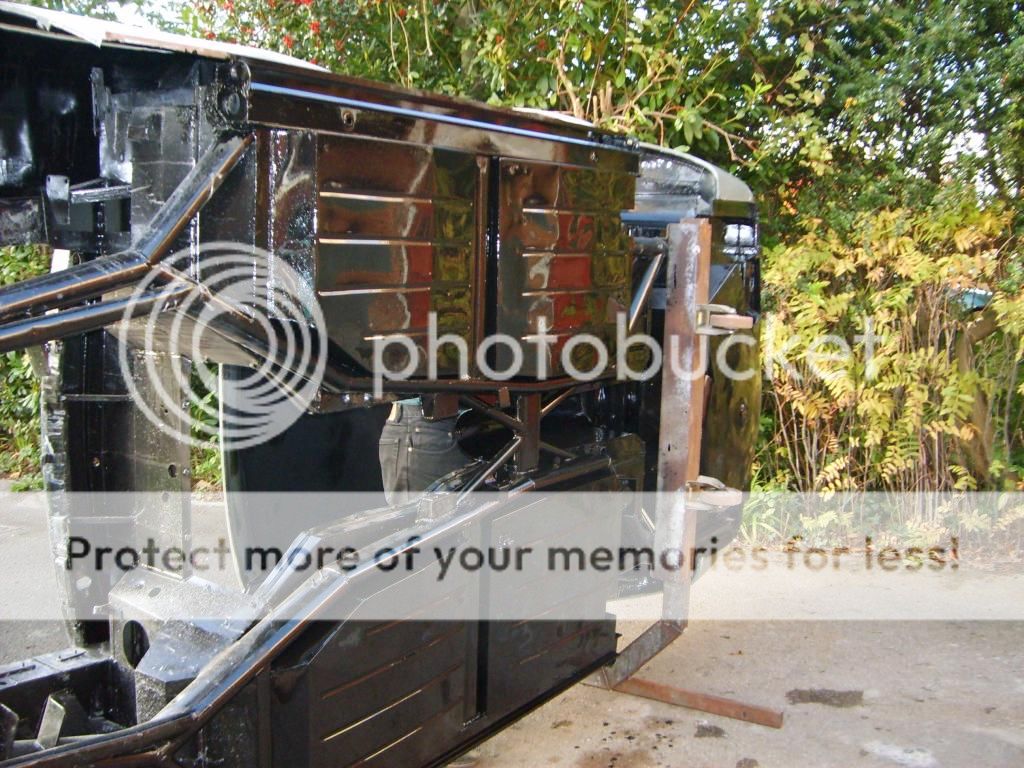
Jacking points (stainless steel) welded in and underbody painted with tie coat primer, just the underbody sealant to spray.

Underbody seams sealed. Note drain and access holes in sills.

Underbody coating being applied.

Job done.
Thats only five years from the time I fabricated the frame to roll the car on its side!
So the floors were cut out and bracing tubes welded in to provide some rigidity for when the sills were removed. Each of the sills is a simple folded shape but due to their length manufacture was beyond the capacity of my little bench folder. A local sheet metal shop folded the inner and middle sills from 16swg Zintec steel and 20swg for the curved outers. A 3ft long 28mm tube with 45 degree bends each end runs through the offside sill to carry the wiring loom from the front to the rear of the car. This had rusted through completely in one place and sagged, allowing the loom to touch the inside bottom of the sill so the loom tube was replicated in 28mm copper and silver soldered into place. To aid future drainage, inspection, ventilation and wax injection of the sills, threaded bosses were welded into each end which will be fitted with brass plugs when finished. A series of drain holes in the bottom of each sill were also incorporated which should allow any water that does find its way in to escape.
The floor pans are again a simple folded shape but have fore and aft ridges swaged into the bases to add stiffness. My mate Richard who is also restoring a Ghibli (RHD too) had already turned up the correct profile wheels for his hand swaging machine to form the ridges. Keeping the swaged ridges straight was no mean task but nothing compared to flattening back the twisted floor pan base after the ridges had been formed. This was when I stumped up the readies to buy a spiral shrinking hammer, a wonder tool that actually does work – with a bit of practice. In all I think we scrapped two floor pans but two sets were made in the course of a weekend. I should mention that each floor pan was unique, not only front to back and side to side but for each car as well!
Floors out and inner and mid sills welded in
Stiffeners removed waiting for new floor pans. Note factory lead loading on rear edge of front wing and rebuilt door frame being fettled for fit.
Floor pans in with seat fixings in place. So that’s what Marigold’s are for.
Out with the old in with the new.
Nearly there, just jacking points to weld in
Jacking points (stainless steel) welded in and underbody painted with tie coat primer, just the underbody sealant to spray.
Underbody seams sealed. Note drain and access holes in sills.
Underbody coating being applied.
Job done.
Thats only five years from the time I fabricated the frame to roll the car on its side!
Ok guys thanks for the bump.
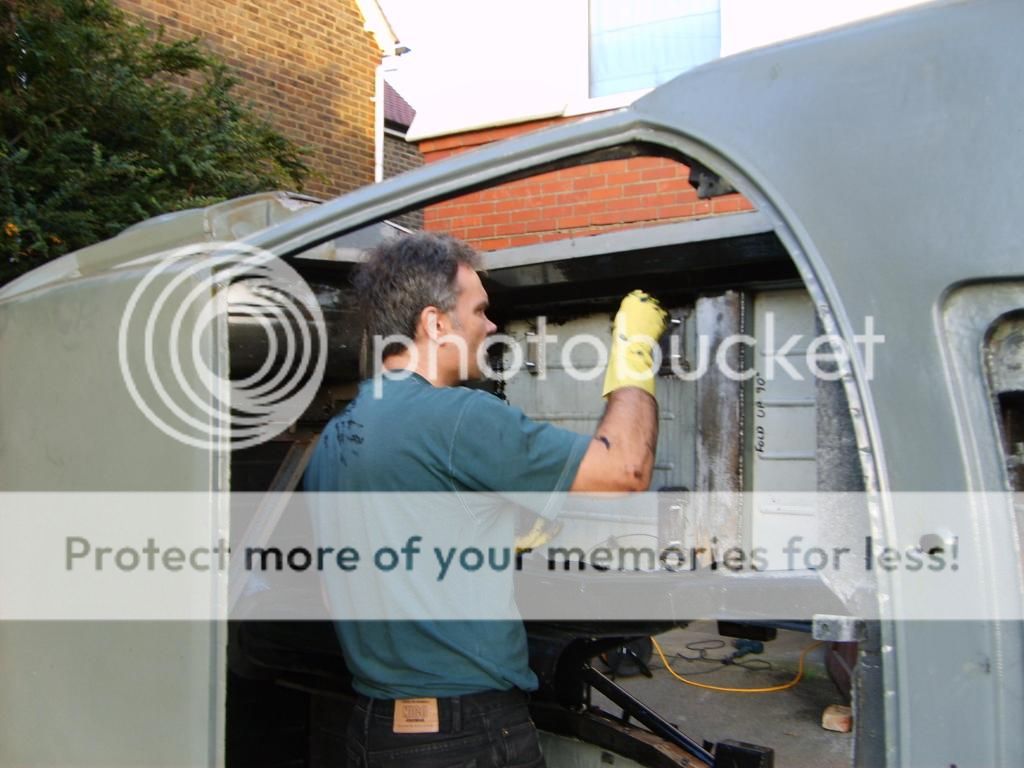
Progress since the last post has been somewhat traumatic and very slow despite banging in the hours. Sometimes I don't know what makes me do it, at other times I pour the evening beer with the warm glow that comes from having achieved something. Anyway as the next few months will show its not been plain sailing, did you ever think it would be?
We're into body preparation prior to painting:

The lines on a Ghibli should be fine, straight and true like a sharp Italian suit. Many have lost the clean edges on the front wings and swage lines down the sides, not to mention the little crease where the wheel arch runs past it.

More soon
Progress since the last post has been somewhat traumatic and very slow despite banging in the hours. Sometimes I don't know what makes me do it, at other times I pour the evening beer with the warm glow that comes from having achieved something. Anyway as the next few months will show its not been plain sailing, did you ever think it would be?
We're into body preparation prior to painting:
The lines on a Ghibli should be fine, straight and true like a sharp Italian suit. Many have lost the clean edges on the front wings and swage lines down the sides, not to mention the little crease where the wheel arch runs past it.
More soon
V41LEY said:
First comment on this thread and I am in awe !
Surely an inspiration to all home restorers.
showing on the first page ? Why did it need so much filler ? Had the door profiles changed over the years ?
Just curious.....
It is going to be an absolute stunner. Thanks for the thread.
Well spotted Jon, the previous bodger had cut the bottoms of the door skins off and beaten back what remained before brazing new lower skins on. The new pieces were made from more or less flat sheet, hence the massive amount of filler required to regain the original curveSurely an inspiration to all home restorers.
- EPIC as they say
showing on the first page ? Why did it need so much filler ? Had the door profiles changed over the years ?
Just curious.....
It is going to be an absolute stunner. Thanks for the thread.

V41LEY said:
Thanks for that. With your experience would you say that is a common practice ? Seems to me a much more
labour intensive fix than just replacing the whole skin and forming to the correct profile.
Were all the bodges done at the same time or has the car been through a series of dubious restorers ?
Not sure if its common practice per-say but on this car both doors and the lower half of the offside front wing had suffered the panel on panel treatment. I guess the lack of replacement panels might lead a back street body shop to turn a quick buck this way, just hope that the owner that paid for it didn't think he was getting a decent job. labour intensive fix than just replacing the whole skin and forming to the correct profile.
Were all the bodges done at the same time or has the car been through a series of dubious restorers ?
I think that the doors, both front lower wings, four wheel arches, headlight pods, bonnet, nose and lower wings behind the rear wheels were bodged at the same time as they were all brazed which is just about the most unsuitable metal jointing method you could choose for thin sheet metal.
P5Nij said:
Just a quickie... went along with a mate to the NEC this afternoon as he was taking his SD1 to put on the club stand, went for a good old wander round so's to get as many uncluttered photos as possible before the crowds arrive tomorrow... I grabbed a few shot's of this gorgeous machine on the Maserati club stand and stared at it for several minutesm quite literally agog with envy...
http://www.flickr.com/photos/21403537@N00/81891356...
Superlatives are almost pointless when confronted with something manmade and this beautiful...
Thanks for posting that, this Ghibli, in stunning Verdi Gemma, was one of the stars at the clubs annual concour d'elegance in June at Stanford Hall. Owned by arch enthusiast Stephen Dowling and restored/maintained by top UK marque specialists Bill McGrath Maserati it made the journey in day long torrential rain so much more worthwhile. I made the trip specifically to look at the finer details of the Ghibli body as I commenced final preparation for painting, a better example I couldn't have hopped to find.http://www.flickr.com/photos/21403537@N00/81891356...
Superlatives are almost pointless when confronted with something manmade and this beautiful...
IroningMan said:
That must surely be streets ahead of the standards of fit and finish in which it left the factory?
From what I have gleaned from period reviews of the Ghibli it had one of the best built body shells of the time, not just Maserati but out of all the other high end cars available. Factory add photo's and show press photo's bear this out but whether production cars were built to the same standard is another thing - they were probably not. What I can say is the few unmolested panels on my car were very good and the adjacent panel fit excellent, gaps between panels on my daily driver Porsche 968 are around double.So, yes better than factory but not by much and consistent with what I think the factory aspired to.
GVLJ said:
Hi Chadspeed,
This is my first ever post on Pistonheads (although I've been hanging around these parts for a wee while). Your thread is stunning. Absolutely superb. I'm in my 20s and once I'm married next year I've promised myself that I'll begin my first ever project (going to start small - just tossing up between an MGB and a Mini Cooper). Reading this thread has been an inspiration and it's wonderful that you and others on here work so bloody hard to bring cars like this back to life. I'll continue to read with a mixture of awe and fascination!
Thank you.
GVLJ
Go for it GVLJ, either choice is good but both will need you to be handy with a MIG welder if bought at the bottom end of the price range. Don't let that put you off, I'd recommend getting a MIG set (lower Amps the better) some damaged panels from the scrappie and practising in a shed or garage.This is my first ever post on Pistonheads (although I've been hanging around these parts for a wee while). Your thread is stunning. Absolutely superb. I'm in my 20s and once I'm married next year I've promised myself that I'll begin my first ever project (going to start small - just tossing up between an MGB and a Mini Cooper). Reading this thread has been an inspiration and it's wonderful that you and others on here work so bloody hard to bring cars like this back to life. I'll continue to read with a mixture of awe and fascination!
Thank you.
GVLJ
Chad
Good day on the car but dead beat now so few words, that bottle of Chianti's not going to last long:
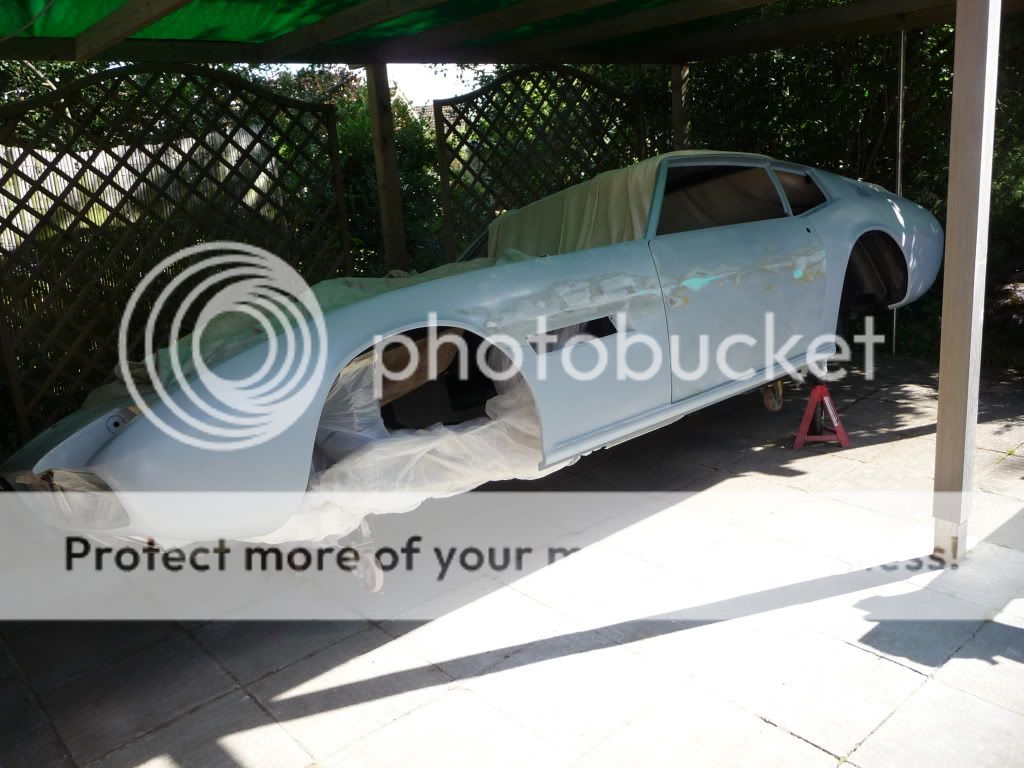
Thought the swage line was straight until it was all one colour.

The castors and roll over frame were one of the best decisions I made, still reaping the benefits even at this stage.

Slow, but its still progress

You can just see the door hinges in their final place. Once the shell finally receives it's last coat of lacquer the doors can be hung. A mistake as it turned out
Thought the swage line was straight until it was all one colour.
The castors and roll over frame were one of the best decisions I made, still reaping the benefits even at this stage.
Slow, but its still progress
You can just see the door hinges in their final place. Once the shell finally receives it's last coat of lacquer the doors can be hung. A mistake as it turned out
gowmonster said:
is that because the doors/hinges sit wrong now they are devoid of the inch of paint/filler?
Misalignment after removing the filler was corrected at the metal stage, the mistake was more simple than that - couldn't paint in all the nooks and crannies so off they had to come. The hinges are tapped M8, the bolts pass through slots in the door pillars from inside the cabin but how to remove them so they go back in exactly the right place? Solution - drill a couple of 3mm holes through the door pillar into each hinge from the inside (but not going right through the hinge) and insert some short pegs - simples.
evil len said:
Out of curiosity, how did you correct the swage line?
Indeed, good question. The swage line was actually in the right place it just waved up and down by perhaps up to a millimetre when looking down the length of the car. The inaccuracies were only on the door skins and were caused by the jig bolt holes pulling ever so slightly when they were welded up, see page 7. Spray primer/filler followed by blocking off with wet/dry trued them up.Edited by Chad speed on Sunday 18th November 18:57
The Surveyor said:
Great work Roger, it's looking fantastic and the quality of your work is just amazing. I was at the NEC yesterday & spent a lot of time on the Maserati Club stand. Nice bunch of guys & joined up, but the green Ghibli was the star of the show for me, (closely followed by a TVR 3000m and the Mexico....) and when you see them in the flesh, you notice that there isn't a wrong line on these beauties. It WILL be worth it......
Hi Paul, bit of a hike for you to the NEC so glad the trip was worth it, read many positive reports about it. Stephen Dowlings Ghibli is an absolute top notch restoration and he has a 5000GT as well!I'm always amazed how many enthusiasts have both TVR's and Maserati, many similarities between the two and I hear the TVR club won the stand of the show, a great effort.
Someone on PH mentioned we should meet up when both cars are done, sounds like a great idea and there are a few down South restoring 60's Maserati as well so a mini meet half way looks on the cards at some time (if you venture down this way before though please drop in).
Collating the photo's of the bumpers at the moment so will post soon but have you had a trial fit of yours yet?
Body prep continues, yellow high build primer over grey then wet 'n' dry block off to 800 grit in-between coats

The old Satajet 92 gun is on its last legs but still capable of spraying high build primer.

A serious look or a frustrated one - you decide? After a few weeks of this I had to wear gloves as the skin on my fingertips was paper thin, no finger prints left at all!
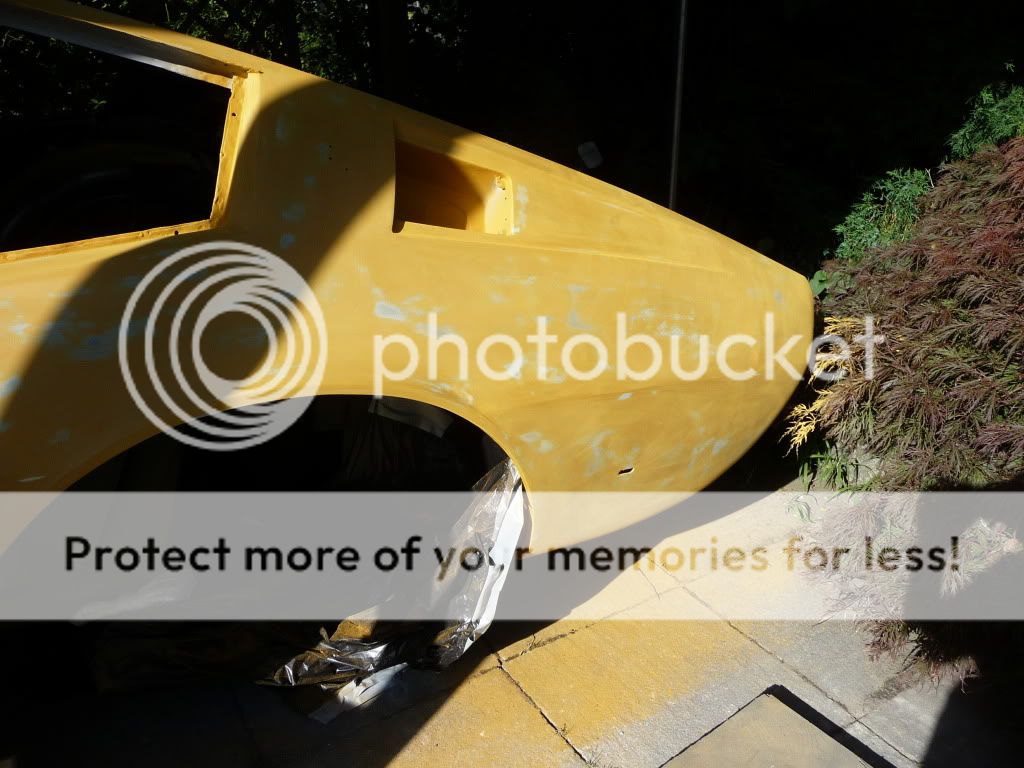
What looked flat and smooth in the grey coat turned out to be no where near.

Something strange happened on the front nearside wing, the light green patched are stop putty patches over dips in the primer.
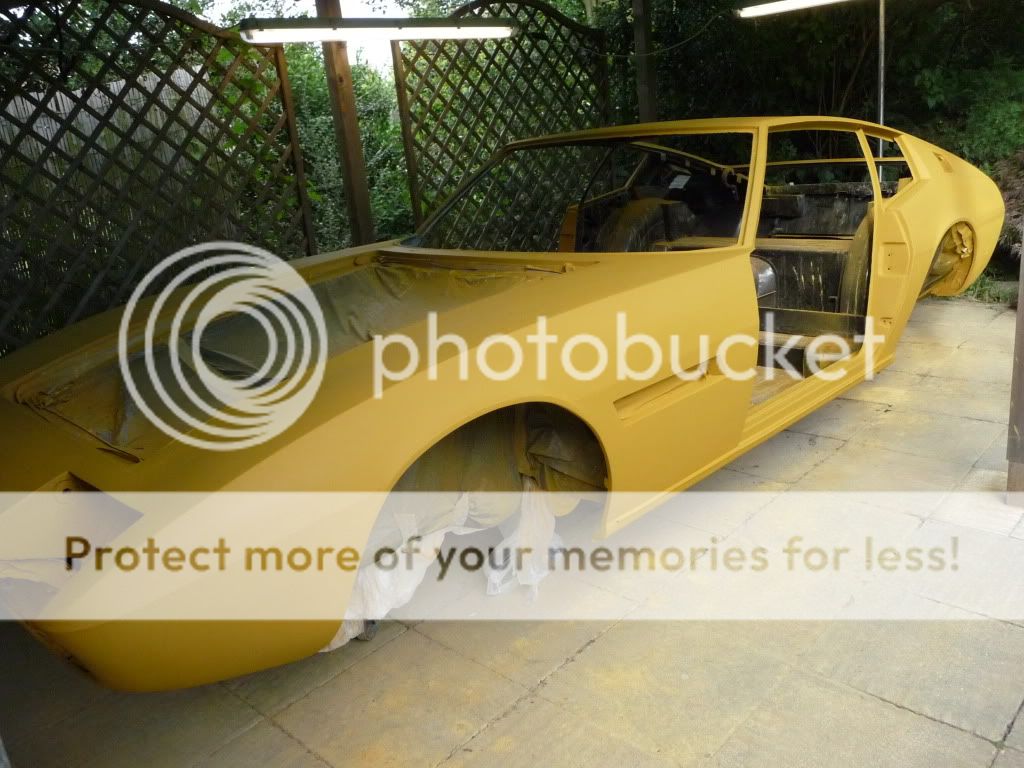


Next post and its the top coats, you may recall my goal for this year was to get the painting finished, as of now its touch and go whether I'll achieve it and the weather's not helping.
And the colour, well there's no going back now although there was a moment when I thought I'd made the wrong choice - any guesses?
The old Satajet 92 gun is on its last legs but still capable of spraying high build primer.
A serious look or a frustrated one - you decide? After a few weeks of this I had to wear gloves as the skin on my fingertips was paper thin, no finger prints left at all!
What looked flat and smooth in the grey coat turned out to be no where near.
Something strange happened on the front nearside wing, the light green patched are stop putty patches over dips in the primer.
Next post and its the top coats, you may recall my goal for this year was to get the painting finished, as of now its touch and go whether I'll achieve it and the weather's not helping.
And the colour, well there's no going back now although there was a moment when I thought I'd made the wrong choice - any guesses?
larrylamb11 said:
Immensely impressed with all your work - it really is outstanding for a home restoration job. I have followed this thread with keen interest. I see you are now working on the paint and priming - one observation, it looks like you are wet flatting, I assume you are aware that some primers are hygroscopic and as such can trap moisture leading to failure of the topcoat at a later date - usually manifesting itself in microblistering. Before you lay on the expensive top coat it might be worth checking with the paint manufacturer to establish whether any of the products you have used are hygroscopic - that applies to any of the layers that have been exposed to moisture, either by being outside or from exposure when rubbed through in block sanding. It may pay to find a friendly body shop locally that will allow use of their oven to bake the car off before applying top coat - you could then top coat in the oven too. Baking whilst still in primer will reduce the moisture content and minimise the risk of any moisture related problems at a later date if it turns out some of your primer layers are porous.
Hi Larry, you are absolutely correct regarding hygroscopic primers, its not an issue I've had on previous projects thank goodness but its a potential problem I'am always aware of. Pretty sure I'm ok with the products I've used and the issues I had (now solved) were something else and quite different to moisture adsorption - watch this space! Thanks for the pointer though, spray shops don't spend many thousands on specialist spray booths for nothing.
uk66fastback said:
Are you spraying the final colour coats yourself, or giving it to a specialist paintshop? (Please say the latter) ... this is a Maserati remember and it's got to be perfect! I'd go for a dark wine red, but then I would.
For me the journey is more important than arriving and that includes the enjoyment of learning new skills and improving those I already have, paying a specialist doesn't always guarantee a top job just as much as doing it yourself doesn't always result in a poor one.So yes I'm painting the top coats myself but don't worry I bought a new tar brush

Seriously though, how interesting would it be having the car collected, paying a few £k and having it returned done?
I want to know what can be achieved at home (probably the whole point of the project) and am aware that I might be digging myself a hole so if it all goes Pete Tong I am prepared to get a specialist to paint the top coats. All I will have lost is 6 months, £3-4k and a bucket full of PH credibility
Gassing Station | Classic Cars and Yesterday's Heroes | Top of Page | What's New | My Stuff