A tortured tale of quattro restoration,
Discussion


This is a somewhat condensed account of a car I aquired back in 2009 with a view to doing the bare minimum rebuild and then to drive it around, upgrading and fixing it up as required.
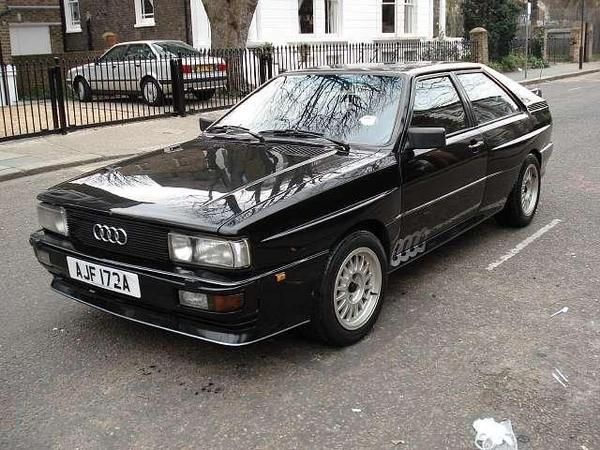
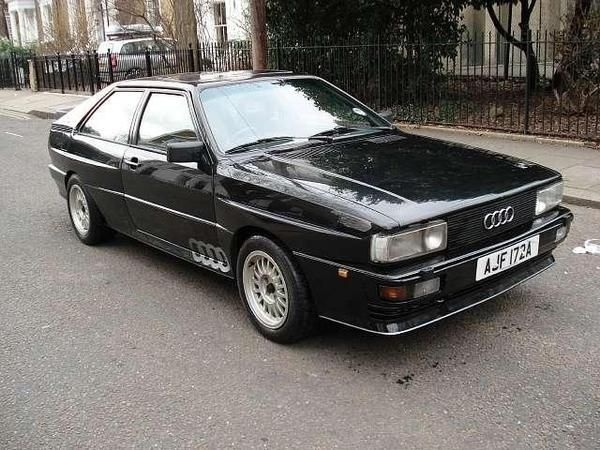
This is how it looked after it had been resprayed and "fixed" up long before it passed to me.
My plans didnt really go the way I anticipated though, perhaps I underestimated the amount I'd have to do and spend on it just to get it to that state, its taken far longer than I envisaged and cost a lot more than I'd have believed even though the works been done all by my own hand and on an exceptionally tight budget....and its still not finished!
The car was bought from a US serviceman at RAF Lakenheath who found it assaulting his wallet at a frightening rate and we agreed a price to take it off his hands.
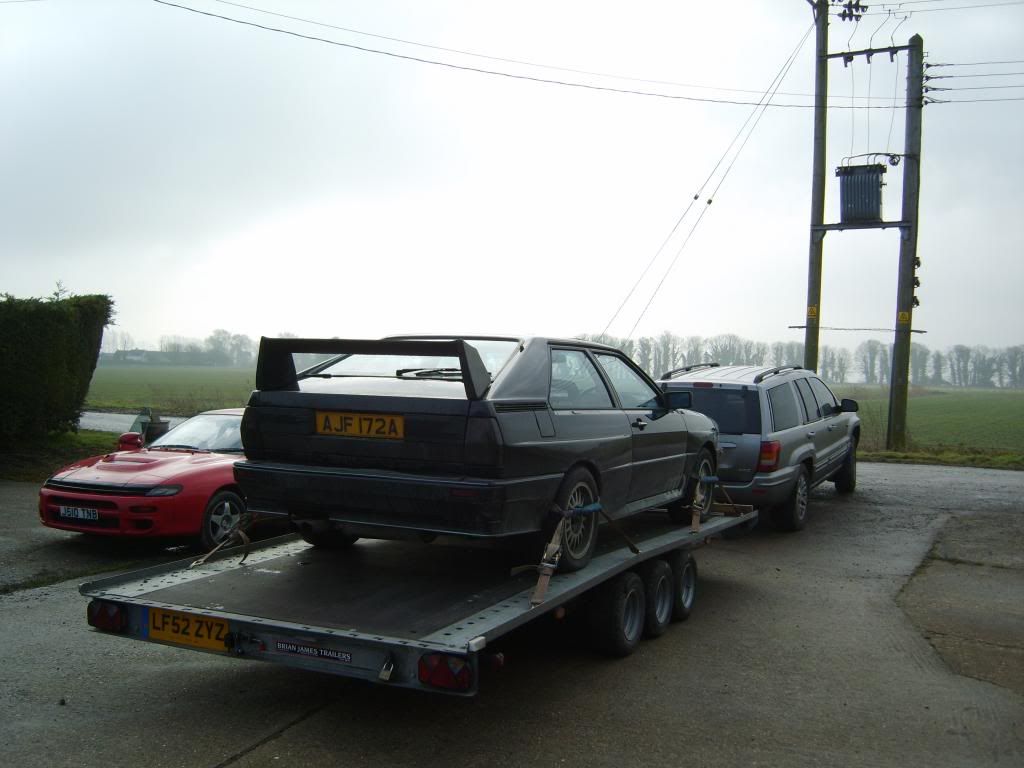
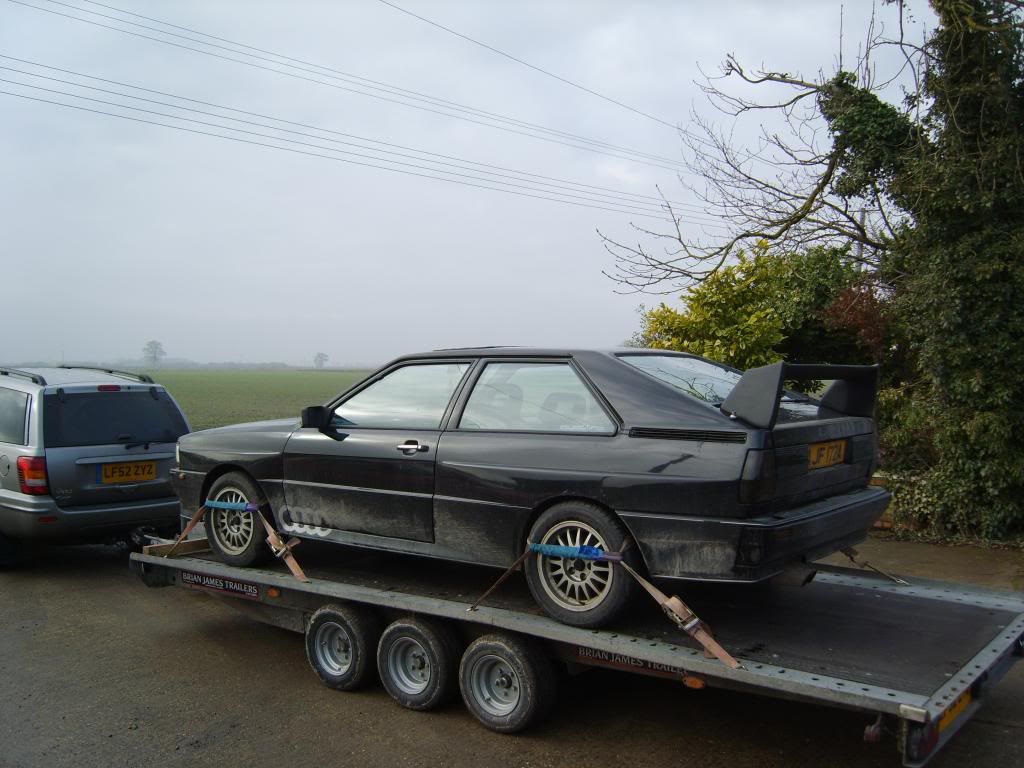
There was no way it could have driven to my location so a car transport service was engaged, the car loaded and carted back to me ( Thanks Terry!).
The nail.
Upon getting it into the garage space I set about the task of searching out all its problems...it had many small things adding up to a big fat nightmare, itd not have been economical for someone to take it on and have to pay the costs of welding,fabrication, mechanicals and bodywork which is where I had a bit of an advantage as I'm fairly adept at most of those aspects.
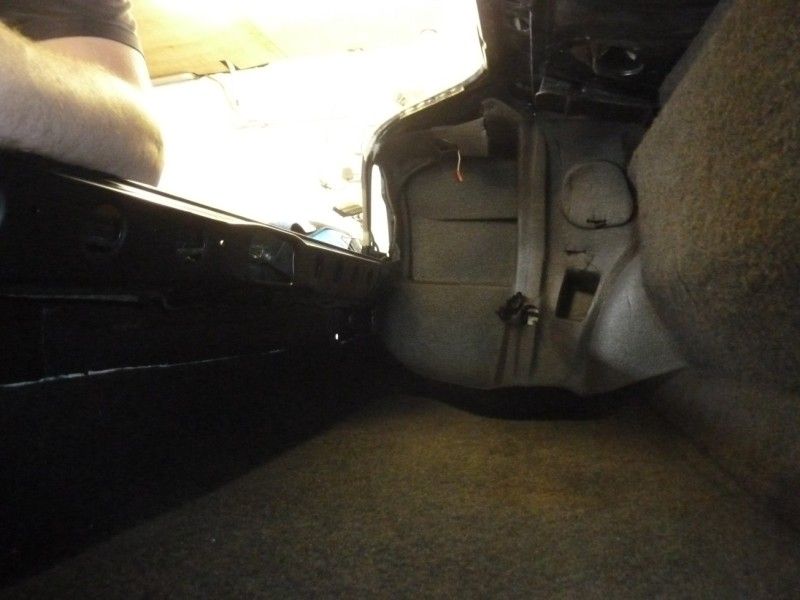
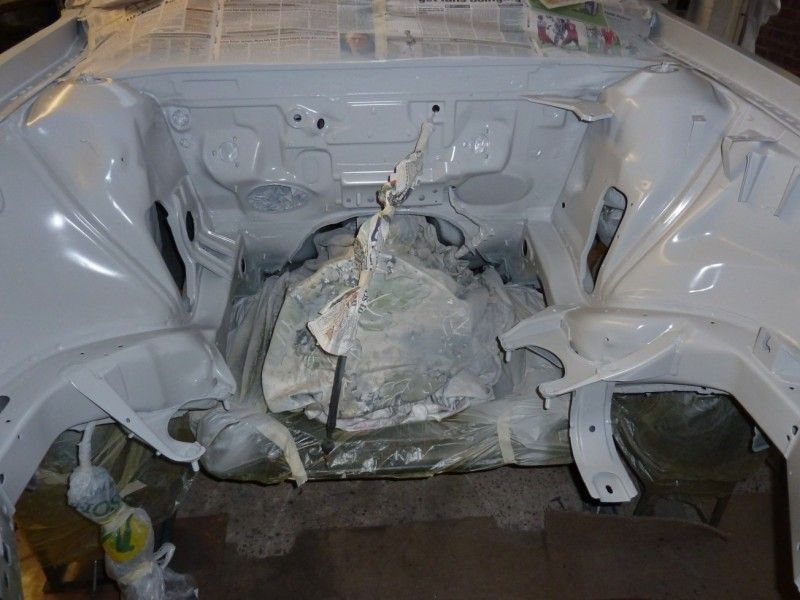
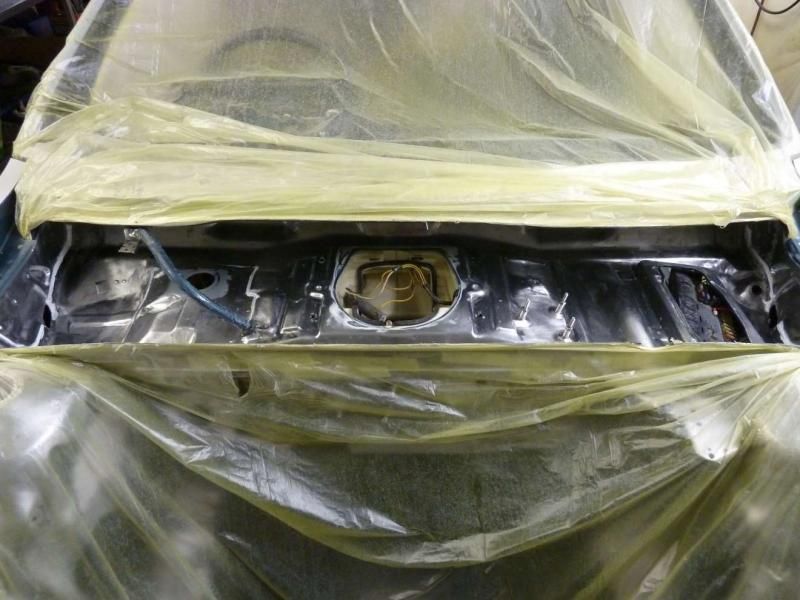
The interior was pretty much gutted leaving only the headliner in place and the main parts of the dashboard so I could have a good nosey around.
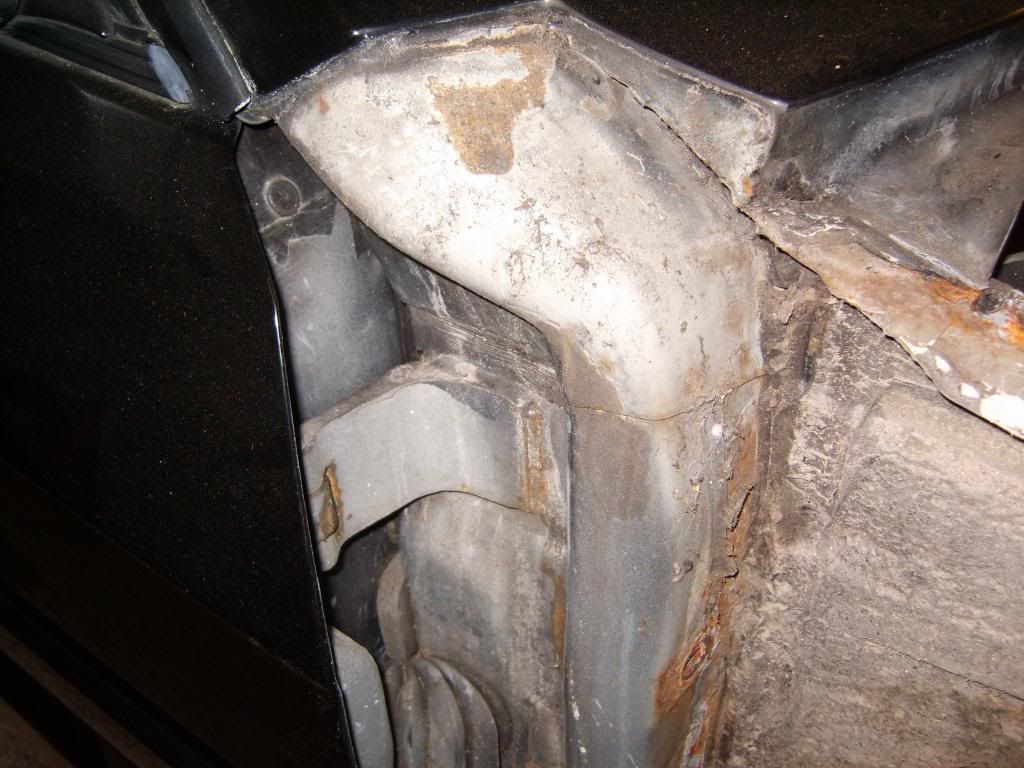
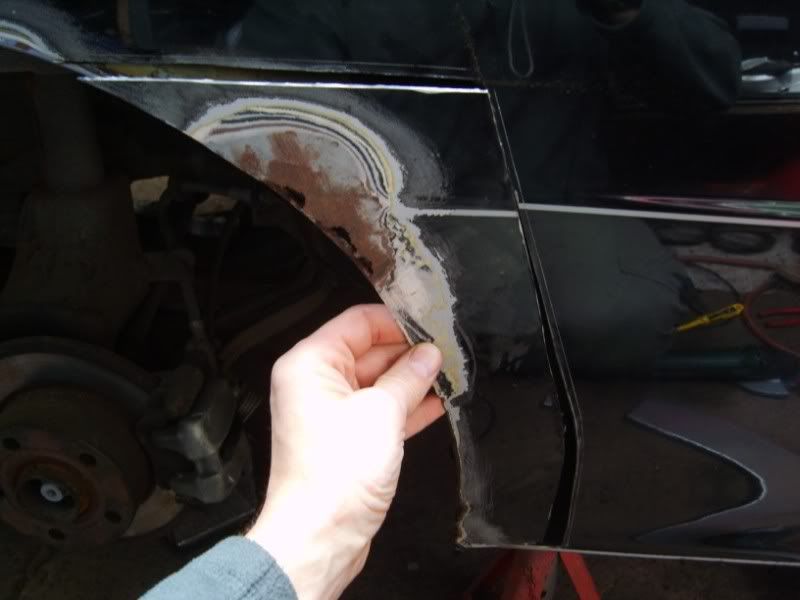
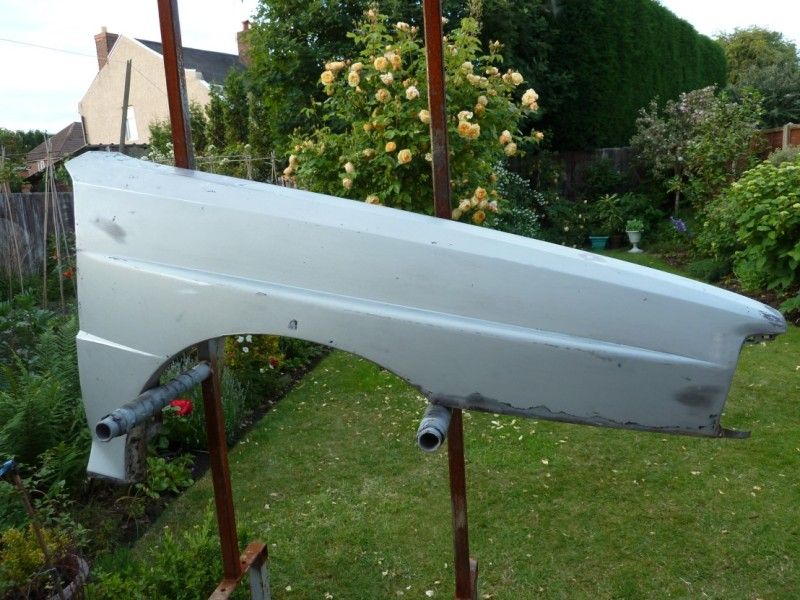
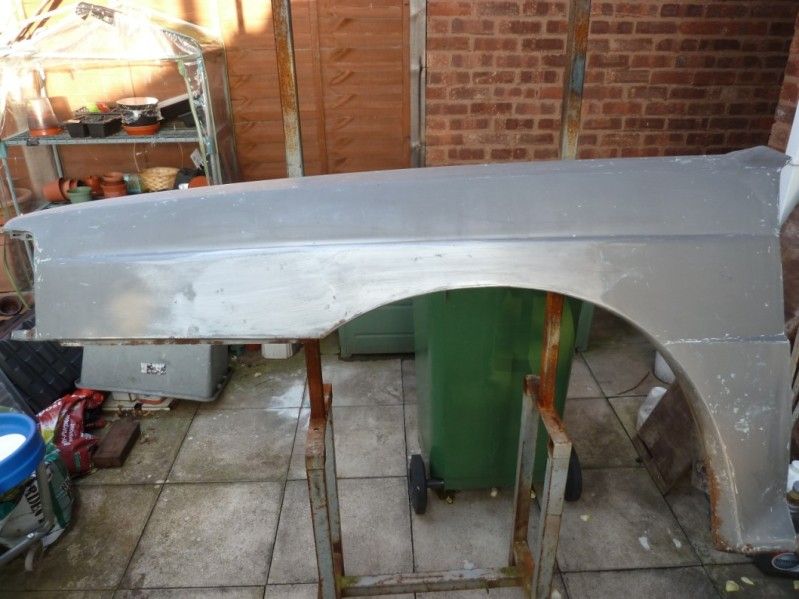
I'd noticed the drivers wing appeared to have been replaced at some point so I removed it to find the lovely colour of rust under it, they never bloody seal them properly after theyve been removed.

These cars often rust terribly at the windscreen lower corners and the top of the door pillar, this ones got nothing to speak of which made me happy for a while.
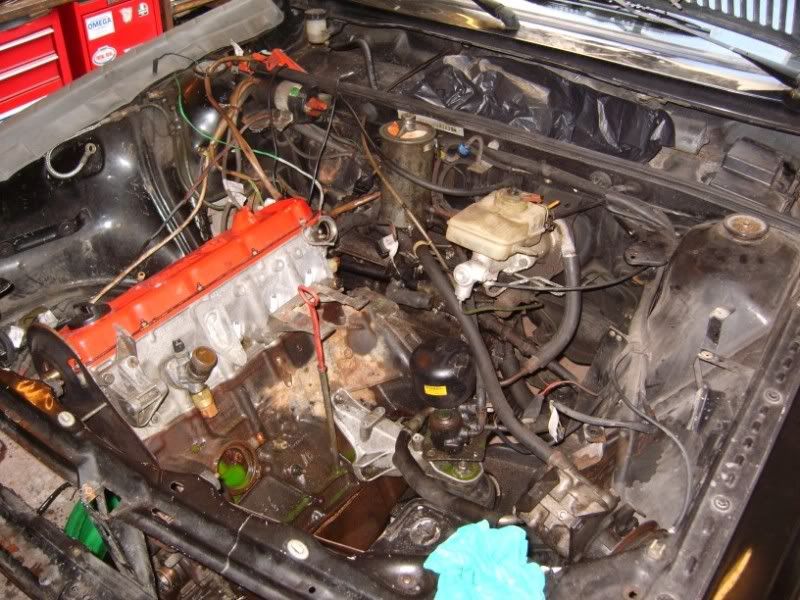
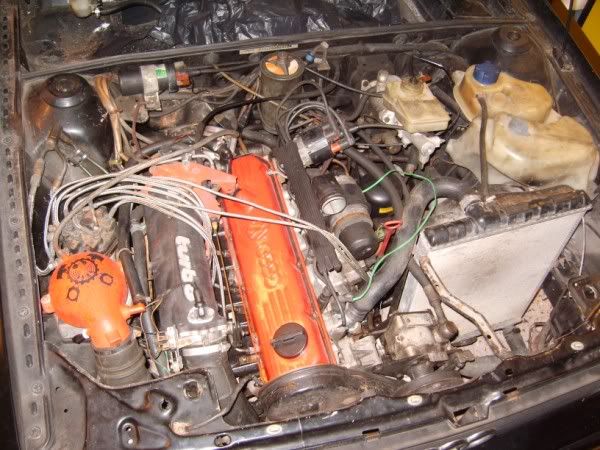
The engine was looking pretty sorry for itself and although the original 10 valve WR motors are a good old beast I didnt want the hassle of non available fuel injection parts (K-jetronic) or the extreme crowding on the drivers side engine bay which is why months earlier I'd already aquired a 20 valve turbo motor from an S6 estate.
Its the same basic motor as fitted to the RR but has coil packs and a tad more power at 230 bhp stock.
Quite quick enough for me and room to go higher if boredom sets in.

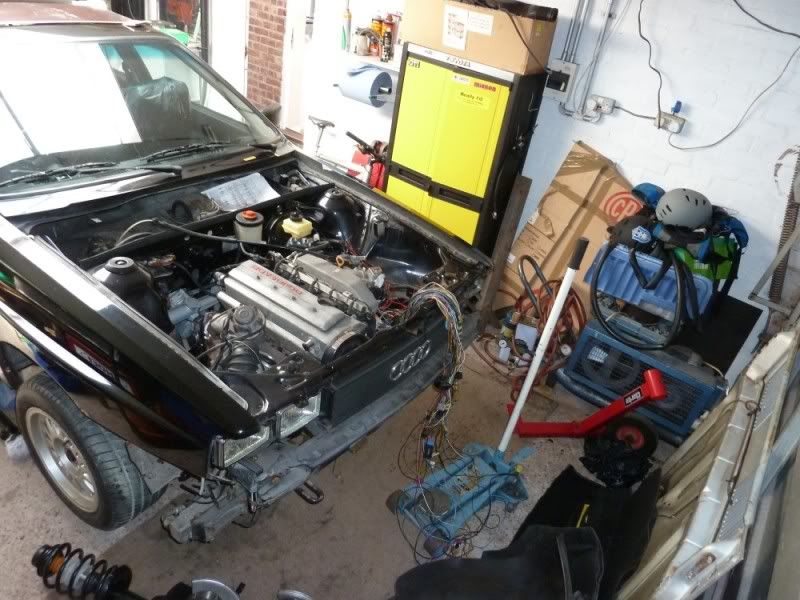
Cramped and messy engine bay.
Once I'd got the old clunker engine out I set about rectifying the easiest to reach bodywork issues, cutting out the rust and welding in new steel with the tig.

The passenger side had nothing of concern and was initially wire brushed and zinc primered whilst the rest of the work was being done.
Stripping the engine revealed it to be on the brink of a violent, noisy and messy destruction.
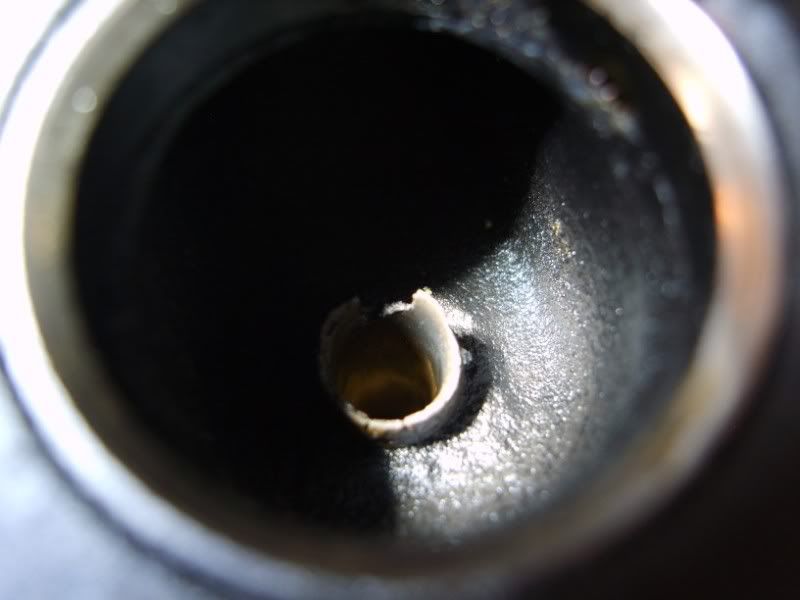
This is an exhaust valve guide, its almost completely eroded at the tip and with the valve extended out the head of the valve to its normal maximum lift waved about by up to 5mm, the book spec is 1.3mm max, so these were probably original to that head and totally worn out, the car had already had a replacement head at some point at great cost, but as with a lot of things on these cars it hadnt been refurbed at all well, if at all judging by those guides.
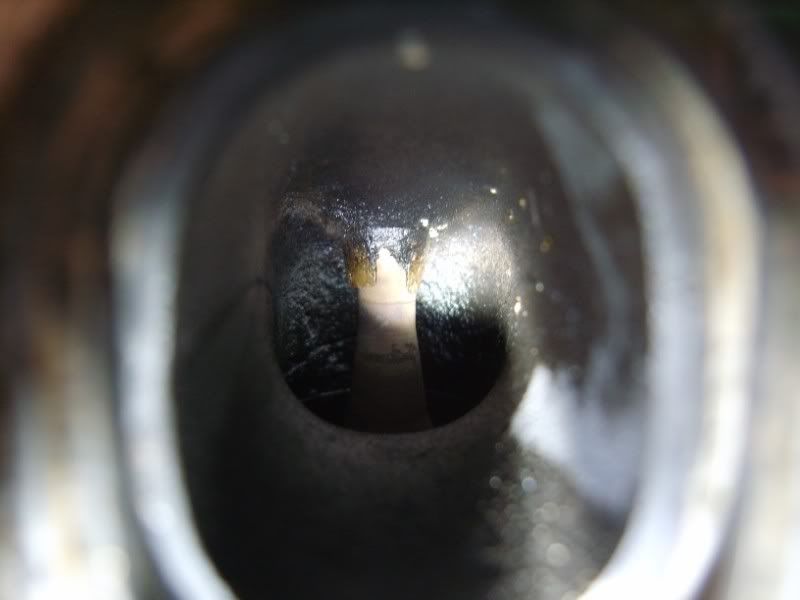
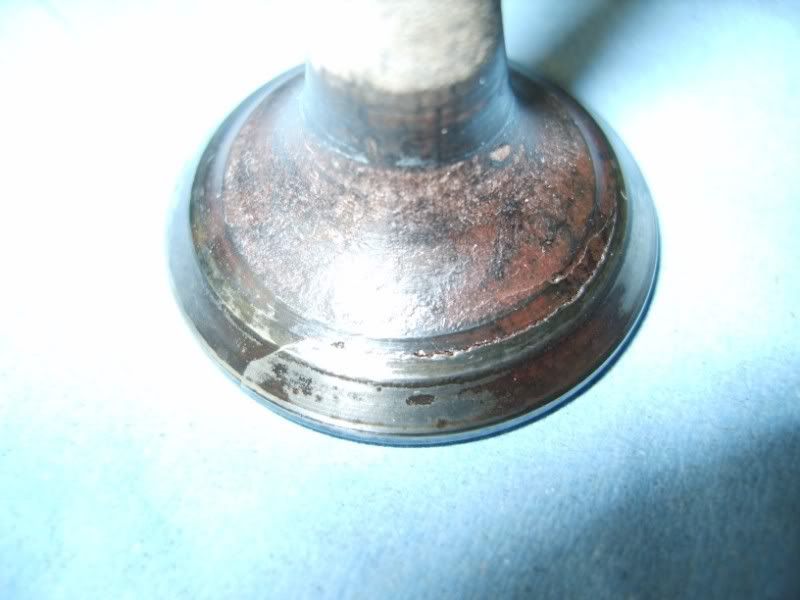
Deep cracks between the valves and a nice split on the one exhaust valve, caused by it closing to its seat way off centre.

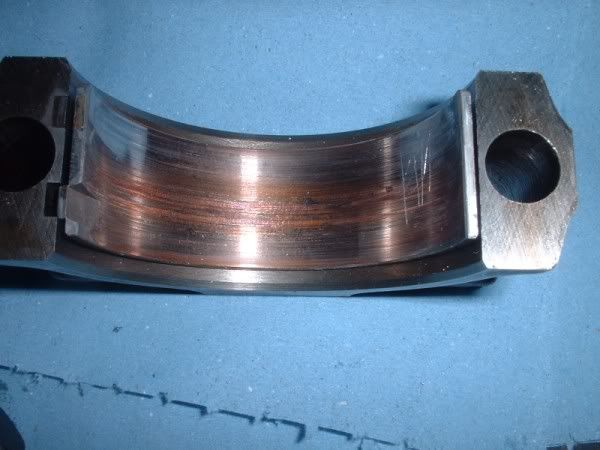
Stripping the rest of the engine yielded big end shells that were loose in the caps and damage to the crank.
The parts that were reusable or saveable were sold on along with the dialynx exhaust manifold which all helped to fund further parts purchases.

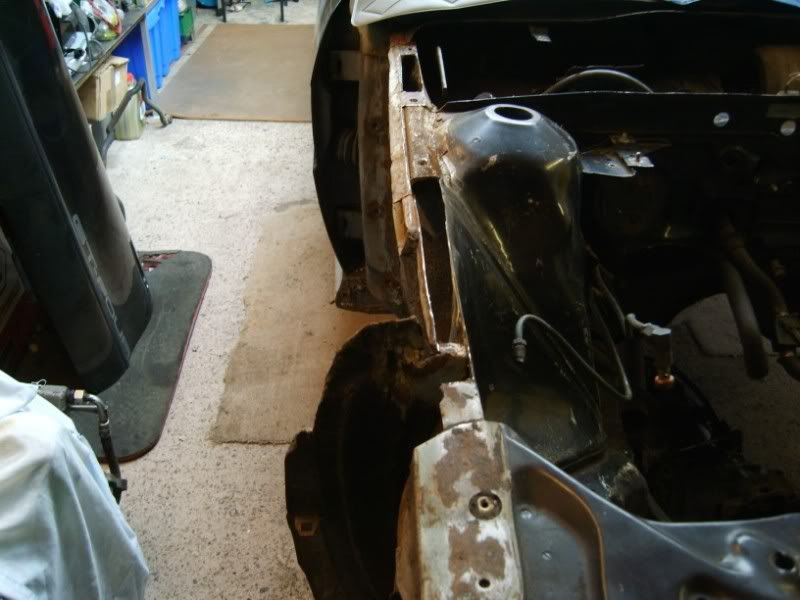
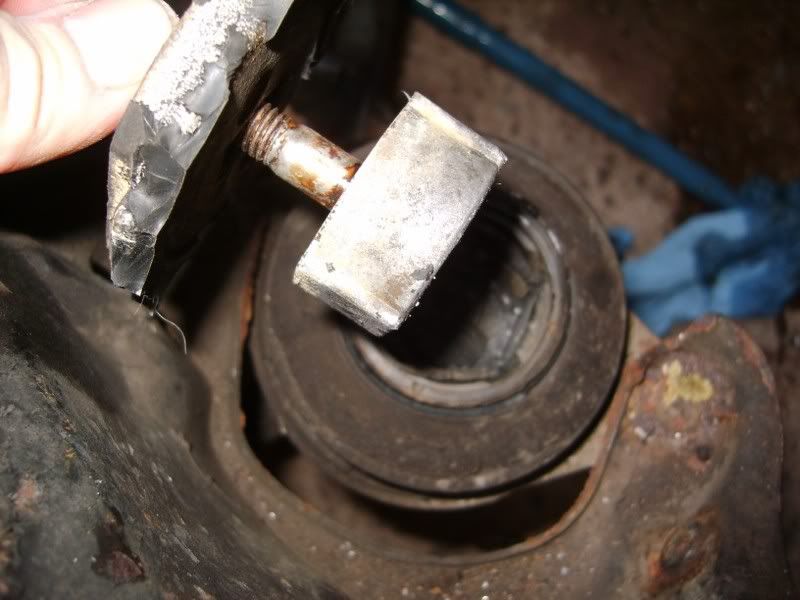
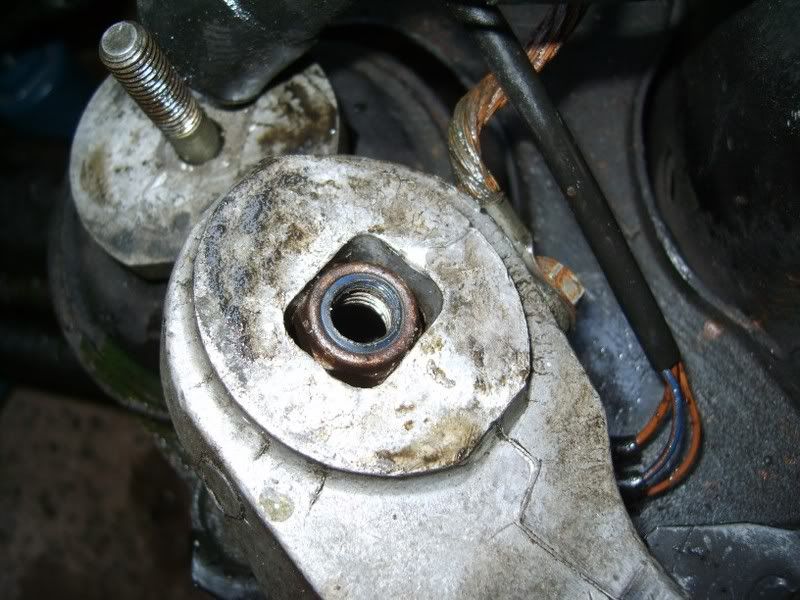
Many issues were found, such as broken engine mounts and bodges galore.
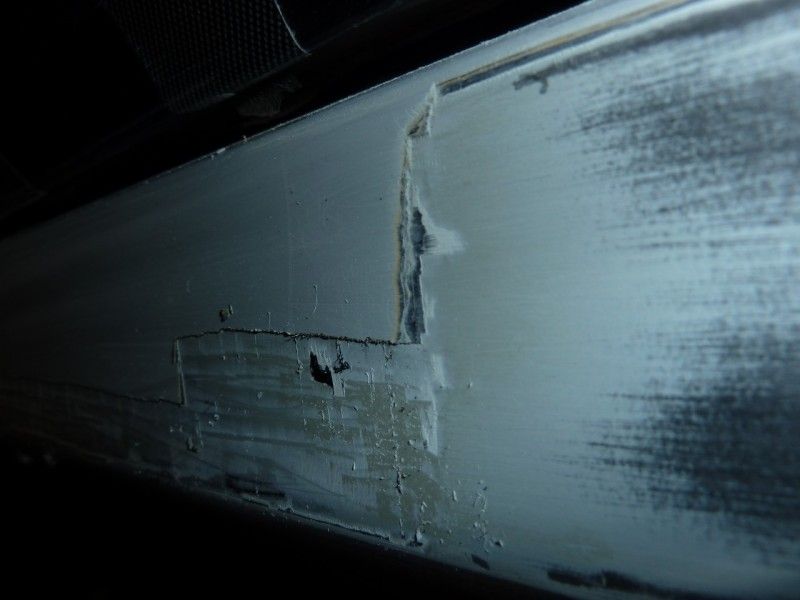
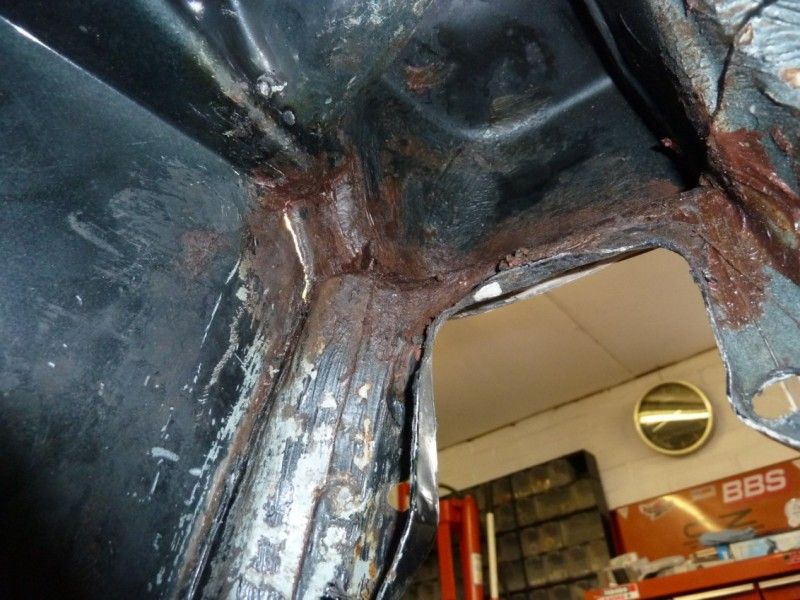
Plenty of work to do on the shell, rust and more rust.

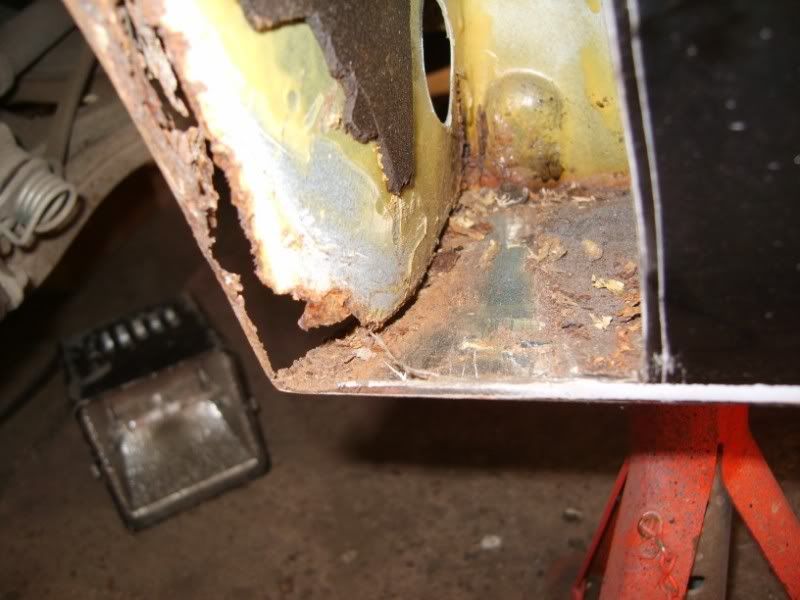
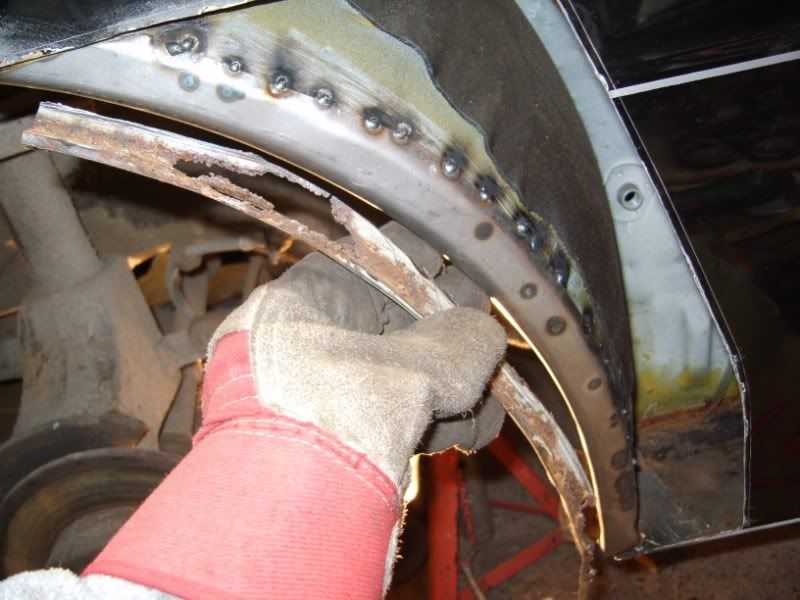
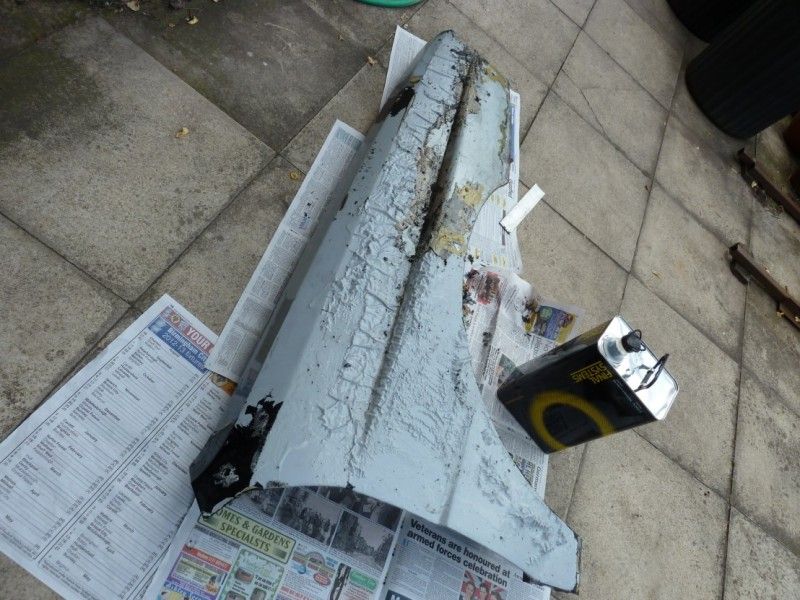
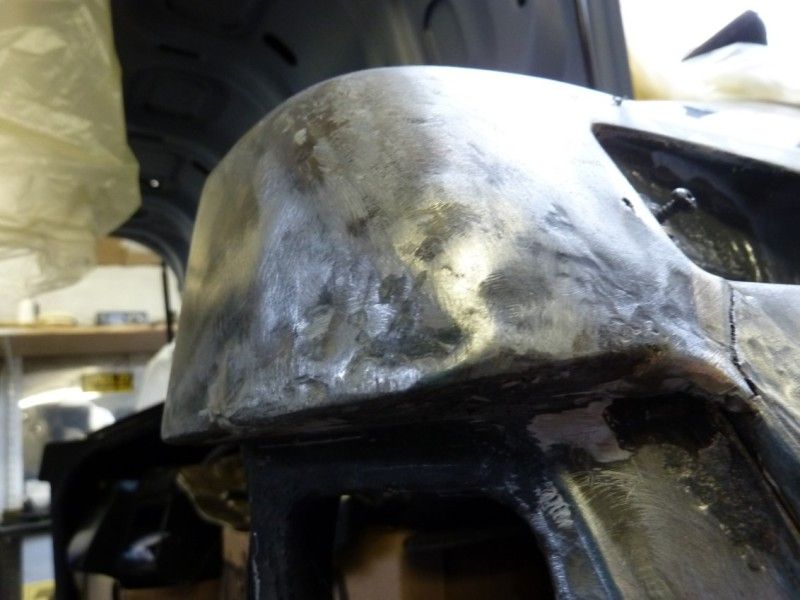
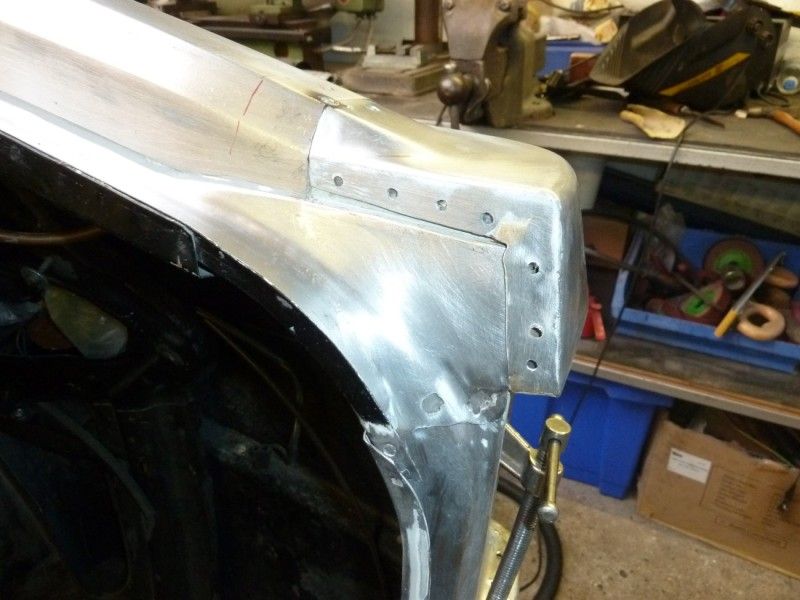
The blister arch and leading edge of the offside rear was fairly challenging as its a compound curve so I set about trying to make a repair panel in one piece but leaving the inner rusted section in situ to locate it against.
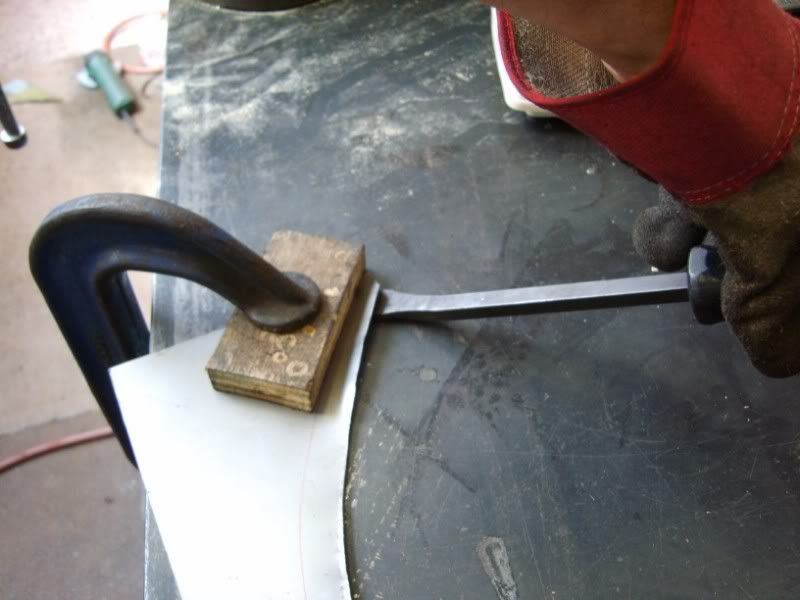
A steel table, g-clamp, hammer, wood blocks and ear defenders were my partners for this.
Clamping the flat steel to the table and forming the curve by slowly levering it up and hammering it.
After a few hours I had what appeared to be a fairly close match to what I wanted.
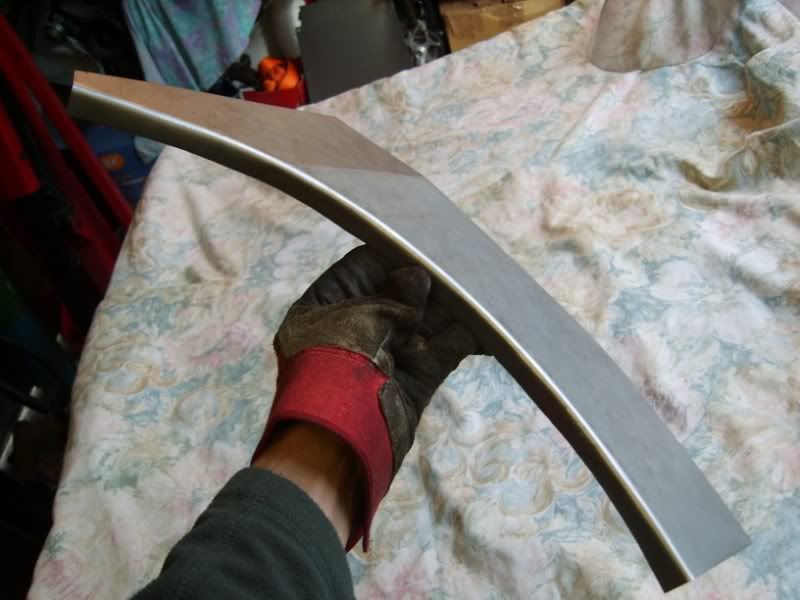
A quick test fit showed it to be largely accurate and almost good enough to weld right in but I couldnt do that until I'd fettled it a little more and fabricated an inner section to replace the rusted out return lip.
I made that in a similar fashion and it took around an hour get it close.
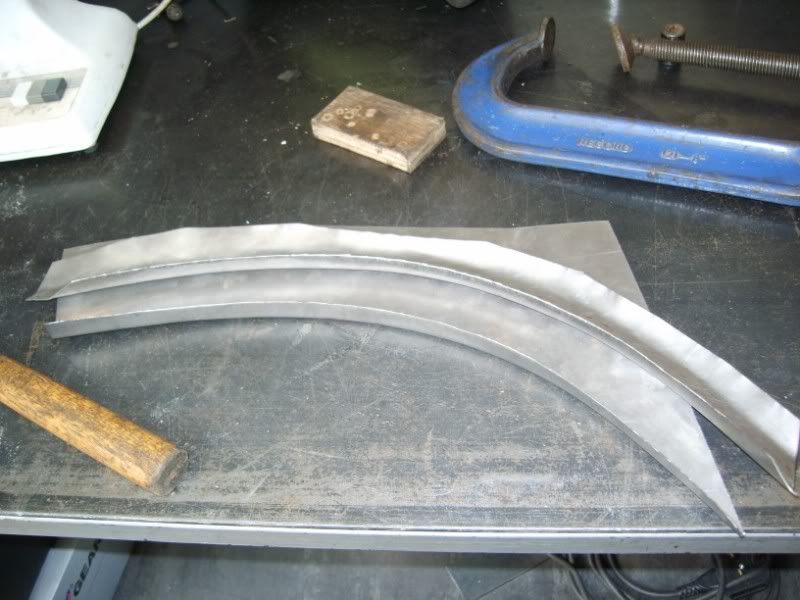
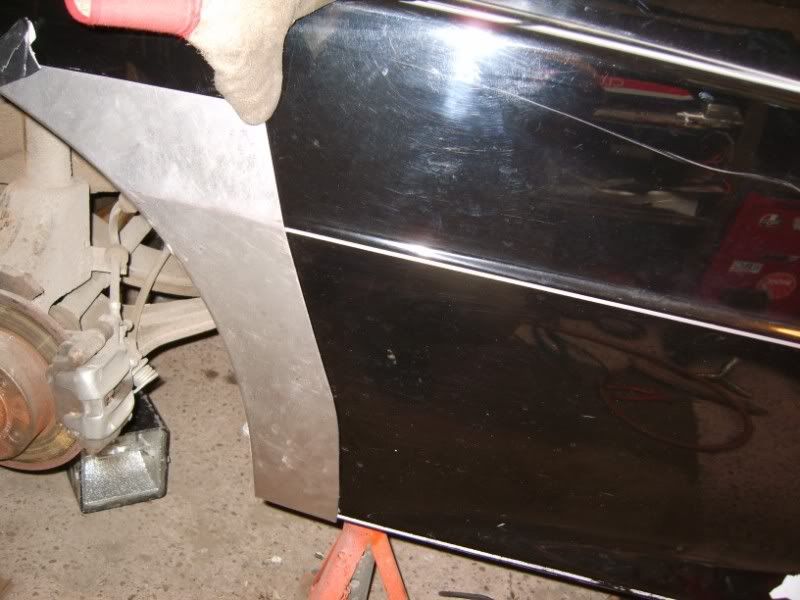
Leaving strategic parts of the rusted body in place I could locate the replacements accurately and tack them in before eventually removing the rusted parts completely and welding the new stuff in properly.

In the midst of this I was looking for parts but theyre a pain to come by as Audi have a policy of "NLA". no longer available, or No Longer Ars*d, still a useful local independant or two got me most of what I needed.

New old stock windscreen.

And a "quattro" scripted one for the rear which came in the boot of the car.
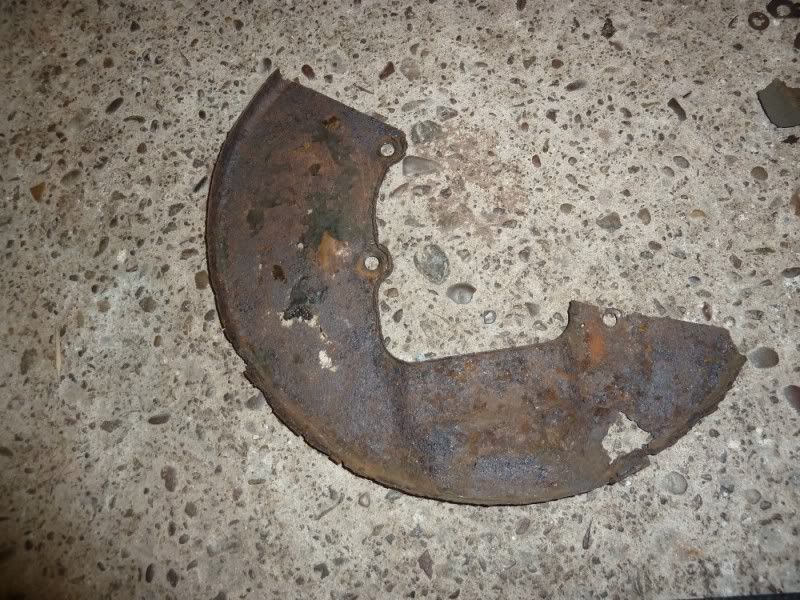
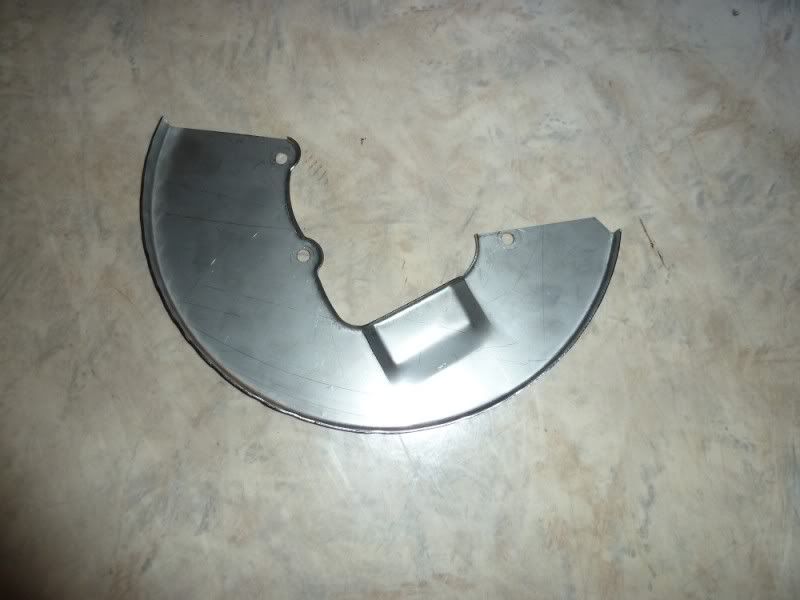
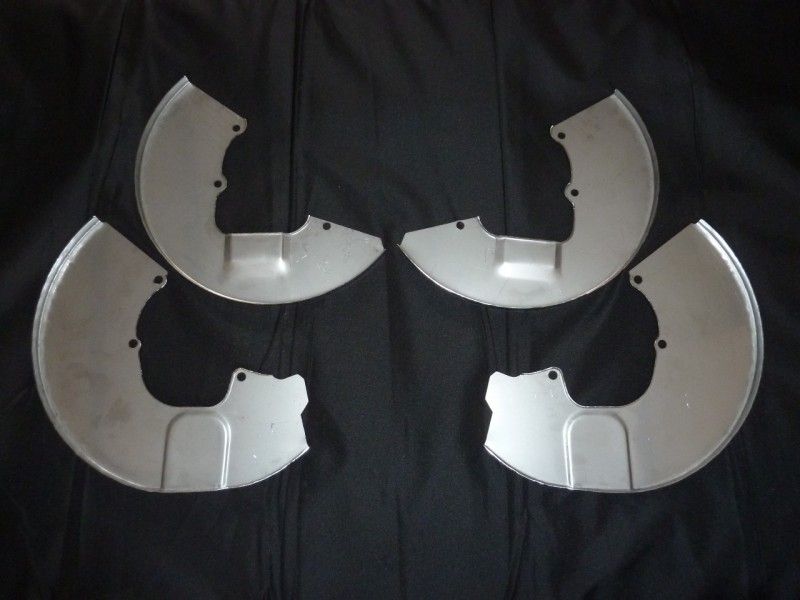
The brake dust/stone guards on these rust to oblivion in a fairly short time due to the heat and battering they get from the elements and you guessed it, theyre "NLA" leaving me the only alternative, make my flipping own but from everlasting stainless steel.
Using what was left of the fronts and rears I had some blanks laser cut to take account of the lip on the edge and also had some steel in 8mm cut out to act as punches and dies to form them over by clamping them in a vice and hammerforming the edge tighter than the press could manage and to form the pressings.
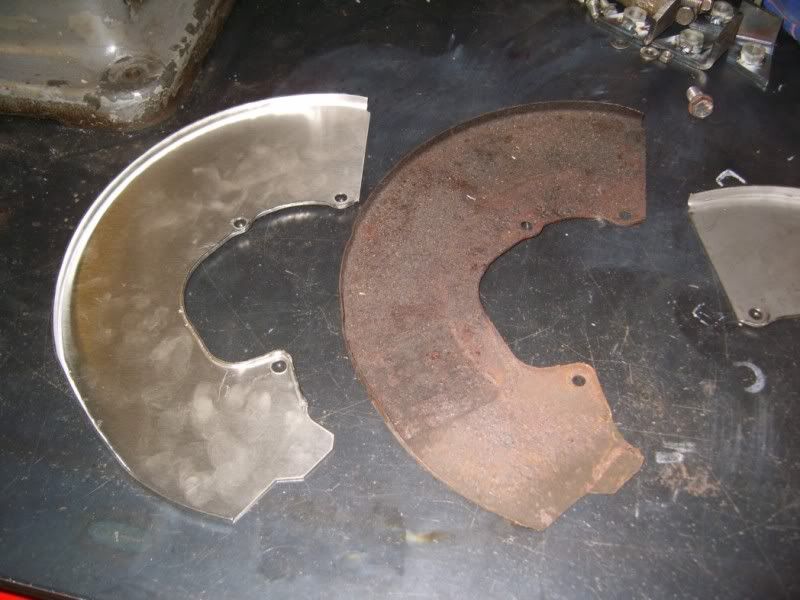
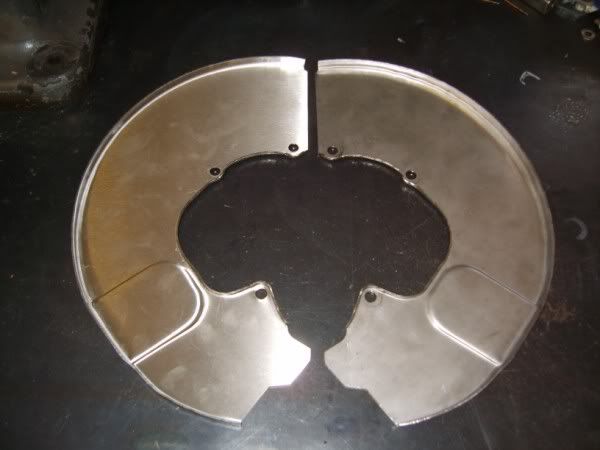
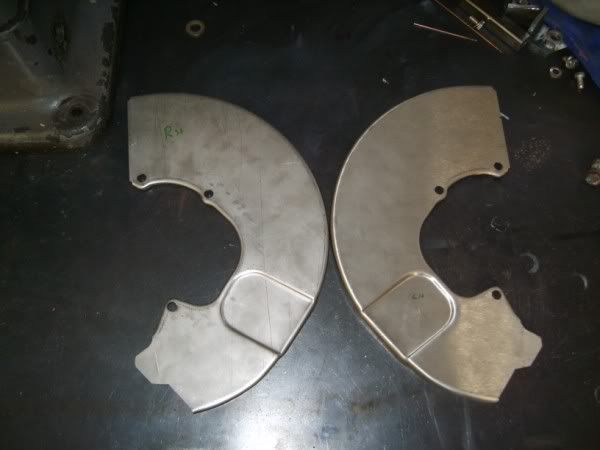
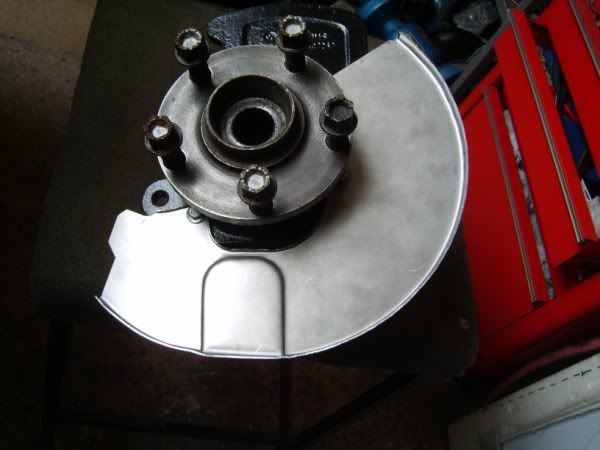
I also formed the rears, luckily I had one of the originals that was just about inctact enough to measure and have the blanks cut.
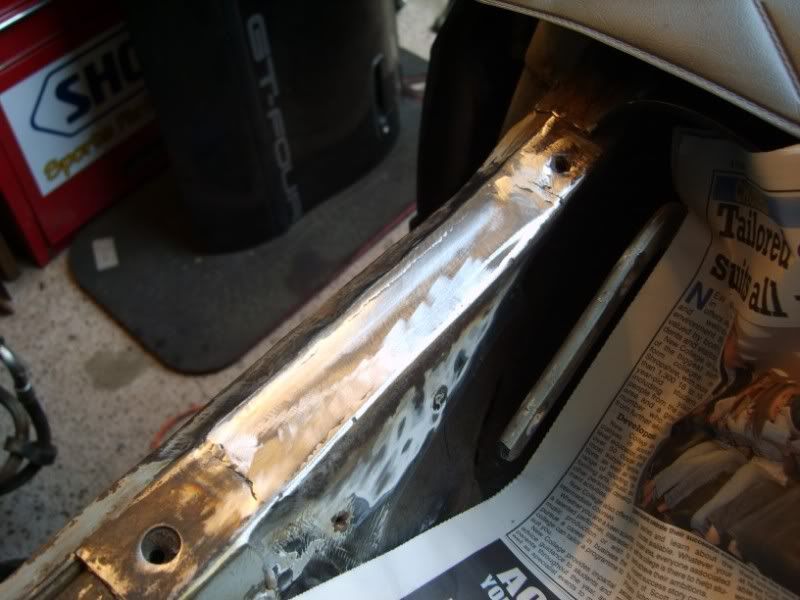
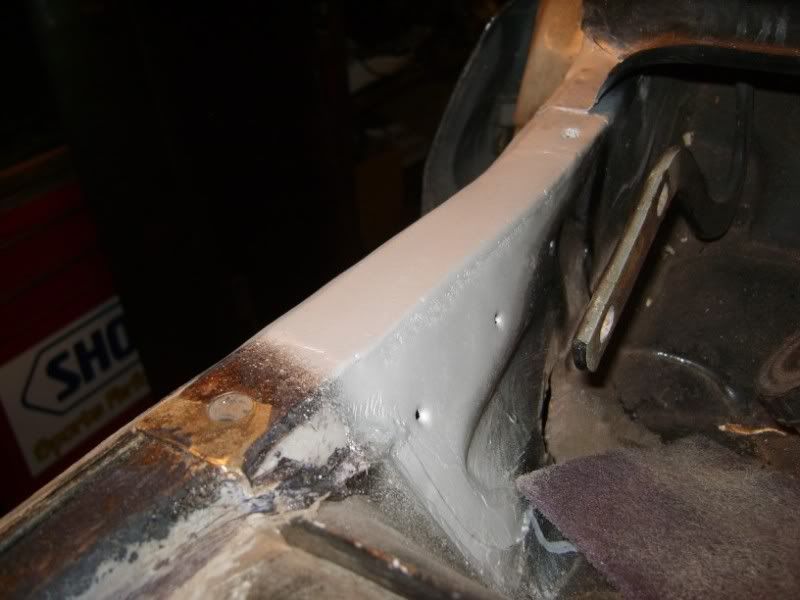
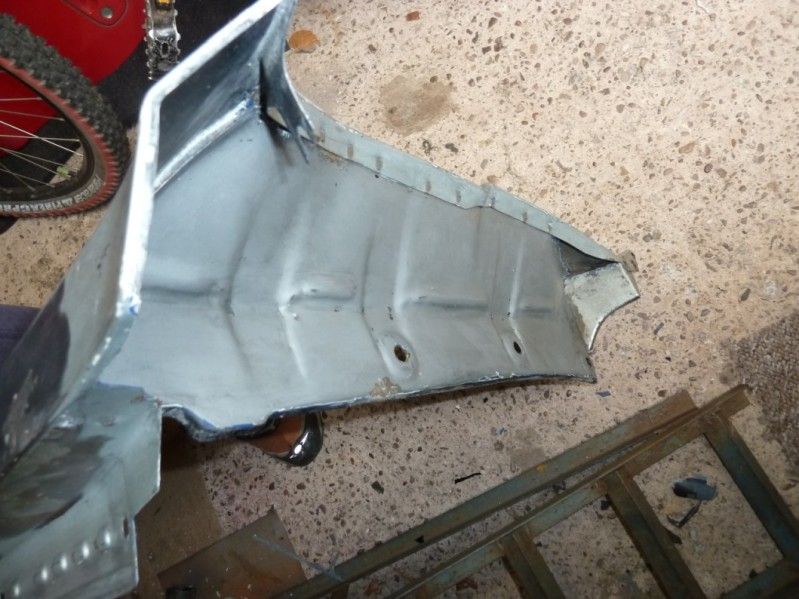
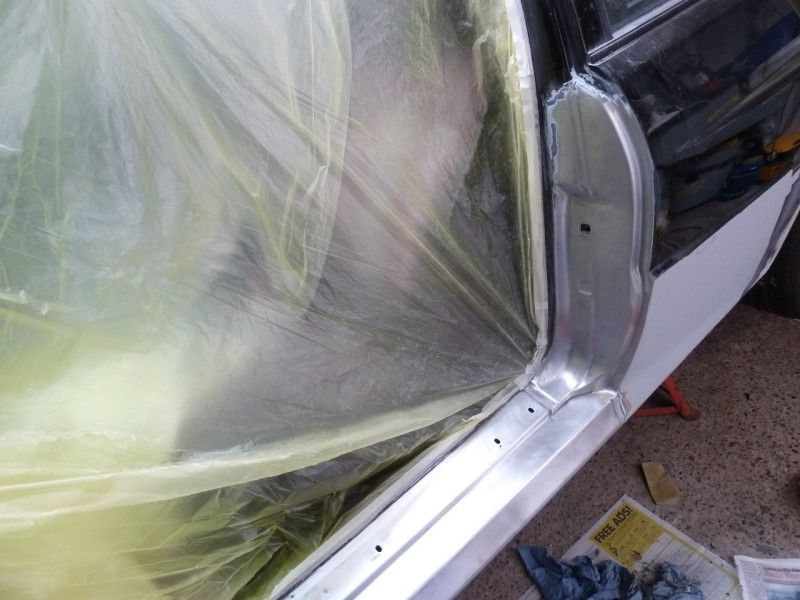
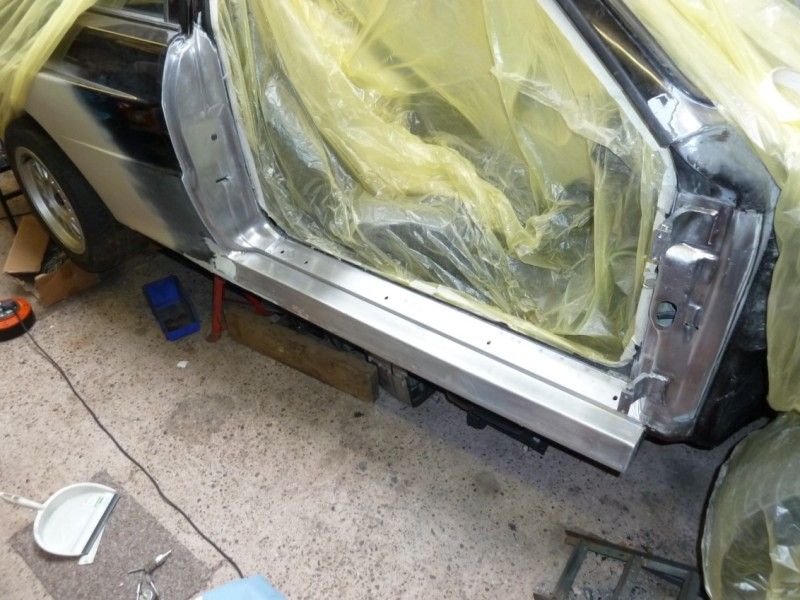
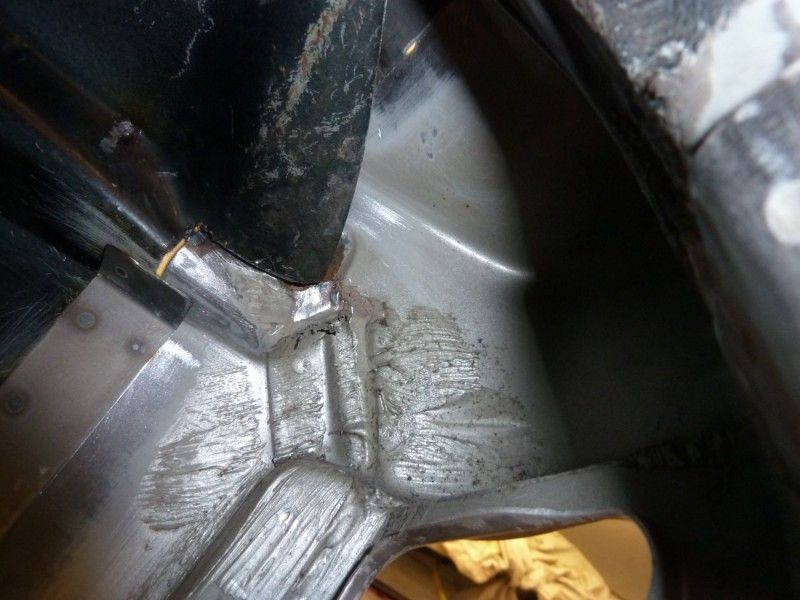
With my parts collection starting to grow I continued onwards with the body repairs, doing all the leading and trailing arches and derusting suspension components in readiness for reassembly.
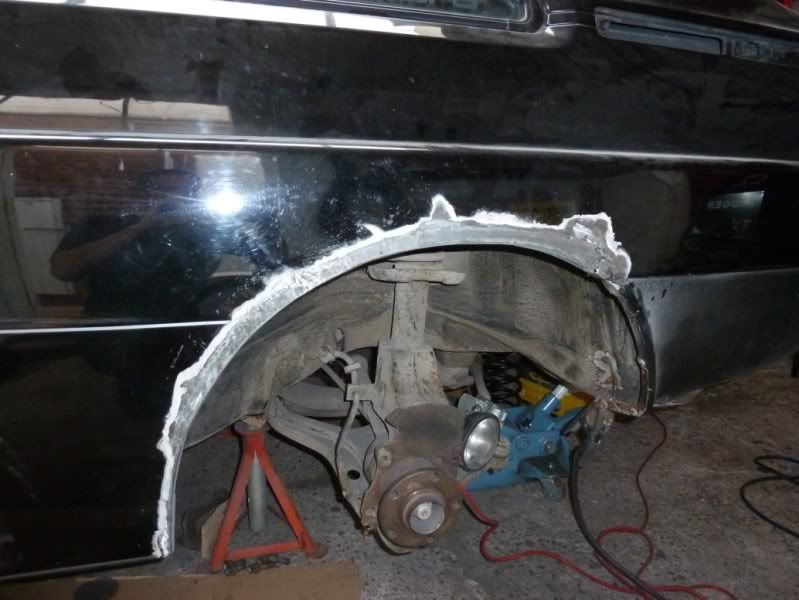
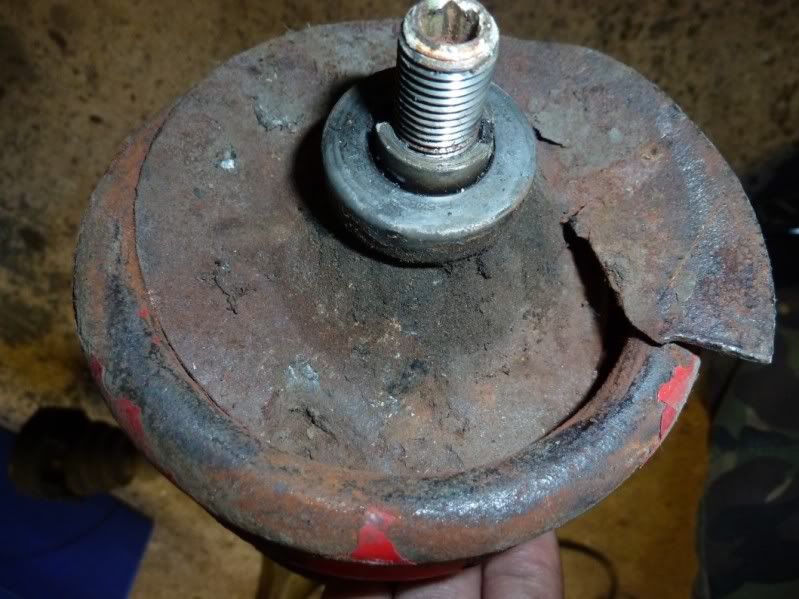
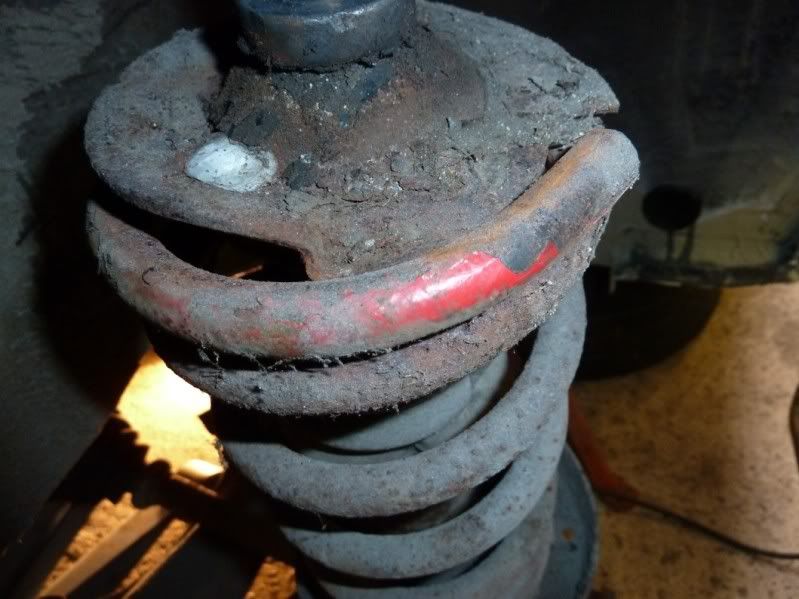
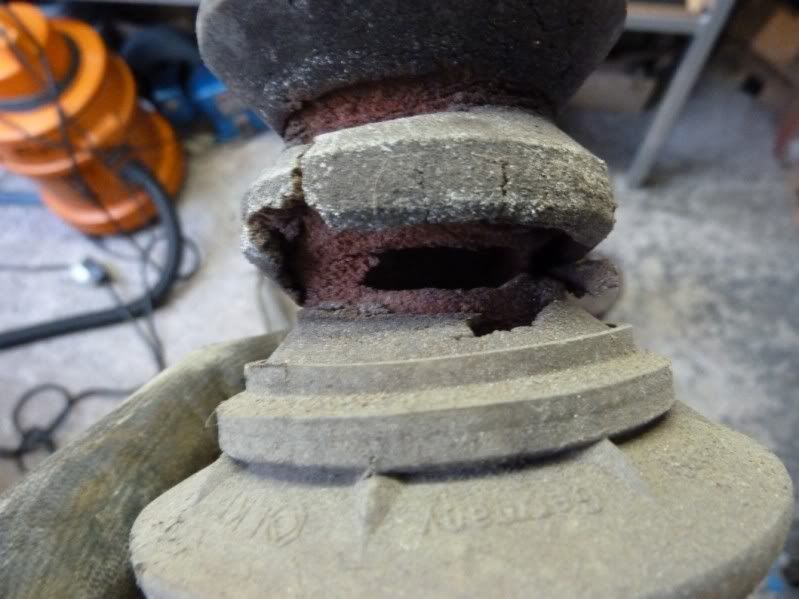
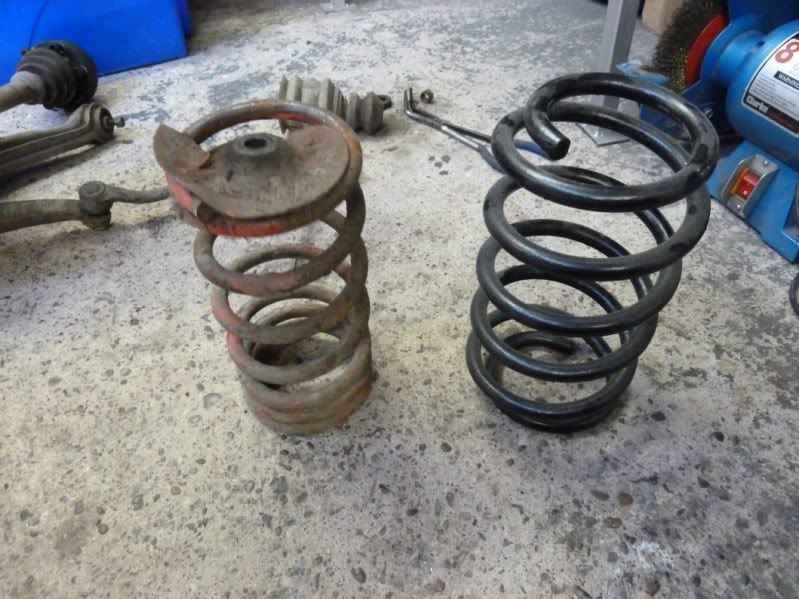
The rear suspension had been making some funny doinging and creaking sounds when the car was removed from the trailer, it also had a 5 degree list to starboard and the reason was at some point itd had lowering srpings fitted that didnt fit the struts properly with the spring flopping up and down with the suspension on full droop which had cracked the already weakened top spring seats.

Ripped bumpstops and stut gaitors.
The spring on the right is what it should have had fitted.
Original rear strut inserts were still pretty functional, not bad for a 30 year old car.
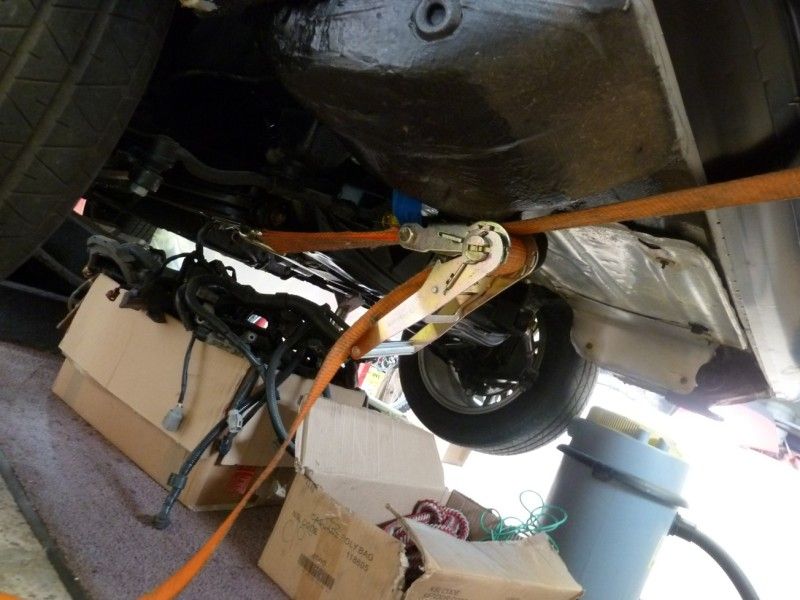
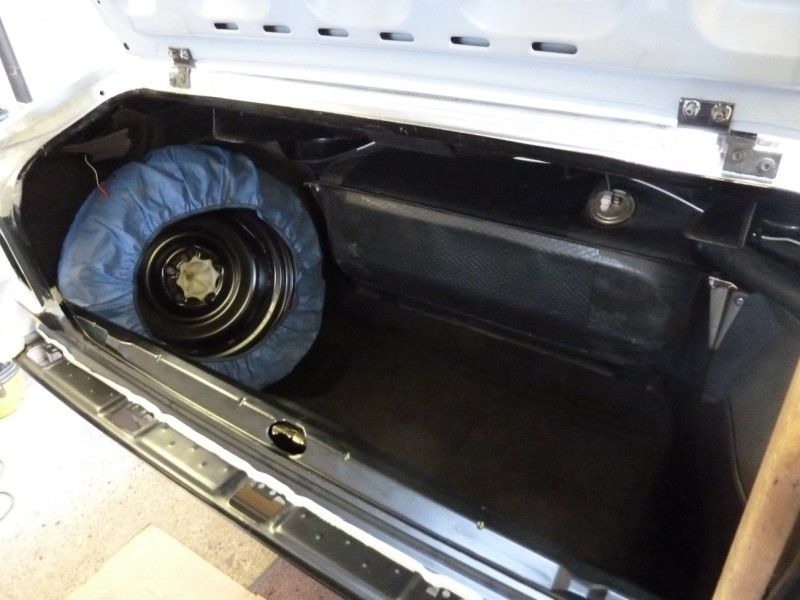
The rear diff and subframe all came out to be cleaned, seals renewed (nla on the big left one, cost £80 from the states).
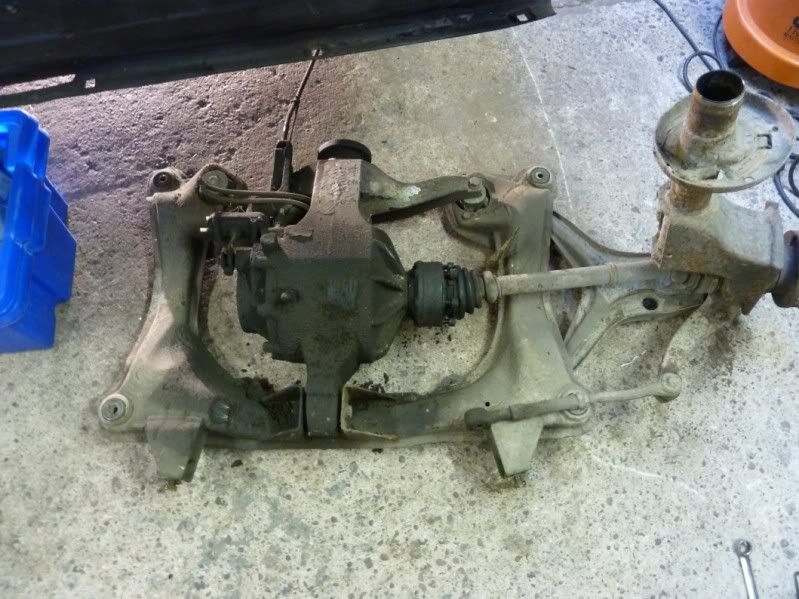
Underbody over the diff wasnt too bad and had been preserved by the leaky oil seals flinging hypoid all over the place.
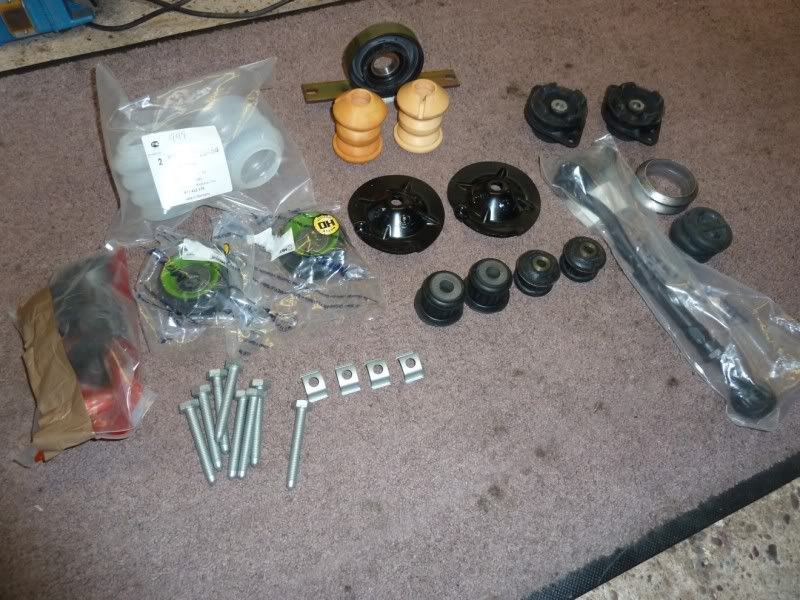
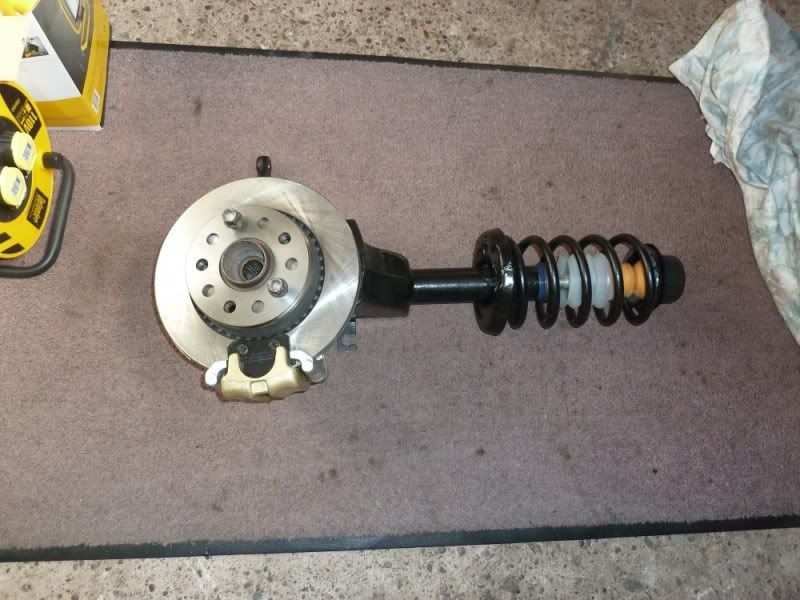
With parts coming together and a daily routine of derusting, scraping, cleaning and painting, things started to go back together, the struts cost £500 a corner just for parts which comprised of new strut inserts, wheel bearings, seals, bumpstop rubbers and gaitors, top strut bearing, discs and calipers and pads not including my stainless brake shields.
I had previously scuffed and repainted the engine bay, intending to return the car to its original montego black metallic, but I wanted a different colour.
While I was making my mind up about that the s6 20 valve engine was trial fitted and a set of early quad headlamps sourced which I refurbed as I like the look of the early cars moreso than the facelifted later types.
The plastic chromed surrounds I got from a friend in Massachusetts for which I'm eternally grateful, Thanks Matt!

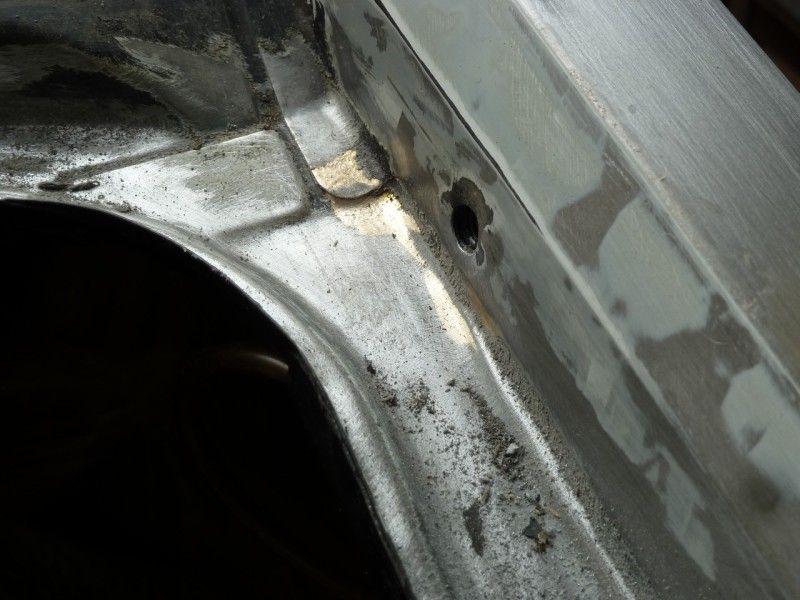
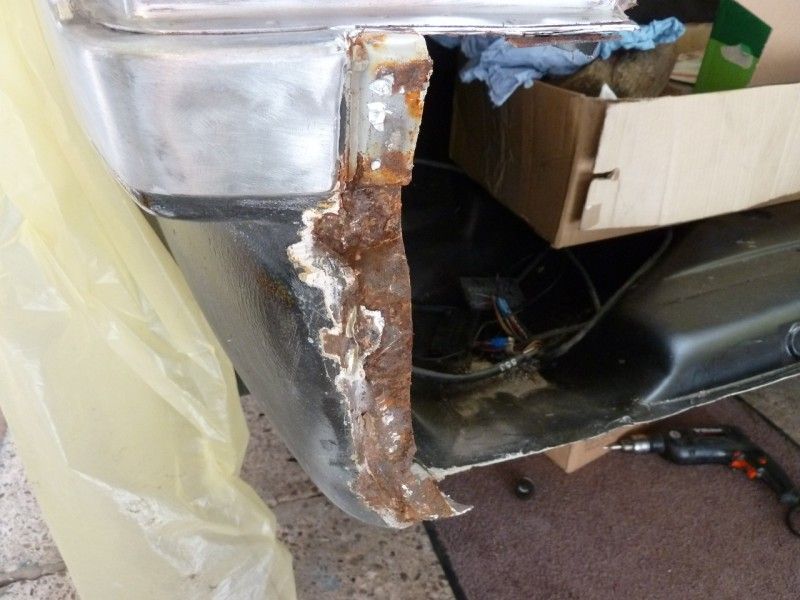
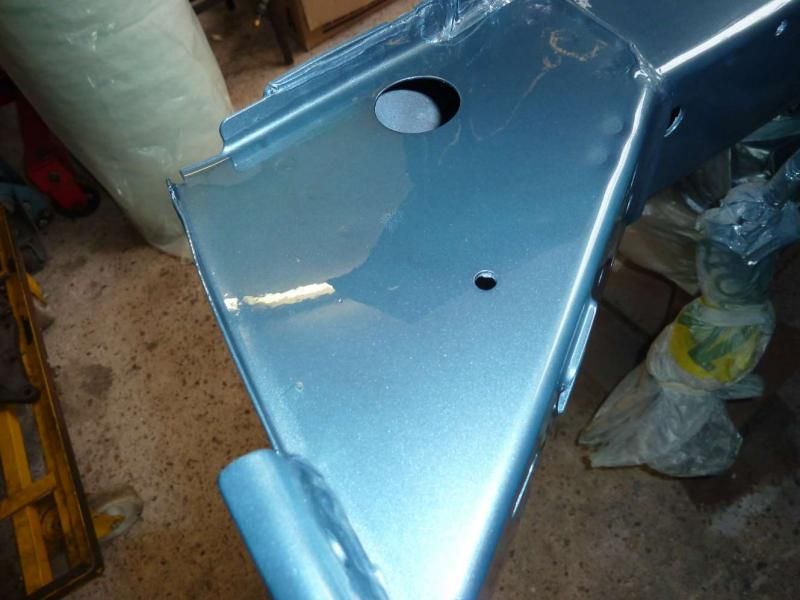
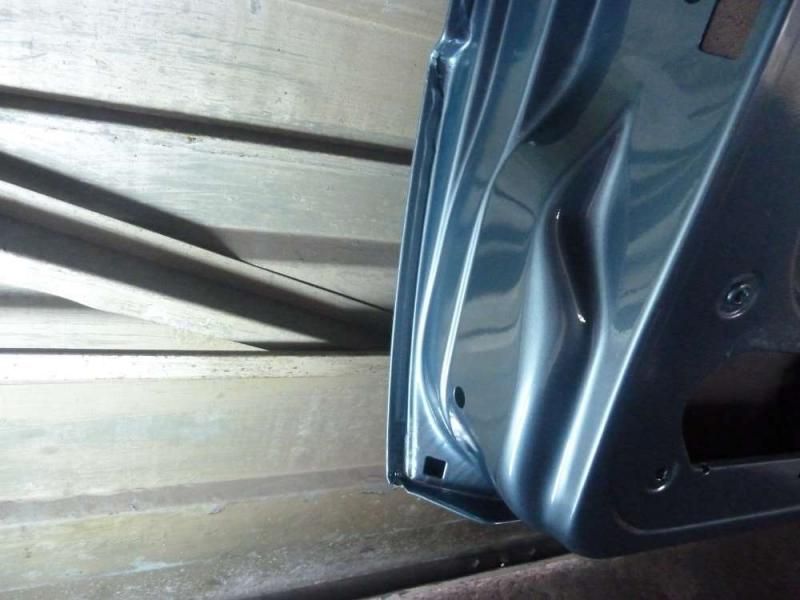
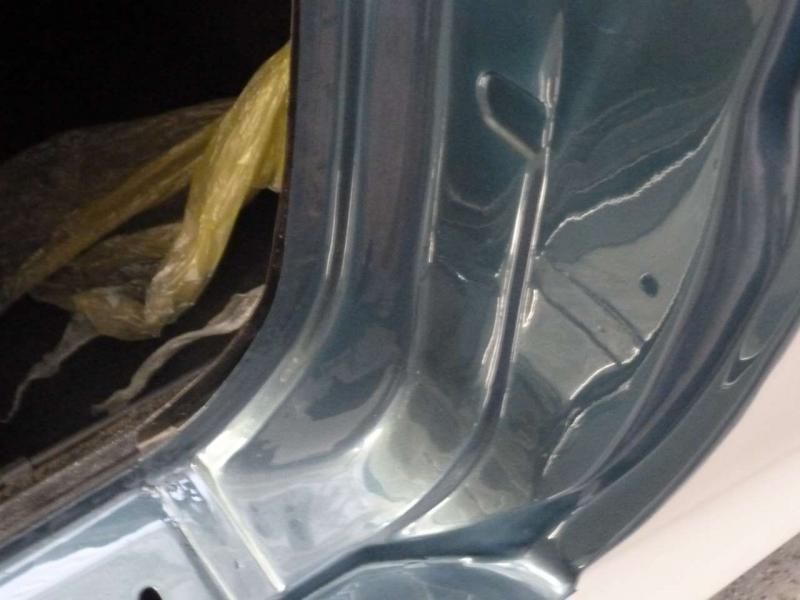
Other bodywork issues continued to show themselves.
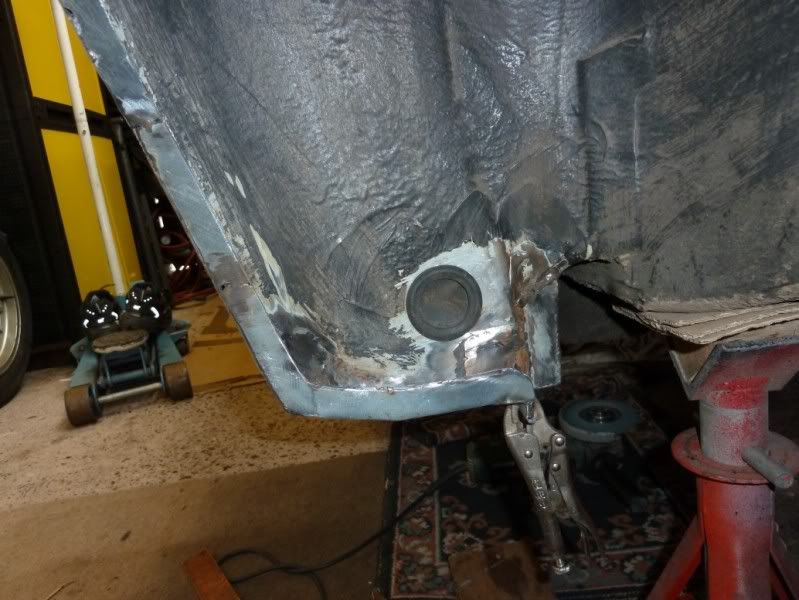
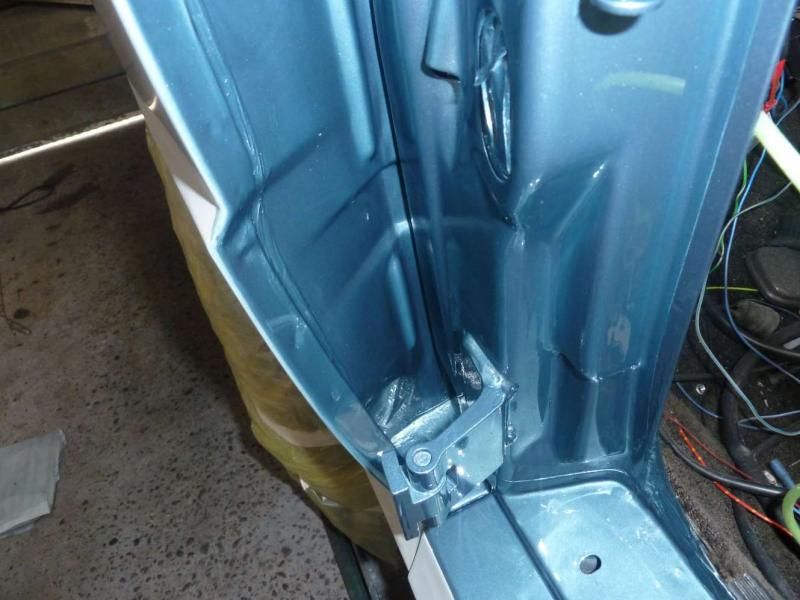
The car had previously had a new clutch master cylinder fitted but instead of unbolting the steering column components and removing the cylinder out the bottom the top of the scuttle panel had been butchered by some jockey with a chisel and then fibreglassed over.
That was never going to do, luckily a friend had an old coupe gt he was stripping down and I got the area of scuttle panel I needed to make a decent repair to mine.


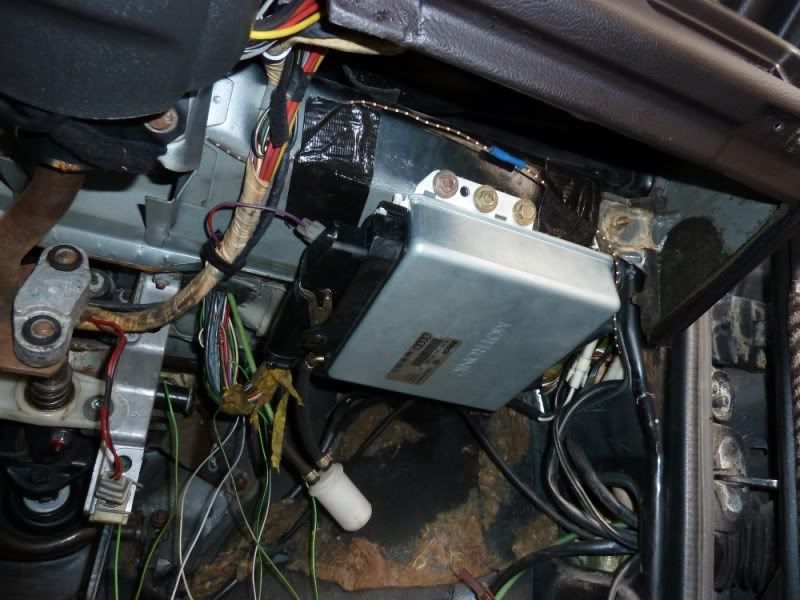
The hole is for the replacement motronic ecu wiring to pass through as I wanted to keep the underdash free from sphagetti where it would just be tight to fit in.

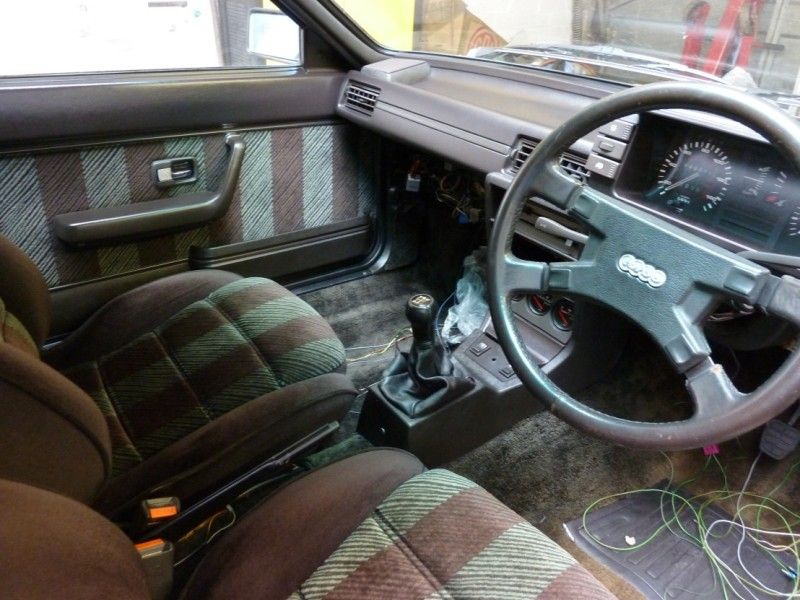
With all the major welding work on in or near the passnger cell completed a clean up of the interior and refit was carried out, including repair of the drivers seat frame (they crack frequently over time) and fitting the correct seat base with its height adjustment, its very late 70's but I like it.


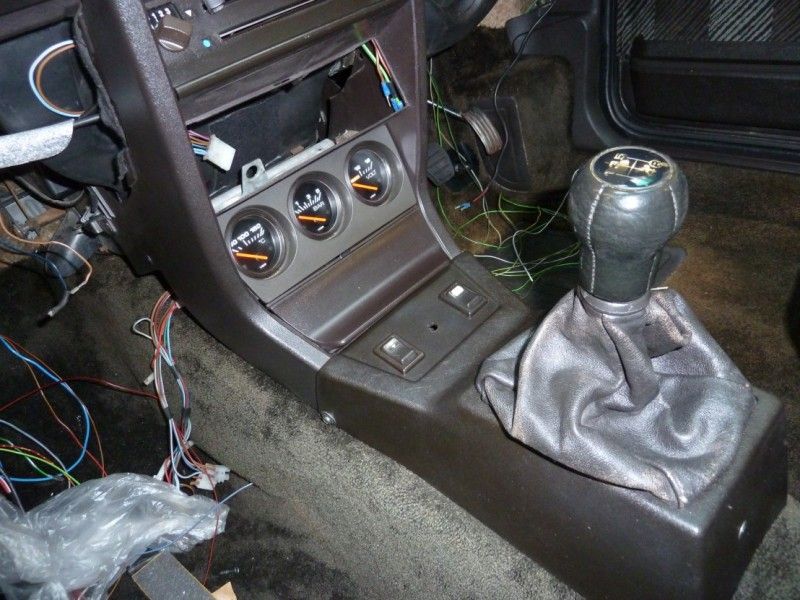
Since this is the early 83 model with the pneumatic diff locks I decided to dispense with them and lock them out until I decide to either convert them to elctrical operation or maybe go torsen diffs on it, the panel could then be removed and a more useful set of coupe gt clocks fitted in, I think these look way better than the original pull knob panel.
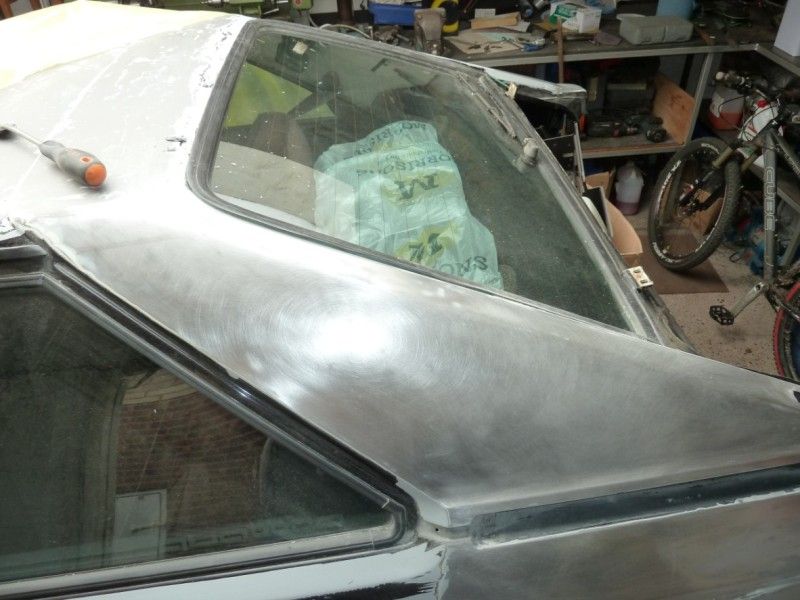
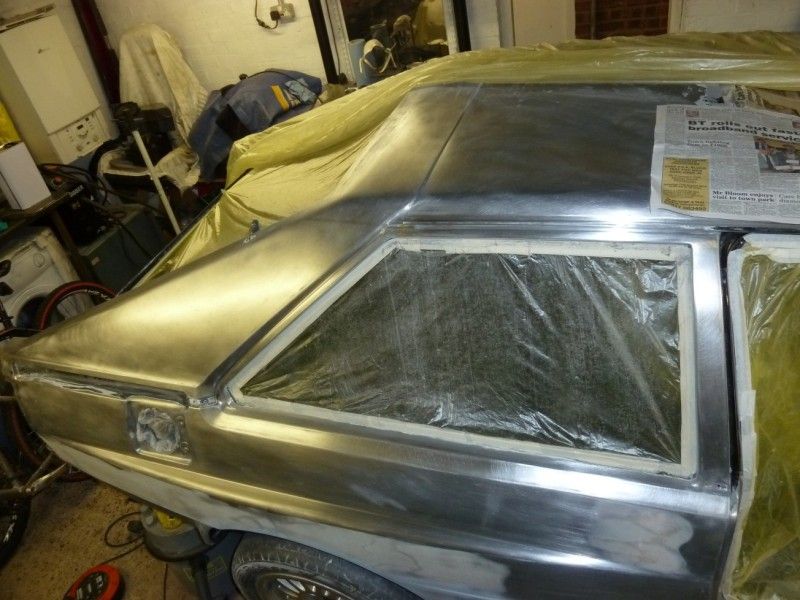
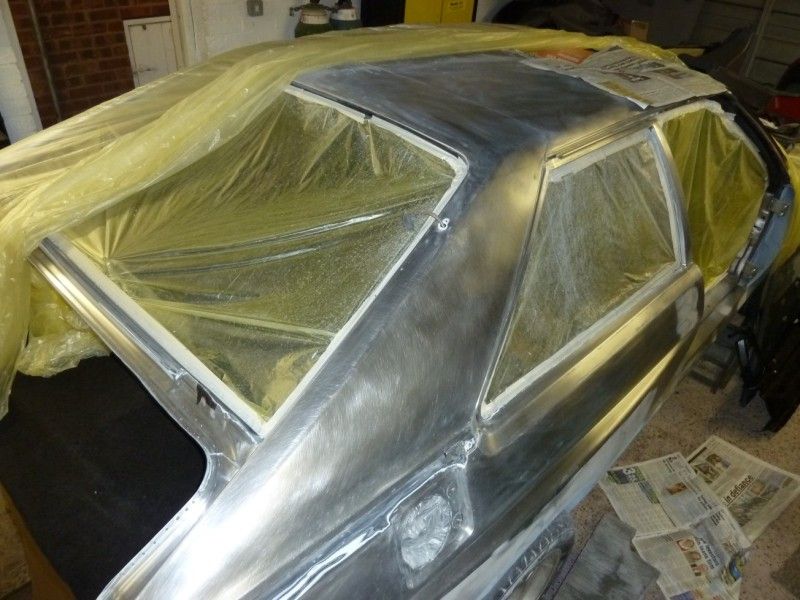
Fast forward a couple of years and Ive started to remove every single scrap of the original paint thats been trowelled on over the years...by hand.
Paint stripping the wings and body took the best part of 8 weeks.
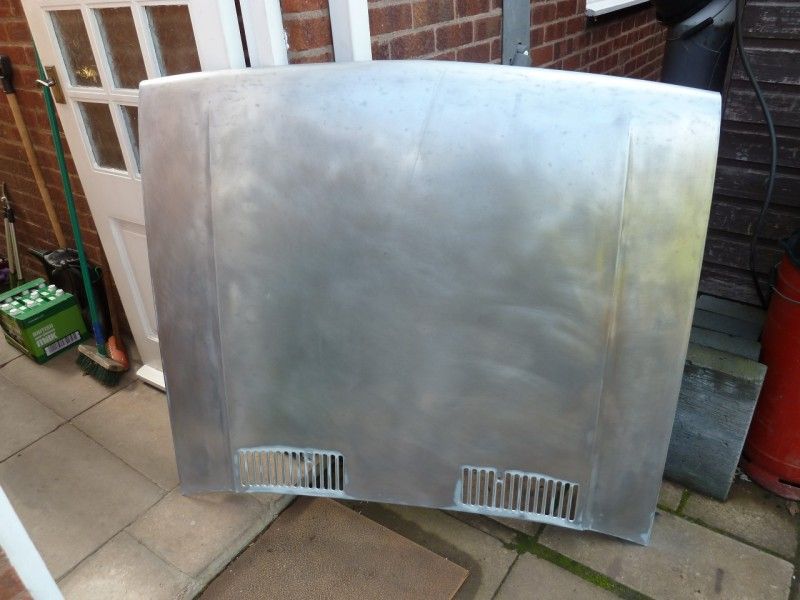
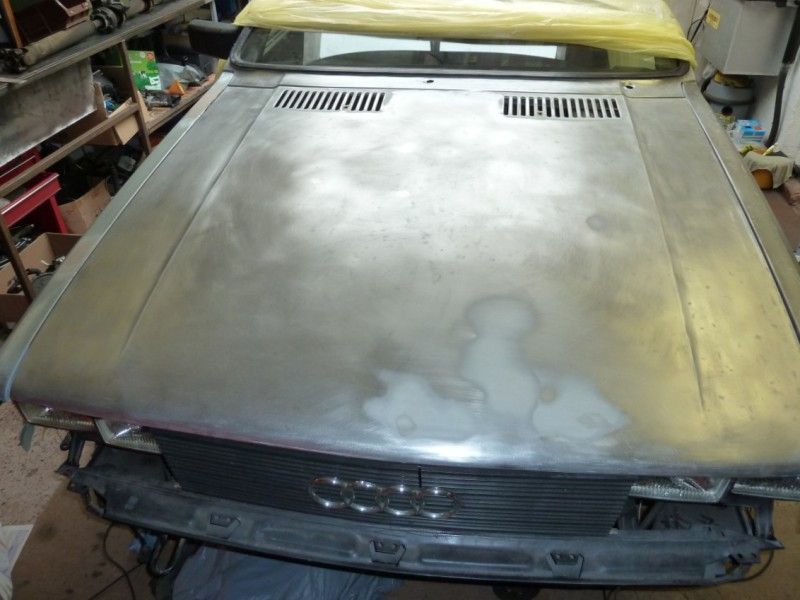
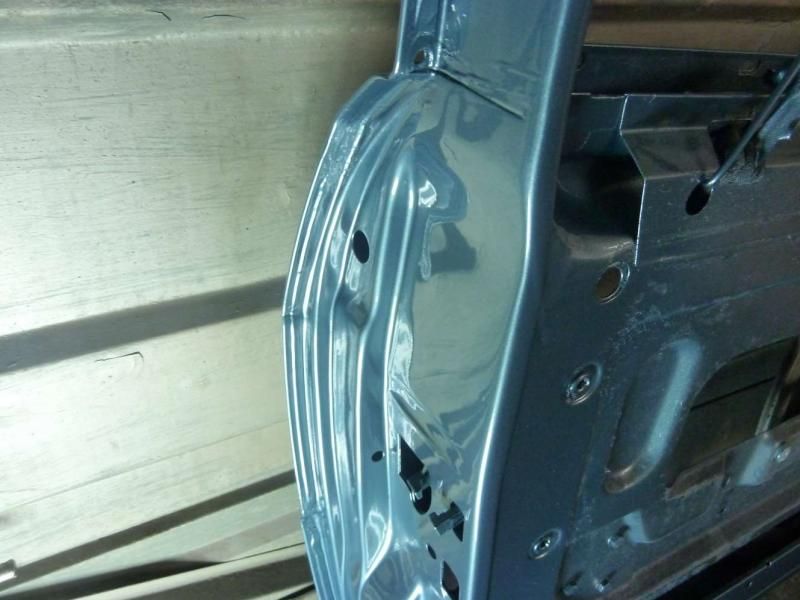
Bonnet isnt the cars original, its from an 82 coupe gt model but was in way better condition than my original bonnet
Sunroof panel was stripped inside and out by hand and repaired .
Paint film was at least 1mm in places.

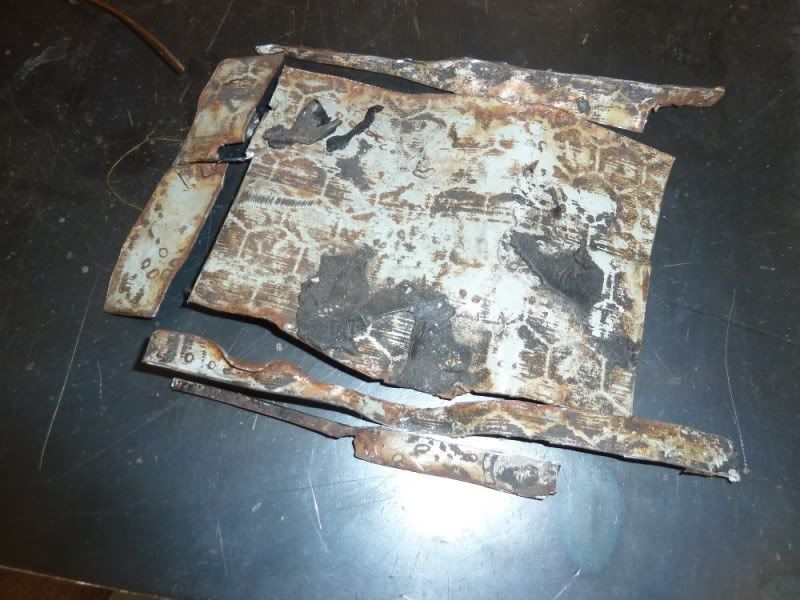
I found what looks like a possible bullet hole in the osr quarter, dunno whether it is but the panel wasnt damaged otherwise so could be.

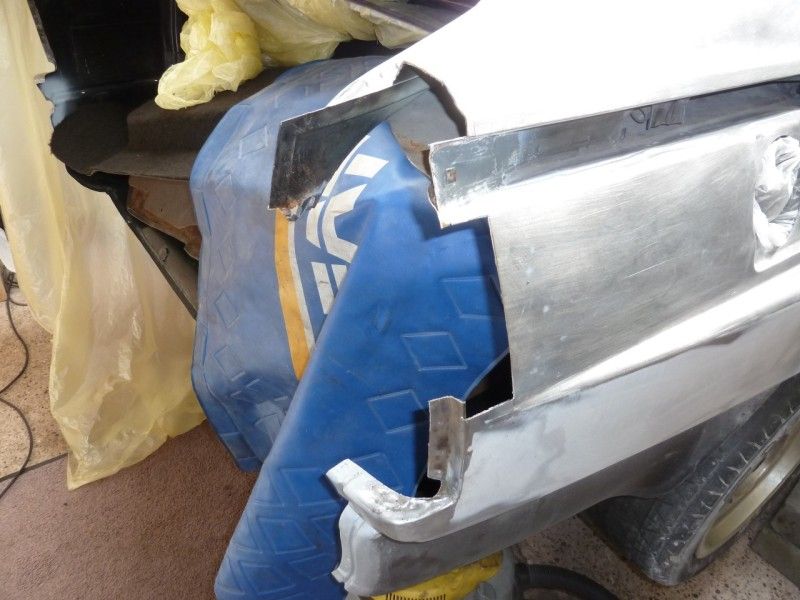
The osr quarter at the tail light area had always bugged me and once I started stripping off the paint I found out why, its because its been crudely infilled with filler and weld to disguise a rear end shunt.
I did attempt to pull it out some but to no avail so the only remedy here was to remove the entire section and weld in a replacement tail light section from a coupe gt and a brand new rear valance at £400 ..ouch!

The old panel was bashed to hell vs the new one.
Replacement tail light section.

I trimmed off what I could but still trying to retain datum points to refit the newer part, this was really quite a difficult part to do as its in 3 dimensions and has to be right so I was a little cautious about it to say the least.
After many trial fits, removing tiny amounts so as not to go too far it finally dropped in where it was supposed to.
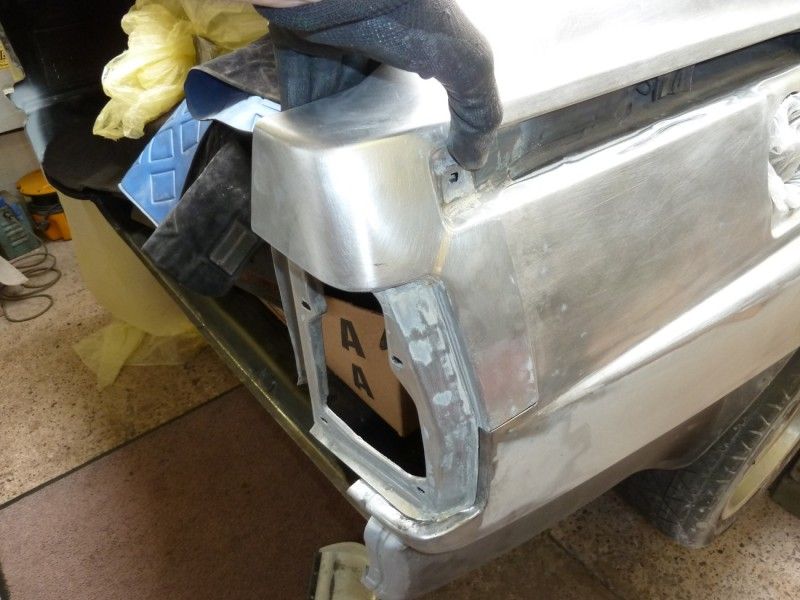
With a backing strip to get it as flush as possible it could be tacked tentatively into place and ogled.
It fits very nicely with a minimum of panel warp.
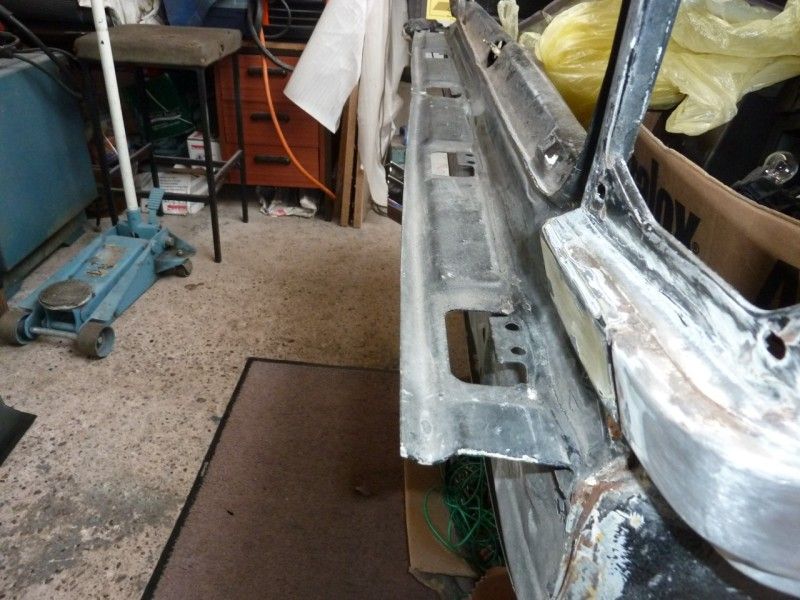
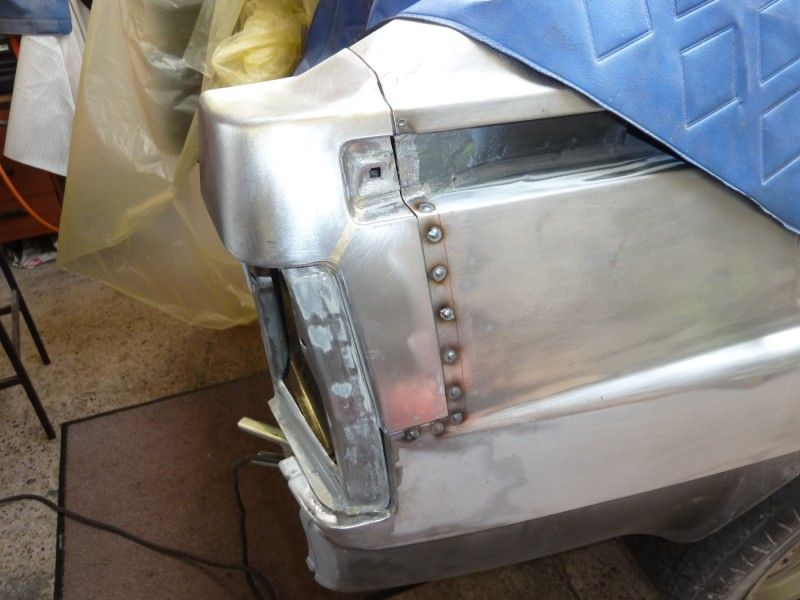
With the light aperture where it should be I could start fitting the new rear valance, pulling it into place with a ratchet strap and some blocks.
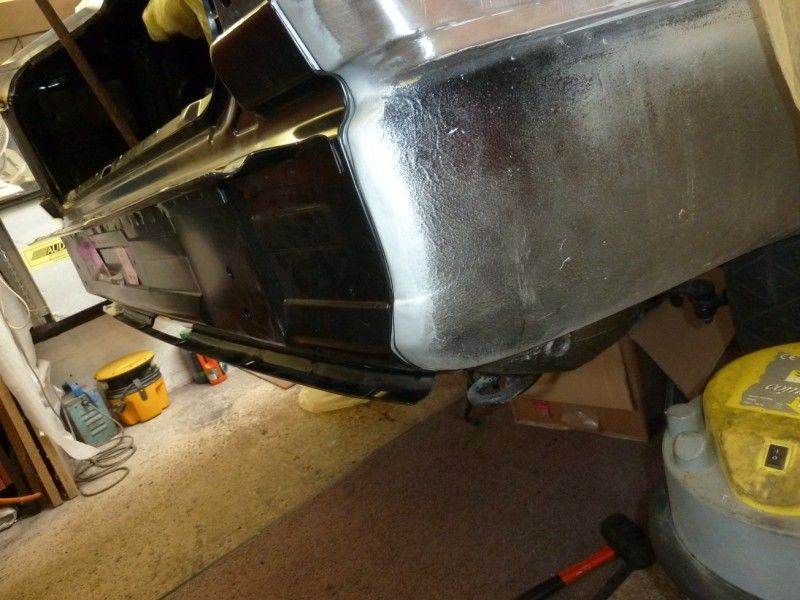
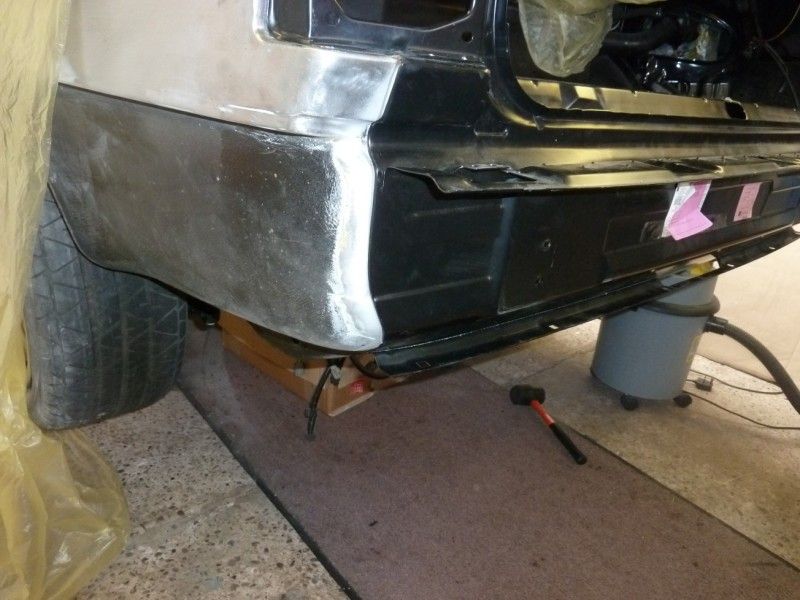
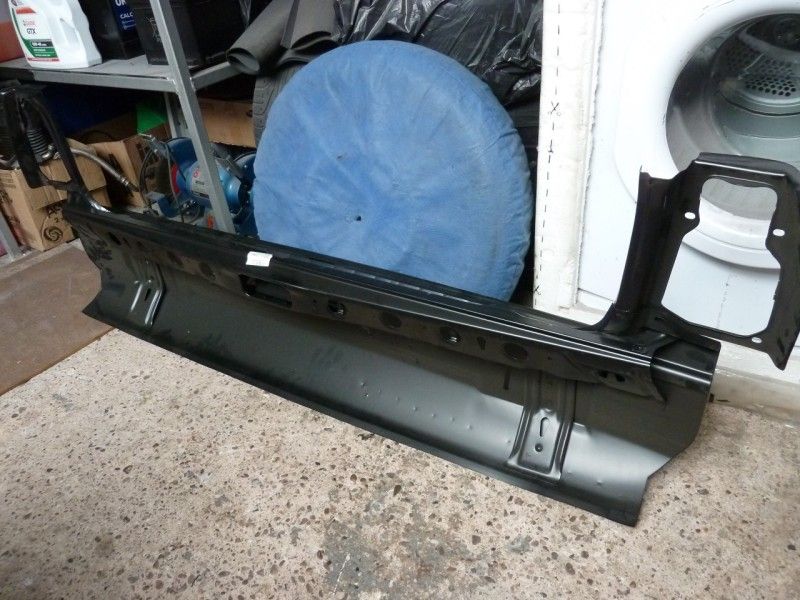
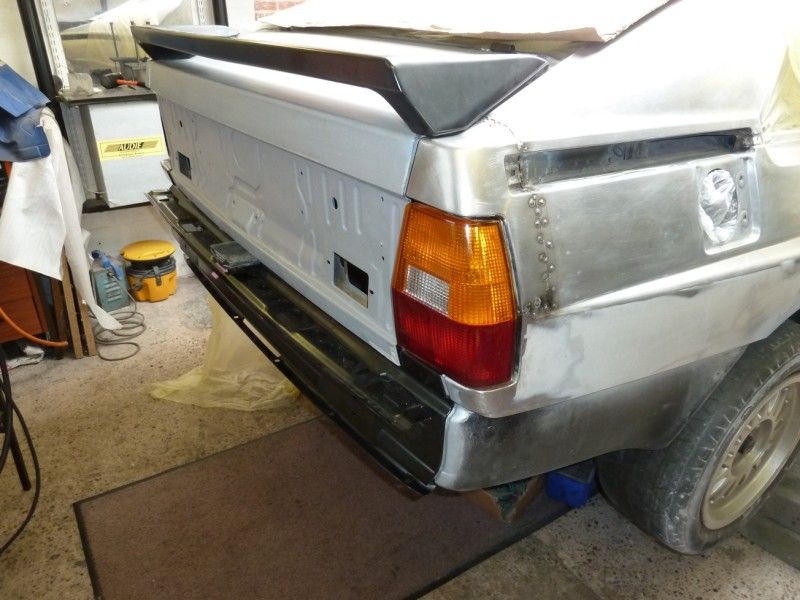
Rear valance welded in and sealed, the back end looks a lot squarer than previously.
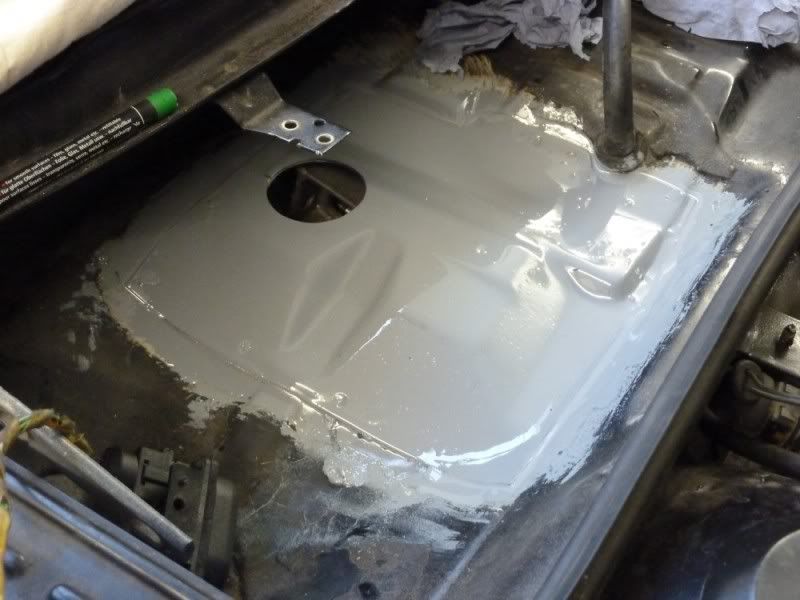
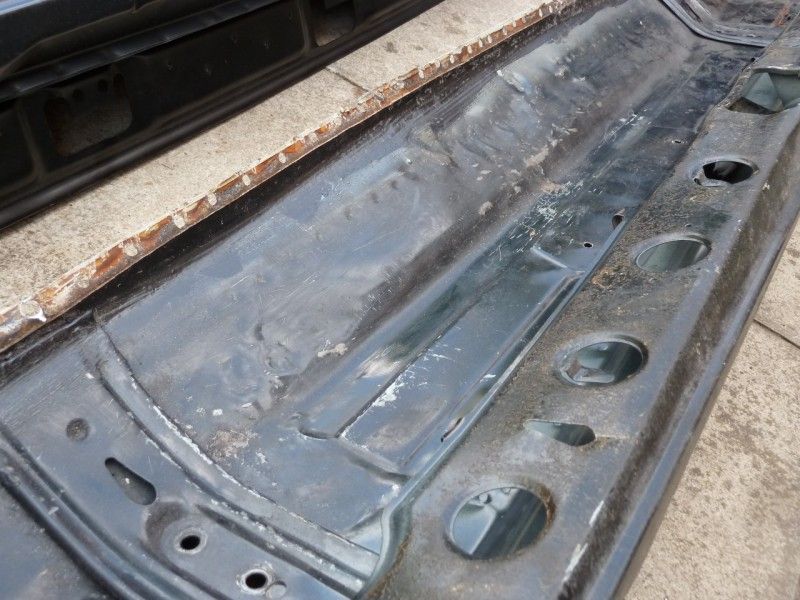
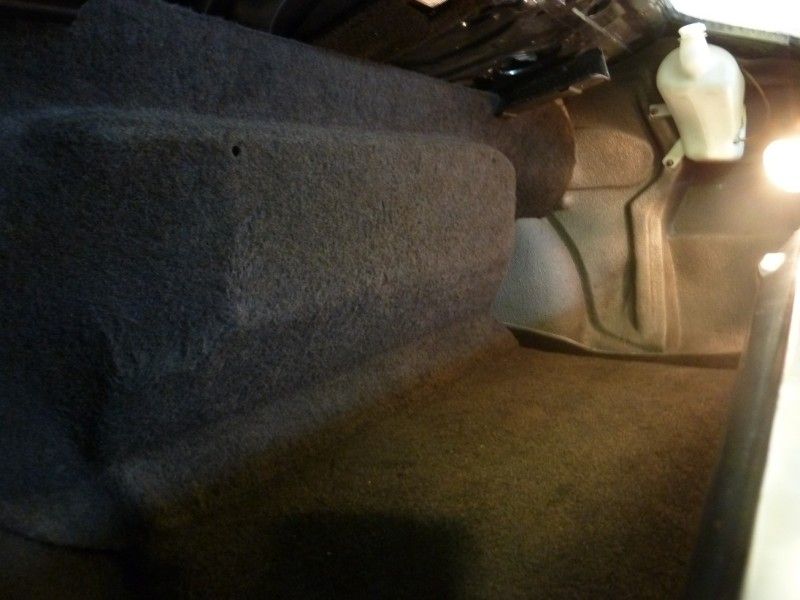
Also fitted new sound deadening panels.
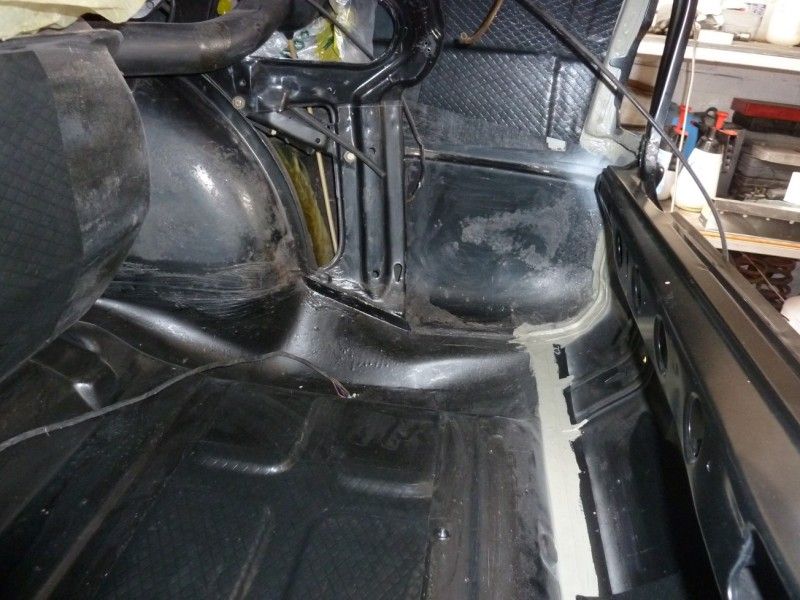
With the cleaned carpet and panels fitted its a nicer place to be....if you should find yourself locked in there.
Since the old boot lid had also been twisted by the previous shunt a friend donated an old unused one to me, thanks Glenn, appreciated!
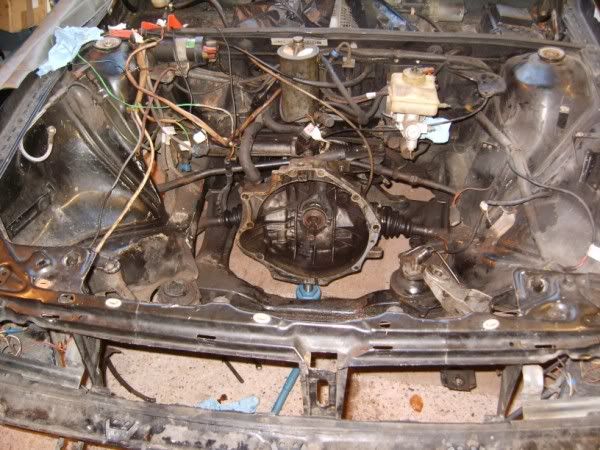
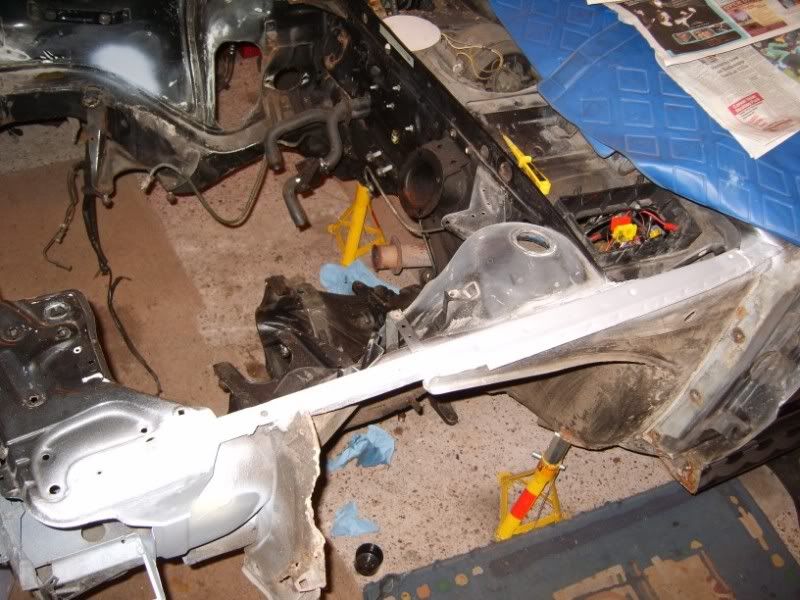
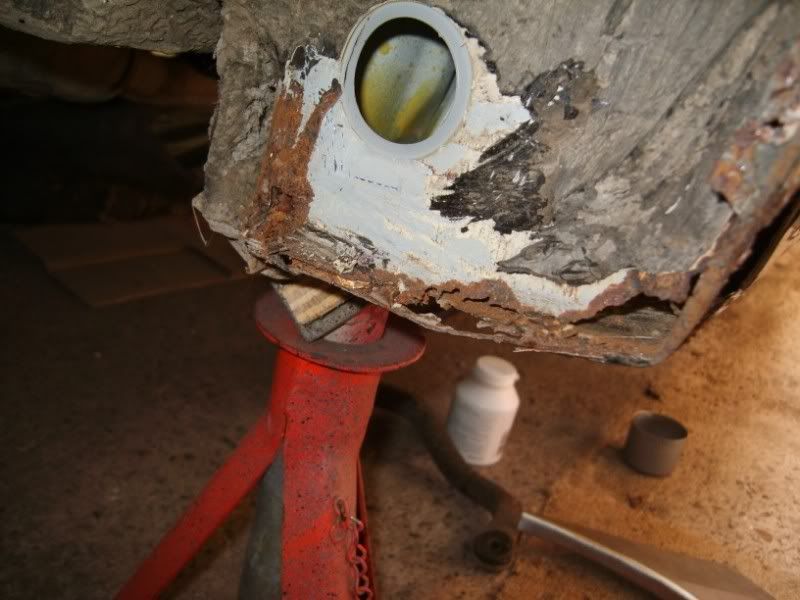
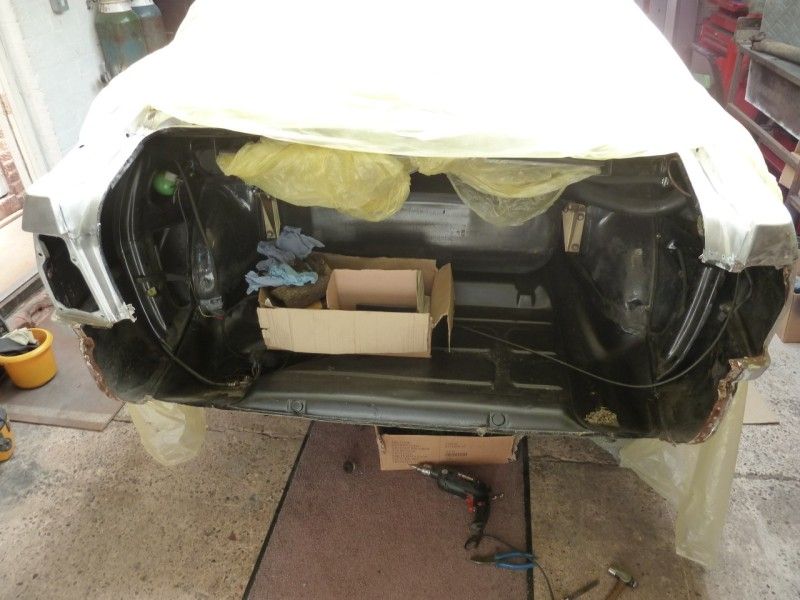
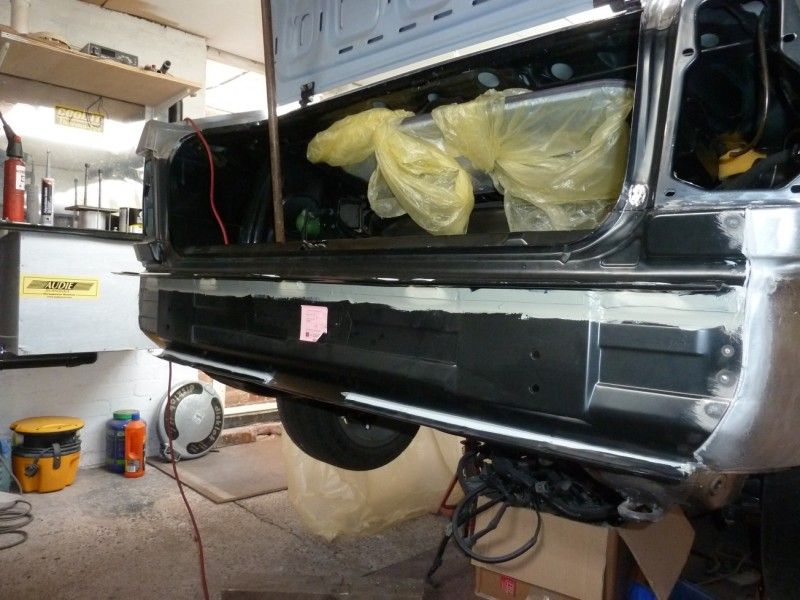
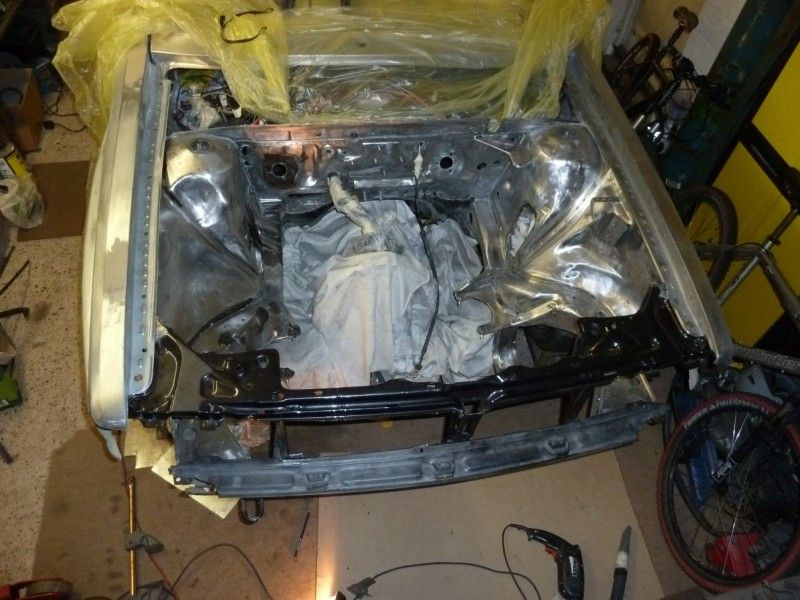
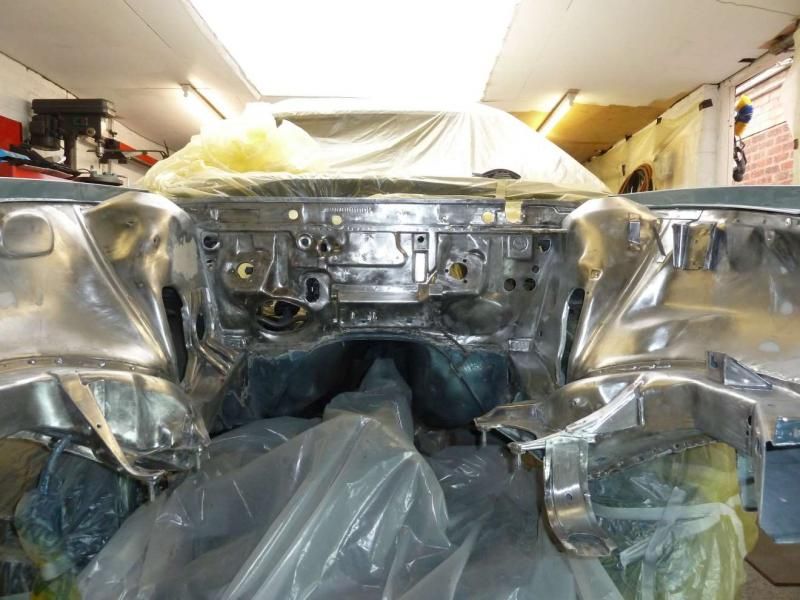
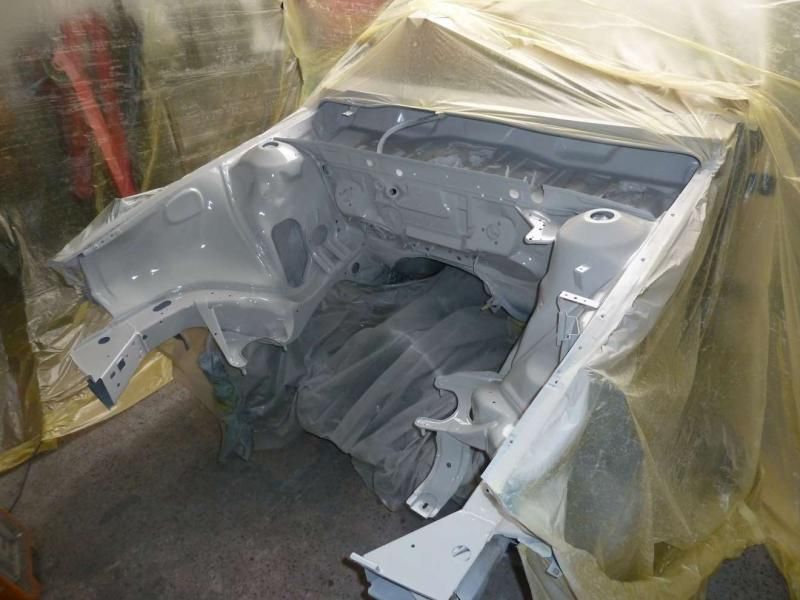
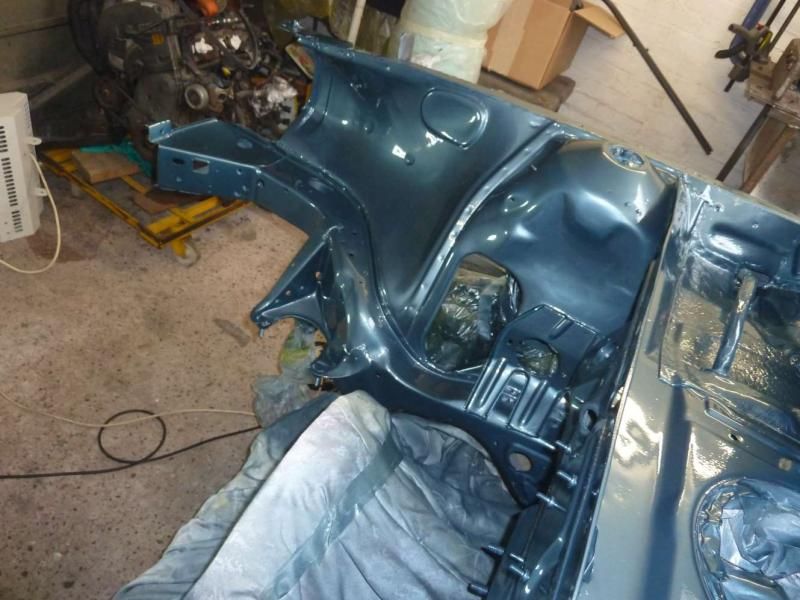
The engine bay was also stripped completely of paint and the front panel removed to enable the easier fitment of the engine and allow access for maintainance.
http://www.youtube.com/watch?v=6ZgeiQ_yqWk
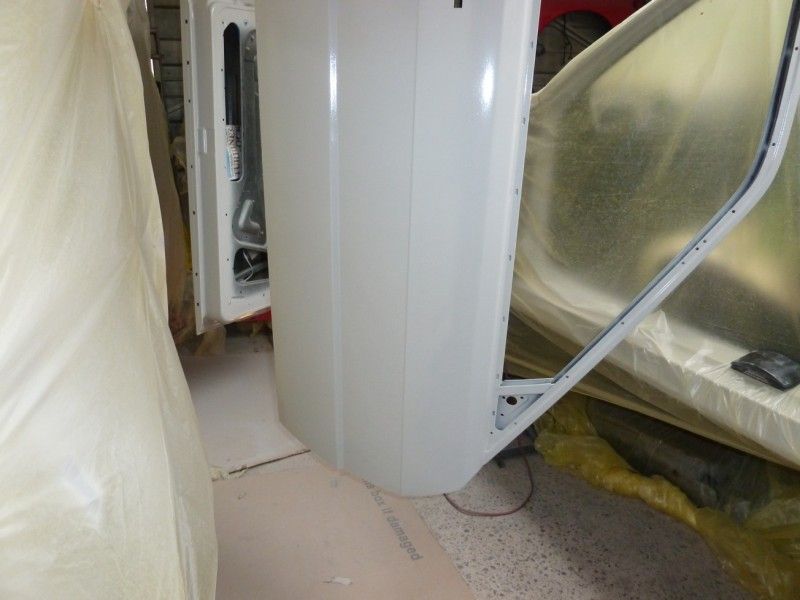
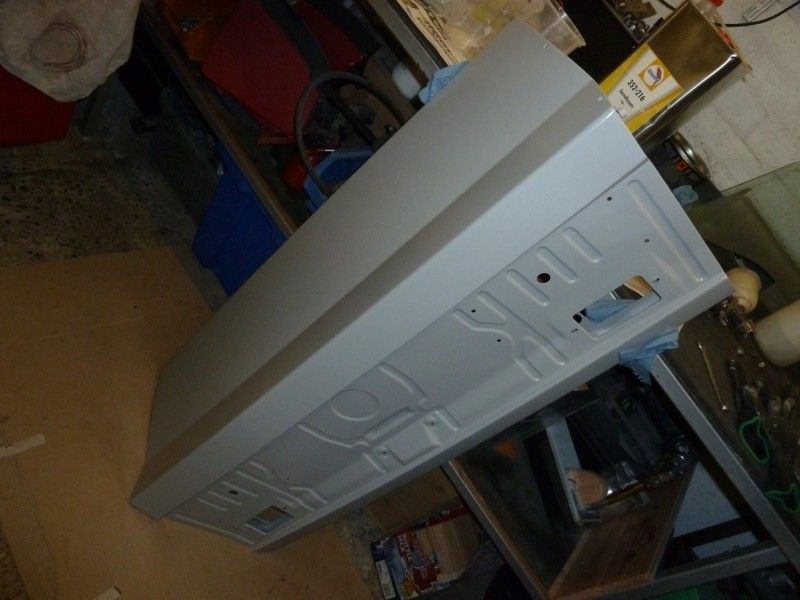
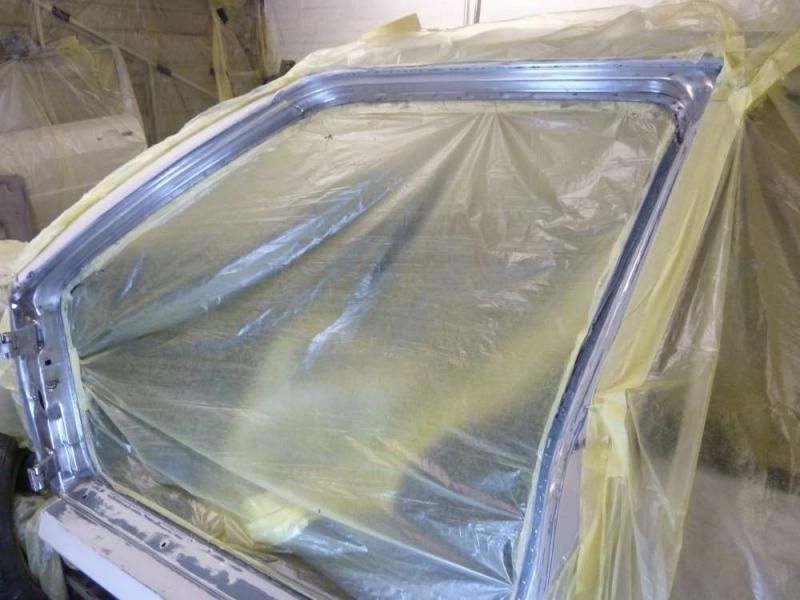
The bodywork I spent some months on getting as close to perfect as a non professional bodyworker like me can reasonably get after which i could start priming the shell in epoxy primer as it wouldnt have been feasible to get it sanded and ready for colour and clears in the remaining time.
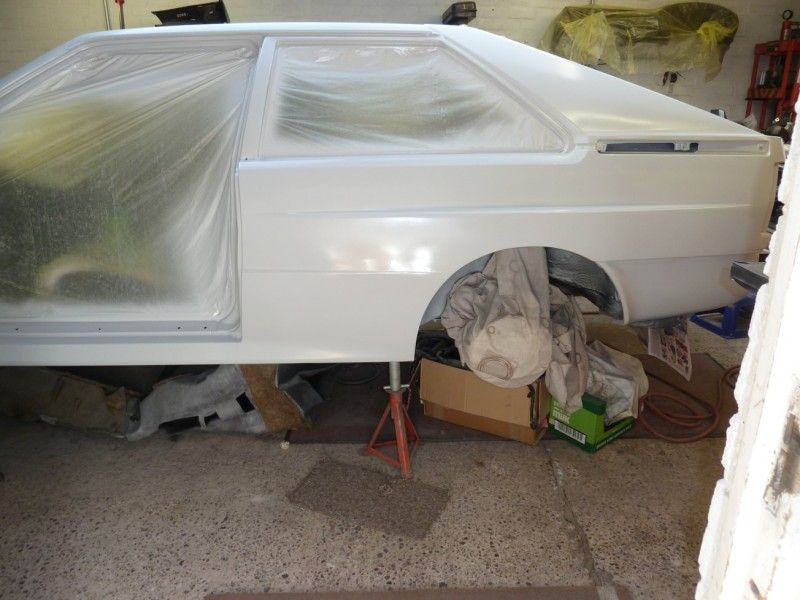
I did actually managed to get the majority of the body sanding done before time ran out and winter set in.
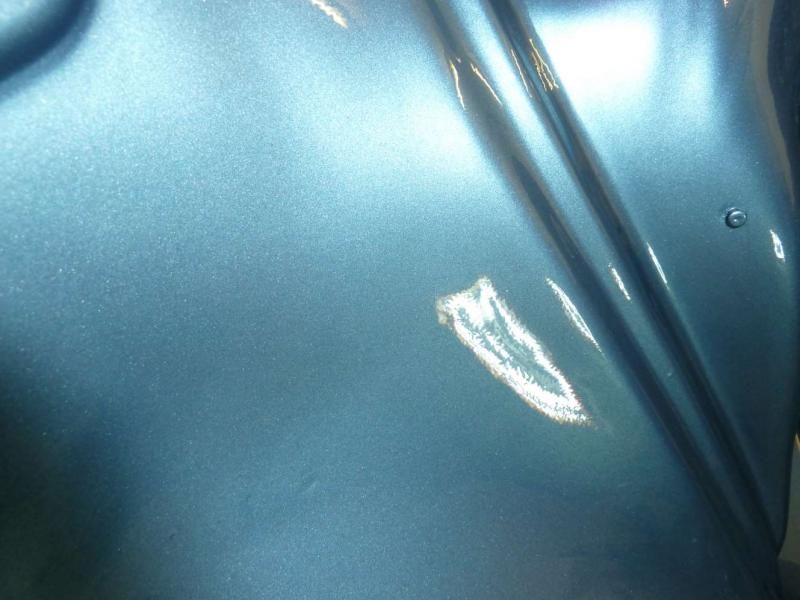
During the summer last year I had the opportunity to start putting on body colour and clearcoat, it all went very well, too well as it happens as a few weeks later I discovered that the clear coat I was using was undercatalyzed ( my own fault I misread the mixing instructions) meaning its had to come off again.
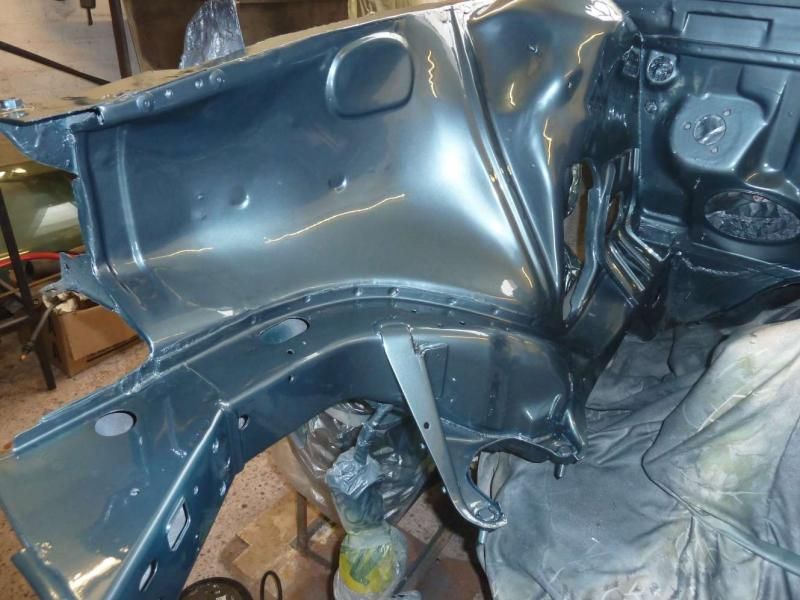
Gutted was I but after a few days of kicking myself I got back into removing the engine bay paintwork first ( it WAS lovely) which took about a week of hard graft before I re primed it in the same epoxy I used previously to do the rest of the body.
No one ever said restoration was an easy job.
Its on, its off its on its off again....
Reprimed!
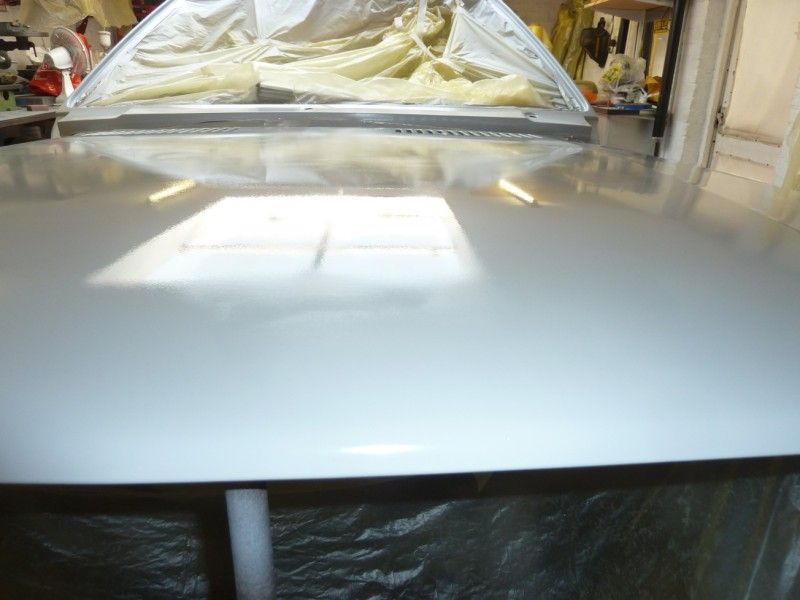
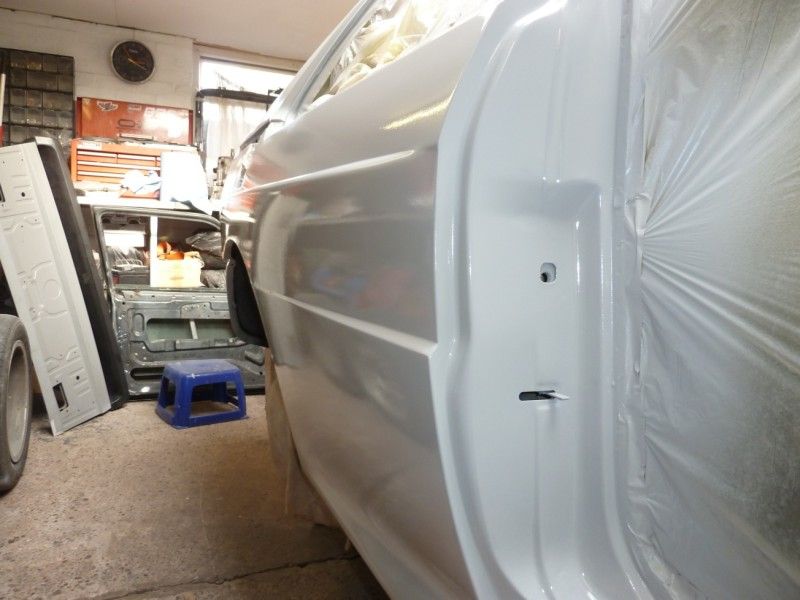
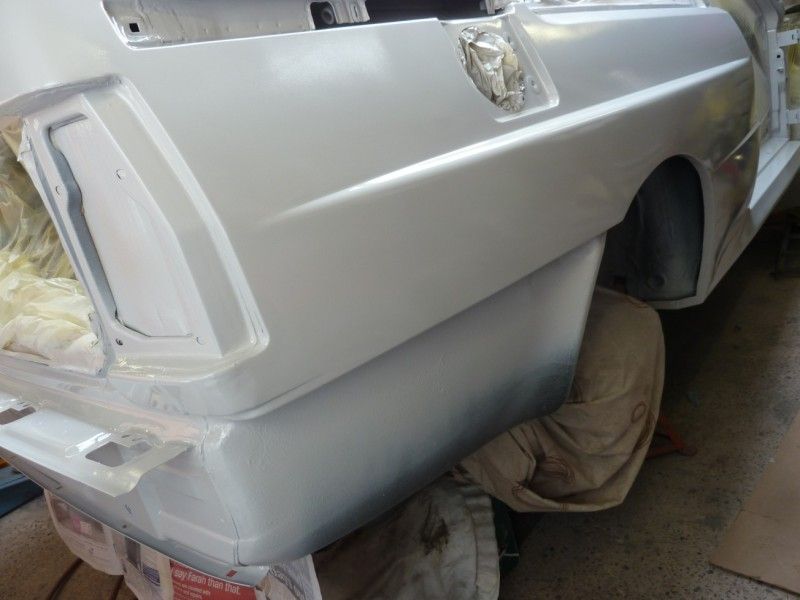
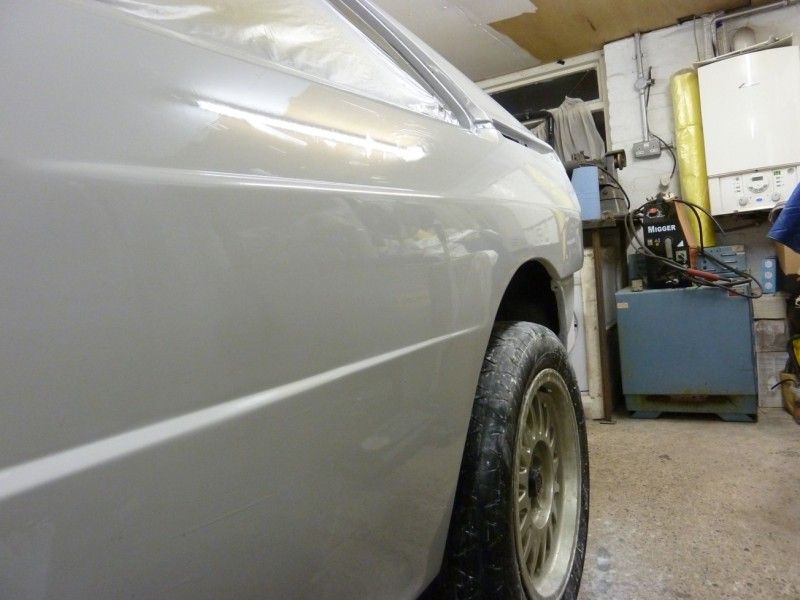
Heres some shots of the paint and clear as it came out the gun ( its dried here).
[img]http://i29.photobucket.com/albums/c259/twarren600/P1100656_zps32f31fec.jpg/img]

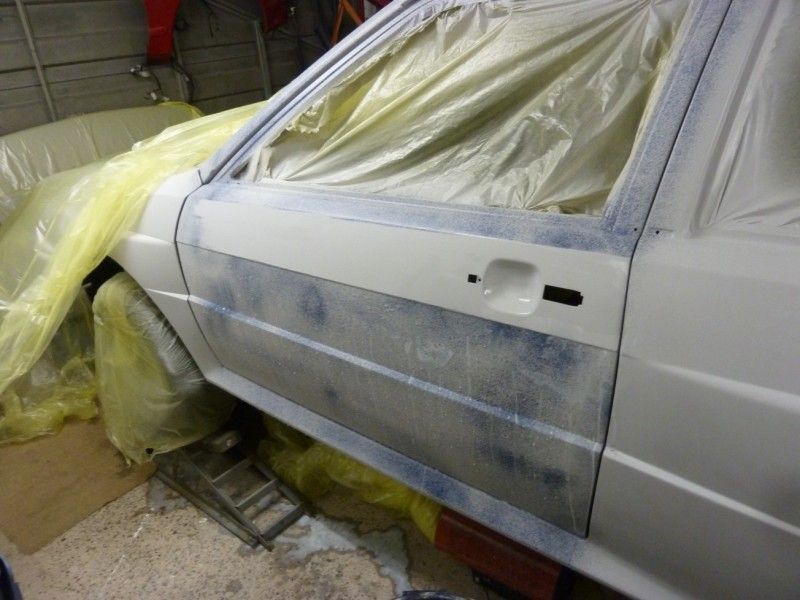
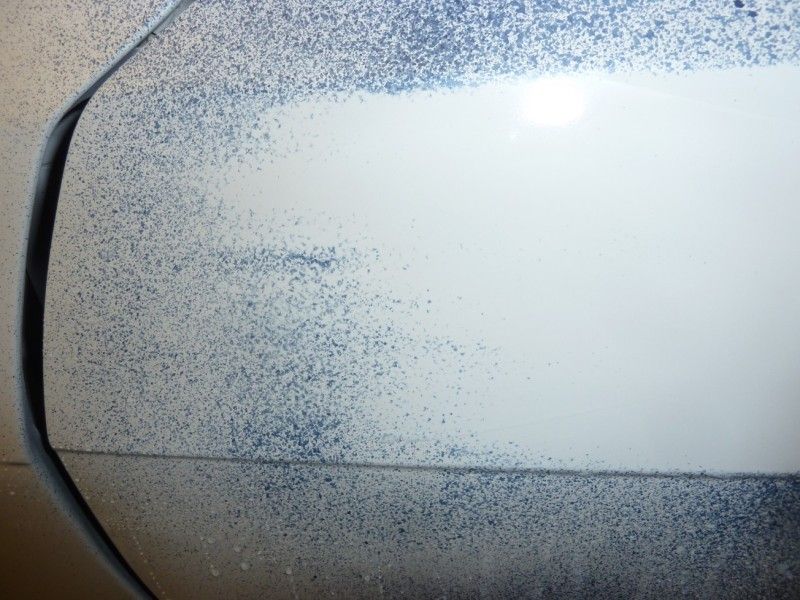
Currently I'm stripping back the door apertures for a reprime and repaint buts its tough as the paints soft so it simply balls up and clogs paper which is why the harder bits have been paint stripped ( not ideal), still itll be ready to take some paint in a few days time then I can start on the doors...again.
Luckily I noticed my error before I painted the outer body panels so it could have been worse.
A bit of spraying malarky of the day I fouled upon on.
http://www.youtube.com/watch?v=XCJ0GFrC9sk
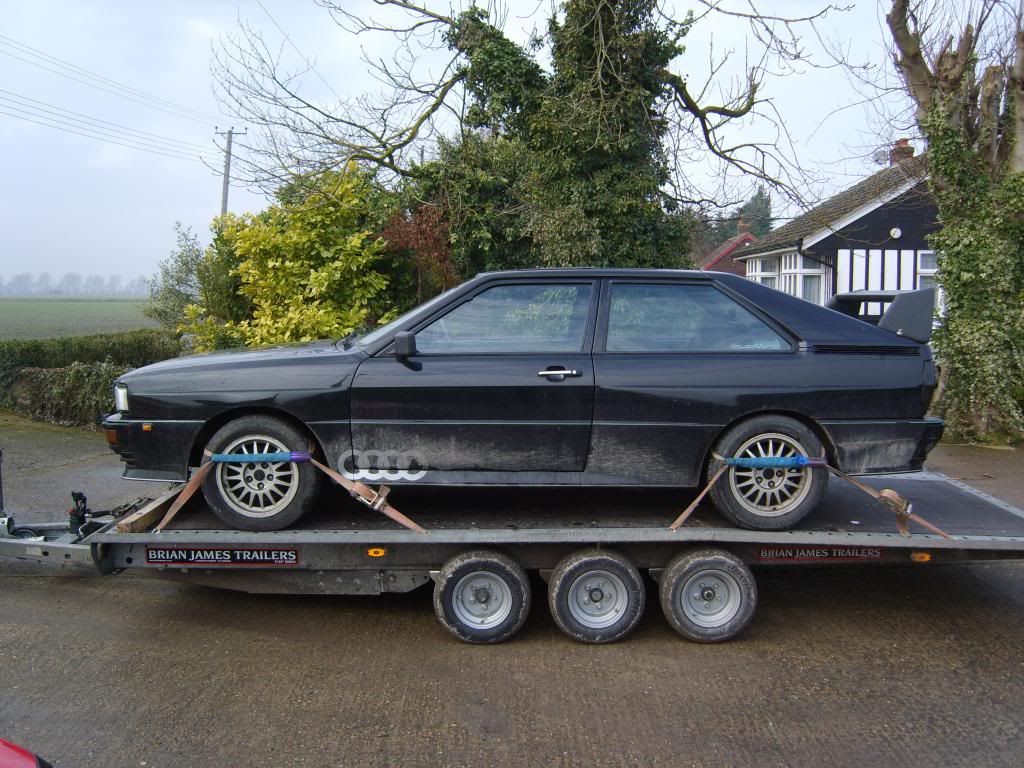
This is how it looked after it had been resprayed and "fixed" up long before it passed to me.
My plans didnt really go the way I anticipated though, perhaps I underestimated the amount I'd have to do and spend on it just to get it to that state, its taken far longer than I envisaged and cost a lot more than I'd have believed even though the works been done all by my own hand and on an exceptionally tight budget....and its still not finished!
The car was bought from a US serviceman at RAF Lakenheath who found it assaulting his wallet at a frightening rate and we agreed a price to take it off his hands.
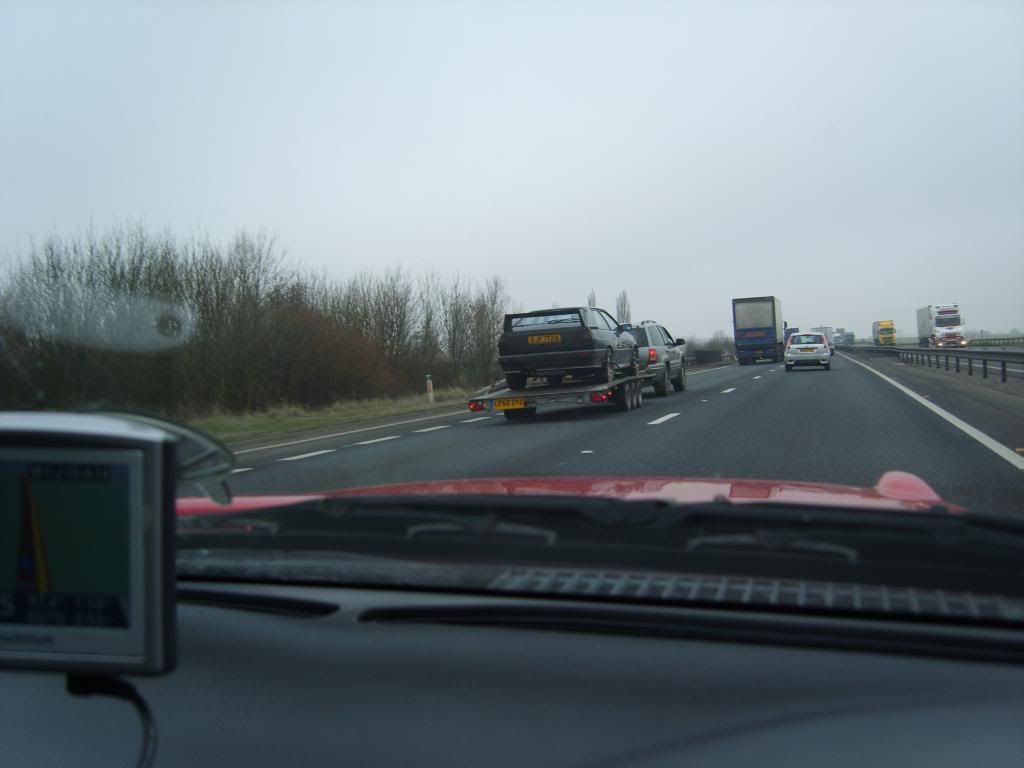
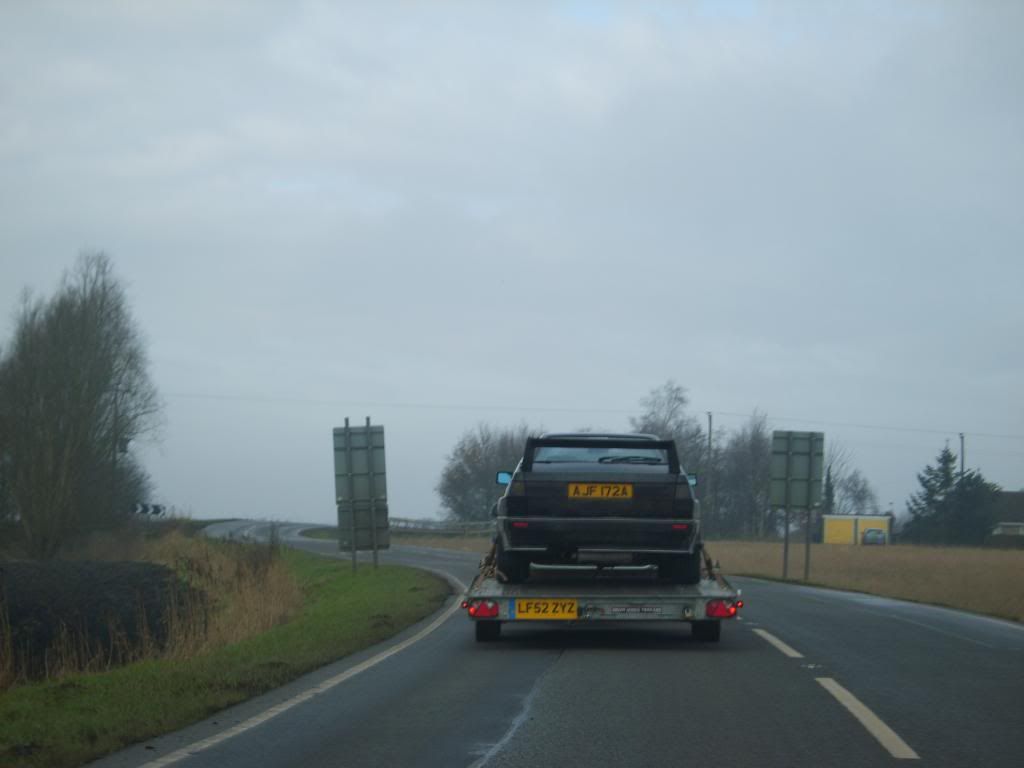
There was no way it could have driven to my location so a car transport service was engaged, the car loaded and carted back to me ( Thanks Terry!).
The nail.
Upon getting it into the garage space I set about the task of searching out all its problems...it had many small things adding up to a big fat nightmare, itd not have been economical for someone to take it on and have to pay the costs of welding,fabrication, mechanicals and bodywork which is where I had a bit of an advantage as I'm fairly adept at most of those aspects.
The interior was pretty much gutted leaving only the headliner in place and the main parts of the dashboard so I could have a good nosey around.
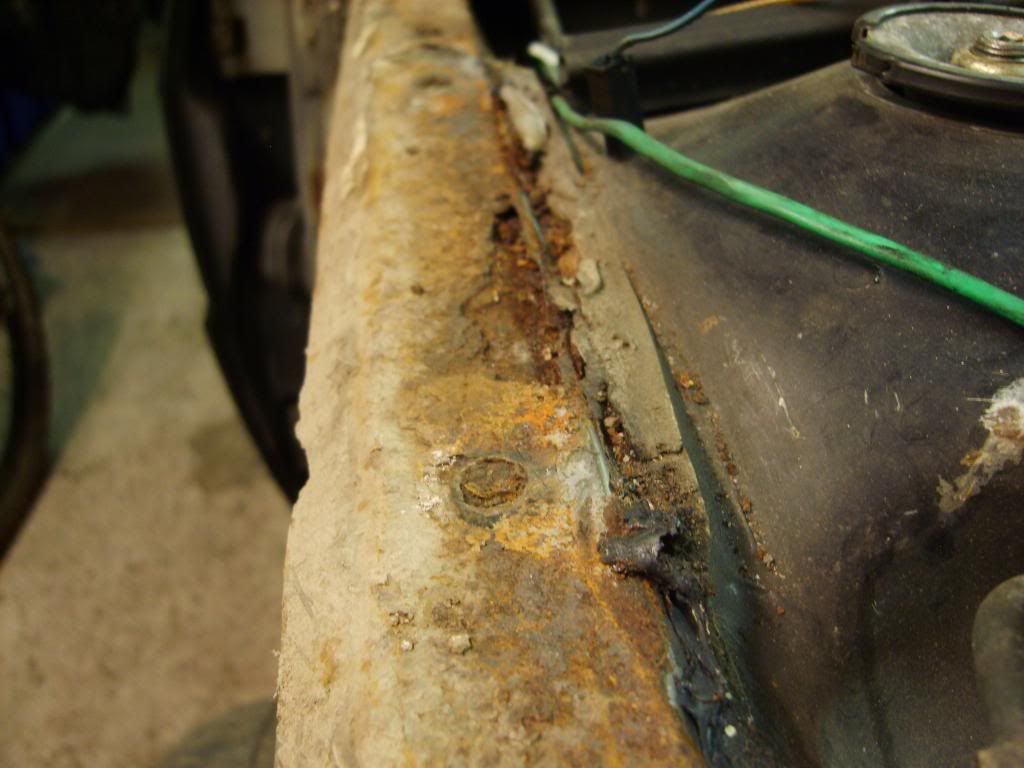
I'd noticed the drivers wing appeared to have been replaced at some point so I removed it to find the lovely colour of rust under it, they never bloody seal them properly after theyve been removed.
These cars often rust terribly at the windscreen lower corners and the top of the door pillar, this ones got nothing to speak of which made me happy for a while.
The engine was looking pretty sorry for itself and although the original 10 valve WR motors are a good old beast I didnt want the hassle of non available fuel injection parts (K-jetronic) or the extreme crowding on the drivers side engine bay which is why months earlier I'd already aquired a 20 valve turbo motor from an S6 estate.
Its the same basic motor as fitted to the RR but has coil packs and a tad more power at 230 bhp stock.
Quite quick enough for me and room to go higher if boredom sets in.
Cramped and messy engine bay.
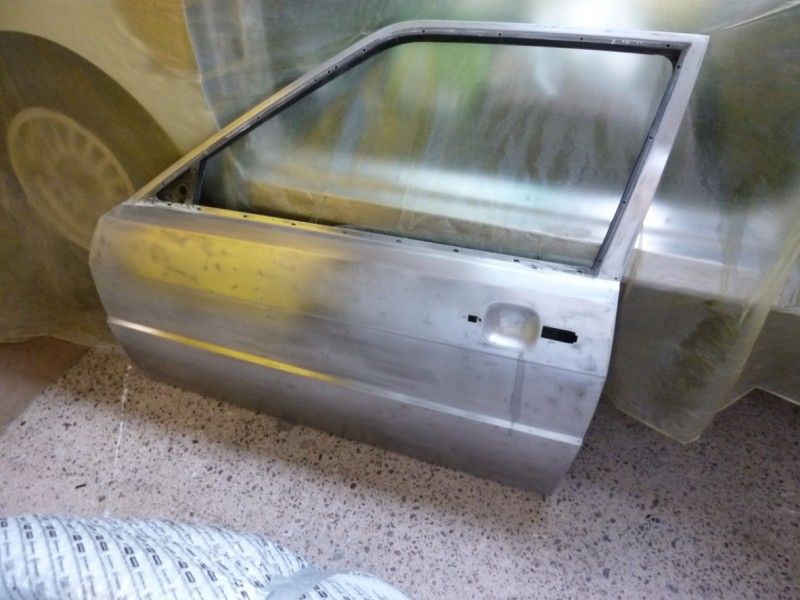
Once I'd got the old clunker engine out I set about rectifying the easiest to reach bodywork issues, cutting out the rust and welding in new steel with the tig.
The passenger side had nothing of concern and was initially wire brushed and zinc primered whilst the rest of the work was being done.
Stripping the engine revealed it to be on the brink of a violent, noisy and messy destruction.
This is an exhaust valve guide, its almost completely eroded at the tip and with the valve extended out the head of the valve to its normal maximum lift waved about by up to 5mm, the book spec is 1.3mm max, so these were probably original to that head and totally worn out, the car had already had a replacement head at some point at great cost, but as with a lot of things on these cars it hadnt been refurbed at all well, if at all judging by those guides.
Deep cracks between the valves and a nice split on the one exhaust valve, caused by it closing to its seat way off centre.
Stripping the rest of the engine yielded big end shells that were loose in the caps and damage to the crank.
The parts that were reusable or saveable were sold on along with the dialynx exhaust manifold which all helped to fund further parts purchases.
Many issues were found, such as broken engine mounts and bodges galore.
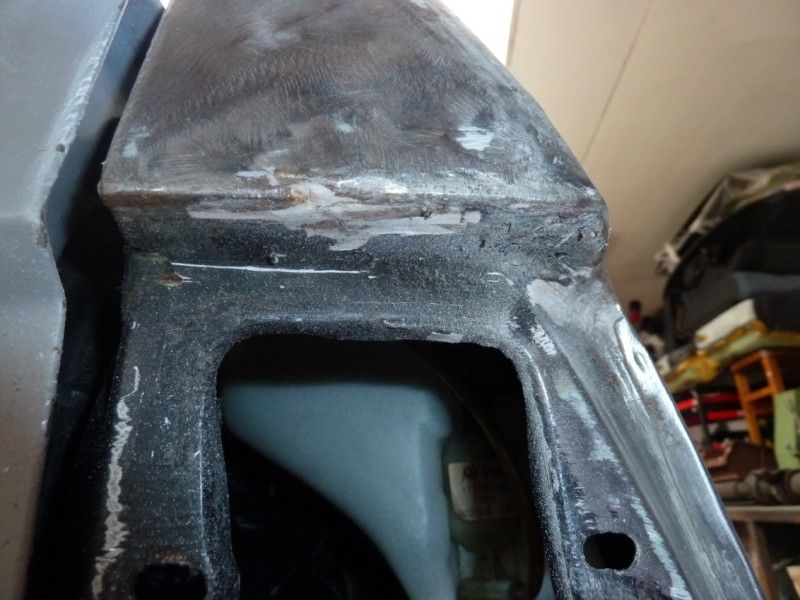
Plenty of work to do on the shell, rust and more rust.
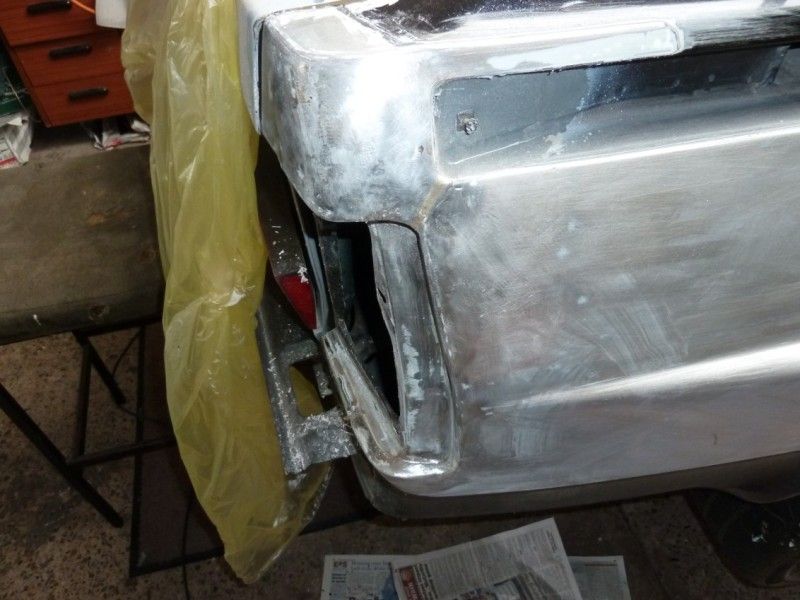
The blister arch and leading edge of the offside rear was fairly challenging as its a compound curve so I set about trying to make a repair panel in one piece but leaving the inner rusted section in situ to locate it against.
A steel table, g-clamp, hammer, wood blocks and ear defenders were my partners for this.
Clamping the flat steel to the table and forming the curve by slowly levering it up and hammering it.
After a few hours I had what appeared to be a fairly close match to what I wanted.
A quick test fit showed it to be largely accurate and almost good enough to weld right in but I couldnt do that until I'd fettled it a little more and fabricated an inner section to replace the rusted out return lip.
I made that in a similar fashion and it took around an hour get it close.
Leaving strategic parts of the rusted body in place I could locate the replacements accurately and tack them in before eventually removing the rusted parts completely and welding the new stuff in properly.
In the midst of this I was looking for parts but theyre a pain to come by as Audi have a policy of "NLA". no longer available, or No Longer Ars*d, still a useful local independant or two got me most of what I needed.
New old stock windscreen.
And a "quattro" scripted one for the rear which came in the boot of the car.
The brake dust/stone guards on these rust to oblivion in a fairly short time due to the heat and battering they get from the elements and you guessed it, theyre "NLA" leaving me the only alternative, make my flipping own but from everlasting stainless steel.
Using what was left of the fronts and rears I had some blanks laser cut to take account of the lip on the edge and also had some steel in 8mm cut out to act as punches and dies to form them over by clamping them in a vice and hammerforming the edge tighter than the press could manage and to form the pressings.
I also formed the rears, luckily I had one of the originals that was just about inctact enough to measure and have the blanks cut.
With my parts collection starting to grow I continued onwards with the body repairs, doing all the leading and trailing arches and derusting suspension components in readiness for reassembly.
The rear suspension had been making some funny doinging and creaking sounds when the car was removed from the trailer, it also had a 5 degree list to starboard and the reason was at some point itd had lowering srpings fitted that didnt fit the struts properly with the spring flopping up and down with the suspension on full droop which had cracked the already weakened top spring seats.
Ripped bumpstops and stut gaitors.
The spring on the right is what it should have had fitted.
Original rear strut inserts were still pretty functional, not bad for a 30 year old car.
The rear diff and subframe all came out to be cleaned, seals renewed (nla on the big left one, cost £80 from the states).
Underbody over the diff wasnt too bad and had been preserved by the leaky oil seals flinging hypoid all over the place.
With parts coming together and a daily routine of derusting, scraping, cleaning and painting, things started to go back together, the struts cost £500 a corner just for parts which comprised of new strut inserts, wheel bearings, seals, bumpstop rubbers and gaitors, top strut bearing, discs and calipers and pads not including my stainless brake shields.
I had previously scuffed and repainted the engine bay, intending to return the car to its original montego black metallic, but I wanted a different colour.
While I was making my mind up about that the s6 20 valve engine was trial fitted and a set of early quad headlamps sourced which I refurbed as I like the look of the early cars moreso than the facelifted later types.
The plastic chromed surrounds I got from a friend in Massachusetts for which I'm eternally grateful, Thanks Matt!
Other bodywork issues continued to show themselves.
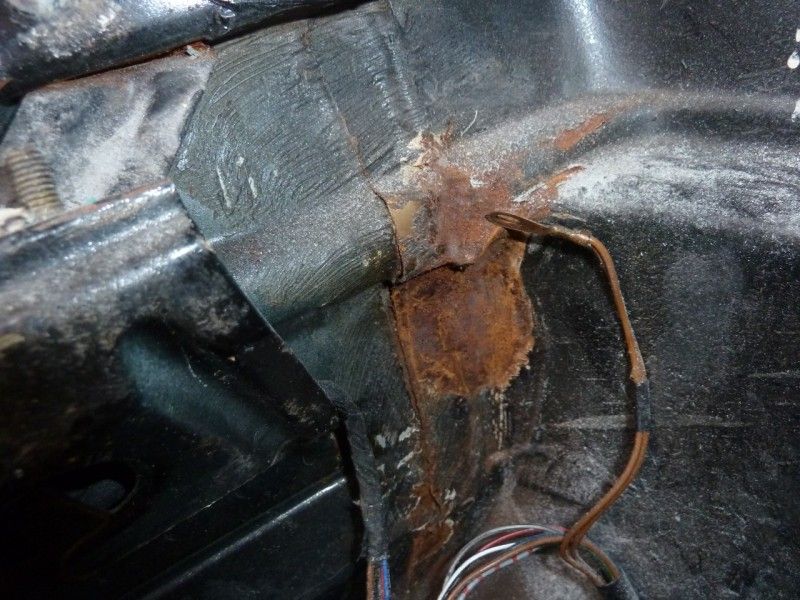
The car had previously had a new clutch master cylinder fitted but instead of unbolting the steering column components and removing the cylinder out the bottom the top of the scuttle panel had been butchered by some jockey with a chisel and then fibreglassed over.
That was never going to do, luckily a friend had an old coupe gt he was stripping down and I got the area of scuttle panel I needed to make a decent repair to mine.
The hole is for the replacement motronic ecu wiring to pass through as I wanted to keep the underdash free from sphagetti where it would just be tight to fit in.
With all the major welding work on in or near the passnger cell completed a clean up of the interior and refit was carried out, including repair of the drivers seat frame (they crack frequently over time) and fitting the correct seat base with its height adjustment, its very late 70's but I like it.
Since this is the early 83 model with the pneumatic diff locks I decided to dispense with them and lock them out until I decide to either convert them to elctrical operation or maybe go torsen diffs on it, the panel could then be removed and a more useful set of coupe gt clocks fitted in, I think these look way better than the original pull knob panel.
Fast forward a couple of years and Ive started to remove every single scrap of the original paint thats been trowelled on over the years...by hand.
Paint stripping the wings and body took the best part of 8 weeks.
Bonnet isnt the cars original, its from an 82 coupe gt model but was in way better condition than my original bonnet
Sunroof panel was stripped inside and out by hand and repaired .
Paint film was at least 1mm in places.
I found what looks like a possible bullet hole in the osr quarter, dunno whether it is but the panel wasnt damaged otherwise so could be.
The osr quarter at the tail light area had always bugged me and once I started stripping off the paint I found out why, its because its been crudely infilled with filler and weld to disguise a rear end shunt.
I did attempt to pull it out some but to no avail so the only remedy here was to remove the entire section and weld in a replacement tail light section from a coupe gt and a brand new rear valance at £400 ..ouch!
The old panel was bashed to hell vs the new one.
Replacement tail light section.
I trimmed off what I could but still trying to retain datum points to refit the newer part, this was really quite a difficult part to do as its in 3 dimensions and has to be right so I was a little cautious about it to say the least.
After many trial fits, removing tiny amounts so as not to go too far it finally dropped in where it was supposed to.
With a backing strip to get it as flush as possible it could be tacked tentatively into place and ogled.
It fits very nicely with a minimum of panel warp.
With the light aperture where it should be I could start fitting the new rear valance, pulling it into place with a ratchet strap and some blocks.
Rear valance welded in and sealed, the back end looks a lot squarer than previously.
Also fitted new sound deadening panels.
With the cleaned carpet and panels fitted its a nicer place to be....if you should find yourself locked in there.
Since the old boot lid had also been twisted by the previous shunt a friend donated an old unused one to me, thanks Glenn, appreciated!
The engine bay was also stripped completely of paint and the front panel removed to enable the easier fitment of the engine and allow access for maintainance.
http://www.youtube.com/watch?v=6ZgeiQ_yqWk
The bodywork I spent some months on getting as close to perfect as a non professional bodyworker like me can reasonably get after which i could start priming the shell in epoxy primer as it wouldnt have been feasible to get it sanded and ready for colour and clears in the remaining time.
I did actually managed to get the majority of the body sanding done before time ran out and winter set in.
During the summer last year I had the opportunity to start putting on body colour and clearcoat, it all went very well, too well as it happens as a few weeks later I discovered that the clear coat I was using was undercatalyzed ( my own fault I misread the mixing instructions) meaning its had to come off again.
Gutted was I but after a few days of kicking myself I got back into removing the engine bay paintwork first ( it WAS lovely) which took about a week of hard graft before I re primed it in the same epoxy I used previously to do the rest of the body.
No one ever said restoration was an easy job.
Its on, its off its on its off again....
Reprimed!
Heres some shots of the paint and clear as it came out the gun ( its dried here).
[img]http://i29.photobucket.com/albums/c259/twarren600/P1100656_zps32f31fec.jpg/img]
Currently I'm stripping back the door apertures for a reprime and repaint buts its tough as the paints soft so it simply balls up and clogs paper which is why the harder bits have been paint stripped ( not ideal), still itll be ready to take some paint in a few days time then I can start on the doors...again.
Luckily I noticed my error before I painted the outer body panels so it could have been worse.
A bit of spraying malarky of the day I fouled upon on.
http://www.youtube.com/watch?v=XCJ0GFrC9sk
Edited by 4v6 on Sunday 26th January 18:53
Edited by 4v6 on Sunday 26th January 19:00
Edited by 4v6 on Sunday 26th January 19:02
Edited by 4v6 on Sunday 26th January 19:03


Thanks for the comments turboblue and esso.
Colour will be the same as in the photos there lago green, and I should be done on the bodywork by this summer I'd think, which gives me all winter to get it screwed back together and any remaining stuff largely ironed out.
I might just paint out the bay first and get the engine and front suspension back in withing a few weeks, depends.
5 cylinders turn me to jelly, would have loved the new ttrs 340 bhp motor to slide in there but the 20 valver will be fine.
Not really a case of being patient esso, its been done on a budget, adhoc and all by myself so its taken ages purely because of that, but its got to be finished as I got suckered by a certain 4 year old nephew when he was 12 months old into promising him a ride in it.


Thanks for all the positive comments guys, its good to see that this kind of thing appeals to others too.
The engine did actually run and sounded quite healthy but it would have died rather sooner than later I think, it was just too far worn.
Ive always liked the quattro, always loved the sound and the shape.
I've never actually driven the thing yet, unless driving it off the trailer and backing it into the cave is considered so, it should be a good day the first time I get to do so properly.
Cant wait....much longer.
I'm aiming to have all the main bodywork painted up by mid summer which I'll also do so the glass can all go back in etc, it should come together pretty quickly after that.
More pictures when I have them, hoping to attend some meets once its finished.
Gassing Station | Classic Cars and Yesterday's Heroes | Top of Page | What's New | My Stuff