Project Scimitar MV6
Discussion


Thanks folks, sorry its been a while, here's another update.
Been working on the back end of the car this weekend.
Its been a case of lots of work with little to show for it, like tidying up the inside bodywork with glass fibre and painting it again. I've finally got a pair of original toyota balljoints for the front to allow the suspension full movement, so that can be fully assembled now (well soon).
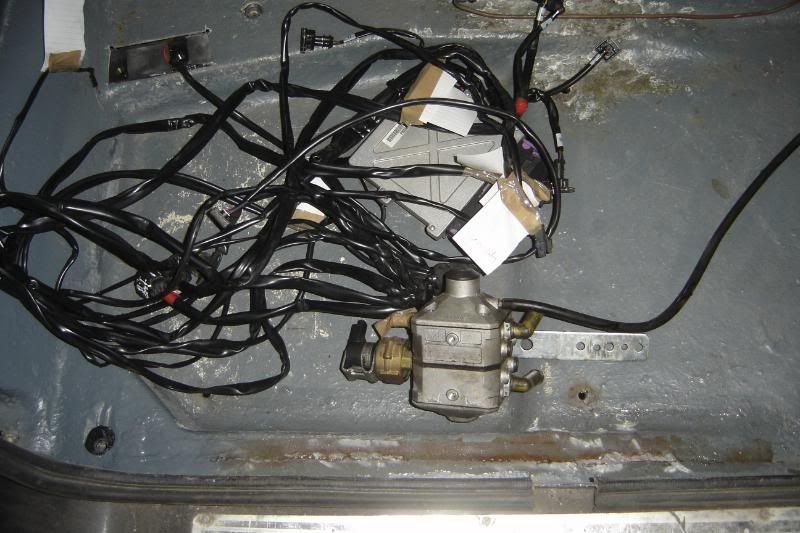
I went crazy on the rear loom, stripped it of all the rear wiper stuff and wired in some waterproof connectors, 5 pin for each of the light clusters, a 2 pin connector for the number plate lights, and a 3 pin (using the rear wiper wires) for the lpg connections. There will be no fog lights in the bumper to keep it looking simple, one of the reverse lights will have ared fog bulb in it.
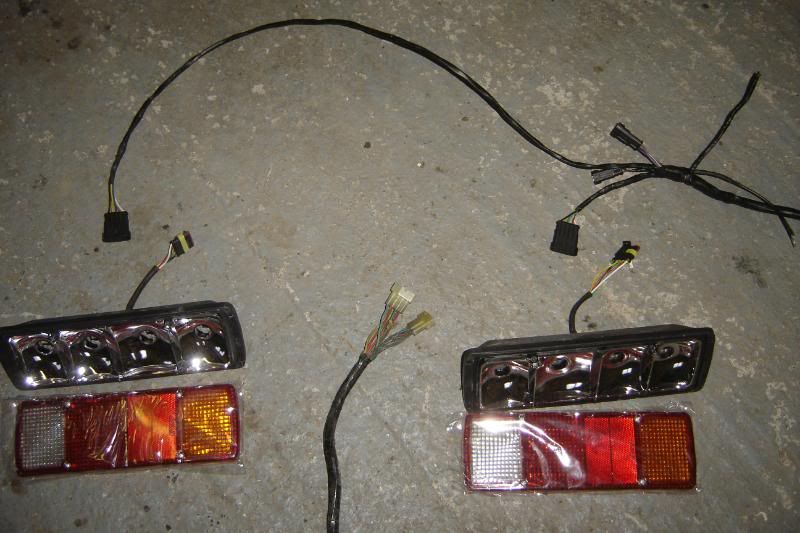
Spent a while fitting the new lights (the ones that has been in slice recently). I'm really pleased with them (still in plastic at the mo)
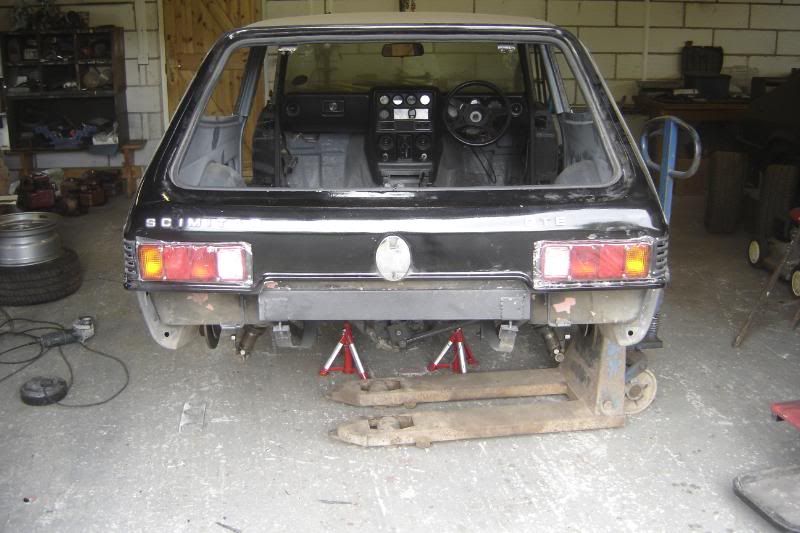
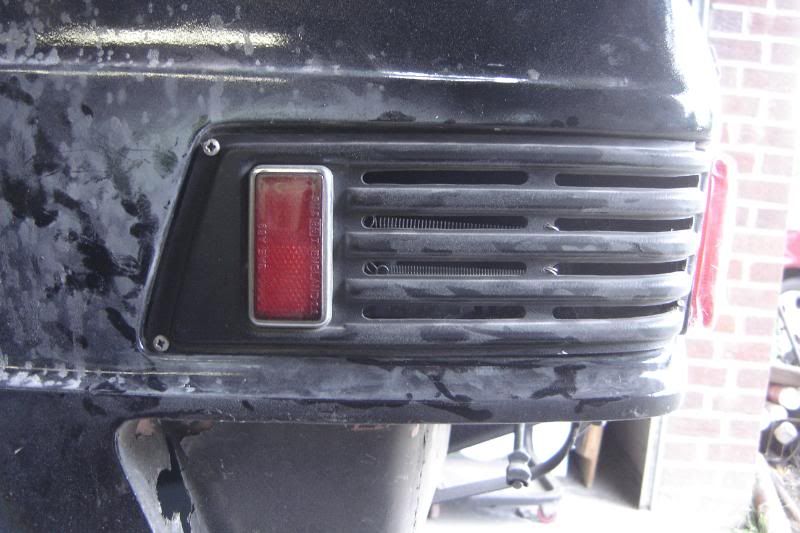
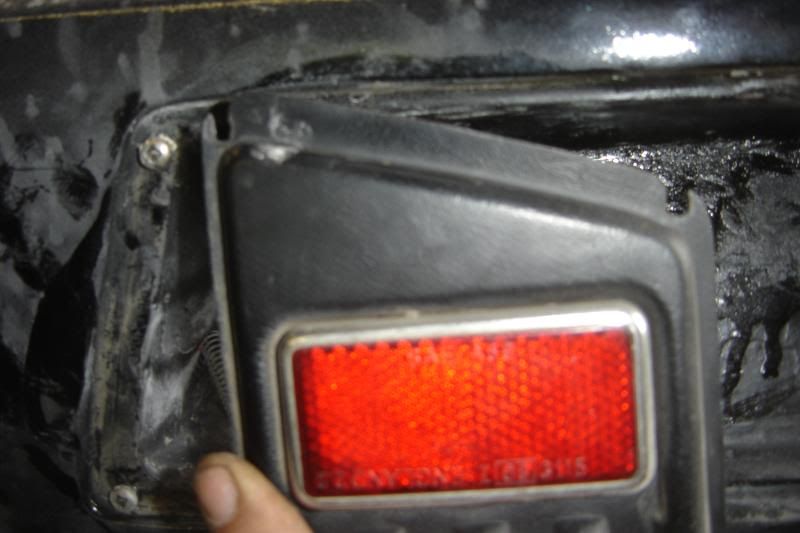
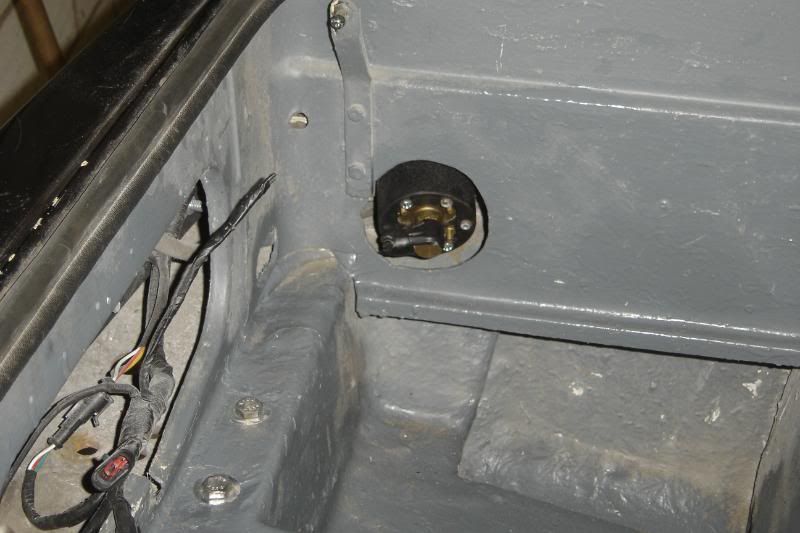
And finally I spent a while fiddling around trying to arrange a hidden location for the LPG filler. I'm well chuffed with it. The rear left vent has been sealed up and the filler fitted in, so that no gas goes in the car when you remove the filler pipe. It fits neatly inside so the pipe to the tank goes immediatly into the rear light cluster area. and the cover plate has been slotted where the screw holes are, and two springs hold it in place (if you see what mean).

Might not be any more for a couple of weeks till the next holiday. Thanks for looking.
Been working on the back end of the car this weekend.
Its been a case of lots of work with little to show for it, like tidying up the inside bodywork with glass fibre and painting it again. I've finally got a pair of original toyota balljoints for the front to allow the suspension full movement, so that can be fully assembled now (well soon).
I went crazy on the rear loom, stripped it of all the rear wiper stuff and wired in some waterproof connectors, 5 pin for each of the light clusters, a 2 pin connector for the number plate lights, and a 3 pin (using the rear wiper wires) for the lpg connections. There will be no fog lights in the bumper to keep it looking simple, one of the reverse lights will have ared fog bulb in it.
Spent a while fitting the new lights (the ones that has been in slice recently). I'm really pleased with them (still in plastic at the mo)
And finally I spent a while fiddling around trying to arrange a hidden location for the LPG filler. I'm well chuffed with it. The rear left vent has been sealed up and the filler fitted in, so that no gas goes in the car when you remove the filler pipe. It fits neatly inside so the pipe to the tank goes immediatly into the rear light cluster area. and the cover plate has been slotted where the screw holes are, and two springs hold it in place (if you see what mean).
Might not be any more for a couple of weeks till the next holiday. Thanks for looking.

AAAAAAGGGGGGGHHHHHHHH !!!!!!!!
I'm so annoyed!
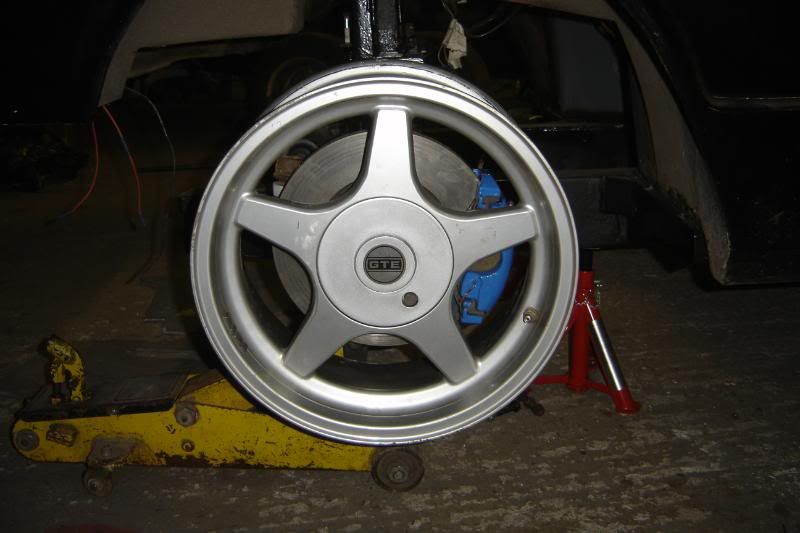
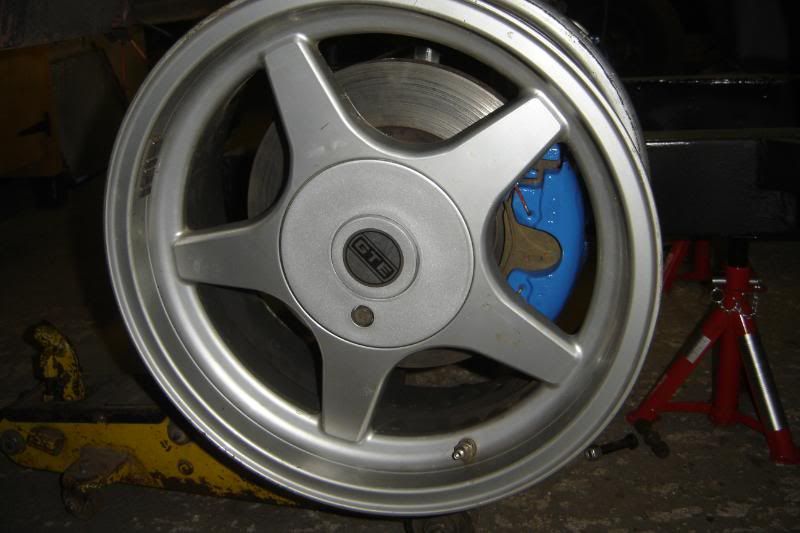
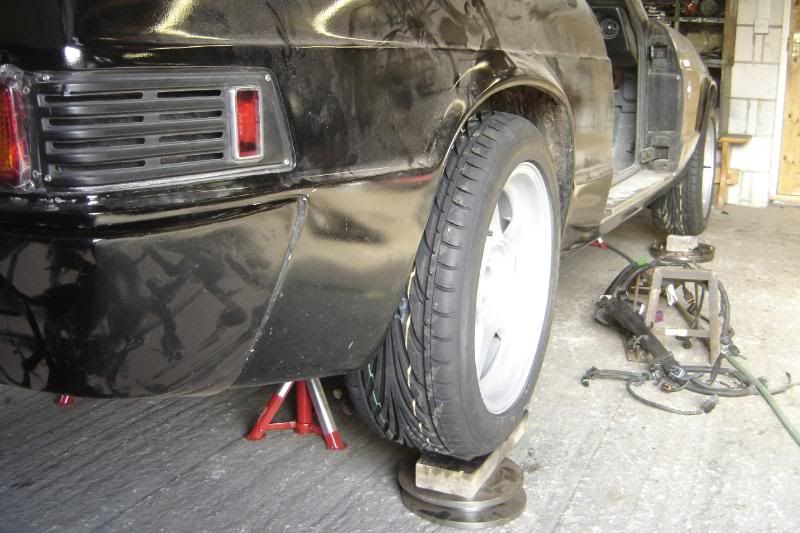
Wnet down to say hello to the car, span the wheel (the one in the photo) and it is not centred on the hub properly
The b***dy engineering company that redrilled the hubs seem to have done it with their eyes closed
Its challenging enough as it is, I don't need to be taking the hubs off again, especially as the fronts have news bearings and new grease and the rears are so dam hard to get off
there's noone here at the mo to listen to me rant so:
AAAAAAAAAAAAAAAAAAAAAAAAGGGGGGGGGGGGGGGGGGGGHHHHHHHHHHHHHHHHH
rant over
I'm so annoyed!
Wnet down to say hello to the car, span the wheel (the one in the photo) and it is not centred on the hub properly
The b***dy engineering company that redrilled the hubs seem to have done it with their eyes closed
Its challenging enough as it is, I don't need to be taking the hubs off again, especially as the fronts have news bearings and new grease and the rears are so dam hard to get off
there's noone here at the mo to listen to me rant so:
AAAAAAAAAAAAAAAAAAAAAAAAGGGGGGGGGGGGGGGGGGGGHHHHHHHHHHHHHHHHH
rant over
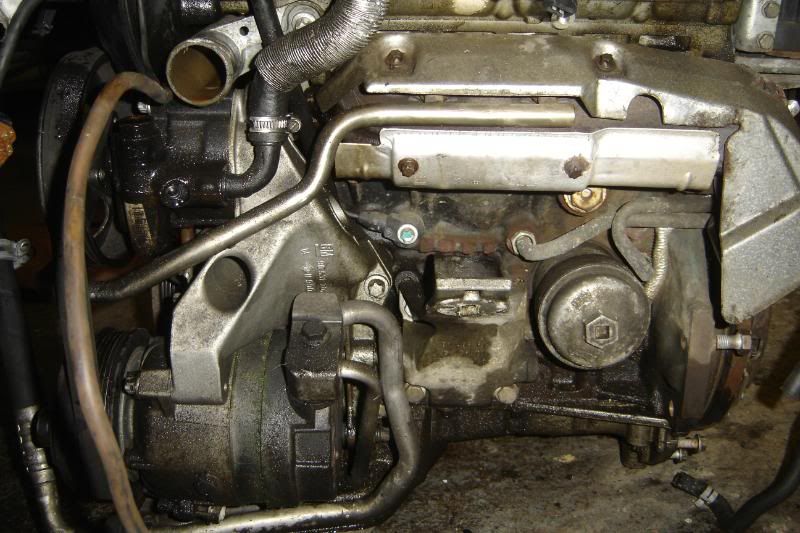
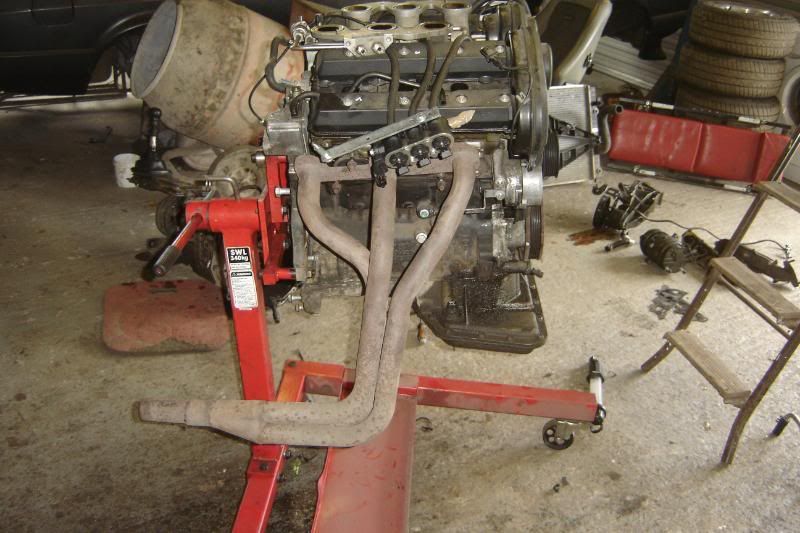
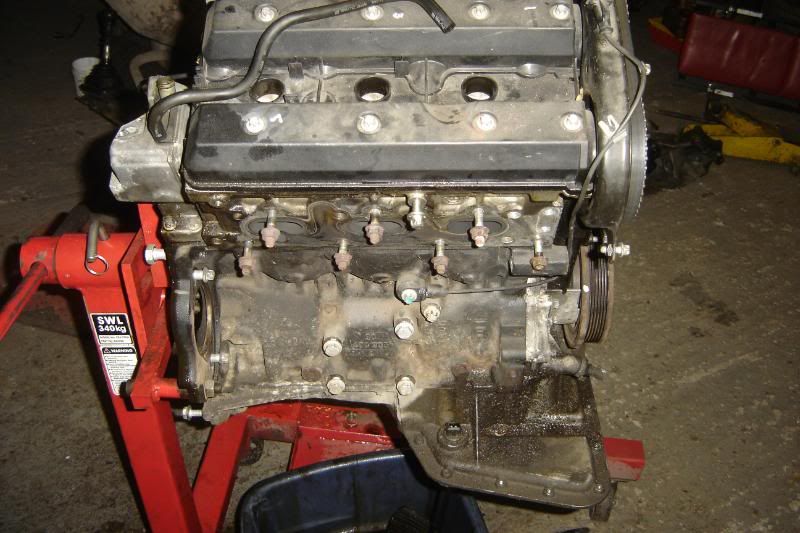
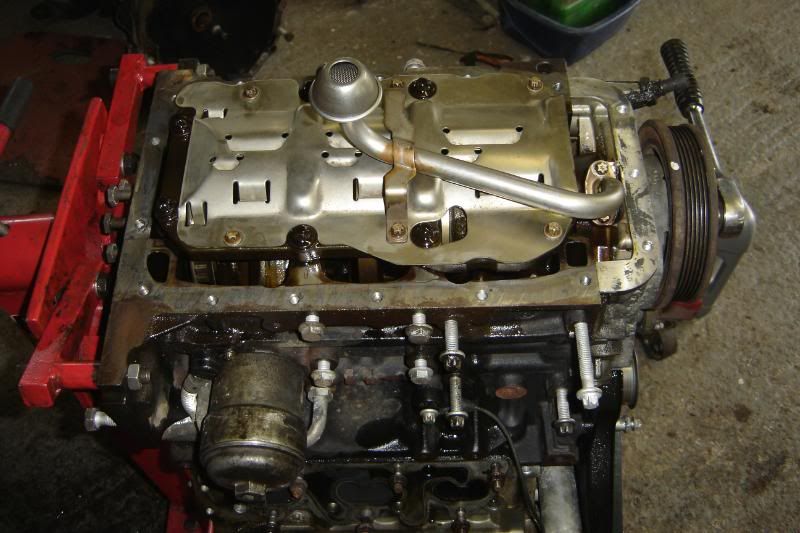
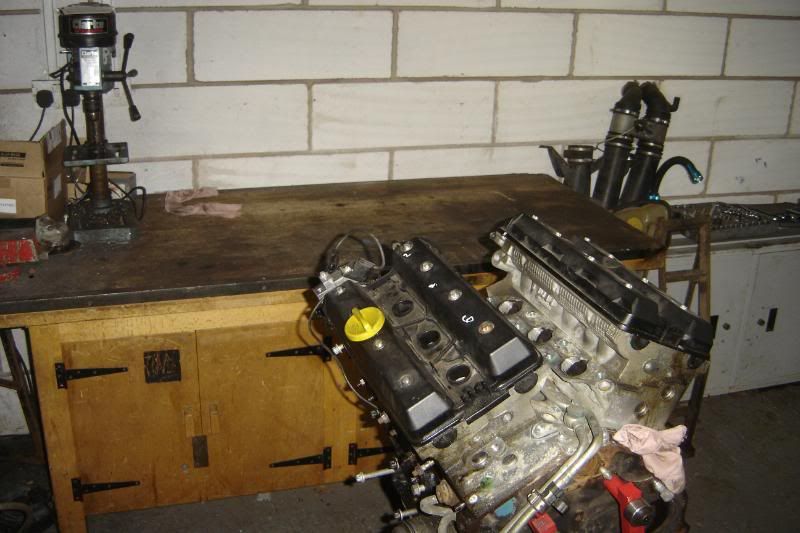
Got a fews more days holiday to get some more done. I spent the day trying to take the engine out of the Omega, there is so much s**t in that car its unbelievable.
Here are a few piccies
LPG successfully removed and the engine can still run (so I know how to install it when its back on the Scimitar). Worried the vapouriser is a bit small for this installation?
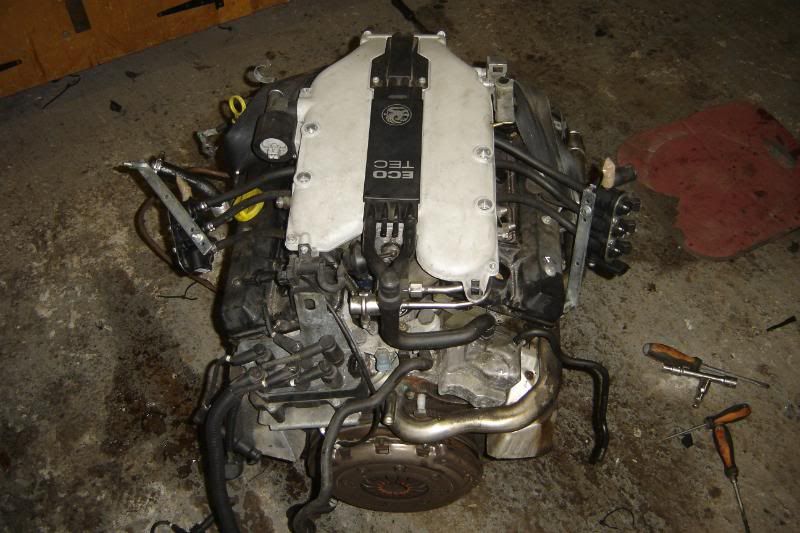
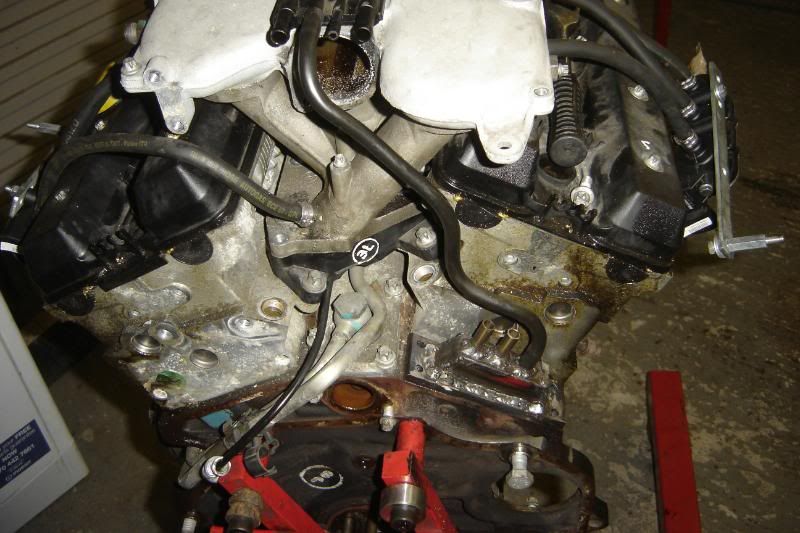
And the engine:
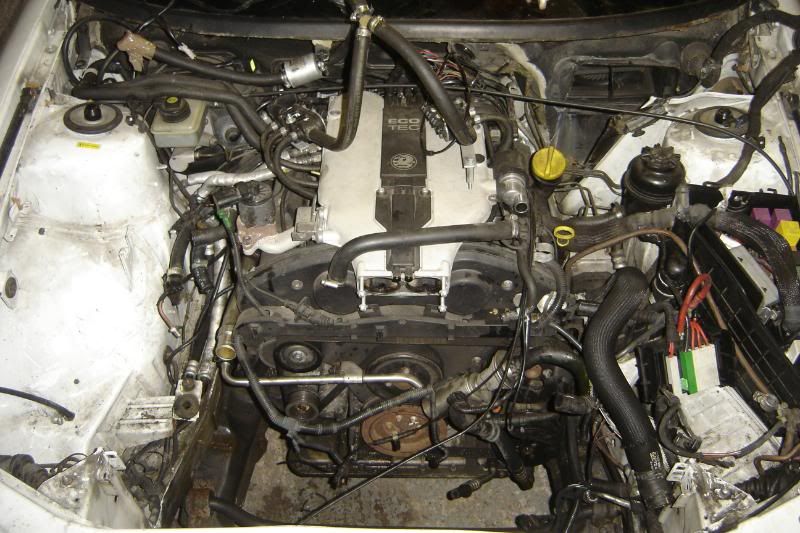
More to come
Here are a few piccies
LPG successfully removed and the engine can still run (so I know how to install it when its back on the Scimitar). Worried the vapouriser is a bit small for this installation?
And the engine:
More to come
A little update.
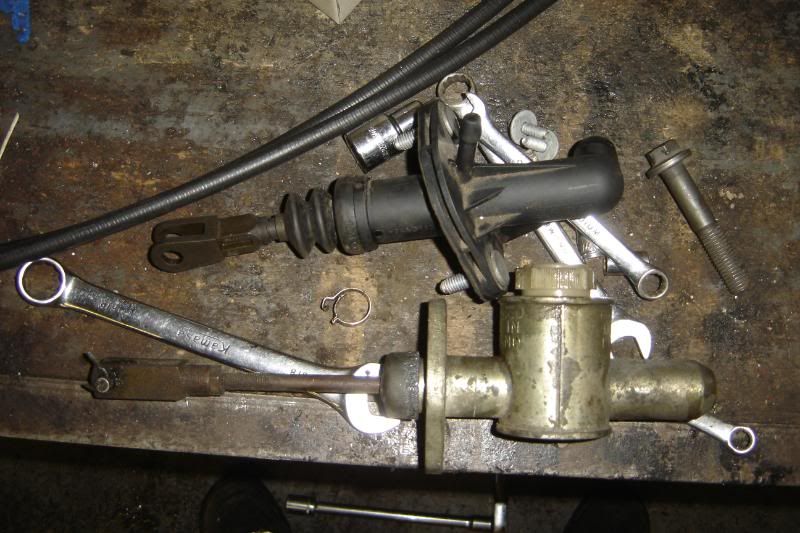
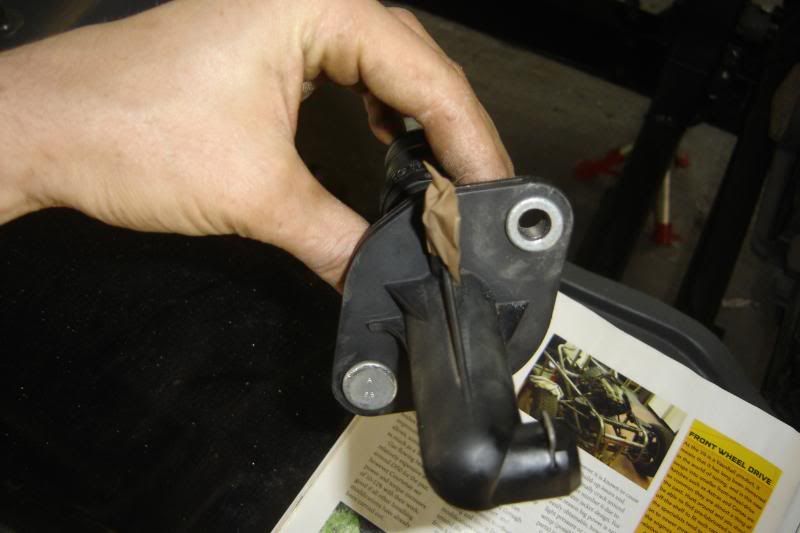
The clutch cylinder is 21.5mm diameter and the scimitar one that I have seems to be about 16 so using that is out of the question enless I want loads of pedal travel. It seems fitting the omega one will require some butchery; the rod will need extending, and a "thing" making to bolt the odd shaped omega master to the scimitar bulk head.
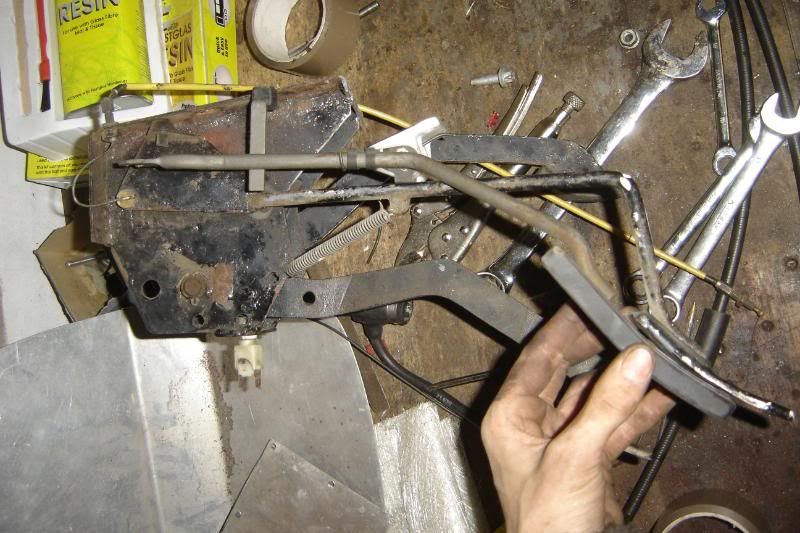
The scimitar always had lots of throttle travel and I wanted to address that, now if I use the scimitar one with the omega throttle body it'll get worse, so I'll graft the omega pedal onto the scimitar pedal box as it has a pivot much lower giving far less travel.
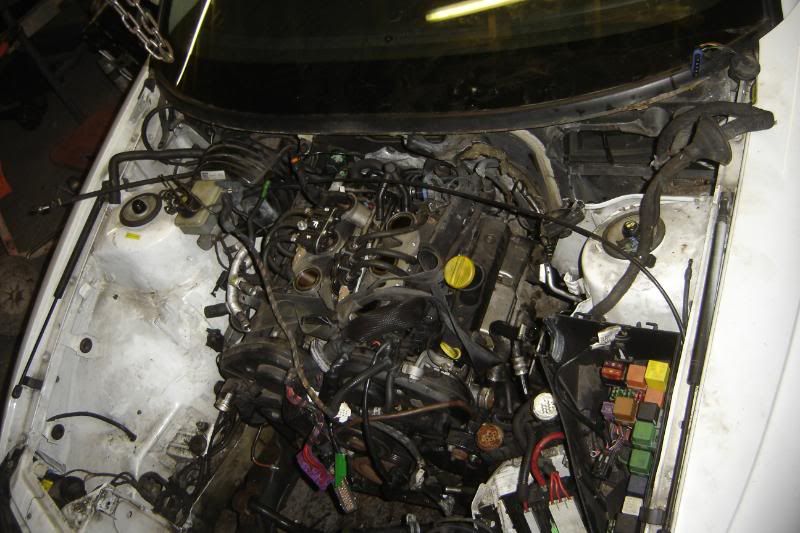
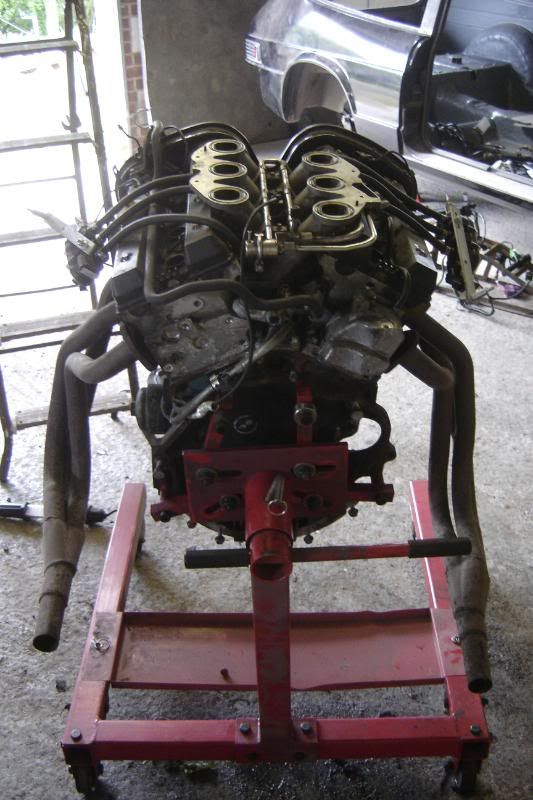
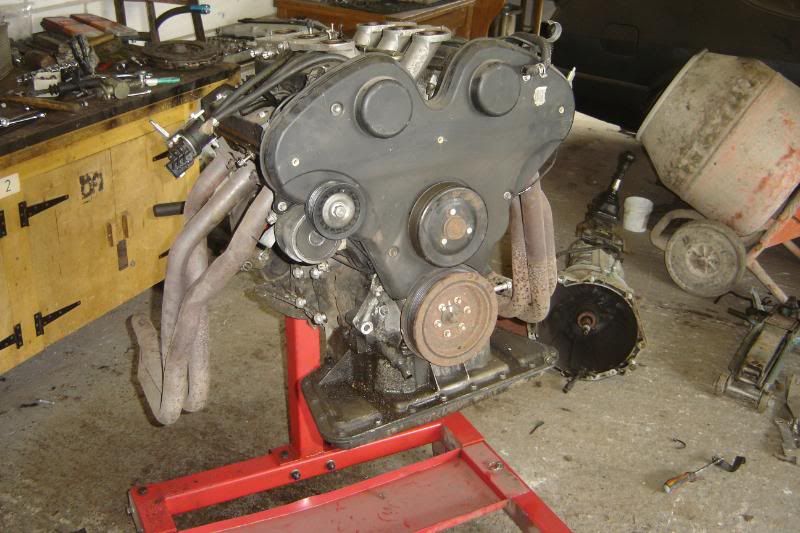
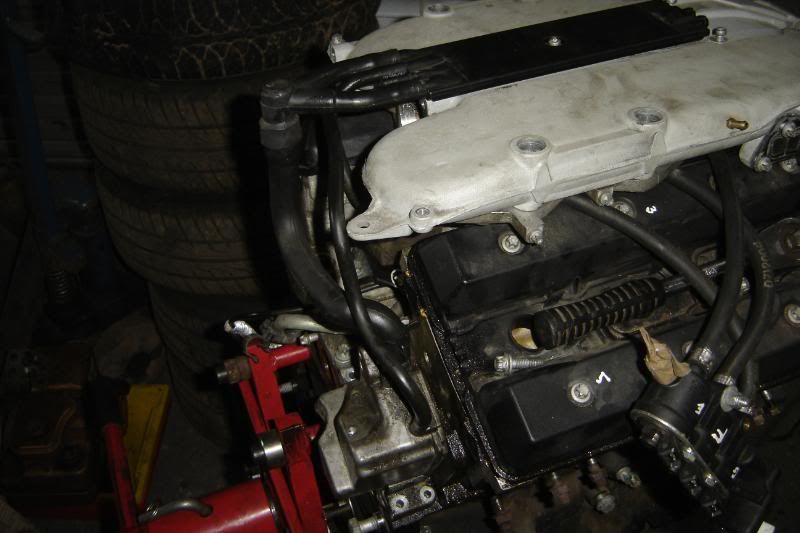
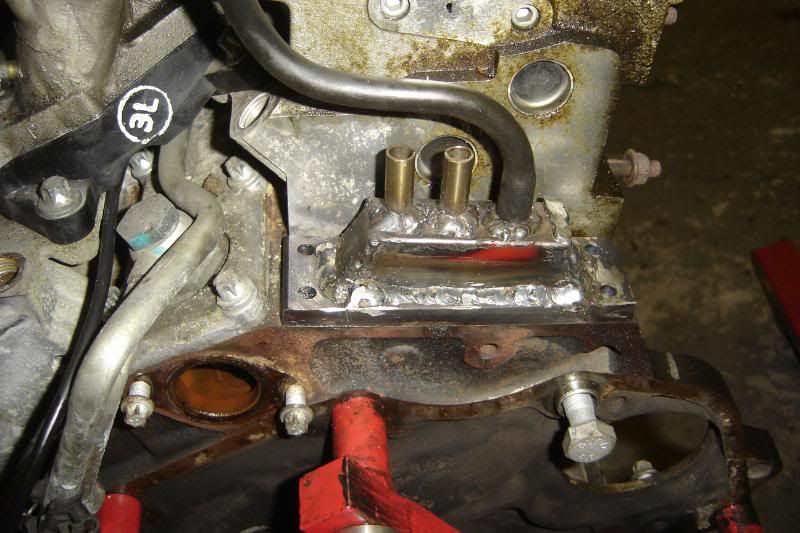
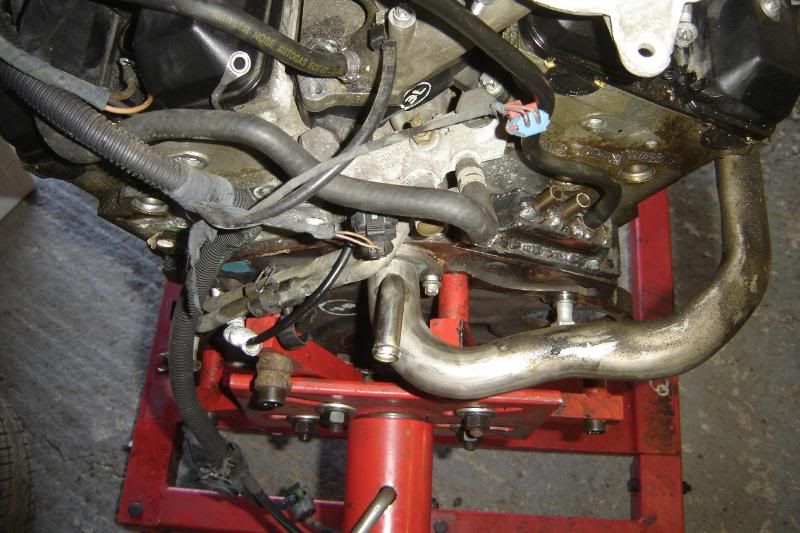
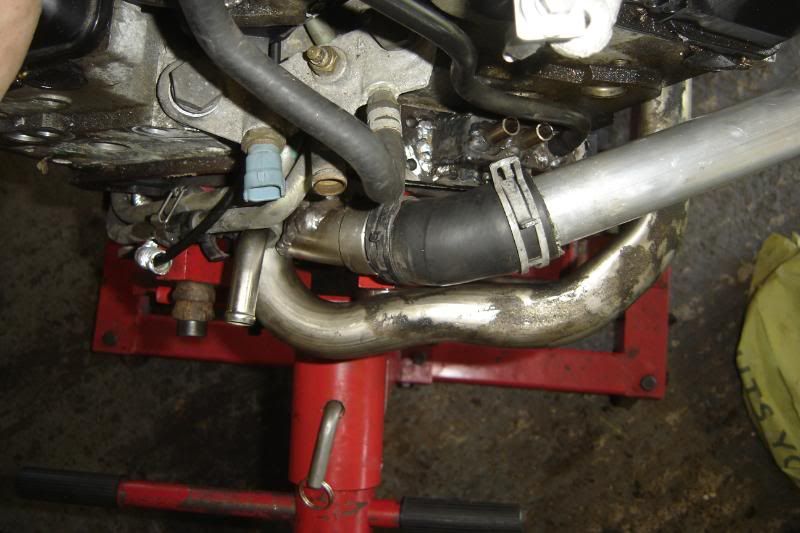
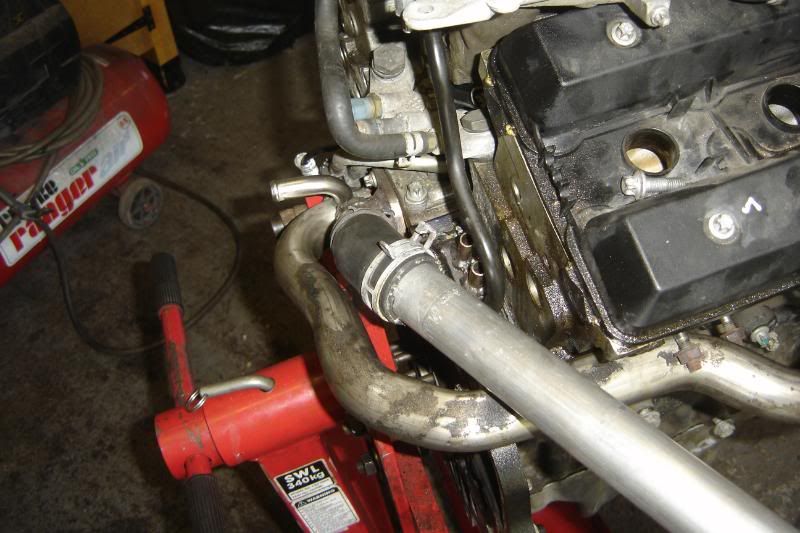
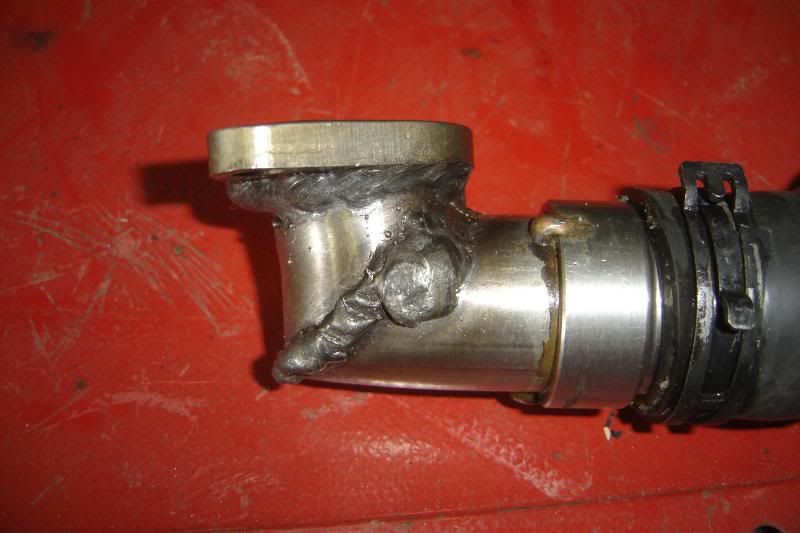
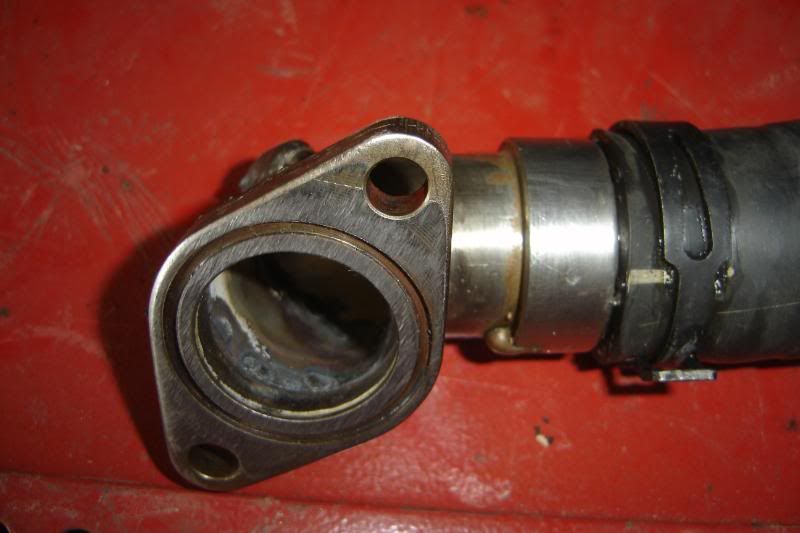
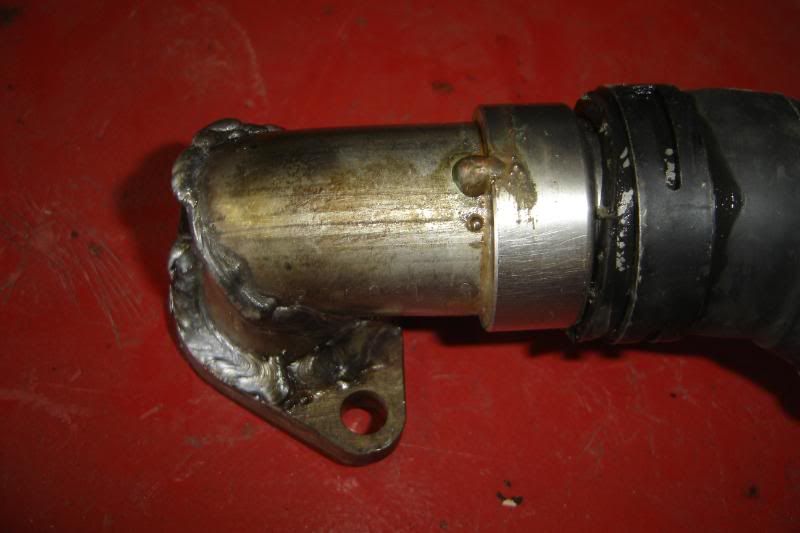
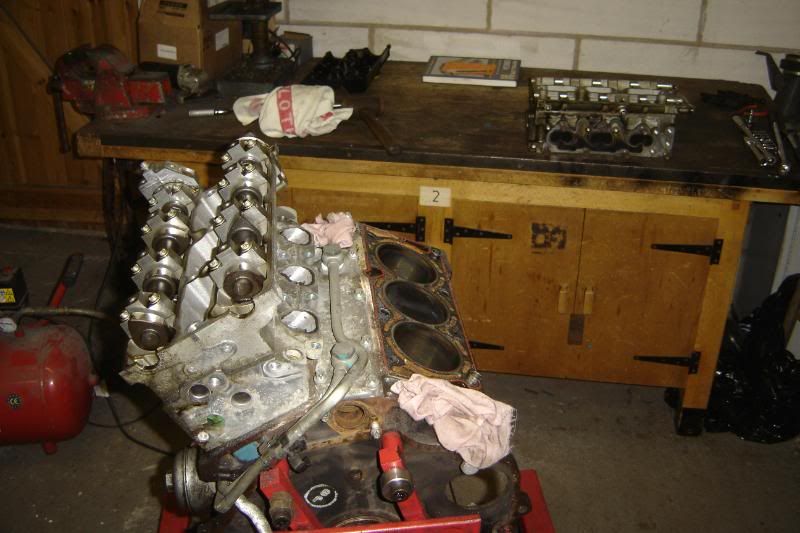
What on earth of these pipes then?? They go from each side of the engine in the exhaust manifolds and meet at the front in this odd pipe.

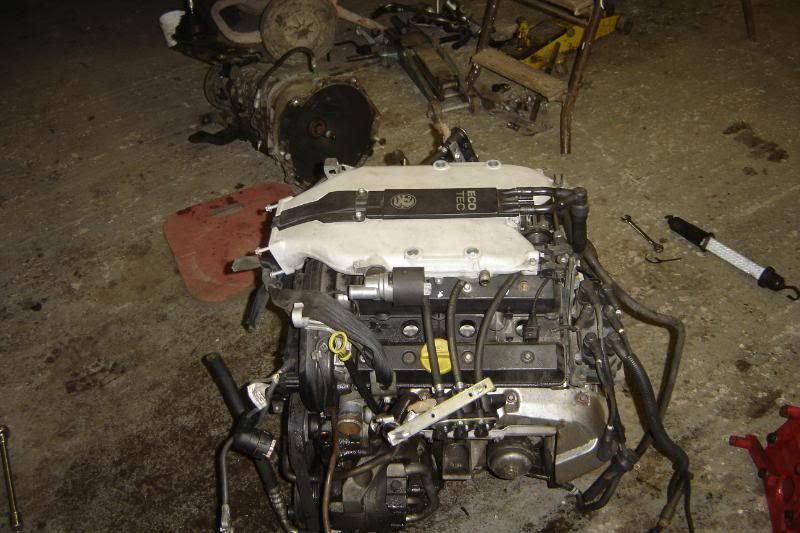
And some more of the engine just in case you haven't seen the x30xe enough yet.
More to come
The clutch cylinder is 21.5mm diameter and the scimitar one that I have seems to be about 16 so using that is out of the question enless I want loads of pedal travel. It seems fitting the omega one will require some butchery; the rod will need extending, and a "thing" making to bolt the odd shaped omega master to the scimitar bulk head.
The scimitar always had lots of throttle travel and I wanted to address that, now if I use the scimitar one with the omega throttle body it'll get worse, so I'll graft the omega pedal onto the scimitar pedal box as it has a pivot much lower giving far less travel.
What on earth of these pipes then?? They go from each side of the engine in the exhaust manifolds and meet at the front in this odd pipe.
And some more of the engine just in case you haven't seen the x30xe enough yet.
More to come
The hubs are with a different engineering firm now hopefully they'll get the PCD right, I'm about to spent a frightening amount of a decent set of tires and the engine is looking much more like a V6 now with the ancilaries removed, the only one that'll be going back on is the alternator. I'm wondering if there is a lower amp on that might fit and more importantly might be smaller and lighter.
I couldn't help myself and had to try the manifolds on to see how it'll look
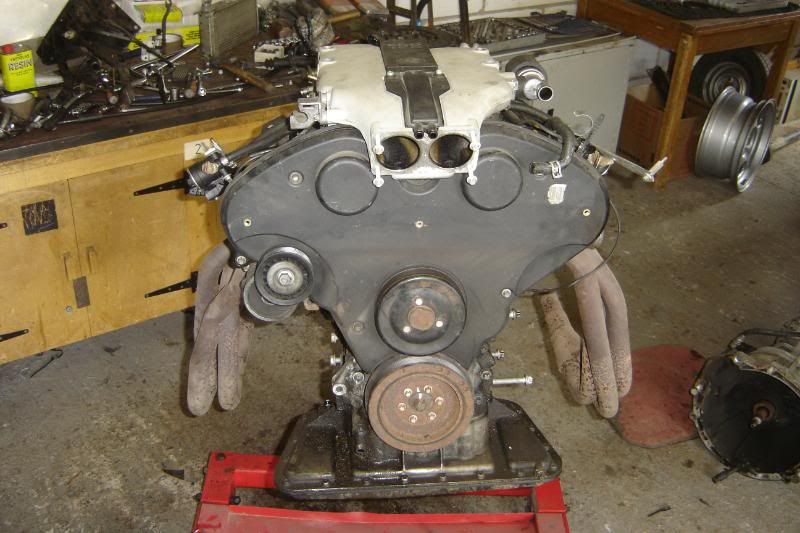
More to come
I couldn't help myself and had to try the manifolds on to see how it'll look
More to come
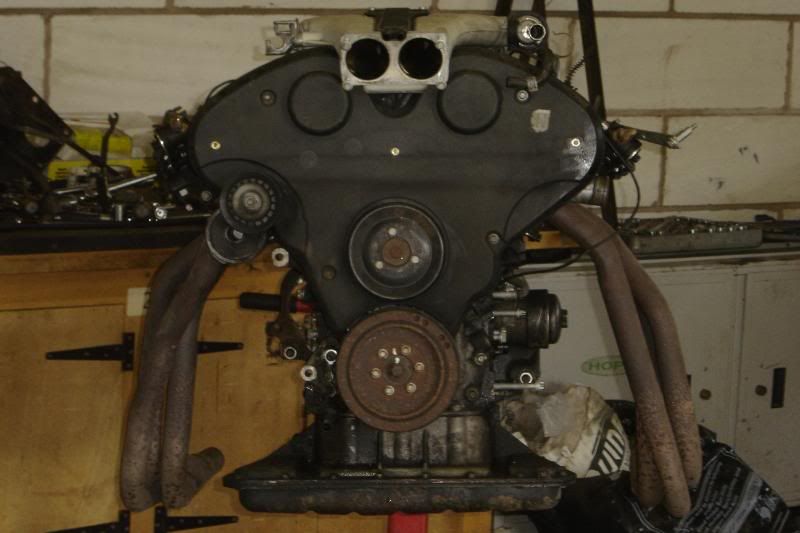
Besides the problem with money and not being able to get the car finished maybe even this year, its been a great day, I've not been this happy for ages, I love working on engines. I'm about the swap the sumps, I'll check a main bearing and big end, but looking through the inlets I can see the honing looks perfect, so it looks like I'll be leaving the bottom half alone.
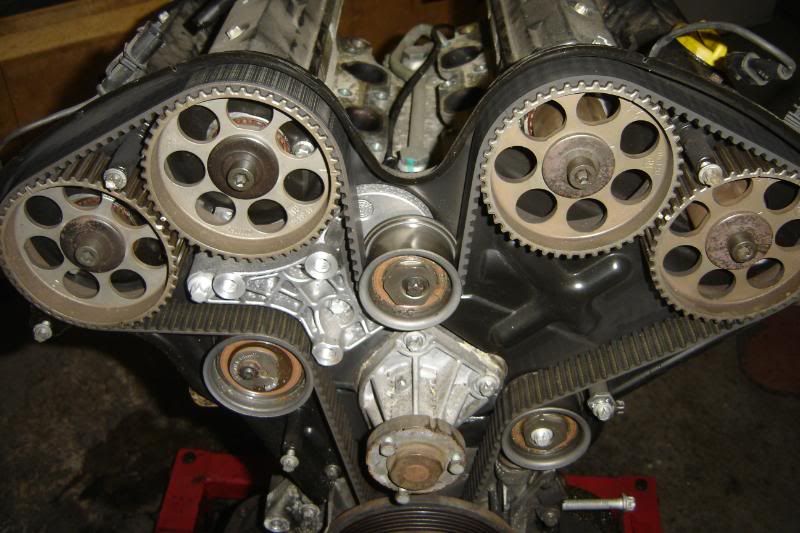
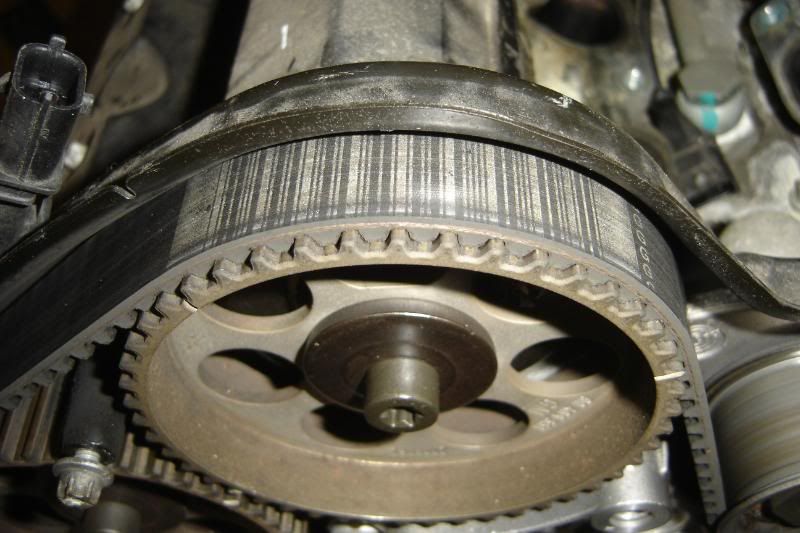
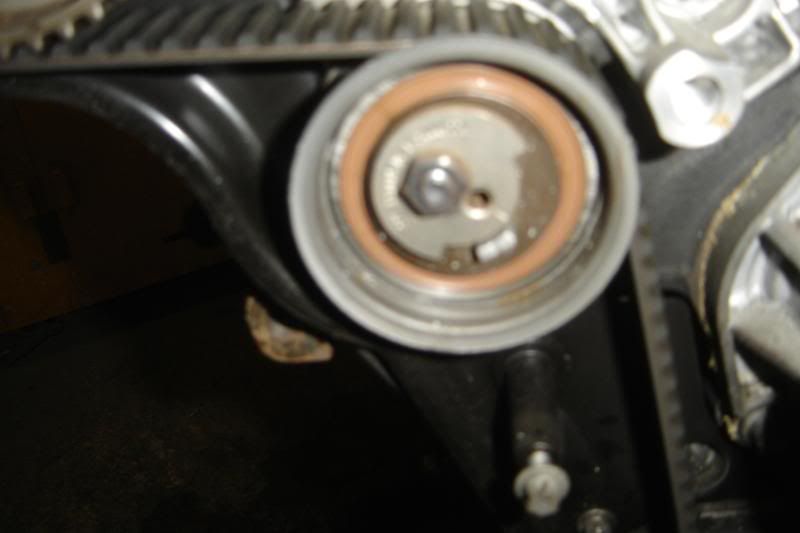
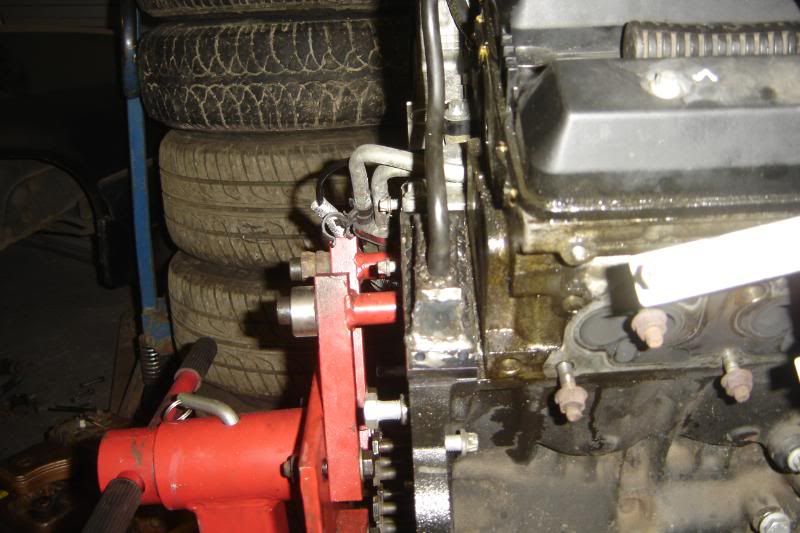
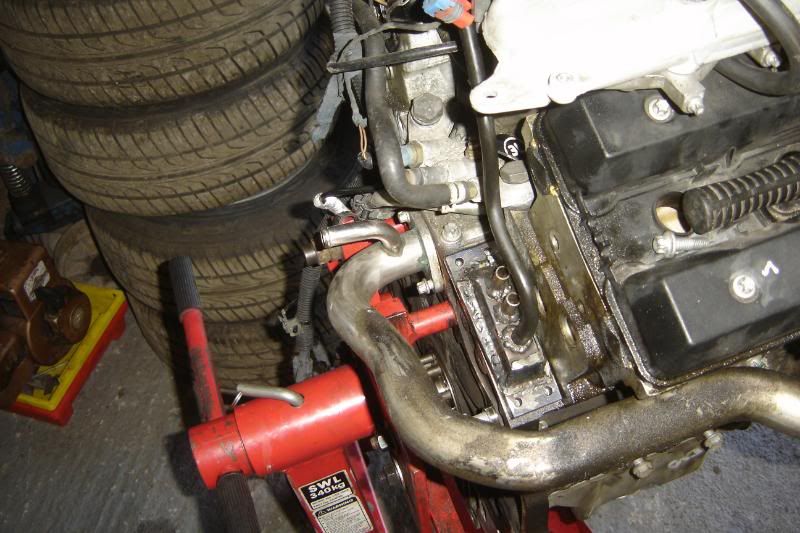
The cam belt lookts pretty recent as you can still see the print on the outside of the belt and the tensioners look very new too. But as its this stripped I should probably change it all, not sure yet? heres a few piccies.
Its amazingly compact with all the ancillaries removed it really is small
More to come
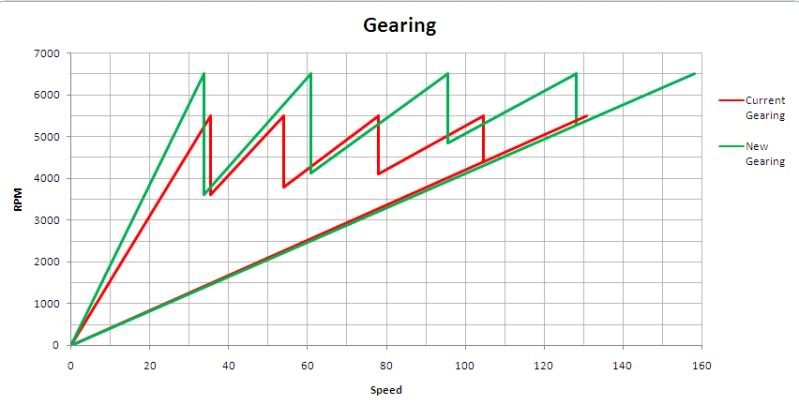
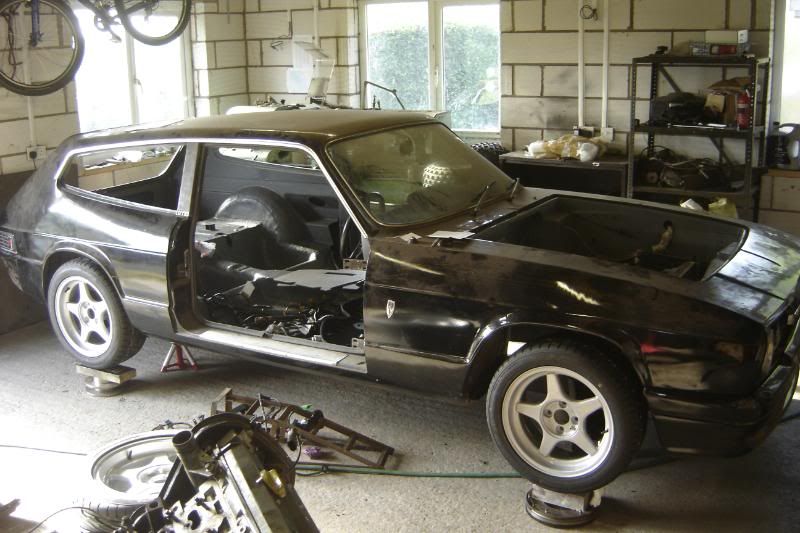
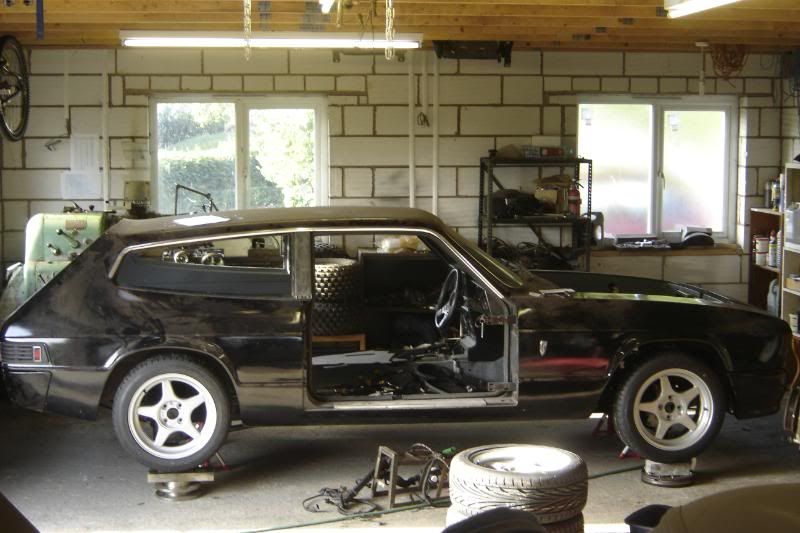
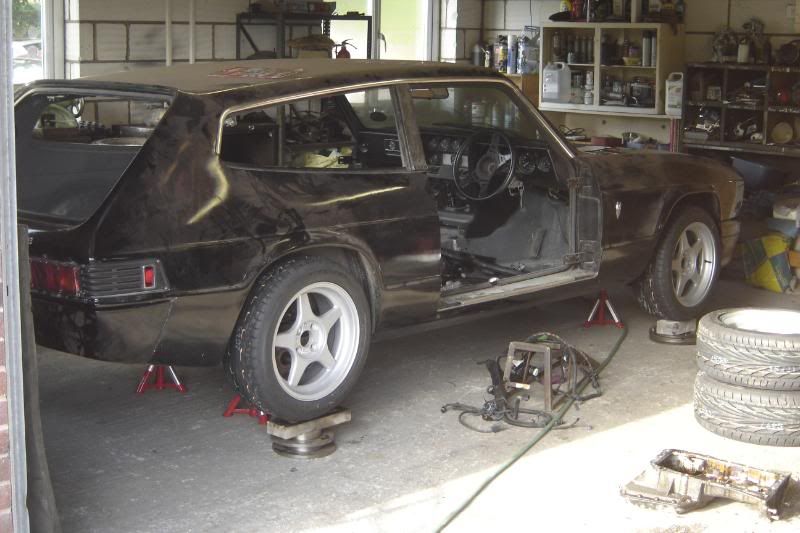
Right then, an exciting update. Got the tires fitted, I've never spent so much on tires before, but I wanted to buy a serious road tire so got a set of Toyo Proxies T-1R's. I couldn't resist mocking it up to see how it would look (the hubs are still MIA). I could not be happier with how it looks, I love the Wheels, I love the tires, I love the aspect ratio
The gearing is spot on as far as I can see, I think its almost exactly the same as in the omega with this wheel and tire combination ("new gearing " is the new wheels):
And here is my gorgeous car

Checked a big end bearing and it looks like new, so I'm going ot leave the bottom end alone now, its all cleaned and seal with the vectra sump and pick up.
With the lightweight flywheel I got for the engine I was told by Courtney (Vauxhall performance company) that I would need to buy one of their uprated clutches as the lightwieght flywheel was for the FWD engines and wouldn't fit the omega clutch. And as such the clutch slave would be extending just a little further and it would be wise to get a new one of those too. But....
Upon inspection today it seems the flywheel is exactly the same dimension as the dual mass beasty, in all the important dimensions, I've checked and checked it really looks identical so as the clutch has loads of meat on it thats £300 saved.
In terms of whether the clutch can handle the extra power...
I called Canems (who I'll be buying a programable ECU from shortly) they were very helpful and think with the MAF sensor replaced with a MAP sensor and the tubular manifolds I should be seeing upwards of 240bhp. To back this up they did a carpi with the MAP sensor mod and a decent exhasut system (but not manifol) and saw 238bhp.
My thinking is the standard clutch should be fine with a 20% increase.
I should start work on the heads soon
More to come
The gearing is spot on as far as I can see, I think its almost exactly the same as in the omega with this wheel and tire combination ("new gearing " is the new wheels):
And here is my gorgeous car
Checked a big end bearing and it looks like new, so I'm going ot leave the bottom end alone now, its all cleaned and seal with the vectra sump and pick up.
With the lightweight flywheel I got for the engine I was told by Courtney (Vauxhall performance company) that I would need to buy one of their uprated clutches as the lightwieght flywheel was for the FWD engines and wouldn't fit the omega clutch. And as such the clutch slave would be extending just a little further and it would be wise to get a new one of those too. But....
Upon inspection today it seems the flywheel is exactly the same dimension as the dual mass beasty, in all the important dimensions, I've checked and checked it really looks identical so as the clutch has loads of meat on it thats £300 saved.
In terms of whether the clutch can handle the extra power...
I called Canems (who I'll be buying a programable ECU from shortly) they were very helpful and think with the MAF sensor replaced with a MAP sensor and the tubular manifolds I should be seeing upwards of 240bhp. To back this up they did a carpi with the MAP sensor mod and a decent exhasut system (but not manifol) and saw 238bhp.
My thinking is the standard clutch should be fine with a 20% increase.
I should start work on the heads soon
More to come
Today I've spent far too much time looking at the car with its new wheels in place, I can't get enough, I know it won't be to everyones taste but its exactly what I've wanted for ages.
Anyway on with the important buisness of progress.
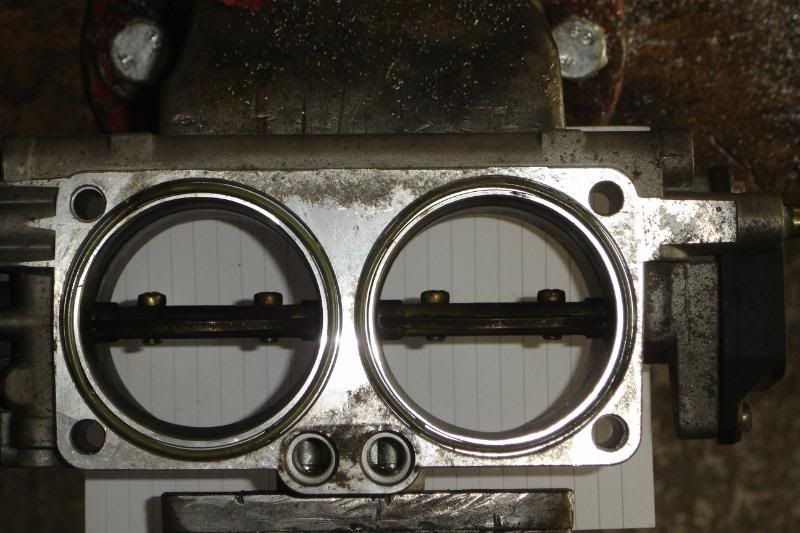
Between staring sessions I enlarged the throttle body a bit, not to the point of need bigger butterflies but there were some signifcant chunk of material that would hinder flow, I think its there to make small throttle openings more controllable, I think! In the photo, with the throttle held open, the one on the left is as vauxhall intended it and the right one is getting on for as I intend it to be on the bottom side was done at this point.
And I'm going to have a go at making a more compact version of the following, I quite fancy putting the engine back as far as Nath did but without changing the bulkhead. The coilpacks will also need relocating, it seems all the other stuff on the back of the engine is emissions stuff so can all be binned
More to come
Anyway on with the important buisness of progress.
Between staring sessions I enlarged the throttle body a bit, not to the point of need bigger butterflies but there were some signifcant chunk of material that would hinder flow, I think its there to make small throttle openings more controllable, I think! In the photo, with the throttle held open, the one on the left is as vauxhall intended it and the right one is getting on for as I intend it to be
on the bottom side was done at this point. And I'm going to have a go at making a more compact version of the following, I quite fancy putting the engine back as far as Nath did but without changing the bulkhead. The coilpacks will also need relocating, it seems all the other stuff on the back of the engine is emissions stuff so can all be binned
More to come
Thanks Max, but in case you hadn't noticed, this is taking me ages and costing a fortune
You've got a point about the Clutch, but I think at worst it'll just give gearbox chatter and might be a little harsher on take off and gearchanges. I've no experiance of this before but you can buy paddle clutches with no springs like this:
http://www.burtonpower.com/parts-by-category/trans...
After a slow day (fixing a friends mower in the morning ) I've had a productive evening.
I smashed the ali box thing up that bolts to the back of the block to get a better idea of what it was. Its just full of baffles and a non return valve thats so stiff it clearly wasn't doing anything so I've made a replacement part with a baffle in it and all the vacuum take offs to give the correct PCV or positive crankcase ventilation into the inlet manifold. The most important thing you'll notice is that its now much smaller and should give more room to get the engine up against the bulkhead.
There's a thin vacuum line to the downstream side of the throttles (i.e. inside the plenum) for PCV at idle and light load, then at full load when there's more blowby gas in the crank case there are two bigger pipes that take the gas to just upstream of the throttle. I've tried to keep this system as close as pos to how it's intended to be, and a partial vacuum in the crankcase is great for stopping oil leaks past the oil seals and reduces sludge biuld up.
Anyway pics tell a thousand words so I'll shut up
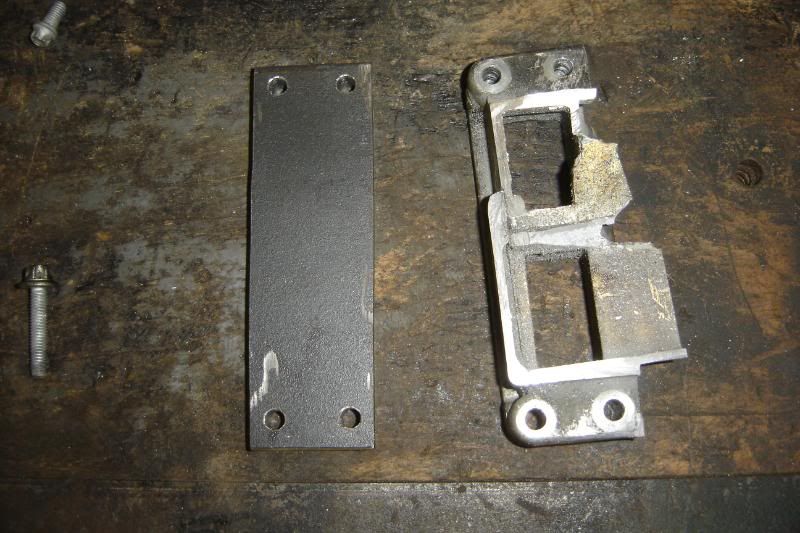
Looks like a little boat
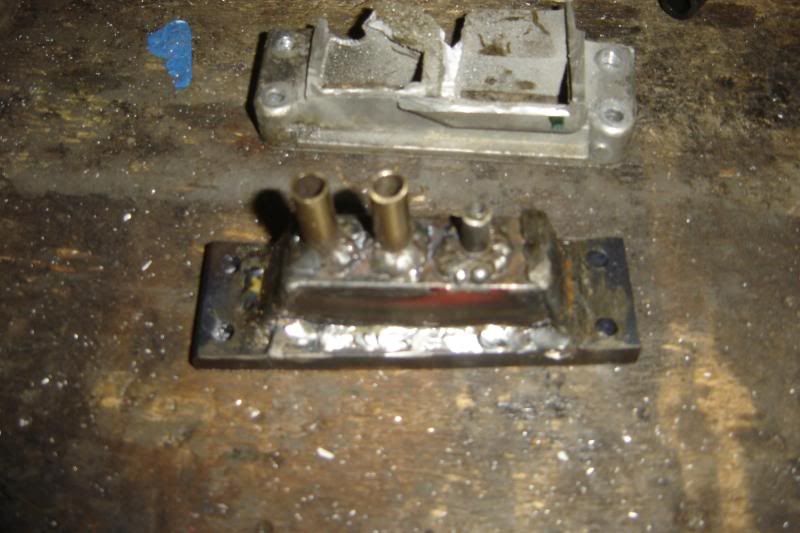
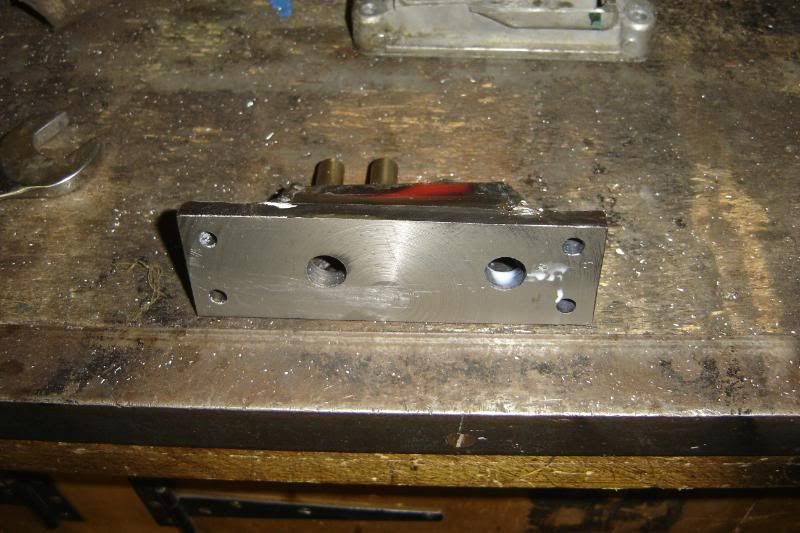
All the welding warped the hell out of it so I span up the lathe and flattened it down again
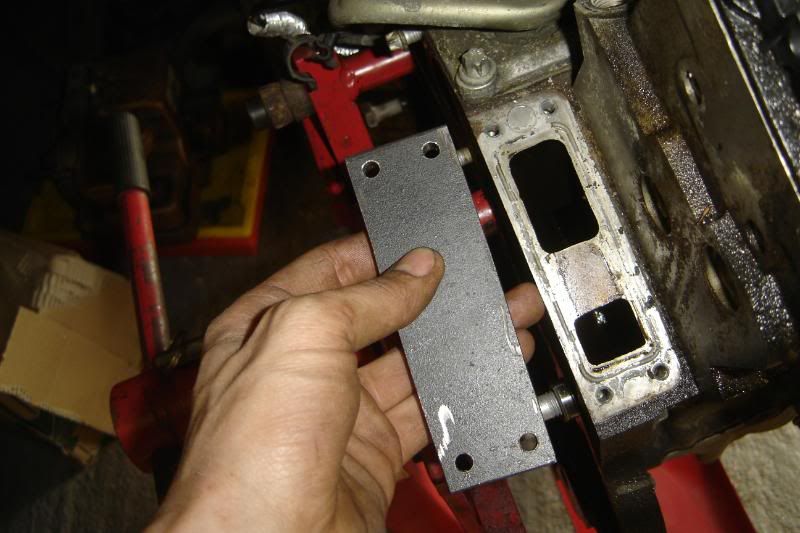
This is where it'll live
You can see its much slimmer
I'm tryign to get my head round the cooling system, any ideas when the two little electric coolant pumps are used anyone, I want to bin them see.
More to come
You've got a point about the Clutch, but I think at worst it'll just give gearbox chatter and might be a little harsher on take off and gearchanges. I've no experiance of this before but you can buy paddle clutches with no springs like this:
http://www.burtonpower.com/parts-by-category/trans...
After a slow day (fixing a friends mower in the morning
) I've had a productive evening. I smashed the ali box thing up that bolts to the back of the block to get a better idea of what it was. Its just full of baffles and a non return valve thats so stiff it clearly wasn't doing anything so I've made a replacement part with a baffle in it and all the vacuum take offs to give the correct PCV or positive crankcase ventilation into the inlet manifold. The most important thing you'll notice is that its now much smaller and should give more room to get the engine up against the bulkhead.
There's a thin vacuum line to the downstream side of the throttles (i.e. inside the plenum) for PCV at idle and light load, then at full load when there's more blowby gas in the crank case there are two bigger pipes that take the gas to just upstream of the throttle. I've tried to keep this system as close as pos to how it's intended to be, and a partial vacuum in the crankcase is great for stopping oil leaks past the oil seals and reduces sludge biuld up.
Anyway pics tell a thousand words so I'll shut up
Looks like a little boat
All the welding warped the hell out of it so I span up the lathe and flattened it down again
This is where it'll live
You can see its much slimmer
I'm tryign to get my head round the cooling system, any ideas when the two little electric coolant pumps are used anyone, I want to bin them see.
More to come
After making that PCV thing smaller I had a look at the coolant hose that goes round the back of the block, thats a real pain that is
I've done my best to make it smaller but its still big enough not to warrent making the PCV thingy
Here's some piccies of the original and the new hose arrangement
As was
And the new one
Might start making the swirl pot now as the SS has arrived
More to come
I've done my best to make it smaller but its still big enough not to warrent making the PCV thingy
Here's some piccies of the original and the new hose arrangement
As was
And the new one
Might start making the swirl pot now as the SS has arrived
More to come
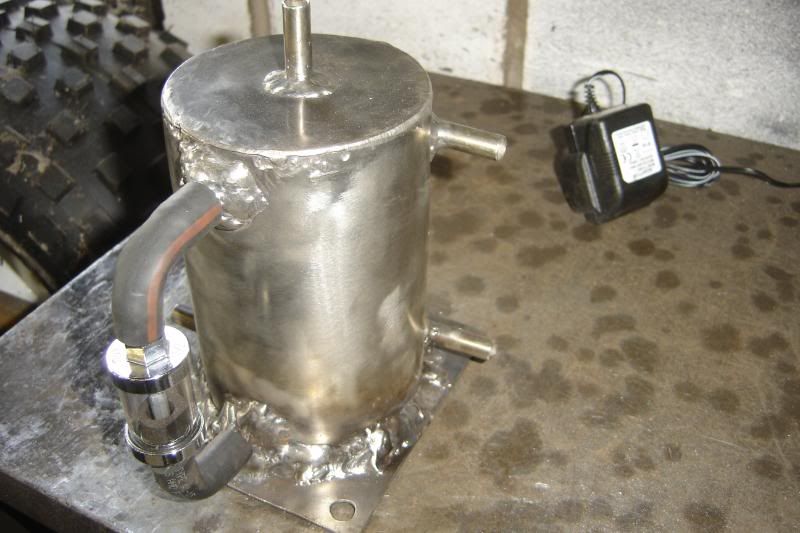
Here's a couple of better photos of the new pipe outlet
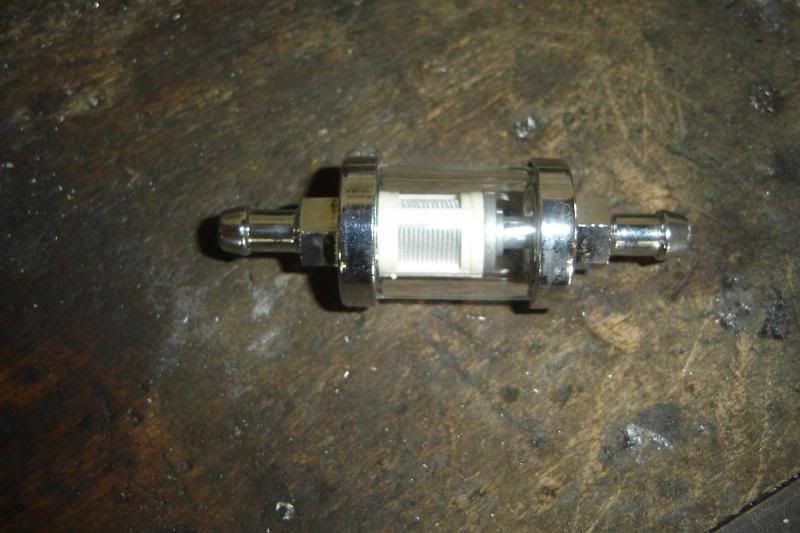
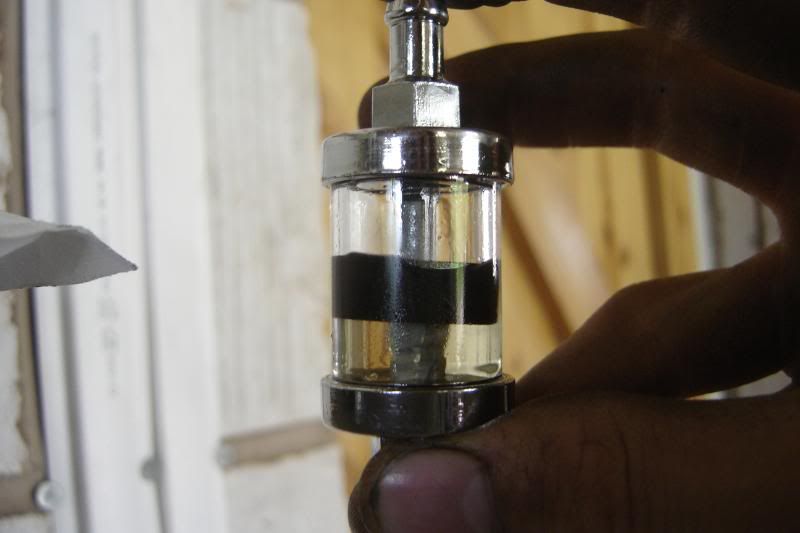
This is will be mounted on the side of the swirl pot as a sight glass just to show everything is working fine (hopefully)
First I took a glass filter
Then gutted it
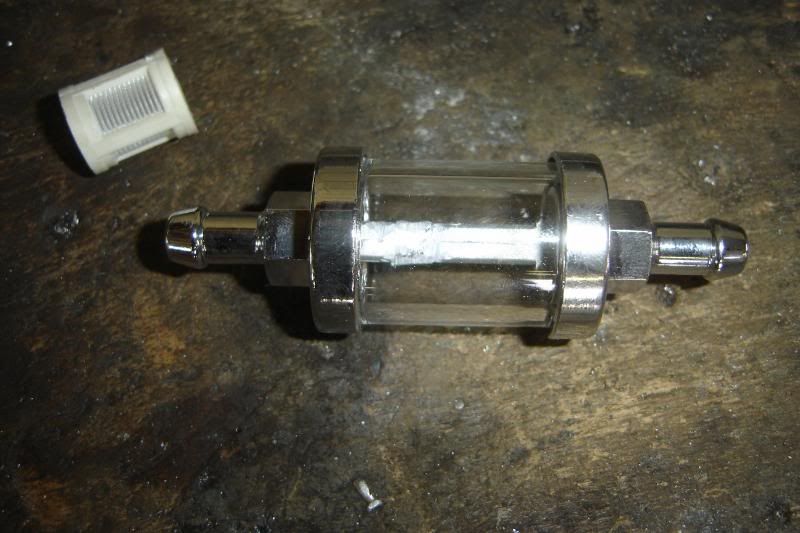
The trimmed down the float from the Omegas fuel tank to fit inside, this should hopefully spend its life at the top of the sight glass
Just researching what size the swirl pot should be
More to come
This is will be mounted on the side of the swirl pot as a sight glass just to show everything is working fine (hopefully)
First I took a glass filter
Then gutted it
The trimmed down the float from the Omegas fuel tank to fit inside, this should hopefully spend its life at the top of the sight glass
Just researching what size the swirl pot should be
More to come
Thanks TeeinChina I would have to learn to weld properly before I could call myself anything
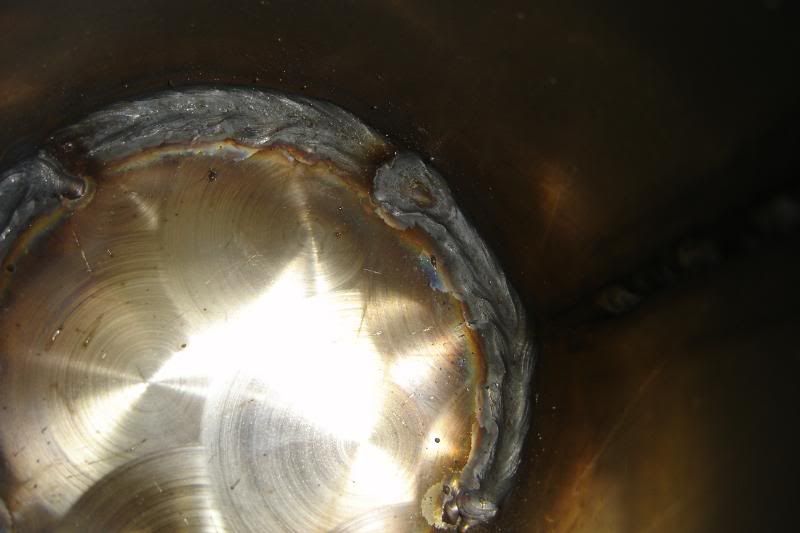
I got a couple of hours free again last night and managed to mess the tank up a bit, but overall progress has been made
The swirl pot is now a bit shinier but still covered in weld
Got some pumps to keep it full, got a second one as a) I've heard they're not the most reliable and b) the second one could be switched on when the tank is getting low.
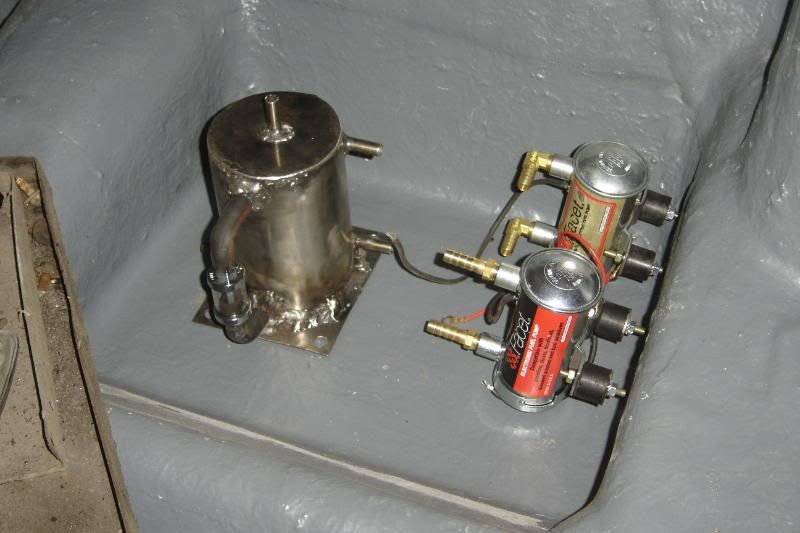
I had thought about using another injecion pump as they're a lot more reliable, but I'm worried that the pressue in the swirl pot might just edge too high and start effecting the pressure at the fuel rail (downstream of the actual high pressure pump), so I'm sticking with these Facet jobs.
I know I'm going a bit OTT for the omega engine but I'm thinking of the future (LS1) so I welding up the tanks 8mm tails and welded in some 10mm ones instead. The return was easy but the feed obviously needs to be fairly near the bottom of the tank so I got it all right, then lowered the tank to the floor to weld it. Turns out the pipe must have been knocked and I ended up welding it up 2 inches from the bottom of the tank
So I cut it out and welded the patch on it that you see, then put another feed tail in the side as you can see int he photo.
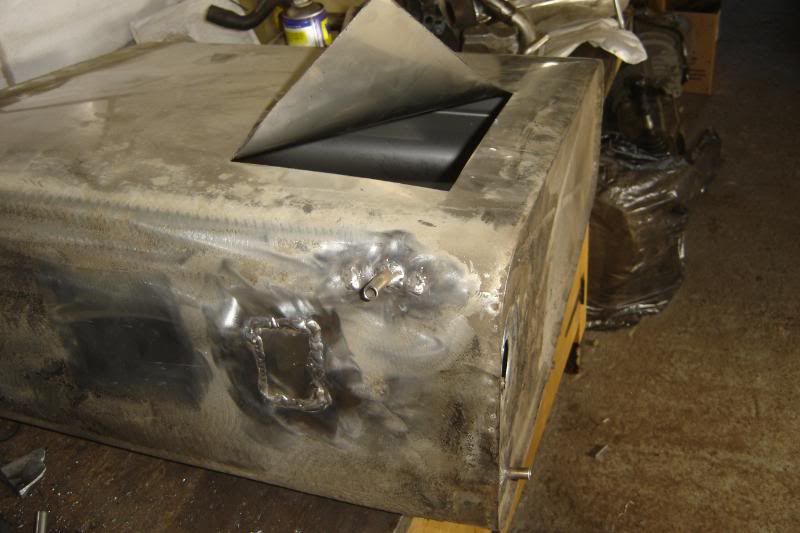
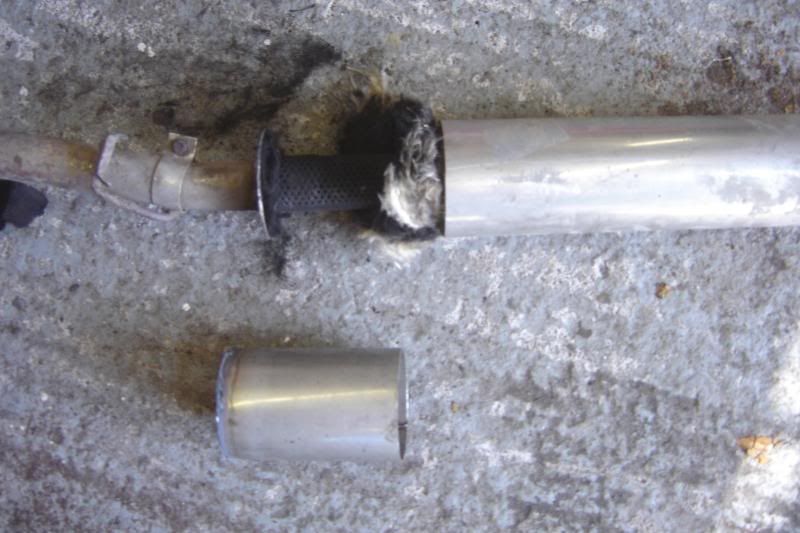
I've cut the tank open as the baffle inside had come loose. Turns out its not stainless where the rest of the tank is so would have suffered with bimetalic corrosion when the ethanol content goes up as ethanol is an electrolite.
So that'll be replaced with a stainless baffle next time I'm down the garage and sealed up again. I did fancy reducing the size of the tank as its so big and will mainly be run on LPG, but sealing a tank with a MIG welder is a mightmare so I'm going to leave it as is I think, just means I'll not often get the pleasure of seeing the fuel guage on full.
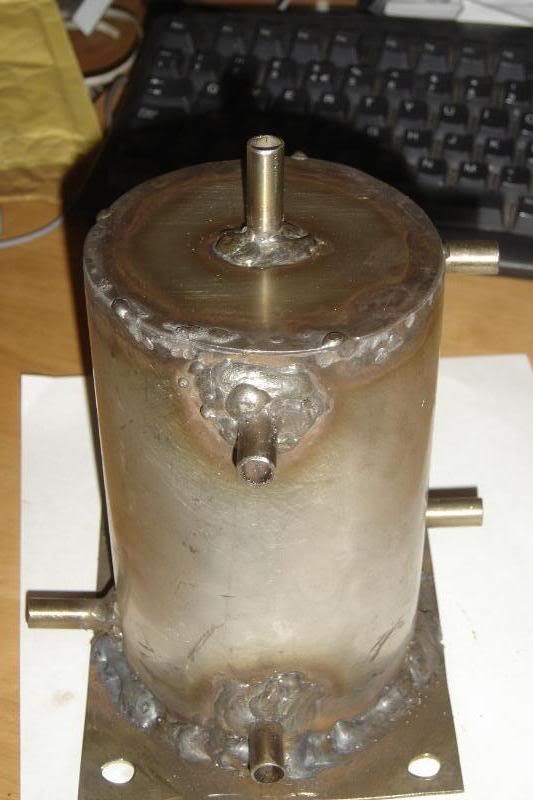
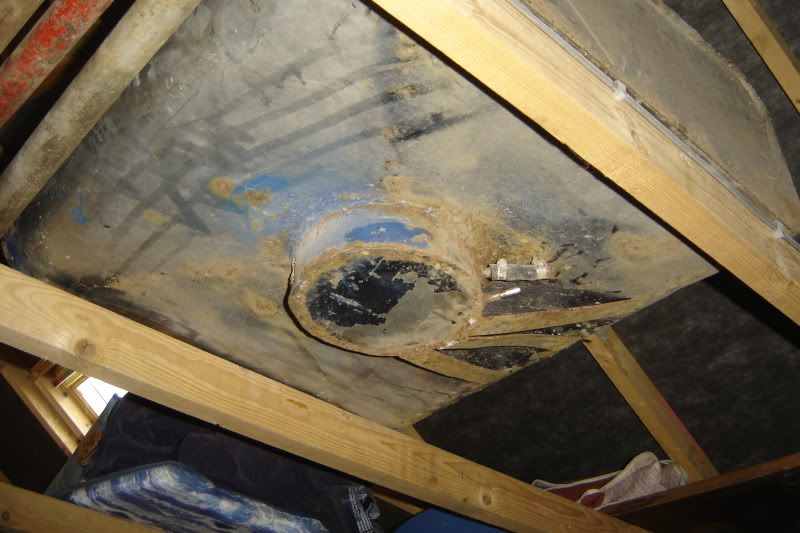
Here's a photo of the abomination I did a couple of years back, viewed from below (its in the rafters). The idea was to put a sump on it to negate the need for a swirl pot. It took FOREVER to get it sealed up. And, as I used mild welding wire the problem of bimetalic corrosion would have still been there.
I'd love to own a business modernising classic cars, that would be ace (pipe dream)
More to come
I got a couple of hours free again last night and managed to mess the tank up a bit, but overall progress has been made
The swirl pot is now a bit shinier but still covered in weld
Got some pumps to keep it full, got a second one as a) I've heard they're not the most reliable and b) the second one could be switched on when the tank is getting low.
I had thought about using another injecion pump as they're a lot more reliable, but I'm worried that the pressue in the swirl pot might just edge too high and start effecting the pressure at the fuel rail (downstream of the actual high pressure pump), so I'm sticking with these Facet jobs.
I know I'm going a bit OTT for the omega engine but I'm thinking of the future (LS1) so I welding up the tanks 8mm tails and welded in some 10mm ones instead. The return was easy but the feed obviously needs to be fairly near the bottom of the tank so I got it all right, then lowered the tank to the floor to weld it. Turns out the pipe must have been knocked and I ended up welding it up 2 inches from the bottom of the tank
So I cut it out and welded the patch on it that you see, then put another feed tail in the side as you can see int he photo.
I've cut the tank open as the baffle inside had come loose. Turns out its not stainless where the rest of the tank is so would have suffered with bimetalic corrosion when the ethanol content goes up as ethanol is an electrolite.
So that'll be replaced with a stainless baffle next time I'm down the garage and sealed up again. I did fancy reducing the size of the tank as its so big and will mainly be run on LPG, but sealing a tank with a MIG welder is a mightmare so I'm going to leave it as is I think, just means I'll not often get the pleasure of seeing the fuel guage on full.
Here's a photo of the abomination I did a couple of years back, viewed from below (its in the rafters). The idea was to put a sump on it to negate the need for a swirl pot. It took FOREVER to get it sealed up. And, as I used mild welding wire the problem of bimetalic corrosion would have still been there.
I'd love to own a business modernising classic cars, that would be ace
(pipe dream)More to come
Edited by lozzzzzz on Tuesday 7th June 19:14
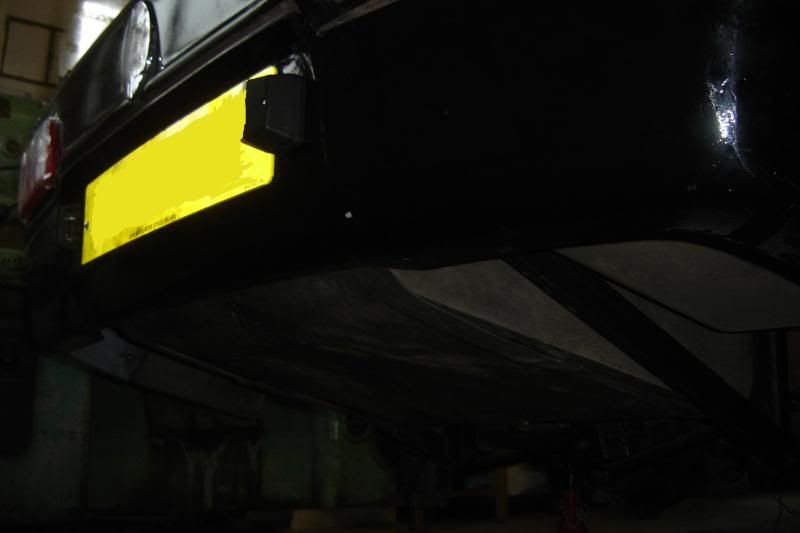
Tthe lpg tank will give about 350 miles mildly spirited driving, and the petrol tank might be more like 500 as it is. In the interest of never getting caught out miles from an LPG filling station I've decided to keep the full capacity of the petrol tank, so it might cost £150 to fill the car up completely but it should be easily capable of over 800 miles on it.
So some photos then,
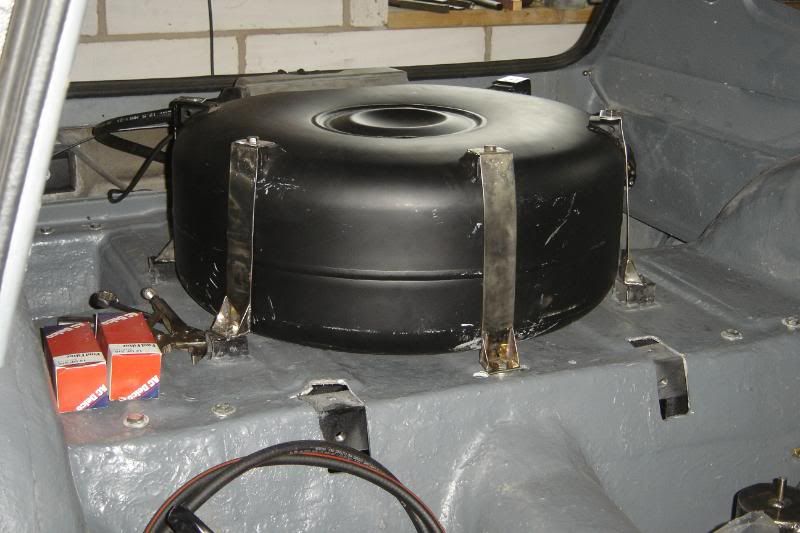
Tank under the car
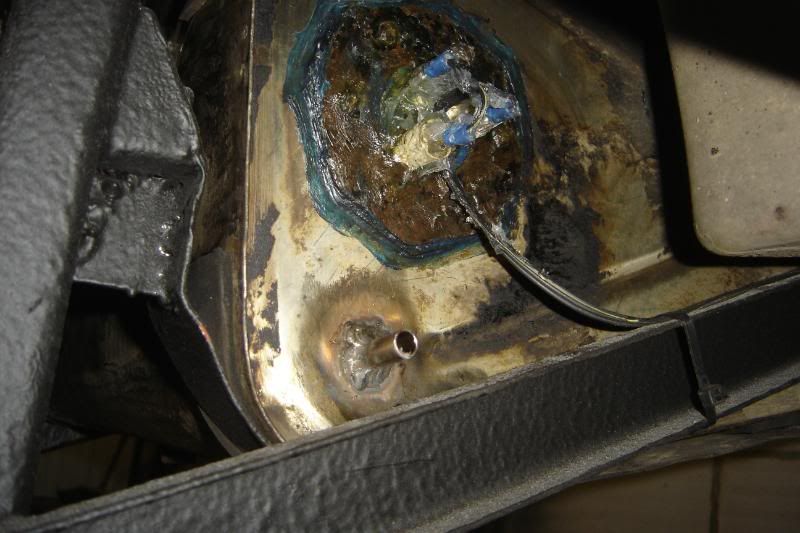
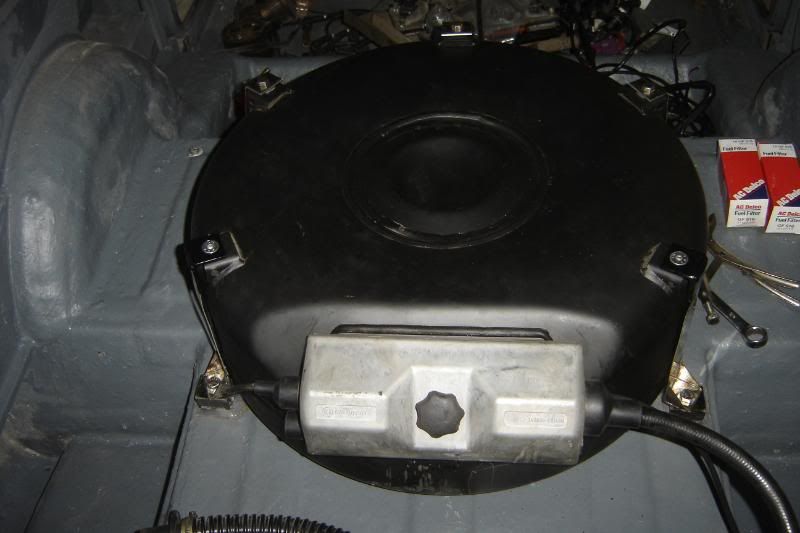
The sender super sealed with silicone over all the electrics to stop corrosion and bad connections developing
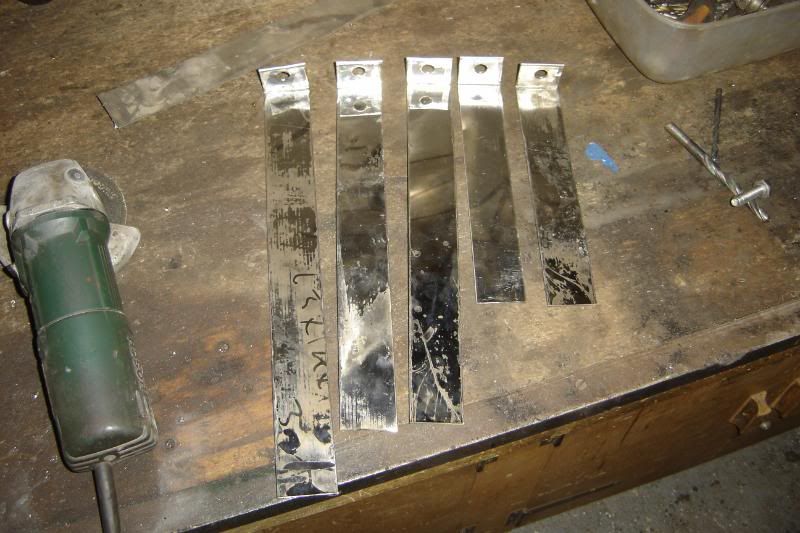
So today I had lots of time to get the LPG tank fitted in place and connected up. Started with making up the straps to hold in down, the omega only used three of the tank bolt locations, but I thought it would be best to use all five as its sat on the flat now, rather than in a well. I'm loz and I'm a SS addict, I can't seem to help myself any more, so the straps are predictably SS.
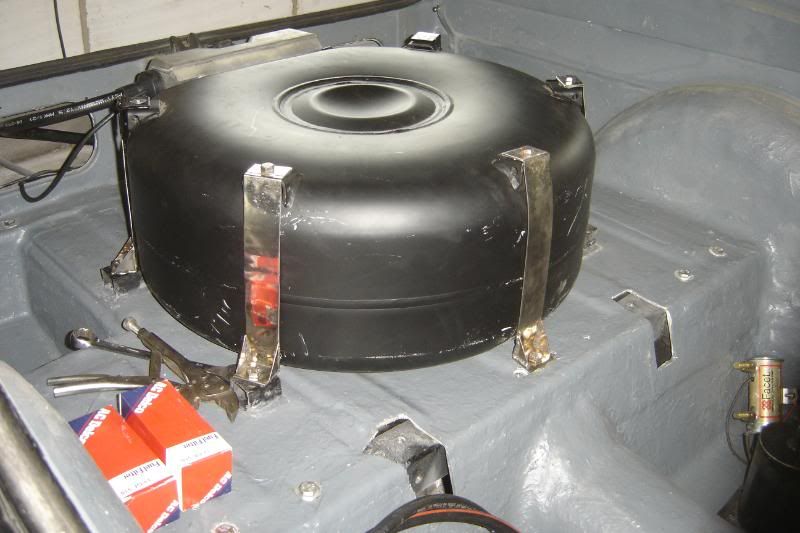
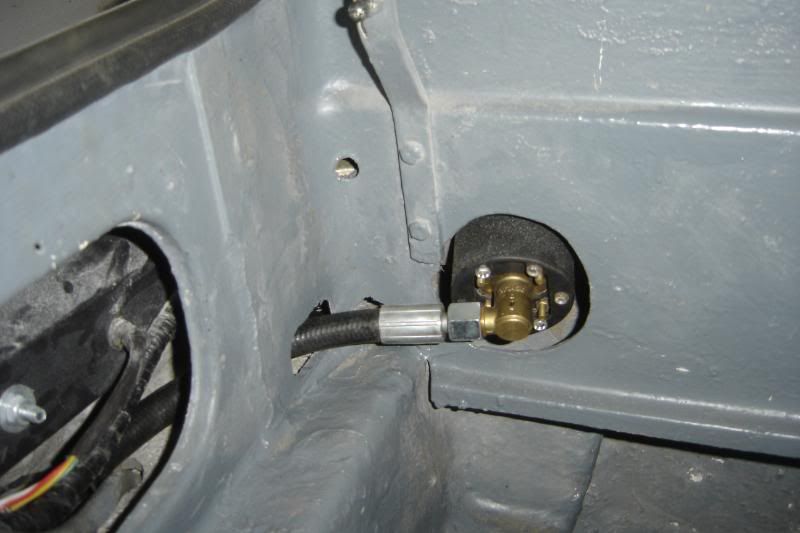
Filler connected up
And finally the vent hose is now connected to the new hole in the boot floor
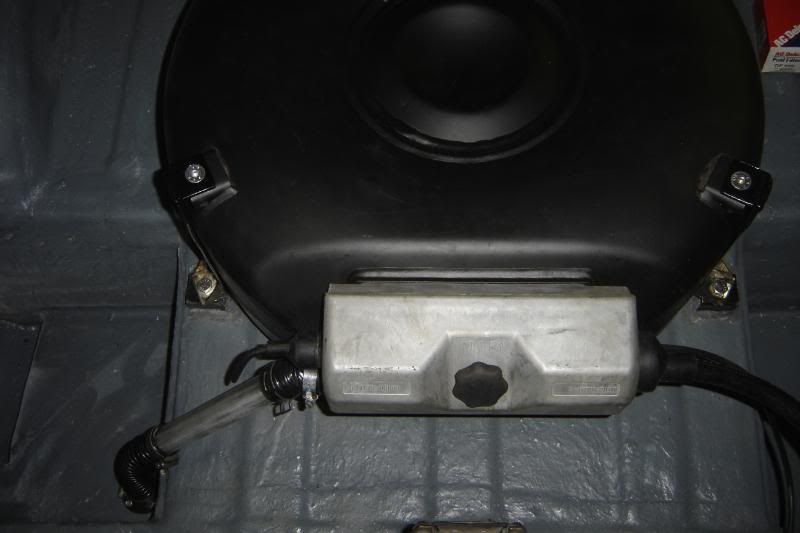
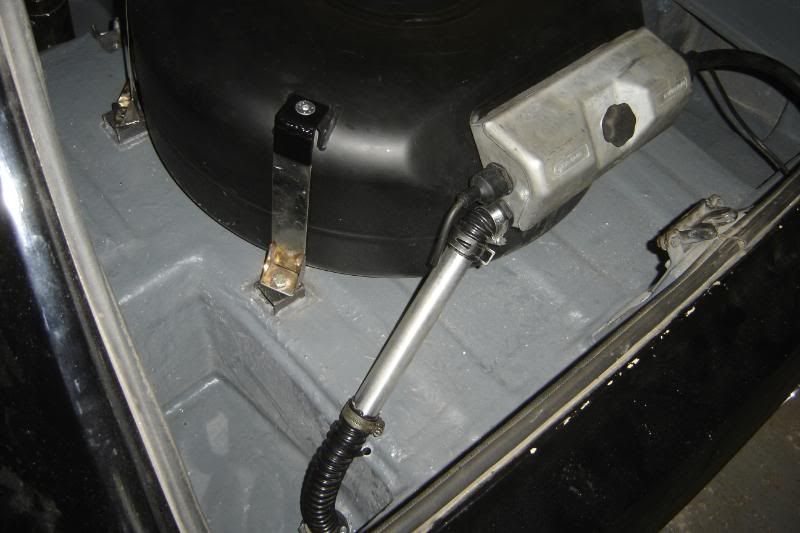
and looking up at it

Started looking at the clutch pedal today, using Naths very helpful pics for info, it looks tight next to the servo!?!?
Can't wait to get going with the engine again.
More to come maybe tonight maybe next weekend.
So some photos then,
Tank under the car
The sender super sealed with silicone over all the electrics to stop corrosion and bad connections developing
So today I had lots of time to get the LPG tank fitted in place and connected up. Started with making up the straps to hold in down, the omega only used three of the tank bolt locations, but I thought it would be best to use all five as its sat on the flat now, rather than in a well. I'm loz and I'm a SS addict, I can't seem to help myself any more, so the straps are predictably SS.
Filler connected up
And finally the vent hose is now connected to the new hole in the boot floor
and looking up at it
Started looking at the clutch pedal today, using Naths very helpful pics for info, it looks tight next to the servo!?!?
Can't wait to get going with the engine again.
More to come maybe tonight maybe next weekend.
Edited by lozzzzzz on Sunday 12th June 20:15
Managed to do some more on the car today,
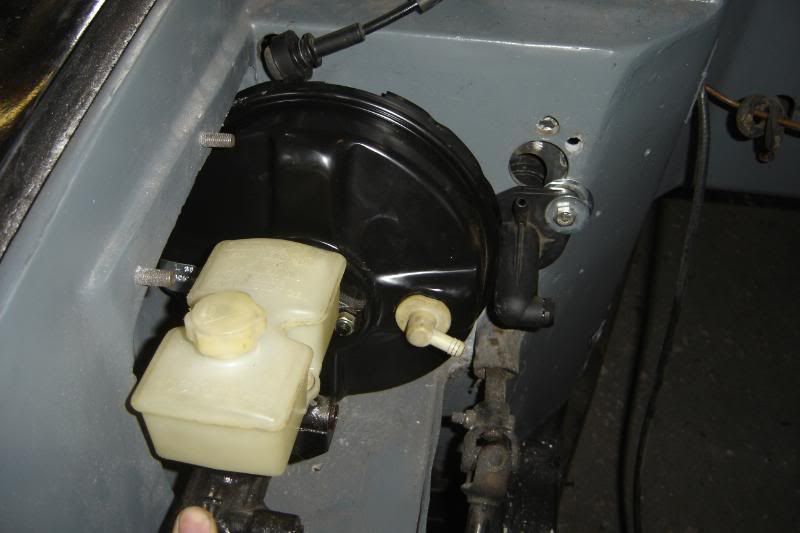
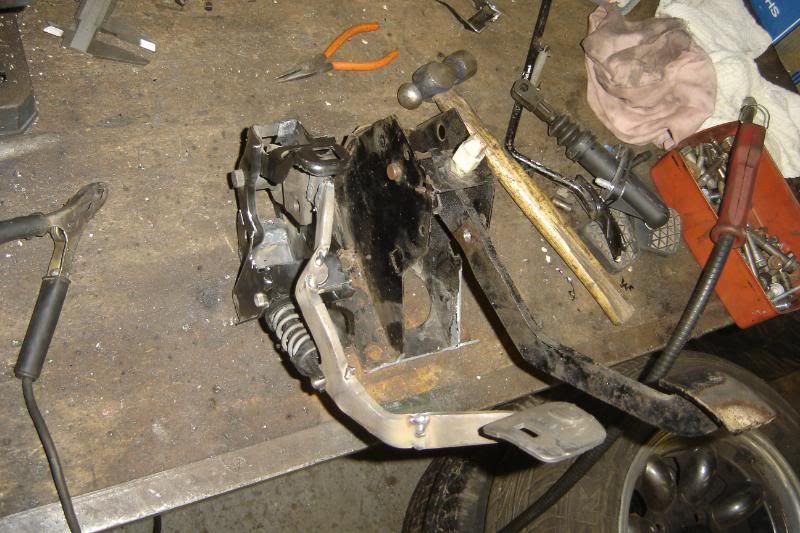
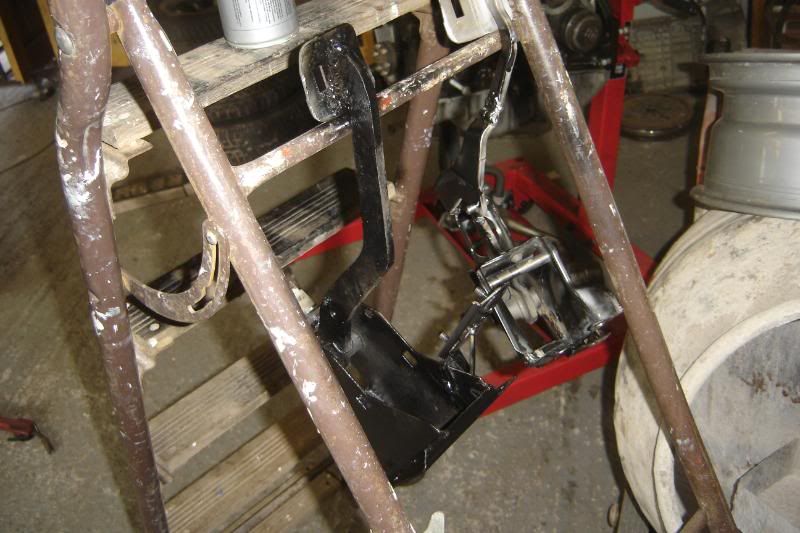
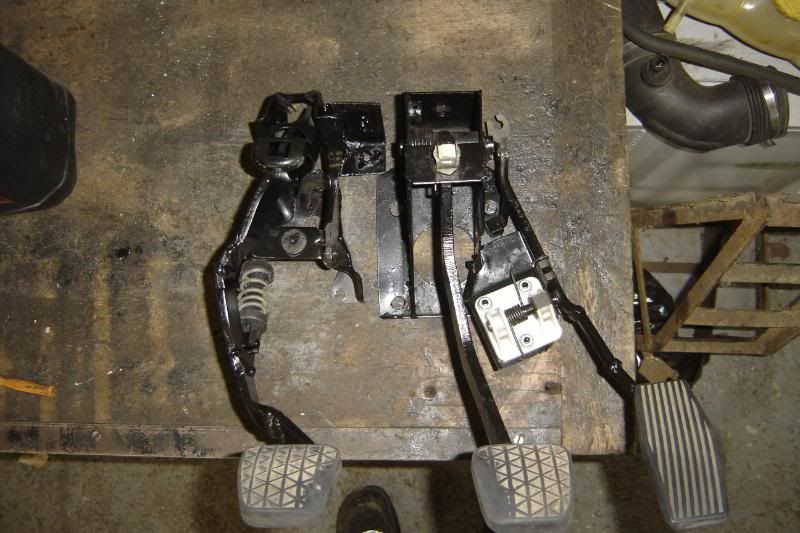
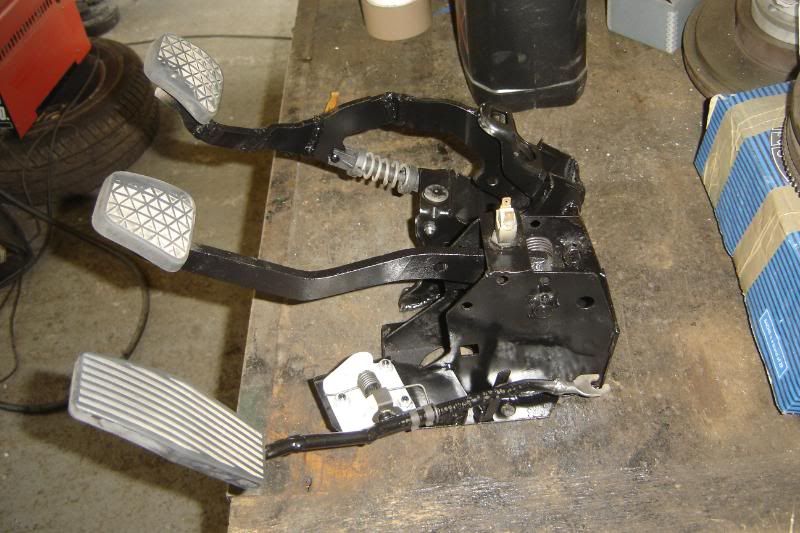
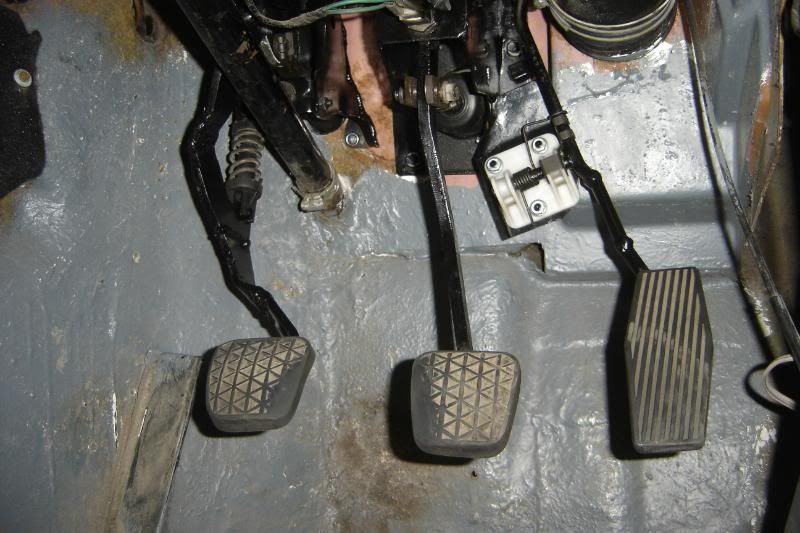
After a couple of hours very unsuccessful butchery of the omega clutch master, I finally got somewhere with it. The pedal now fits and lines up nicely with brake pedal. The pedals ends are all omega now to have a matching set. The accelerator has been replaced with the omega one aswell to make the movement a bit shorter, the Scimitar pedal had nearly 6 inches travel for full throttle.
Its very tight and only just fits, the original hole was too low
These picture represent such a massive amount of thought and work
I weakened the assist spring a bit as I'm not too keen on the modern car soft feel
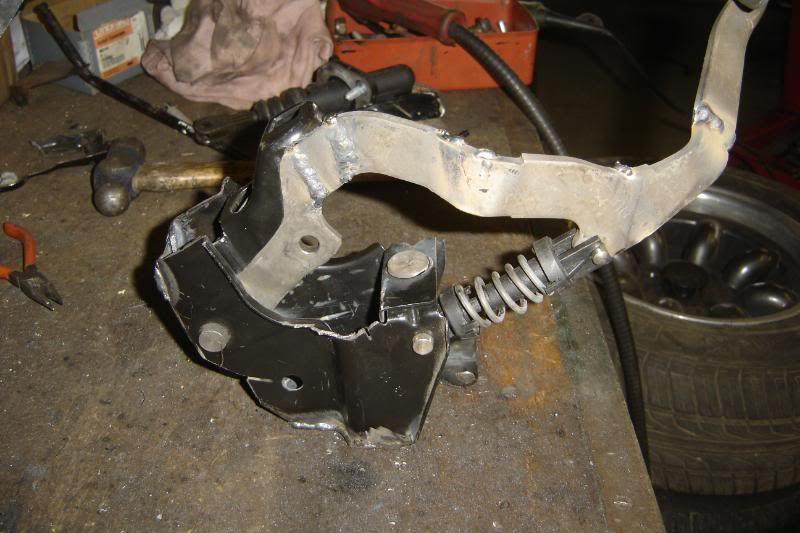
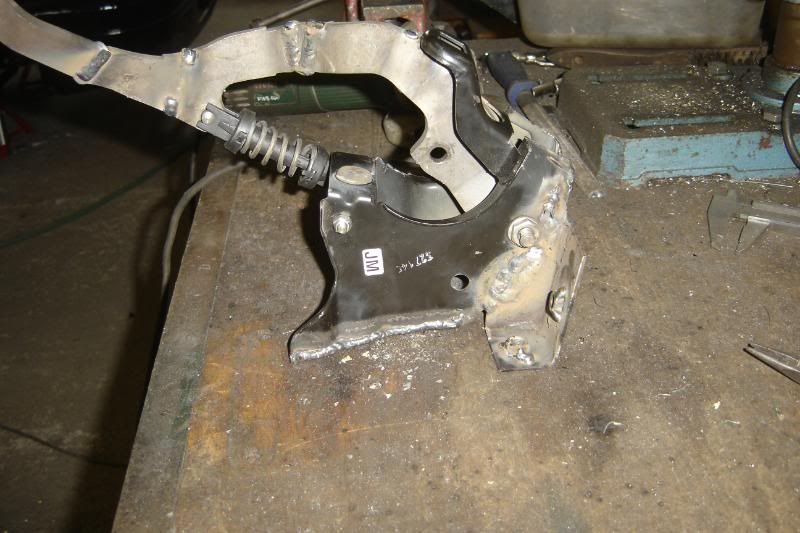
The omega throttle pedal bracket was simple added too the brake pedal assembly and the actual pedal cut and welded a few times to put it in the right place
And a bit more support welded in
Here are the bits drying with a coat of black paint.
The first time I had the hubs drilled it cost £45, but these turned out to be completely wrong and wheel span eccentrically so I had them redone at a different place. They found that the hubs were a little out of true so straightened them up and redrilled (just enough material left) this time it cost £60.
So I put the first hub back on about an hour ago only to find the wheel is moving again, by about 1mm. This is getting to really p*** me off
AAAAGGGGGHHHHHHHH so now I either settle with 1mm or I have to redrill another set of hubs and waste a load of new grease AGAIN, and transfer the new wheel bearings. I JUST WANT FOUR HOLES DRILLED IN THE RIGHT PLACE
After a couple of hours very unsuccessful butchery of the omega clutch master, I finally got somewhere with it. The pedal now fits and lines up nicely with brake pedal. The pedals ends are all omega now to have a matching set. The accelerator has been replaced with the omega one aswell to make the movement a bit shorter, the Scimitar pedal had nearly 6 inches travel for full throttle.
Its very tight and only just fits, the original hole was too low
These picture represent such a massive amount of thought and work
I weakened the assist spring a bit as I'm not too keen on the modern car soft feel
The omega throttle pedal bracket was simple added too the brake pedal assembly and the actual pedal cut and welded a few times to put it in the right place
And a bit more support welded in
Here are the bits drying with a coat of black paint.
The first time I had the hubs drilled it cost £45, but these turned out to be completely wrong and wheel span eccentrically so I had them redone at a different place. They found that the hubs were a little out of true so straightened them up and redrilled (just enough material left) this time it cost £60.
So I put the first hub back on about an hour ago only to find the wheel is moving again, by about 1mm. This is getting to really p*** me off
AAAAGGGGGHHHHHHHH so now I either settle with 1mm or I have to redrill another set of hubs and waste a load of new grease AGAIN, and transfer the new wheel bearings. I JUST WANT FOUR HOLES DRILLED IN THE RIGHT PLACE
Thanks for your kind comments GingerNinja.
Your car has been something of an inspiration to me starting a few years back when I began to change things on the Scim. I love it, what an awesome looking car. Was it on the V8 Church website too??
And if I'm not very much mistaken did I read somewhere that you'd eventually like to pop an LS1 in yours? I'm definiatly in the same camp there! If I came into a bit more money one day the LS1 would be top of the todo list.
Re body mods, I've already done the bumpers and got rid of the boot lock and rear wiper, opened out the front grill to be functional and to be honest, I think I'm happy with how it looks besides little smartening up things. We'll see how it looks when its on the raod again, never say never I guess!
Thanks for the interest.
got to play with the car for the day. I've made very little progress but I'm really really tired!The pedals were all ready to go in this morning
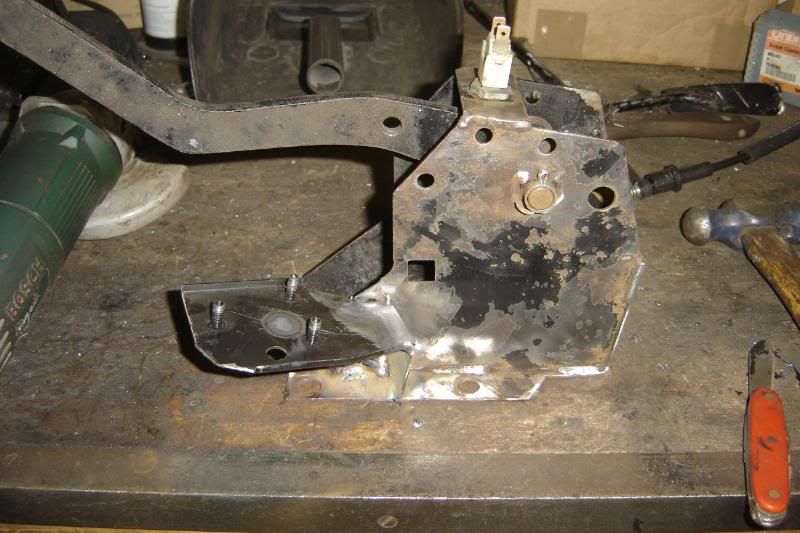
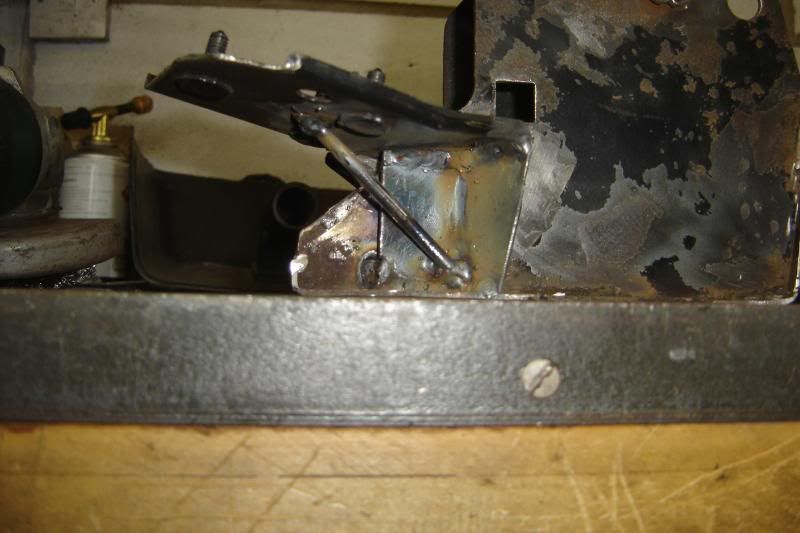
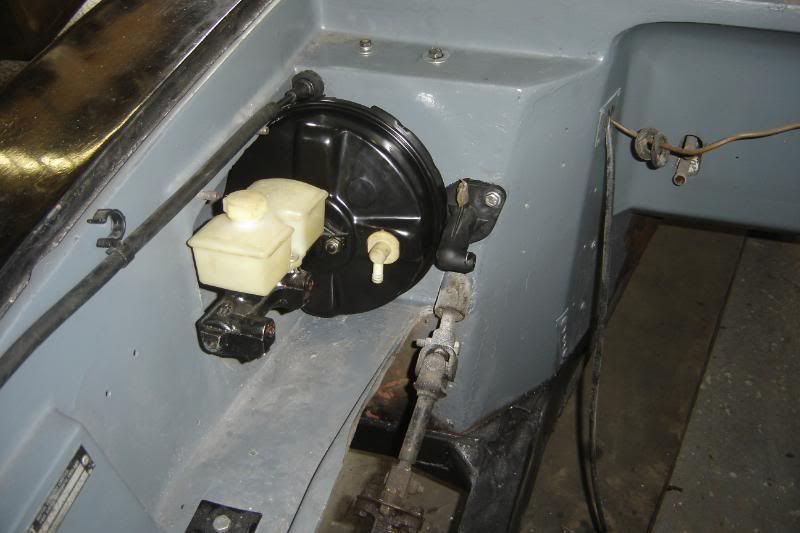
I drilled one of the master cylinder bolts out so I can put a bolt through into a welded nut, making mounting a bit easier
I had a shop around for prices for parts thinking that it might be wise to replace the master with a new one, then I heard the prices and changed my mind, so I gave it a thorough clean instead. In doing so I realised its got a fairly complex design inside and I got the bore wrong, its actually 19mm not 21, hope that doesn't screw thigs up for you Phil.
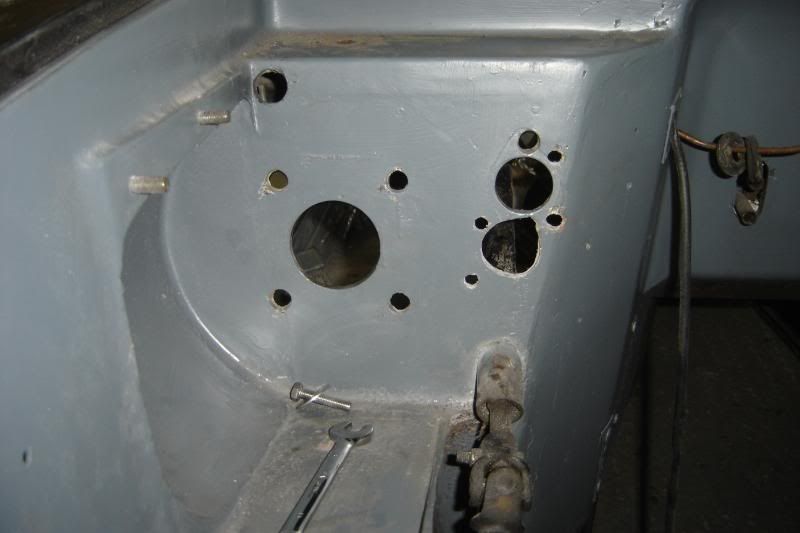
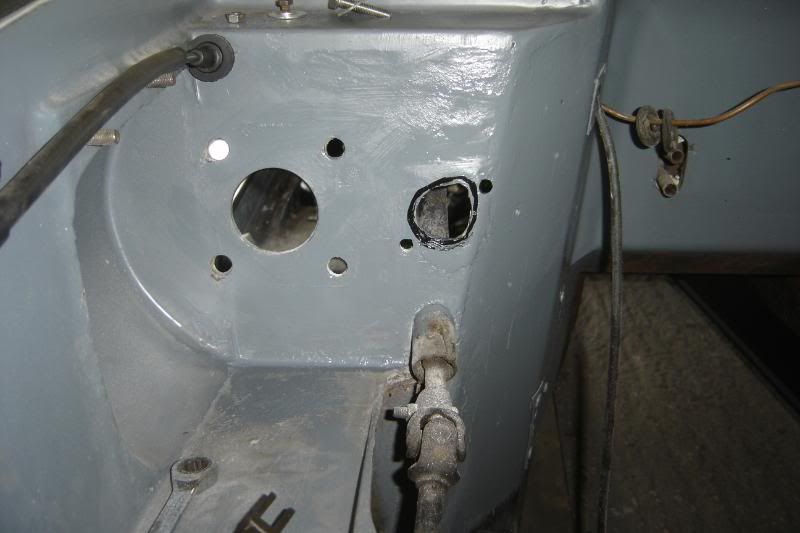
I filled the hole where the old master cylinder used to go
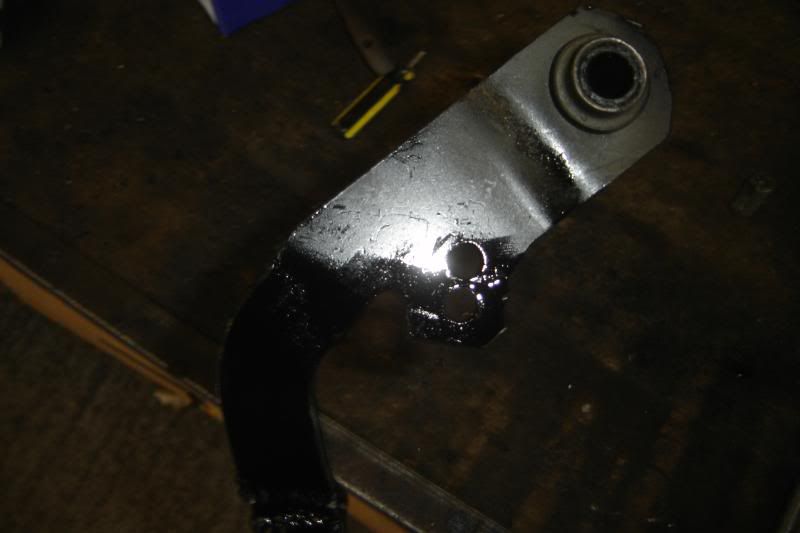
The for some reason the omega master didn't line up with the clutch pedal so out came the welder again, added some material and drilled a new hole
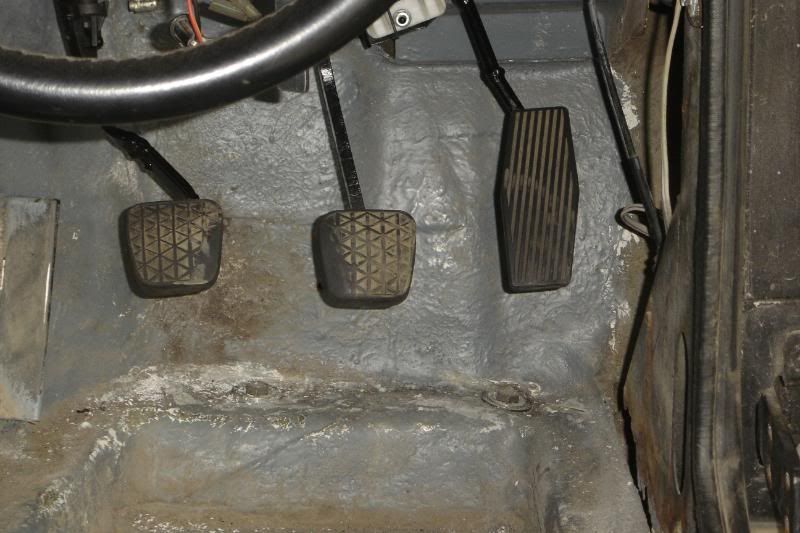
Now I have tree working pedals
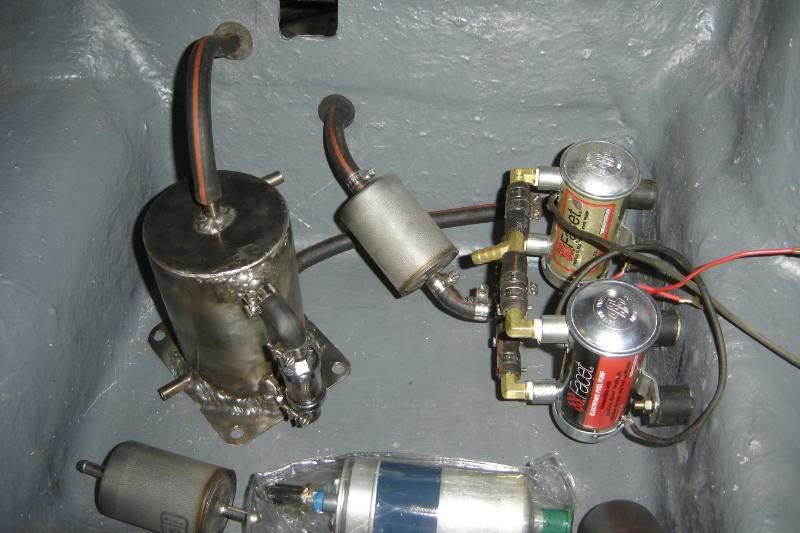
I started mounting the numerous pumps and filters and the swirl pot. The fuel will come in from the hose in the centre of the photo, through the first filter, into one of the two facet pumps, I got two cos they're not the most reliable so they'll both be on switches and only one will be needed at any one time. From there the fuel will go into the swirl pot and return out of the top back to the tank through the top left hose in the photo. There is a take off at the bottom for the high pressure pump to the engine, which will be pre filtered and post filtered meaning that if any item fails it would damage anything else in the system. Its a bit OTT though, especially as the car will spend most of its time on LPG (not a pump in sight for that).
I've not had the patients to look at the hubs yet, I'm hoping they'll get better by themselves.
Thanks for looking.
Good luck with that work, have you got a section on PH where you post progress?
Got some more done today!
A few more bits have arrived making completing the swirl pot assembly and pumps possible. I also measured and fitted all of the hubs:
Front left is perfect,
Both rears are nearly spot on (enough to leave them and see how it drives
That just leaves the front right with is at least 1.5mm out and will need doing again.
I'm all out of space to drill more holes so I've dug out some old hubs and I'll get them done, hopefully for free.
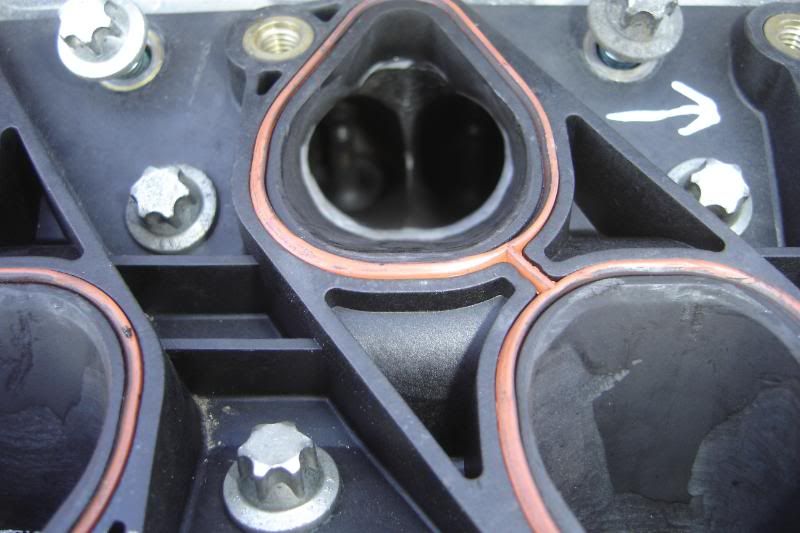
Tidied up ready for stripping the engine, when I had a bright idea. The inlet manifold is in three parts, the plenum, the runners and the base to the runners (plastic). As the cams have spun when I took the belt off and all the valves are closed, I put rag in all the other holes in the engine and bolted the runner base to the heads, then I ported them and matched them to the heads ports. There was loads of material that could be removed, there was an odd shape that squeezes the air from the sides, so I took it all out, the rolling road with tell if I've meddled where I shouldn't have or if it helps. Anyway here are some pics
I've tried to show the marrow section here:
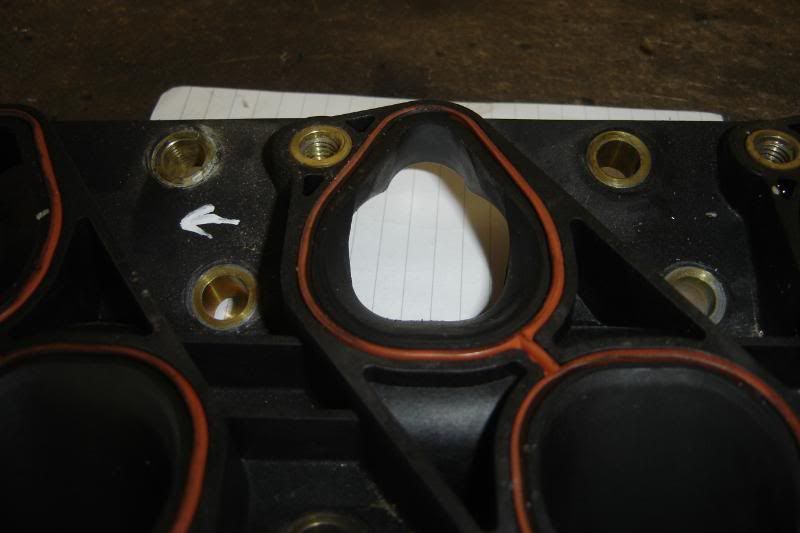
This might be easier to see as a comparison, before:
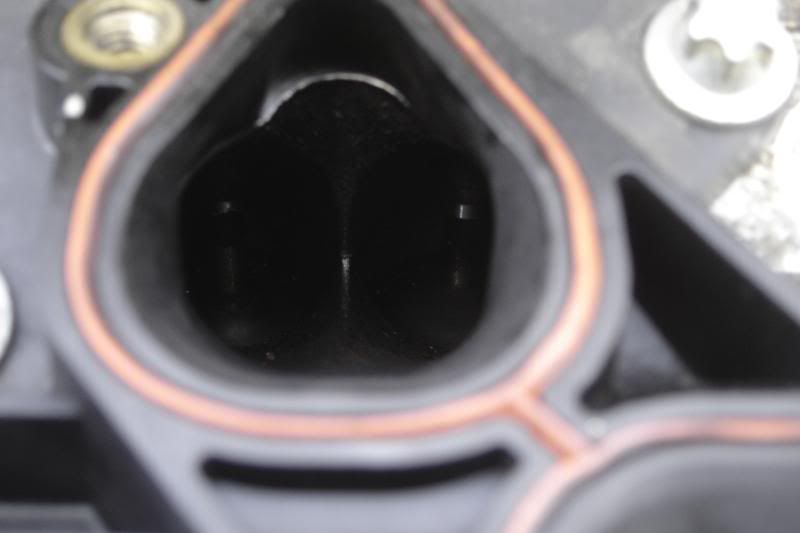
and After:
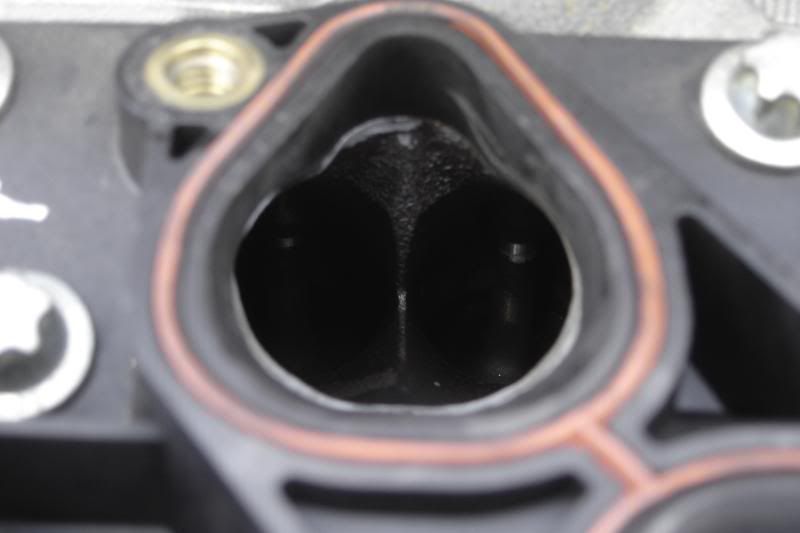
The inlet runner is the same shape as the "after" photo all the way down so I'm hoping that will help flow!

A spot of diner now, then its off with her heads
More to come
Got some more done today!
A few more bits have arrived making completing the swirl pot assembly and pumps possible. I also measured and fitted all of the hubs:
Front left is perfect,
Both rears are nearly spot on (enough to leave them and see how it drives
That just leaves the front right with is at least 1.5mm out and will need doing again.
I'm all out of space to drill more holes so I've dug out some old hubs and I'll get them done, hopefully for free.
Tidied up ready for stripping the engine, when I had a bright idea. The inlet manifold is in three parts, the plenum, the runners and the base to the runners (plastic). As the cams have spun when I took the belt off and all the valves are closed, I put rag in all the other holes in the engine and bolted the runner base to the heads, then I ported them and matched them to the heads ports. There was loads of material that could be removed, there was an odd shape that squeezes the air from the sides, so I took it all out, the rolling road with tell if I've meddled where I shouldn't have or if it helps. Anyway here are some pics
I've tried to show the marrow section here:
This might be easier to see as a comparison, before:
and After:
The inlet runner is the same shape as the "after" photo all the way down so I'm hoping that will help flow!
A spot of diner now, then its off with her heads
More to come
One down one to go
Lots of lovely honing, still intact all the way round
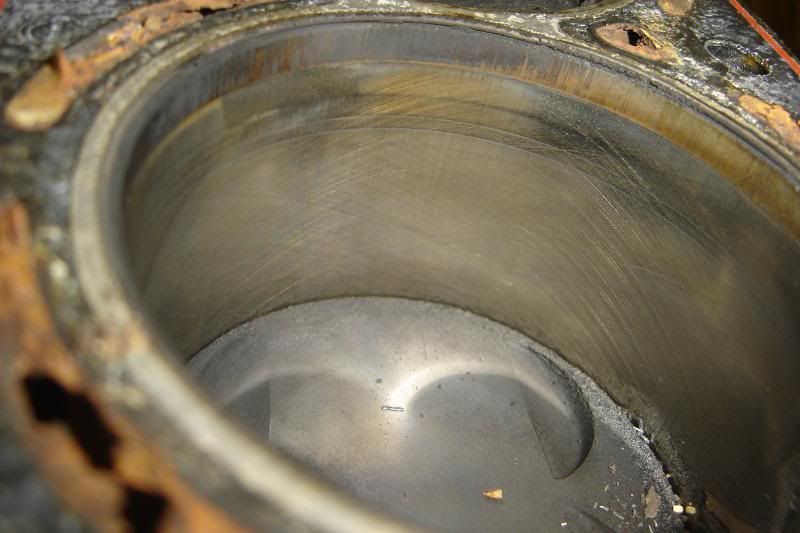
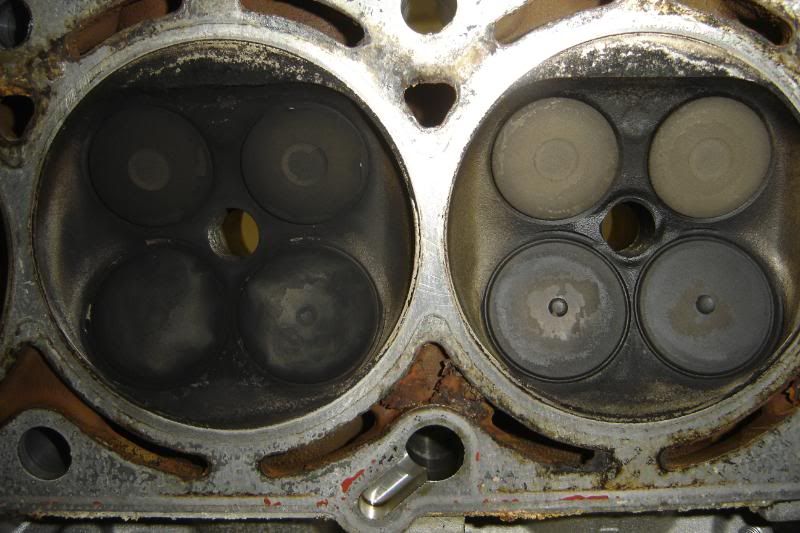
A nice simple combustion chamber shape, fairly clean valves
I can't wait to do more Engines are my favourite
Off to JapFest at Donnington tomorrow where my friend will be showing off his supra powered capri that recently gave him a massive surprise on a Dyno, he was expecting 260hp and got 394
More to come next weekend, or amybe tomorrow afternoon
Lots of lovely honing, still intact all the way round
A nice simple combustion chamber shape, fairly clean valves
I can't wait to do more
Engines are my favourite Off to JapFest at Donnington tomorrow where my friend will be showing off his supra powered capri that recently gave him a massive surprise on a Dyno, he was expecting 260hp and got 394
More to come next weekend, or amybe tomorrow afternoon
Gassing Station | Scimitar | Top of Page | What's New | My Stuff