Project Scimitar MV6
Discussion


Tim, was nice to meet you too. I'm sorry I didn't hang around long, my dad had been there with me all day so I thought I'd best get back after Jim had a little blast.
It was a little frustrating in that there has never been so much interest in it, I'd really liked to have taken a few folk for a ride, next time perhaps
There is a fair bit to get through now, but I'm hoping it'll be pretty slick for next year.
It was a little frustrating in that there has never been so much interest in it, I'd really liked to have taken a few folk for a ride, next time perhaps
There is a fair bit to get through now, but I'm hoping it'll be pretty slick for next year.
Its been a while and I hope you're concentrating
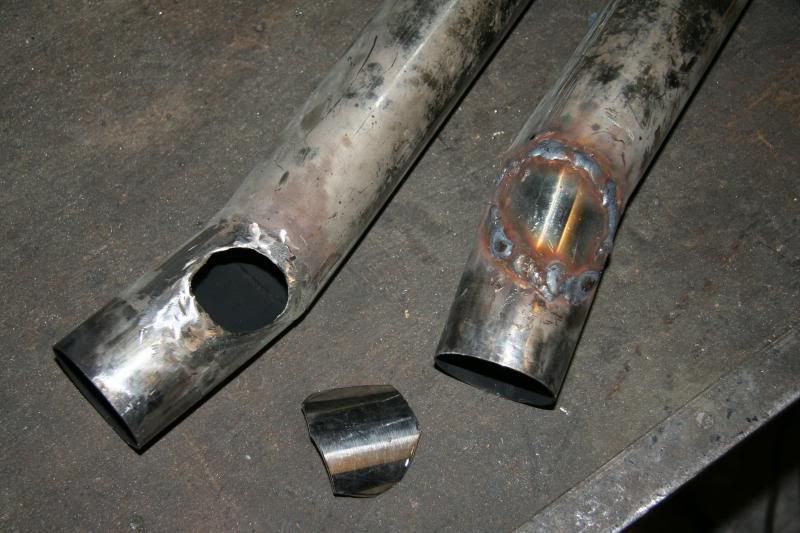
Tonight I've removed the balance pipe I put in and I've welded up one of the holes. I'm pretty sure I'll be making up some silencers of my own now, I'll be looking at copying something like the design of the Flowmaster exhausts I think.
I've finally done the weighing of the un-sprung weight of the car. This was a little tricky even with the simple method of removing the springs and lowering the wheel onto the bathroom scales. The trouble was the friction in the bushes. So I weighed it on the way down then continued to lower the car, then raised it and took another reading on the way back up (the average of the values is the true unsprung weight plus a little extra for the spring). I did this a load of times and got a very interesting result.....
The front unsprung weight was (a massive) 87kg per side, and the rear was less!!!! at 73kg per side. I didn't see that coming (with a heavy beam axle on the rear).
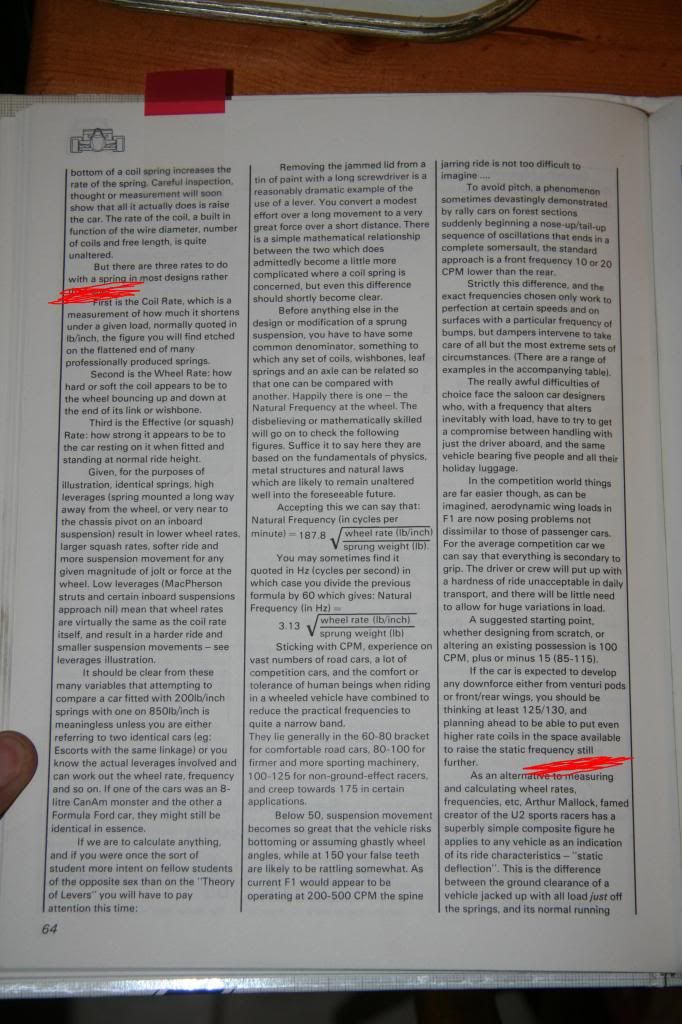
Now there are people who can build cars, and people who can drive them, then there are the rare skilled folk who can drive a car and can feel what alterations need making. I'm not one of them, so I was genuinely relieved to find there are some calculations you can do to get the spring rates in the ball part. Hence the all the weighing. The end goal is to find the natural frequency of the car front and back and bring these frequency figures close together. Here is the page I used from "The Race and Rally Source Book" Alan Staniforth: (If you're interested read between the red bits)
Now to cut a very long story reasonably short, you need to know
Axle wieghts
Unsprungs weights
to find the sprung weights of each corner of the car.
Then the coil spring rates
leverage ratios
leverage ratio ^2
Effective coil rates due to their angle on inclination (a little trigonometry)
to get the wheel ratio
then using the sprung weight and the wheel ratio, calculate the natural frequency.
Which is exactly what I did here:
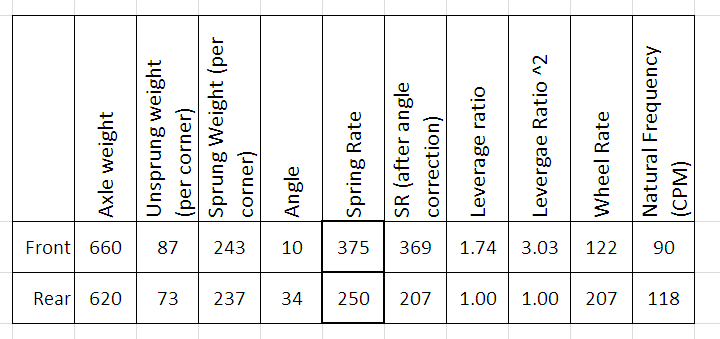
The book is a little old but basic physics doesn't change, it suggests that for a road car the natural frequency (in cycles per minute) should be between 60 and 80, then 80 - 100 for a sports car, 100 - 125 for race cars. With the front being between 10 and 20 less than the rear. You can see mine in the sheet above. I was expecting to have to get stronger springs for the rear, but it seems the opposite is true I need to strengthen up the front end to get the balance right (show's I'm not much good at "feeling" what a car needs )
The reason the front needs to be so much stronger on Scimitars is the fact that the wishbones weaken the effect of the springs by giving the wheels more leverage of the spring.
I've yet to decide which to buy but I'm thinking 450lb/in front and 225 rear to get the balance spot on.
Hope you took all that in
More to come.
Tonight I've removed the balance pipe I put in and I've welded up one of the holes. I'm pretty sure I'll be making up some silencers of my own now, I'll be looking at copying something like the design of the Flowmaster exhausts I think.

I've finally done the weighing of the un-sprung weight of the car. This was a little tricky even with the simple method of removing the springs and lowering the wheel onto the bathroom scales. The trouble was the friction in the bushes. So I weighed it on the way down then continued to lower the car, then raised it and took another reading on the way back up (the average of the values is the true unsprung weight plus a little extra for the spring). I did this a load of times and got a very interesting result.....
The front unsprung weight was (a massive) 87kg per side, and the rear was less!!!! at 73kg per side. I didn't see that coming (with a heavy beam axle on the rear).
Now there are people who can build cars, and people who can drive them, then there are the rare skilled folk who can drive a car and can feel what alterations need making. I'm not one of them, so I was genuinely relieved to find there are some calculations you can do to get the spring rates in the ball part. Hence the all the weighing. The end goal is to find the natural frequency of the car front and back and bring these frequency figures close together. Here is the page I used from "The Race and Rally Source Book" Alan Staniforth: (If you're interested read between the red bits)

Now to cut a very long story reasonably short, you need to know
Axle wieghts
Unsprungs weights
to find the sprung weights of each corner of the car.
Then the coil spring rates
leverage ratios
leverage ratio ^2
Effective coil rates due to their angle on inclination (a little trigonometry)
to get the wheel ratio
then using the sprung weight and the wheel ratio, calculate the natural frequency.
Which is exactly what I did here:

The book is a little old but basic physics doesn't change, it suggests that for a road car the natural frequency (in cycles per minute) should be between 60 and 80, then 80 - 100 for a sports car, 100 - 125 for race cars. With the front being between 10 and 20 less than the rear. You can see mine in the sheet above. I was expecting to have to get stronger springs for the rear, but it seems the opposite is true I need to strengthen up the front end to get the balance right (show's I'm not much good at "feeling" what a car needs
)The reason the front needs to be so much stronger on Scimitars is the fact that the wishbones weaken the effect of the springs by giving the wheels more leverage of the spring.
I've yet to decide which to buy but I'm thinking 450lb/in front and 225 rear to get the balance spot on.
Hope you took all that in
More to come.
Edited by lozzzzzz on Friday 30th August 22:06
Edited by lozzzzzz on Friday 30th August 22:08
Rodders, To be honest it doesn't feel that bad now, but I've not exactly pushed around the bends yet. I just hope I don't screw the handling up too badly
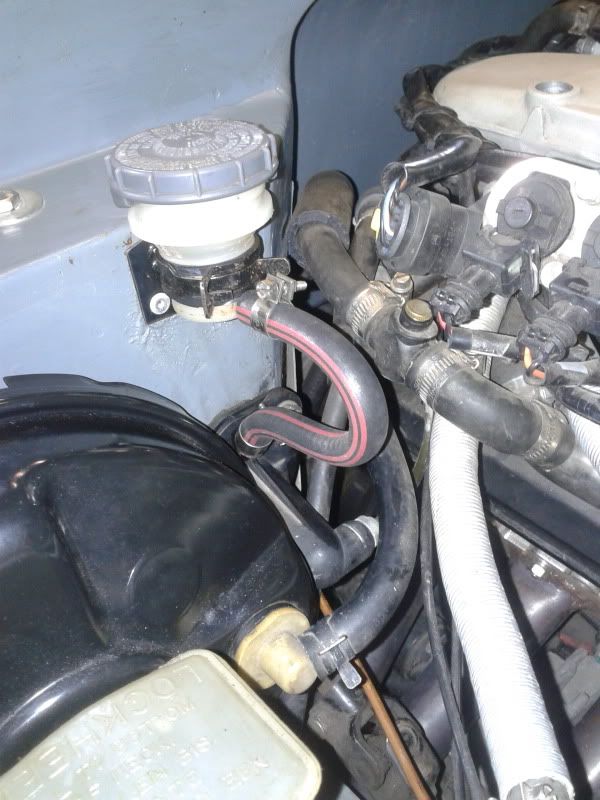
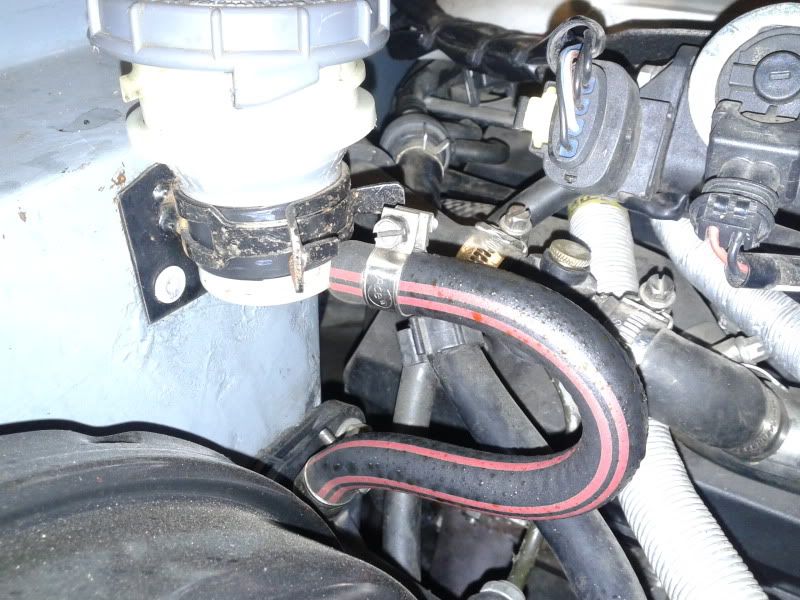
I faffed on this morning and this afternoon doing electric jobs, a diode here and a new bulb there and I put a new hose between the clutch reservoir and the master cylinder. This job has been dragging a little. I got the reservoir and a short length of hose from a civic 'great' I thought, 'OEM quality', 'this must be up to the handling DOT4' but after 6 months use its soaked through and turning the fluid black.
Brake fluid is nasty! it eats all sorts. My buddy is a materials engineer and had a theory that acetylene corrodes hoses in a similar way to brake fluid, so got some welding hose for his car...... it ate through it! Its lunches paintwork hoses even the OEM flexi hoses eventually.
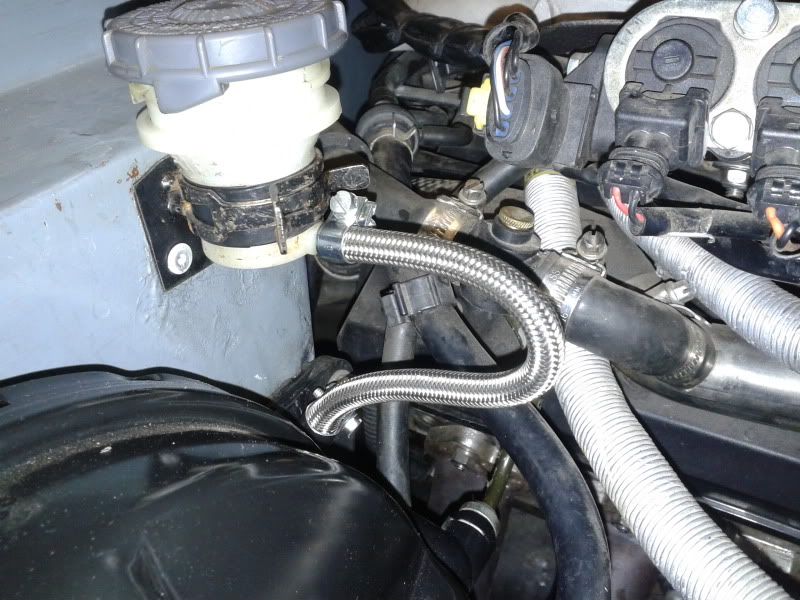
I was nearly at the point of spending £18 on a new Honda part (£18 for 20cm of hose!!!!!). Then tried a hydraulics place. The chap behind the desk reckons the hose he gave me is good for petrol diesel, all kinds of oils and selection of other chemicals, so should be alright. He also gave me a section of nylon line with SS over braid, and they were both Gratis!. I've got with the fuel hose first as its the only one I had clips to fit.
If that fails I've give the nylon one a go.
Boring story over
I've got lots of big jobs to do but I'm just scratching the surface at the moment for fear of the car not being road worthy for the photo shoot at the end of the month. When photos are taken and the car SORN for a while, then I can get stuck into the earth loops, and finishing preparations for the roll hoop to be made, then get some bucket seats and the last harness and it'll be ready for some track action
I'm thinking about dropping a cheeky little supercharger in there too
I might change the spring rates before the shoot, and I'm itching to get the exhausts changed as soon as they arrive.... Can't wait.
I faffed on this morning and this afternoon doing electric jobs, a diode here and a new bulb there and I put a new hose between the clutch reservoir and the master cylinder. This job has been dragging a little. I got the reservoir and a short length of hose from a civic 'great' I thought, 'OEM quality', 'this must be up to the handling DOT4' but after 6 months use its soaked through and turning the fluid black.
Brake fluid is nasty! it eats all sorts. My buddy is a materials engineer and had a theory that acetylene corrodes hoses in a similar way to brake fluid, so got some welding hose for his car...... it ate through it! Its lunches paintwork hoses even the OEM flexi hoses eventually.
I was nearly at the point of spending £18 on a new Honda part (£18 for 20cm of hose!!!!!). Then tried a hydraulics place. The chap behind the desk reckons the hose he gave me is good for petrol diesel, all kinds of oils and selection of other chemicals, so should be alright. He also gave me a section of nylon line with SS over braid, and they were both Gratis!. I've got with the fuel hose first as its the only one I had clips to fit.
If that fails I've give the nylon one a go.

Boring story over
I've got lots of big jobs to do but I'm just scratching the surface at the moment for fear of the car not being road worthy for the photo shoot at the end of the month. When photos are taken and the car SORN for a while, then I can get stuck into the earth loops, and finishing preparations for the roll hoop to be made, then get some bucket seats and the last harness and it'll be ready for some track action
I'm thinking about dropping a cheeky little supercharger in there too
I might change the spring rates before the shoot, and I'm itching to get the exhausts changed as soon as they arrive.... Can't wait.


Did some work on the car, its been a while since I really got stuck in with some cutting welding and painting.
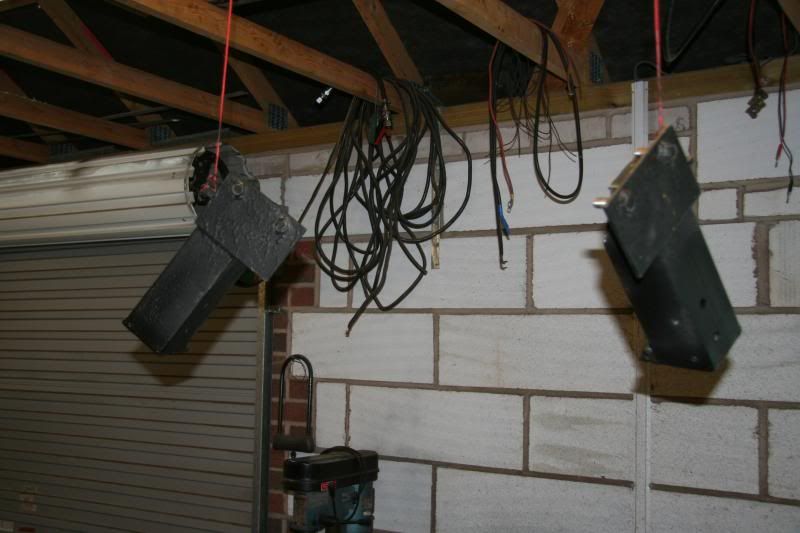
I decided to do a little more work on the roll hoop mounts. So I removed the large box section bits you can see in this old photo.
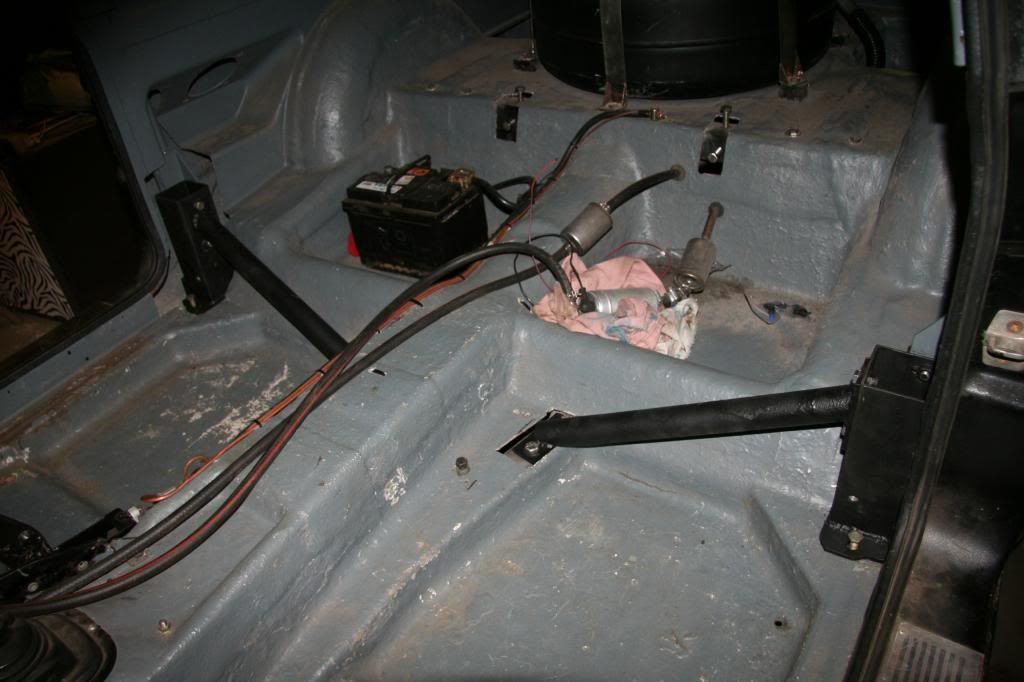
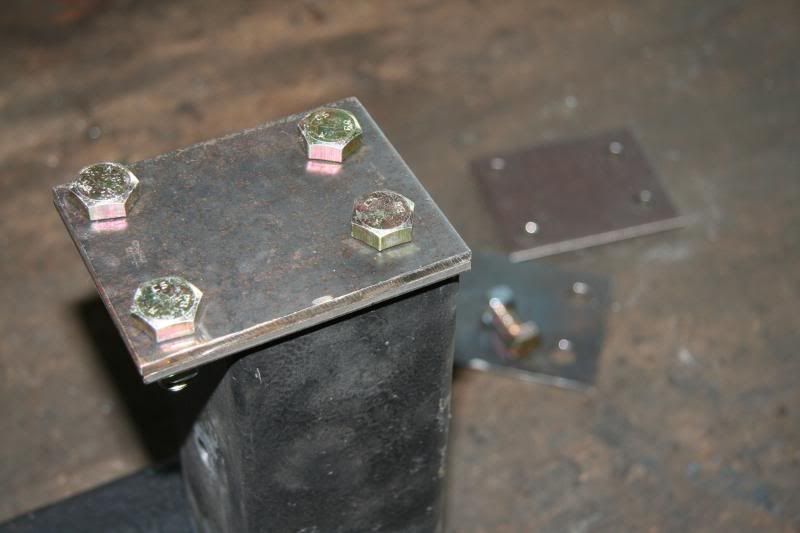
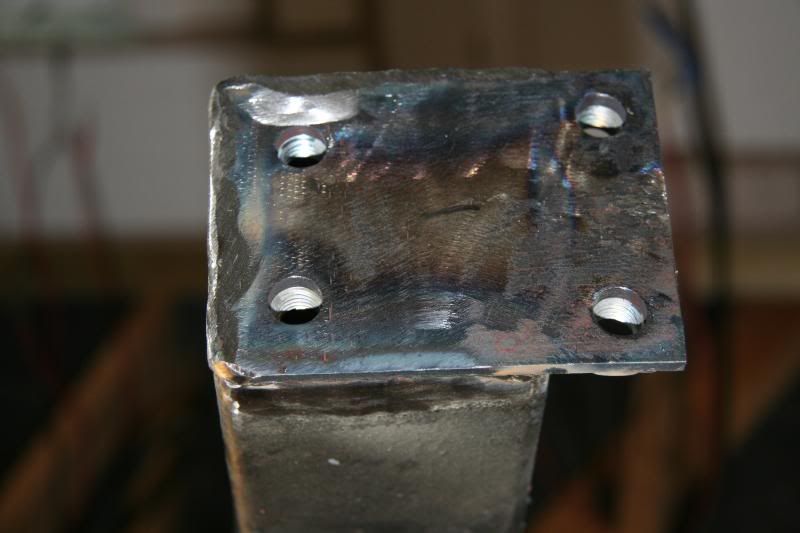
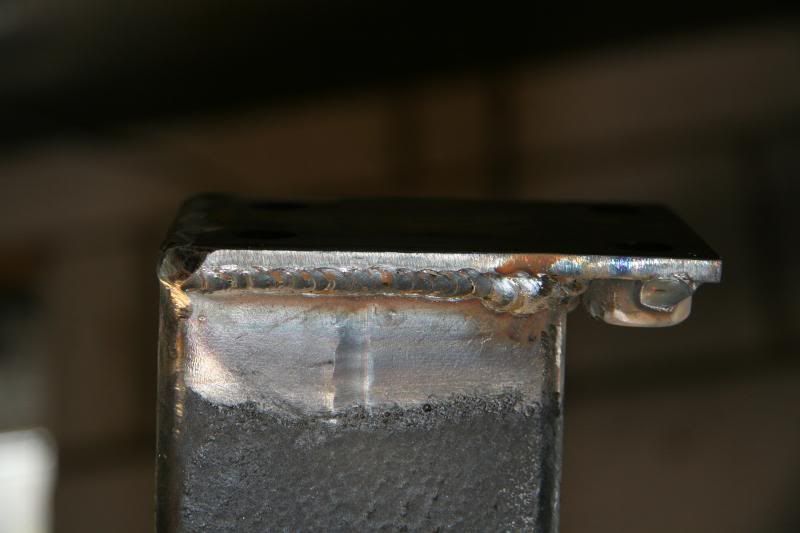
And I've added tops with captive nuts, and a base for the roll cage man to weld straight to reducing the work he has to do and hopefully the cost a little too. I'll do something similar for the base of the diagonal down bars too and the door bars.
Now drying
More to come
I decided to do a little more work on the roll hoop mounts. So I removed the large box section bits you can see in this old photo.

And I've added tops with captive nuts, and a base for the roll cage man to weld straight to reducing the work he has to do and hopefully the cost a little too. I'll do something similar for the base of the diagonal down bars too and the door bars.


Now drying

More to come


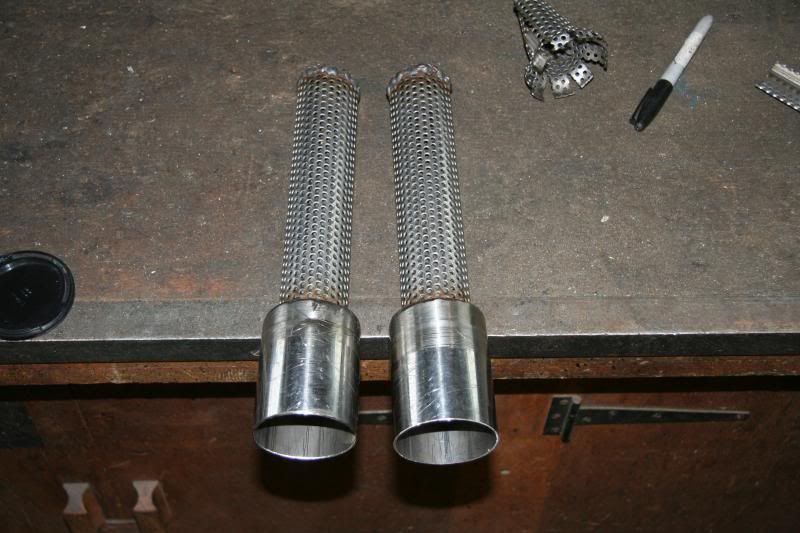
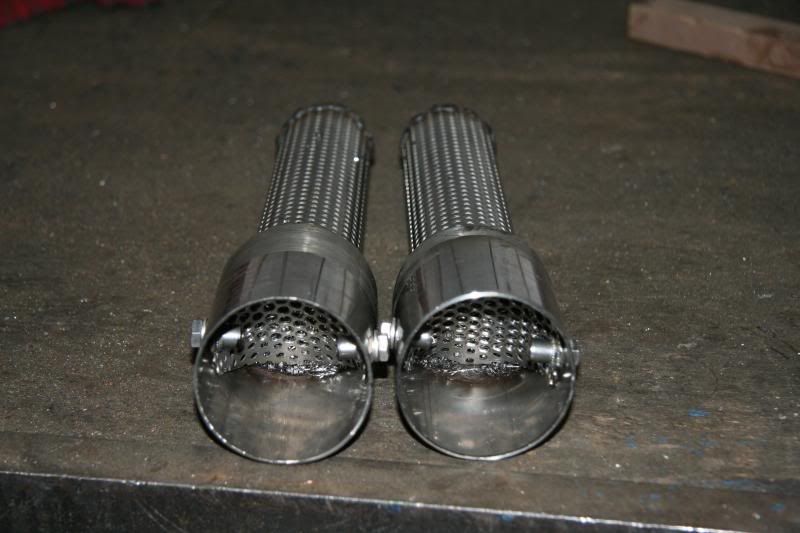
I've been trying to make another way of silencing the car a little more for the long boring journeys and this is what I came up with.
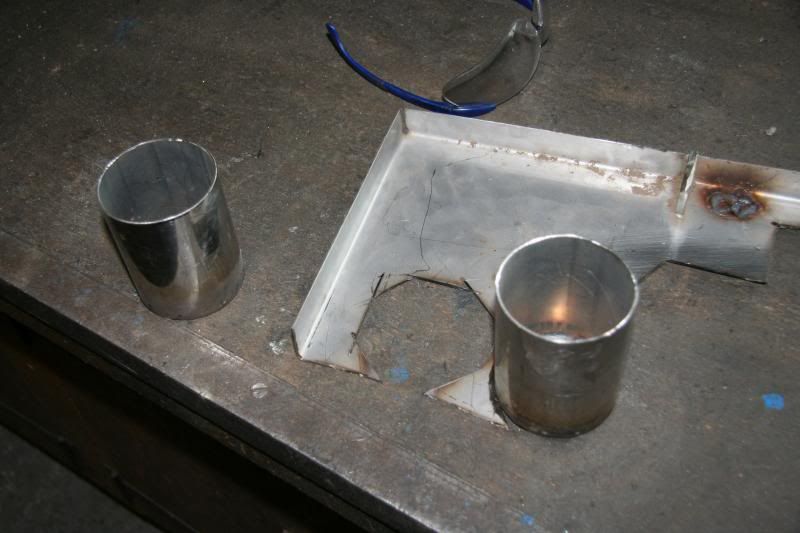
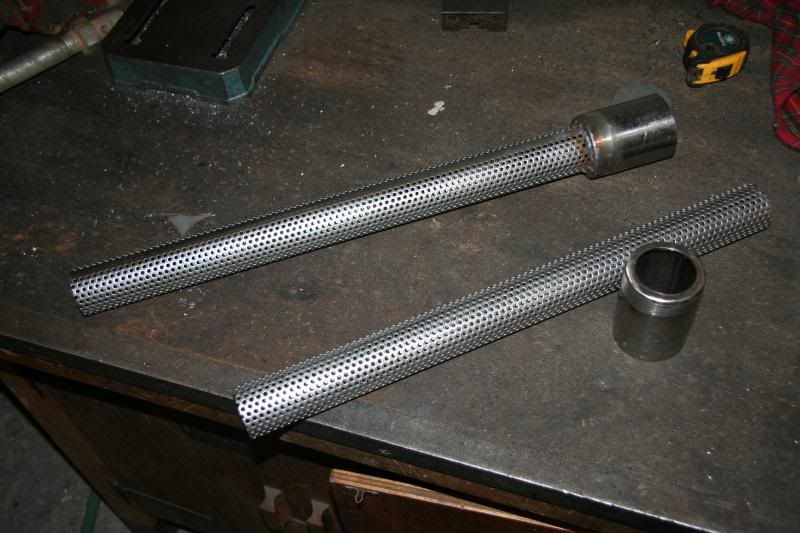
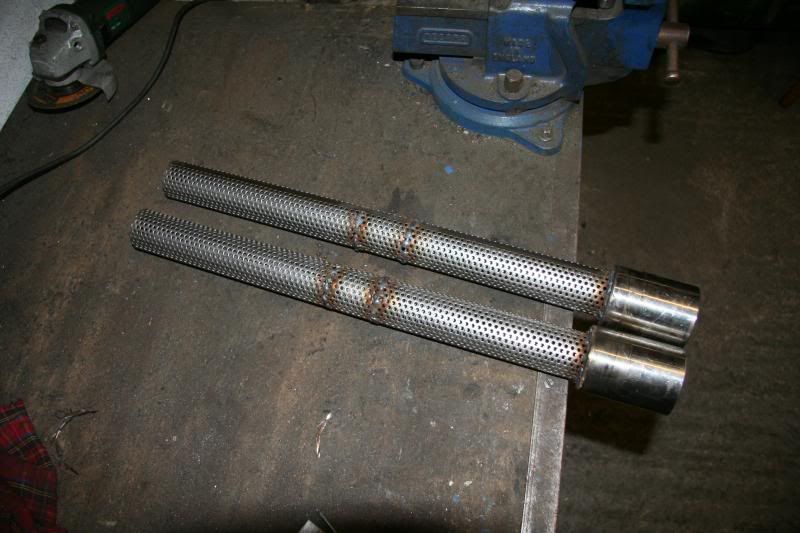
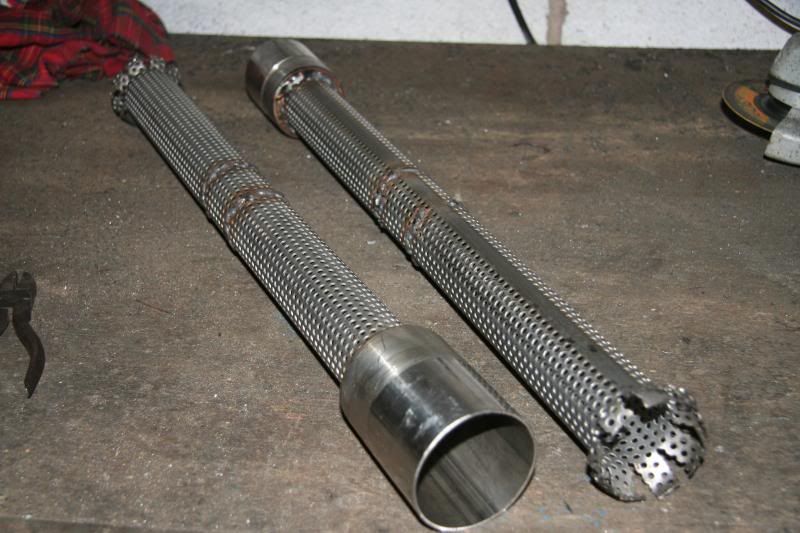
Hopefully you can tell from the photos that these get pushed into the exhausts and mean the gas has to take a torturous route to get out. Restictive yes, but removable too The hope was that the gas will have to go up the center of the first section of perforated tube, out through the walls to the surroundings then back into the perforated tube before coming out the back.
Bit like this:
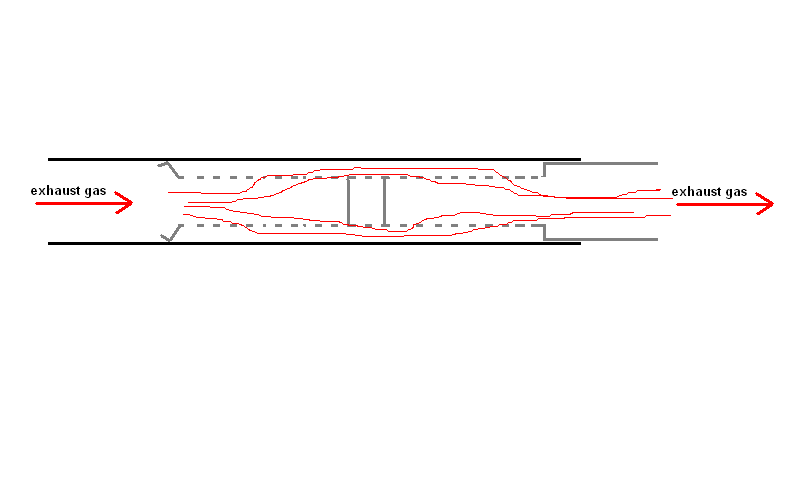
But guess what..... it hasn't wo... well its the best thing yet but it still isn't killing the drone.


Hopefully you can tell from the photos that these get pushed into the exhausts and mean the gas has to take a torturous route to get out. Restictive yes, but removable too
The hope was that the gas will have to go up the center of the first section of perforated tube, out through the walls to the surroundings then back into the perforated tube before coming out the back. Bit like this:

But guess what..... it hasn't wo... well its the best thing yet but it still isn't killing the drone.
Right then, this wire wool is really doing the trick . I've no doubt its restricting the hell out of it, but it really has made it quiet
And its easily removed
Its not the neatest, but I now have a direction to head in making something better in the future.
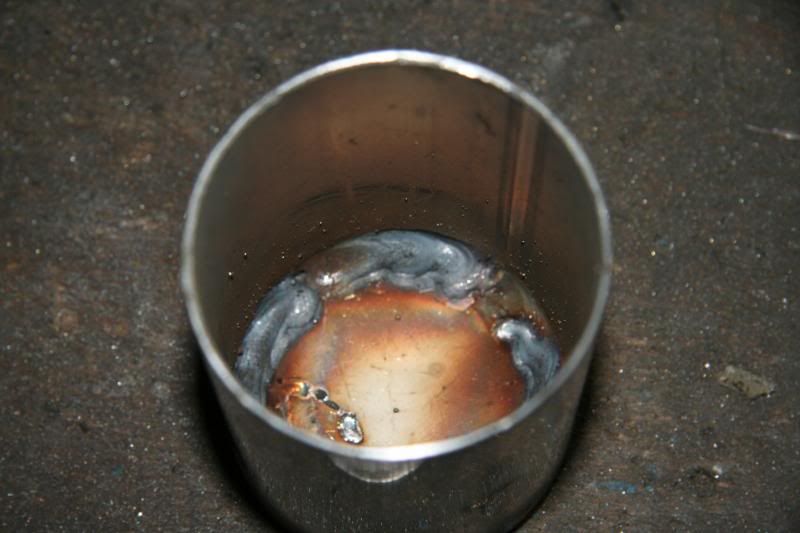
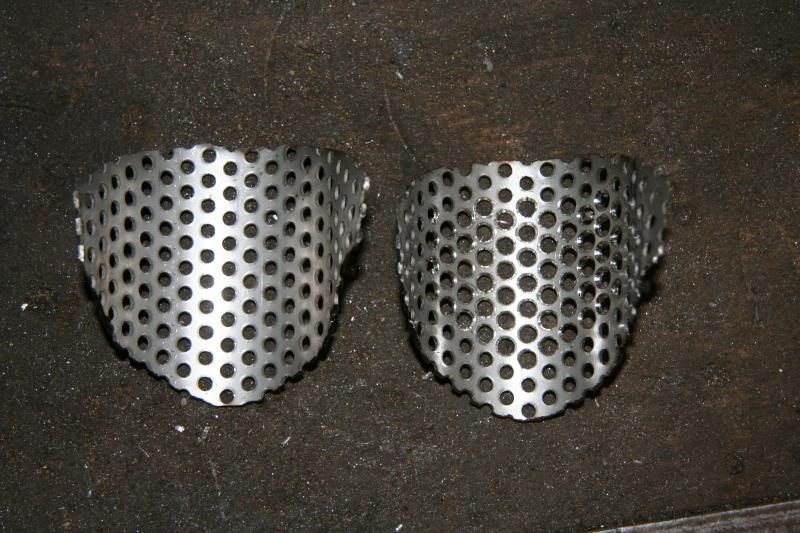
First I cut the ends off, so its a much shorted perforated tube now, and with one blocked end
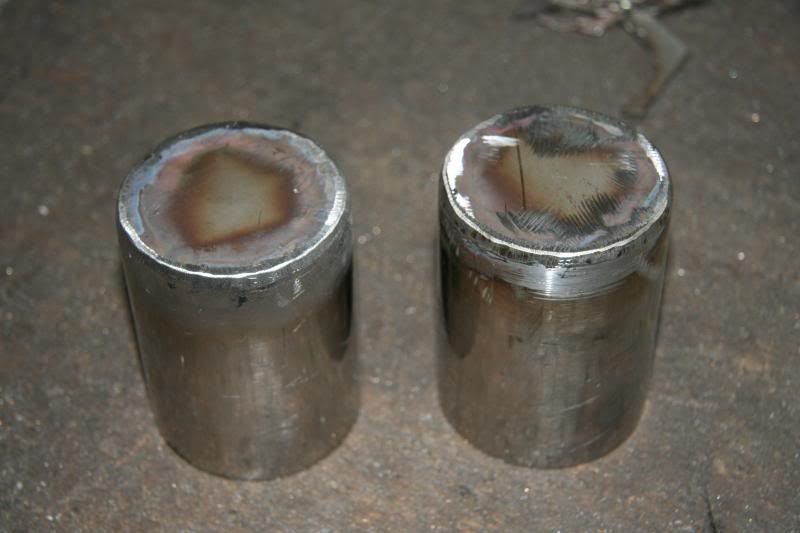
Then cut up some perforated ends to stop the wire wool blowing out, I even drilled the holes out in an attempt to make is slightly less restrictive.
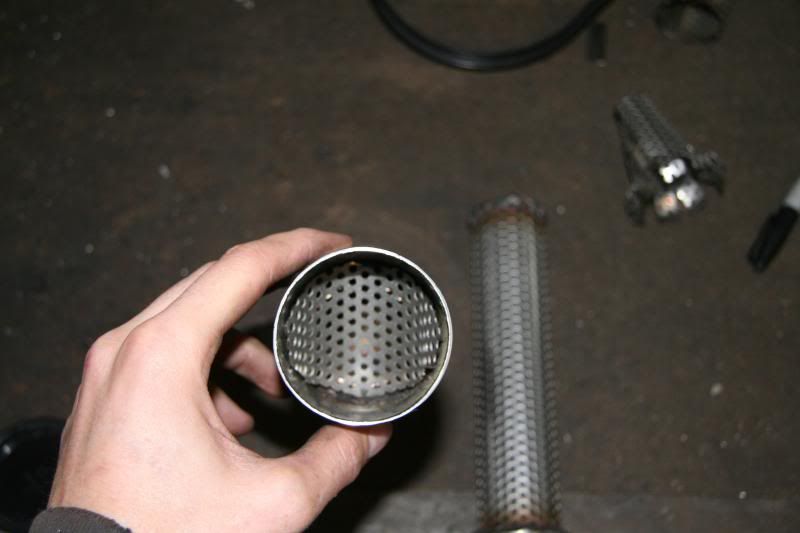
Then I went and bought the Co-op supply of scourer's (sp?) and filled up the tubes.
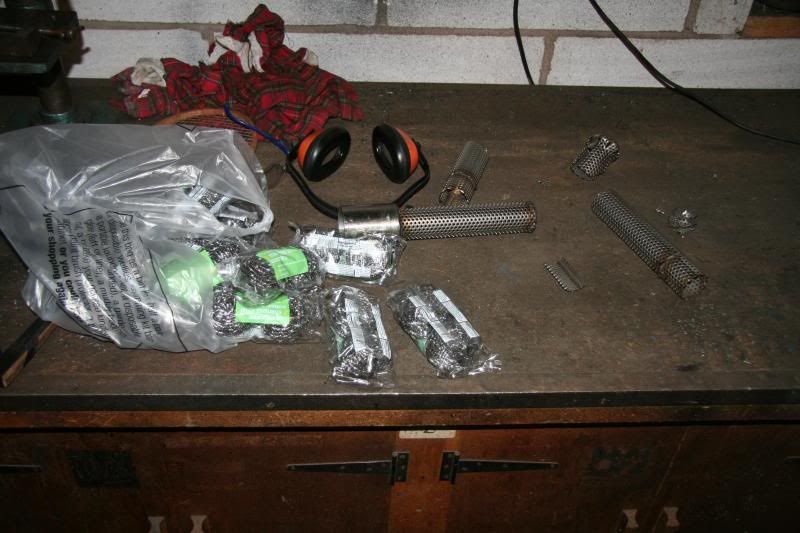
Drilled some holes and popped some rivnuts in and hey presto!
More to come.
. I've no doubt its restricting the hell out of it, but it really has made it quiet And its easily removed
Its not the neatest, but I now have a direction to head in making something better in the future.
First I cut the ends off, so its a much shorted perforated tube now, and with one blocked end

Then cut up some perforated ends to stop the wire wool blowing out, I even drilled the holes out in an attempt to make is slightly less restrictive.


Then I went and bought the Co-op supply of scourer's (sp?) and filled up the tubes.

Drilled some holes and popped some rivnuts in and hey presto!


More to come.
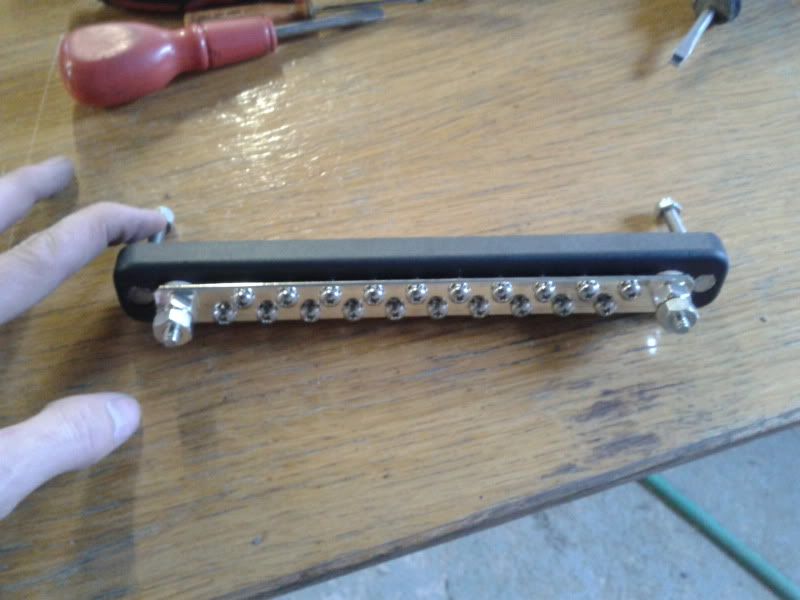
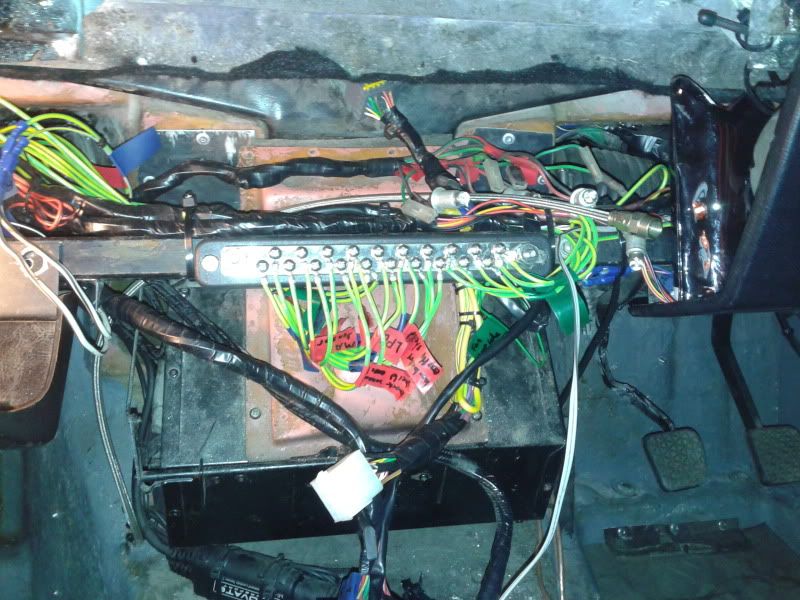
I've really started ripping into the electrics now, I've made all the changes to the central dash, and all of the bits that needed changing on the drivers side, and I'm in the midst of opening up the bulk of the loom on the passenger side now. I'm basically giving everything that has anything to do with the ECU an earth on the "busbar". And hopefully that'll cure the earth loop problems. I've got a fairly good idea of the problem now, after much reading and sifting through various webpages.
This is the busbar:
This is where its going:
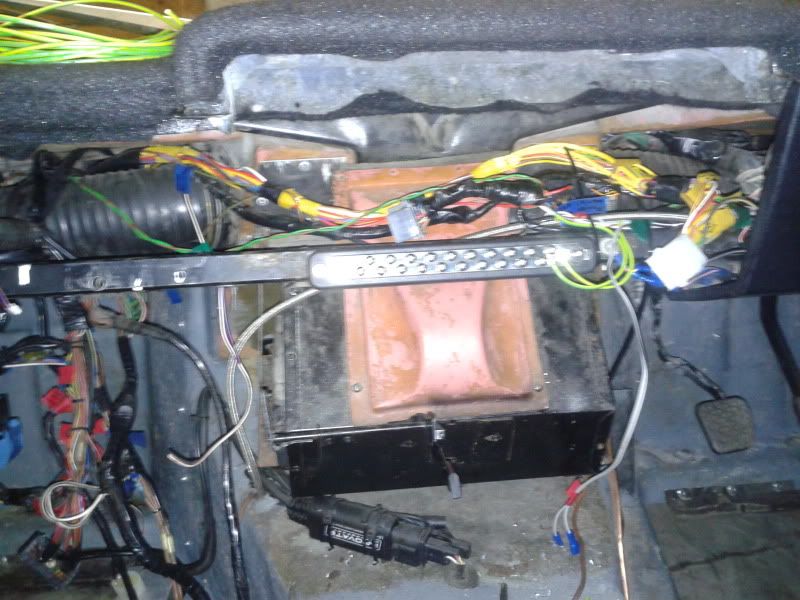
And this is the mess as it stands at the moment:
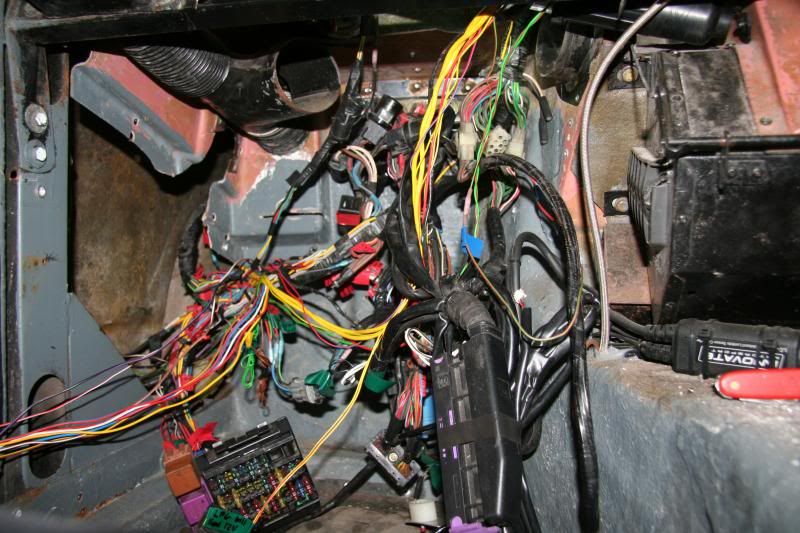
Apart from the busbar, the other changes are to get rid of the Map switch and have it auto switch to Map2 when the LPG solenoids open, bin the fuel pump switches as they have to be on all the time anyway (even when on gas), and add an LPG momentary kill switch. This will serve two purposes, firstly ont he very rare occasion the LPG plays up it'll mean I don't have to switch the engine off to reset the LPG ecu, and secondly (and more cool), it'll give a 20s go on petrol then switch back to gas, good for overtaking when lots of power is needed.
More to come
This is the busbar:

This is where its going:

And this is the mess as it stands at the moment:

Apart from the busbar, the other changes are to get rid of the Map switch and have it auto switch to Map2 when the LPG solenoids open, bin the fuel pump switches as they have to be on all the time anyway (even when on gas), and add an LPG momentary kill switch. This will serve two purposes, firstly ont he very rare occasion the LPG plays up it'll mean I don't have to switch the engine off to reset the LPG ecu, and secondly (and more cool), it'll give a 20s go on petrol then switch back to gas, good for overtaking when lots of power is needed.
More to come
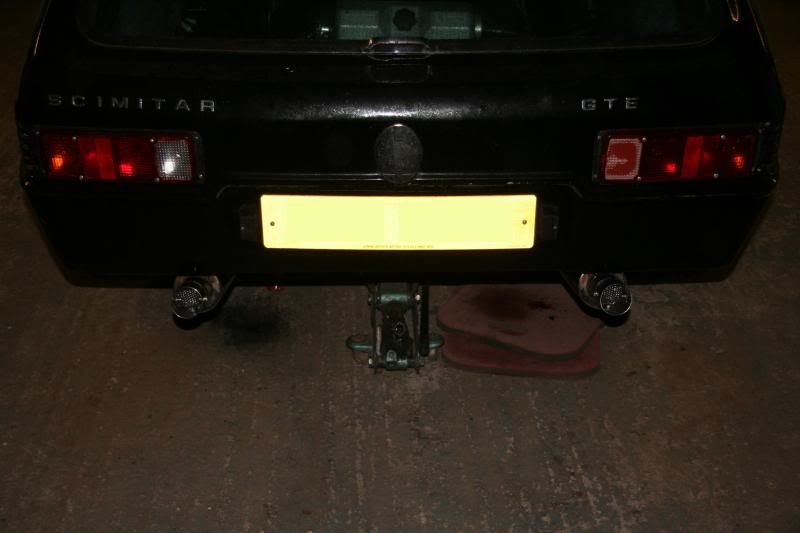
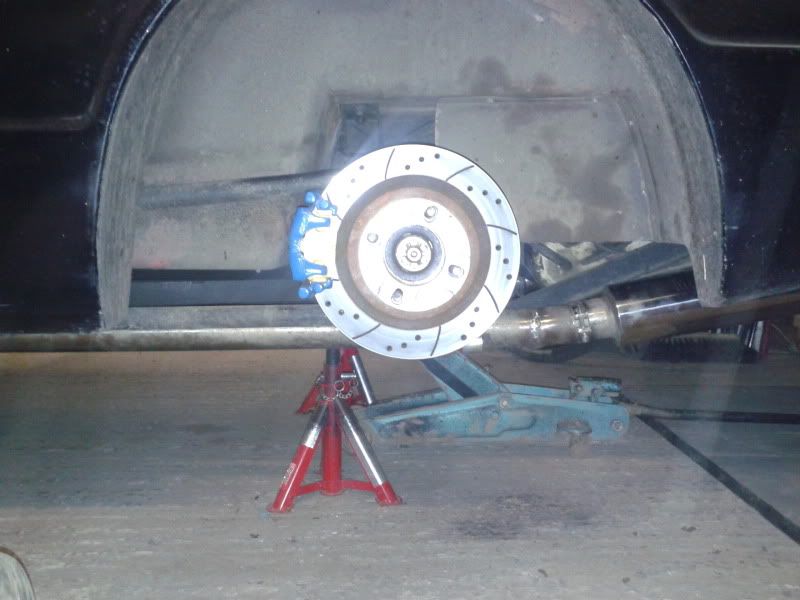
These arrived yesterday, so I'll get them fitted when I'm done with the wiring, then when I can find the time to go get the front springs the handling should stand a chance of being ok
I requested they make them 1" shorter this means I can raise the exhaust and hopefully have less exhaust road contact
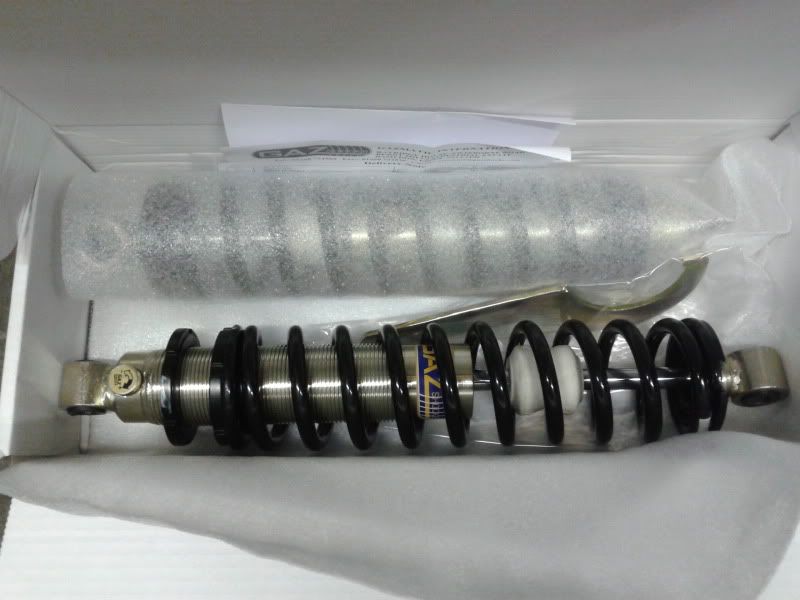
Meanwhile, the wiring still looks like this
More to come
I requested they make them 1" shorter this means I can raise the exhaust and hopefully have less exhaust road contact

Meanwhile, the wiring still looks like this
More to come
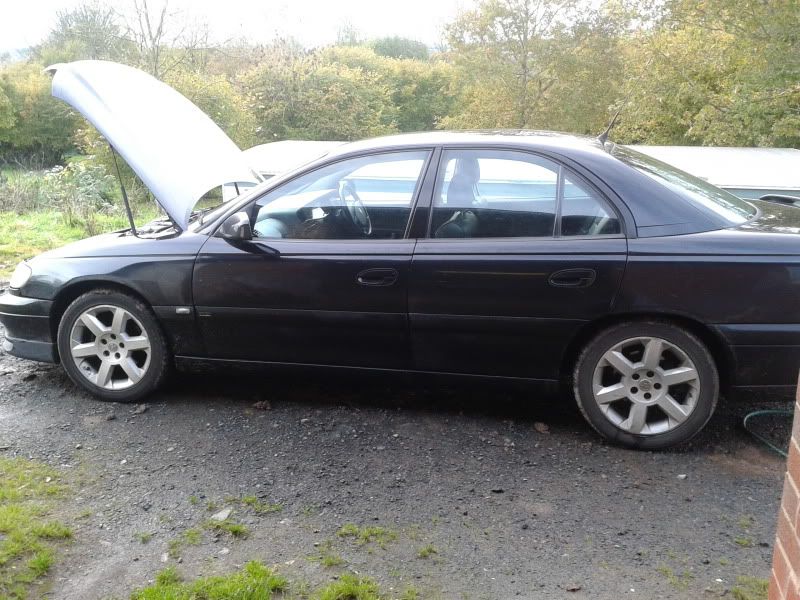
This won't pick up pace for about a year yet but the supercharged 3.2 project has officially begun. I've bought a 3.2 engine (with forged crank) and conveniently an R30 gearbox
Thing is its completely covered in car at the moment
Anyway off the garage for more Scimitar wiring.
More to come
Thing is its completely covered in car at the moment

Anyway off the garage for more Scimitar wiring.
More to come
I've finally had a good day on the car, its been a while since I've had a good long sesh in the garage, but yesterday I got all the earth's properly attached to the busbar with crimped and soldered ring terminals.
The moment of truth arrived as I started the car and attached the laptop to see the inputs on screen. The car started really quickly (not sure if that related really) and the inputs were rock steady, the temp input was the worst and used to jump all over the place by 10 degrees now there is no movement at all, it just stays on one number and clicks up to the next as the engine warms up. BRILLIANT!!!!!!! very happy with that I'll get the car mapped again when its back on the road and have the gas mapped properly too.
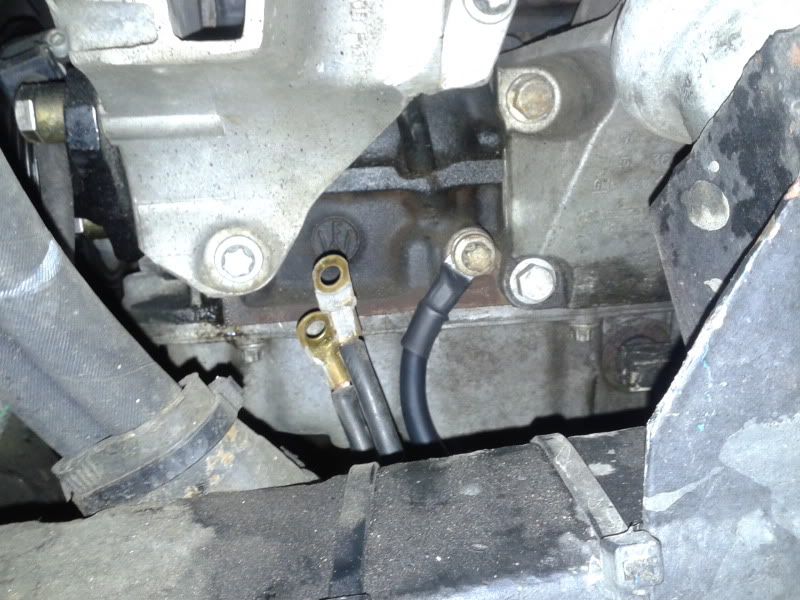
Next was to change the piddling earth straps for one big sealed 35mm^2 earth strap, I had to take the exhaust manifold off for this which was a bit of a pain, but all went well.
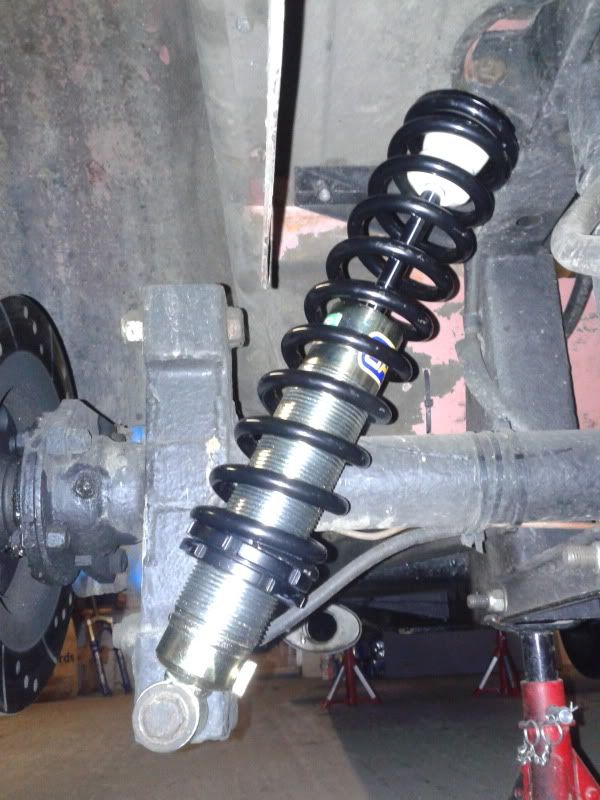
And then I got round to fitting the new GAZ rear units. GAZ made them shorter by 1" as requested so the axle is over an inch higher on full droop, this means the exhausts can be raised and will hopefully stop hitting the road when I drive through a dip in the road.
I tried adjusting the exhausts but I'm asking too much by just loosening the clamps and re-tightening in a different position so I'll have to cut and shut them next.
More to come

The moment of truth arrived as I started the car and attached the laptop to see the inputs on screen. The car started really quickly (not sure if that related really) and the inputs were rock steady, the temp input was the worst and used to jump all over the place by 10 degrees now there is no movement at all, it just stays on one number and clicks up to the next as the engine warms up. BRILLIANT!!!!!!! very happy with that
I'll get the car mapped again when its back on the road and have the gas mapped properly too. Next was to change the piddling earth straps for one big sealed 35mm^2 earth strap, I had to take the exhaust manifold off for this which was a bit of a pain, but all went well.

And then I got round to fitting the new GAZ rear units. GAZ made them shorter by 1" as requested so the axle is over an inch higher on full droop, this means the exhausts can be raised and will hopefully stop hitting the road when I drive through a dip in the road.

I tried adjusting the exhausts but I'm asking too much by just loosening the clamps and re-tightening in a different position so I'll have to cut and shut them next.
More to come
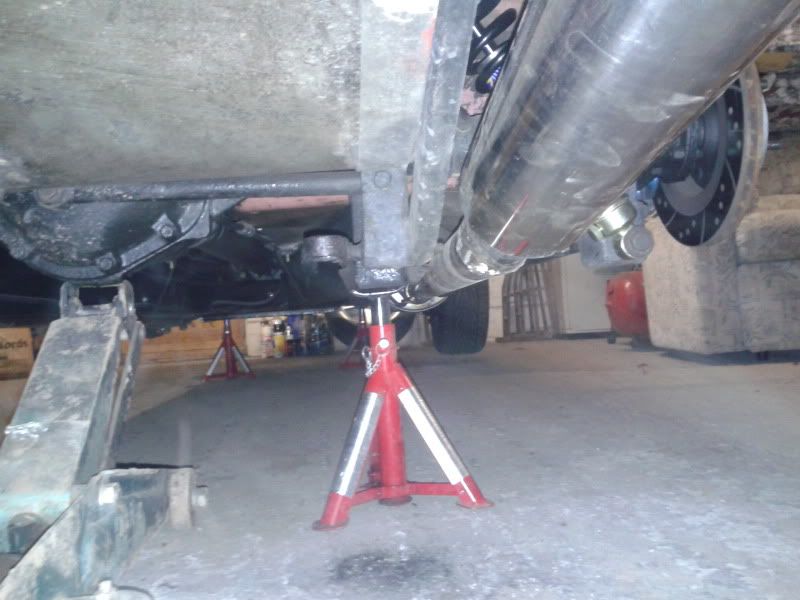
I had a little while in the garage this evening and got the exhausts raised, which involved cutting a small section out, bending the gap shut and welding it up again in SS. The lowest point in now 35mm higher than it was .
It look s better too, with the exhaust being just 1cm or two below the lowest part of the chassis now:
Very happy with that, hopefully no more horrible scraping noises and sparks out the back.
Next is to change the clutch reservoir hose again, (still haven't found anything that stands up to brake fluid, next thing to try nylon with SS over-braid, I'm hopeful with this one.
Then fit new front springs, sort the petrol gauge (which seems to be sticking on empty and only occasionally telling the truth), then faff on with the fuel filler cap to try stopping it pressurising the tank, then.... It's ready to be taxed again and sent off for cage making
More to come.
.It look s better too, with the exhaust being just 1cm or two below the lowest part of the chassis now:


Very happy with that, hopefully no more horrible scraping noises and sparks out the back.
Next is to change the clutch reservoir hose again, (still haven't found anything that stands up to brake fluid, next thing to try nylon with SS over-braid, I'm hopeful with this one.
Then fit new front springs, sort the petrol gauge (which seems to be sticking on empty and only occasionally telling the truth), then faff on with the fuel filler cap to try stopping it pressurising the tank, then.... It's ready to be taxed again and sent off for cage making
More to come.
These updates are getting less and less interesting, It used to be I've made new suspension wishbone and my own manifolds, well last night folks, in the hour I had working on the car,
I changed the clutch hose... Another job ticked off the list though.
Here is the old one, its turned the fluid black and you can see the DOT4 "sweating" through the hose:
Now it looks like this:
More to come (hopefully more exciting)
I changed the clutch hose... Another job ticked off the list though.
Here is the old one, its turned the fluid black and you can see the DOT4 "sweating" through the hose:

Now it looks like this:

More to come (hopefully more exciting)
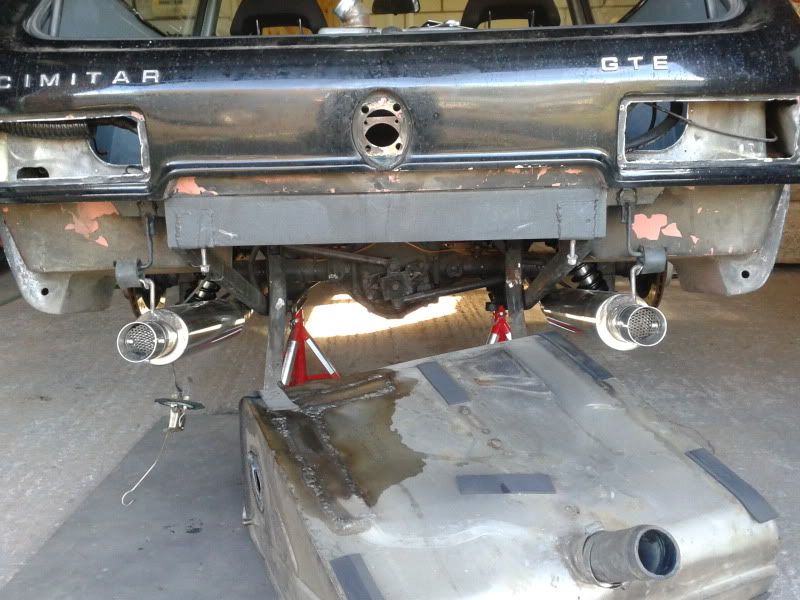
Yesterday was fuel tank day. I had to sort the fuel gauge problem. While I was messing about looking around the fuel tank i noticed a stain that looked as though it had been leaking. It would make sense for a weak point to have been found as the tank had been pressurising. So off came the bumper and the tank.
The bumper was easy, there were captive bolts and other things making it easy that I'd forgot I'd done, and light clusters came off with 4 screws and one waterproof multiplug
You can see evidence of the tank leak:
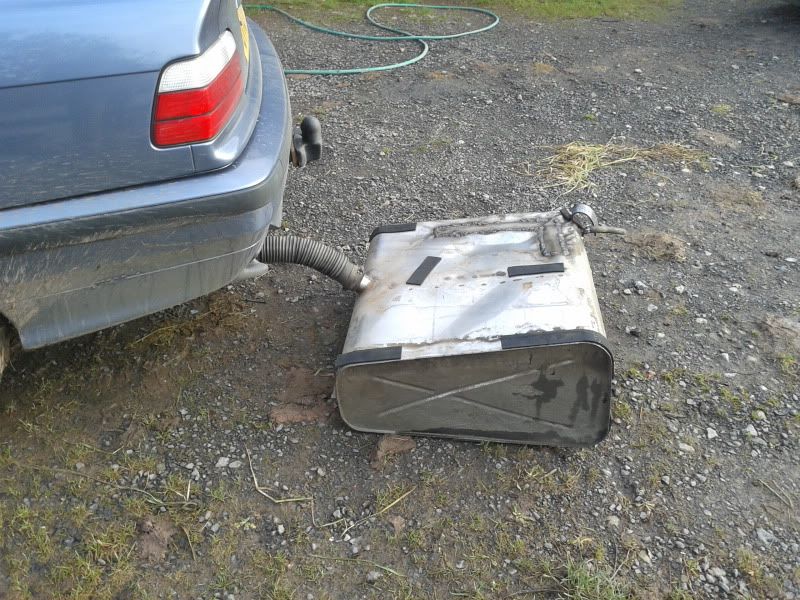
I pressurised the tank and put soapy water on and found a simgle point leak. Reasonably easy to fix I've heard of connecting it to the exhaust of another car to ensure it doesn't blow up in your face so I gave that a go, it worked (I'm still breathing) but it did put a lot of water into the tank from condensation:
Its repaired now, all welded up. Oh and the sender problem was easy, the float has a hole in it and was was full of petrol making it more of a "sink". This meant I'd kept putting petrol in the tank worrying that it was empty, so when I came to empty the tank there was s**t loads in there! I look 10 cans to empty it. There was a right panic moment when all four cans were full and I went to put the plug back in, petrol flowing everywhere, all down my arm and I'm fumbling with freezing hands that don't work properly!
Oh yeah I was saying, I robbed the float from the latest Omega and grafted in on to the Scimitar sender:

More to come
The bumper was easy, there were captive bolts and other things making it easy that I'd forgot I'd done, and light clusters came off with 4 screws and one waterproof multiplug
You can see evidence of the tank leak:

I pressurised the tank and put soapy water on and found a simgle point leak. Reasonably easy to fix
I've heard of connecting it to the exhaust of another car to ensure it doesn't blow up in your face so I gave that a go, it worked (I'm still breathing) but it did put a lot of water into the tank from condensation:
Its repaired now, all welded up. Oh and the sender problem was easy, the float has a hole in it and was was full of petrol making it more of a "sink". This meant I'd kept putting petrol in the tank worrying that it was empty, so when I came to empty the tank there was s**t loads in there! I look 10 cans to empty it. There was a right panic moment when all four cans were full and I went to put the plug back in, petrol flowing everywhere, all down my arm and I'm fumbling with freezing hands that don't work properly!
Oh yeah I was saying, I robbed the float from the latest Omega
and grafted in on to the Scimitar sender:
More to come


A little update.
The car is booked in for cage fitting in mid January, and I've penciled in the idea of a track day at Bedford Autodrome on the 22nd March. I was nervous just considering it. I've had the car 8 years and been doing this latest major project nearly 4 years, the thought of.... well the unthinkable happening is terrifying, but this was always the end goal so here goes
I was working through the list last night and got to the point where there was nothing left to do but change the gearbox (something I've been putting off).
The current GB works, but is the R28, with an apparent oil leak under hard acceleration and a gear linkage problem. I've got the stronger R30 to fit (I wanted this done in time for the track day) and with a fully working gear linkage.
So I studied the new gearbox to try and understand the oil leak problem and its become apparent that it's not a "leak" really. In the Scim the acceleration is rather more rapid than in an Omega and the oil swills to the back of the box, so much so that it poors out of the breather (which is right at the back, see photos). Great design that! Thing is it only happens when the box is more than 45 degrees which must mean the Scim is pulling more than 1G in acceleration in 1st gear!!!
I did a few calcs based on the 0-60 being 5.5s or less and it might very well be pulling more than 1G in 1st gear.... cool!!!
But annoying for the gearbox "leak"
Anyway, here is the fix I've come up with. It saves drilling and getting swarf in the box. It's not ideal but certainly can't make it worse, and it might even work a bit (I'll bee keeping an eye on the oil level)
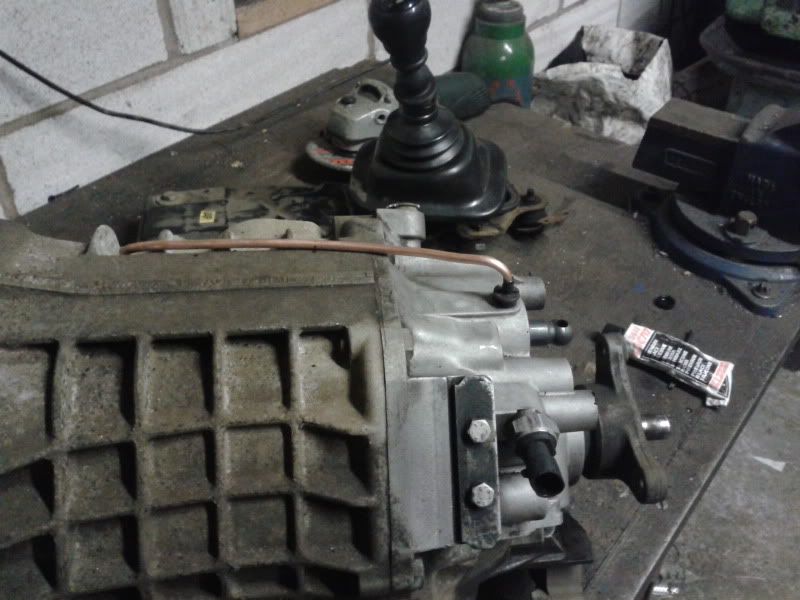
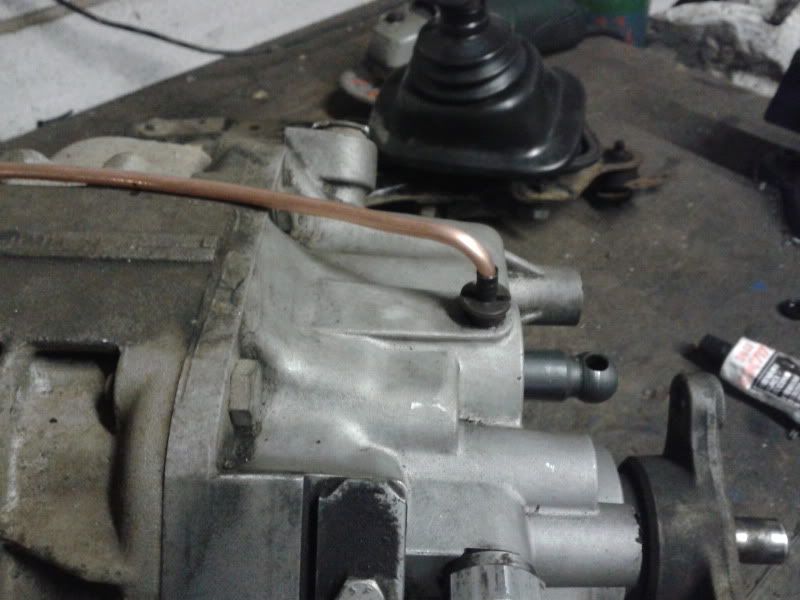
With the breather extended forward so much it can pull 80G and won't poor out.
After faffing around with that a bit I only got as far as taking the prop off and gearbox mount, so more to come on the gear box change.
The car is booked in for cage fitting in mid January, and I've penciled in the idea of a track day at Bedford Autodrome on the 22nd March. I was nervous just considering it. I've had the car 8 years and been doing this latest major project nearly 4 years, the thought of.... well the unthinkable happening is terrifying, but this was always the end goal so here goes
I was working through the list last night and got to the point where there was nothing left to do but change the gearbox (something I've been putting off).
The current GB works, but is the R28, with an apparent oil leak under hard acceleration and a gear linkage problem. I've got the stronger R30 to fit (I wanted this done in time for the track day) and with a fully working gear linkage.
So I studied the new gearbox to try and understand the oil leak problem and its become apparent that it's not a "leak" really. In the Scim the acceleration is rather more rapid than in an Omega and the oil swills to the back of the box, so much so that it poors out of the breather (which is right at the back, see photos). Great design that! Thing is it only happens when the box is more than 45 degrees which must mean the Scim is pulling more than 1G in acceleration in 1st gear!!!
I did a few calcs based on the 0-60 being 5.5s or less and it might very well be pulling more than 1G in 1st gear.... cool!!!
But annoying for the gearbox "leak"
Anyway, here is the fix I've come up with. It saves drilling and getting swarf in the box. It's not ideal but certainly can't make it worse, and it might even work a bit
(I'll bee keeping an eye on the oil level)

With the breather extended forward so much it can pull 80G and won't poor out.
After faffing around with that a bit I only got as far as taking the prop off and gearbox mount, so more to come on the gear box change.
Gassing Station | Scimitar | Top of Page | What's New | My Stuff