Project Scimitar MV6
Discussion


Tthe lpg tank will give about 350 miles mildly spirited driving, and the petrol tank might be more like 500 as it is. In the interest of never getting caught out miles from an LPG filling station I've decided to keep the full capacity of the petrol tank, so it might cost £150 to fill the car up completely but it should be easily capable of over 800 miles on it.
So some photos then,
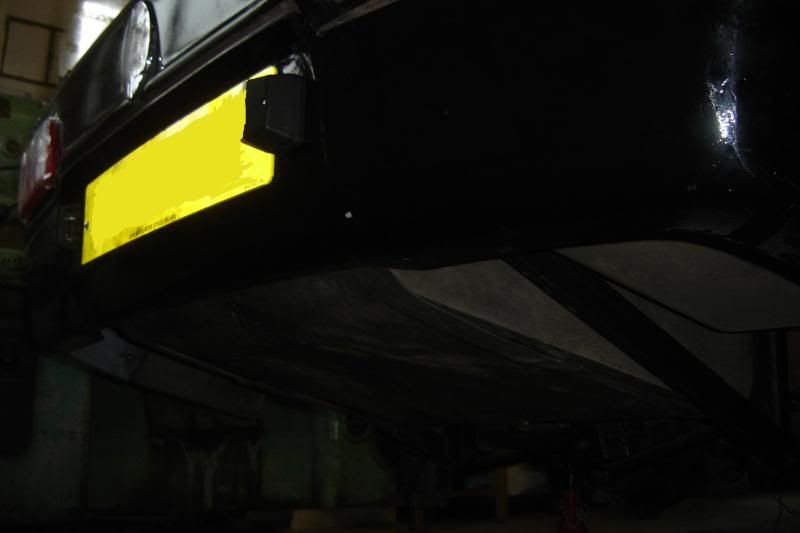
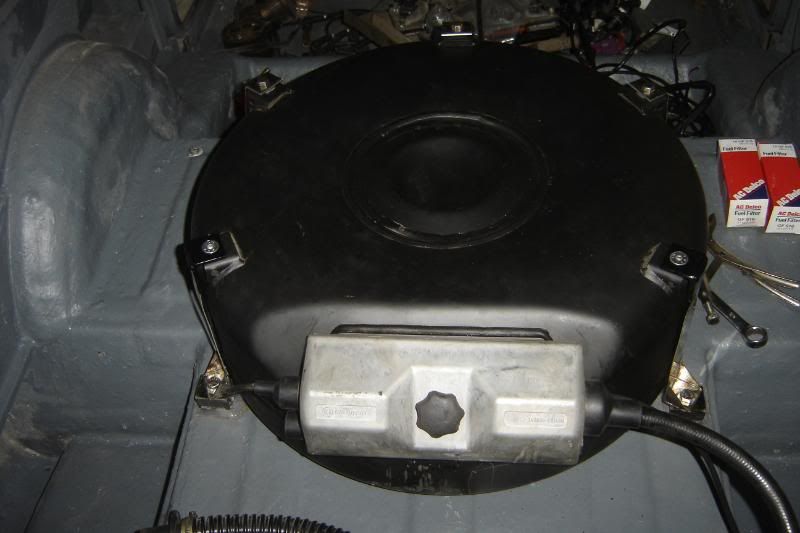
Tank under the car
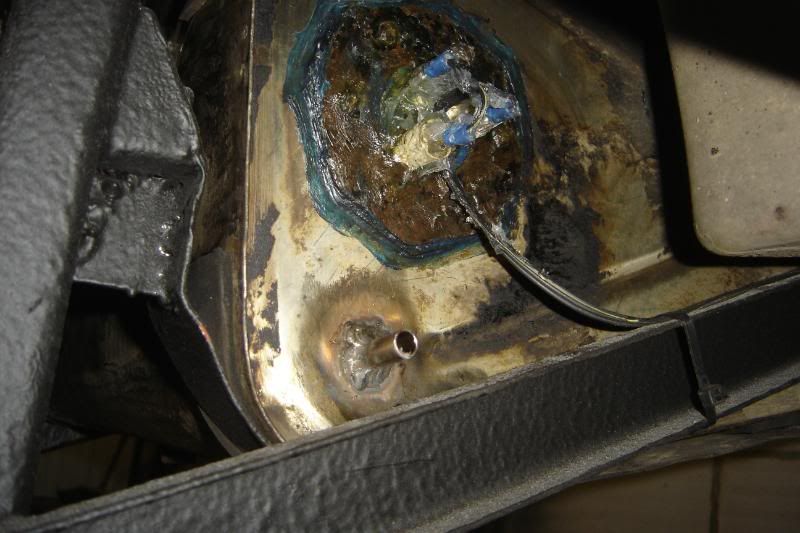
The sender super sealed with silicone over all the electrics to stop corrosion and bad connections developing
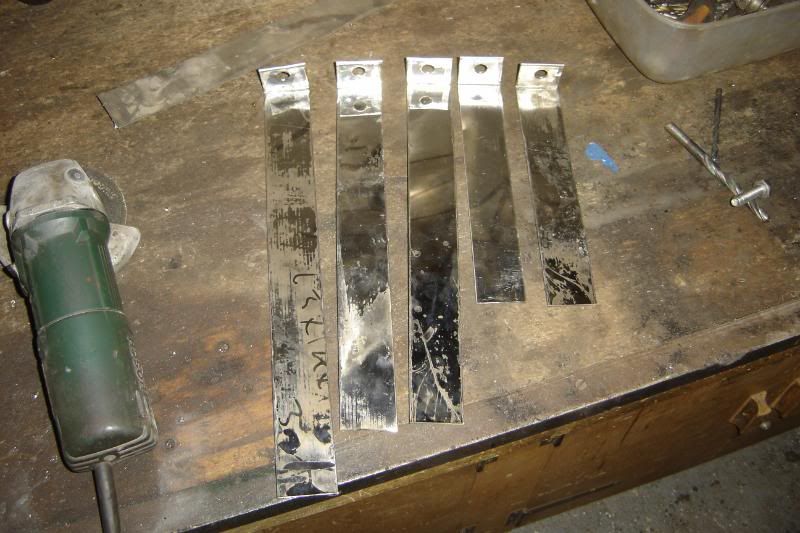
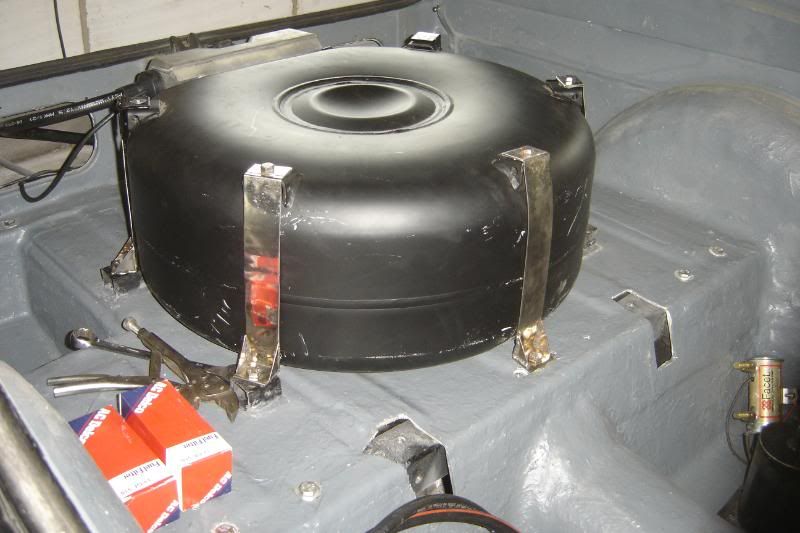
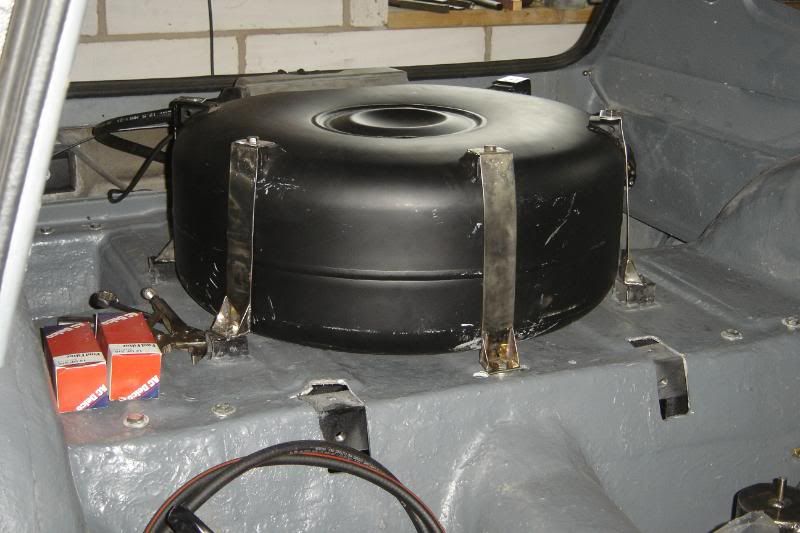
So today I had lots of time to get the LPG tank fitted in place and connected up. Started with making up the straps to hold in down, the omega only used three of the tank bolt locations, but I thought it would be best to use all five as its sat on the flat now, rather than in a well. I'm loz and I'm a SS addict, I can't seem to help myself any more, so the straps are predictably SS.
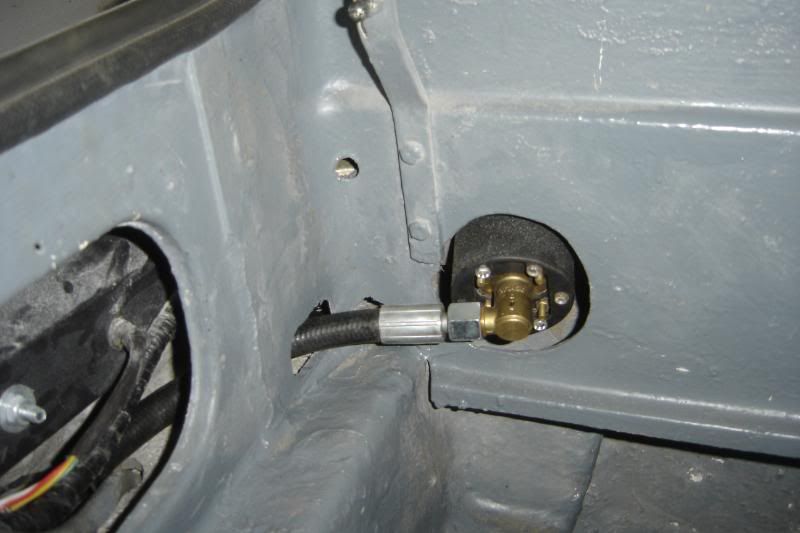
Filler connected up
And finally the vent hose is now connected to the new hole in the boot floor
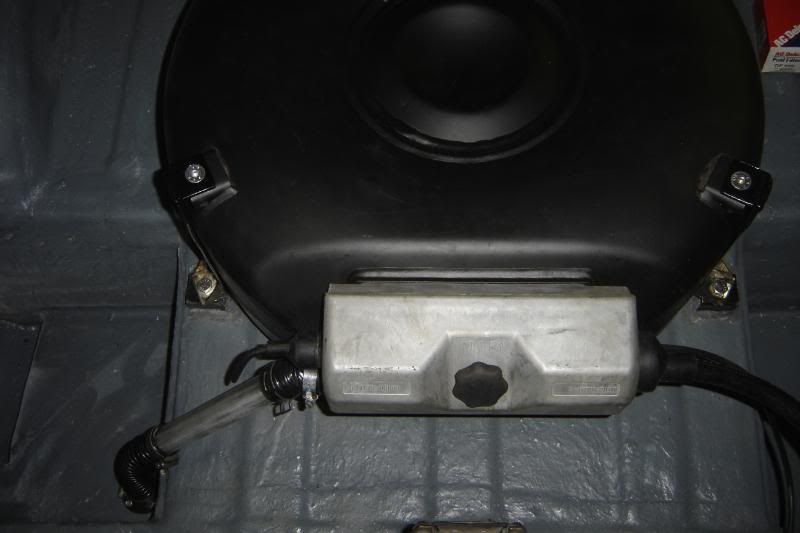
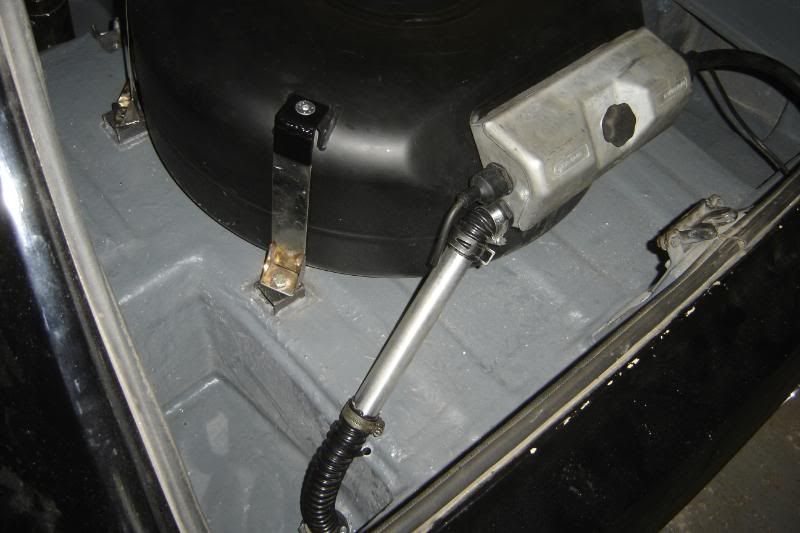
and looking up at it

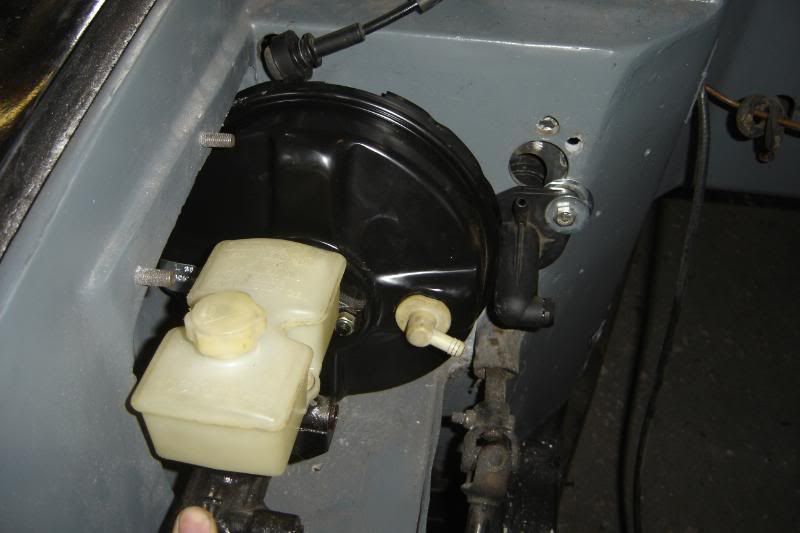
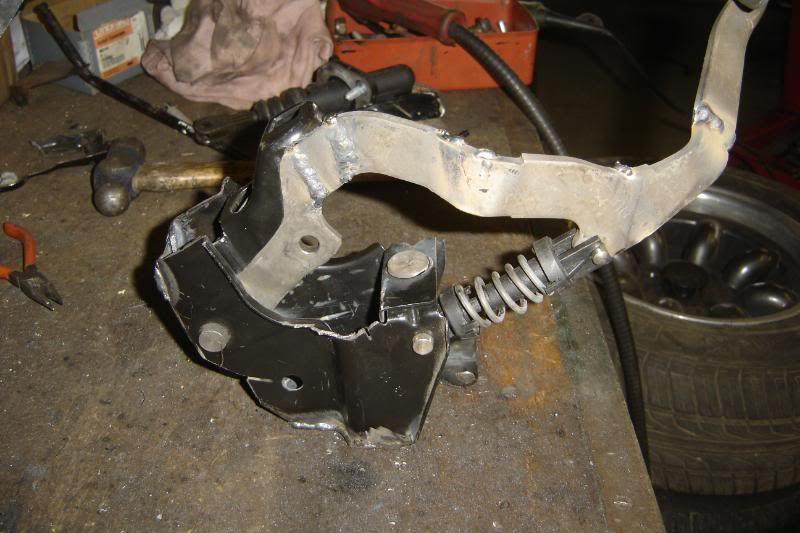
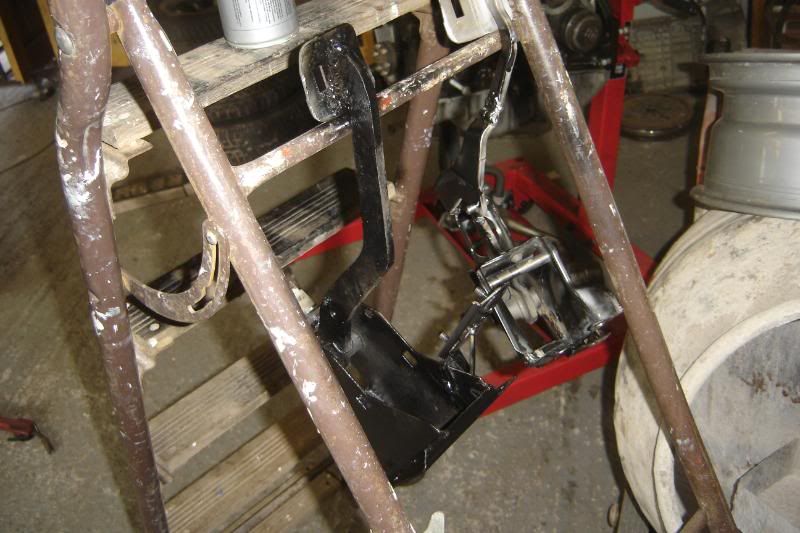
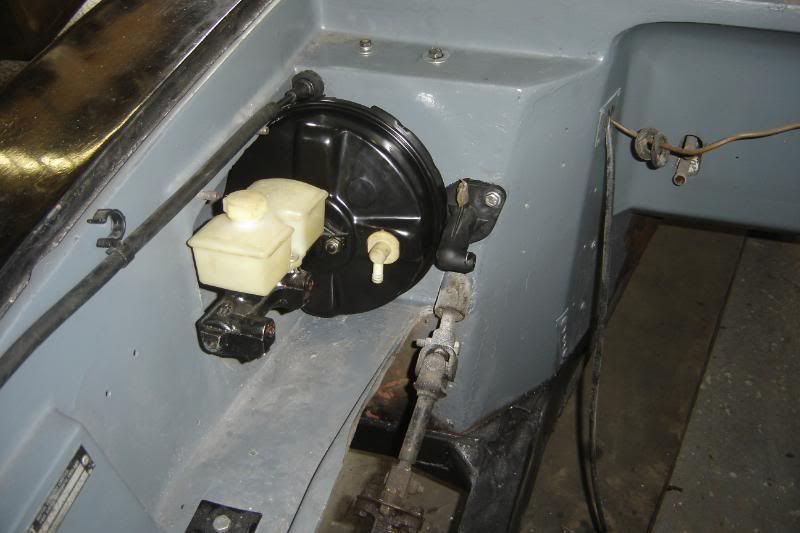
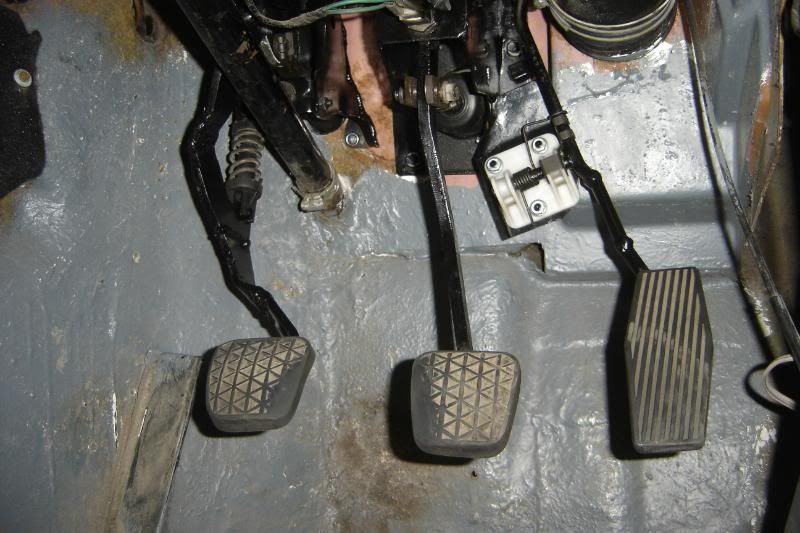
Started looking at the clutch pedal today, using Naths very helpful pics for info, it looks tight next to the servo!?!?
Can't wait to get going with the engine again.
More to come maybe tonight maybe next weekend.
So some photos then,
Tank under the car
The sender super sealed with silicone over all the electrics to stop corrosion and bad connections developing
So today I had lots of time to get the LPG tank fitted in place and connected up. Started with making up the straps to hold in down, the omega only used three of the tank bolt locations, but I thought it would be best to use all five as its sat on the flat now, rather than in a well. I'm loz and I'm a SS addict, I can't seem to help myself any more, so the straps are predictably SS.
Filler connected up
And finally the vent hose is now connected to the new hole in the boot floor
and looking up at it
Started looking at the clutch pedal today, using Naths very helpful pics for info, it looks tight next to the servo!?!?
Can't wait to get going with the engine again.
More to come maybe tonight maybe next weekend.
Edited by lozzzzzz on Sunday 12th June 20:15
Managed to do some more on the car today,
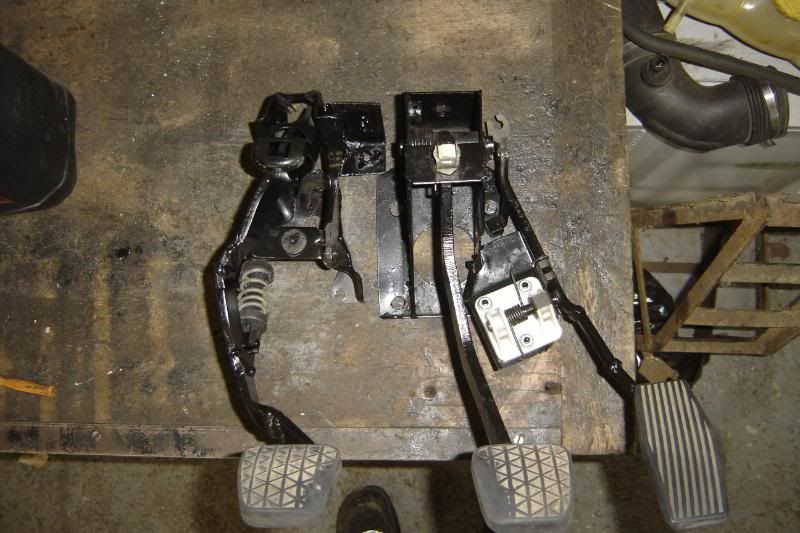
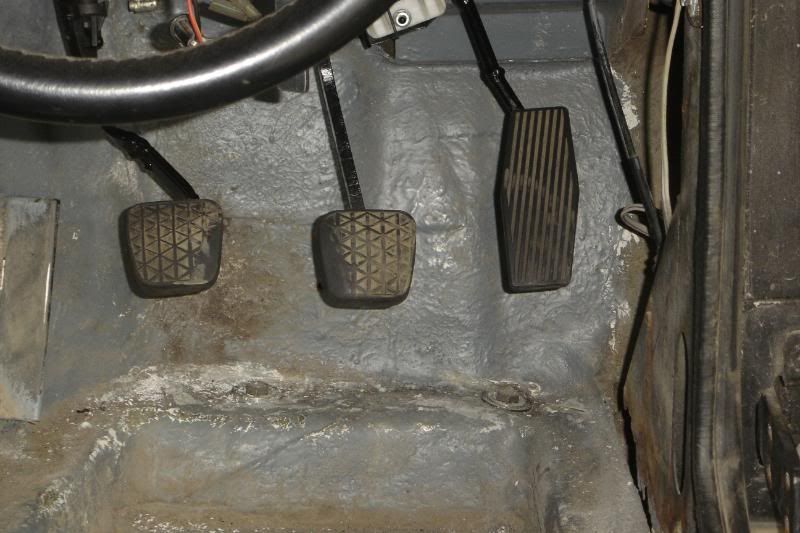
After a couple of hours very unsuccessful butchery of the omega clutch master, I finally got somewhere with it. The pedal now fits and lines up nicely with brake pedal. The pedals ends are all omega now to have a matching set. The accelerator has been replaced with the omega one aswell to make the movement a bit shorter, the Scimitar pedal had nearly 6 inches travel for full throttle.
Its very tight and only just fits, the original hole was too low
These picture represent such a massive amount of thought and work
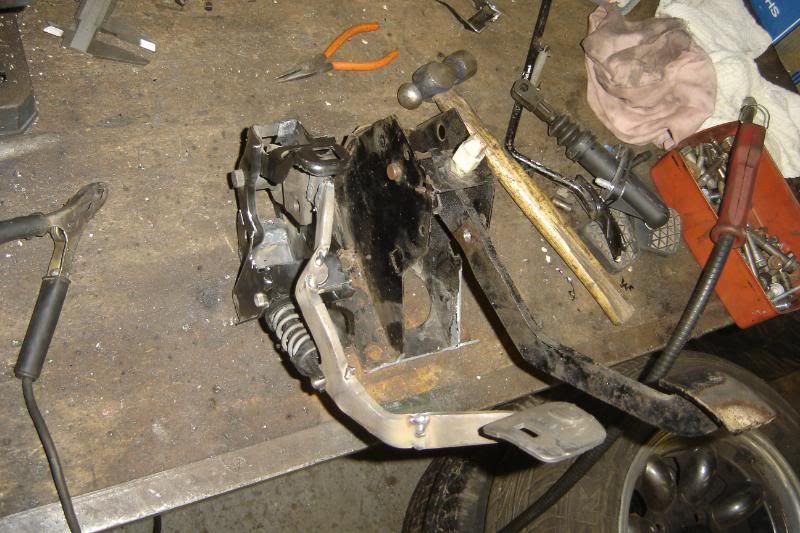
I weakened the assist spring a bit as I'm not too keen on the modern car soft feel
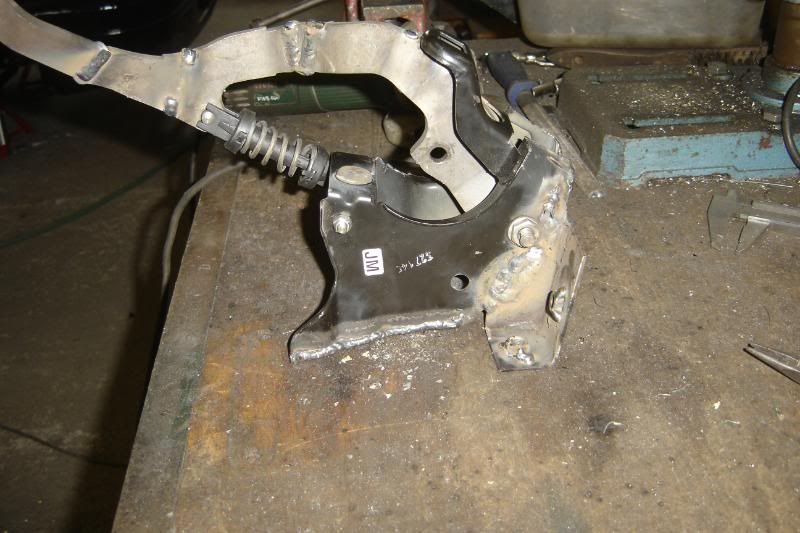
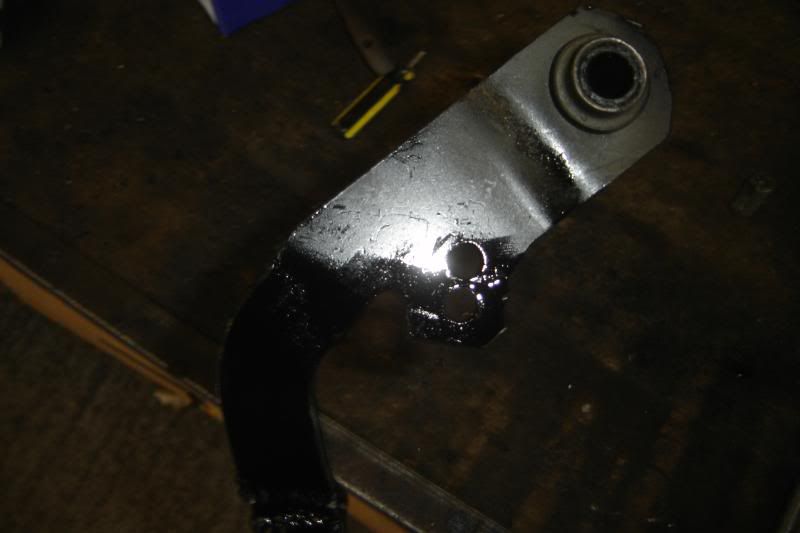
The omega throttle pedal bracket was simple added too the brake pedal assembly and the actual pedal cut and welded a few times to put it in the right place
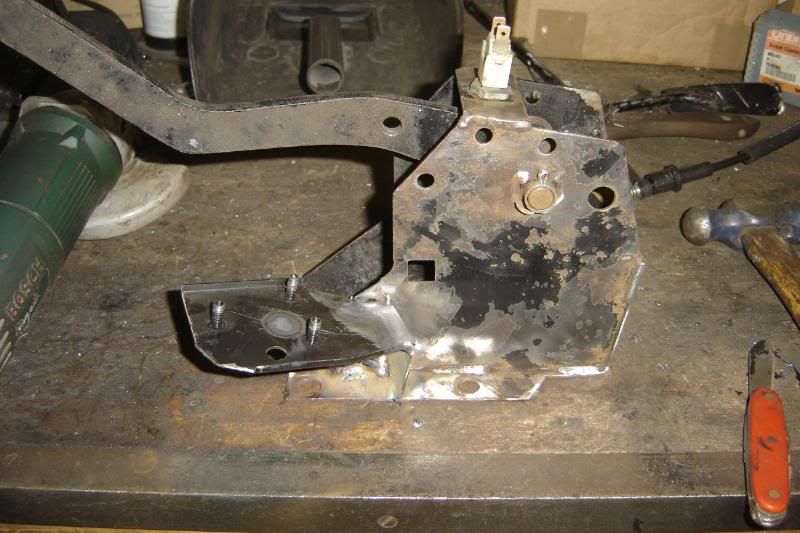
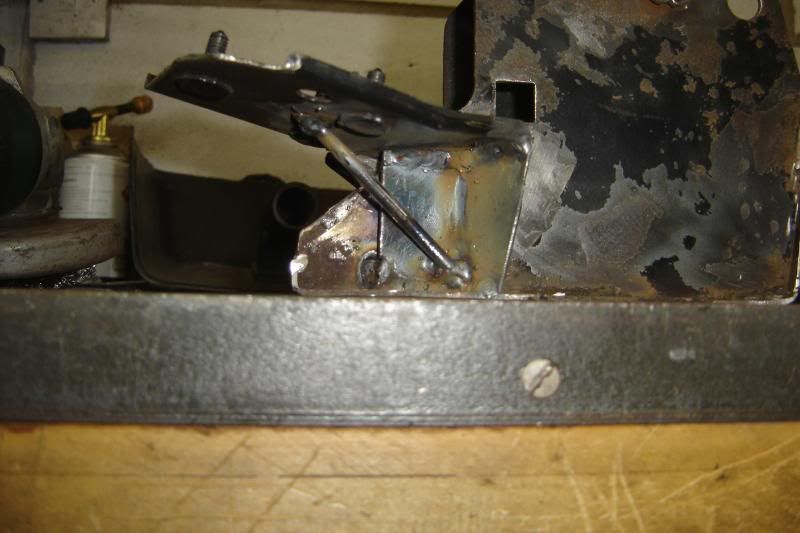
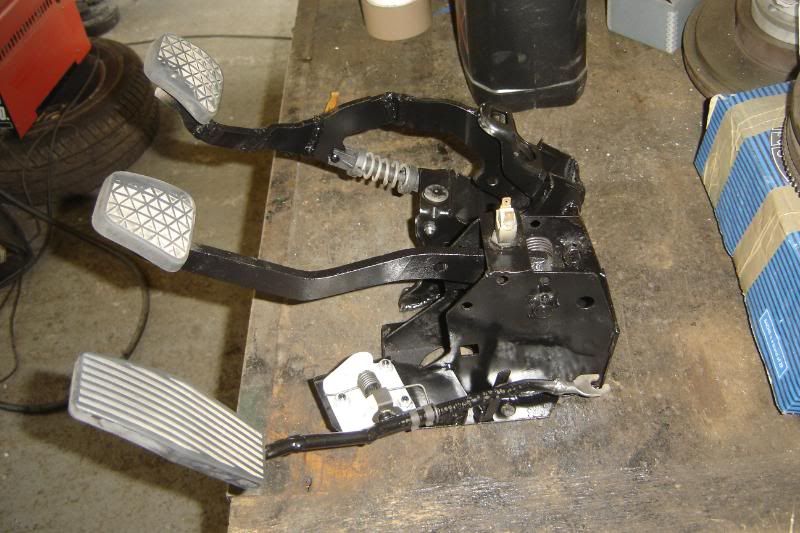
And a bit more support welded in
Here are the bits drying with a coat of black paint.
The first time I had the hubs drilled it cost £45, but these turned out to be completely wrong and wheel span eccentrically so I had them redone at a different place. They found that the hubs were a little out of true so straightened them up and redrilled (just enough material left) this time it cost £60.
So I put the first hub back on about an hour ago only to find the wheel is moving again, by about 1mm. This is getting to really p*** me off
AAAAGGGGGHHHHHHHH so now I either settle with 1mm or I have to redrill another set of hubs and waste a load of new grease AGAIN, and transfer the new wheel bearings. I JUST WANT FOUR HOLES DRILLED IN THE RIGHT PLACE
After a couple of hours very unsuccessful butchery of the omega clutch master, I finally got somewhere with it. The pedal now fits and lines up nicely with brake pedal. The pedals ends are all omega now to have a matching set. The accelerator has been replaced with the omega one aswell to make the movement a bit shorter, the Scimitar pedal had nearly 6 inches travel for full throttle.
Its very tight and only just fits, the original hole was too low
These picture represent such a massive amount of thought and work
I weakened the assist spring a bit as I'm not too keen on the modern car soft feel
The omega throttle pedal bracket was simple added too the brake pedal assembly and the actual pedal cut and welded a few times to put it in the right place
And a bit more support welded in
Here are the bits drying with a coat of black paint.
The first time I had the hubs drilled it cost £45, but these turned out to be completely wrong and wheel span eccentrically so I had them redone at a different place. They found that the hubs were a little out of true so straightened them up and redrilled (just enough material left) this time it cost £60.
So I put the first hub back on about an hour ago only to find the wheel is moving again, by about 1mm. This is getting to really p*** me off
AAAAGGGGGHHHHHHHH so now I either settle with 1mm or I have to redrill another set of hubs and waste a load of new grease AGAIN, and transfer the new wheel bearings. I JUST WANT FOUR HOLES DRILLED IN THE RIGHT PLACE
Thanks for your kind comments GingerNinja.
Your car has been something of an inspiration to me starting a few years back when I began to change things on the Scim. I love it, what an awesome looking car. Was it on the V8 Church website too??
And if I'm not very much mistaken did I read somewhere that you'd eventually like to pop an LS1 in yours? I'm definiatly in the same camp there! If I came into a bit more money one day the LS1 would be top of the todo list.
Re body mods, I've already done the bumpers and got rid of the boot lock and rear wiper, opened out the front grill to be functional and to be honest, I think I'm happy with how it looks besides little smartening up things. We'll see how it looks when its on the raod again, never say never I guess!
Thanks for the interest.

 got to play with the car for the day. I've made very little progress but I'm really really tired!
The pedals were all ready to go in this morning
I drilled one of the master cylinder bolts out so I can put a bolt through into a welded nut, making mounting a bit easier
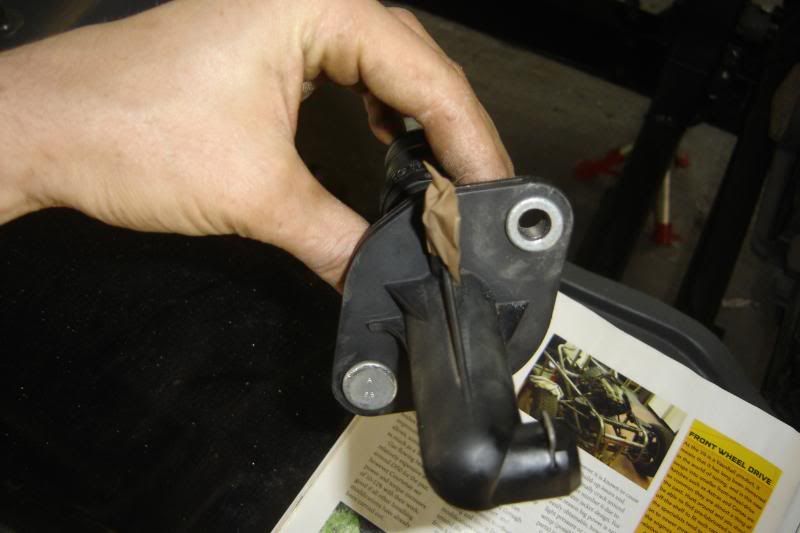
I had a shop around for prices for parts thinking that it might be wise to replace the master with a new one, then I heard the prices and changed my mind, so I gave it a thorough clean instead. In doing so I realised its got a fairly complex design inside and I got the bore wrong, its actually 19mm not 21, hope that doesn't screw thigs up for you Phil.
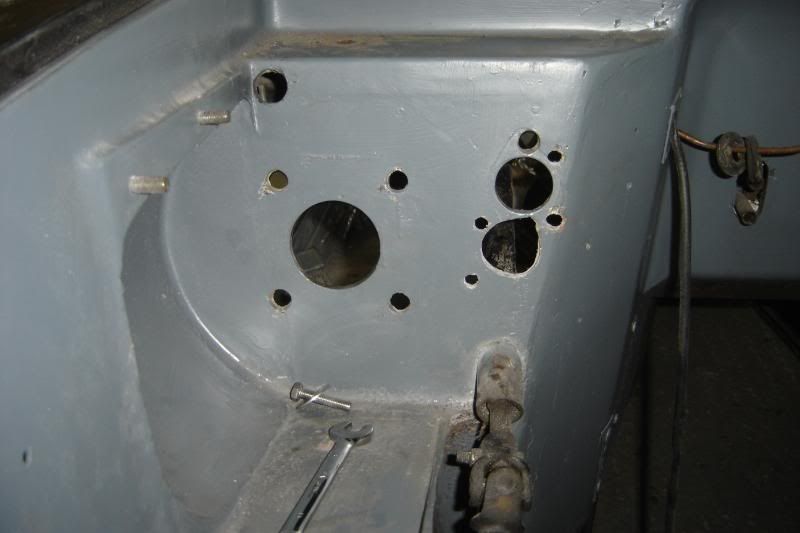
I filled the hole where the old master cylinder used to go
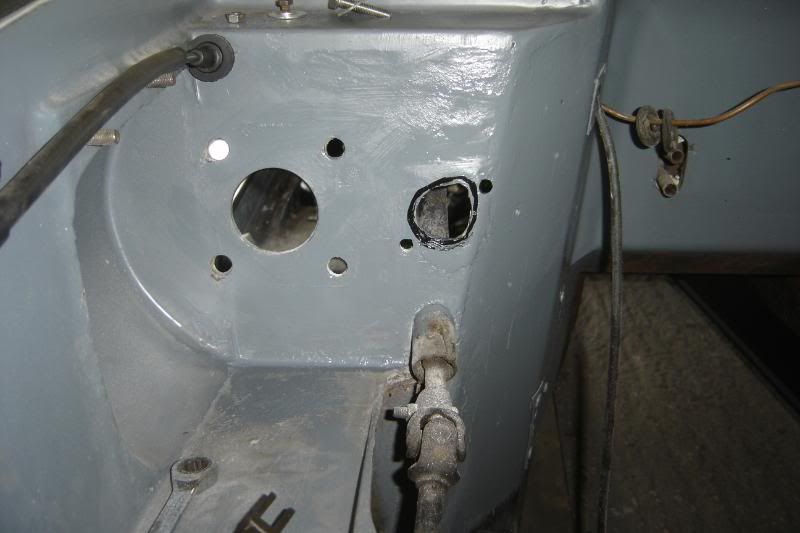
The for some reason the omega master didn't line up with the clutch pedal so out came the welder again, added some material and drilled a new hole
Now I have tree working pedals
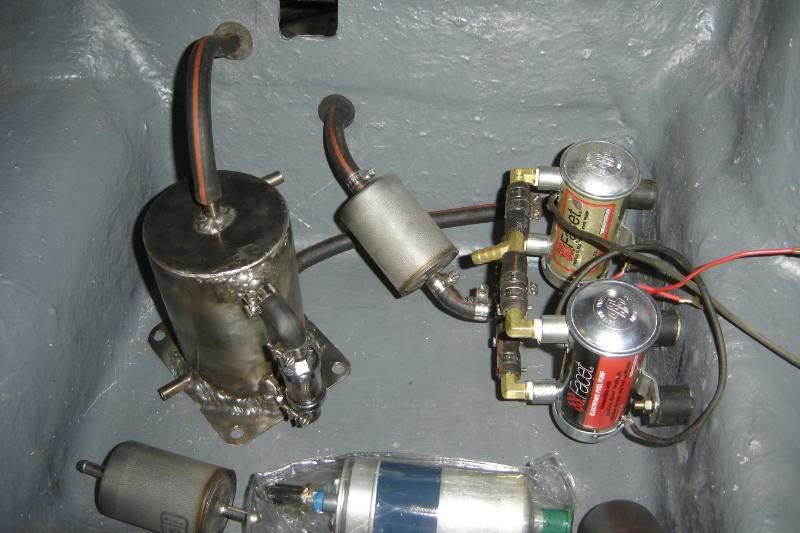
I started mounting the numerous pumps and filters and the swirl pot. The fuel will come in from the hose in the centre of the photo, through the first filter, into one of the two facet pumps, I got two cos they're not the most reliable so they'll both be on switches and only one will be needed at any one time. From there the fuel will go into the swirl pot and return out of the top back to the tank through the top left hose in the photo. There is a take off at the bottom for the high pressure pump to the engine, which will be pre filtered and post filtered meaning that if any item fails it would damage anything else in the system. Its a bit OTT though, especially as the car will spend most of its time on LPG (not a pump in sight for that).
I've not had the patients to look at the hubs yet, I'm hoping they'll get better by themselves.
Thanks for looking.
lozzzzzz said:
Was it on the V8 Church website too??
And if I'm not very much mistaken did I read somewhere that you'd eventually like to pop an LS1 in yours?
I think it was on the V8 Church site, but via the original builder.And if I'm not very much mistaken did I read somewhere that you'd eventually like to pop an LS1 in yours?
No plans to drop an LS1 into mine - long list of things I would like to do though; a/c, power steering, LSD, Emerald ECU, new hubs.....
Good luck with that work, have you got a section on PH where you post progress?
Got some more done today!
A few more bits have arrived making completing the swirl pot assembly and pumps possible. I also measured and fitted all of the hubs:
Front left is perfect,
Both rears are nearly spot on (enough to leave them and see how it drives
That just leaves the front right with is at least 1.5mm out and will need doing again.
I'm all out of space to drill more holes so I've dug out some old hubs and I'll get them done, hopefully for free.
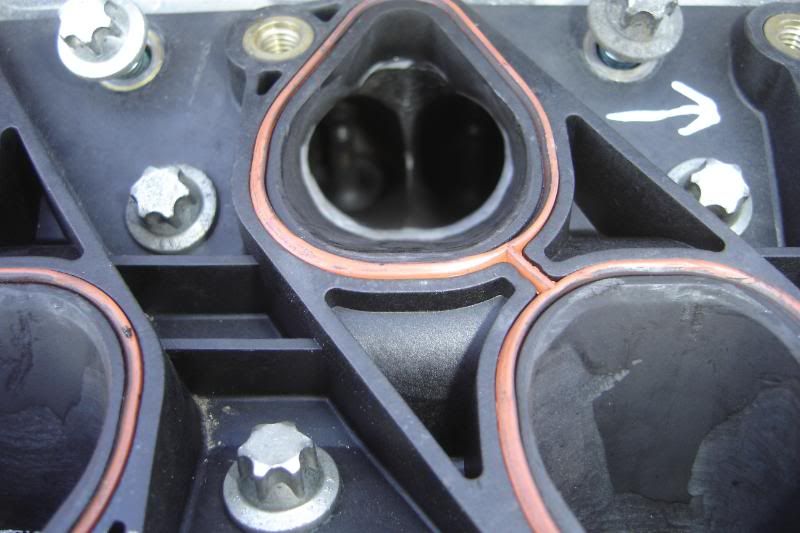
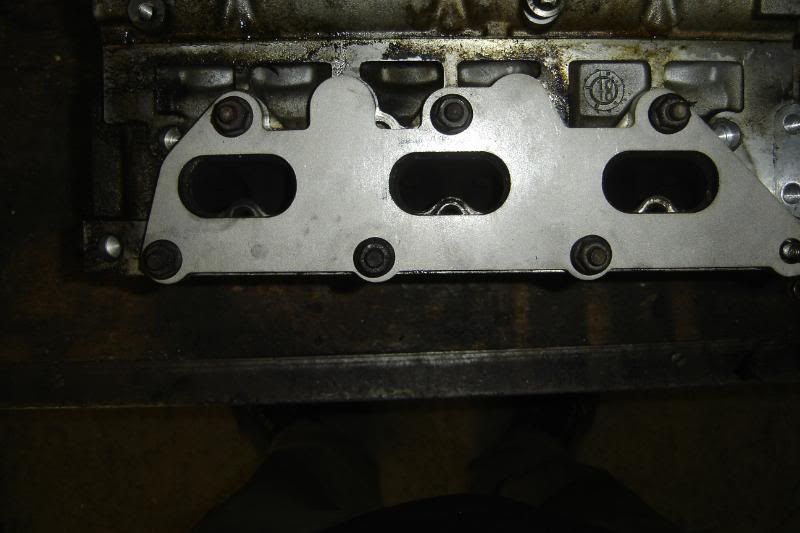
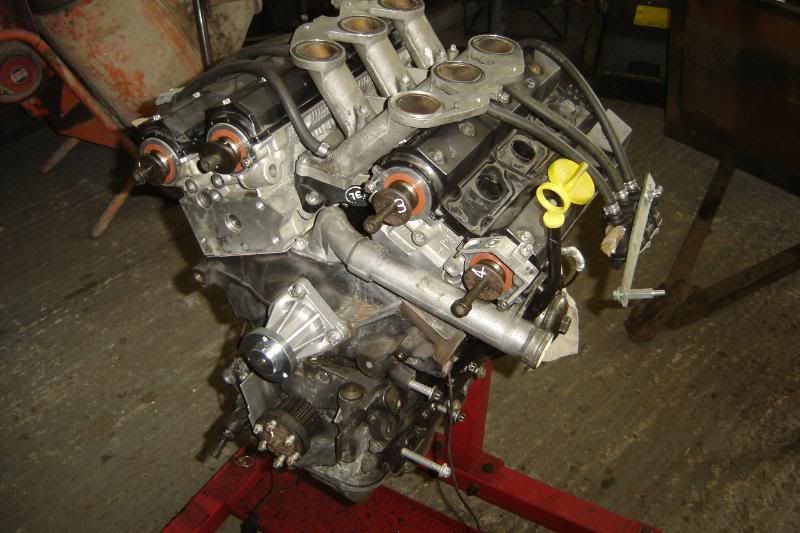
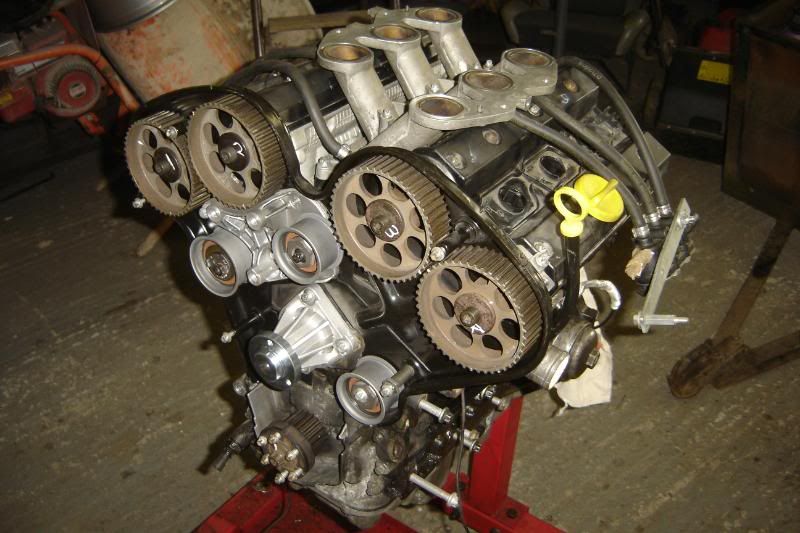
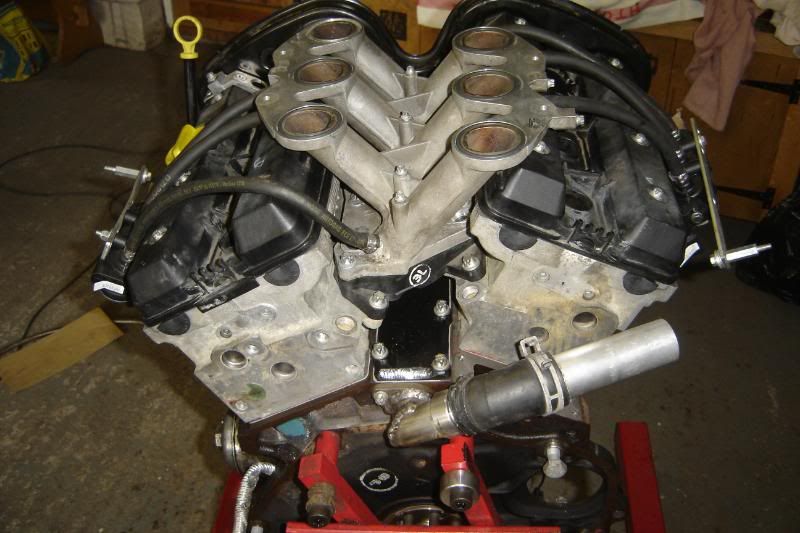
Tidied up ready for stripping the engine, when I had a bright idea. The inlet manifold is in three parts, the plenum, the runners and the base to the runners (plastic). As the cams have spun when I took the belt off and all the valves are closed, I put rag in all the other holes in the engine and bolted the runner base to the heads, then I ported them and matched them to the heads ports. There was loads of material that could be removed, there was an odd shape that squeezes the air from the sides, so I took it all out, the rolling road with tell if I've meddled where I shouldn't have or if it helps. Anyway here are some pics
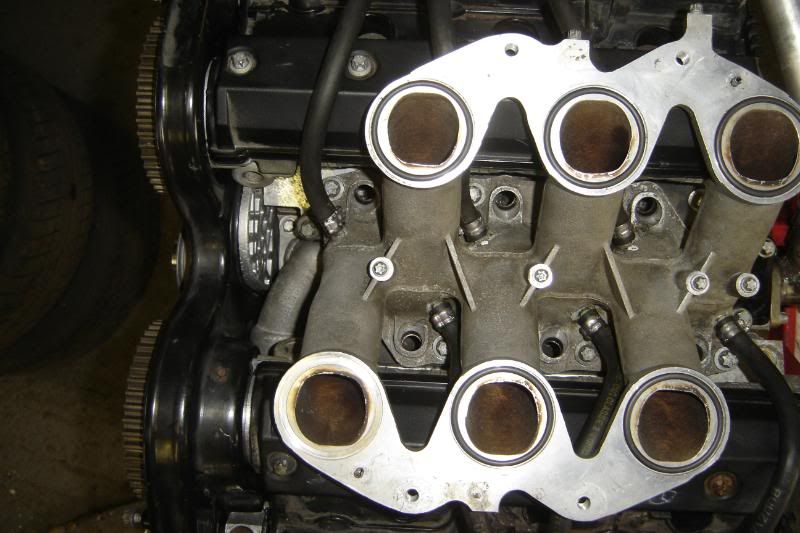
I've tried to show the marrow section here:
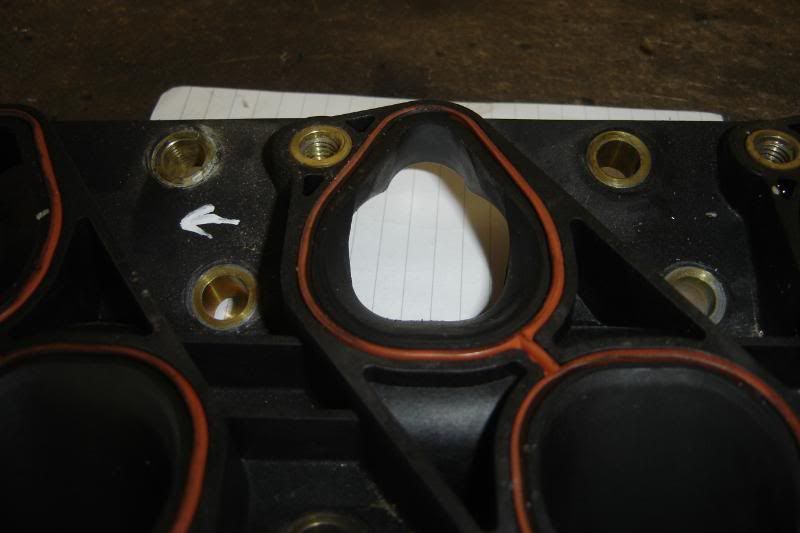
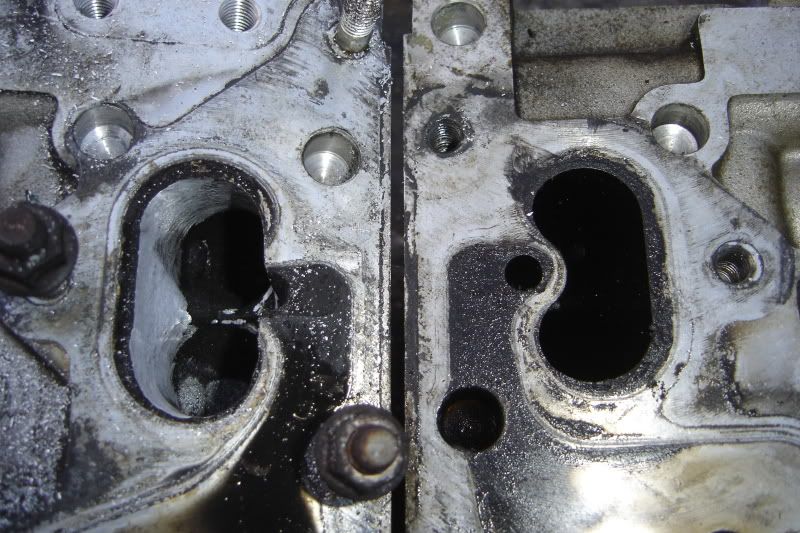
This might be easier to see as a comparison, before:
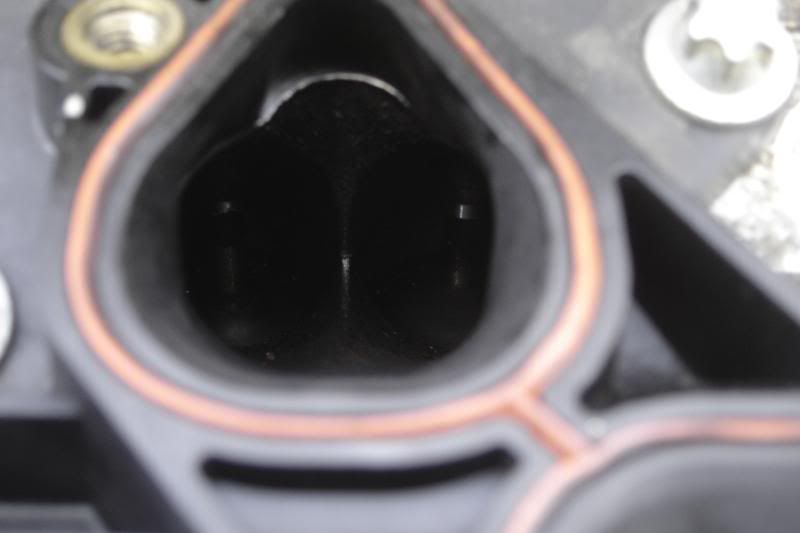
and After:
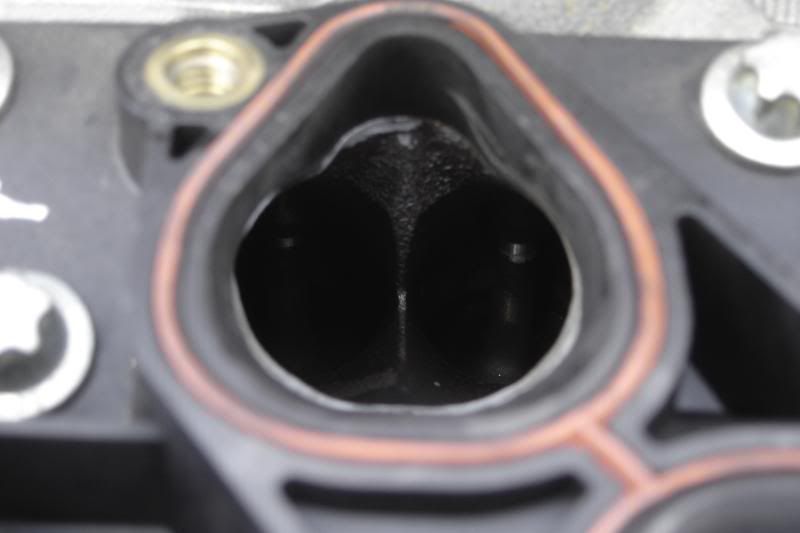
The inlet runner is the same shape as the "after" photo all the way down so I'm hoping that will help flow!

A spot of diner now, then its off with her heads
More to come
Got some more done today!
A few more bits have arrived making completing the swirl pot assembly and pumps possible. I also measured and fitted all of the hubs:
Front left is perfect,
Both rears are nearly spot on (enough to leave them and see how it drives
That just leaves the front right with is at least 1.5mm out and will need doing again.
I'm all out of space to drill more holes so I've dug out some old hubs and I'll get them done, hopefully for free.
Tidied up ready for stripping the engine, when I had a bright idea. The inlet manifold is in three parts, the plenum, the runners and the base to the runners (plastic). As the cams have spun when I took the belt off and all the valves are closed, I put rag in all the other holes in the engine and bolted the runner base to the heads, then I ported them and matched them to the heads ports. There was loads of material that could be removed, there was an odd shape that squeezes the air from the sides, so I took it all out, the rolling road with tell if I've meddled where I shouldn't have or if it helps. Anyway here are some pics
I've tried to show the marrow section here:
This might be easier to see as a comparison, before:
and After:
The inlet runner is the same shape as the "after" photo all the way down so I'm hoping that will help flow!
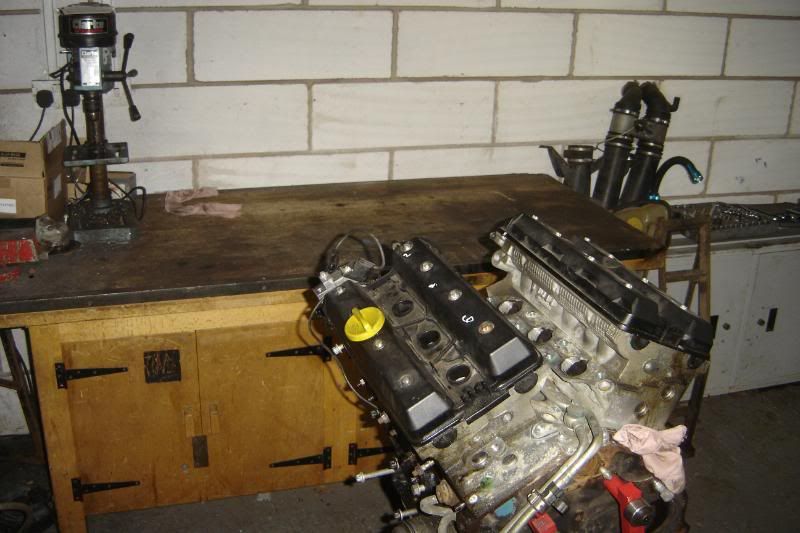
A spot of diner now, then its off with her heads
More to come
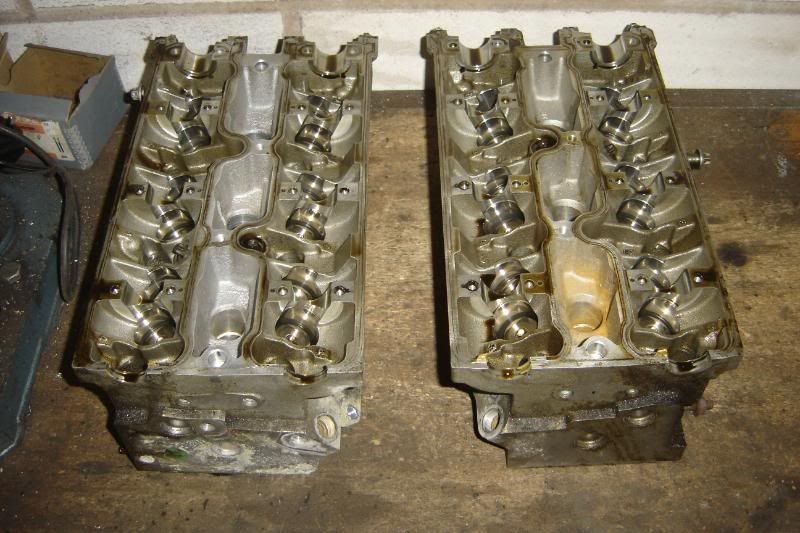
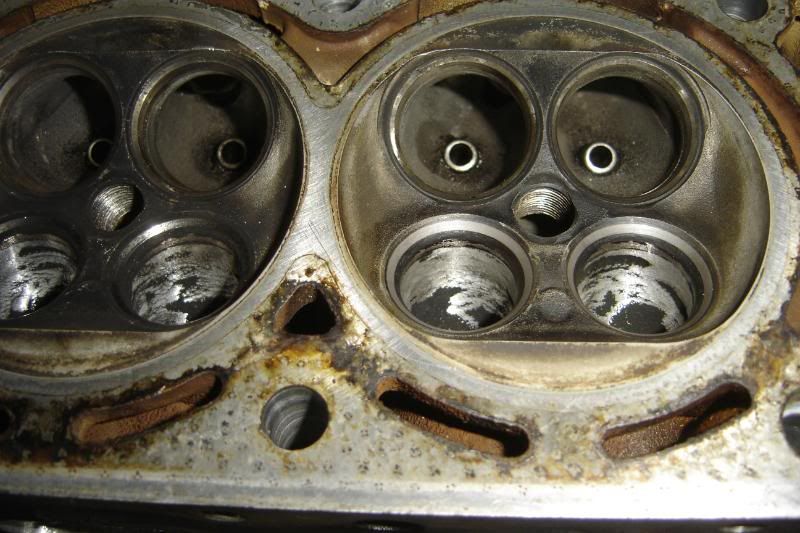
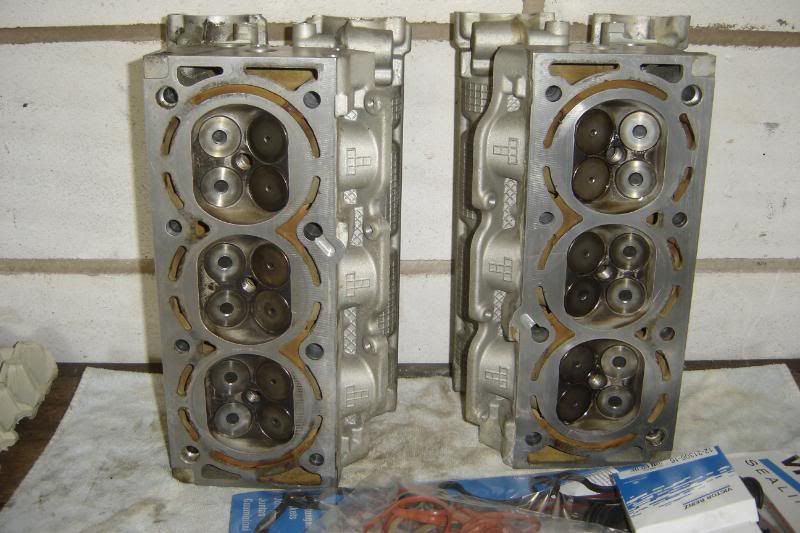
One down one to go
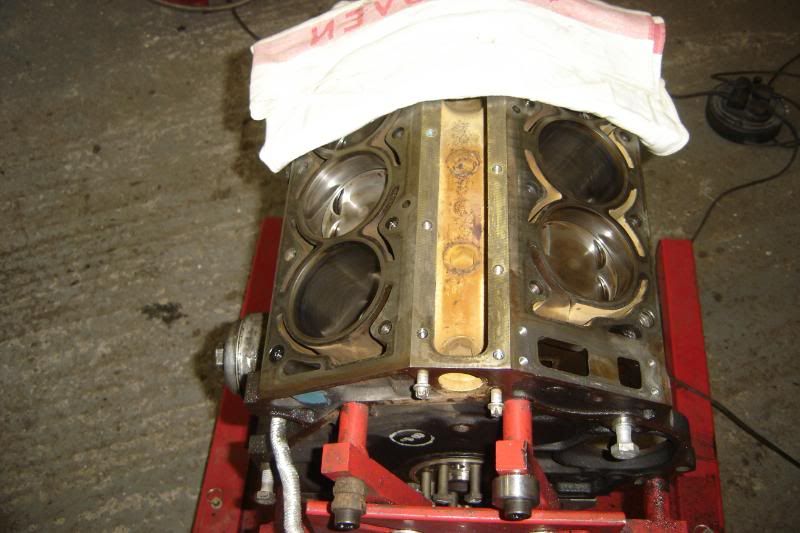
Lots of lovely honing, still intact all the way round
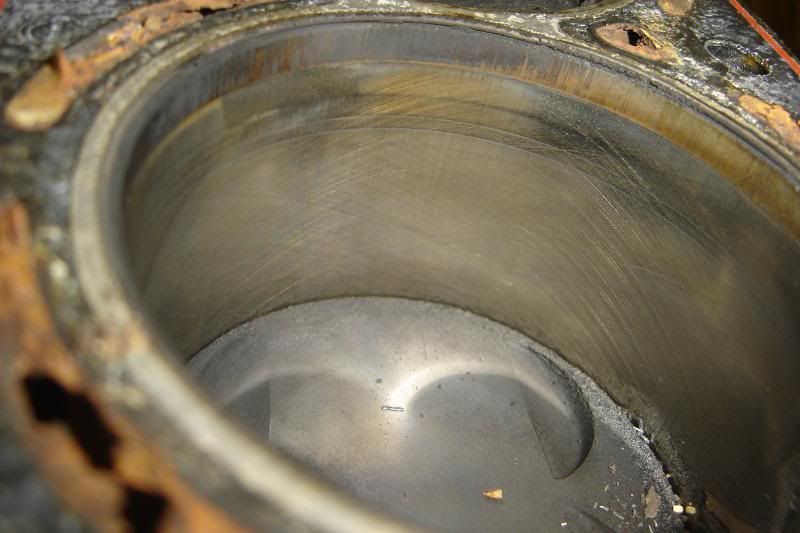
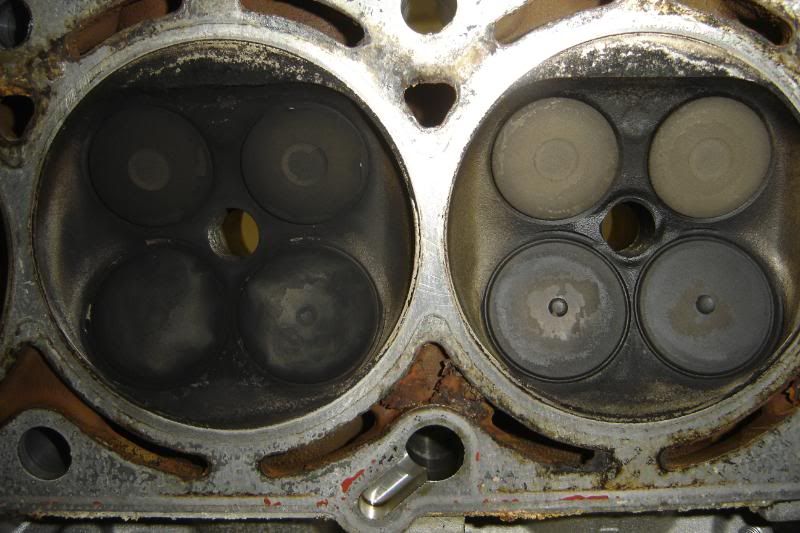
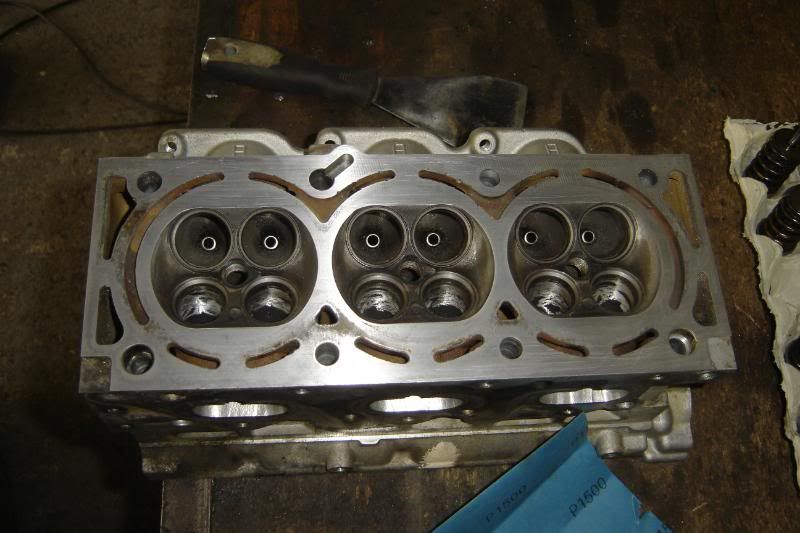
A nice simple combustion chamber shape, fairly clean valves
I can't wait to do more Engines are my favourite
Off to JapFest at Donnington tomorrow where my friend will be showing off his supra powered capri that recently gave him a massive surprise on a Dyno, he was expecting 260hp and got 394
More to come next weekend, or amybe tomorrow afternoon
Lots of lovely honing, still intact all the way round
A nice simple combustion chamber shape, fairly clean valves
I can't wait to do more
Engines are my favourite Off to JapFest at Donnington tomorrow where my friend will be showing off his supra powered capri that recently gave him a massive surprise on a Dyno, he was expecting 260hp and got 394
More to come next weekend, or amybe tomorrow afternoon
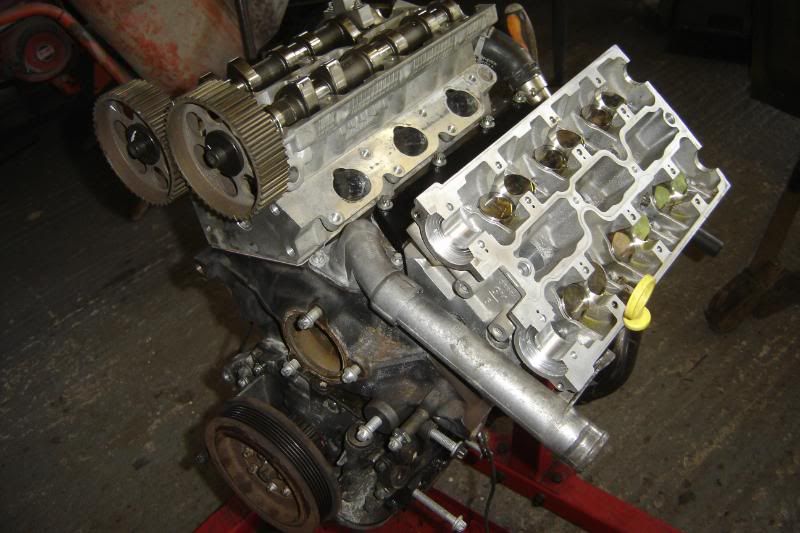
I'm officially back in love with this project. The hubs being drilled wrong a second time resulted in slow work on the car but yesterday and today I've been working on the engine and there is nothing I love more about my hobby than working on engines
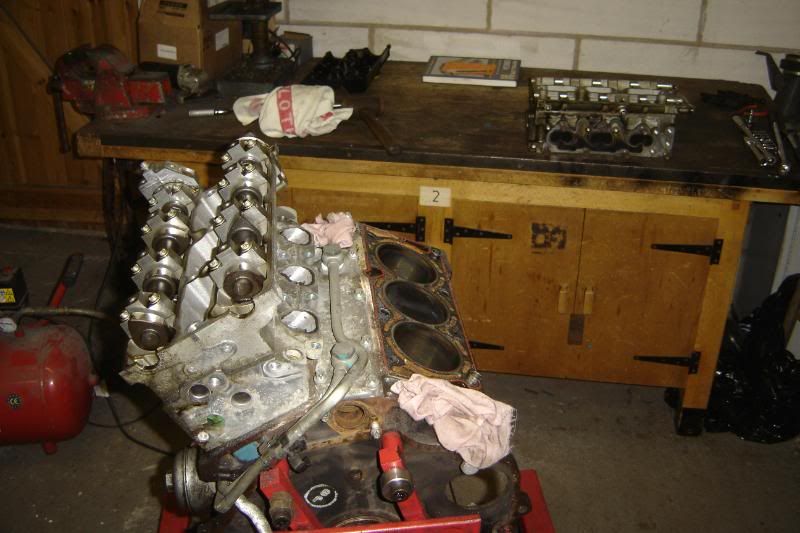
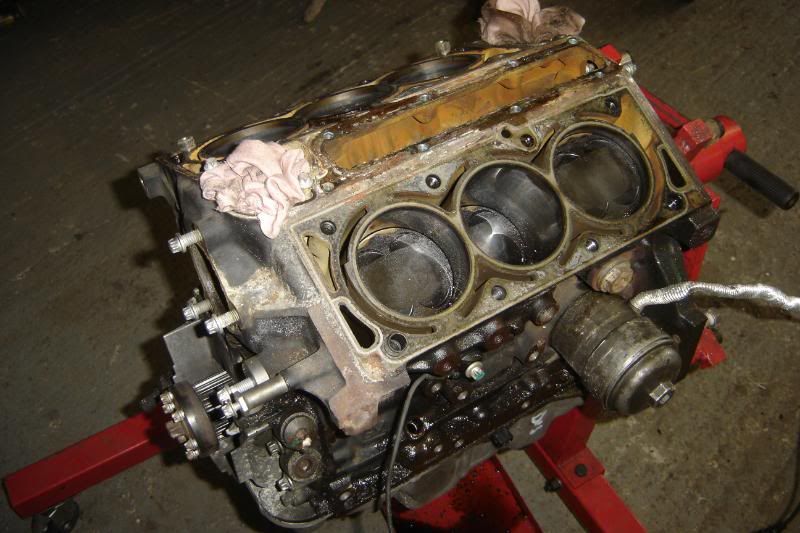
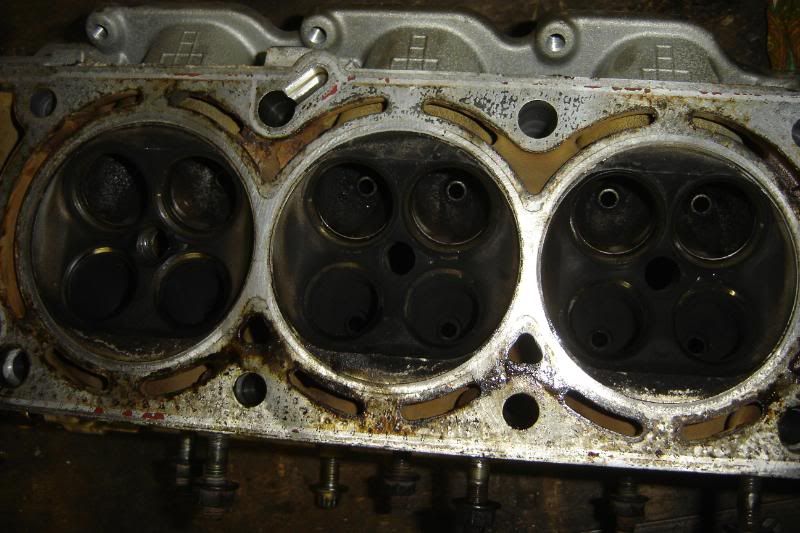
Got the other head off and cleaned the deck face a little, there's no corrosion anywhere on the face, and the waterways are stained rather than pitted There are no scrathes on any of the bores After a struggle I got both the oil cooler hoses out of the block ready to go to the air to oil cooler.
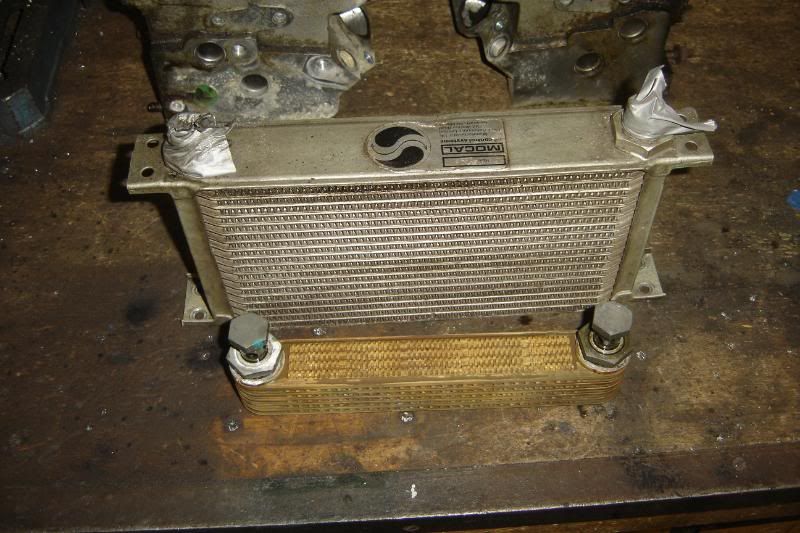
The new cooler is a LOT bigger than the old one, I realise that water has a much higher specific heat capacity than air but there is a huge amount more surface area on the mocal jobby and the air will be at a lot lower temperature than the coolant in the engine so this cooler will be seriously effective. I'm definately going to fit an oil thermostat so its not cooling cold oil. IMHO fitting an oil cooler with no stat is a really bad idea.
Got one valve out (I still need 24 bags with labels) and was really pleasently surprised with how little play there is side to side, the valve guides are in great shape In terms of porting, its pretty sweet, there is very little I can do as far as I can see, just smooth casting marks and open the port out a little furthest from the valve to go wtih the work thats been done on the inlet.
Japfest was smaller than I was expecting, but my friends car got so much attention he was loving it!
Annoyingly I'll not be able to do much more till next weekend so my new found enthusiasm will have to wait till then
Got the other head off and cleaned the deck face a little, there's no corrosion anywhere on the face, and the waterways are stained rather than pitted
There are no scrathes on any of the bores After a struggle I got both the oil cooler hoses out of the block ready to go to the air to oil cooler. The new cooler is a LOT bigger than the old one, I realise that water has a much higher specific heat capacity than air but there is a huge amount more surface area on the mocal jobby and the air will be at a lot lower temperature than the coolant in the engine so this cooler will be seriously effective. I'm definately going to fit an oil thermostat so its not cooling cold oil. IMHO fitting an oil cooler with no stat is a really bad idea.
Got one valve out (I still need 24 bags with labels) and was really pleasently surprised with how little play there is side to side, the valve guides are in great shape
In terms of porting, its pretty sweet, there is very little I can do as far as I can see, just smooth casting marks and open the port out a little furthest from the valve to go wtih the work thats been done on the inlet. Japfest was smaller than I was expecting, but my friends car got so much attention he was loving it!
Annoyingly I'll not be able to do much more till next weekend so my new found enthusiasm will have to wait till then
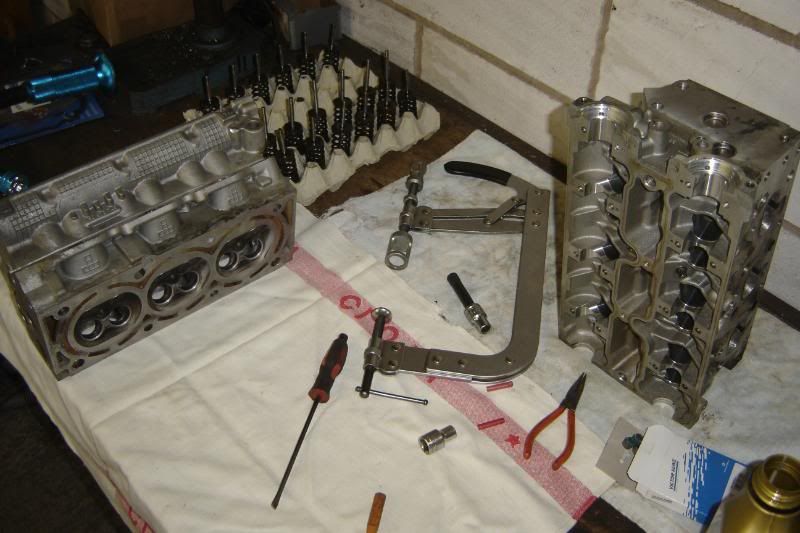
Got all the valves out this evening in a couple of free hours I found myself with
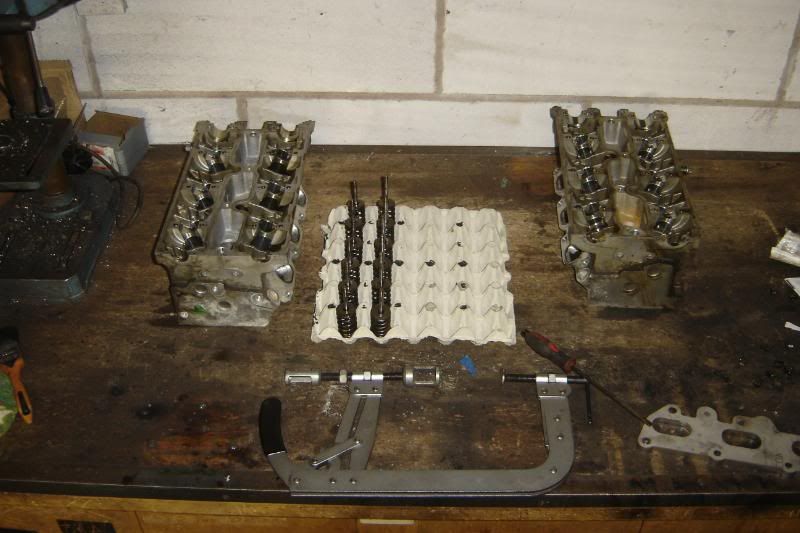
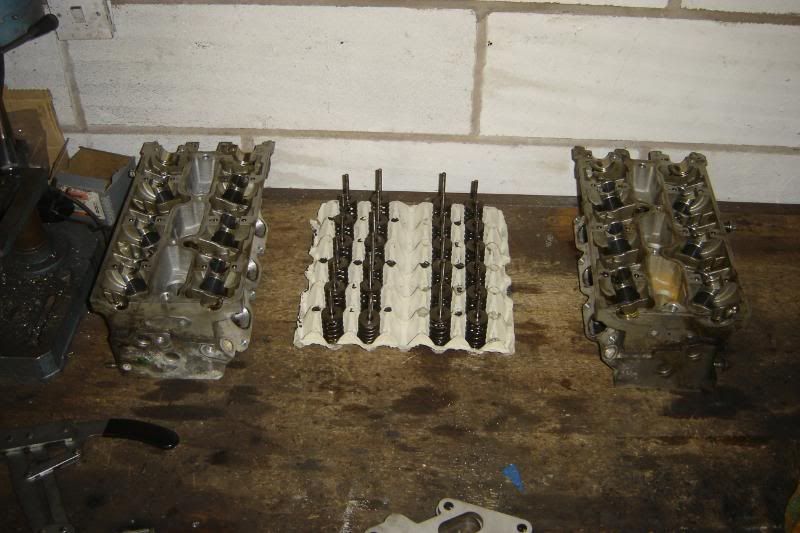
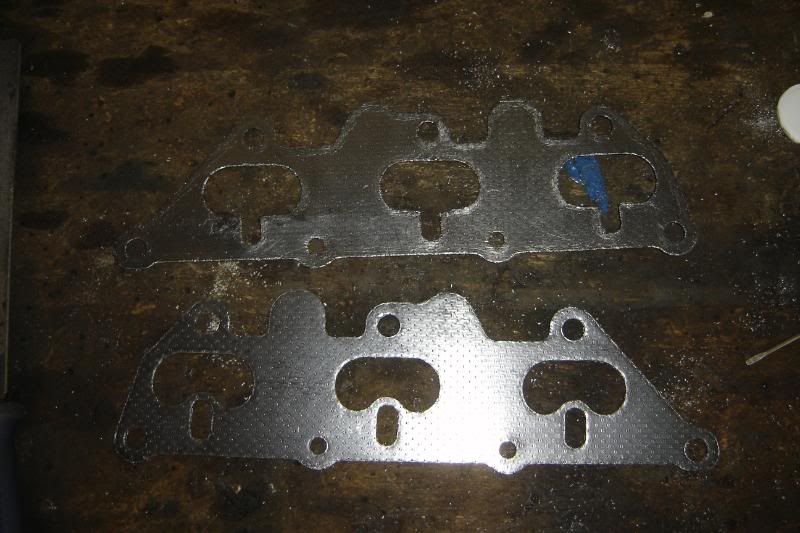
Its hard to see in the photo but there's lots of exhaust port wall to be removed to match up with the manifold flange (even taking into account the thickness of the pipe being welded to the flange)
More to come at the weekend hopefully or even tomorrow night?
Its hard to see in the photo but there's lots of exhaust port wall to be removed to match up with the manifold flange (even taking into account the thickness of the pipe being welded to the flange)
More to come at the weekend hopefully or even tomorrow night?
Made loads of prgress this evening but try as I might it just wouldn't photograph properly, the only decent photo is that of the exhasut ports before and after and even that doesn't really show how much they've been opened out.
Anyway, the inlets have been slightly enlarged and a just a bit of casting smothing done nearer the valve seats, its a compromise like every I guess, If I open the ports right out the max power (at high rpm obviously) will be great but with the reduced gas speed at lower rpm I'll loose midrange torque, thats my understanding anyway. So I've done a bit!
The exhausts are taking ages cos of the big stupid lump of air injection casting, but hopefully they whould make a real diffierence, they're considerably bigger than they were
I can't wait till this is on the rolling road being mapped
More to come at the weekend hopefully,
Doing more today, I can't believe I've got all this time, I love it. Cut the exhaust gaskets to match (getting a bit ahead of myself)
And I've been tidying up the heads, sanding the ports to smooth things out a bit, this got very boring and painful relly quickly so I only did the inlets. 8 of the valves are reground so far, I got inpatient after the first one and got the drill out
There is still lots of old gasket on the heads but the surfaces are completely free from corrosion and pitting so I think I'll just clean them up and reassemble the engine, no skimming, I've got to stop spending money tis going crazy!
So I could have it looking like an engine again soon
More to come
Had another good go at it this afternoon.
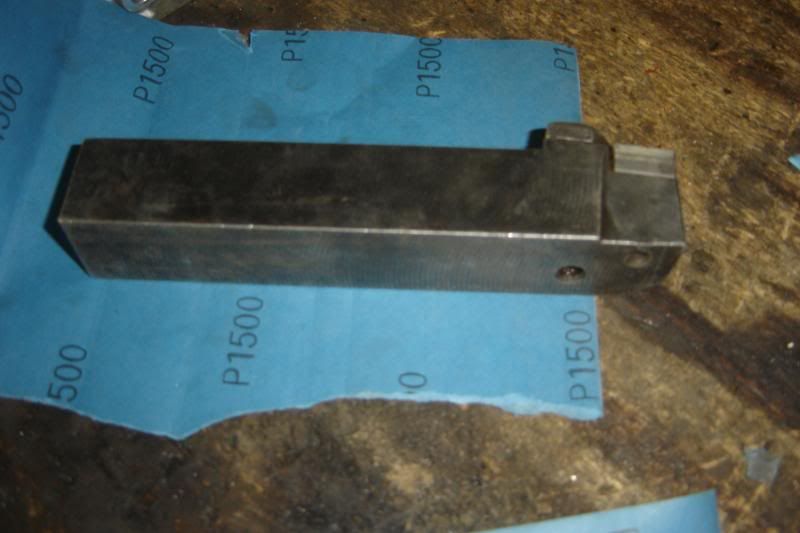
Using the bottom of a large lathe tool and sheets of 1500 grit wet and dry, the heads and deck surfaces were cleaned and checked for flatness. The deck is perfect, one head is perfect and one is getting near tollerance, but still ok (and the head gaskets were fine before stripping). I got through 4 litres of petrol in the parafin gun cleaning the heads and making sure the oil galleries are perfectly clean, I think I get a little carried away.
I'm so pleased with the finish
I couldn't help myself, I had to take the sump off again and make sure no dust had got in, I cleaned and blew through all the drain back channels, cleand the deck face and down all the water jackets with the blow gun, and did the grease around the bores trick to scoop out all the debris.
And finally got round to putting the valves back in, well 6 so far!
More to come
Wow, should be some beastie when you've finished. Thanks for posting the pics. Just picked up an MV6 recently myself, but it's still an the Omega as intended! Had the cambelt replaced last week, what a difference in performance. My mechanic tells me they use a lock plate to set the timing, rather than lining marks up with the Mk1 eyeball, which seems to make the difference.
Keep up the good work.
Keep up the good work.
An update, then, summer holiday has started got ages now in which to make some serious progress.
Starting with the heads, they're back together now, valves ground, ports ported (it was all guess work so ime will tell how badly I've done that) and both surfaces flatted and prepared for reassembly.
Before any of that goes back together the problem aof what to do about the oil cooler needs solving. I'm fitting an air to air oil cooler and doing away with the water to oil one.
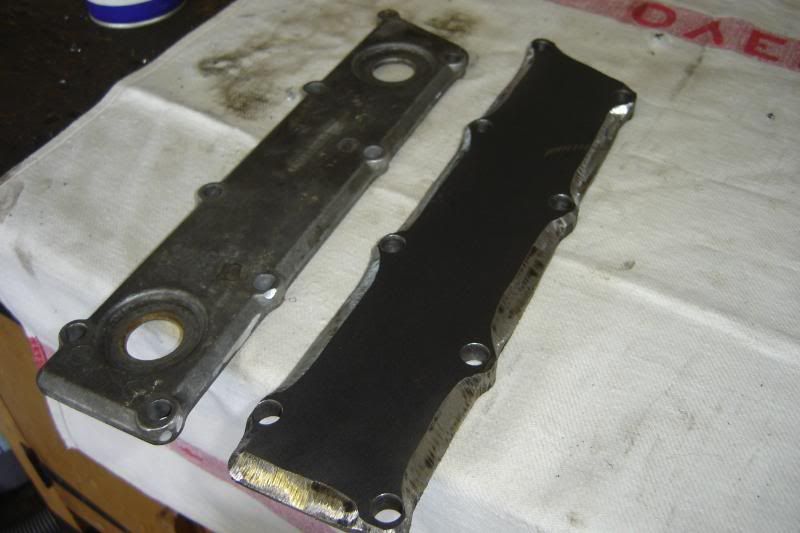
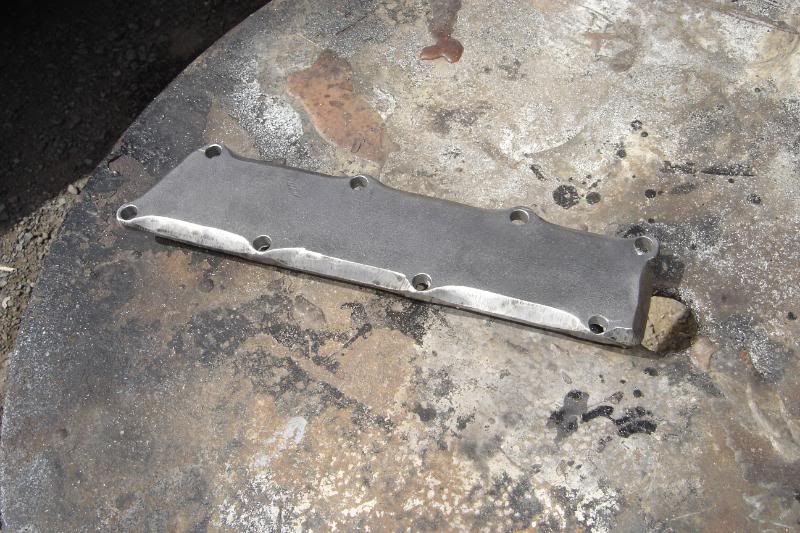
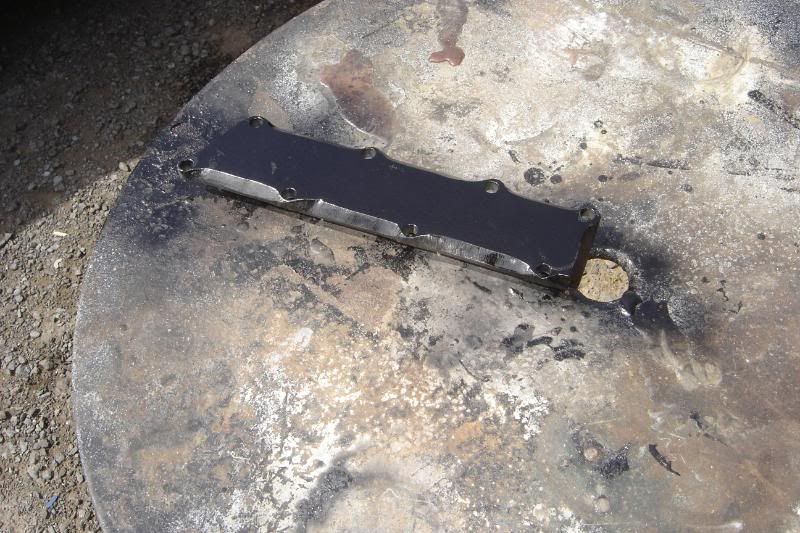
I saw three options, first just leave it in there with no oil in and use the cooler itself to block up the holes, thing is they're known to leak so I thought best not. Next option would be to use some big bolts and washers to block up the holes left where the oil cooler used to bolt through, but with lots of heading and cooling I was worried they might work lose and leak especially as they'd probably have a short grip length. So the most difficult and the one I've chosen is to make a blanking plate. I chose steel cos it will expand in much the same way as the block as apposed to ali which will expand a different amount being a very different metal. That and I had some steel lying around
Here it is nearly finished sat next to the original
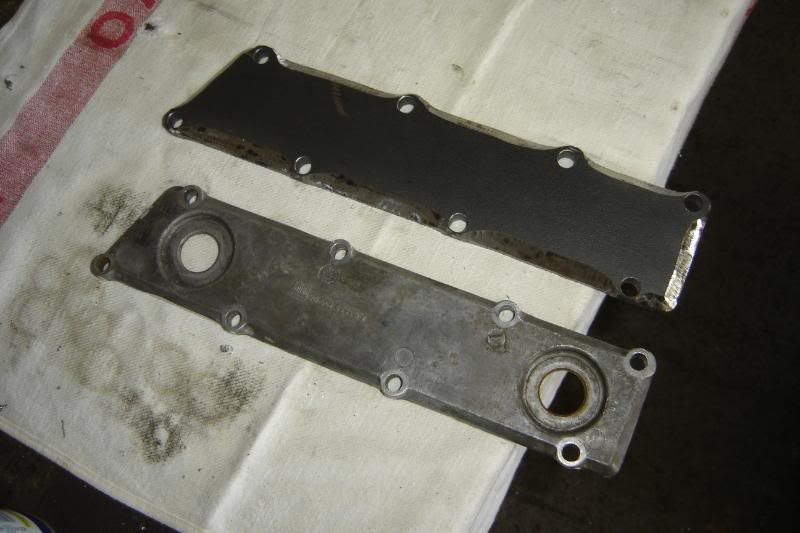
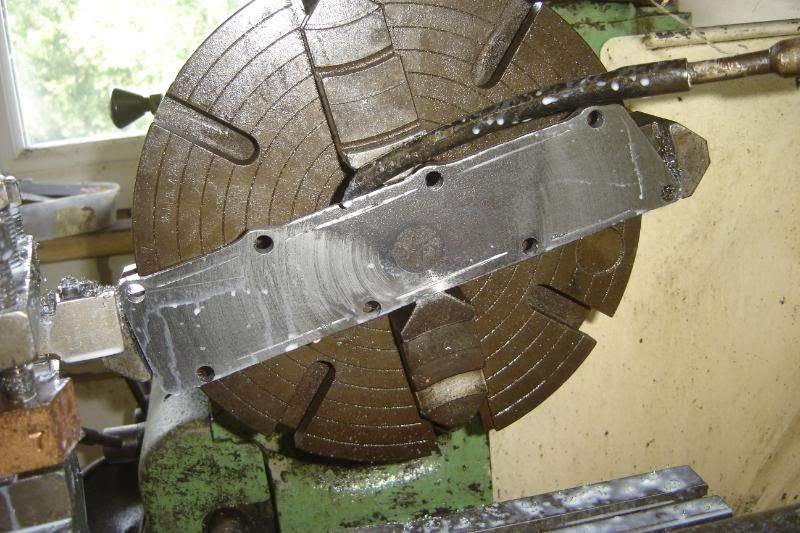
The bottom wasn't flat so its on the lathe being skimmed
I'll ask at a local garage if they've got a vauxhall v6 timing tool, I think I'll be at that stage on monday (fingers crossed)
More to come
got ages now in which to make some serious progress. Starting with the heads, they're back together now, valves ground, ports ported (it was all guess work so ime will tell how badly I've done that) and both surfaces flatted and prepared for reassembly.
Before any of that goes back together the problem aof what to do about the oil cooler needs solving. I'm fitting an air to air oil cooler and doing away with the water to oil one.
I saw three options, first just leave it in there with no oil in and use the cooler itself to block up the holes, thing is they're known to leak so I thought best not. Next option would be to use some big bolts and washers to block up the holes left where the oil cooler used to bolt through, but with lots of heading and cooling I was worried they might work lose and leak especially as they'd probably have a short grip length. So the most difficult and the one I've chosen is to make a blanking plate. I chose steel cos it will expand in much the same way as the block as apposed to ali which will expand a different amount being a very different metal. That and I had some steel lying around
Here it is nearly finished sat next to the original
The bottom wasn't flat so its on the lathe being skimmed
I'll ask at a local garage if they've got a vauxhall v6 timing tool, I think I'll be at that stage on monday (fingers crossed)
More to come
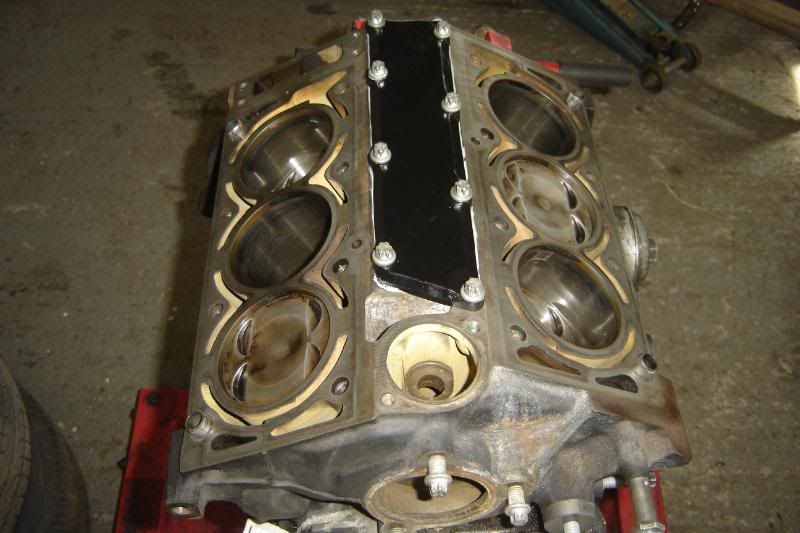
Got the cooler plate on and the heads on, but went to see an old friend to borrow the head bolt tool socket and got talking for ages, which was nice, then later top gear was on and couldn't be missed (another cracking episode).
So the bolts still haven't been torqued down yet.
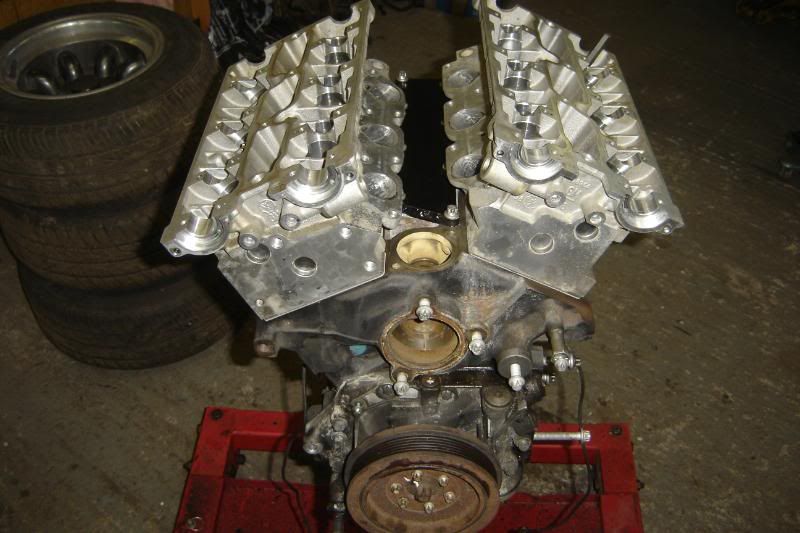
I've got to wait intil I've got the new thermostat before I can put the timing cover and belt on, as its tucked away behind the timing belt covers
And I've got to get the boring oil burner ready for MOT this week
more to come
So the bolts still haven't been torqued down yet.
I've got to wait intil I've got the new thermostat before I can put the timing cover and belt on, as its tucked away behind the timing belt covers
And I've got to get the boring oil burner ready for MOT this week
more to come
I managed to forget to work on my boring car today
Got atermostat for next to nothing today, so I was able to carry on some more
The latest hold up is the camshaft pulley bolts, apparently they need renewing, after a quick look they do appear to have a neck in them so I guess they're stretch bolts.
There is lettle avoiding it now, I must get on with the boring car tomorrow so...
More to come later in the week
Gassing Station | Scimitar | Top of Page | What's New | My Stuff