Project Scimitar MV6
Discussion


I'm officially back in love with this project. The hubs being drilled wrong a second time resulted in slow work on the car but yesterday and today I've been working on the engine and there is nothing I love more about my hobby than working on engines 
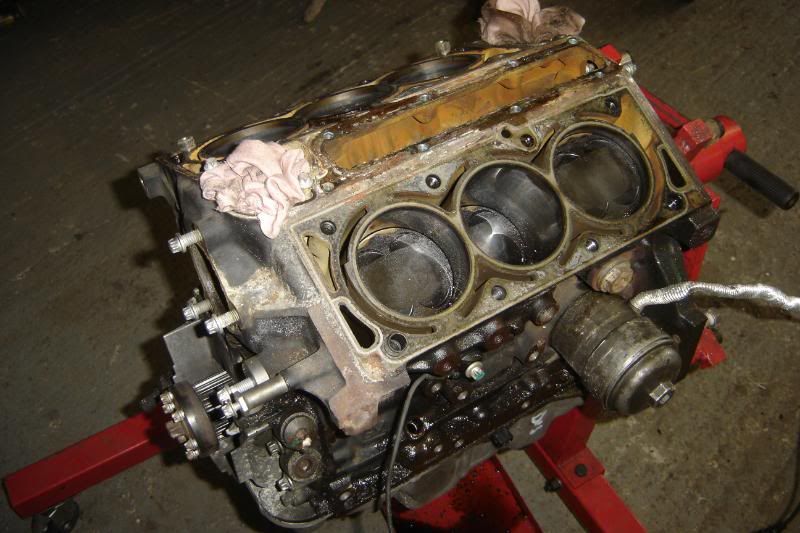
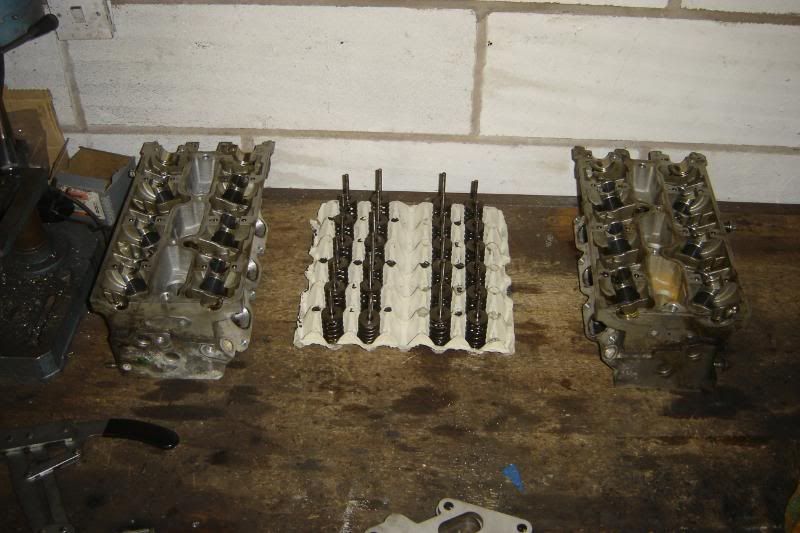
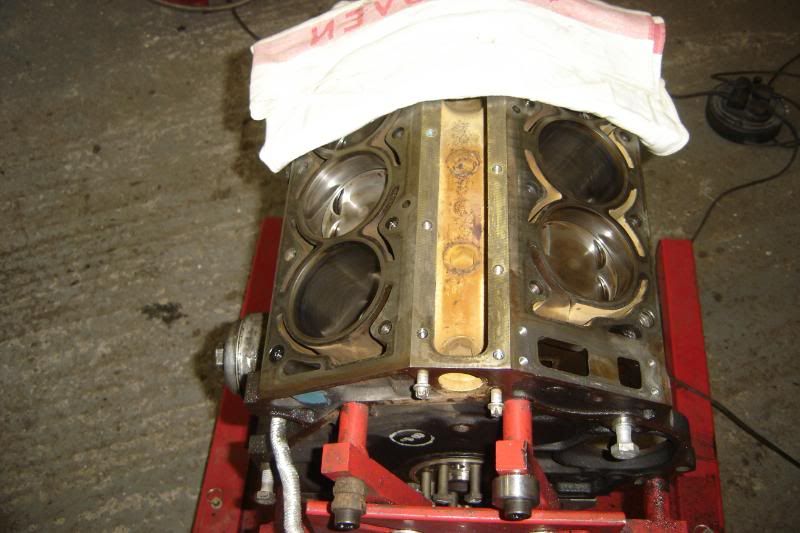
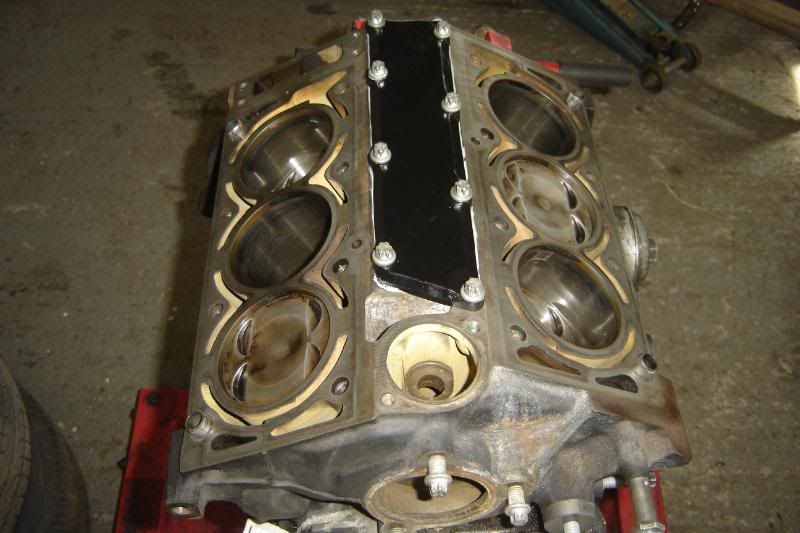
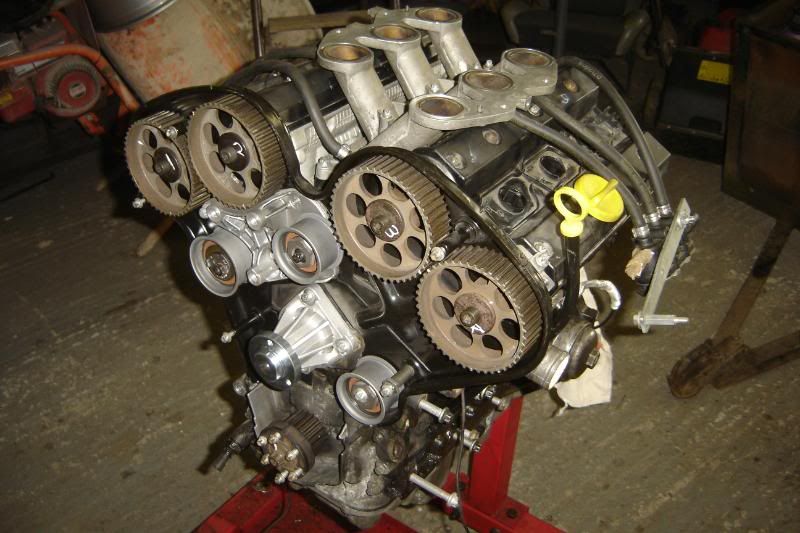
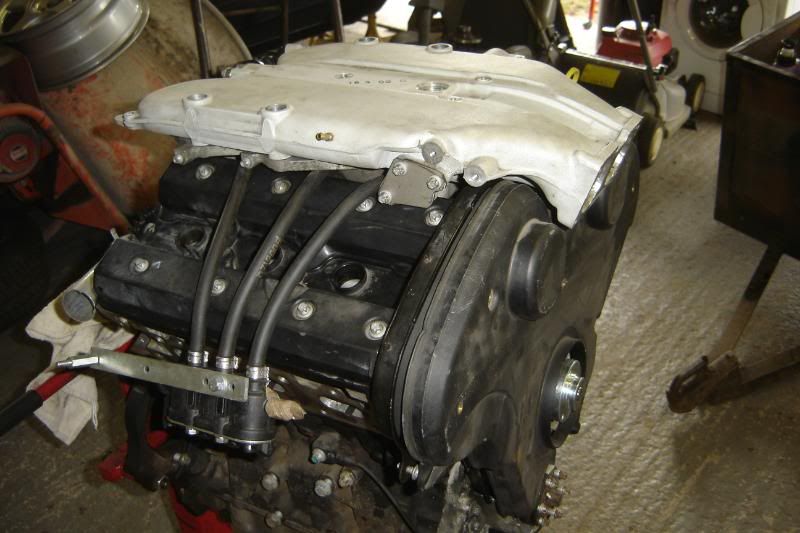
Got the other head off and cleaned the deck face a little, there's no corrosion anywhere on the face, and the waterways are stained rather than pitted There are no scrathes on any of the bores After a struggle I got both the oil cooler hoses out of the block ready to go to the air to oil cooler.
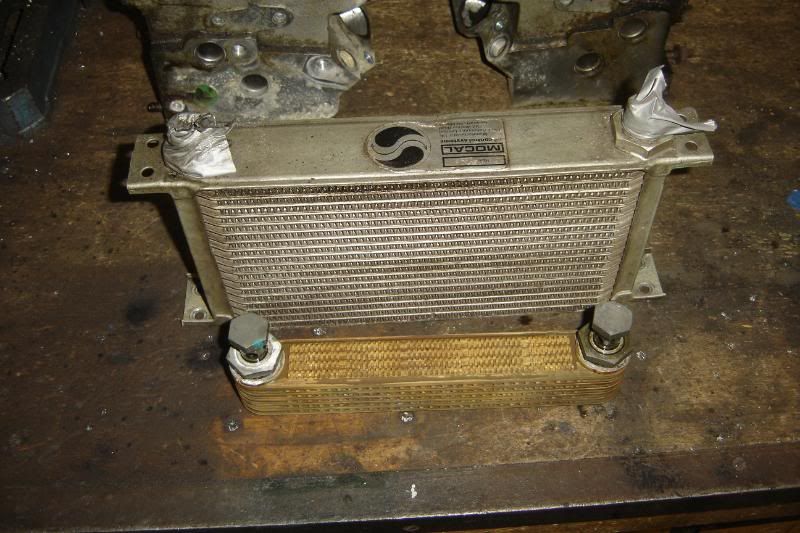
The new cooler is a LOT bigger than the old one, I realise that water has a much higher specific heat capacity than air but there is a huge amount more surface area on the mocal jobby and the air will be at a lot lower temperature than the coolant in the engine so this cooler will be seriously effective. I'm definately going to fit an oil thermostat so its not cooling cold oil. IMHO fitting an oil cooler with no stat is a really bad idea.
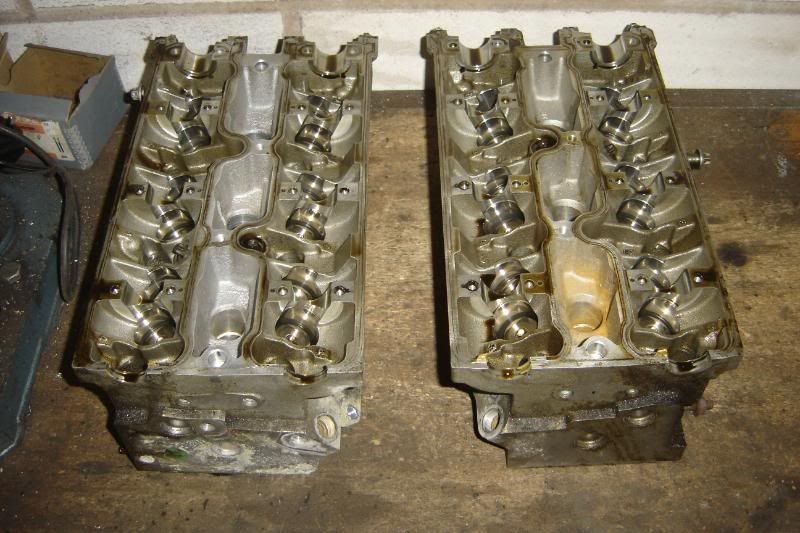
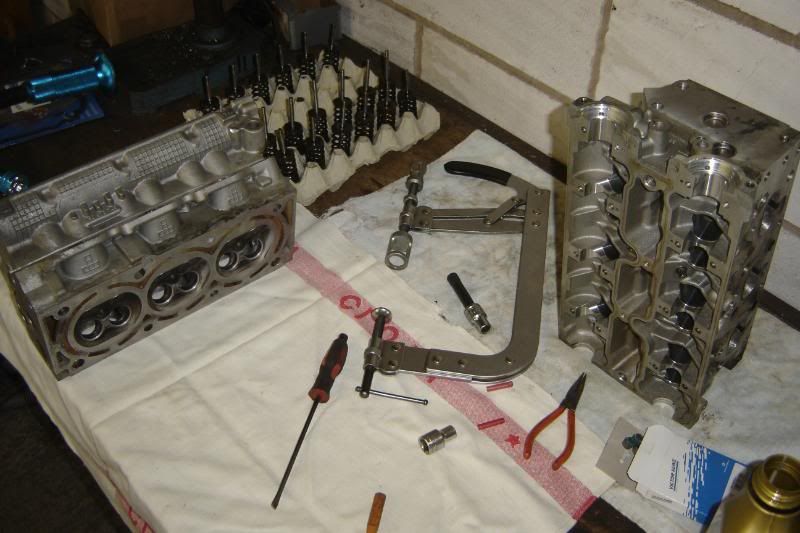
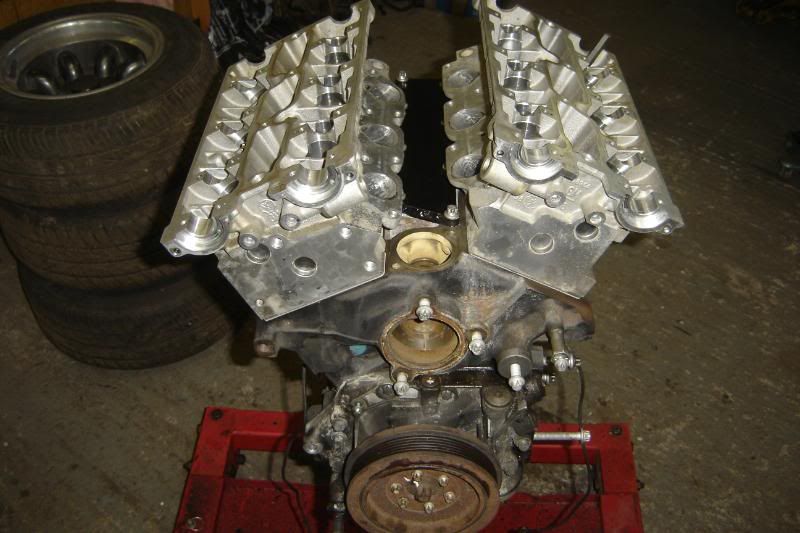
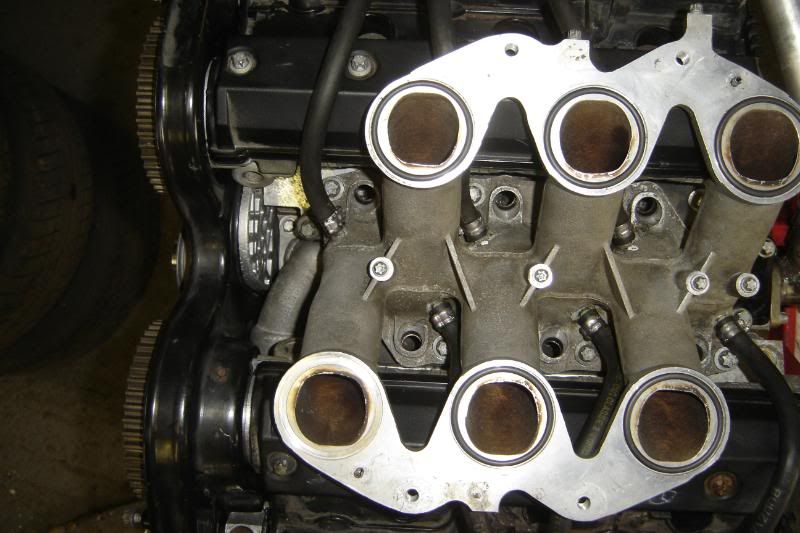
Got one valve out (I still need 24 bags with labels) and was really pleasently surprised with how little play there is side to side, the valve guides are in great shape In terms of porting, its pretty sweet, there is very little I can do as far as I can see, just smooth casting marks and open the port out a little furthest from the valve to go wtih the work thats been done on the inlet.
Japfest was smaller than I was expecting, but my friends car got so much attention he was loving it!
Annoyingly I'll not be able to do much more till next weekend so my new found enthusiasm will have to wait till then
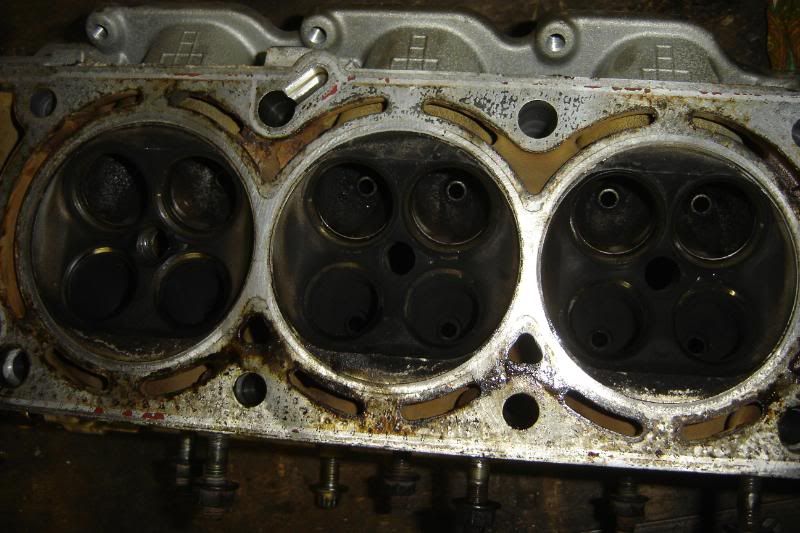
Got the other head off and cleaned the deck face a little, there's no corrosion anywhere on the face, and the waterways are stained rather than pitted
There are no scrathes on any of the bores After a struggle I got both the oil cooler hoses out of the block ready to go to the air to oil cooler. The new cooler is a LOT bigger than the old one, I realise that water has a much higher specific heat capacity than air but there is a huge amount more surface area on the mocal jobby and the air will be at a lot lower temperature than the coolant in the engine so this cooler will be seriously effective. I'm definately going to fit an oil thermostat so its not cooling cold oil. IMHO fitting an oil cooler with no stat is a really bad idea.
Got one valve out (I still need 24 bags with labels) and was really pleasently surprised with how little play there is side to side, the valve guides are in great shape
In terms of porting, its pretty sweet, there is very little I can do as far as I can see, just smooth casting marks and open the port out a little furthest from the valve to go wtih the work thats been done on the inlet. Japfest was smaller than I was expecting, but my friends car got so much attention he was loving it!
Annoyingly I'll not be able to do much more till next weekend so my new found enthusiasm will have to wait till then
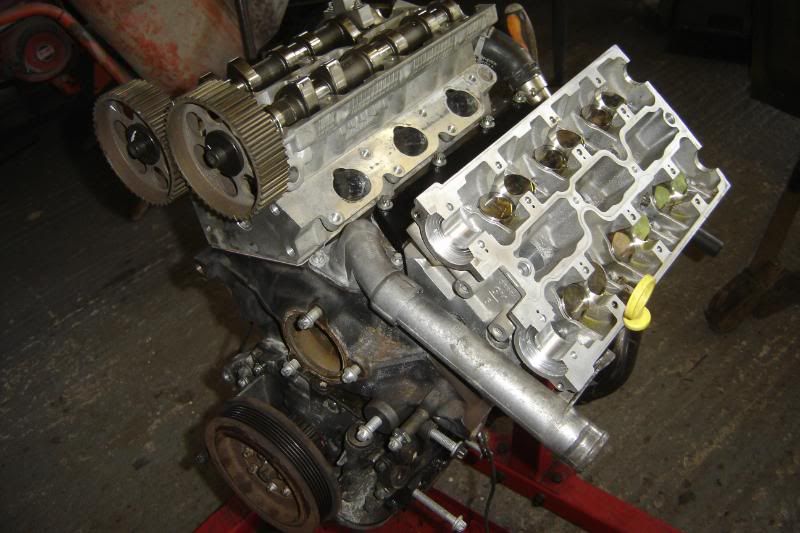
Got all the valves out this evening in a couple of free hours I found myself with
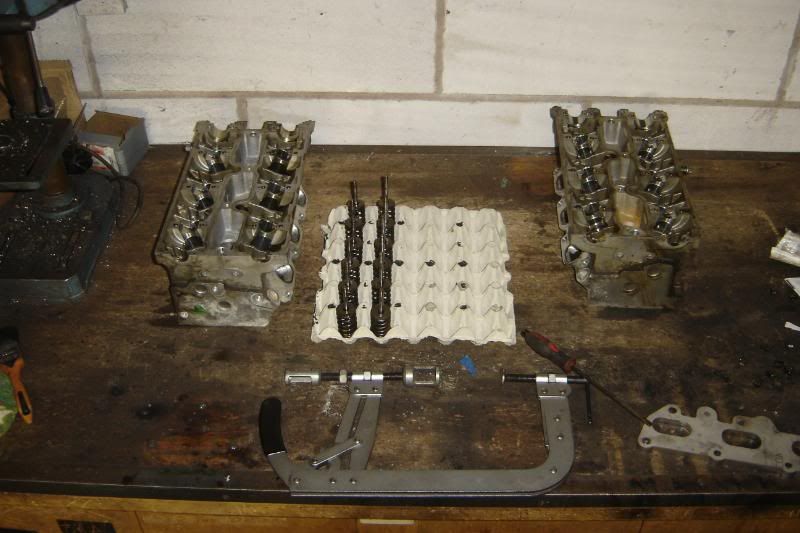
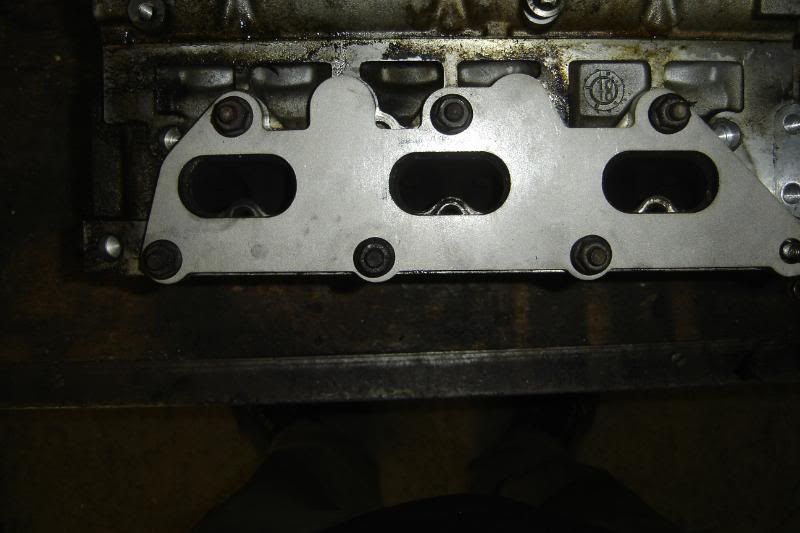
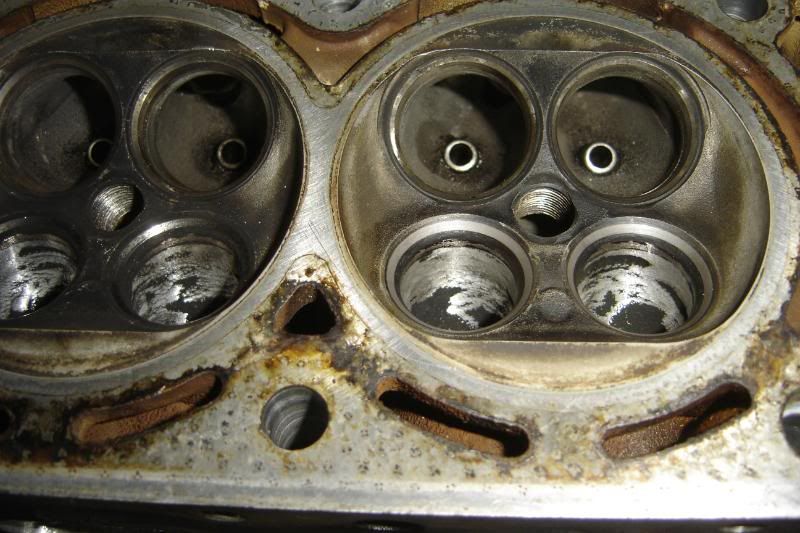
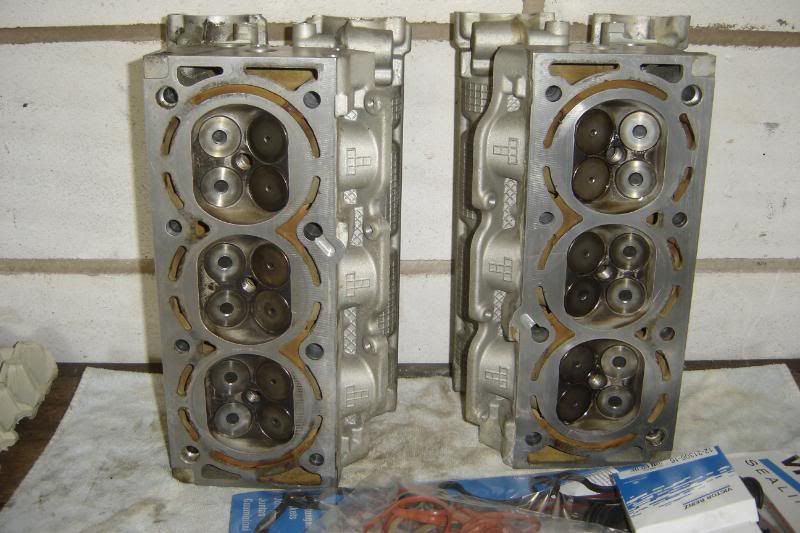
Its hard to see in the photo but there's lots of exhaust port wall to be removed to match up with the manifold flange (even taking into account the thickness of the pipe being welded to the flange)
More to come at the weekend hopefully or even tomorrow night?
Its hard to see in the photo but there's lots of exhaust port wall to be removed to match up with the manifold flange (even taking into account the thickness of the pipe being welded to the flange)
More to come at the weekend hopefully or even tomorrow night?
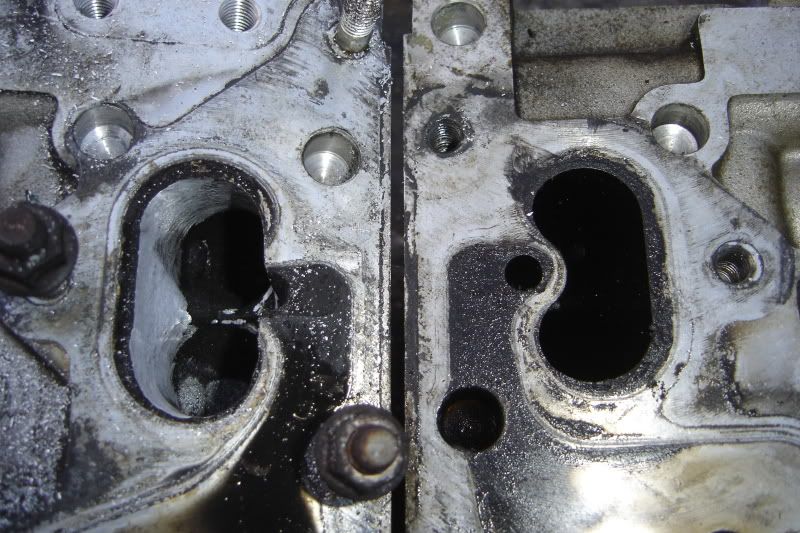
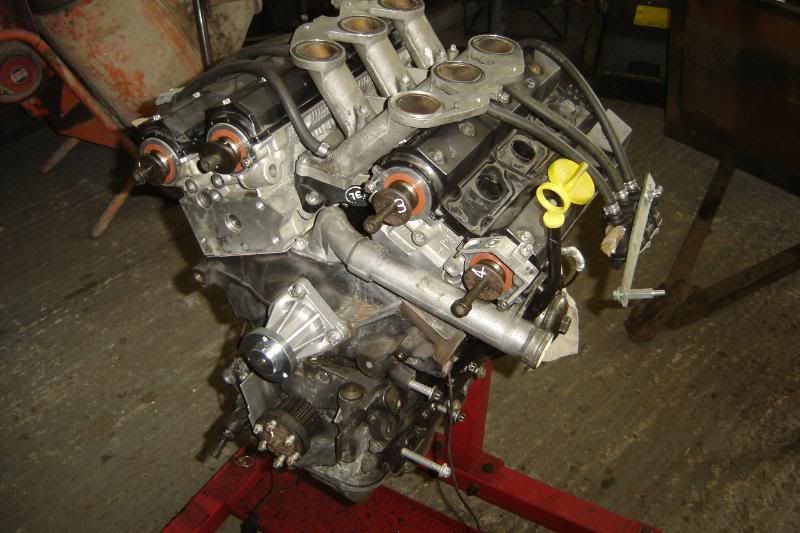
Made loads of prgress this evening but try as I might it just wouldn't photograph properly, the only decent photo is that of the exhasut ports before and after and even that doesn't really show how much they've been opened out.
Anyway, the inlets have been slightly enlarged and a just a bit of casting smothing done nearer the valve seats, its a compromise like every I guess, If I open the ports right out the max power (at high rpm obviously) will be great but with the reduced gas speed at lower rpm I'll loose midrange torque, thats my understanding anyway. So I've done a bit!
The exhausts are taking ages cos of the big stupid lump of air injection casting, but hopefully they whould make a real diffierence, they're considerably bigger than they were
I can't wait till this is on the rolling road being mapped
More to come at the weekend hopefully,
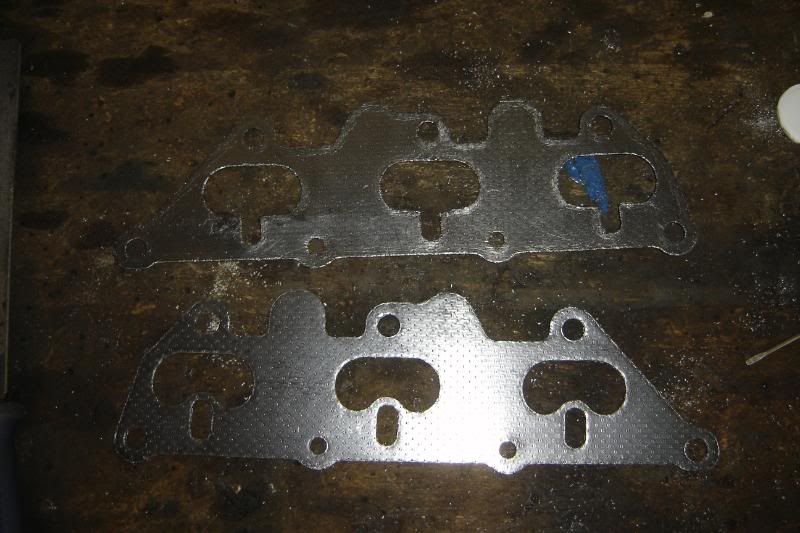
Doing more today, I can't believe I've got all this time, I love it. Cut the exhaust gaskets to match (getting a bit ahead of myself)
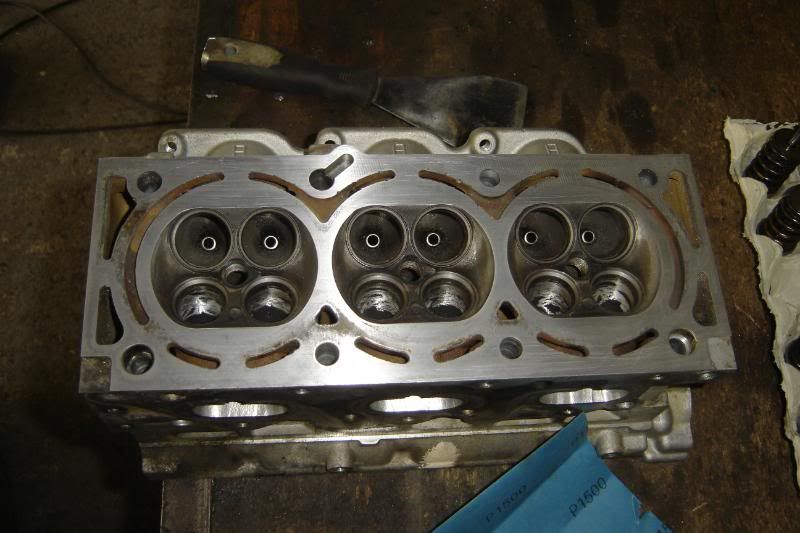
And I've been tidying up the heads, sanding the ports to smooth things out a bit, this got very boring and painful relly quickly so I only did the inlets. 8 of the valves are reground so far, I got inpatient after the first one and got the drill out
There is still lots of old gasket on the heads but the surfaces are completely free from corrosion and pitting so I think I'll just clean them up and reassemble the engine, no skimming, I've got to stop spending money tis going crazy!
So I could have it looking like an engine again soon
More to come
Had another good go at it this afternoon.
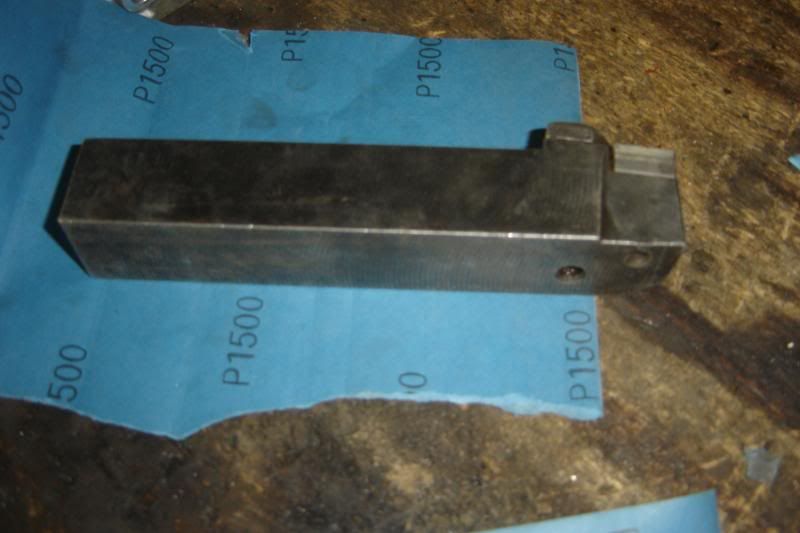
Using the bottom of a large lathe tool and sheets of 1500 grit wet and dry, the heads and deck surfaces were cleaned and checked for flatness. The deck is perfect, one head is perfect and one is getting near tollerance, but still ok (and the head gaskets were fine before stripping). I got through 4 litres of petrol in the parafin gun cleaning the heads and making sure the oil galleries are perfectly clean, I think I get a little carried away.
I'm so pleased with the finish
I couldn't help myself, I had to take the sump off again and make sure no dust had got in, I cleaned and blew through all the drain back channels, cleand the deck face and down all the water jackets with the blow gun, and did the grease around the bores trick to scoop out all the debris.
And finally got round to putting the valves back in, well 6 so far!
More to come
An update, then, summer holiday has started got ages now in which to make some serious progress.
Starting with the heads, they're back together now, valves ground, ports ported (it was all guess work so ime will tell how badly I've done that) and both surfaces flatted and prepared for reassembly.
Before any of that goes back together the problem aof what to do about the oil cooler needs solving. I'm fitting an air to air oil cooler and doing away with the water to oil one.
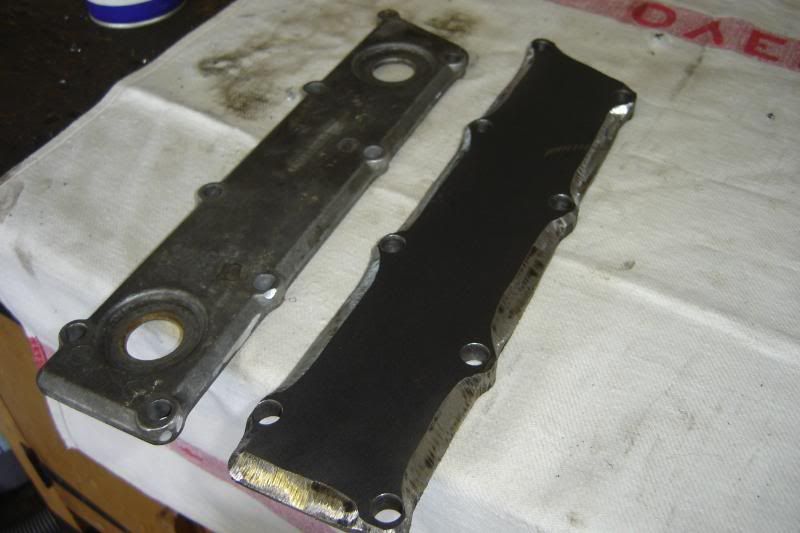
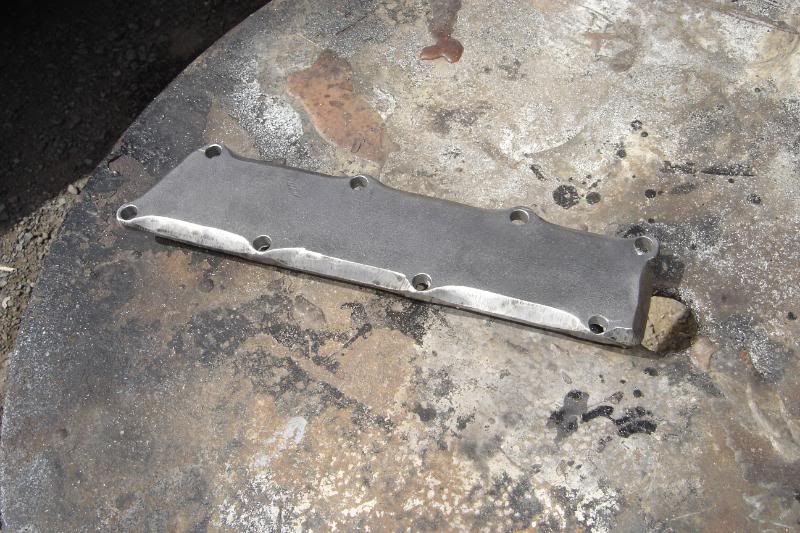
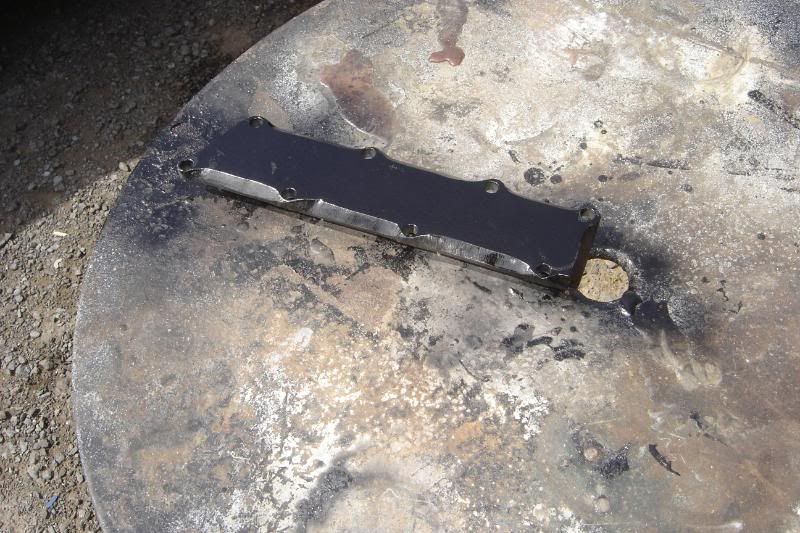
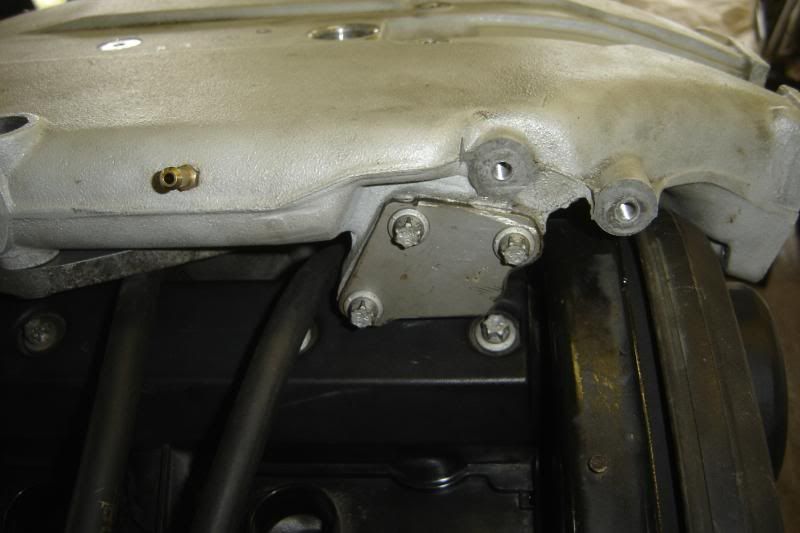
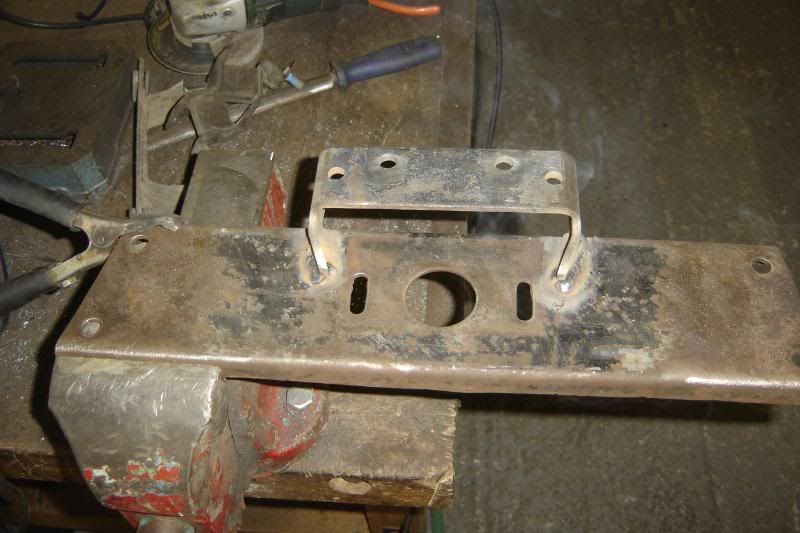
I saw three options, first just leave it in there with no oil in and use the cooler itself to block up the holes, thing is they're known to leak so I thought best not. Next option would be to use some big bolts and washers to block up the holes left where the oil cooler used to bolt through, but with lots of heading and cooling I was worried they might work lose and leak especially as they'd probably have a short grip length. So the most difficult and the one I've chosen is to make a blanking plate. I chose steel cos it will expand in much the same way as the block as apposed to ali which will expand a different amount being a very different metal. That and I had some steel lying around
Here it is nearly finished sat next to the original
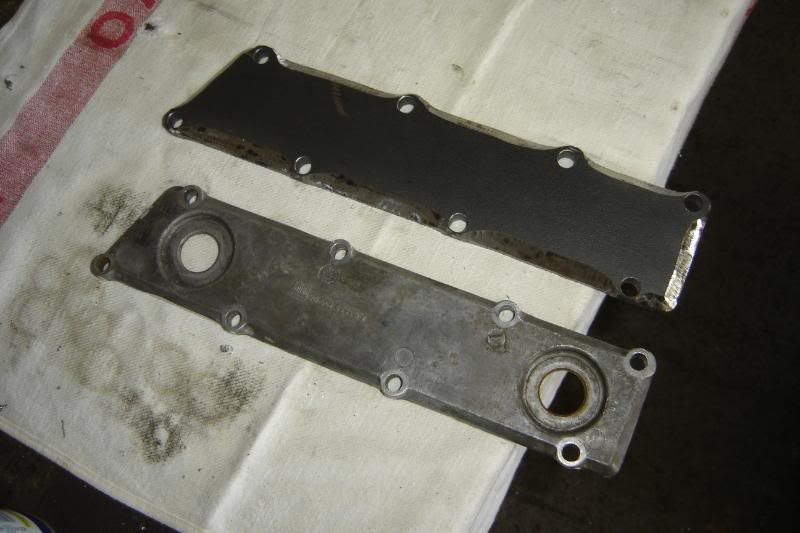
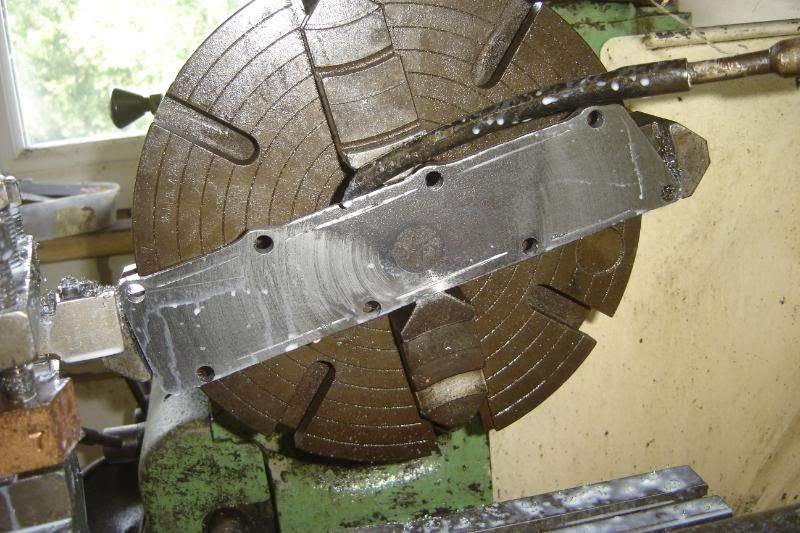
The bottom wasn't flat so its on the lathe being skimmed
I'll ask at a local garage if they've got a vauxhall v6 timing tool, I think I'll be at that stage on monday (fingers crossed)
More to come
got ages now in which to make some serious progress. Starting with the heads, they're back together now, valves ground, ports ported (it was all guess work so ime will tell how badly I've done that) and both surfaces flatted and prepared for reassembly.
Before any of that goes back together the problem aof what to do about the oil cooler needs solving. I'm fitting an air to air oil cooler and doing away with the water to oil one.
I saw three options, first just leave it in there with no oil in and use the cooler itself to block up the holes, thing is they're known to leak so I thought best not. Next option would be to use some big bolts and washers to block up the holes left where the oil cooler used to bolt through, but with lots of heading and cooling I was worried they might work lose and leak especially as they'd probably have a short grip length. So the most difficult and the one I've chosen is to make a blanking plate. I chose steel cos it will expand in much the same way as the block as apposed to ali which will expand a different amount being a very different metal. That and I had some steel lying around
Here it is nearly finished sat next to the original
The bottom wasn't flat so its on the lathe being skimmed
I'll ask at a local garage if they've got a vauxhall v6 timing tool, I think I'll be at that stage on monday (fingers crossed)
More to come
Got the cooler plate on and the heads on, but went to see an old friend to borrow the head bolt tool socket and got talking for ages, which was nice, then later top gear was on and couldn't be missed (another cracking episode).
So the bolts still haven't been torqued down yet.
I've got to wait intil I've got the new thermostat before I can put the timing cover and belt on, as its tucked away behind the timing belt covers
And I've got to get the boring oil burner ready for MOT this week
more to come
So the bolts still haven't been torqued down yet.
I've got to wait intil I've got the new thermostat before I can put the timing cover and belt on, as its tucked away behind the timing belt covers
And I've got to get the boring oil burner ready for MOT this week
more to come
I managed to forget to work on my boring car today
Got atermostat for next to nothing today, so I was able to carry on some more
The latest hold up is the camshaft pulley bolts, apparently they need renewing, after a quick look they do appear to have a neck in them so I guess they're stretch bolts.
There is lettle avoiding it now, I must get on with the boring car tomorrow so...
More to come later in the week
Thanks pacman! its good to know someone is watching.
Got the dirty diesel done today, I hate HATE HATE doing bodywork on metal cars! the sill looks passable now though and the bushes are all good
I moped about for a couple of hours after that looking for bolts for the engine, eventually found them and put a few bits together on the back of the engine.
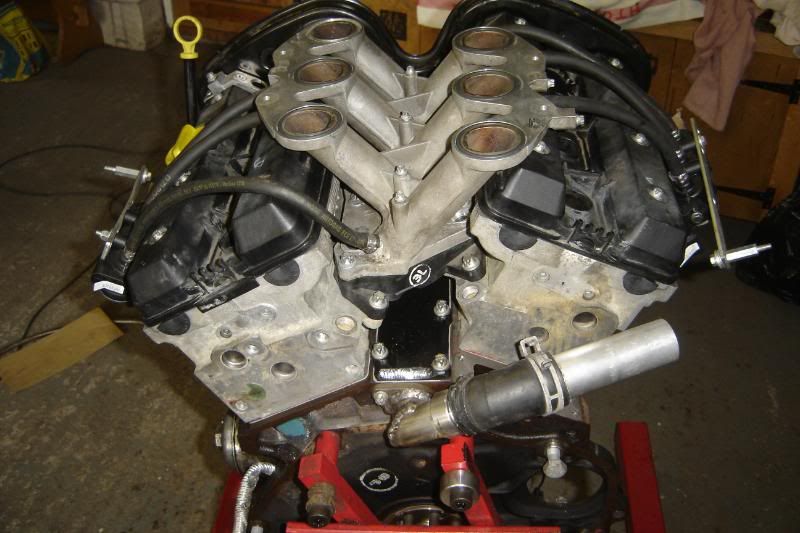
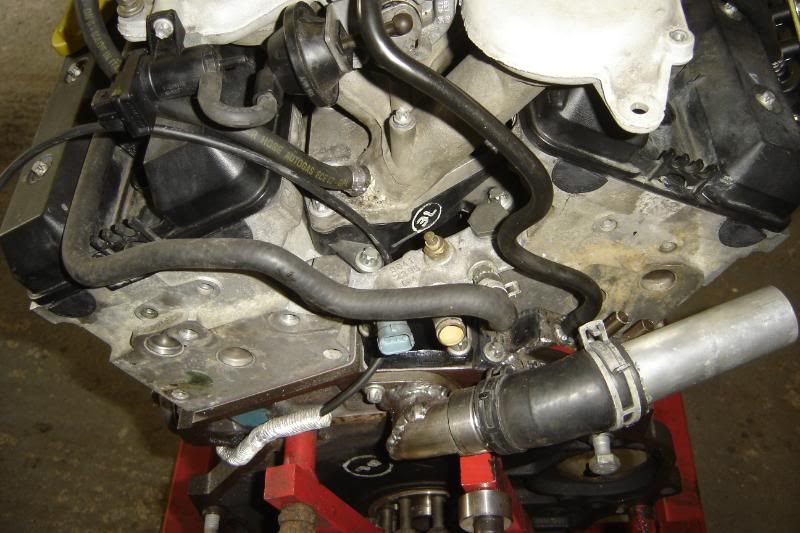
Made a little blanking plate for where the EGR would have gone into the inlet manifold
And put the engine breather and water crossover pipe thingy on
I did spend a lot of time with the wiring loom figuring out what goes where.
Hopefully I'll get the cam pulley (stretch) bolts tomorrow and start putting lots back together
Some advice please,
I've been looking into injector cleaning and it seems to be a good idea, especially if there is an inbalance, the engine will never make good power if one is injecting more that the others but.... £14 per injector OMG has anyone done this and found a difference?
More to come
Got the dirty diesel done today, I hate HATE HATE doing bodywork on metal cars! the sill looks passable now though and the bushes are all good
I moped about for a couple of hours after that looking for bolts for the engine, eventually found them and put a few bits together on the back of the engine.
Made a little blanking plate for where the EGR would have gone into the inlet manifold
And put the engine breather and water crossover pipe thingy on
I did spend a lot of time with the wiring loom figuring out what goes where.
Hopefully I'll get the cam pulley (stretch) bolts tomorrow and start putting lots back together
Some advice please,
I've been looking into injector cleaning and it seems to be a good idea, especially if there is an inbalance, the engine will never make good power if one is injecting more that the others but.... £14 per injector OMG has anyone done this and found a difference?
More to come
A little update,
someone on the Scimitar forum had the genius idea of asking a jewellers to put the injectors in their ultaasonic tank hopefully that would be a lot cheaper
After a massive amount of looking into the clutch options, I've found that (hopefully) the vectra B 2.2 petrol clutch will fit although its 228mm as apposed to 238 of the original. Found a used one for £20 on the bay so I'll put that in with the original slave cylinder as a tester. If its good I'll fit a new one when the money allows along with a new slave.
I've also found some spacers for the flywheel bolts as the dual mass jobby is so much thicker than the lightweight one so the bolts bottom out in the crank. The spacers should arrive next week, so I'll get on and fit the flywheel, clutch and gearbox next week.
For now I've been looking and how all the hoses and stuff with fit around the engine. Next I'll start making calls to canems (the ECU folk) and make up my new reduced engien loom and bulkhead multi socket from the old motronic ECU plug.
Sorry there's no photo's for the first time ever (it won't happen again )
More to come.
someone on the Scimitar forum had the genius idea of asking a jewellers to put the injectors in their ultaasonic tank hopefully that would be a lot cheaper
After a massive amount of looking into the clutch options, I've found that (hopefully) the vectra B 2.2 petrol clutch will fit although its 228mm as apposed to 238 of the original. Found a used one for £20 on the bay so I'll put that in with the original slave cylinder as a tester. If its good I'll fit a new one when the money allows along with a new slave.
I've also found some spacers for the flywheel bolts as the dual mass jobby is so much thicker than the lightweight one so the bolts bottom out in the crank. The spacers should arrive next week, so I'll get on and fit the flywheel, clutch and gearbox next week.
For now I've been looking and how all the hoses and stuff with fit around the engine. Next I'll start making calls to canems (the ECU folk) and make up my new reduced engien loom and bulkhead multi socket from the old motronic ECU plug.
Sorry there's no photo's for the first time ever (it won't happen again
)More to come.
Well the boring car another year of MOT so I can hopefully ignore that now.
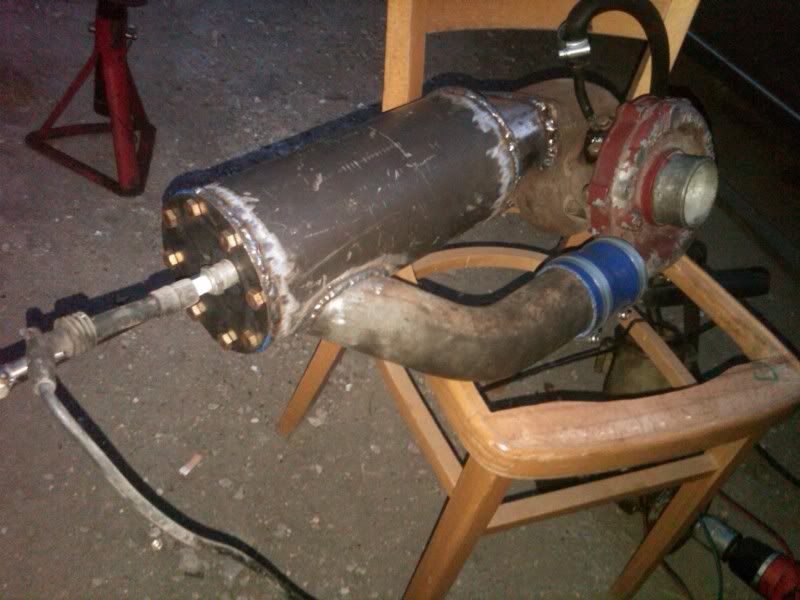
I had an amazing weekend, I went to see an old uni friend and we made a jet engine, it was awesome we got it running last night, it scared the s*** out of me I'll put a video link up when I have one.
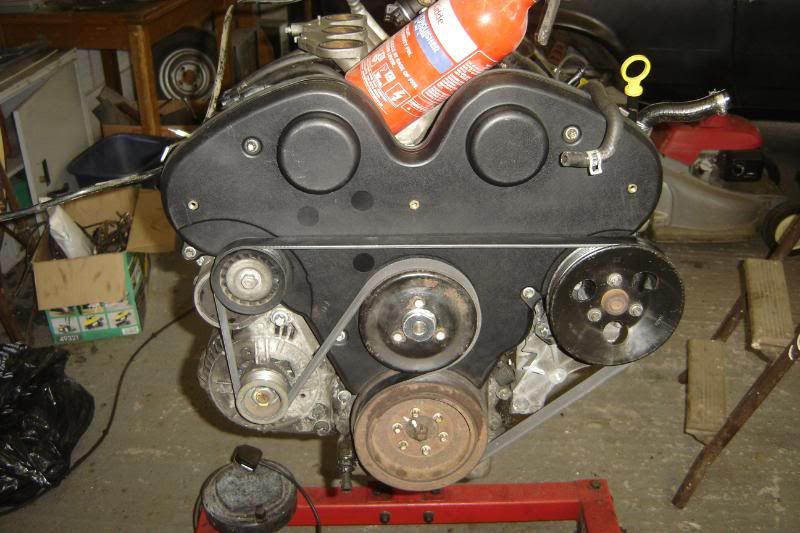
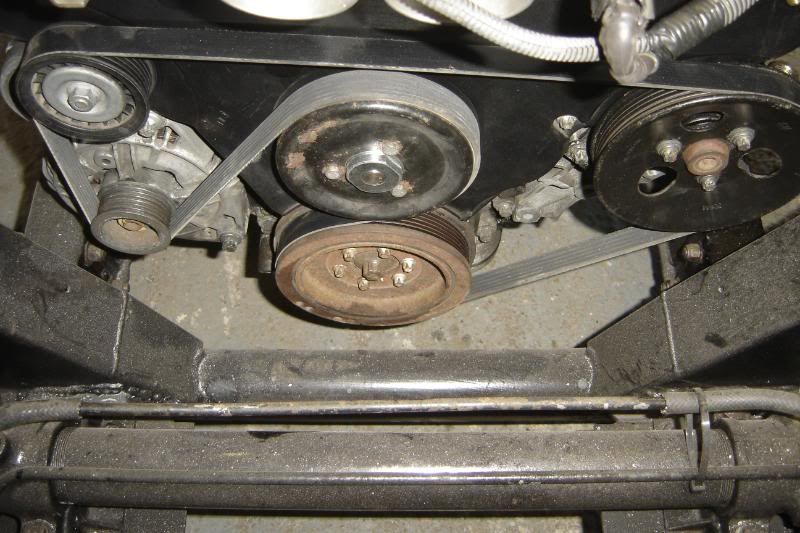
The non AC belt arrived in the post and fits a treat
Having looked at a few videos of injector testing, I rigged up all the gear and tested mine, with some measuring cylinders borrowed from work


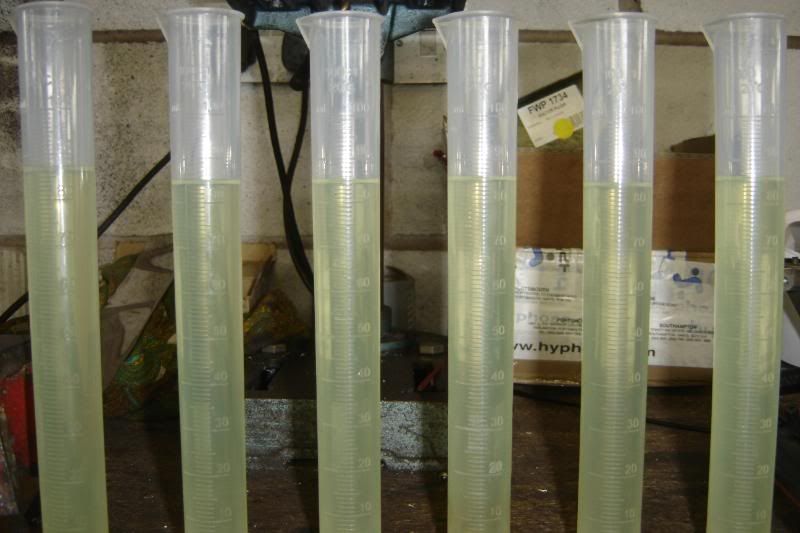
Initially I ot a 2.5% immballance, but then I noticed that one of he cylinders was bend, (I think it got too close a Bunsen burner). So I filled them ahlf way ish and ran the test a few times, it looks like there is a about a 1.2% imballance. From reading some forums, it seems when folks send them off for cleaning injectors are often 3-6% off and come back about 0.5 - 1% off, so I'm happy mine will be fine as they are.
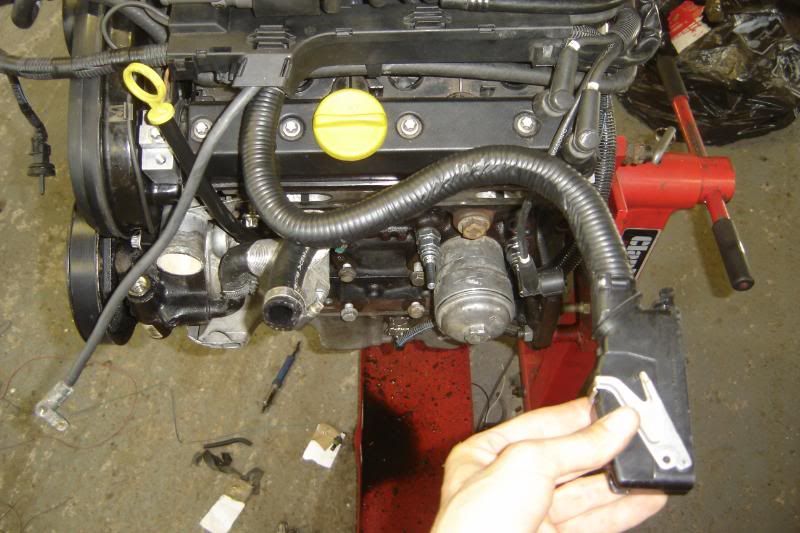
I got loads of spares and extras off an omega 2.5 in a scrap yard this weekend and some other cars. Here are the new breather tubes to suit the little breather thingy I made at the back of the engine.
Got the Timing tools in the post taday so I'll got finish putting hte engine together now
More to come
so I can hopefully ignore that now. I had an amazing weekend, I went to see an old uni friend and we made a jet engine, it was awesome we got it running last night, it scared the s*** out of me
I'll put a video link up when I have one. The non AC belt arrived in the post and fits a treat
Having looked at a few videos of injector testing, I rigged up all the gear and tested mine, with some measuring cylinders borrowed from work
Initially I ot a 2.5% immballance, but then I noticed that one of he cylinders was bend, (I think it got too close a Bunsen burner). So I filled them ahlf way ish and ran the test a few times, it looks like there is a about a 1.2% imballance. From reading some forums, it seems when folks send them off for cleaning injectors are often 3-6% off and come back about 0.5 - 1% off, so I'm happy mine will be fine as they are.
I got loads of spares and extras off an omega 2.5 in a scrap yard this weekend and some other cars. Here are the new breather tubes to suit the little breather thingy I made at the back of the engine.
Got the Timing tools in the post taday so I'll got finish putting hte engine together now
More to come
Thanks Warren, you can get a really nice one for a couple of grand you know, they really are stupidly cheap at the moment compared to other classics of their age.
Update.
I spent forever getting the cam timing right this afternoon, then I went to a friends house and borrowed a better spanner and the job was done
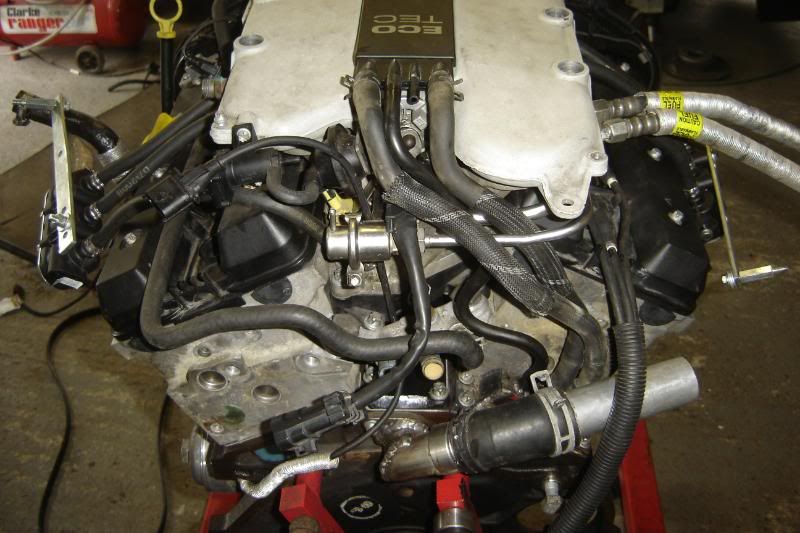
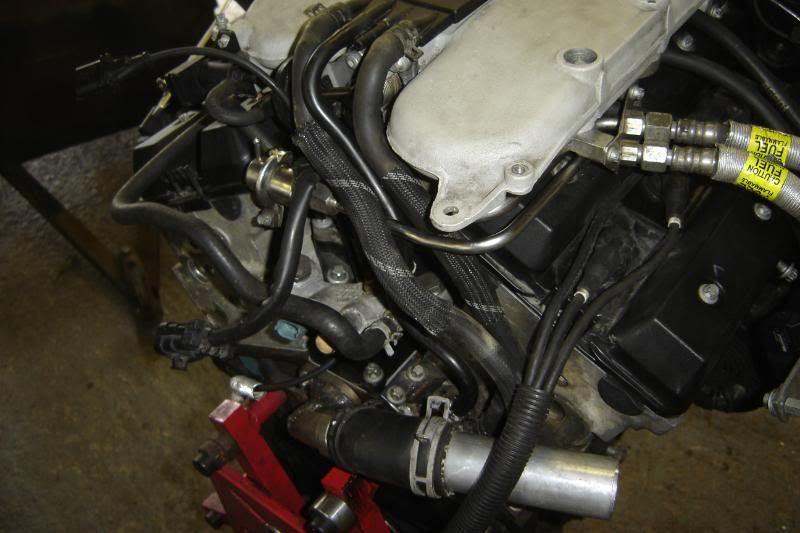
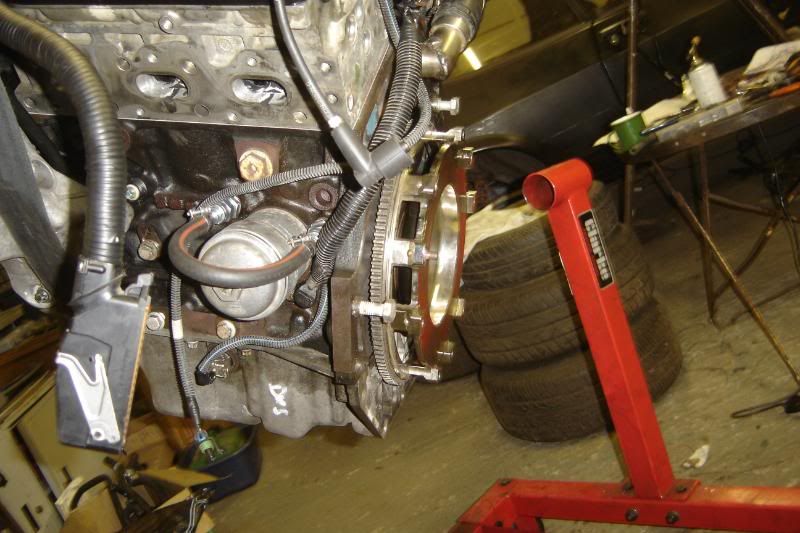
Then I looked at fitting all the hoses and stuff on the back of the engine, its getting really close to going in now but I'm waiting on another bl***y hub before he car is mobile again to move under the hoist. I'm really pleased with how well it all hugs the back of the engine, I'm hoping with the differernt sump and the modifications at the back that the bulkhead won't need too much fettling, time will tell. A photo then.

The clutch arrived in the post today, so I'm hoping to have an engine and gearbox all ready to go in by the end of tomorrow (then wait weeks for the hub). Then I'll get bock onto the wiring, I've had a crazy plan with that, watch this space.
More to come
Update.
I spent forever getting the cam timing right this afternoon, then I went to a friends house and borrowed a better spanner and the job was done
Then I looked at fitting all the hoses and stuff on the back of the engine, its getting really close to going in now
but I'm waiting on another bl***y hub before he car is mobile again to move under the hoist. I'm really pleased with how well it all hugs the back of the engine, I'm hoping with the differernt sump and the modifications at the back that the bulkhead won't need too much fettling, time will tell. A photo then. The clutch arrived in the post today, so I'm hoping to have an engine and gearbox all ready to go in by the end of tomorrow (then wait weeks for the hub). Then I'll get bock onto the wiring, I've had a crazy plan with that, watch this space.
More to come
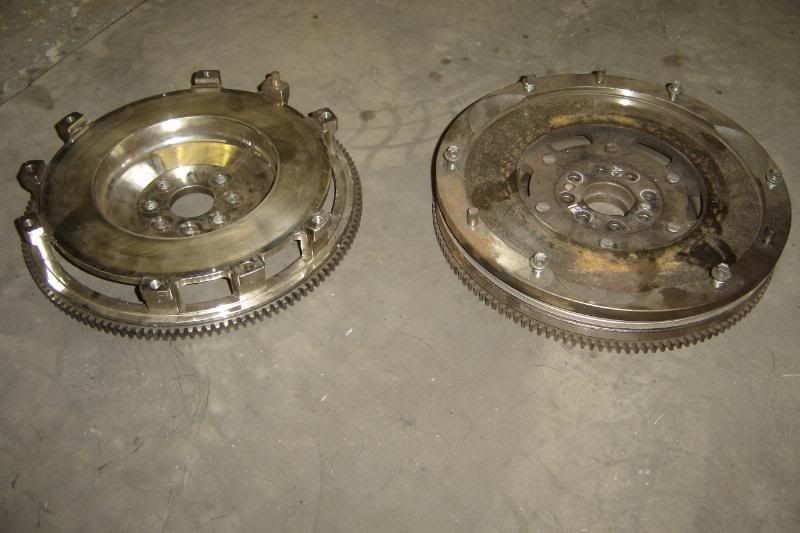
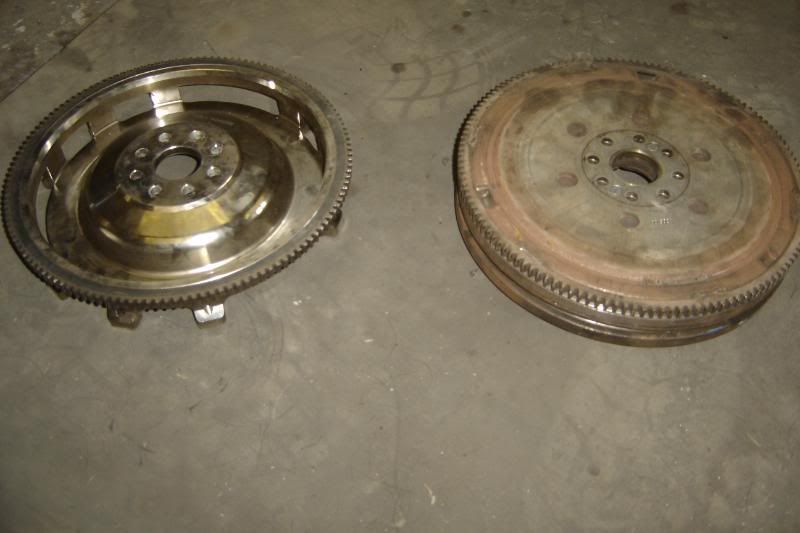
The engine did have a 16kg dual mass flywheel on it. I did look briefly into alternative OEM flywheels, but when a full on lightweight version came up on ebay I couldn't help but buy it, and it shares the exact overall dimensions with the dual mass original but only weighs 5.6kg
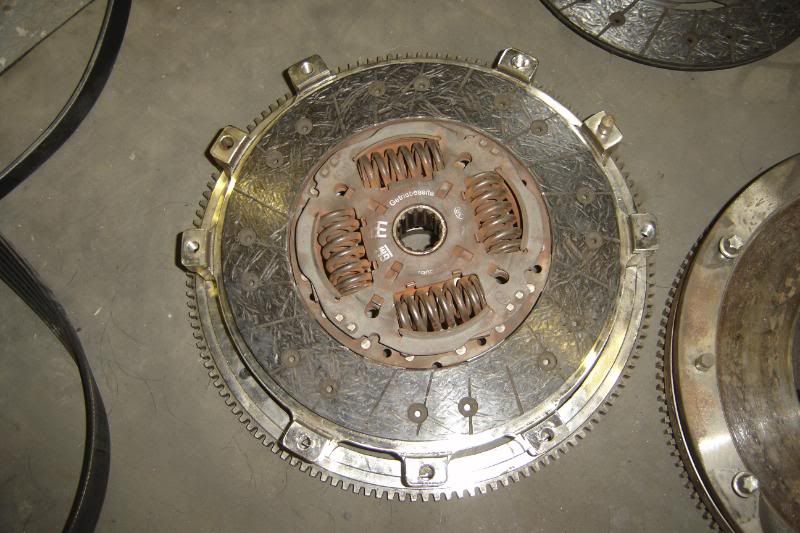
The only difficulty was finding a clutch with springs cos the old dual mass one didn't need springs in the clutch. I've found one from a 2.2 petrol which is nearly the same but with springs, it is a bit of an experiment though, its 228mm dia where the omega one is 238mm, so I'll pop it in and see if it slips.
You can see the different flywheels here
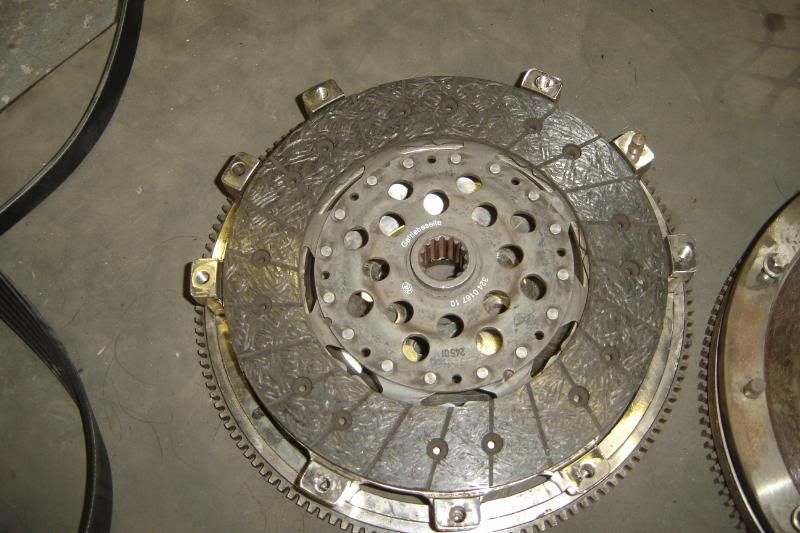
And this is the original clutch
and here is the 2.2 228mm clutch I'll be trying
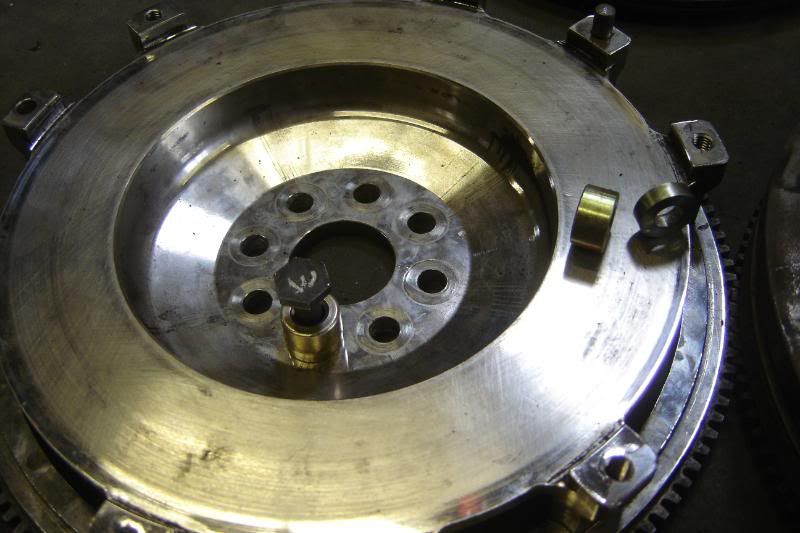
The light flywheel is much thinner where the 8 bolts go through so I've had to make up 16mm spacers to keep the same bolt grip length and thread engagement. but I could only find 11mm spacers so I bought a load and turned some of them down on the lathe you can see in these photos (one with flash one without)

The only difficulty was finding a clutch with springs cos the old dual mass one didn't need springs in the clutch. I've found one from a 2.2 petrol which is nearly the same but with springs, it is a bit of an experiment though, its 228mm dia where the omega one is 238mm, so I'll pop it in and see if it slips.
You can see the different flywheels here
And this is the original clutch
and here is the 2.2 228mm clutch I'll be trying
The light flywheel is much thinner where the 8 bolts go through so I've had to make up 16mm spacers to keep the same bolt grip length and thread engagement. but I could only find 11mm spacers so I bought a load and turned some of them down on the lathe you can see in these photos (one with flash one without)
An Update!
Been away visiting family for a three day weekend so did nothing over the weekend on the car. Started again today.
I did the obvious thing and called the company that supplied and have fitted many of these flywheels, they gave me a part number, I called vauxhall and it turns out to be a 25mm bolt giving 9mm grip length and 16mm thread engagement that was easy!
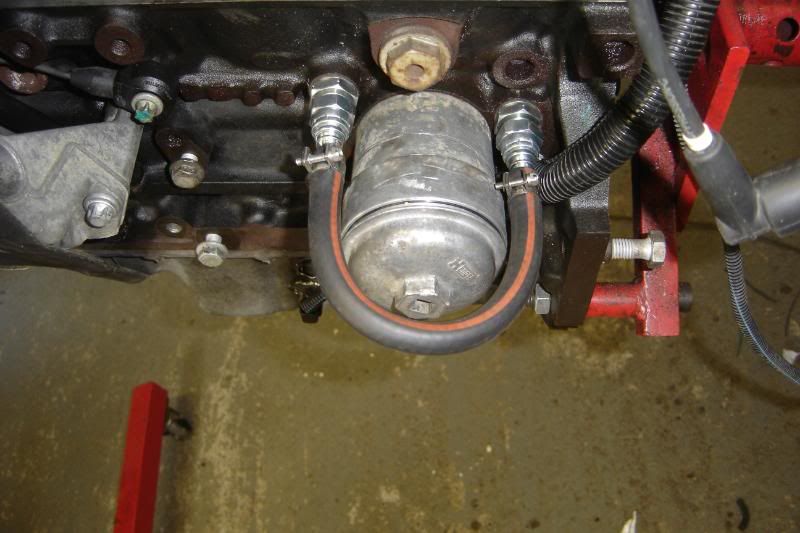
I got some fittings to take hoses off to the oil stat and cooler

but for now (and in an effort to get it running this sommer) I've simply put one hose accross to the other.
As far as the engine is concerned the wiring is all finished, it took quite a few phone calls to the ECU people (Canems) who were very helpful especially considering I haven't even bought their ECU yet (I promised I will). I've reused the motronic ECU connector from the omega and soldered all the wiring through that so now the engine electronics can be disconnected in one go with the exception of the large cable coming from the battery. I've butched the old ECU to make a bulkhead mounted socket that the engine will plug into. Although its been a massive amount of work, and there is still the bulkhead connector and car wiring to do, it should save a lot of time in the future, when changing bits over and getting the engine out for whatever reason.
I got a new spigot bearing so used the grease and hammer trick to get the old one out.

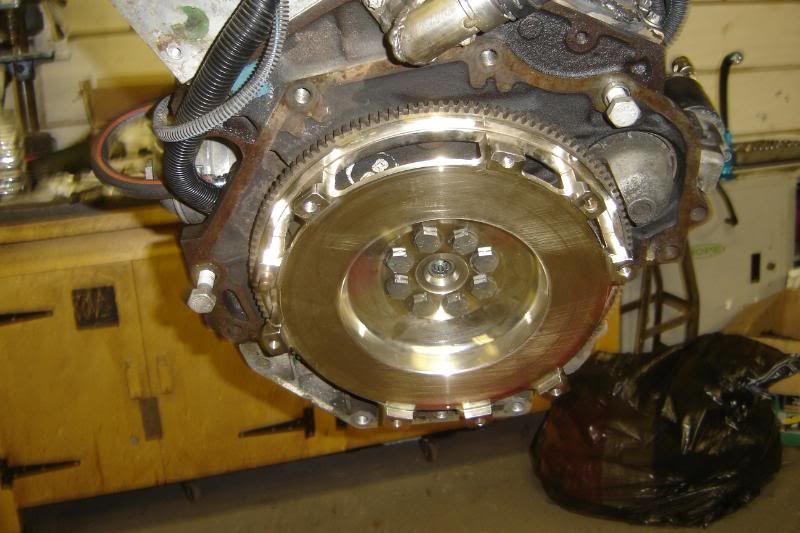
Then with the new spigot bearing in place bolted up the new flywheel with its 25mm bolts and no spacers
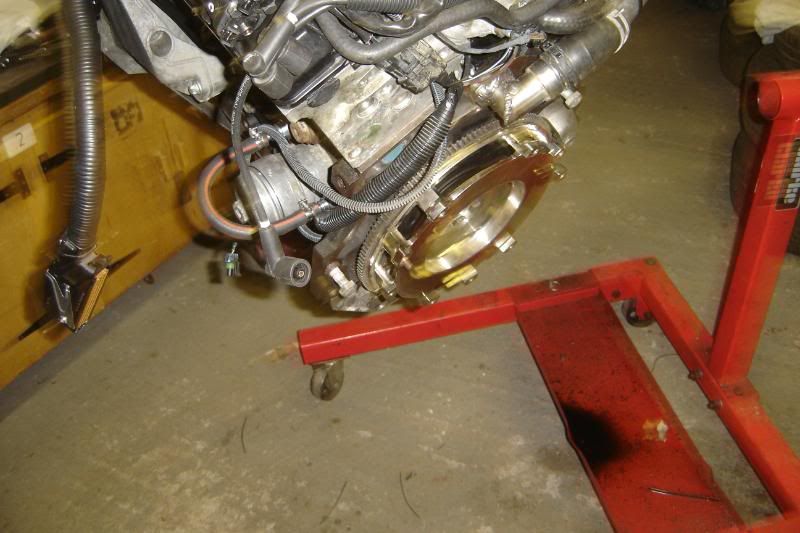
I had to make up a clutch alignment tool on the lathe (its pretty rough) and it took forever to get the clutch locating dowels out of the duel mass flywheel, but the clutch is now fitted


I'm STILLLLLLLLLLL WAITING for the last hub to be done so I went into town again today (hour round trip) to collect the old whobbly one so I can move the car about, I saw the box of bits I took in is still in exactly the same place I left it in the machin shop. I just want hubs with holes in the right places.
I'm pleased with todays progress though.
More to come
Been away visiting family for a three day weekend so did nothing over the weekend on the car. Started again today.
I did the obvious thing and called the company that supplied and have fitted many of these flywheels, they gave me a part number, I called vauxhall and it turns out to be a 25mm bolt giving 9mm grip length and 16mm thread engagement
that was easy! I got some fittings to take hoses off to the oil stat and cooler
but for now (and in an effort to get it running this sommer) I've simply put one hose accross to the other.
As far as the engine is concerned the wiring is all finished, it took quite a few phone calls to the ECU people (Canems) who were very helpful especially considering I haven't even bought their ECU yet
(I promised I will). I've reused the motronic ECU connector from the omega and soldered all the wiring through that so now the engine electronics can be disconnected in one go with the exception of the large cable coming from the battery. I've butched the old ECU to make a bulkhead mounted socket that the engine will plug into. Although its been a massive amount of work, and there is still the bulkhead connector and car wiring to do, it should save a lot of time in the future, when changing bits over and getting the engine out for whatever reason. I got a new spigot bearing so used the grease and hammer trick to get the old one out.
Then with the new spigot bearing in place bolted up the new flywheel with its 25mm bolts and no spacers
I had to make up a clutch alignment tool on the lathe (its pretty rough) and it took forever to get the clutch locating dowels out of the duel mass flywheel, but the clutch is now fitted
I'm STILLLLLLLLLLL WAITING for the last hub to be done
so I went into town again today (hour round trip) to collect the old whobbly one so I can move the car about, I saw the box of bits I took in is still in exactly the same place I left it in the machin shop. I just want hubs with holes in the right places. I'm pleased with todays progress though.
More to come
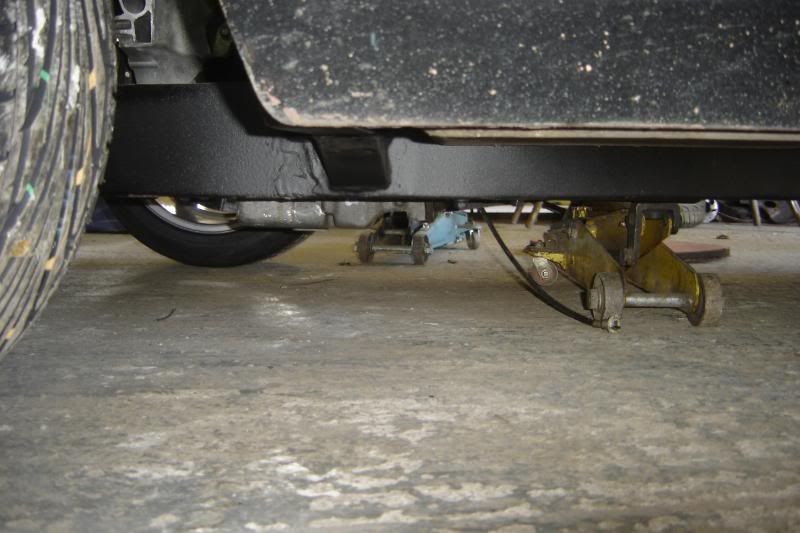
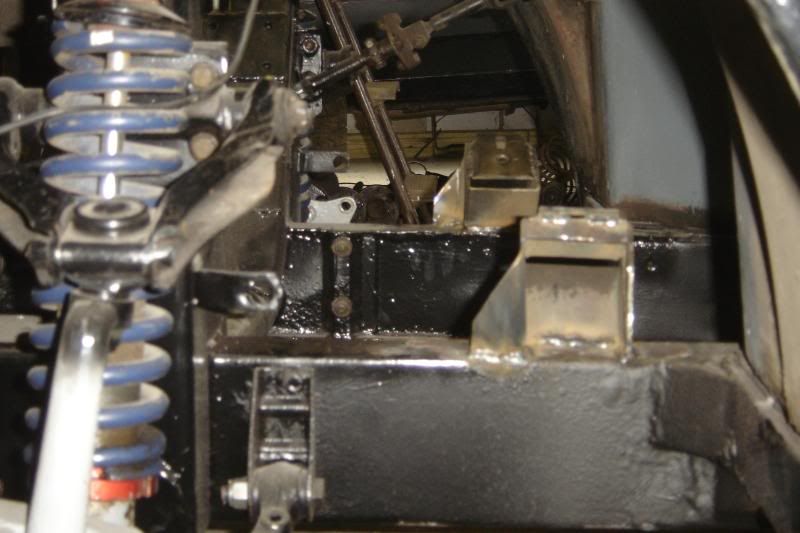
Had a good day today, put the gearbox on
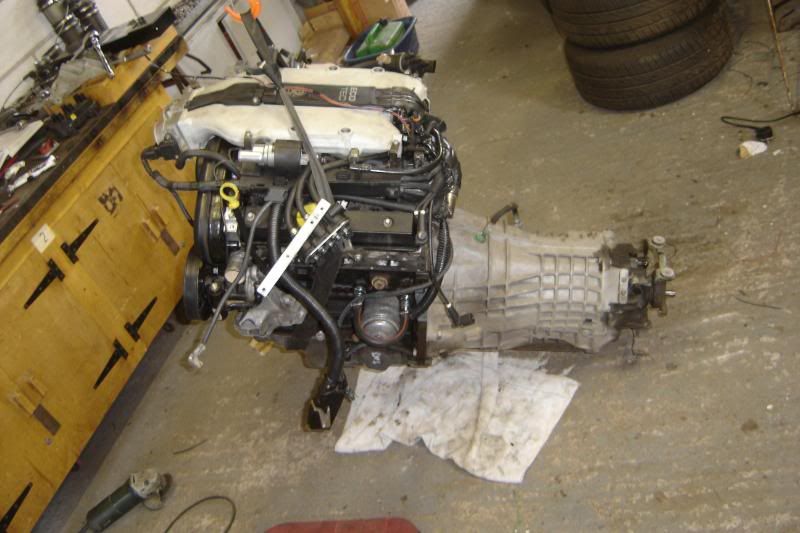
Just trying the engine for size and where to position it. It sits nicely in there there is loads of room at the back of the engine when the front is about an inch from the crossmember, but its low at the mo.

The thing I'd overlooked when messing about at the back of the engine was the cluch hose, at the moment thats fouling on the bulkhead so I'm thinking of bending it, or cutting the a hole in the bulkhead. Hopefully I'll get round to mounting it tomorrow, but there is loads to consider first. On that note, I put the new handbrake cable on, then headed to the rear calipers to connect the cable up and remembered I've got to make up some more caliper mounts that are intrergral to the bearing retainers of the axle. Long story short, the old rear brake conversion used spacers behind the discs to space them out but with redrilling hte PCD I don't have spacers that fit so I'll do the job properly now
Then I went to the front and started removing all the dash to figure out what parts of the transmission tunnel need cutting.
More to come.
Just trying the engine for size and where to position it. It sits nicely in there there is loads of room at the back of the engine when the front is about an inch from the crossmember, but its low at the mo.
The thing I'd overlooked when messing about at the back of the engine was the cluch hose, at the moment thats fouling on the bulkhead so I'm thinking of bending it, or cutting the a hole in the bulkhead. Hopefully I'll get round to mounting it tomorrow, but there is loads to consider first. On that note, I put the new handbrake cable on, then headed to the rear calipers to connect the cable up and remembered I've got to make up some more caliper mounts that are intrergral to the bearing retainers of the axle. Long story short, the old rear brake conversion used spacers behind the discs to space them out but with redrilling hte PCD I don't have spacers that fit so I'll do the job properly now
Then I went to the front and started removing all the dash to figure out what parts of the transmission tunnel need cutting.
More to come.
I'm hacked off with the pace of work today!!!
I've got 6 weeks off from work, and its evaporating quickly with little to show (last two day anyway). The bl**dy angle grinder gave up at about 5pm leaving me with loads of 3mm steel and a hack saw to make engine mounts with I got one done (I even measured twice) but it was still too short! So I need to make more tomorrow, what I really need now are brushes for an Bosch PWS600 angle grinder, There are plently on ebay but I need them now not in a week. Does B&Q sell them? screwfix? Anyone bought any before??
Heres a few piccies
I took the hose off and gently bent it in the vice this helped with clearance.
Here's the beginnings of a short engine mount

God I hope I get more done tomorrow
I've got 6 weeks off from work, and its evaporating quickly with little to show (last two day anyway). The bl**dy angle grinder gave up at about 5pm leaving me with loads of 3mm steel and a hack saw to make engine mounts with
I got one done (I even measured twice) but it was still too short! So I need to make more tomorrow, what I really need now are brushes for an Bosch PWS600 angle grinder, There are plently on ebay but I need them now not in a week. Does B&Q sell them? screwfix? Anyone bought any before??Heres a few piccies
I took the hose off and gently bent it in the vice this helped with clearance.
Here's the beginnings of a short engine mount
God I hope I get more done tomorrow
I had a really good day today, for the first time in a while. Here are the start of the engine mounts (take two)

I added the bits that were cut off fromt he omega

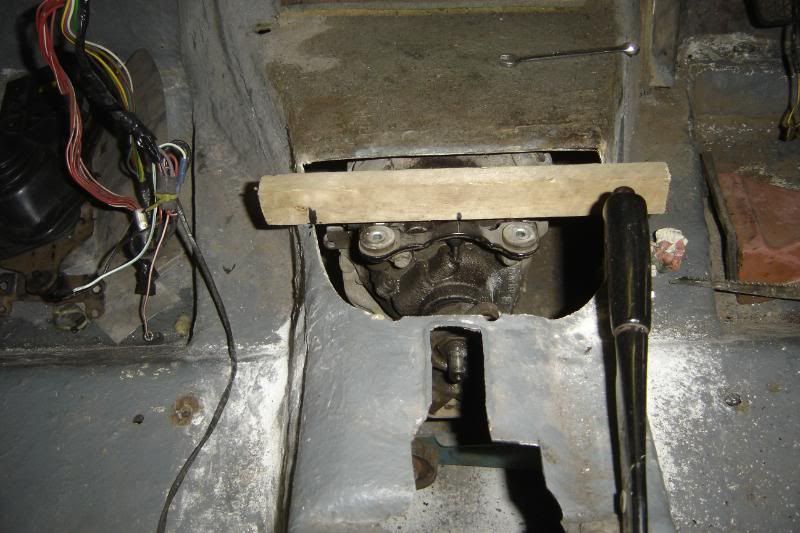
Took about 2 hours checking everything was perfectly lined up, this was a really iterative process, every time something was lined up, it would be out of line somewhere else, here's the jig thingy I used to line up the gearbox centrally.
Eventually got them welded in place
And Primed

Then I started on the gearbox mount, I reused the exhasut mount from the back of the gearbox to give the gearbox mount a bit more height and bring it forward a bit.
Gave it a bit more strength, I was really prowd of this welding and the shape of the structure


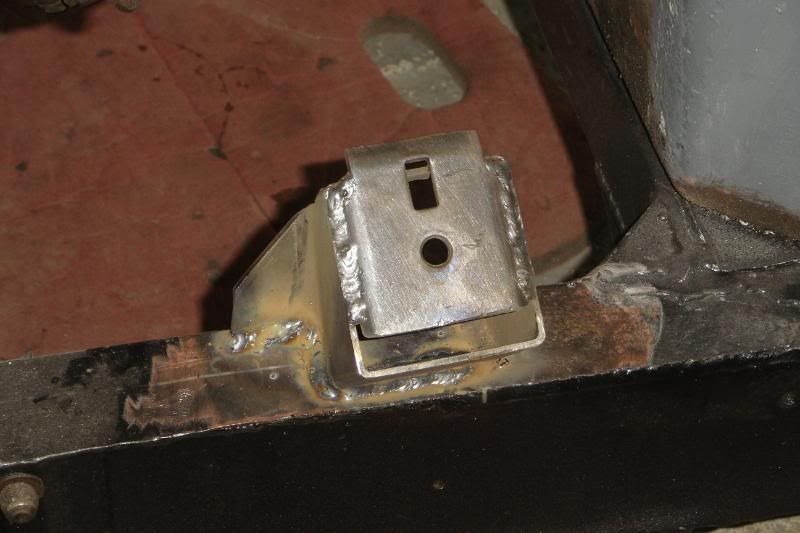
The I tried bolting it in place and found what yo've probably noticed already, I welded it on the wrong way. It seems I've got to do everything twice
So here is the gearbox mount (take two)

From looking at Nath's photos (over and over again) it seems my engine is about 2-3 inches further forward. Obviously this isn't a good thing, but its means I have more room to play with when trying to make the tubular manifold and I didn't want to cut the bulkhead about, that looked like a lot of work. I'm happy with where the engine is height wise though, there is an inch of clearance under the bonnet and the sump sticks out below the chassis rails no more than 2 inches.
I started on the gearlever assembly it turns out for my installation I can use the holes provided and simply cut the excess.


I really hope tomorrow is as good as today was
I added the bits that were cut off fromt he omega
Took about 2 hours checking everything was perfectly lined up, this was a really iterative process, every time something was lined up, it would be out of line somewhere else, here's the jig thingy I used to line up the gearbox centrally.
Eventually got them welded in place
And Primed
Then I started on the gearbox mount, I reused the exhasut mount from the back of the gearbox to give the gearbox mount a bit more height and bring it forward a bit.
Gave it a bit more strength, I was really prowd of this welding and the shape of the structure
The I tried bolting it in place and found what yo've probably noticed already, I welded it on the wrong way. It seems I've got to do everything twice
So here is the gearbox mount (take two)
From looking at Nath's photos (over and over again) it seems my engine is about 2-3 inches further forward. Obviously this isn't a good thing, but its means I have more room to play with when trying to make the tubular manifold and I didn't want to cut the bulkhead about, that looked like a lot of work. I'm happy with where the engine is height wise though, there is an inch of clearance under the bonnet and the sump sticks out below the chassis rails no more than 2 inches.
I started on the gearlever assembly it turns out for my installation I can use the holes provided and simply cut the excess.
I really hope tomorrow is as good as today was
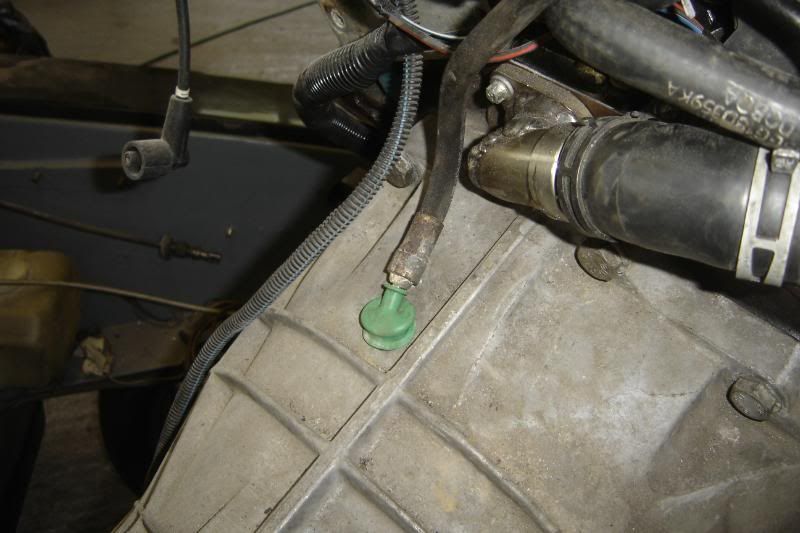
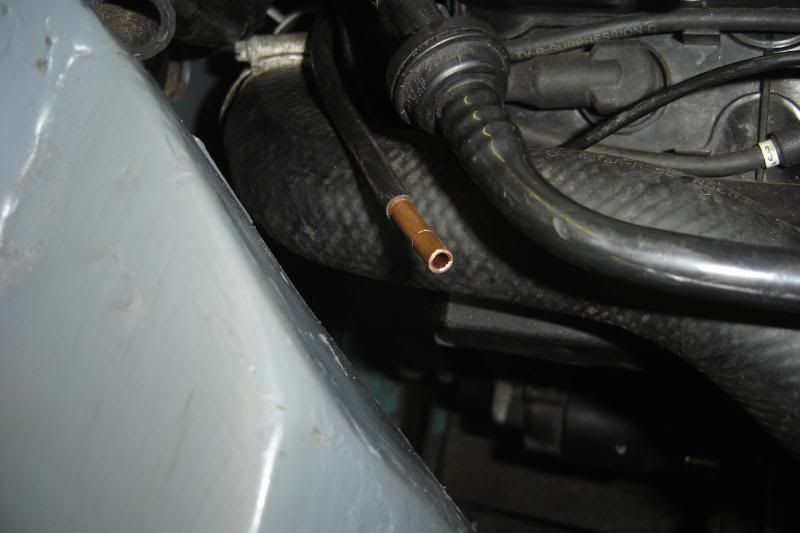
I started off today puting the engine back in with the newly painted gearbox mount, and extending the clutch hose. I initially tried brake line as I thought this is what another scimitar MV6 owner had used but it seemed far to small in diameter so I stole some of the 6mm LPG copper line from the omega this fits a treat and I went and got some nut and bolt type jubilee clips to make sure they don't slide off.
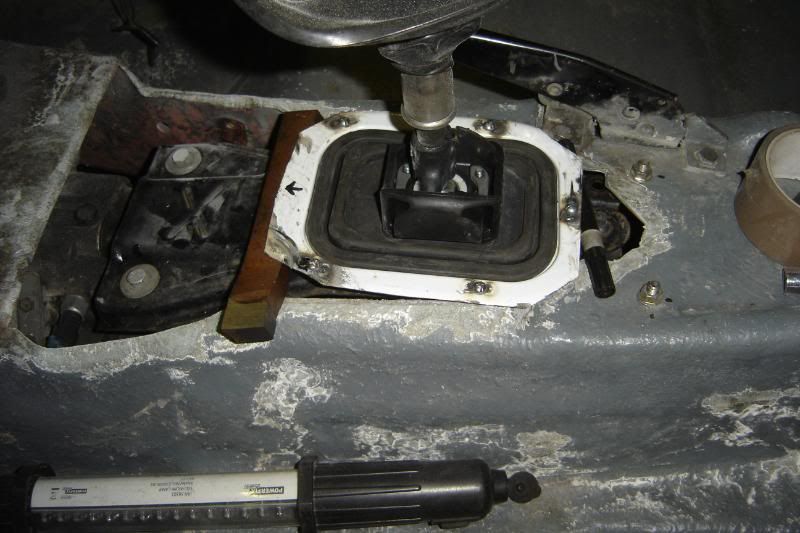
Then I started thinking about mounting the gear lever assembly properly, I cut the suround off the omega to recycle it

After doing the usual 3 hours measuring and staring it, I was happy nothing would foul and it was suitably mounted, it also seems to come up in a great position, I couldn't resist putting the seat in and trying it out
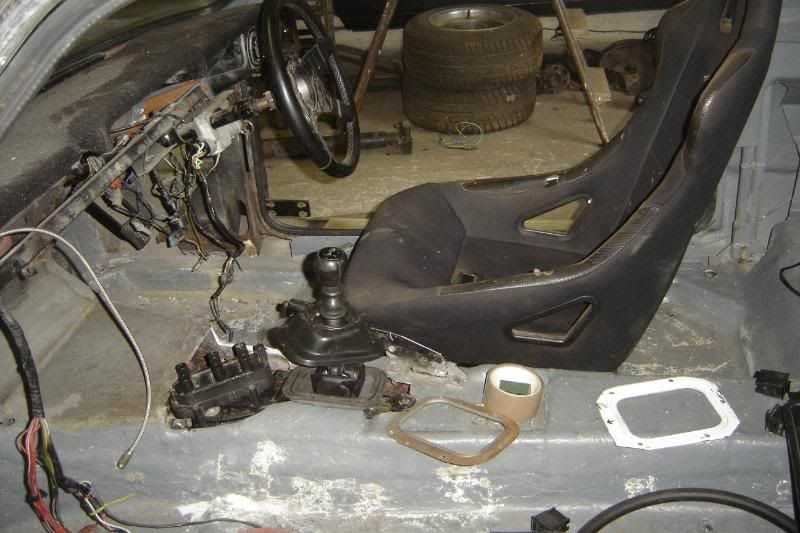
I spend a while each day just looking at the car (don't judge, you're all guilty of doing it) this was the best view today
So next thing was to fibreglass the surround in. I found to things to hold it in place
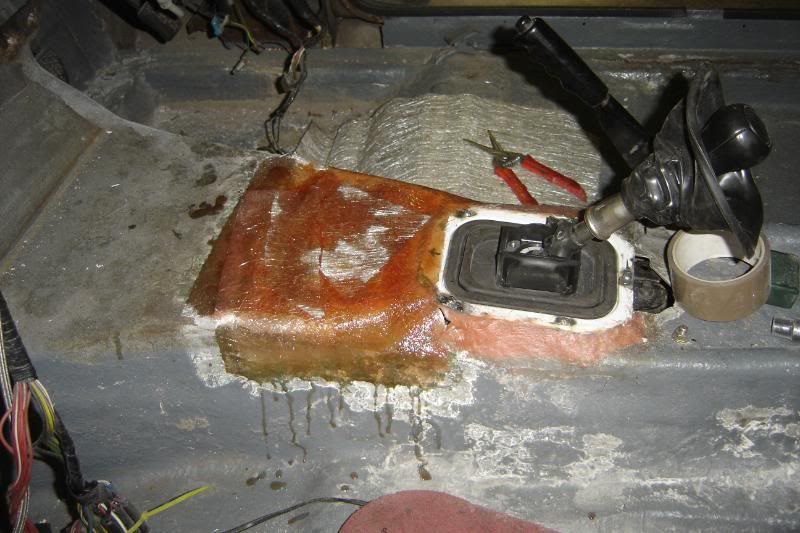
Then started building up the fibre filler underneith it and eventually stuck it in place

Then the large gap needed filling, I put some ali sheet in a plastic bag and put it in the right place under where I wanted the fibreglass to go, you can jsut see the bag slicking out above the garage lamp under the glass fibre sheet.

Did a couple of layers, removed the ali and peeled the bag off and this is where I got to.
I'll give it lots more strenght tomorrow and finish and paint it hopefully then with any luck put the engine in for the last time.
More to come
Then I started thinking about mounting the gear lever assembly properly, I cut the suround off the omega to recycle it
After doing the usual 3 hours measuring and staring it, I was happy nothing would foul and it was suitably mounted, it also seems to come up in a great position, I couldn't resist putting the seat in and trying it out
I spend a while each day just looking at the car (don't judge, you're all guilty of doing it) this was the best view today
So next thing was to fibreglass the surround in. I found to things to hold it in place
Then started building up the fibre filler underneith it and eventually stuck it in place
Then the large gap needed filling, I put some ali sheet in a plastic bag and put it in the right place under where I wanted the fibreglass to go, you can jsut see the bag slicking out above the garage lamp under the glass fibre sheet.
Did a couple of layers, removed the ali and peeled the bag off and this is where I got to.
I'll give it lots more strenght tomorrow and finish and paint it hopefully then with any luck put the engine in for the last time.
More to come
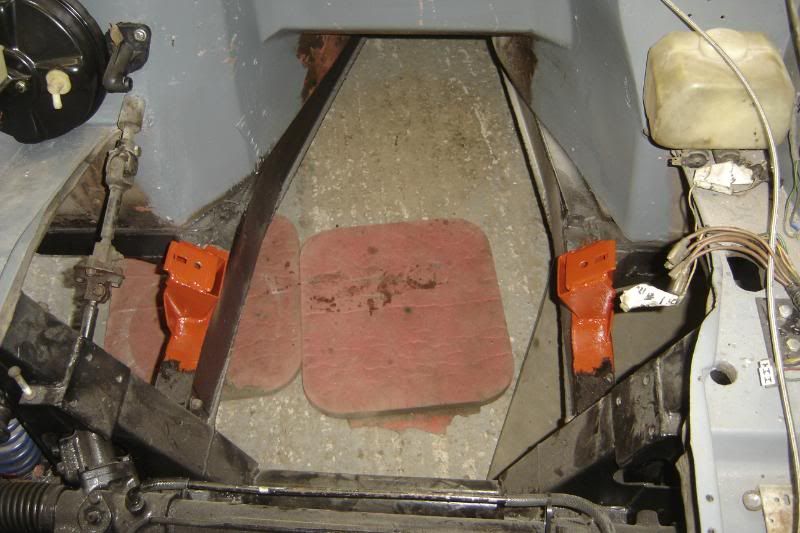
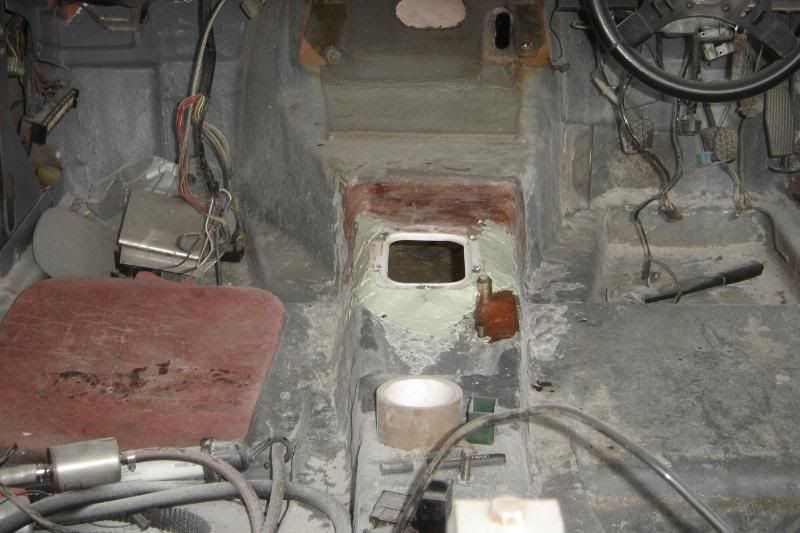
Got some more done on the transmission tunnel this morning, I filled in around the metal surround and and fibregalssed over where thehandbrake goes, so I can cut a tighter fitting hole so stop engine gasses getting in so much.

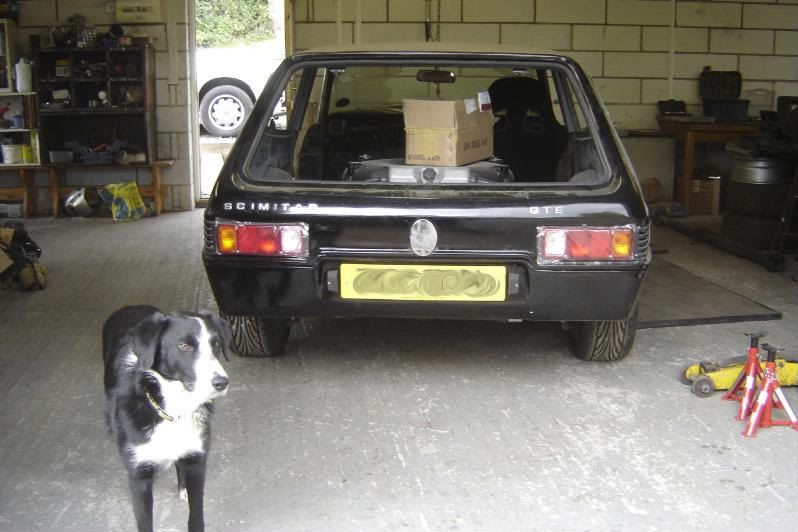
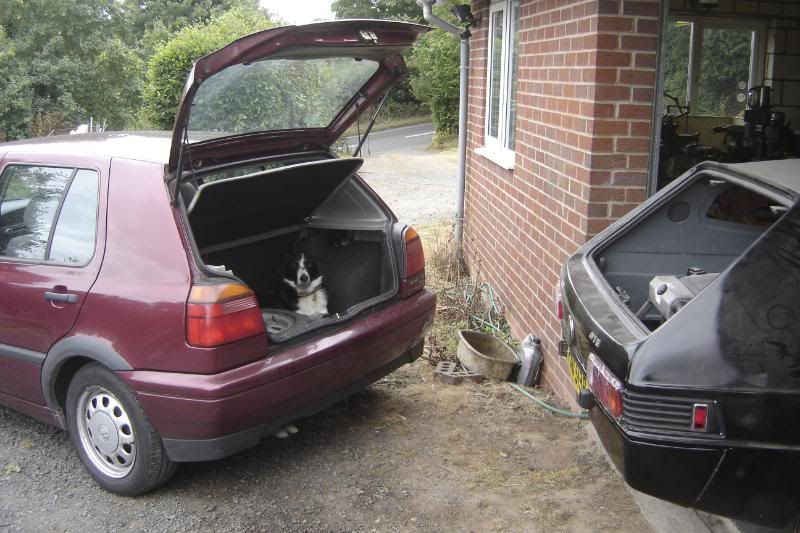
This is where the dog sits and watches, he seems to love boots of cars, he jumps in to random strangers boots sometimes
I even fibre filled the underside to smooth it off and give it more strength

Here it is as it is now, hand brake hole recut and smoothed ready for some garage floor paint

More to come
This is where the dog sits and watches, he seems to love boots of cars, he jumps in to random strangers boots sometimes
I even fibre filled the underside to smooth it off and give it more strength
Here it is as it is now, hand brake hole recut and smoothed ready for some garage floor paint
More to come
Gassing Station | Scimitar | Top of Page | What's New | My Stuff