Audio Install (S2, 111R) (Janitor Guide)
See original Thread;
http://www.pistonheads.com/gassing/topic.asp?h=0&a...
Intro:
This whole change of sound system started off with me putting all my CD’s on to iTunes, which then lead to me thinking how cool an iPod concealed in the boot with head control would be… but then I conceded that car is the only place the iPod would get used as earphones irritate me! Then I saw a post by a guy on SELOC who was installing a JVC AVX2 with DVD playback and a 3.5 inch 16:9 screen on it Bling bling indeed, but having 50 albums on one DVD disc in 192(VBR) MP3 format completely justified the whole thing for me! The telly is just a bonus
I’ve always thought the sound coming the Blaupunkt DAB54 and standard speakers was someway behind very poor! In the head unit’s defence, the speakers with no low-end reproduction capability certainly wouldn’t have been doing it any favours, but as the DAB side of things is next to useless in my area anyway, the AVX2 and some Infinity Kappas front and rear were on the cards. A Sub unit was identified as rather necessary from first time I ever turned the stereo on!
Now I know only too well that an Elise is all about driving and not about home cinema – if that’s your died-in-the-wool school of thought, then fair enough – but for me personally, there are more sides to ownership than that. Let’s face it, there are an awful lot of ‘normal’ bits in between the fun times and as music has been a huge part of my life for the last 25 years, it’s important to me to have something half listenable – no, make that very listenable! The Sub is certainly not there for High Street shaking whilst cruising, but simply because I like to hear music… I want to hear all of it… and that must include the whole frequency spectrum from 50Hz to 20Khz as the original recordings intended!
The Kit:
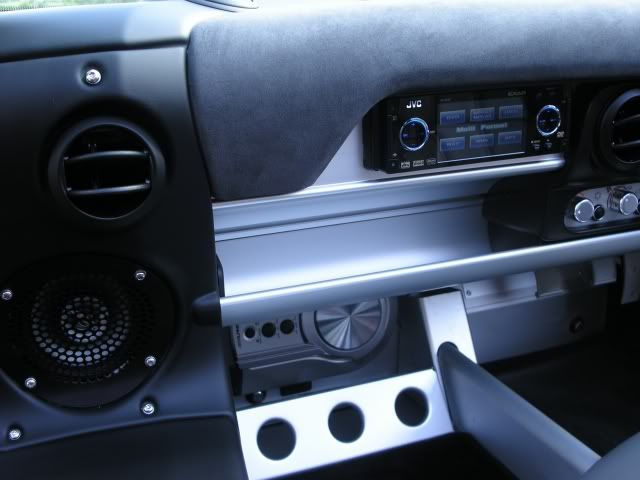
JVC AVX2
Infinity Kappa 42.5i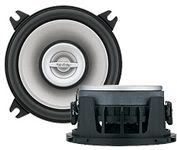
Infinity Kappa 52.7i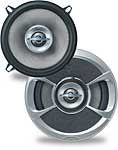
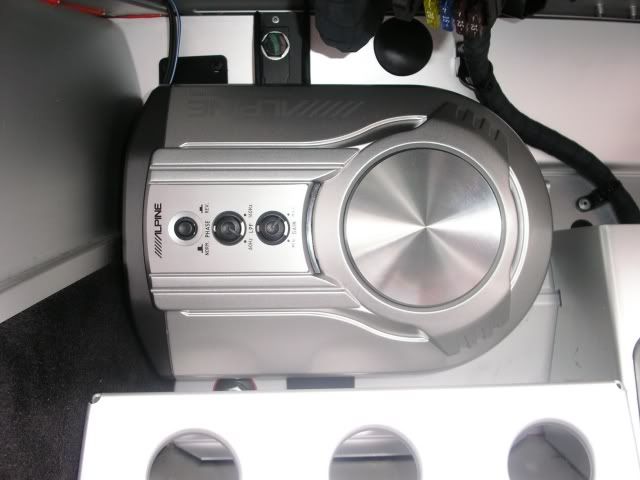
Alpine SWD-1600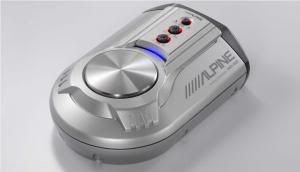
All purchased from bassjunkies.com for £630. I originally contacted a company who specialise in car audio and security for a package price, but evidently they were far too busy to get in touch with a serious customer, so junkies price matched and away we went. I added a Dynomat Wedge Pak and with delivery wound it all up at £669. Ordered Friday, arrived Monday
The install:
(This is obviously all based around the kit I was fitting, but industry standards and codes mean it will be mostly relevant to any similar gear – and of course I’m just a practical fella and not a specialist, so don’t take my word as red!)
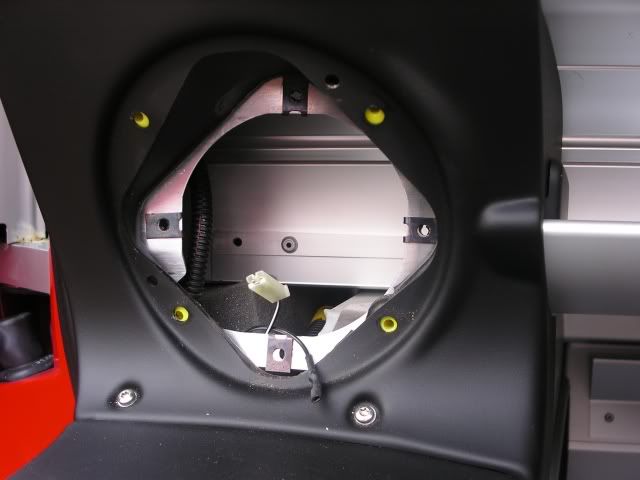
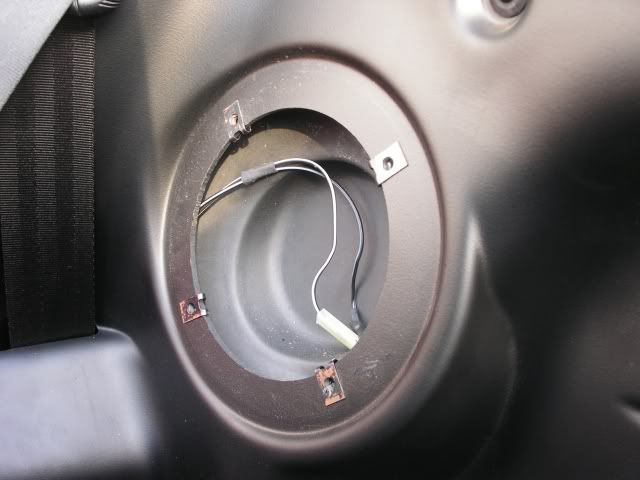
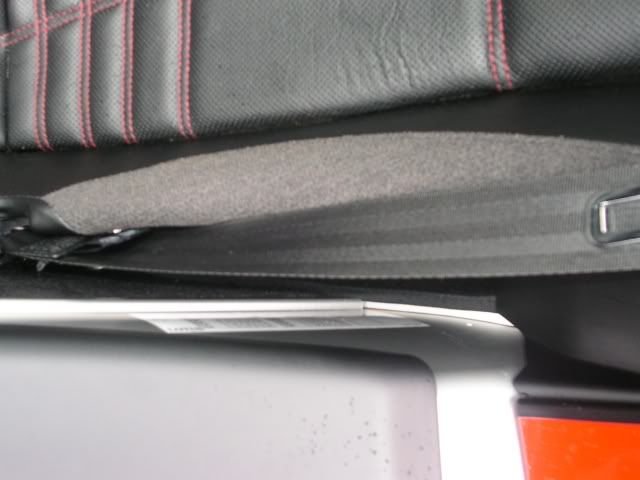
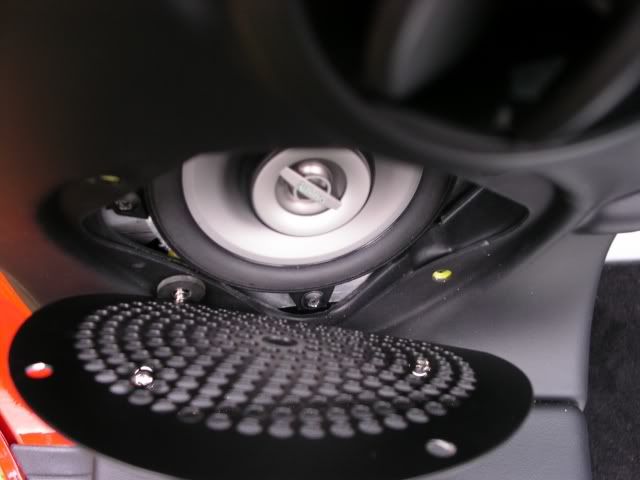
First up, remove all the old kit – simple enough with the right sized/type screwdriver heads/bits. I have seen some installs that require seats out etc – but with some careful dexterity and contortionist moves, I avoided all of that! The removal tools for the DAB54 were in the original unit box that the Dealer kindly left in the boot. The empty speaker housings in a 111R (with Touring Pack) look like:
The first major job was supplying power to the Sub unit – this has to come direct from the battery as tapping the existing wiring may not supply a strong / consistent enough current to drive the unit properly - plus putting that extra load on the existing wiring could cause the loom to overheat
Given the aluminium tub in the Elise, I was unsure about connecting ground (-ve) to the chassis, so opted for a direct feed to the battery too - someone may tell me that’s a bad idea, but it works and as I was running the live feed (+ve) through, it was no extra hassle. (Note in the pics that the ground cable is brown – not standard cabling colours of course, but it’s marked and I know what’s what). Do not connect to battery at this point
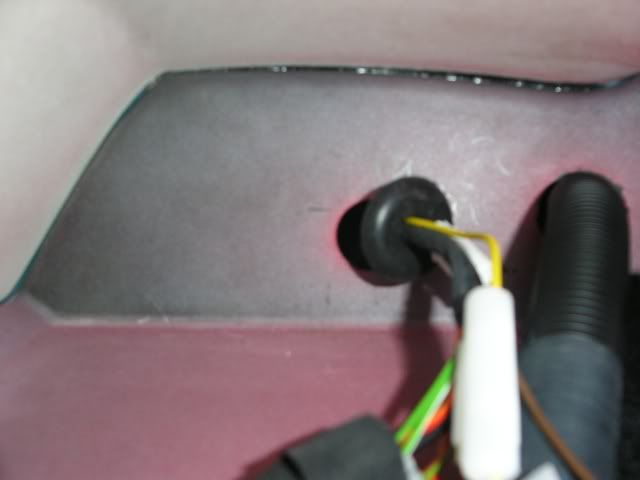
Remember to protect the rear and sides of bodywork with towels as you lean into the boot space, then thread the cables through the far grommet, which was made a whole load easier by easing the grommet out, poking cable through, and replacing
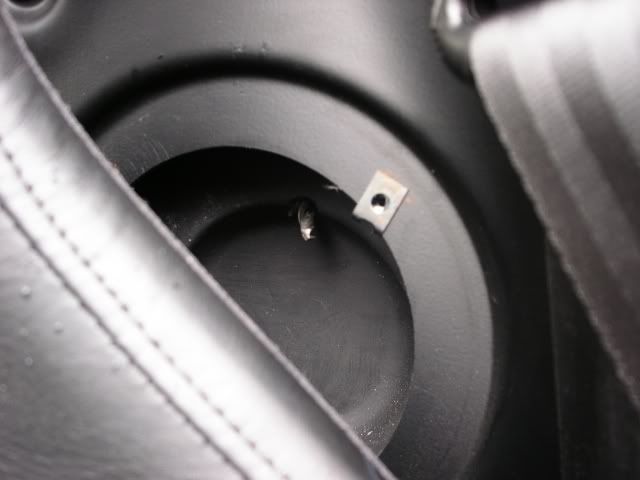
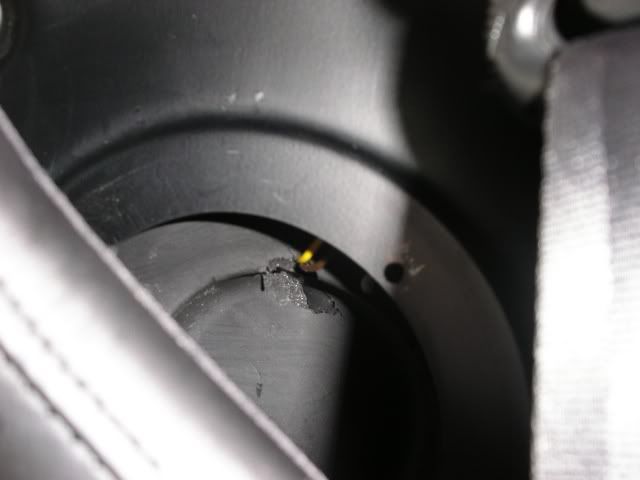
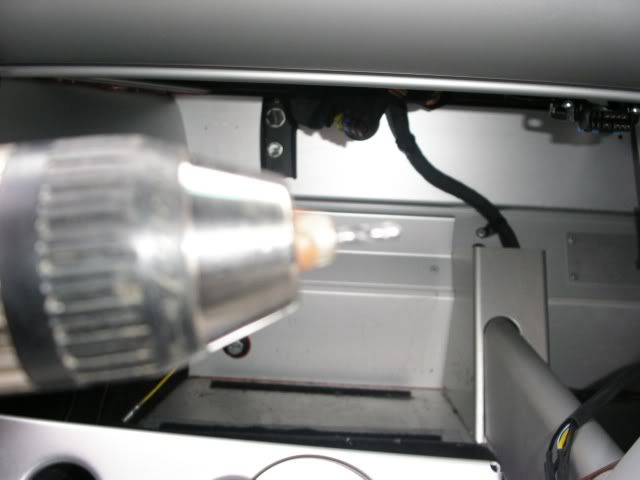
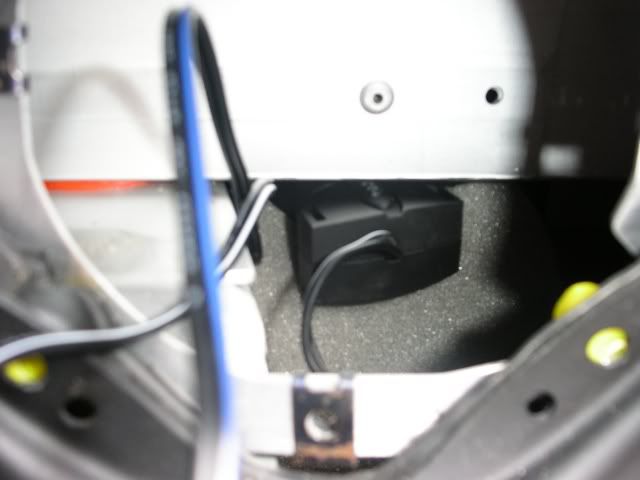
The next issue was getting from engine bay into cabin. I simply opted for drilling through the far left corner (obviously ensuring there were no vital organs in the way!) and at a slight angle as to exit through the speaker recess in the sound-deadening material
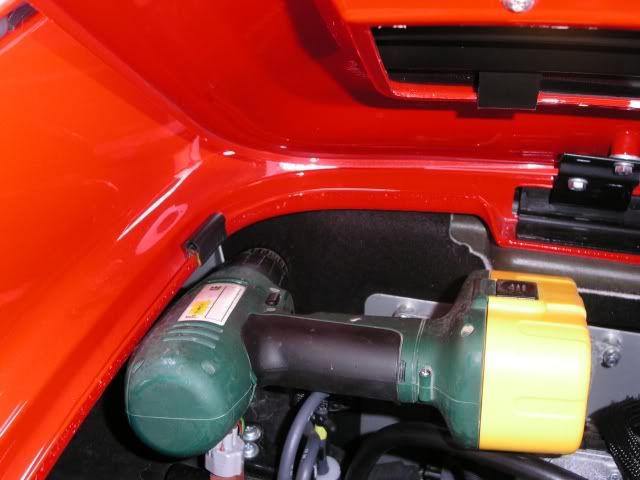
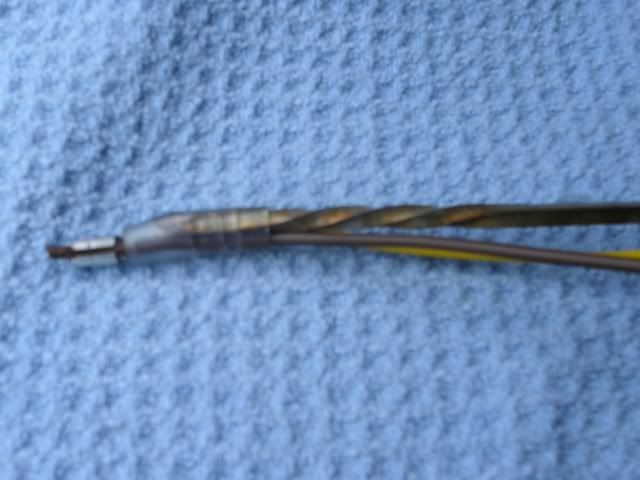
Poking the cables through the hole requires something solid as otherwise the cables will just fold up when being forced through the engine bay liner and foam padding
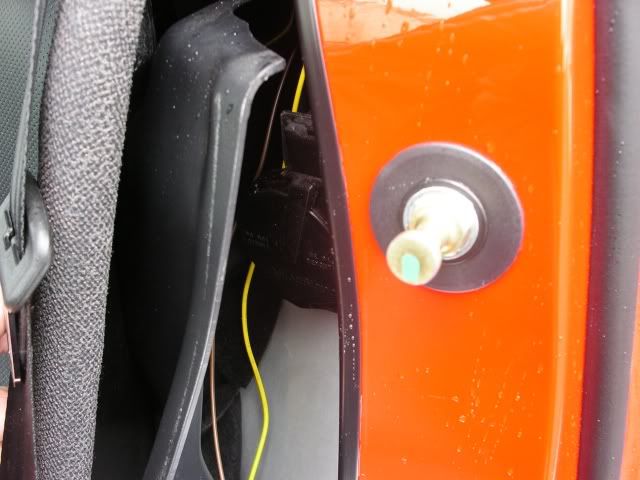
Pull inner bulkhead liner away from door pillar (it bends and moves easily enough) and route power cables down the side behind wall carpet
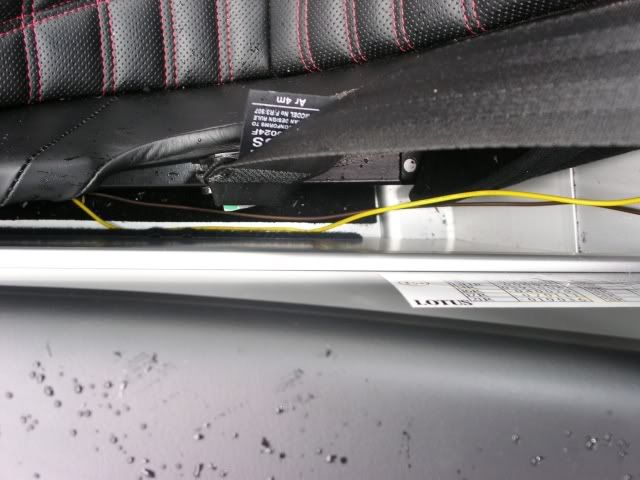
Peel sidewall carpet away from velco fastening along the bottom edge and slip out from aluminium top lip, tape cables along the side of the tub so they don’t foul the Velcro, and replace sidewall carpet
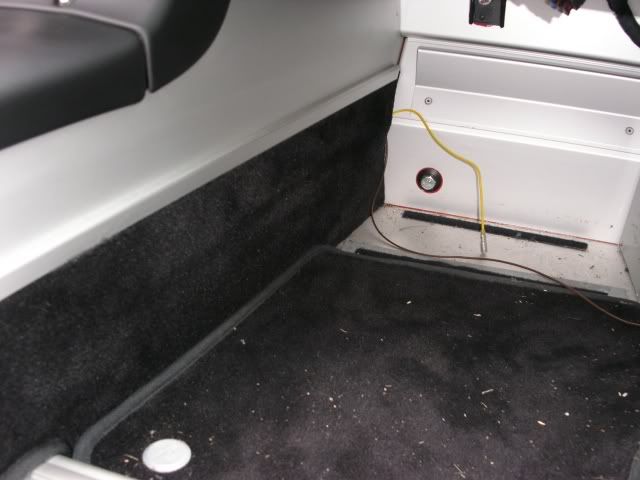
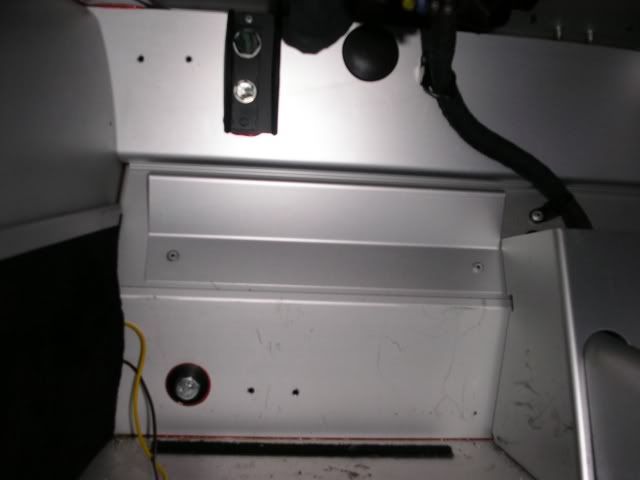
Next up is to fix the Sub mounting brackets in the position shown – these were selected to avoid the existing bolts and mounts on the foot-well end wall
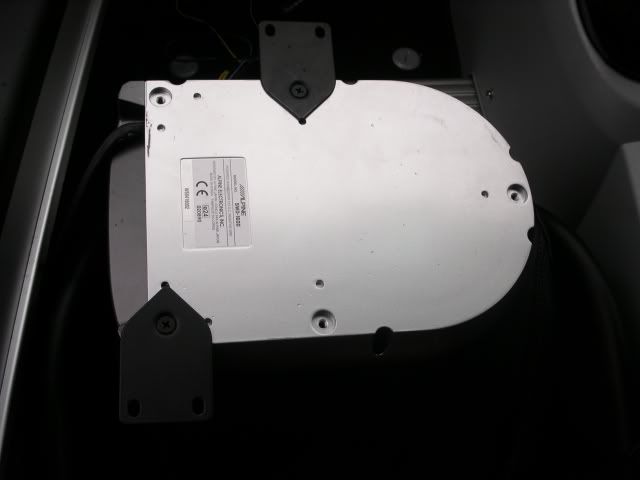
Offer the unit up to the end wall and mark fixing points (this requires a fair bit of crawling, stretching and straining under there!). Drill the pilot holes and tap them out with one of the spare fixing screws to make final fixing far easier. I checked the fixing points by drilling just far enough through the wall and poking around to see if there was anything nearby. All clear (I think the selected points actually enter box section cross members – someone else will no doubt confirm or clarify that)
Don’t fit Sub yet as final cable lengths and placing are easier to achieve once feeds from head unit are sorted
Remember to keep all work areas near the car well protected and be careful when swinging screwdrivers, knives and gear around – one slip and you could injure yourself… or even worse, the car!
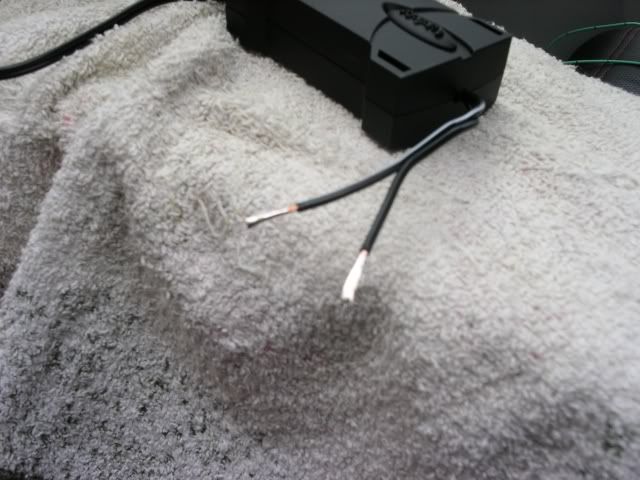
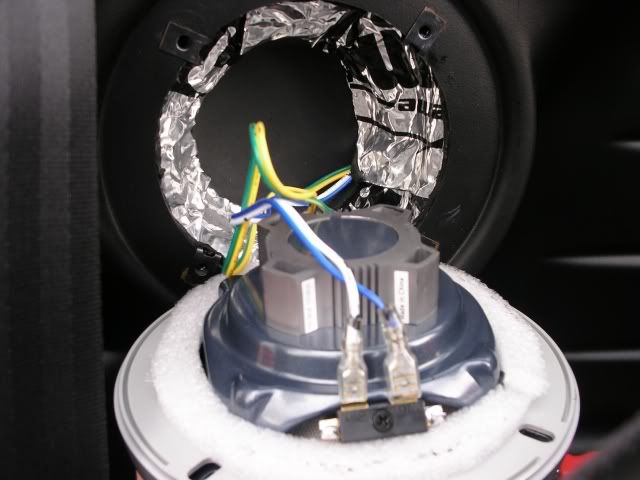
The Infinity 42.5i and 52.7i speakers have crossover units to feed both the cone and the tweeter. These tap off the existing speaker cables and there is room in all housings to accommodate them. Trim, flatten and solder the crossover tail feeds them to make ‘blades’ that slide tightly into existing terminal plugs. You could cut the existing plugs off and hardwire them in, but I thought that was a little severe and taped up snug ‘blades’ work a treat
Top tip! Clamp the screw receiving clips a little tighter together to stop them moving about when trying to position speaker and screws
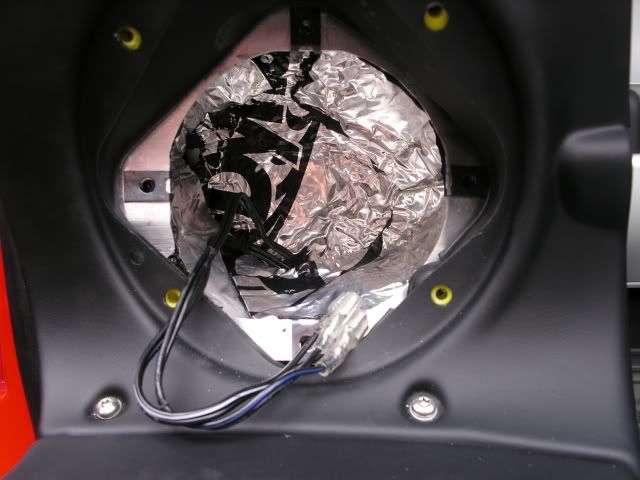
With a firm eye (ear!) on improving, or rather controlling the less than musical tonality generated by the plastic/aluminium housings, it will be beneficial to fit some Dynomat. I initially considered the best way to achieve this and decided on wrapping the rear of the speaker in the stuff to contain the sound... but after some good advice from a few car-audiophiles on SELOC, I revised this and lined the enclosures at the back and around the sides to create a controlled space and a less 'sound discolouring' environment in which the speakers could operate efficiently
Before fitting the Dynomat, place the crossover units and cables tidily away (below drivers side housing is a large void which I felt the crossover would rattle around in, so I eased some foam down to slide it securely away in there)
Line the housings with Dynomat, pressing on to all surfaces firmly and making sure the front edges are firmly attached to the rear of the front mounting face. I personally found this easier using a dish shaped piece at the back and two or three 3" wide strips for the sides, making sure it was all well stuck together without forgetting to lead the speaker cables through!
(Ideally, these housings should also have some long haired wool, or BAF fibre fill in them - I will add that also when sourced)
Put a foam gasket around the back of the speaker before placing speaker into the housing - I simply cut some rings from a piece of the foam packing used in the 52.7i packaging! Bargain! (Another top tip here - use some small snots of the Dynomat black stuff to hold the foam on to the rear of the speaker chassis)
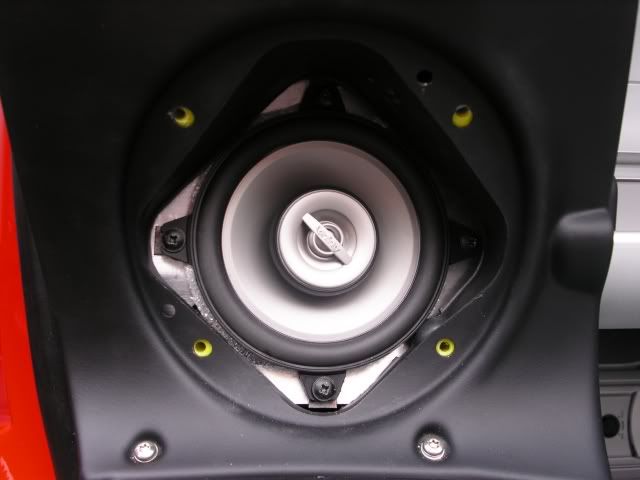
Screw speaker securely back in place taking care not to slip and damage the cone. Note the spacing washer in bottom left hand corner of face grill to ensure clearance between grill and speaker cone edge
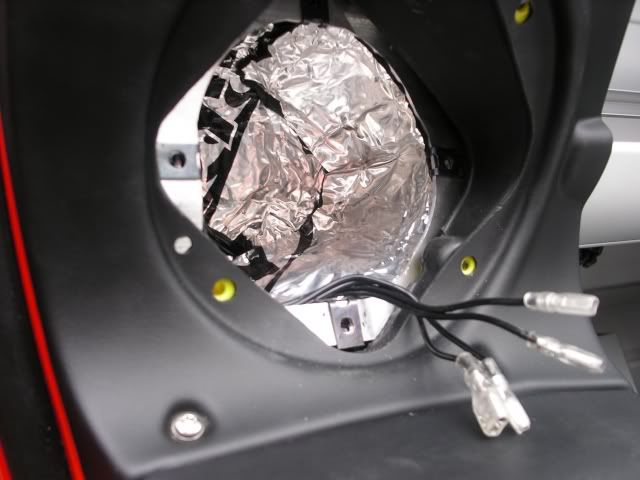
Follow the same preparation for the rears – crossover wiring and placement etc and don’t forget to place the grill surround on the back of speaker before wiring up. As this example has the Touring Pack soundproofing, I just fixed Dynomat around the sides between the existing foam and the rear of the mounting face
Again, fit a foam gasket to the rear face of the speaker before screwing carefully into place
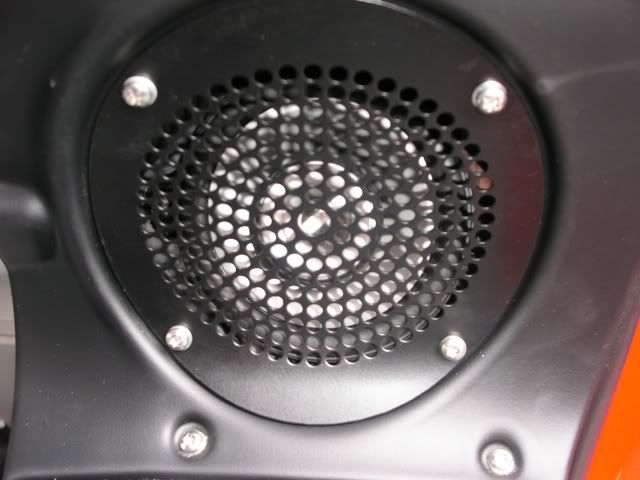
The supplied Infinity grills struck me as a little too 'shiny' and have open sections in them. Seeing as a fair bit of small debris enters the cabin with roof off, I opted to refit the standard Blaupunkt covers as they offer better protection. No modification required as amazingly enough, they fit the Infinity surrounds perfectly! (The original Blaupunkt surrounds impede the cone however as they are fitted in front of the speaker chassis as opposed to behind it)

I made a ‘1 into 2’ phono cable to connect Subwoofer Out from head to the left & right input tails on the Sub unit (Yes, it’s only mono of course, but has two inputs. It may be fine to just use one single cable here, but I fed both from one source)
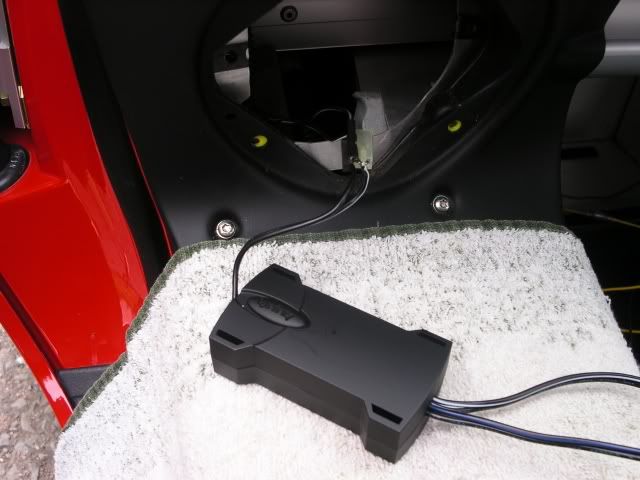
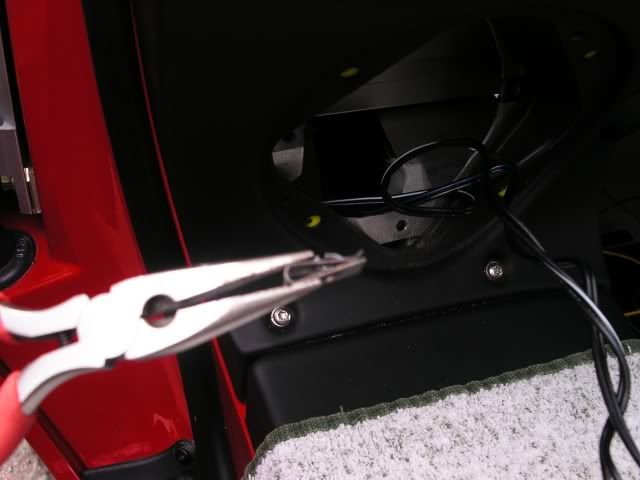
Fix the new head locating unit frame into the fascia slot, remove passenger side speaker / vent panel, then route the Sub feed and remote power cable (this powers up the Sub when the head unit is turned on) from the foot-well behind speaker and back edge of wing before returning and running along the inside of the dash just below side air vent and through to the head unit opening
Stick Dynomat to back of Sub unit to avoid any direct resonance between Sub and end wall. Hide any slack cable in back of Sub unit or behind sidewall carpet and fix the Sub unit in place. Tape Sub feed & remote power cables along top ledge of foot-well sidewall (dust it off first). Refit foot rest – et viola!
Connect the power and speaker blocks up to the head unit. The remote power will need connecting also – use connectors to tap the blue & white cable from the head to the Sub. Attach ariel and finally, in the case of the AVX2, wire the handbrake application cable accordingly so that the telly screen will function (either wire it to the handbrake switch or to a chassis screw on the head unit itself… but I didn’t tell you that and remember don’t ever, never be tempted to watch and drive!)
Refit side panel, connect Sub power cables to battery, tidy up and enjoy!
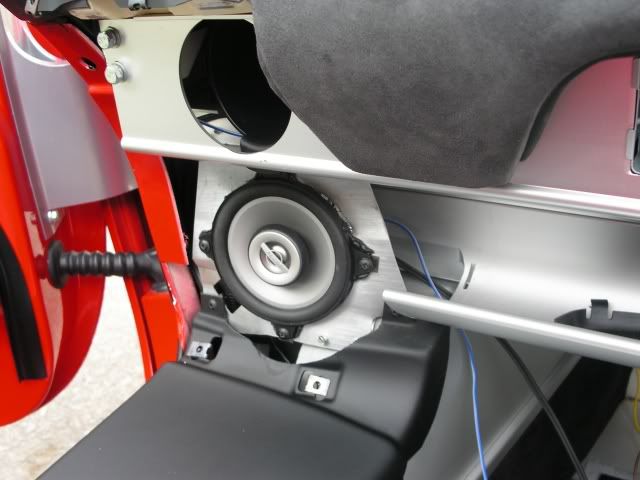
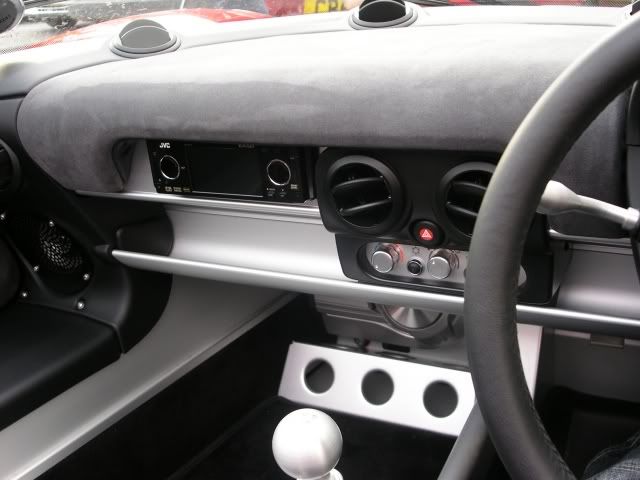
…and from the drivers perspective:
During installation, I found it advantageous to have the head unit temporarily wired and laid on dash to check speaker connections, Sub feed and remote power etc as I went – it can get a little precarious and untidy, but will save a lot of headache having to unpack all your kit and trace any problems. If your work is done to a high standard in the first place of course, the chances of any issues are slim
One last big point is to ensure that you set up the head unit to feed the subwoofer and adjust head unit’s settings so that the high-pass filter is in operation at 150Hz and above so that your little speakers aren’t still getting hammered with low frequencies! Let the Sub do all that (The easiest way to check is to turn the level all the way down on the Sub and listen to what the speakers are doing. Do experimental test if required)
The end result? Stunning! I was after drastic improvement and it’s done that… and then some! Of course you will need to alter the overall EQ on the head to your own taste - as well as the Sub’s level, phase and crossover point (150Hz in theory, but I felt that got a little ‘boomy’ as opposed to ‘subby’ in my humble opinion), but at least its all present now!
The Alpine Sub feels like a very solid piece of kit – but only time will tell there of course. The Infinitys give plenty of clear mids and extremely crisp (not harsh) highs - so much so in fact that I’ve EQ’d a lot of the upper mids out – they produce that much! The power and clarity is excellent although of course some of the subtleties get lost roof-off at 80mph on the driveway, but for me, it’s worked an absolute treat!
I have a buyer for the DAB54 so all in it’s set me back about four and half smooth ones. I could’ve done other mods with that for sure, but induction & sports exhaust etc can all come at a later date Due to my upbringing, this was my personal priority… but that’s just me!
http://www.pistonheads.com/gassing/topic.asp?h=0&a...
Intro:
This whole change of sound system started off with me putting all my CD’s on to iTunes, which then lead to me thinking how cool an iPod concealed in the boot with head control would be… but then I conceded that car is the only place the iPod would get used as earphones irritate me! Then I saw a post by a guy on SELOC who was installing a JVC AVX2 with DVD playback and a 3.5 inch 16:9 screen on it
Bling bling indeed, but having 50 albums on one DVD disc in 192(VBR) MP3 format completely justified the whole thing for me! The telly is just a bonus I’ve always thought the sound coming the Blaupunkt DAB54 and standard speakers was someway behind very poor! In the head unit’s defence, the speakers with no low-end reproduction capability certainly wouldn’t have been doing it any favours, but as the DAB side of things is next to useless in my area anyway, the AVX2 and some Infinity Kappas front and rear were on the cards. A Sub unit was identified as rather necessary from first time I ever turned the stereo on!
Now I know only too well that an Elise is all about driving and not about home cinema – if that’s your died-in-the-wool school of thought, then fair enough – but for me personally, there are more sides to ownership than that. Let’s face it, there are an awful lot of ‘normal’ bits in between the fun times and as music has been a huge part of my life for the last 25 years, it’s important to me to have something half listenable – no, make that very listenable! The Sub is certainly not there for High Street shaking whilst cruising, but simply because I like to hear music… I want to hear all of it… and that must include the whole frequency spectrum from 50Hz to 20Khz as the original recordings intended!
The Kit:
JVC AVX2
Infinity Kappa 42.5i
Infinity Kappa 52.7i
Alpine SWD-1600
All purchased from bassjunkies.com for £630. I originally contacted a company who specialise in car audio and security for a package price, but evidently they were far too busy to get in touch with a serious customer, so junkies price matched and away we went. I added a Dynomat Wedge Pak and with delivery wound it all up at £669. Ordered Friday, arrived Monday
The install:
(This is obviously all based around the kit I was fitting, but industry standards and codes mean it will be mostly relevant to any similar gear – and of course I’m just a practical fella and not a specialist, so don’t take my word as red!)
First up, remove all the old kit – simple enough with the right sized/type screwdriver heads/bits. I have seen some installs that require seats out etc – but with some careful dexterity and contortionist moves, I avoided all of that! The removal tools for the DAB54 were in the original unit box that the Dealer kindly left in the boot. The empty speaker housings in a 111R (with Touring Pack) look like:
The first major job was supplying power to the Sub unit – this has to come direct from the battery as tapping the existing wiring may not supply a strong / consistent enough current to drive the unit properly - plus putting that extra load on the existing wiring could cause the loom to overheat
Given the aluminium tub in the Elise, I was unsure about connecting ground (-ve) to the chassis, so opted for a direct feed to the battery too - someone may tell me that’s a bad idea, but it works and as I was running the live feed (+ve) through, it was no extra hassle. (Note in the pics that the ground cable is brown – not standard cabling colours of course, but it’s marked and I know what’s what). Do not connect to battery at this point
Remember to protect the rear and sides of bodywork with towels as you lean into the boot space, then thread the cables through the far grommet, which was made a whole load easier by easing the grommet out, poking cable through, and replacing
The next issue was getting from engine bay into cabin. I simply opted for drilling through the far left corner (obviously ensuring there were no vital organs in the way!) and at a slight angle as to exit through the speaker recess in the sound-deadening material
Poking the cables through the hole requires something solid as otherwise the cables will just fold up when being forced through the engine bay liner and foam padding
Pull inner bulkhead liner away from door pillar (it bends and moves easily enough) and route power cables down the side behind wall carpet
Peel sidewall carpet away from velco fastening along the bottom edge and slip out from aluminium top lip, tape cables along the side of the tub so they don’t foul the Velcro, and replace sidewall carpet
Next up is to fix the Sub mounting brackets in the position shown – these were selected to avoid the existing bolts and mounts on the foot-well end wall
Offer the unit up to the end wall and mark fixing points (this requires a fair bit of crawling, stretching and straining under there!). Drill the pilot holes and tap them out with one of the spare fixing screws to make final fixing far easier. I checked the fixing points by drilling just far enough through the wall and poking around to see if there was anything nearby. All clear
(I think the selected points actually enter box section cross members – someone else will no doubt confirm or clarify that)Don’t fit Sub yet as final cable lengths and placing are easier to achieve once feeds from head unit are sorted
Remember to keep all work areas near the car well protected and be careful when swinging screwdrivers, knives and gear around – one slip and you could injure yourself… or even worse, the car!
The Infinity 42.5i and 52.7i speakers have crossover units to feed both the cone and the tweeter. These tap off the existing speaker cables and there is room in all housings to accommodate them. Trim, flatten and solder the crossover tail feeds them to make ‘blades’ that slide tightly into existing terminal plugs. You could cut the existing plugs off and hardwire them in, but I thought that was a little severe and taped up snug ‘blades’ work a treat
Top tip! Clamp the screw receiving clips a little tighter together to stop them moving about when trying to position speaker and screws
With a firm eye (ear!) on improving, or rather controlling the less than musical tonality generated by the plastic/aluminium housings, it will be beneficial to fit some Dynomat. I initially considered the best way to achieve this and decided on wrapping the rear of the speaker in the stuff to contain the sound... but after some good advice from a few car-audiophiles on SELOC, I revised this and lined the enclosures at the back and around the sides to create a controlled space and a less 'sound discolouring' environment in which the speakers could operate efficiently
Before fitting the Dynomat, place the crossover units and cables tidily away (below drivers side housing is a large void which I felt the crossover would rattle around in, so I eased some foam down to slide it securely away in there)
Line the housings with Dynomat, pressing on to all surfaces firmly and making sure the front edges are firmly attached to the rear of the front mounting face. I personally found this easier using a dish shaped piece at the back and two or three 3" wide strips for the sides, making sure it was all well stuck together without forgetting to lead the speaker cables through!
(Ideally, these housings should also have some long haired wool, or BAF fibre fill in them - I will add that also when sourced)
Put a foam gasket around the back of the speaker before placing speaker into the housing - I simply cut some rings from a piece of the foam packing used in the 52.7i packaging! Bargain! (Another top tip here - use some small snots of the Dynomat black stuff to hold the foam on to the rear of the speaker chassis
)Screw speaker securely back in place taking care not to slip and damage the cone. Note the spacing washer in bottom left hand corner of face grill to ensure clearance between grill and speaker cone edge
Follow the same preparation for the rears – crossover wiring and placement etc and don’t forget to place the grill surround on the back of speaker before wiring up. As this example has the Touring Pack soundproofing, I just fixed Dynomat around the sides between the existing foam and the rear of the mounting face
Again, fit a foam gasket to the rear face of the speaker before screwing carefully into place
The supplied Infinity grills struck me as a little too 'shiny' and have open sections in them. Seeing as a fair bit of small debris enters the cabin with roof off, I opted to refit the standard Blaupunkt covers as they offer better protection. No modification required as amazingly enough, they fit the Infinity surrounds perfectly! (The original Blaupunkt surrounds impede the cone however as they are fitted in front of the speaker chassis as opposed to behind it)
I made a ‘1 into 2’ phono cable to connect Subwoofer Out from head to the left & right input tails on the Sub unit (Yes, it’s only mono of course, but has two inputs. It may be fine to just use one single cable here, but I fed both from one source)
Fix the new head locating unit frame into the fascia slot, remove passenger side speaker / vent panel, then route the Sub feed and remote power cable (this powers up the Sub when the head unit is turned on) from the foot-well behind speaker and back edge of wing before returning and running along the inside of the dash just below side air vent and through to the head unit opening
Stick Dynomat to back of Sub unit to avoid any direct resonance between Sub and end wall. Hide any slack cable in back of Sub unit or behind sidewall carpet and fix the Sub unit in place. Tape Sub feed & remote power cables along top ledge of foot-well sidewall (dust it off first). Refit foot rest – et viola!
Connect the power and speaker blocks up to the head unit. The remote power will need connecting also – use connectors to tap the blue & white cable from the head to the Sub. Attach ariel and finally, in the case of the AVX2, wire the handbrake application cable accordingly so that the telly screen will function (either wire it to the handbrake switch or to a chassis screw on the head unit itself… but I didn’t tell you that and remember don’t ever, never be tempted to watch and drive!)
Refit side panel, connect Sub power cables to battery, tidy up and enjoy!
…and from the drivers perspective:
During installation, I found it advantageous to have the head unit temporarily wired and laid on dash to check speaker connections, Sub feed and remote power etc as I went – it can get a little precarious and untidy, but will save a lot of headache having to unpack all your kit and trace any problems. If your work is done to a high standard in the first place of course, the chances of any issues are slim
One last big point is to ensure that you set up the head unit to feed the subwoofer and adjust head unit’s settings so that the high-pass filter is in operation at 150Hz and above so that your little speakers aren’t still getting hammered with low frequencies! Let the Sub do all that
(The easiest way to check is to turn the level all the way down on the Sub and listen to what the speakers are doing. Do experimental test if required)The end result? Stunning!
I was after drastic improvement and it’s done that… and then some! Of course you will need to alter the overall EQ on the head to your own taste - as well as the Sub’s level, phase and crossover point (150Hz in theory, but I felt that got a little ‘boomy’ as opposed to ‘subby’ in my humble opinion), but at least its all present now!The Alpine Sub feels like a very solid piece of kit – but only time will tell there of course. The Infinitys give plenty of clear mids and extremely crisp (not harsh) highs - so much so in fact that I’ve EQ’d a lot of the upper mids out – they produce that much! The power and clarity is excellent although of course some of the subtleties get lost roof-off at 80mph on the driveway, but for me, it’s worked an absolute treat!
I have a buyer for the DAB54 so all in it’s set me back about four and half smooth ones. I could’ve done other mods with that for sure, but induction & sports exhaust etc can all come at a later date
Due to my upbringing, this was my personal priority… but that’s just me!