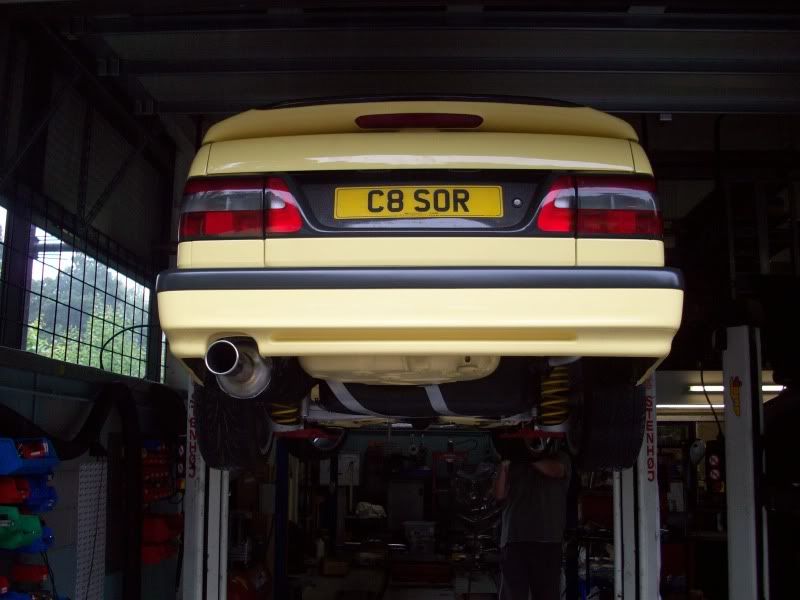
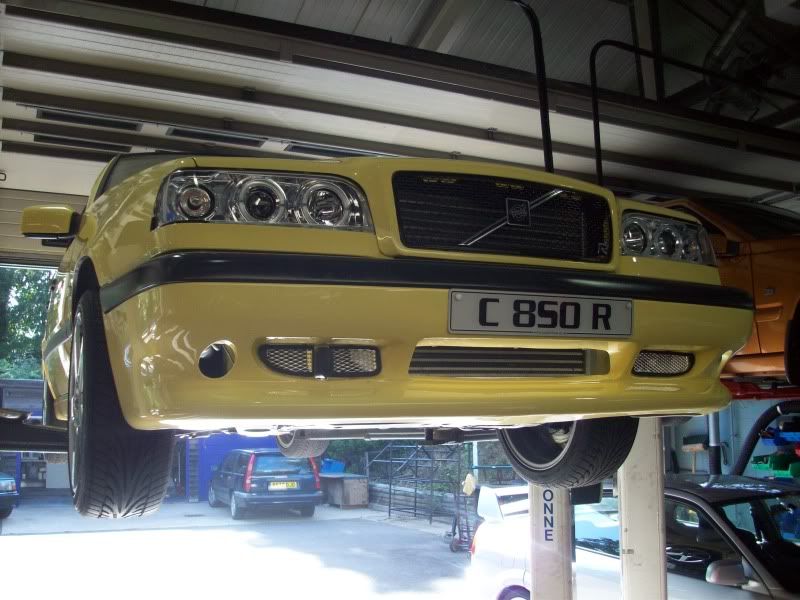
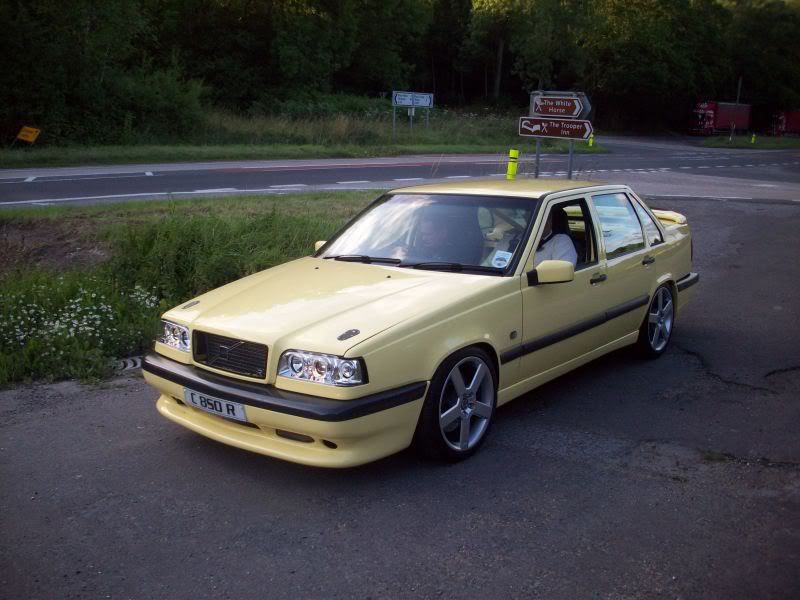
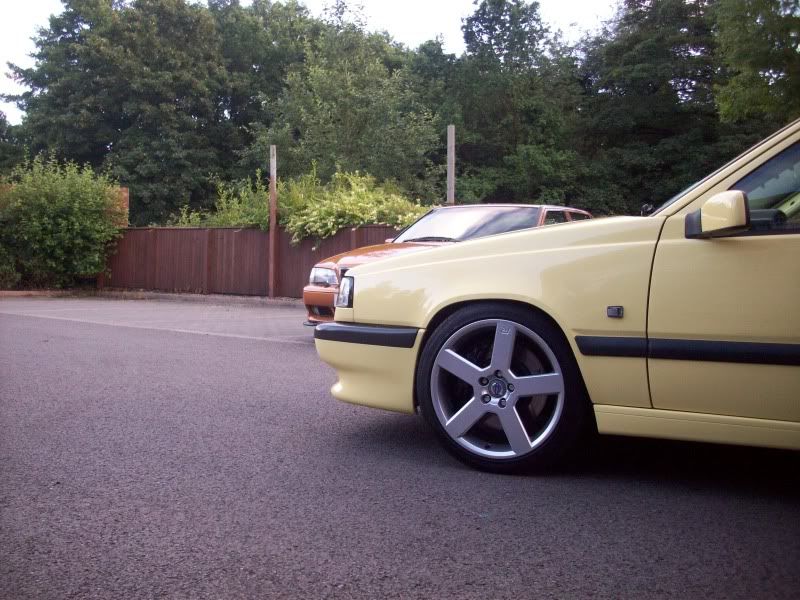
My 535 Bhp and 470 ftlbs torque @2.3 bar Volvo 850 :)
Discussion


JamesK said:
Russ, you are mental 
Having decided I don't want to spend all my cash at the moment, the XC90 is out and fast classic estates are IN!
I am never going to want/handle/afford 500bhp but logically what is the best base model for future tuning? I love the 850's but they are getting pretty old now and good ones very few and far between. Similarly the AWD V70's seem to be more potential trouble than they are worth over time.
Is a FWD V70R the best compromise? Where does the power to cost ratio become disproportionate in your experience (i.e drivetrain/gearbox/internals)? 400bhp? Less?
Hi James Having decided I don't want to spend all my cash at the moment, the XC90 is out and fast classic estates are IN!
I am never going to want/handle/afford 500bhp but logically what is the best base model for future tuning? I love the 850's but they are getting pretty old now and good ones very few and far between. Similarly the AWD V70's seem to be more potential trouble than they are worth over time.
Is a FWD V70R the best compromise? Where does the power to cost ratio become disproportionate in your experience (i.e drivetrain/gearbox/internals)? 400bhp? Less?
You have a pm

Russ
Hi all time for an update:
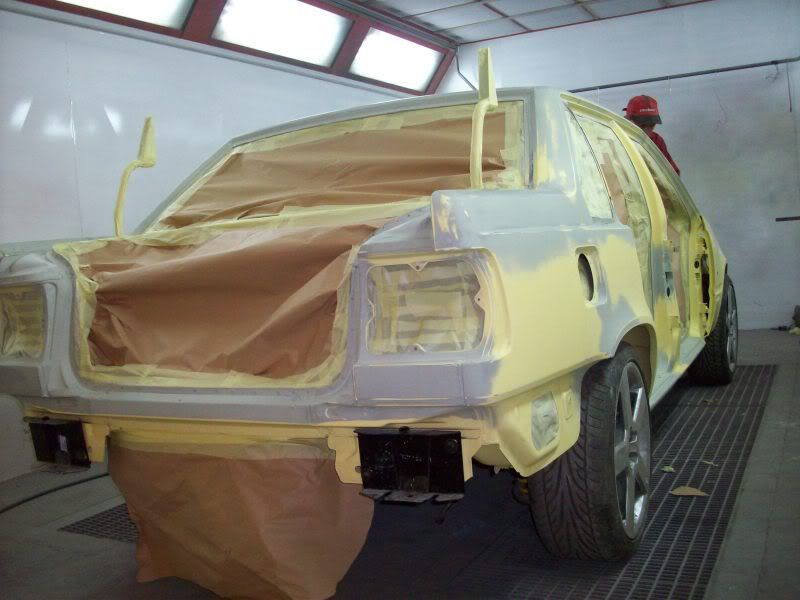
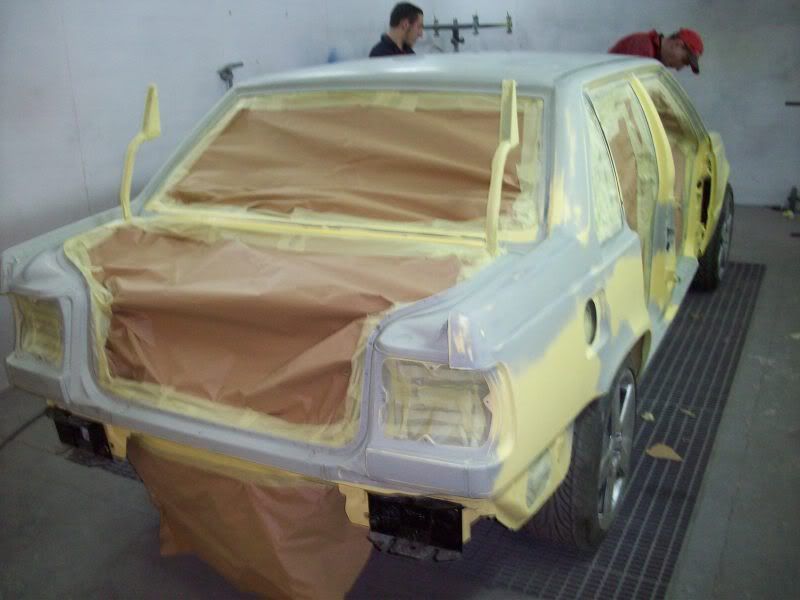
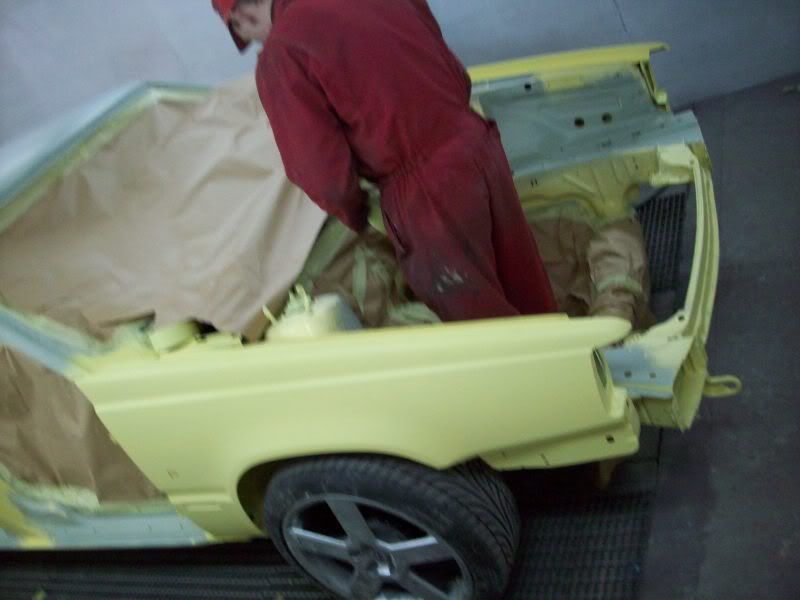
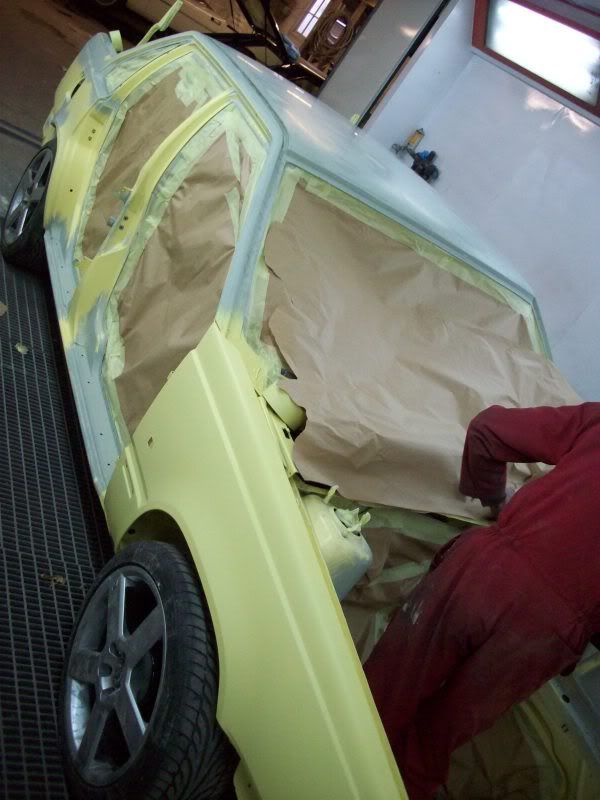
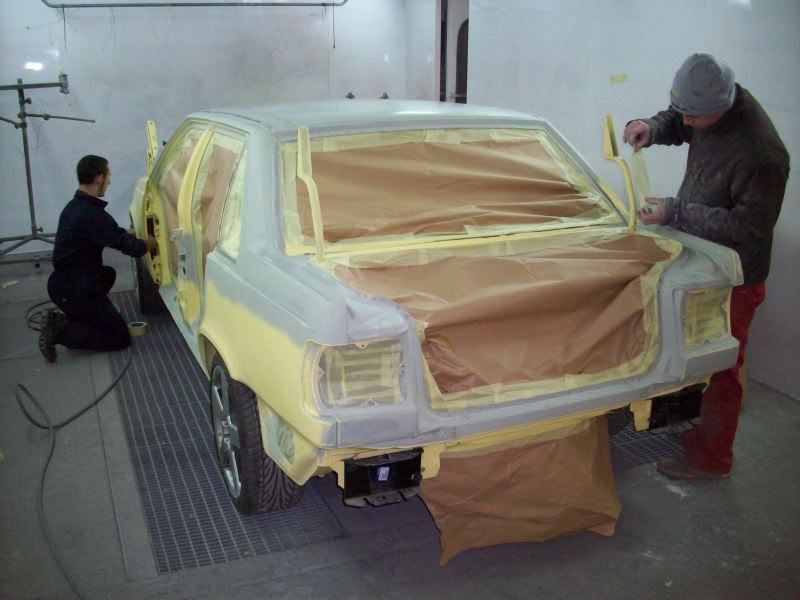
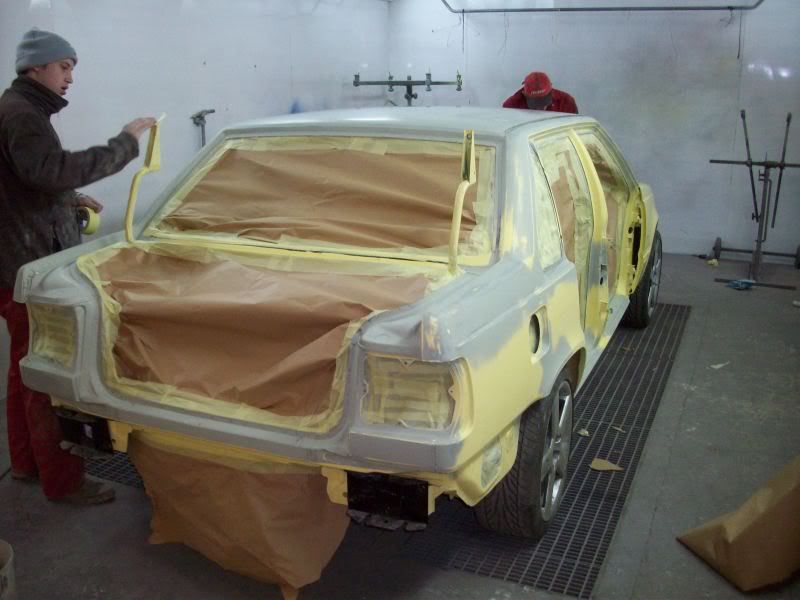
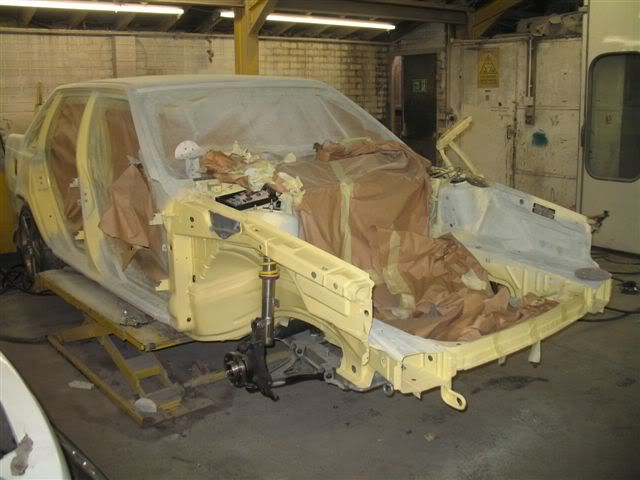
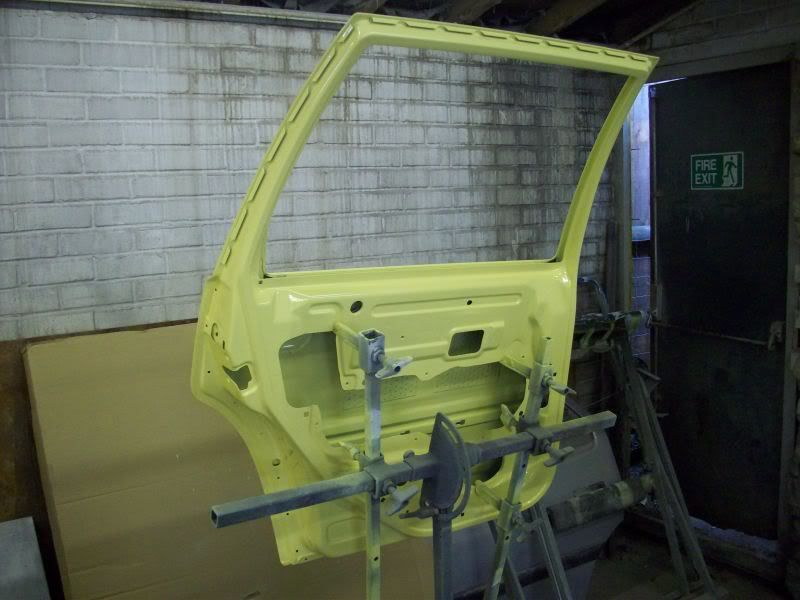
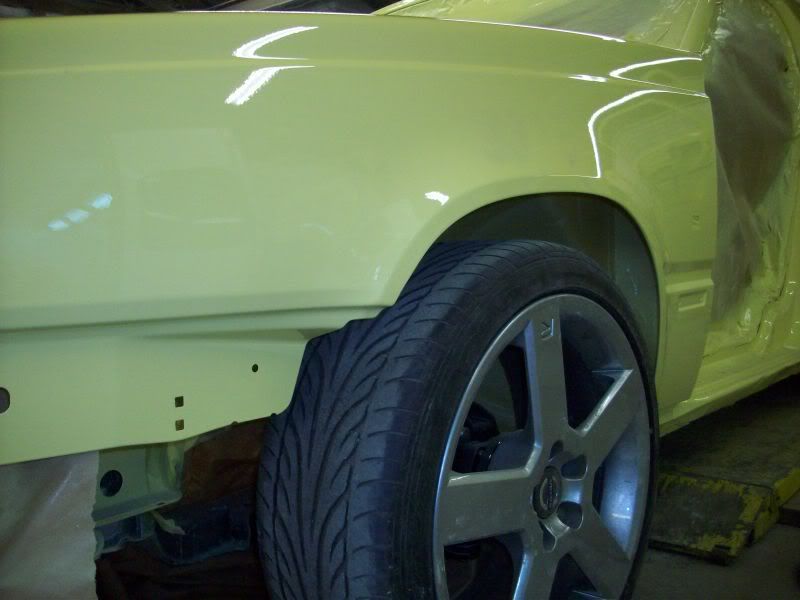
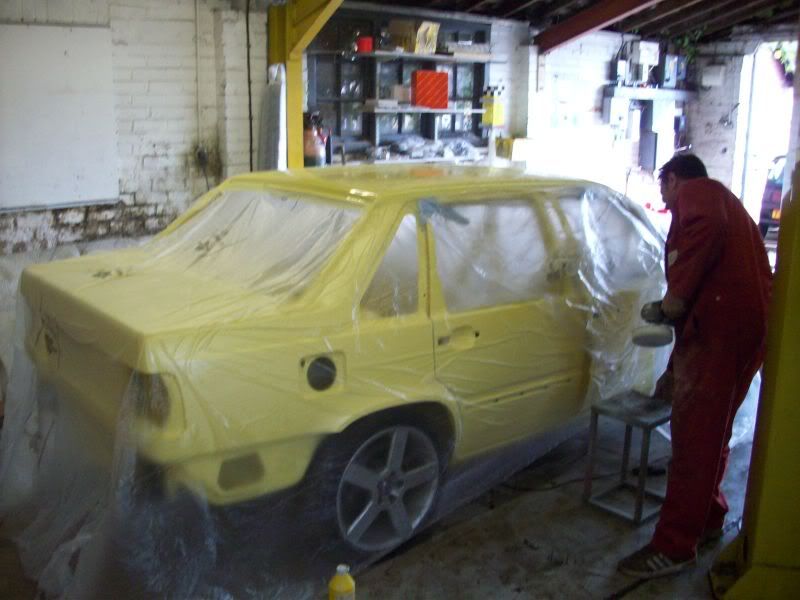
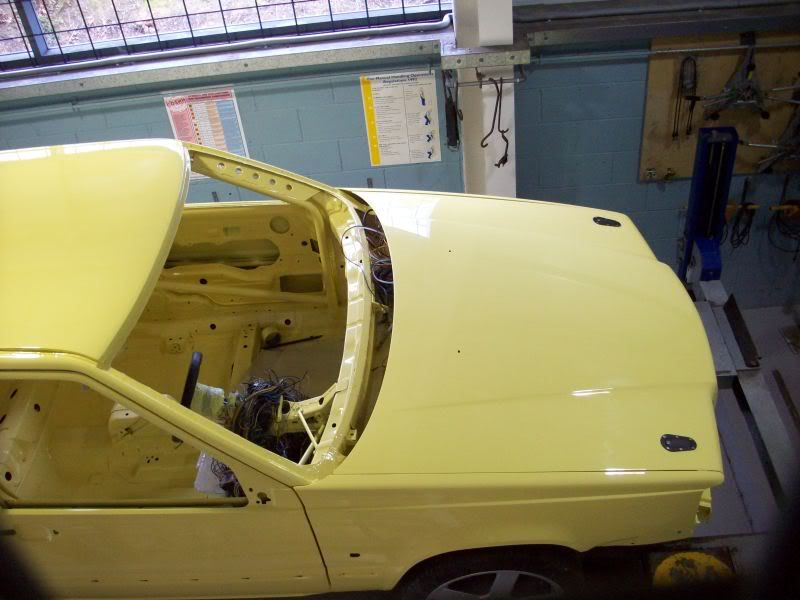
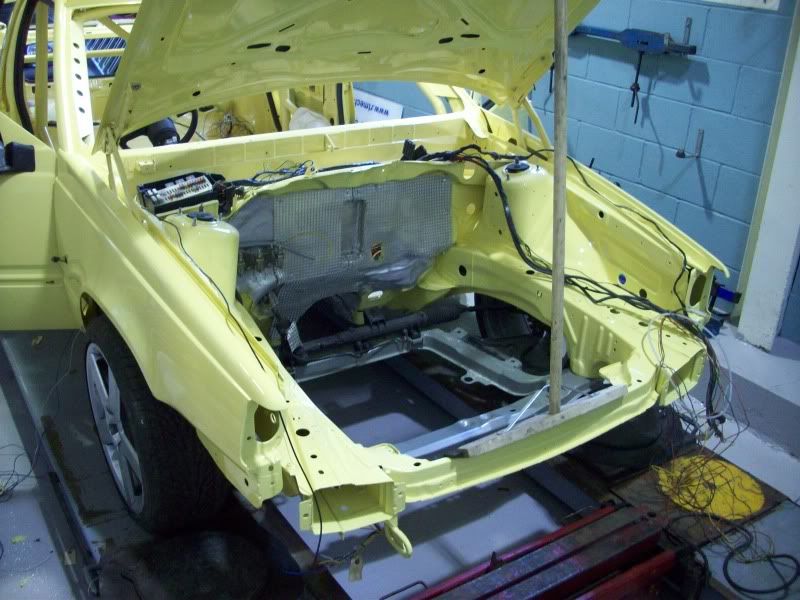
Since the last update the car has been coming along nicely slowly but surely I think is the best way to describe it ƒº The car went to our local bodyshop and was then prepaired ready for the full re paint inside and out I was on no hurry to have the car finished so left the bodyshop guys to get on with what they do best I did pop in from time to time just to see how its going ¡K.
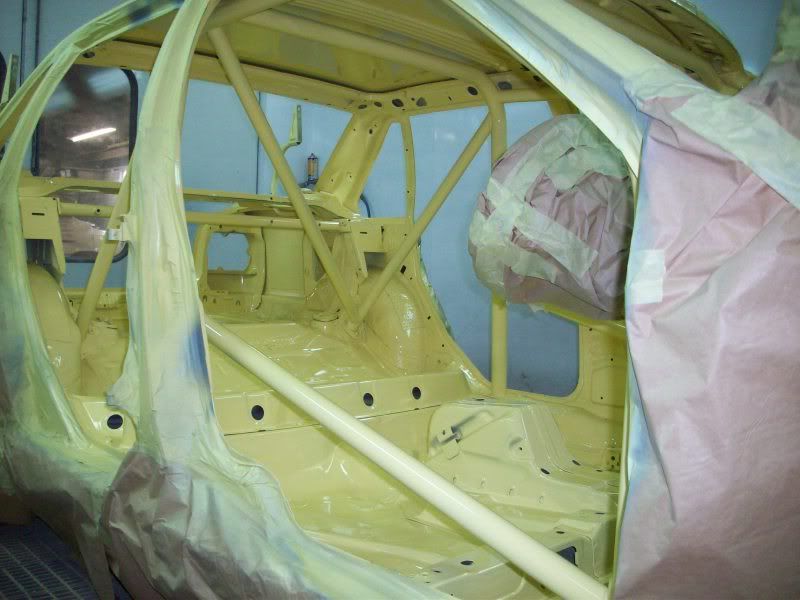
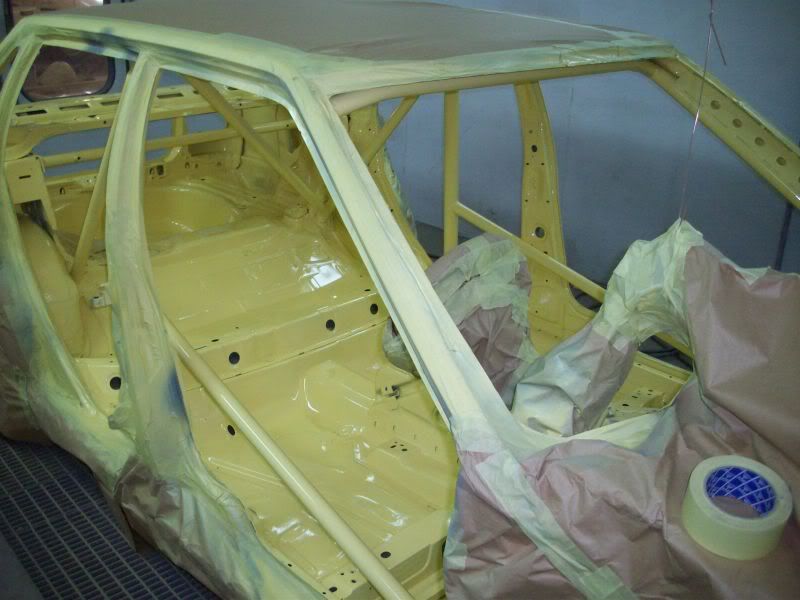
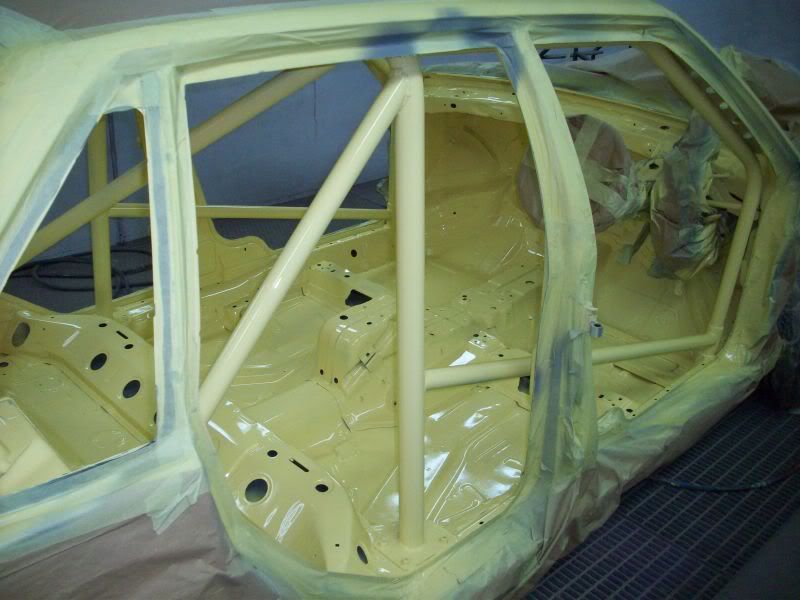
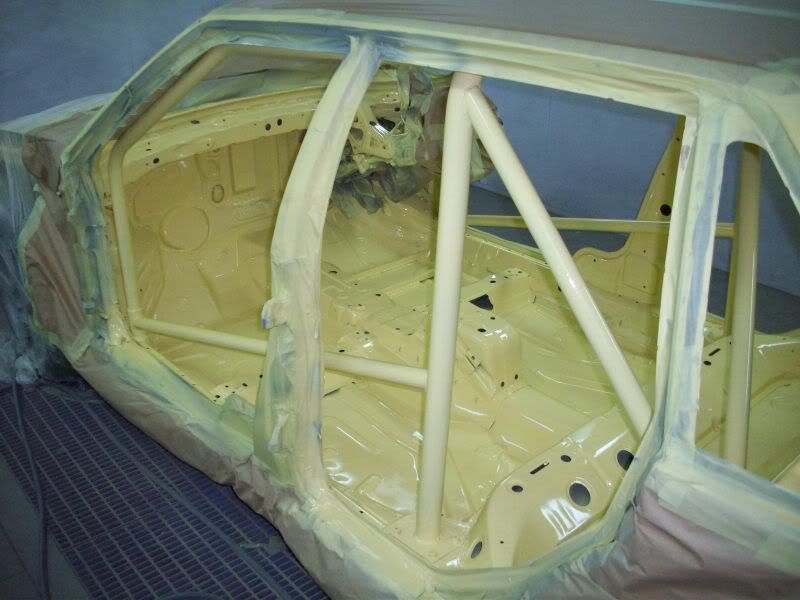
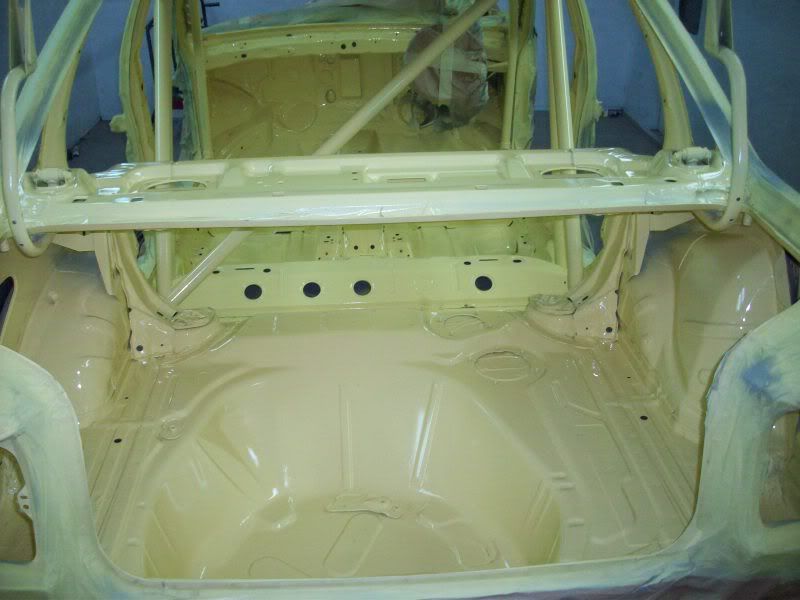
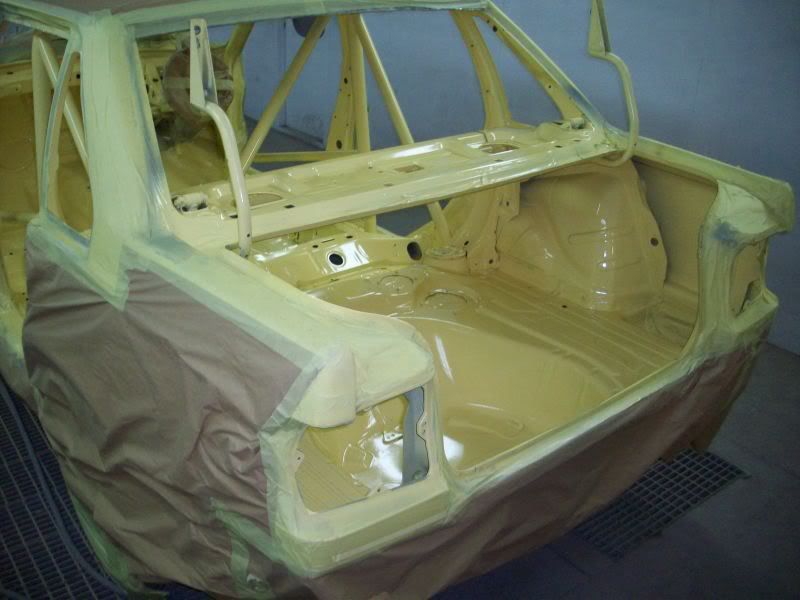
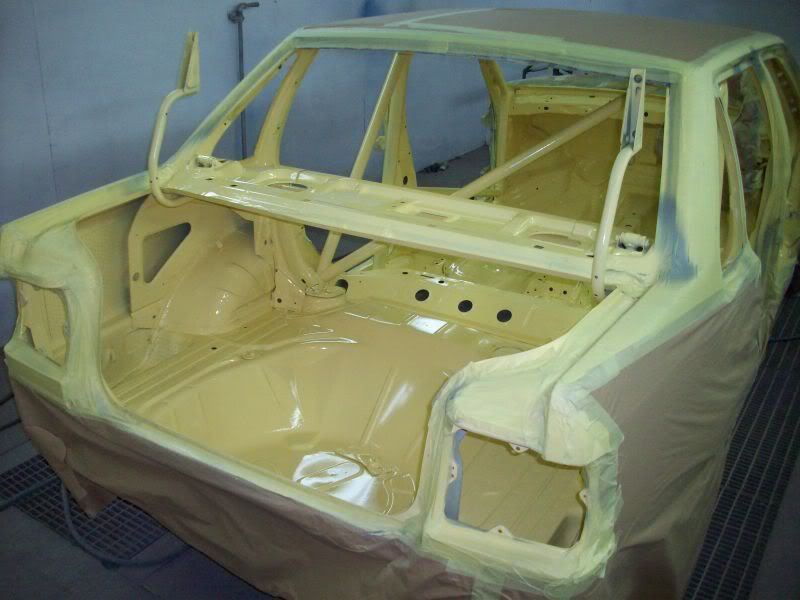
With the inside done the next stage was to roll the arch¡¦s of the brand new wings I brought then these were ready to be repaired and then painted
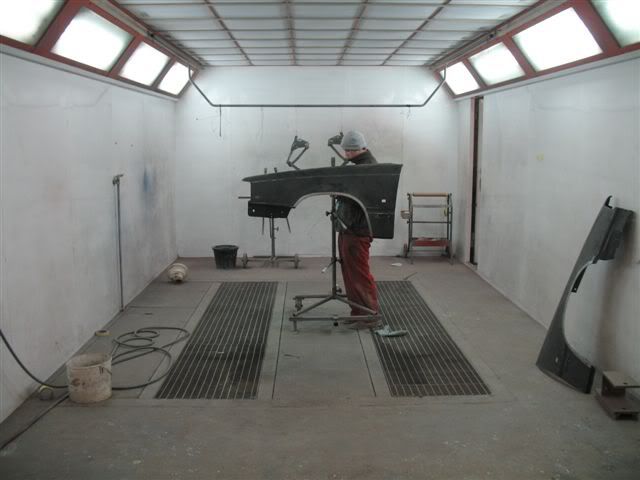
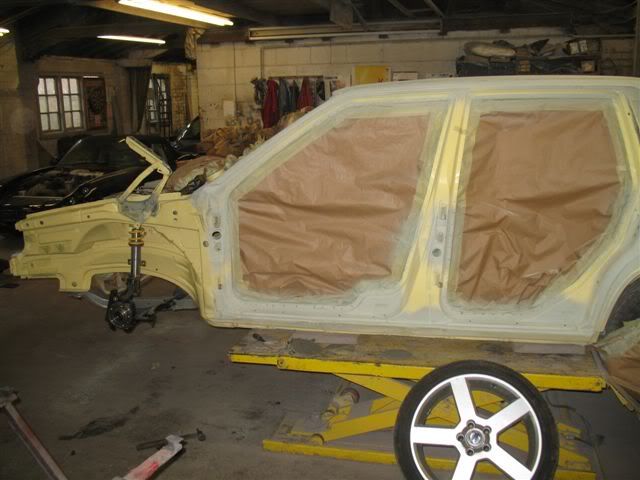
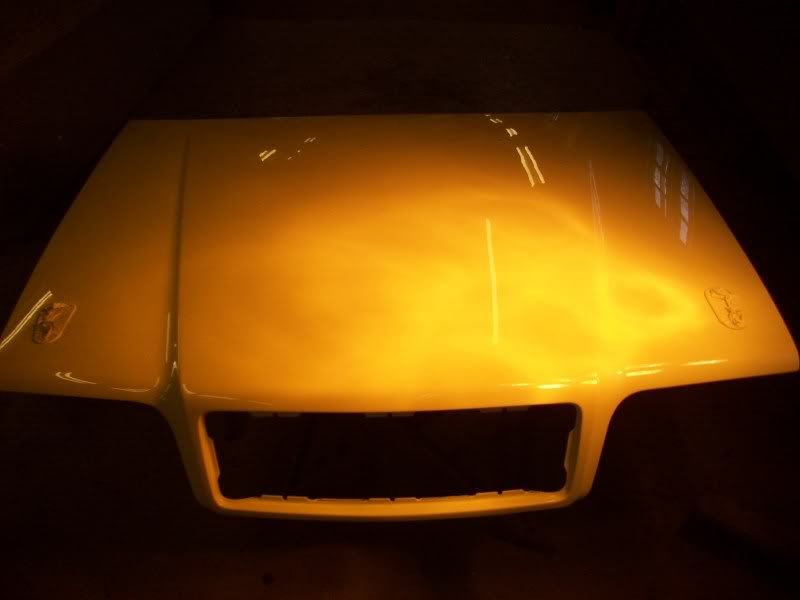
Then the outside was the next stage

]
The Peril arrived at its new home and took pride of place on one of the four poster ramps IMG]http://i79.photobucket.com/albums/j152/500bhpvolvo/The%20Peril/100_2218.jpg[/IMG]
I had time to have a quick poke around another bodyshop visitor ļ

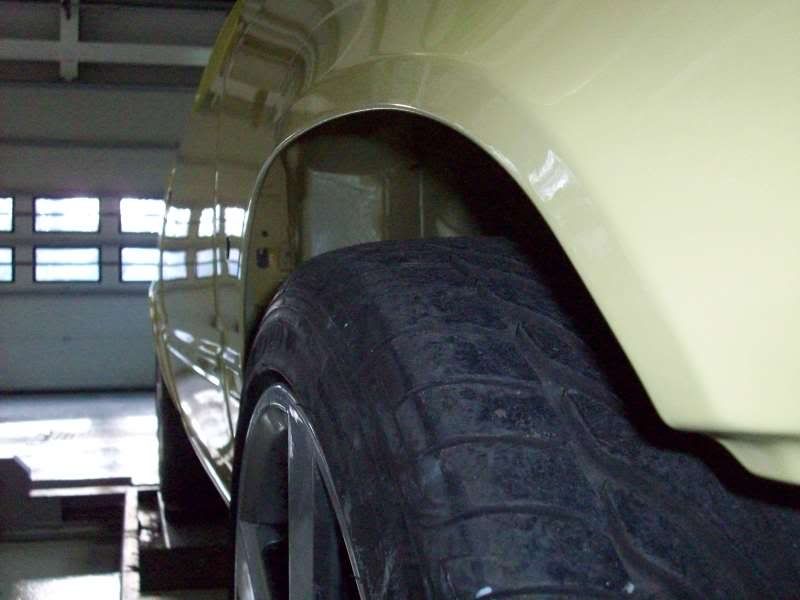
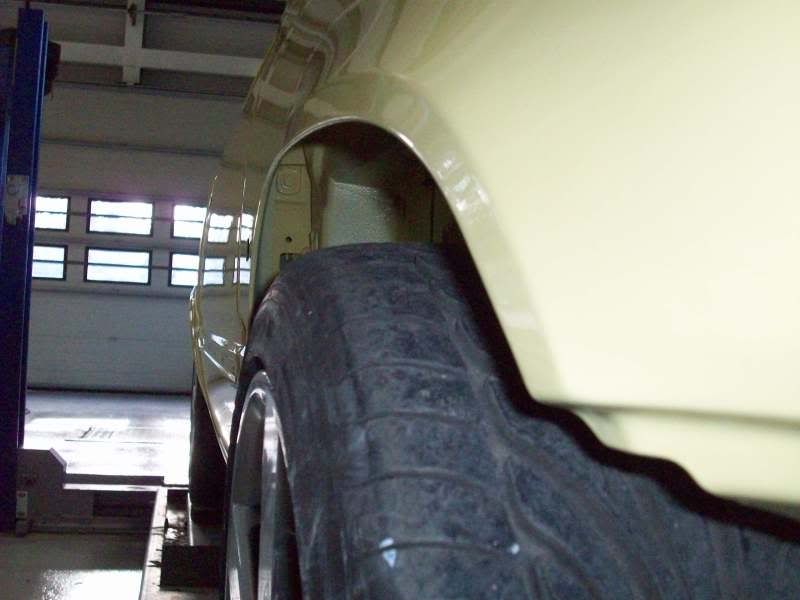
I was pleased how the antenna hole repair turned out I did not want to just put a grommet in the hole .


Since the last update the car has been coming along nicely slowly but surely I think is the best way to describe it ƒº The car went to our local bodyshop and was then prepaired ready for the full re paint inside and out I was on no hurry to have the car finished so left the bodyshop guys to get on with what they do best I did pop in from time to time just to see how its going ¡K.
With the inside done the next stage was to roll the arch¡¦s of the brand new wings I brought then these were ready to be repaired and then painted
Then the outside was the next stage
]
The Peril arrived at its new home and took pride of place on one of the four poster ramps IMG]http://i79.photobucket.com/albums/j152/500bhpvolvo/The%20Peril/100_2218.jpg[/IMG]
I had time to have a quick poke around another bodyshop visitor ļ
I was pleased how the antenna hole repair turned out I did not want to just put a grommet in the hole .
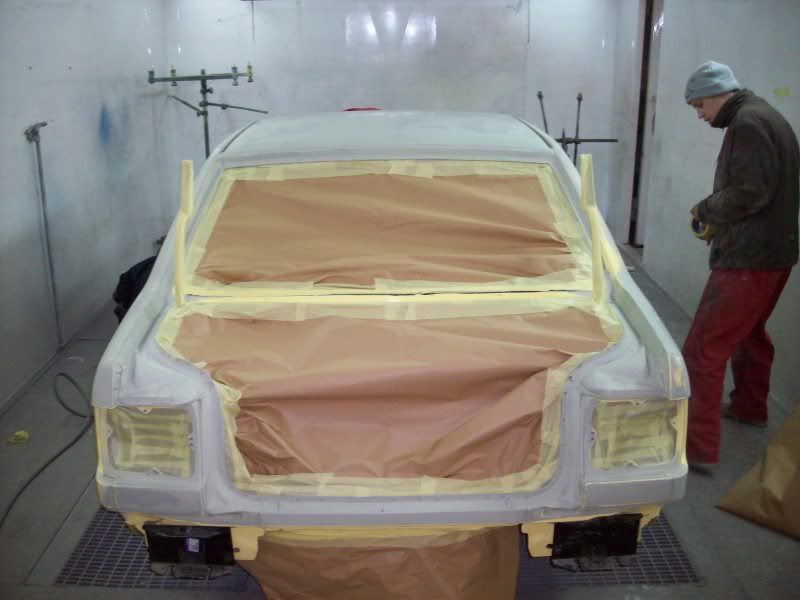
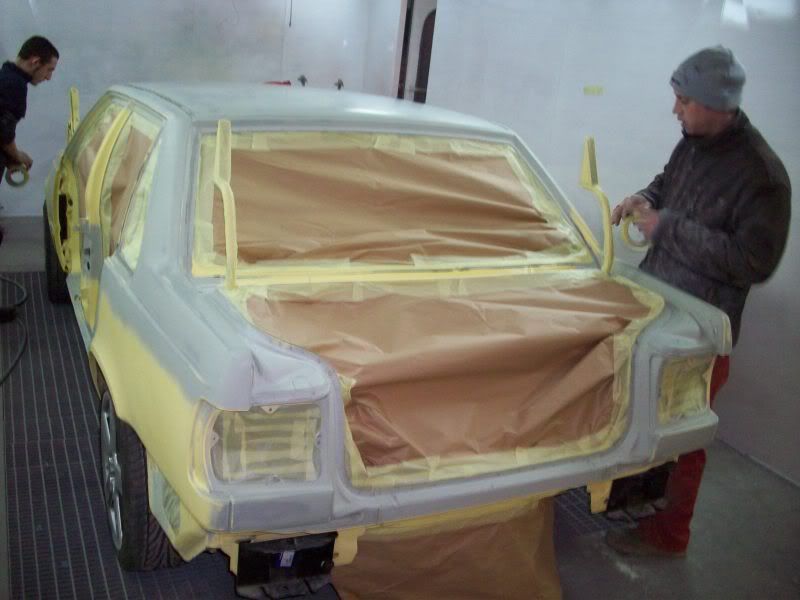
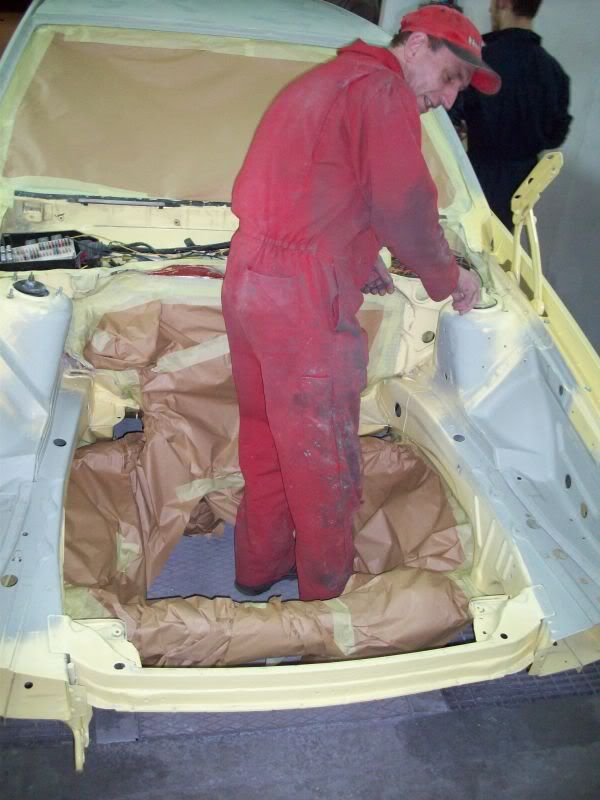
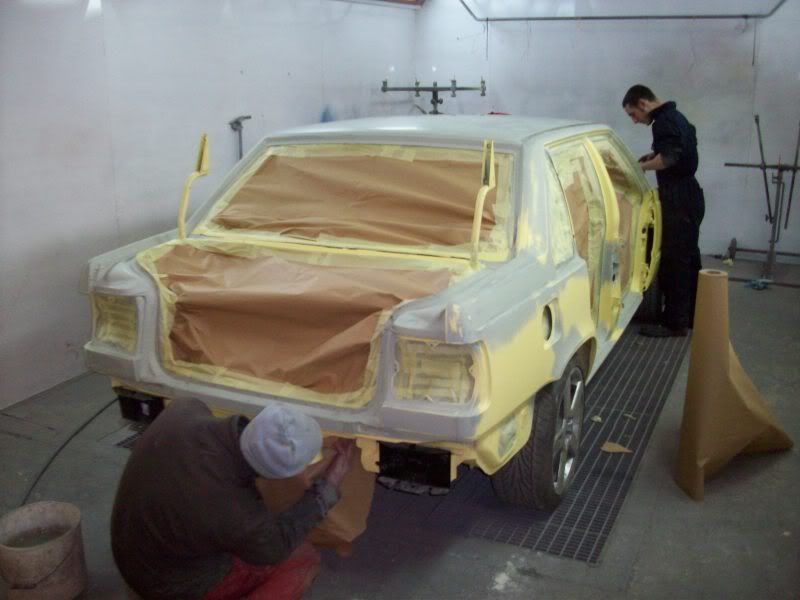
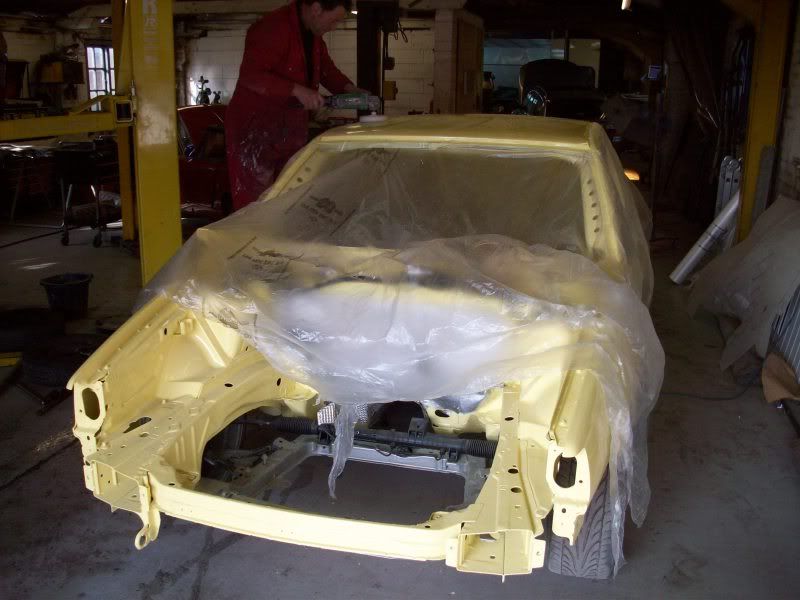
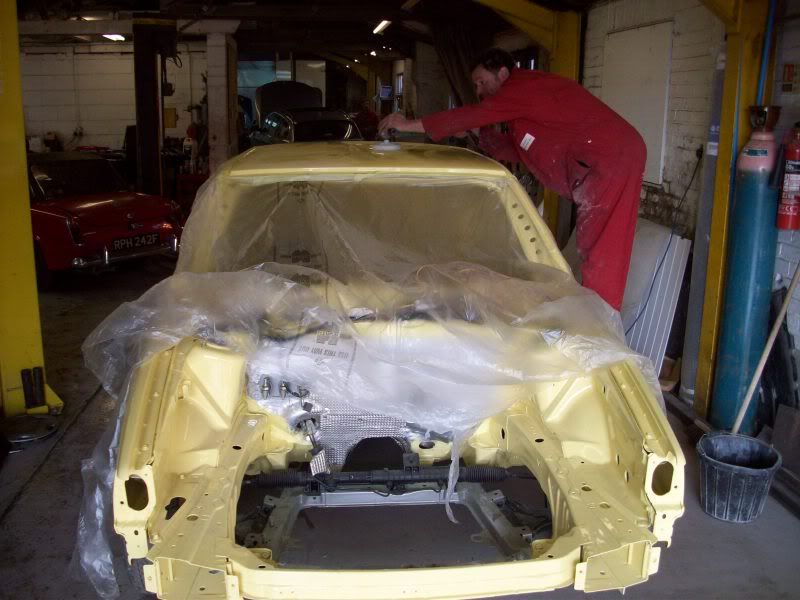
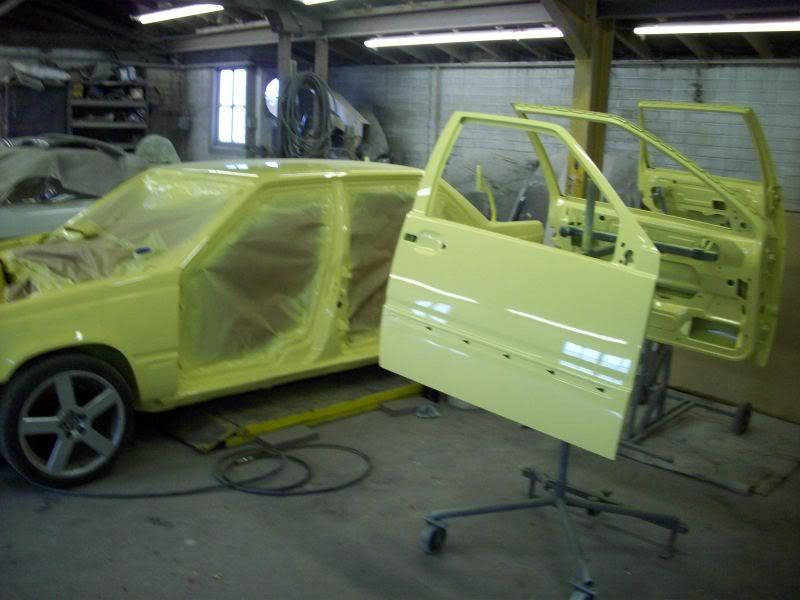
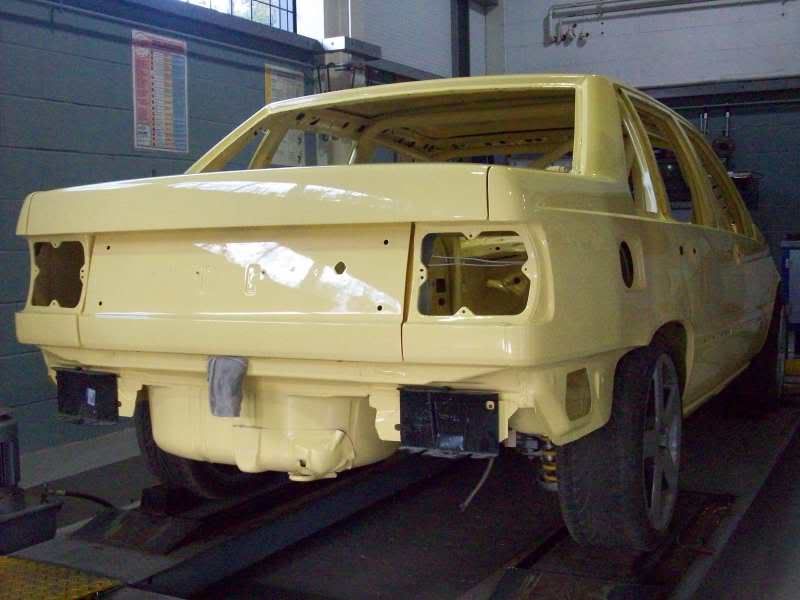
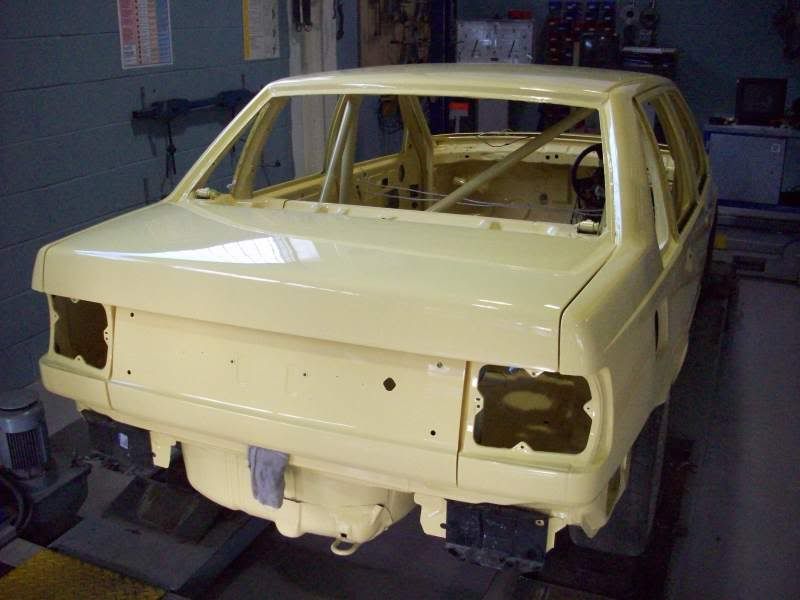
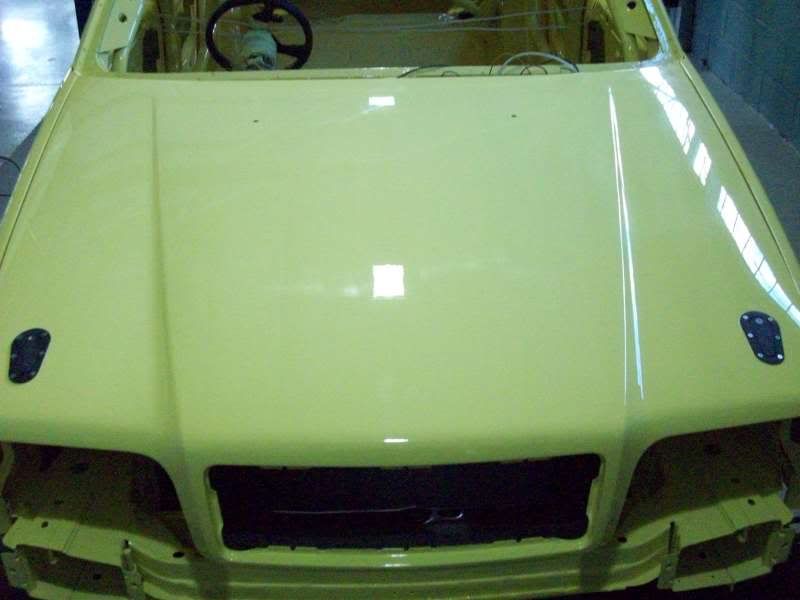
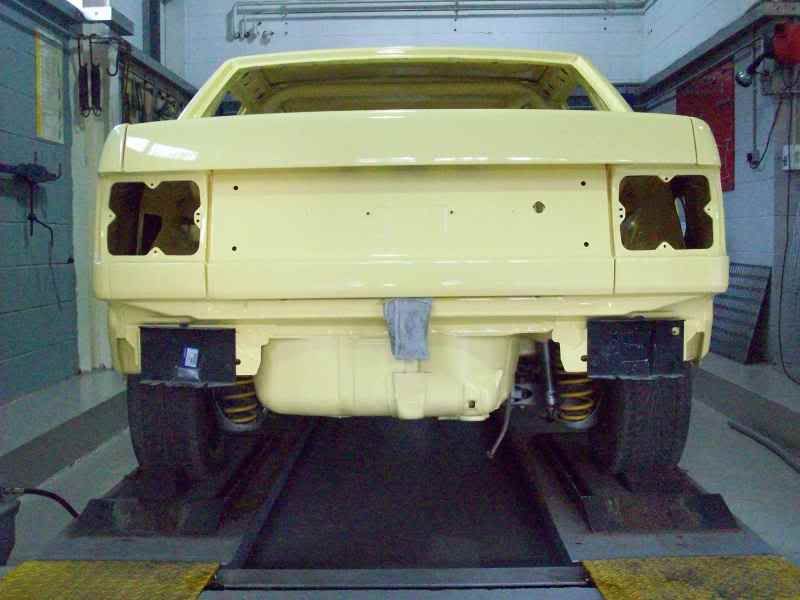
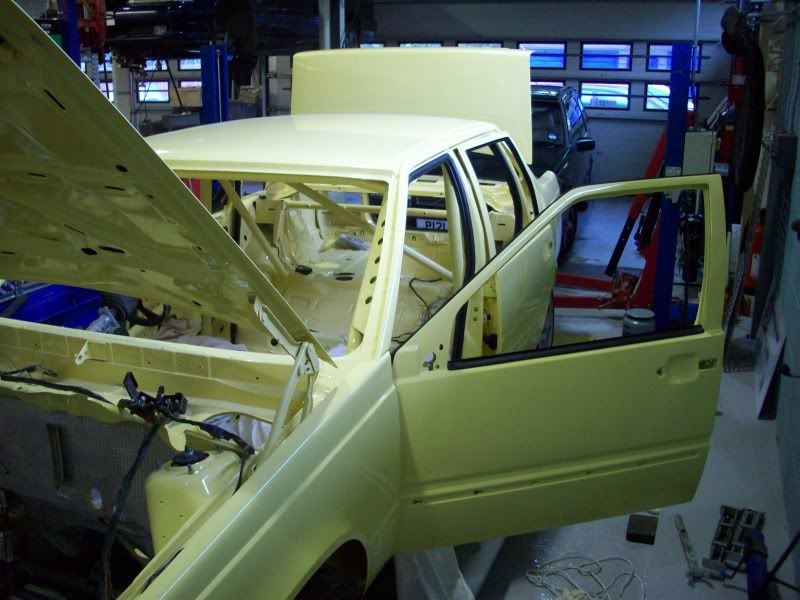
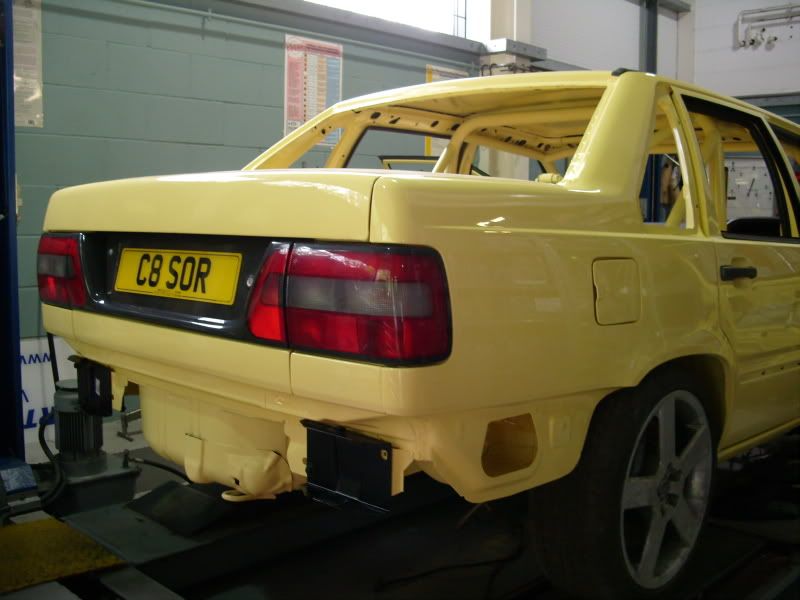
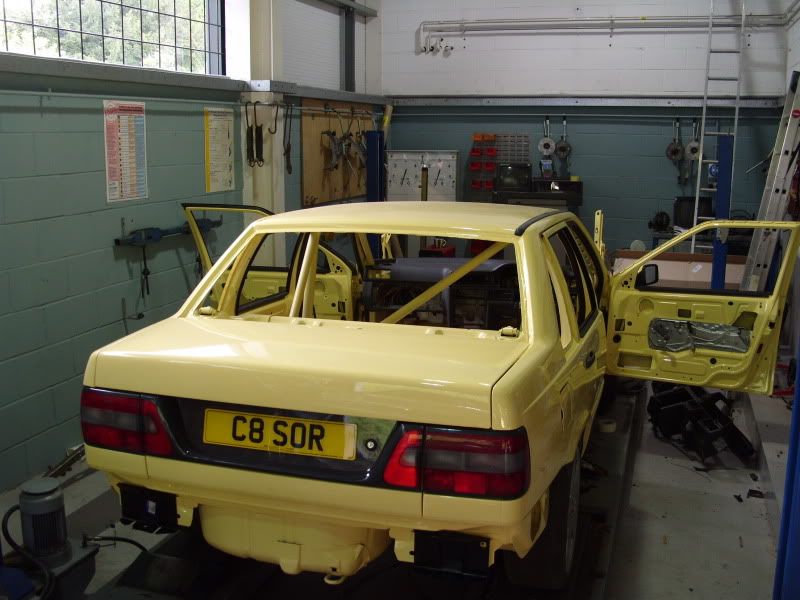
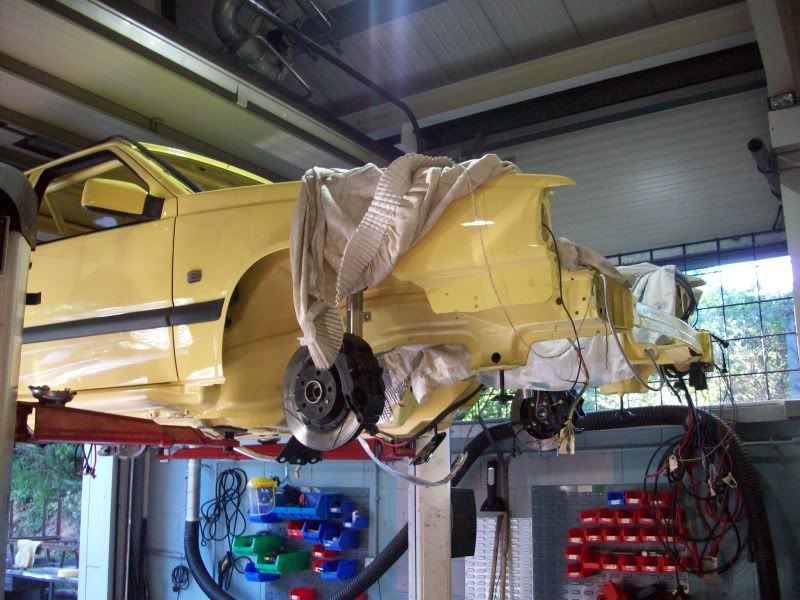
As I said before we where in no hurry to have the car back as during all this going on we where about to move the business to much bigger premises so left the bodyshop guys to finish off the work and just popped in the day before the Peril arrived at its new home in time to see the final finish and polish
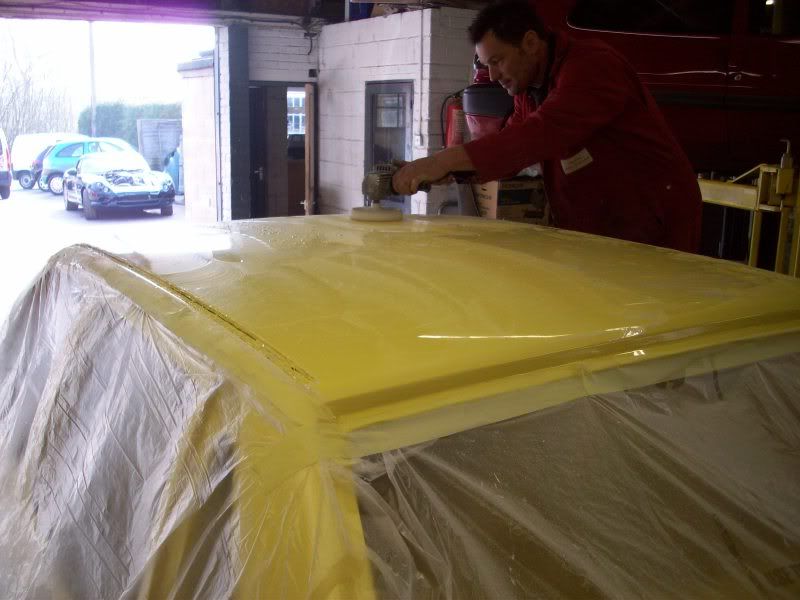
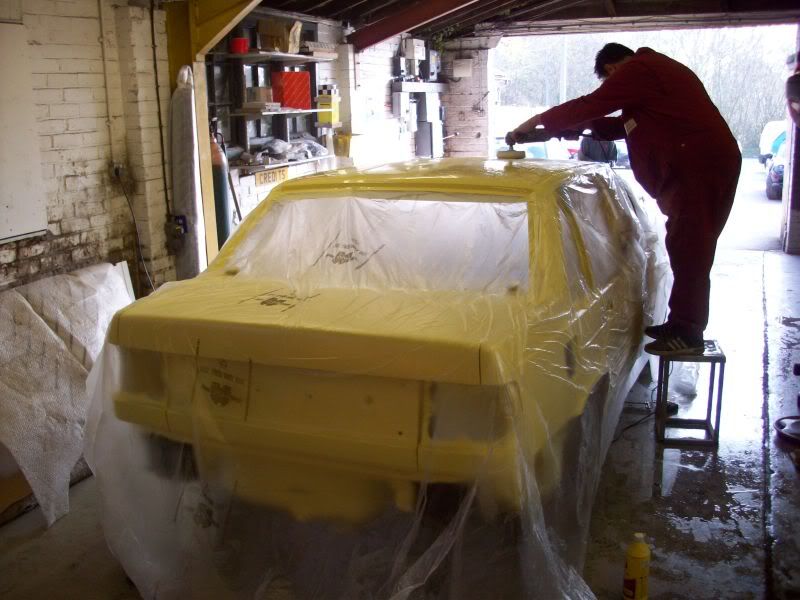
[IMG]http://i79.photobucket.com/albums/j152/500bhpvolvo/The%20Peril/100_2252.jpg[/IMG ich makes it much easier to do the refit so I can crawl inside with blankets covering all the fresh paint


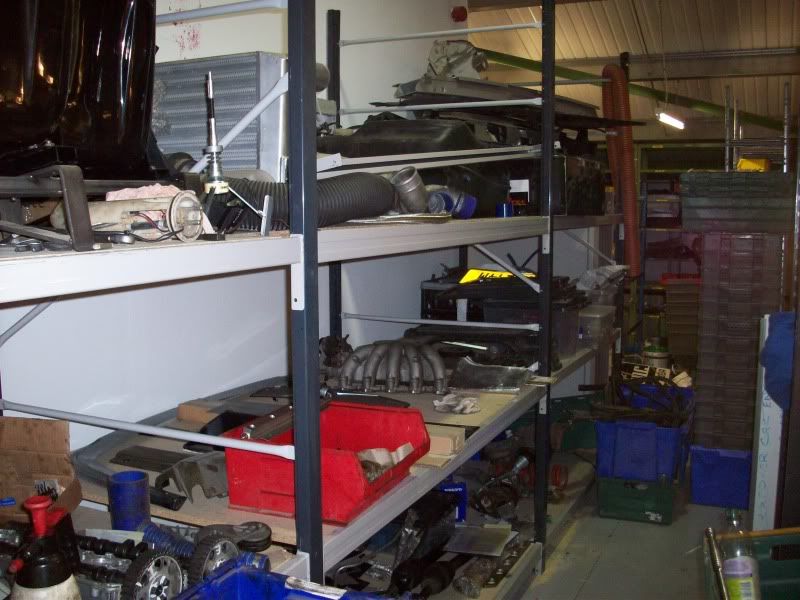
The new building we have moved to has lots of room so I am lucky enough to have my own area for the Peril and all the parts in the different sections so I can be quite organized about how I re assemble the car which is going to take time as its only done in my spare time as we are so busy at work fixing customers cars ļ
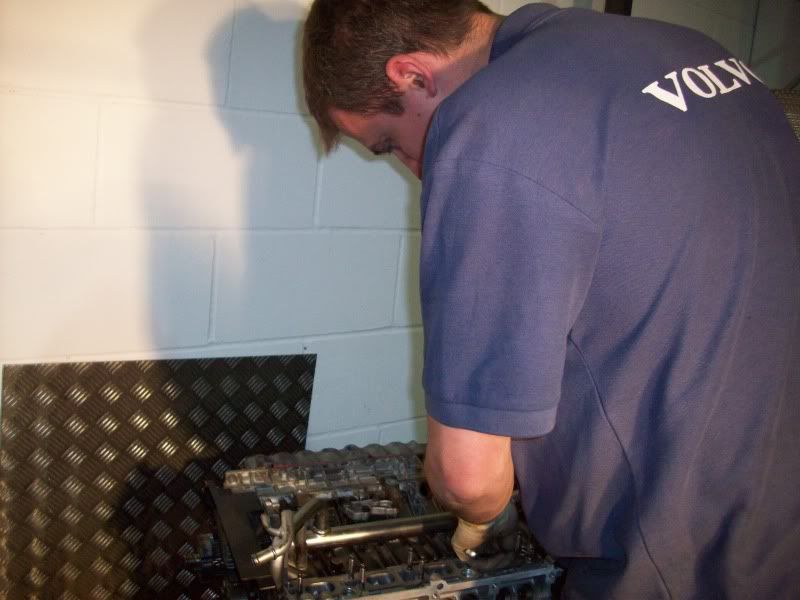
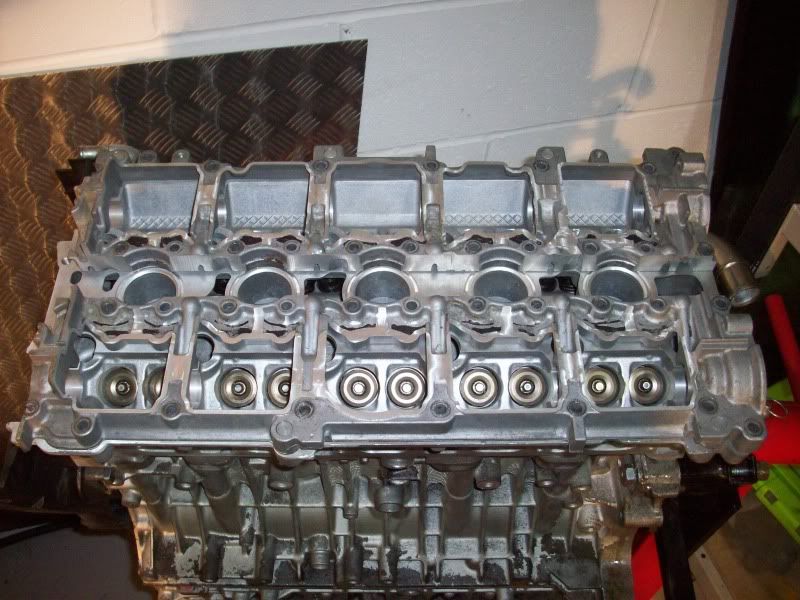
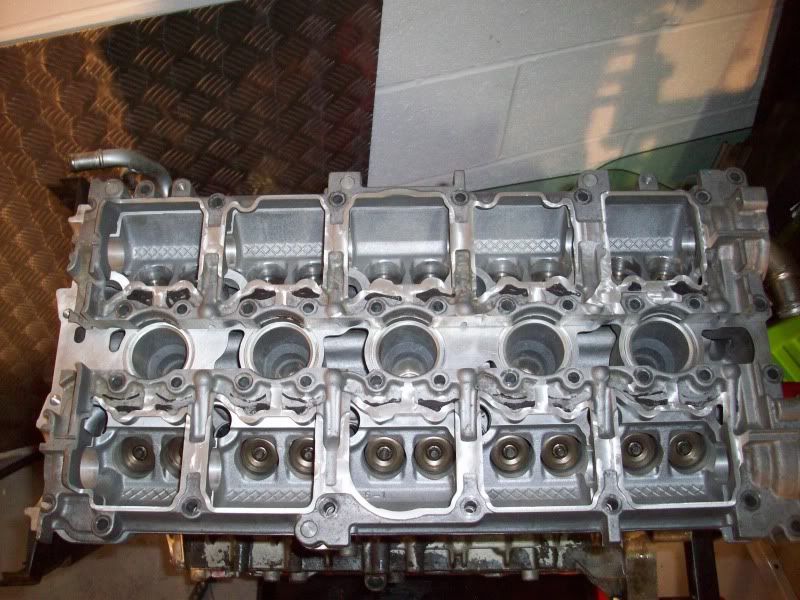
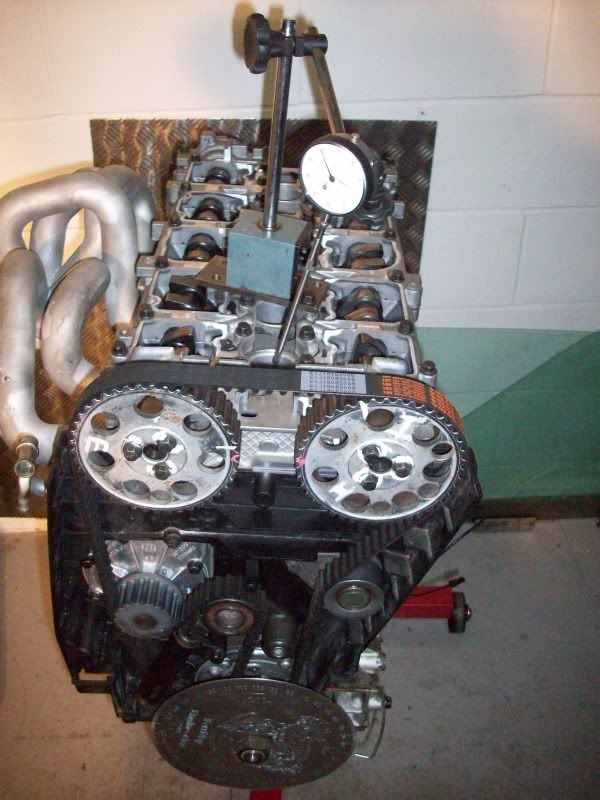
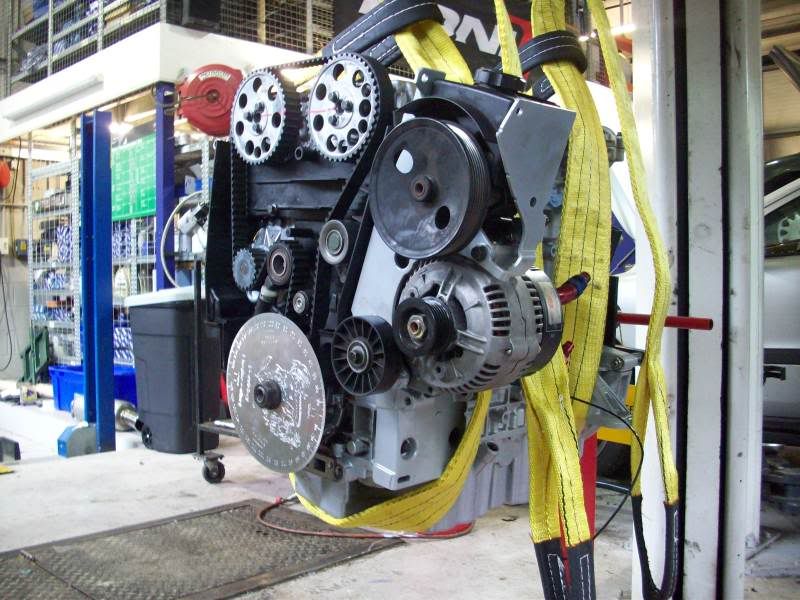
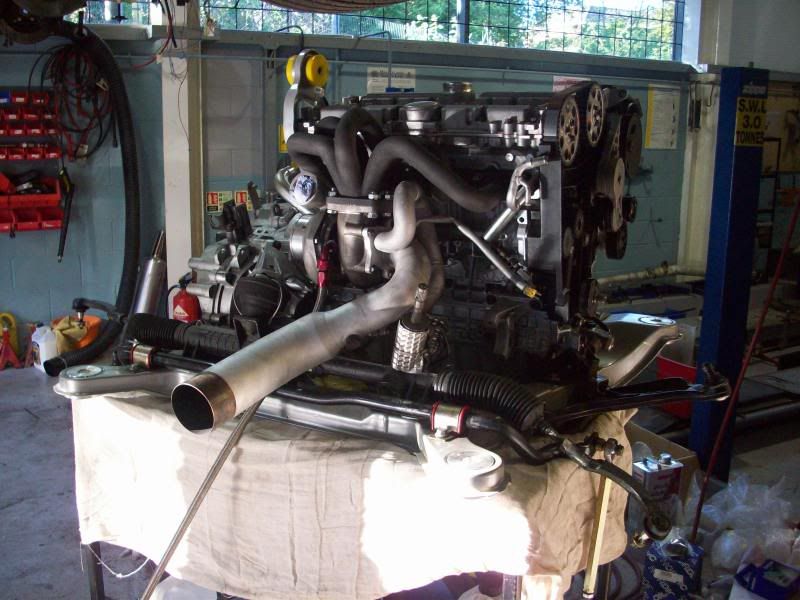
I decided to start the rebuild with the engine first then start on the car re fit I had been waiting for three months for the design/ machining/and fitting of the ne custom liners I had made to hopefully get rid of the split liner problem I started to build up the crank bearings crank/rods pistons first :
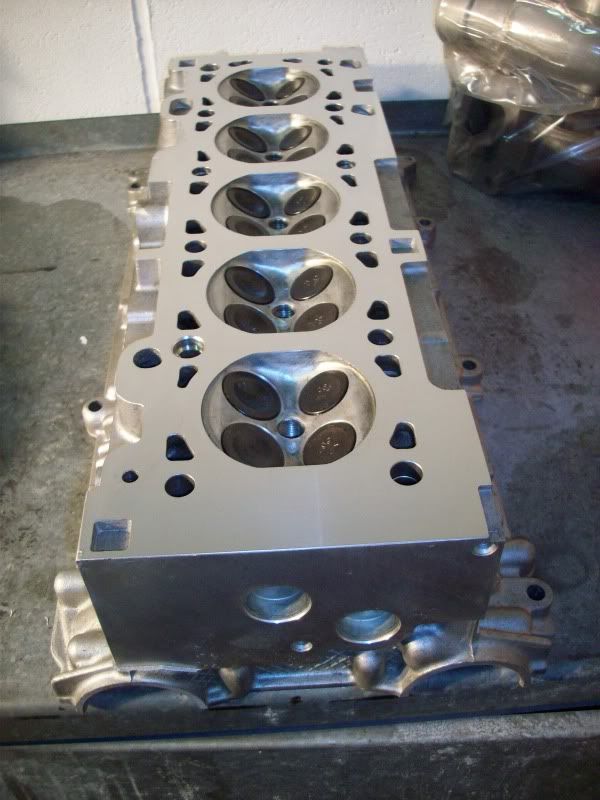

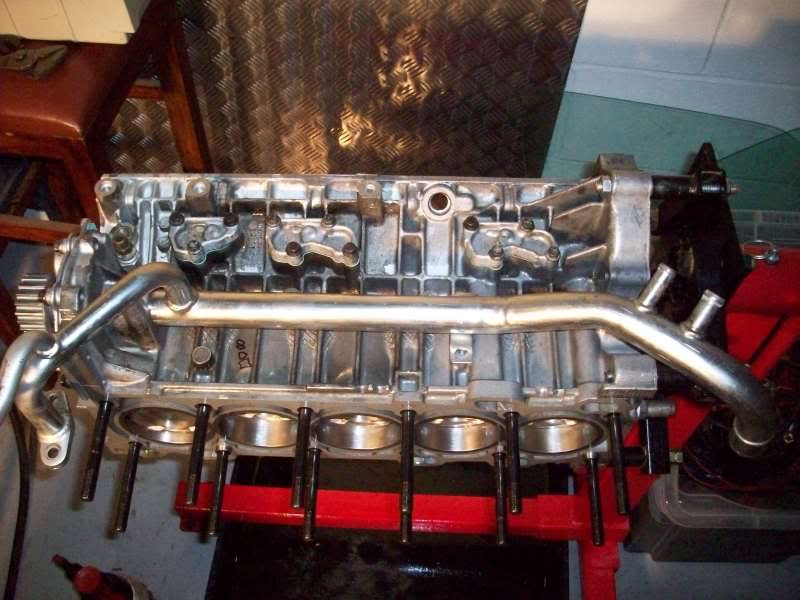

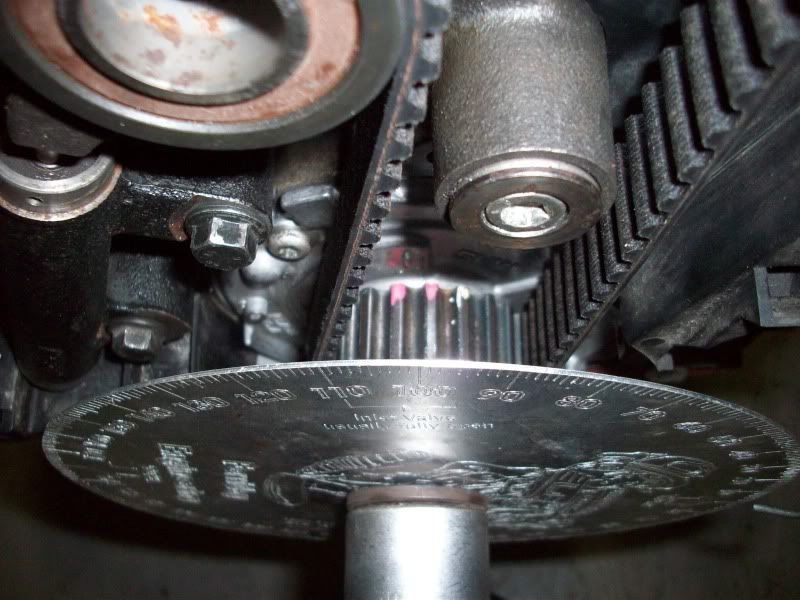
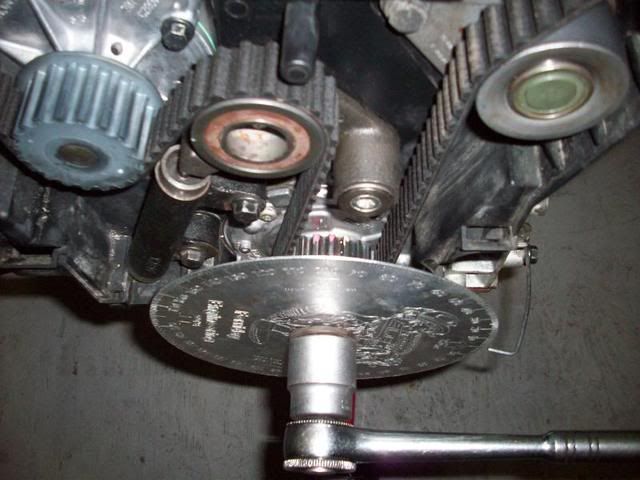
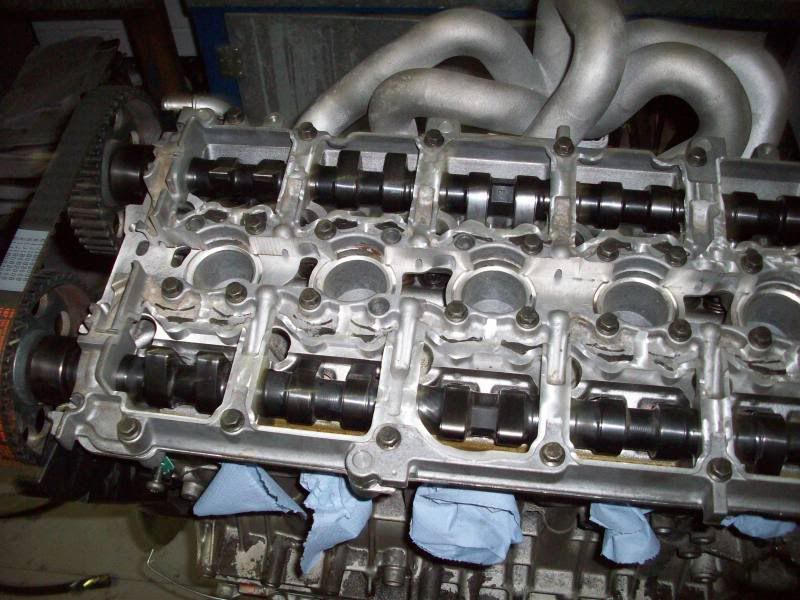
The head was fitted in place and the test cam cover I had an old cover spare so with the help of the machine shop we decided to share the cover as I was still going to run with hydraulic tappets and need to carefully dial in my new spec cams I had to be sure that I had plenty on room as of course I did not want any piston/valve contact¡K
[IMG]http://i79.photobucket.com/albums/j152/500bhpvolvo/The%20Peril/100_2252.jpg[/IMG ich makes it much easier to do the refit so I can crawl inside with blankets covering all the fresh paint
The new building we have moved to has lots of room so I am lucky enough to have my own area for the Peril and all the parts in the different sections so I can be quite organized about how I re assemble the car which is going to take time as its only done in my spare time as we are so busy at work fixing customers cars ļ
I decided to start the rebuild with the engine first then start on the car re fit I had been waiting for three months for the design/ machining/and fitting of the ne custom liners I had made to hopefully get rid of the split liner problem I started to build up the crank bearings crank/rods pistons first :
The head was fitted in place and the test cam cover I had an old cover spare so with the help of the machine shop we decided to share the cover as I was still going to run with hydraulic tappets and need to carefully dial in my new spec cams I had to be sure that I had plenty on room as of course I did not want any piston/valve contact¡K
PART 2
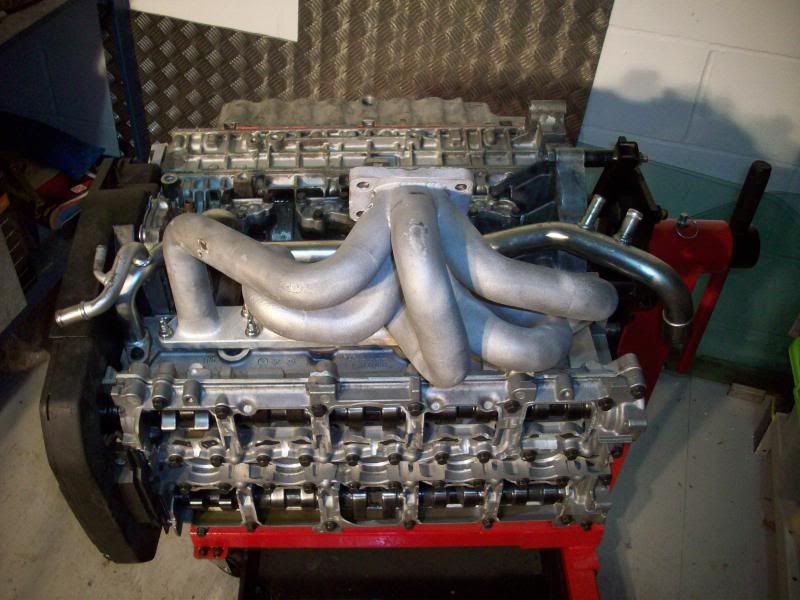
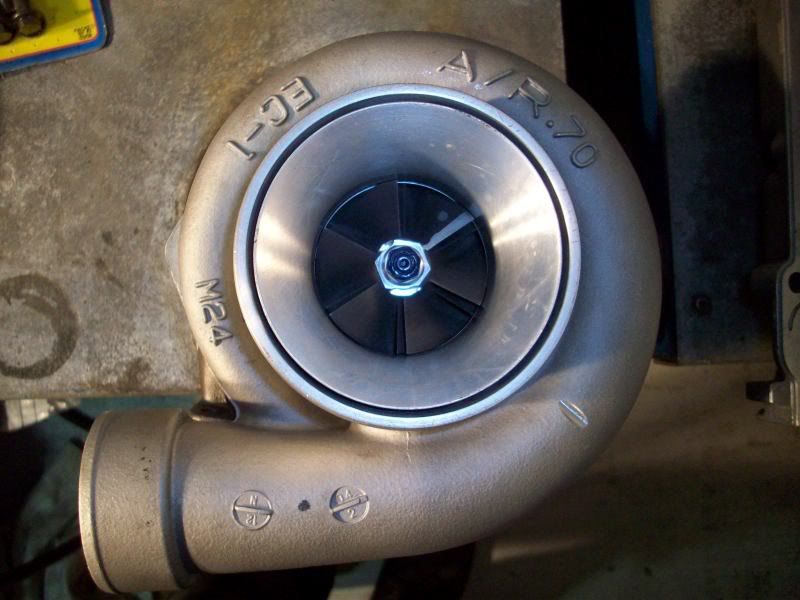
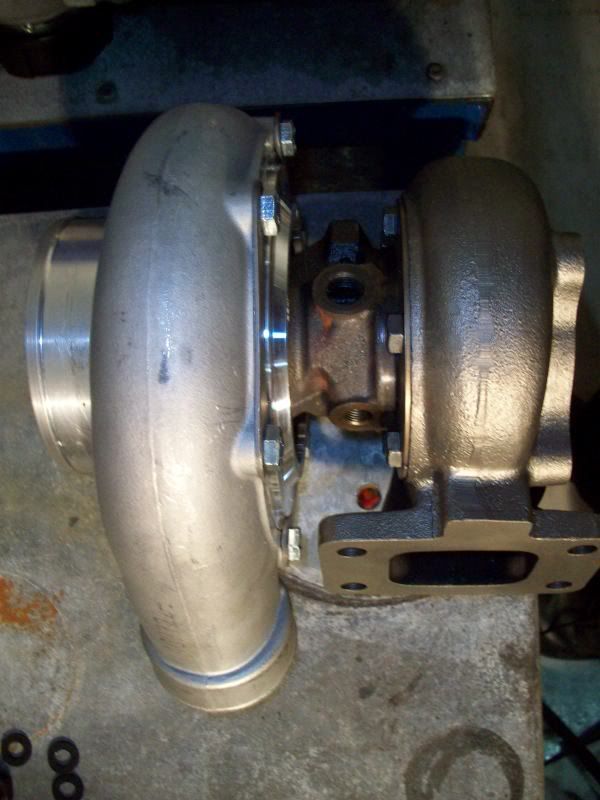
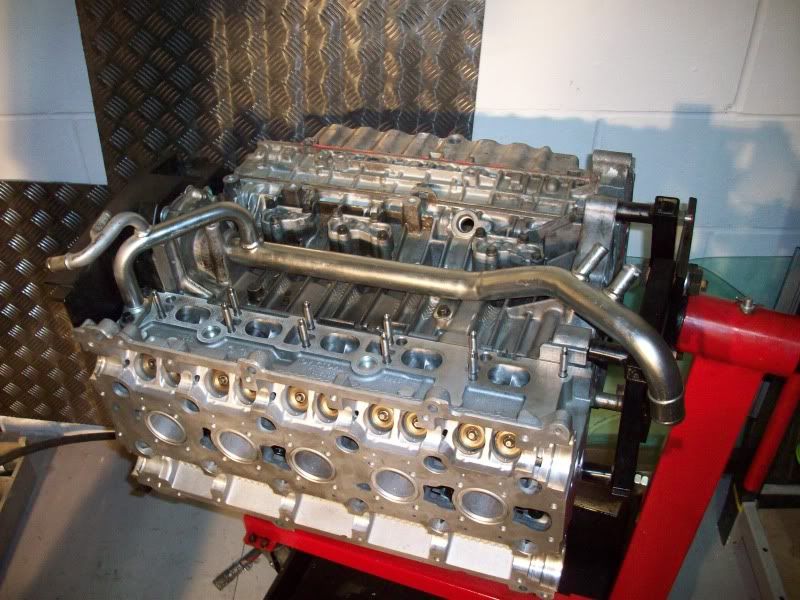
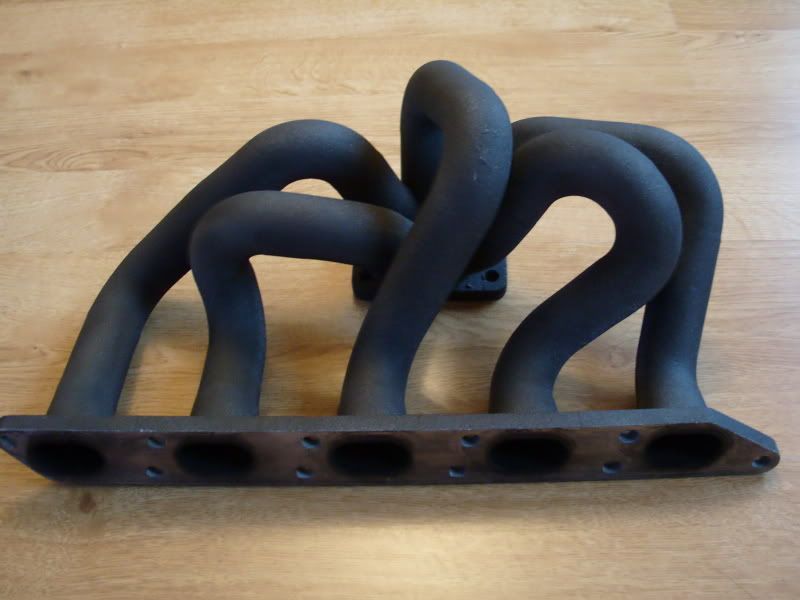
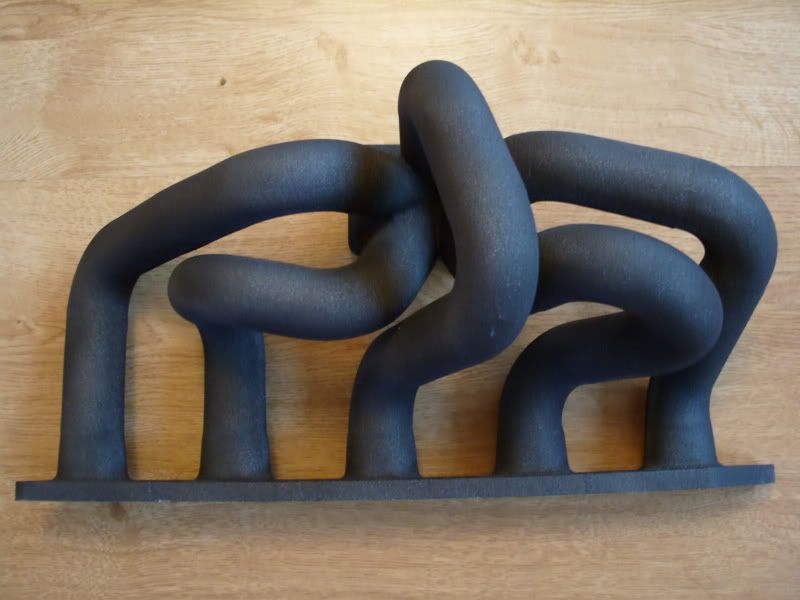
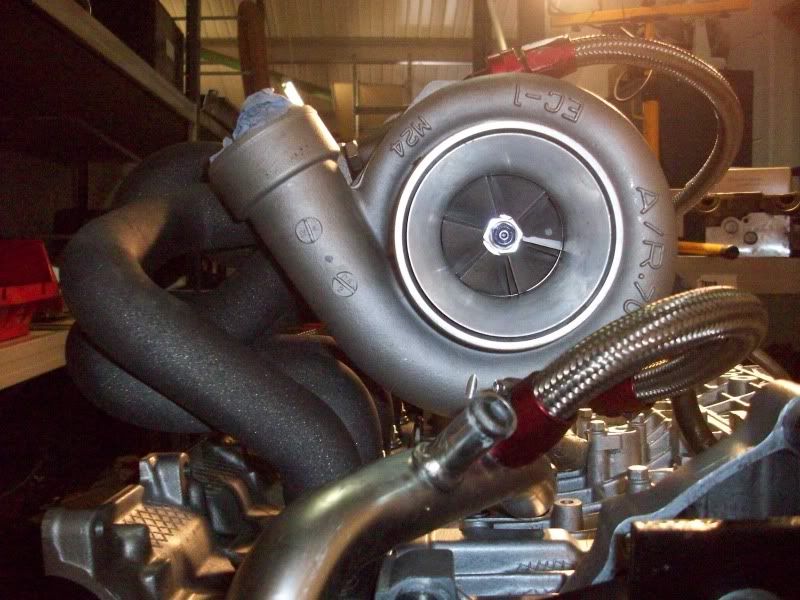
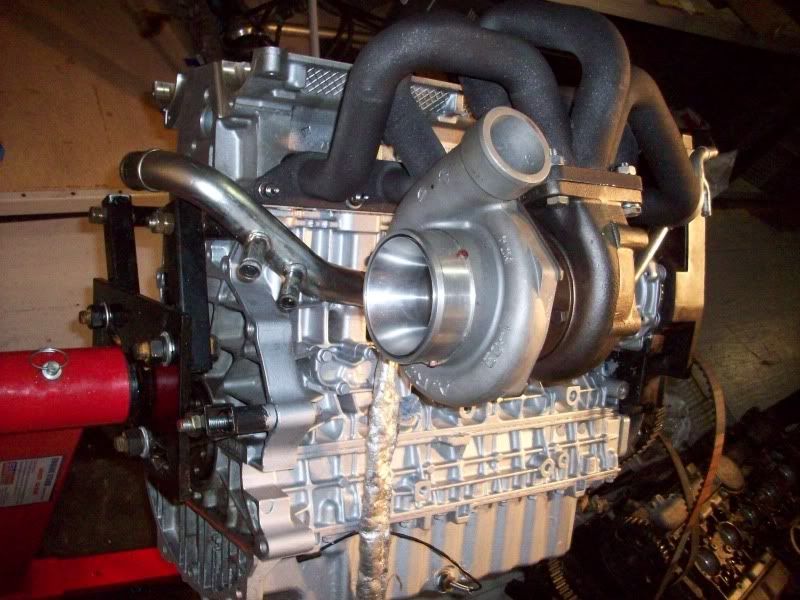
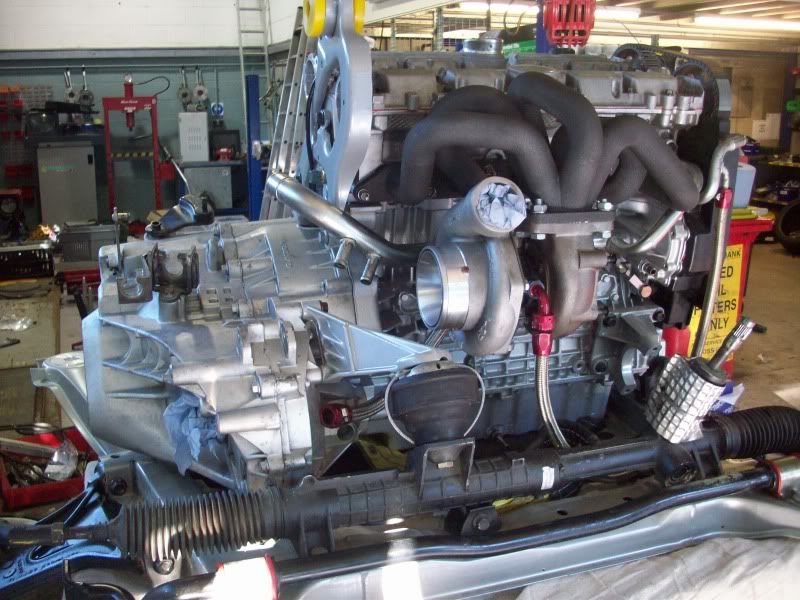
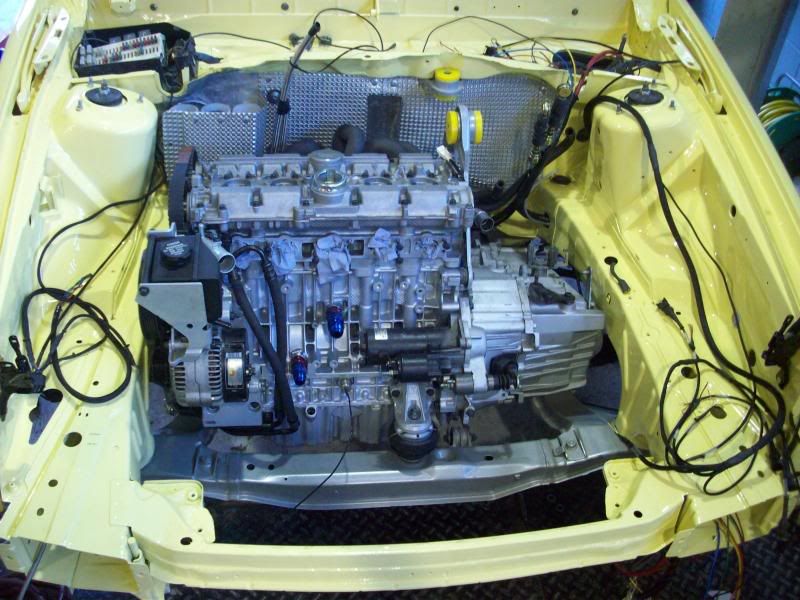
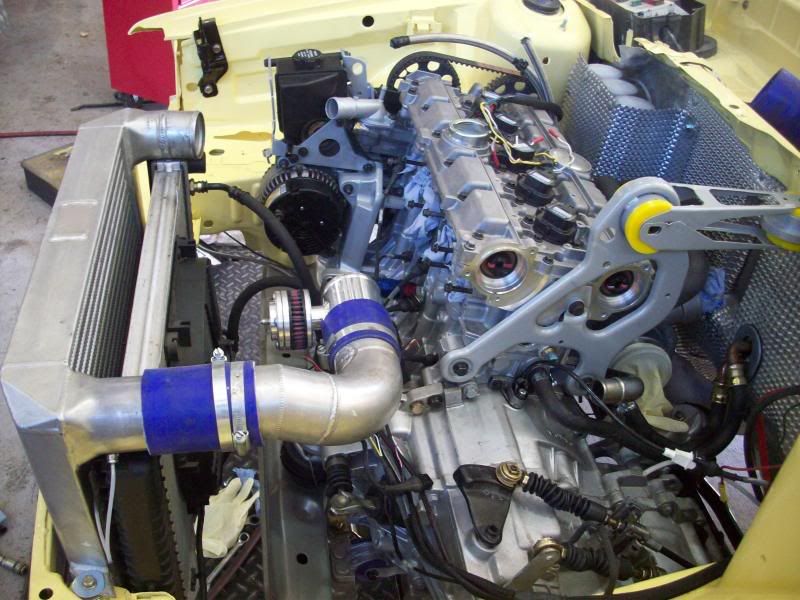
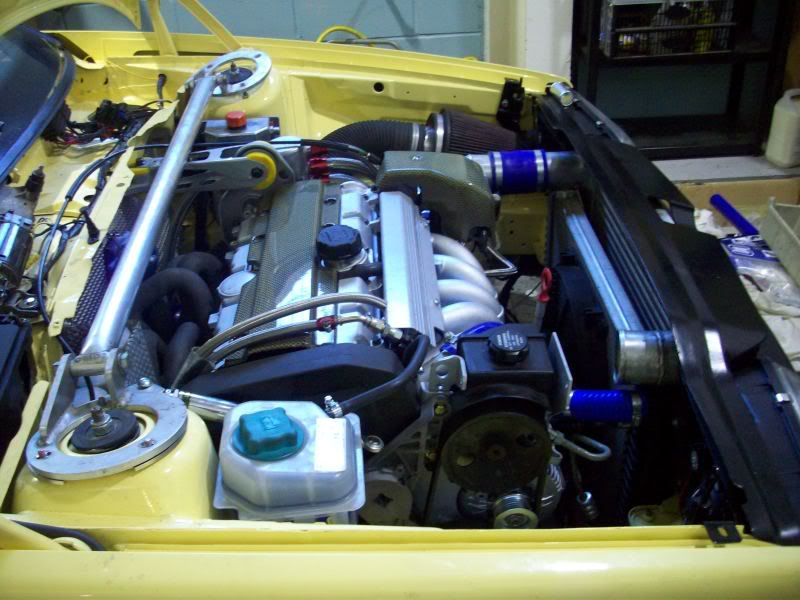
I now had the engine built the new cams dialled in and turned my attention to fitting the manifold and the turbo assembly as I wanted to try a different approach to fitting my engine to the car I wanted to lower the sub frame and place it on a trolley then lower the car onto the assembly so hopefully this would save me time as fitting the manifold in the engine bay is a bit of a fiddle as I am terrified of damaging the coating on the manifold ¡V as it turned out the silver coating would be a problem for me as it had started to flake off which was not something I was expecting¡K.
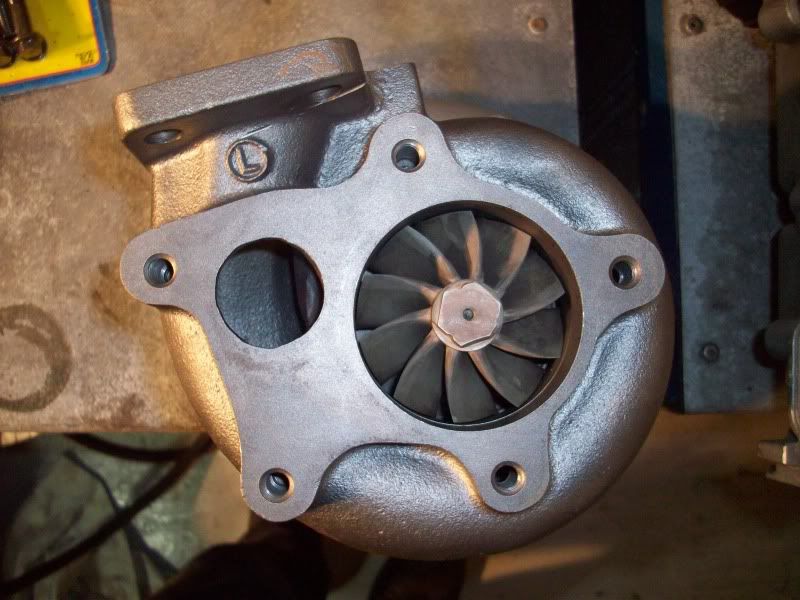
I called the company who did the coating( zircotec) and they were shocked it was coming off so soon they agreed to come over to inspect it and once they saw it they happily agreed to re coat it at there cost I decided to go for a change of colour at the same time so went for a metallic black they do it arrived back in very short time and looked better than ever so started to fit the turbo assembly and pipes etc
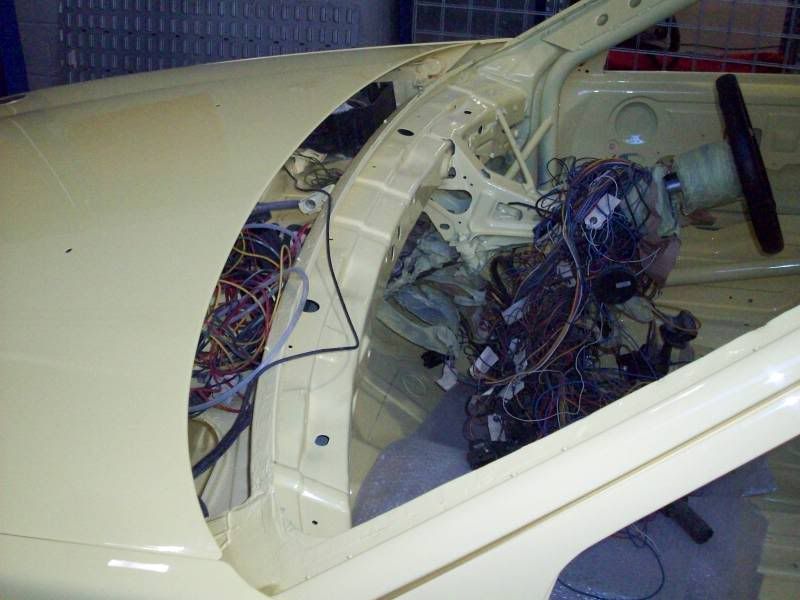
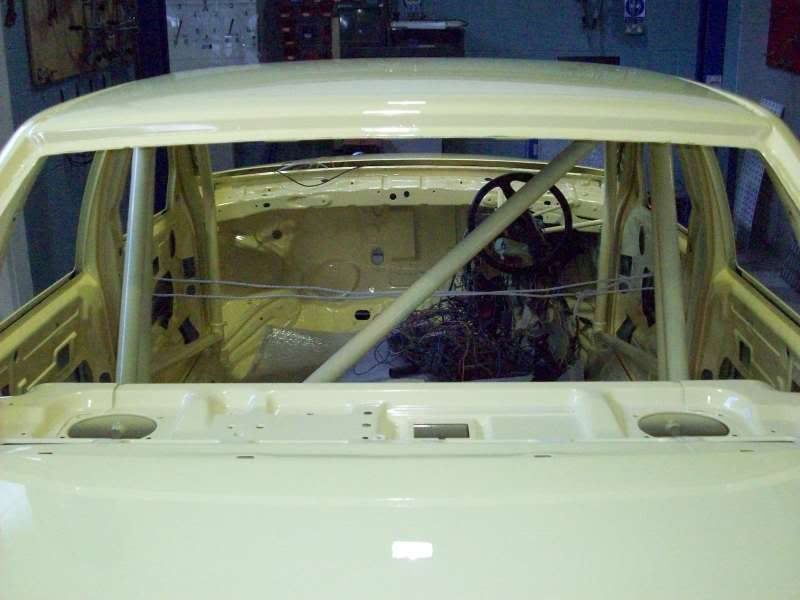
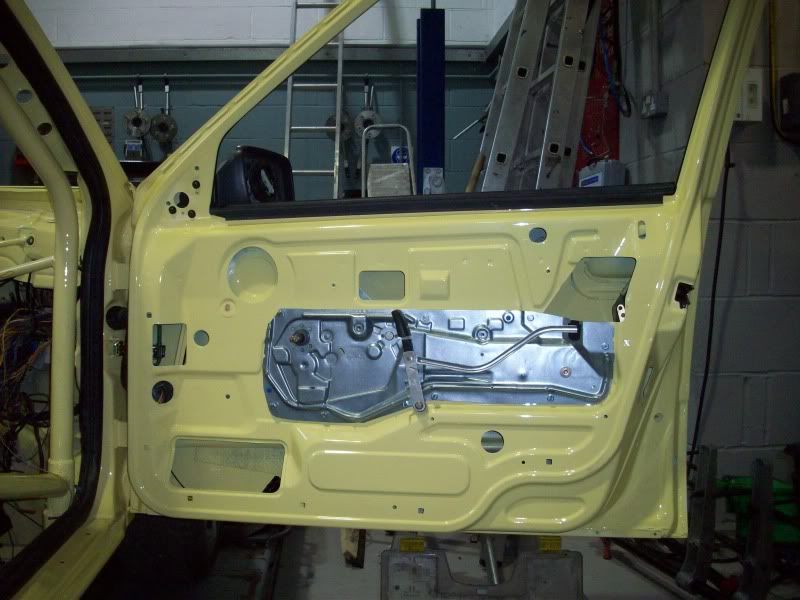
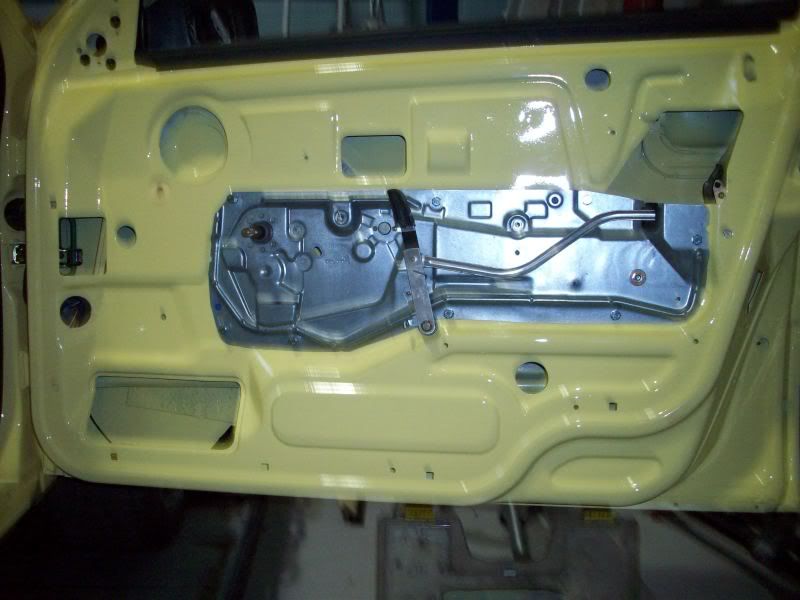
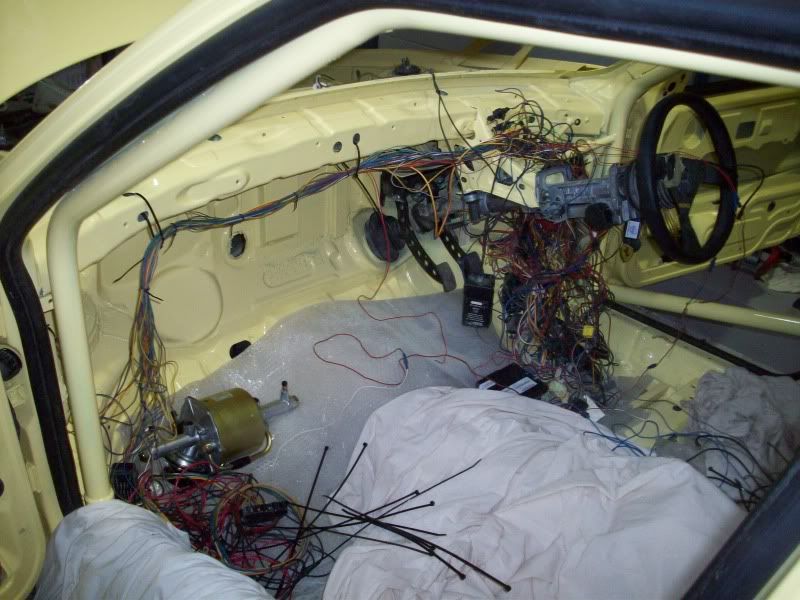
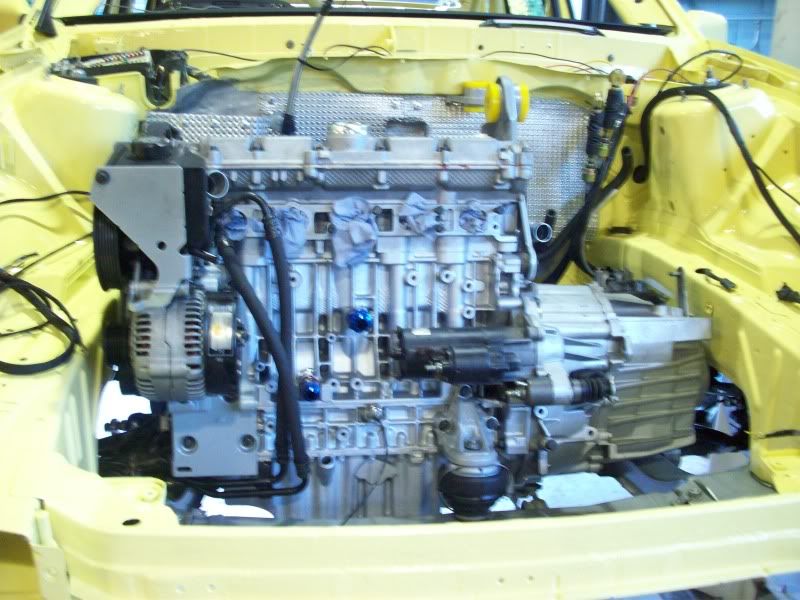
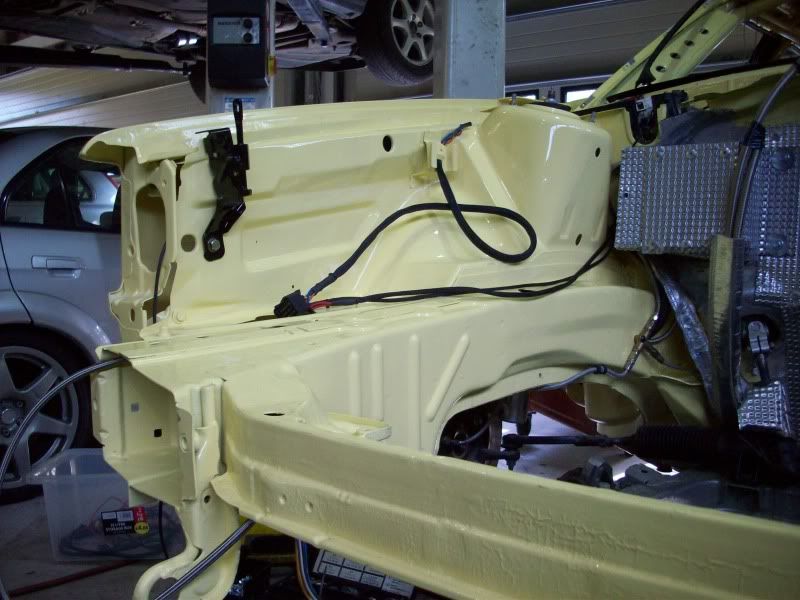
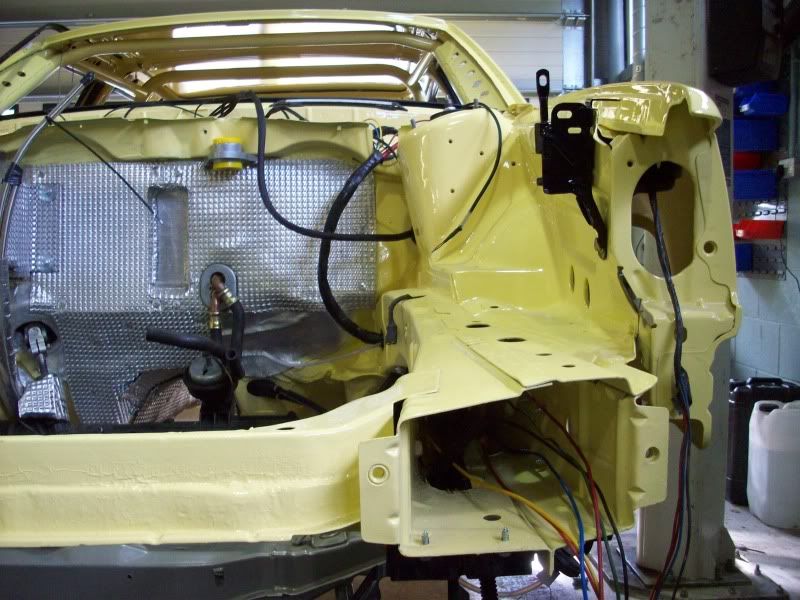
As the engine side of things was on the whole sorted I started to turn my attention to the car and mainly the inside and the dash area at first sorting out the wiring to the various areas and making a few more changes to the car I had decided to not have any electric front windows or mirrors any more as I wanted to use the manual window winders
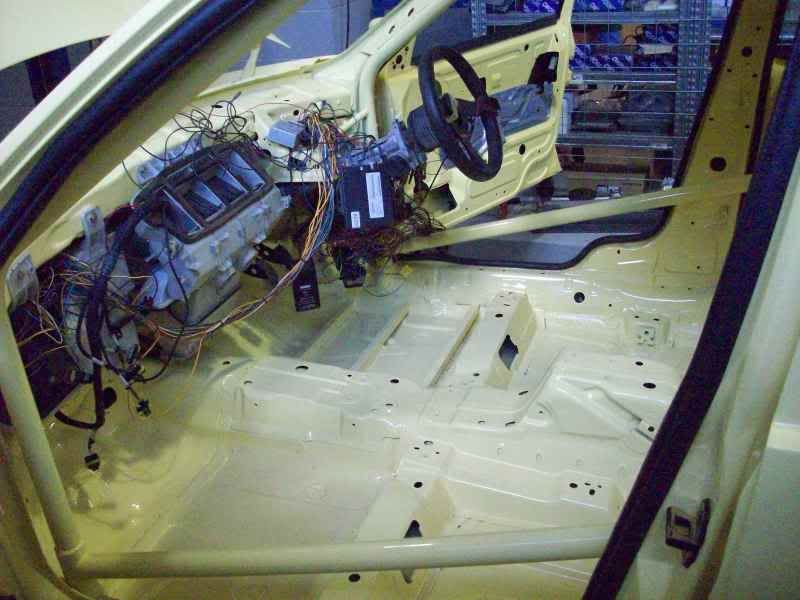
I started to add the other parts to the car lights trim handles etc etc
And started to add the looms I had made into place under the bonnet etc
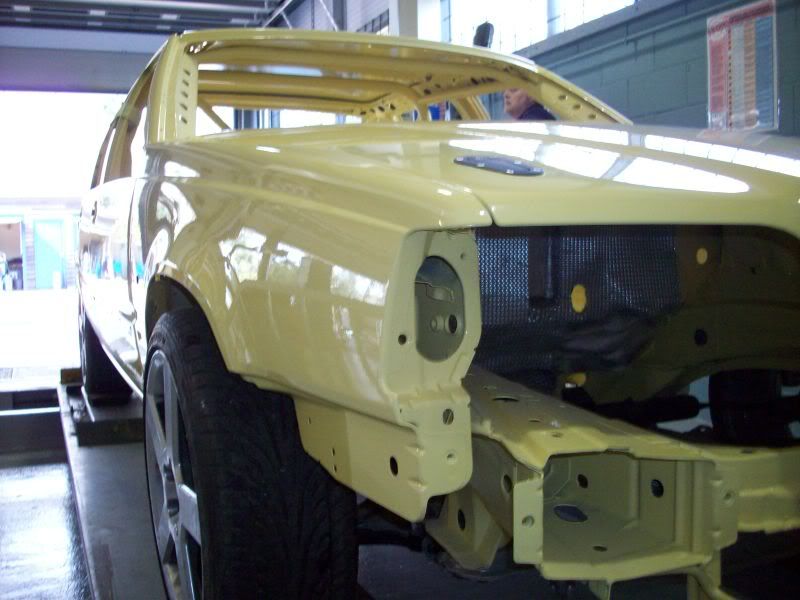
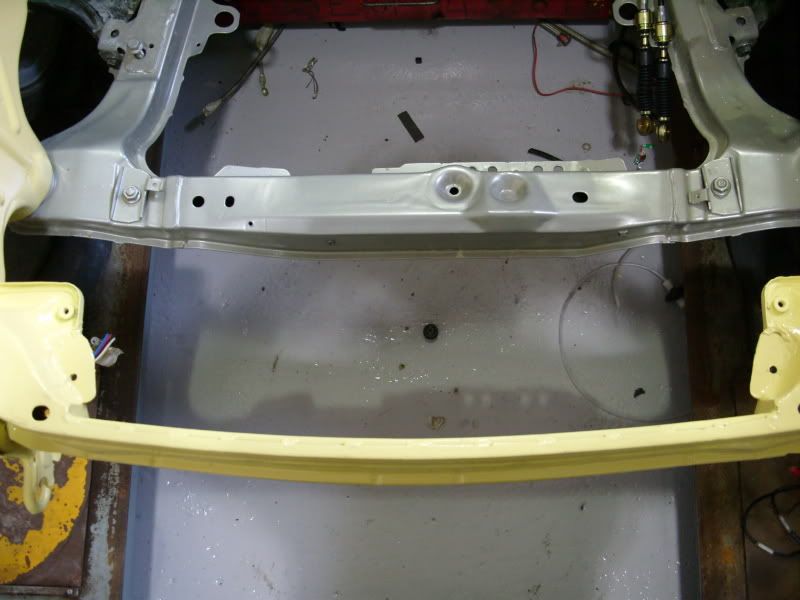
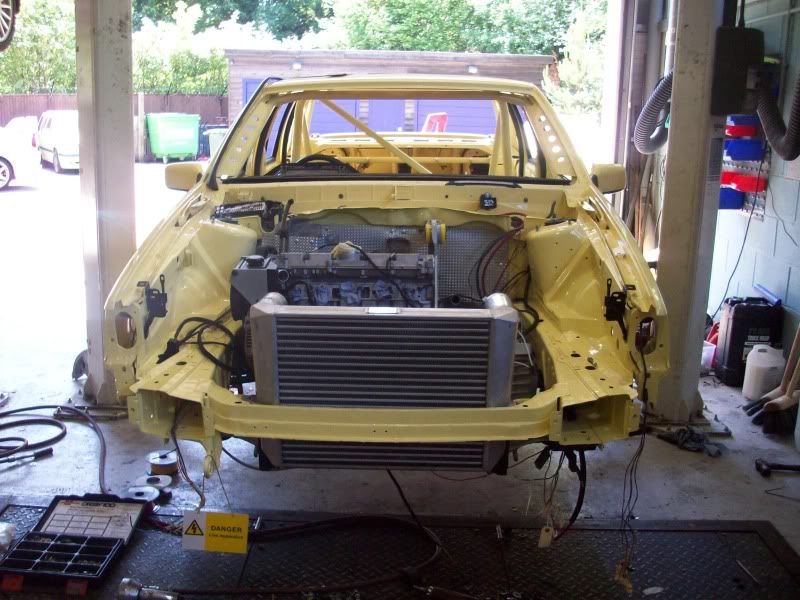
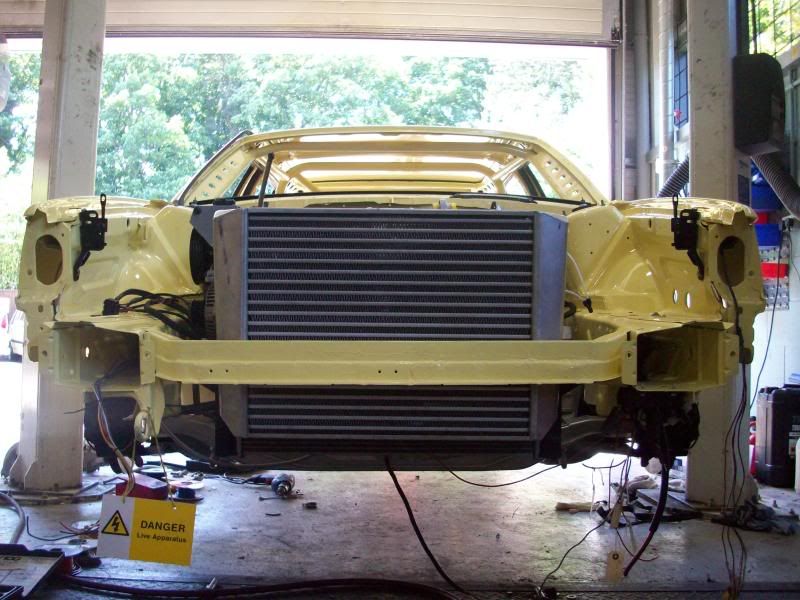
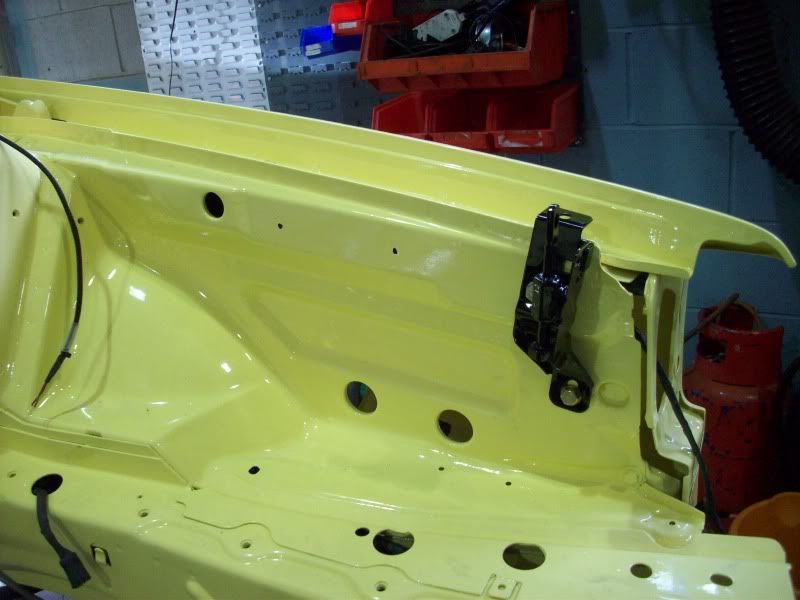
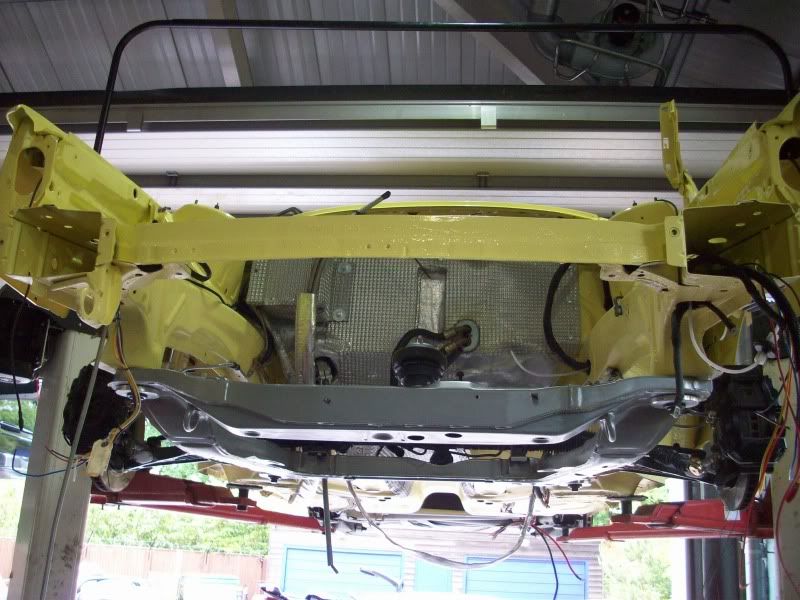
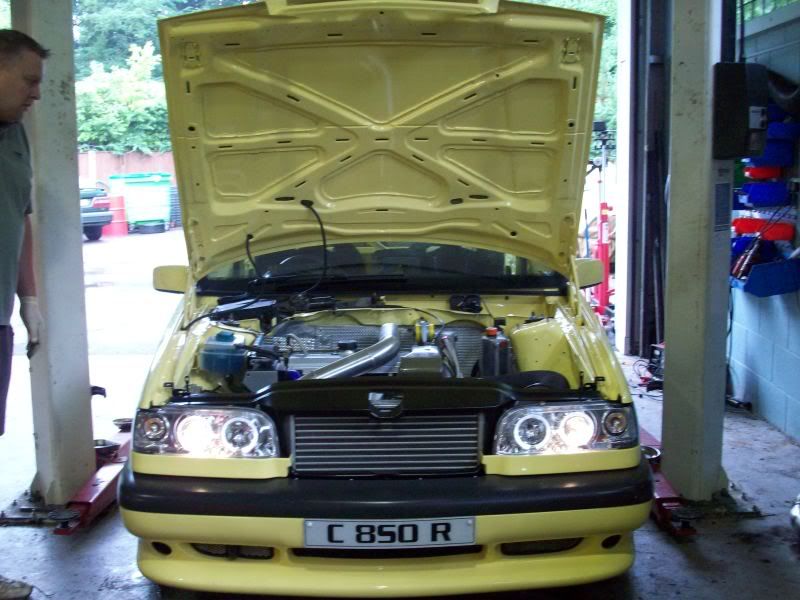
I took this pic to show how much thicker the front panel was now as I had before had the panel modified to fit the intercooler it was cut at both ends but then a much thicker strengthen bar was added.
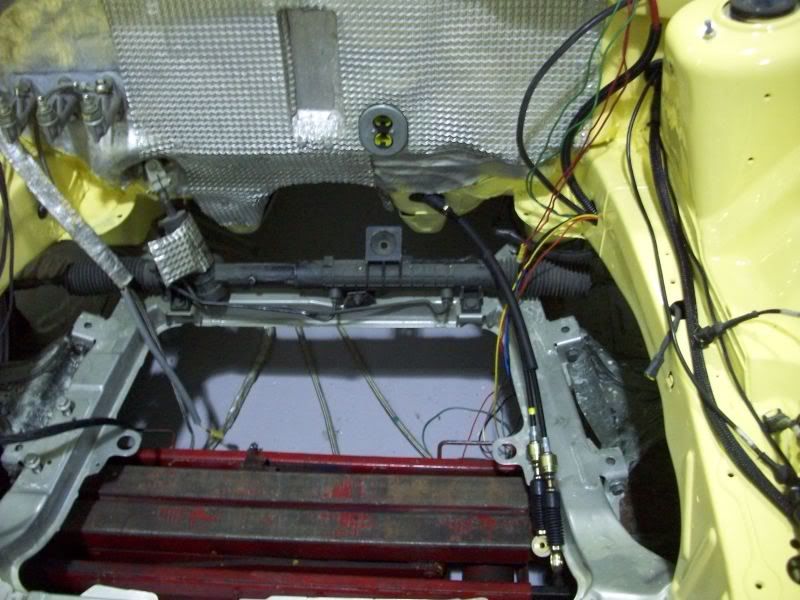
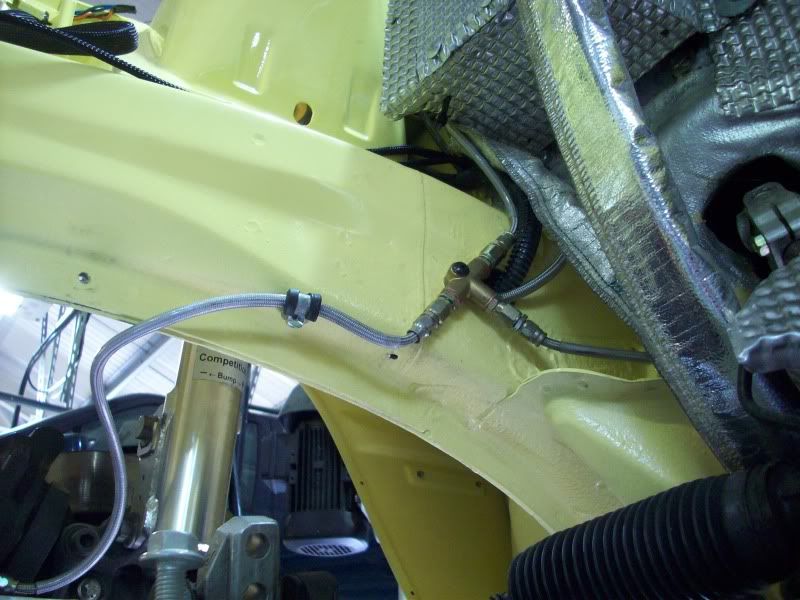
I started to sort out the wires above the bulkhead area
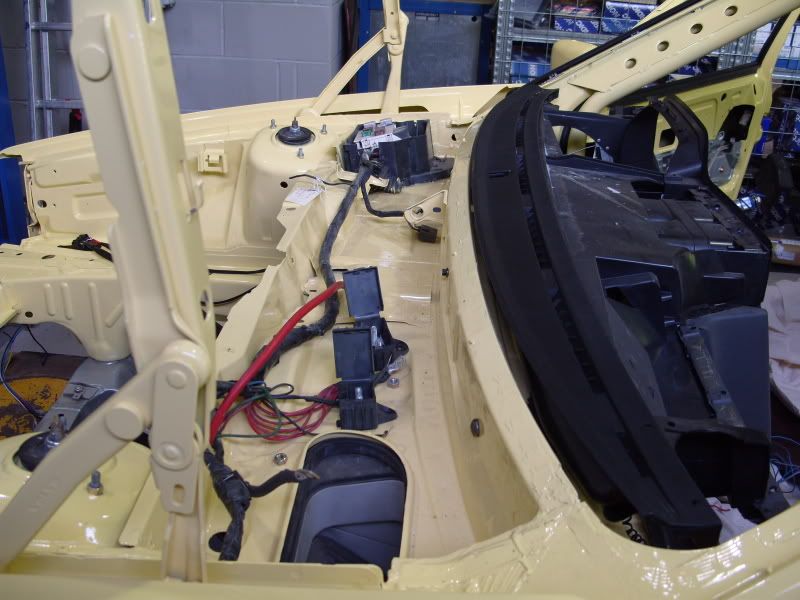
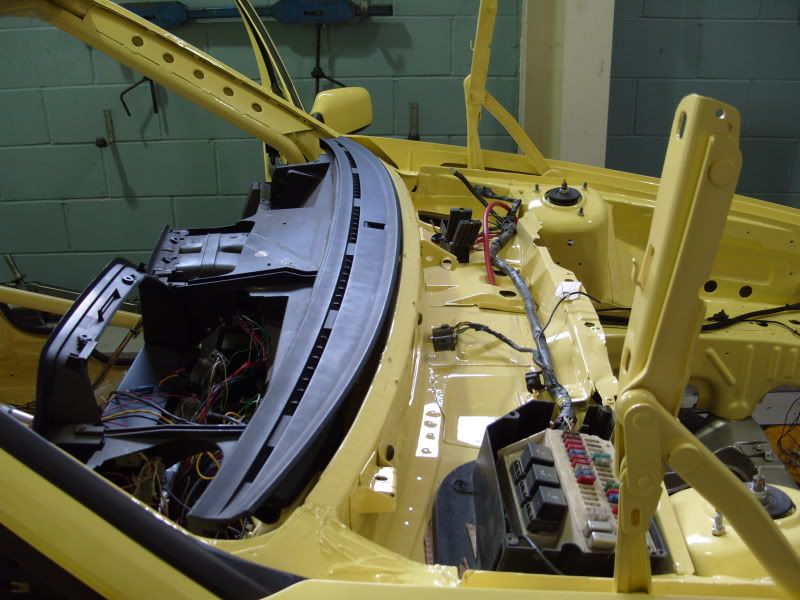
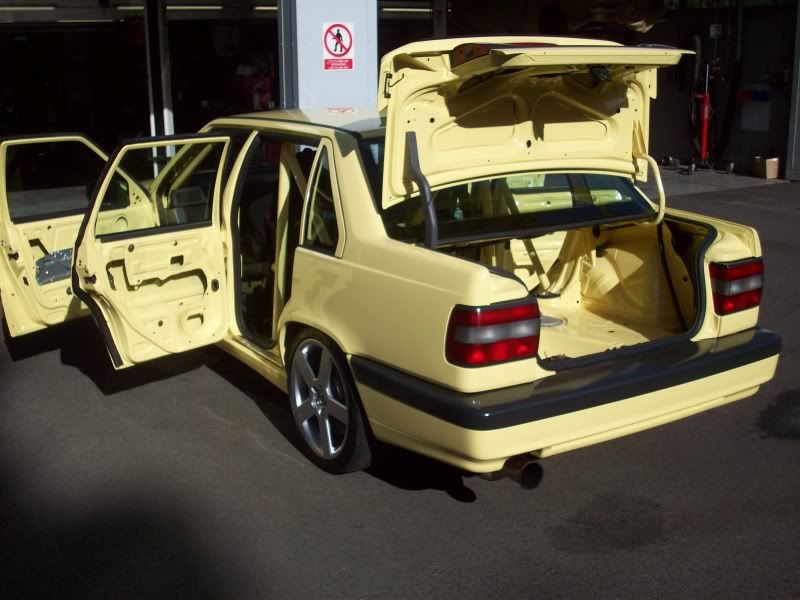
The Peril starts to look like a car again ļ
I now had the engine built the new cams dialled in and turned my attention to fitting the manifold and the turbo assembly as I wanted to try a different approach to fitting my engine to the car I wanted to lower the sub frame and place it on a trolley then lower the car onto the assembly so hopefully this would save me time as fitting the manifold in the engine bay is a bit of a fiddle as I am terrified of damaging the coating on the manifold ¡V as it turned out the silver coating would be a problem for me as it had started to flake off which was not something I was expecting¡K.
I called the company who did the coating( zircotec) and they were shocked it was coming off so soon they agreed to come over to inspect it and once they saw it they happily agreed to re coat it at there cost I decided to go for a change of colour at the same time so went for a metallic black they do it arrived back in very short time and looked better than ever so started to fit the turbo assembly and pipes etc
As the engine side of things was on the whole sorted I started to turn my attention to the car and mainly the inside and the dash area at first sorting out the wiring to the various areas and making a few more changes to the car I had decided to not have any electric front windows or mirrors any more as I wanted to use the manual window winders
I started to add the other parts to the car lights trim handles etc etc
And started to add the looms I had made into place under the bonnet etc
I took this pic to show how much thicker the front panel was now as I had before had the panel modified to fit the intercooler it was cut at both ends but then a much thicker strengthen bar was added.
I started to sort out the wires above the bulkhead area
The Peril starts to look like a car again ļ
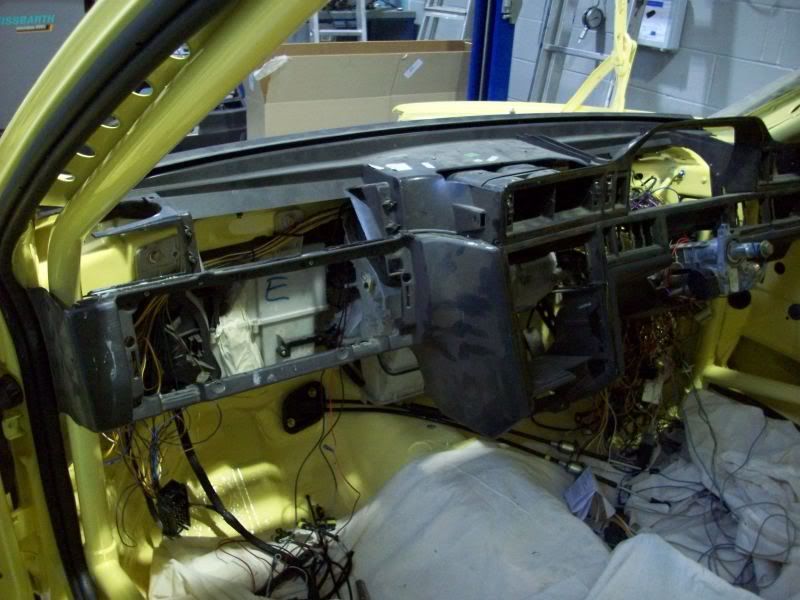
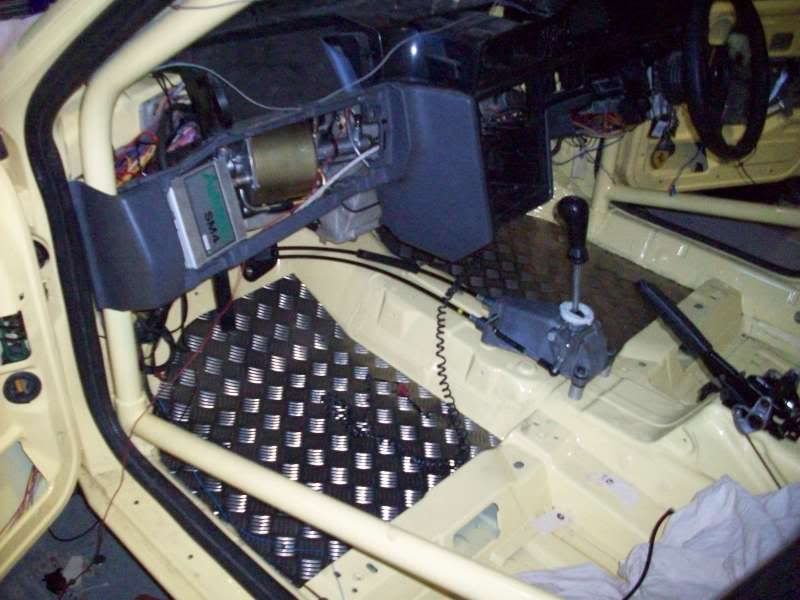
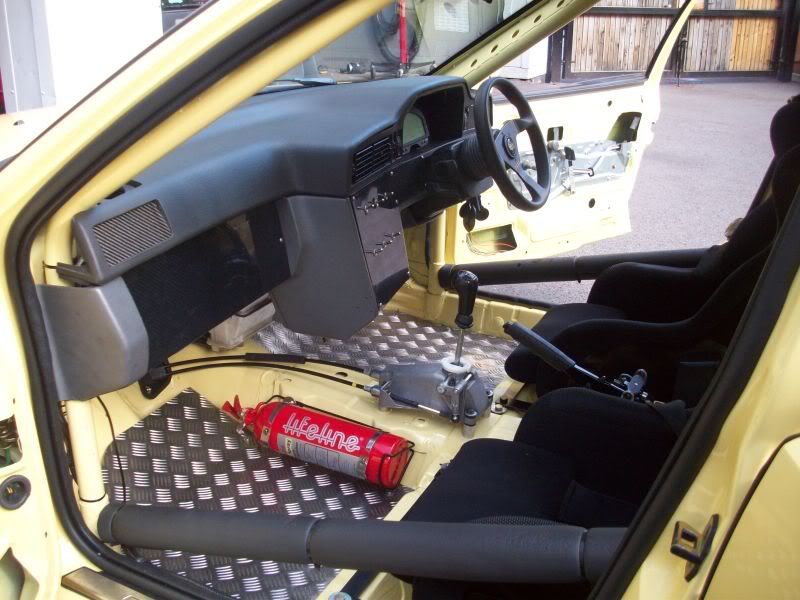
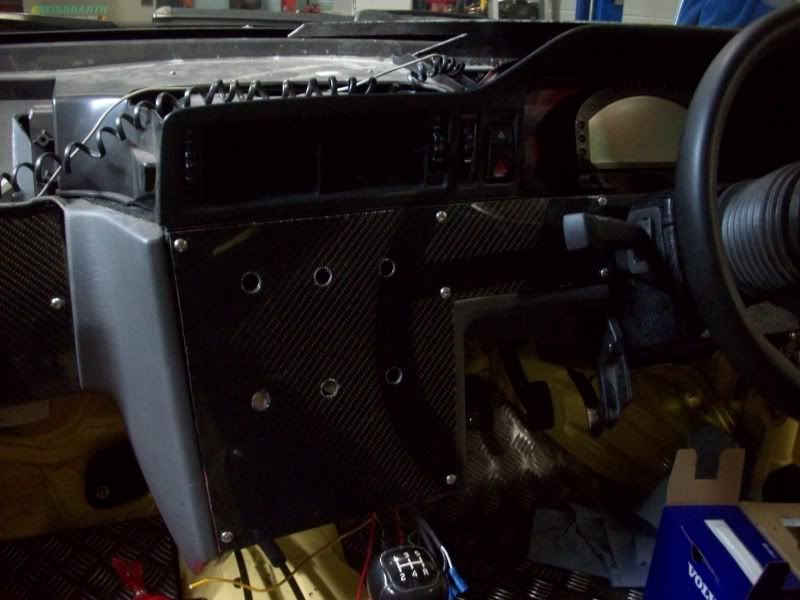
After many hours cutting and trying the new dash in place I finally managed to fit it in place so started to place the wires for any switches etc into the dash and tried hard to get it all looking neat
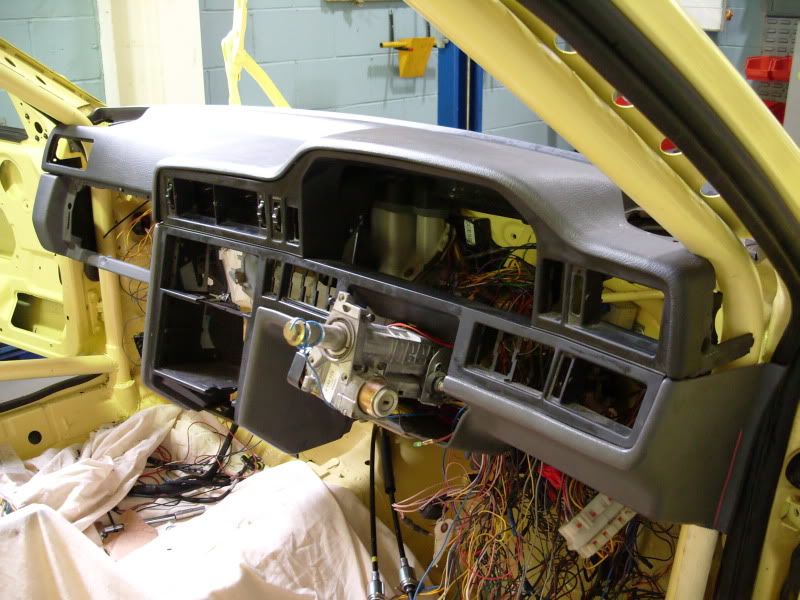
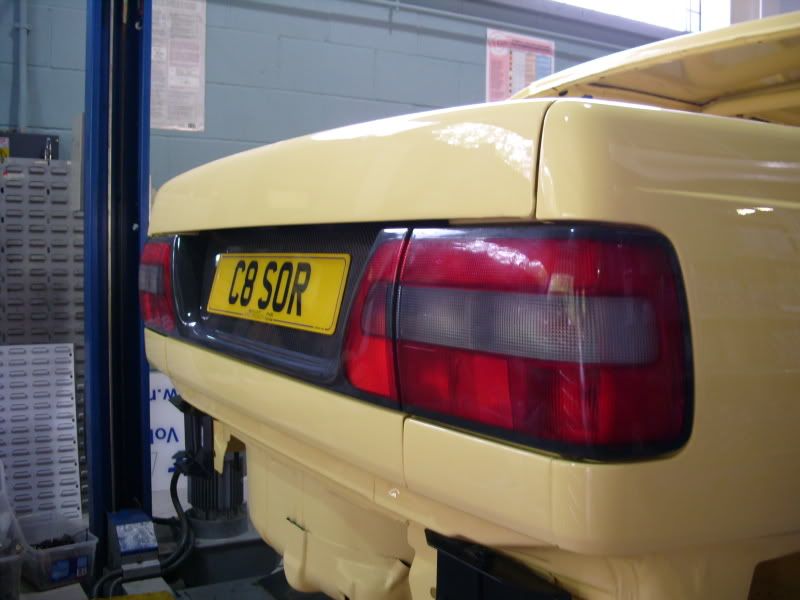
I set about spending more money on all new trims for the waste door moulding’s and the roof trims/boot trims boot lights as the old ones had a few small marks on them
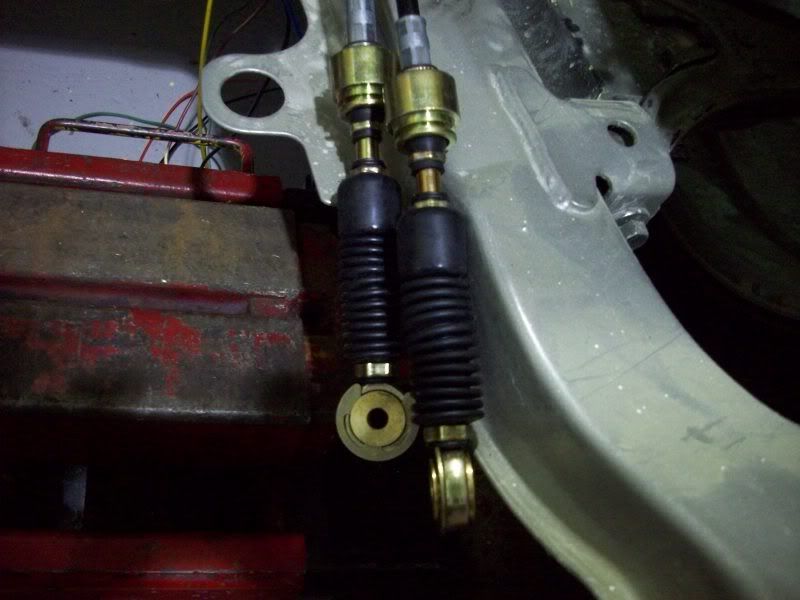
Thanks to a helpful forum member I had added brass gear control cable bushes and also brought new cables that looked the part
JamesK said:
Similarly the AWD V70's seem to be more potential trouble than they are worth over time.
Is a FWD V70R the best compromise?
Prob not possible but would there be an easy (ish) way to change the AWD to RWD ? (I have seen Escort Cosworths done to v good effect & have wondered about Imprezza's (& to a lesser extent Evo's) as there is a lot of moans about understeer.Is a FWD V70R the best compromise?
A RWD V70R would be fun to watch on track.
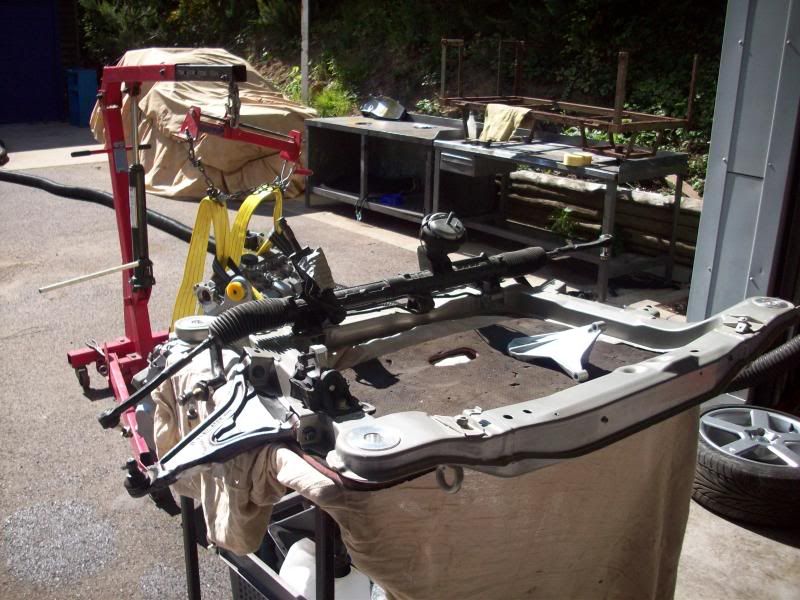
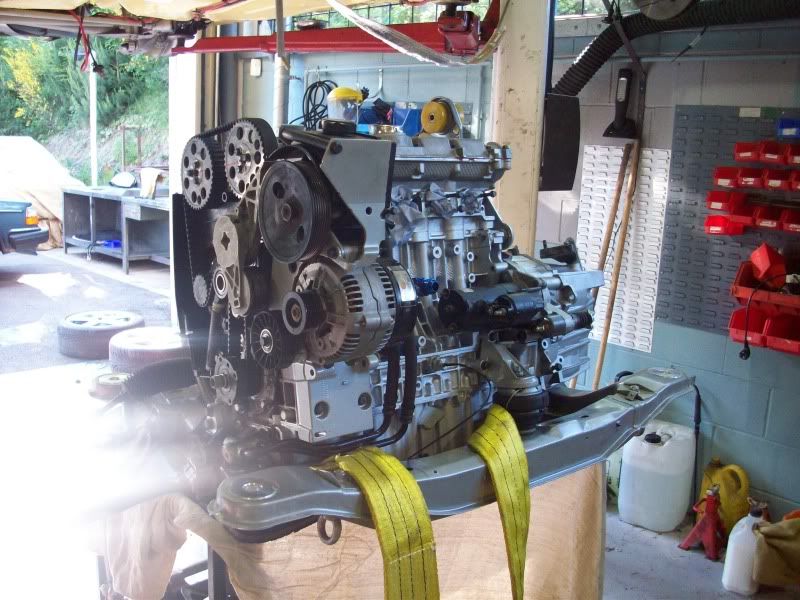
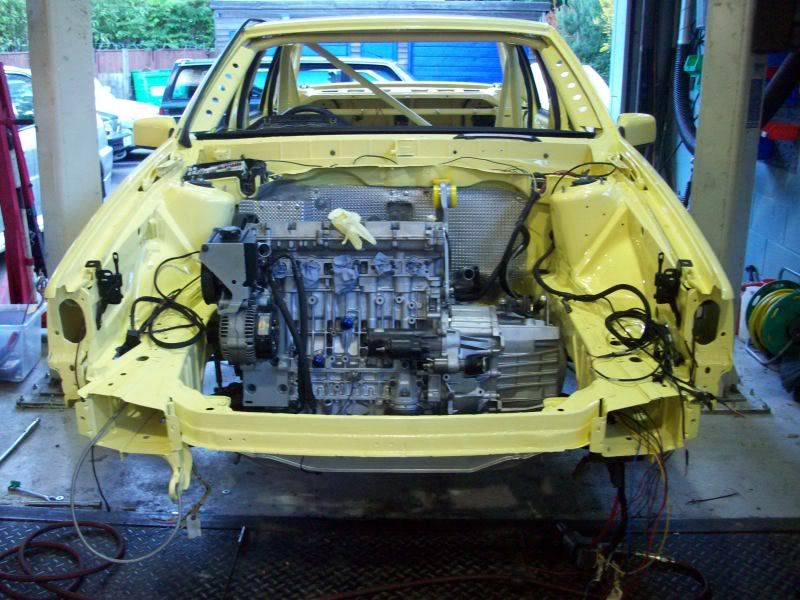
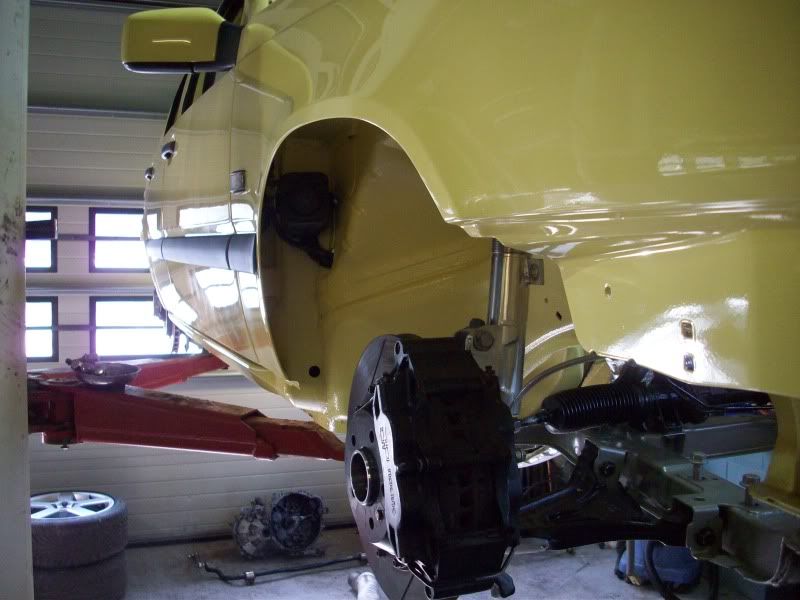
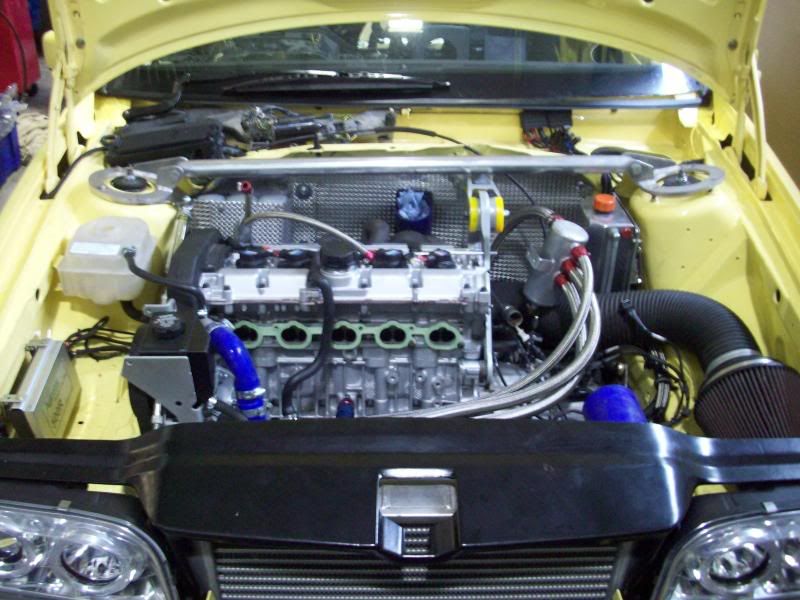
I have continued to be a busy boy and have worked on lots of extra hours at work to really get the car finished so time for a few more pics and details I hope I am not boring you guys I managed to get some help to lift the engine down from the engine room and into the workshop ready to fit into the peril I assembled the lower engine mount and some of the other parts to fit to the engine/subframe before install
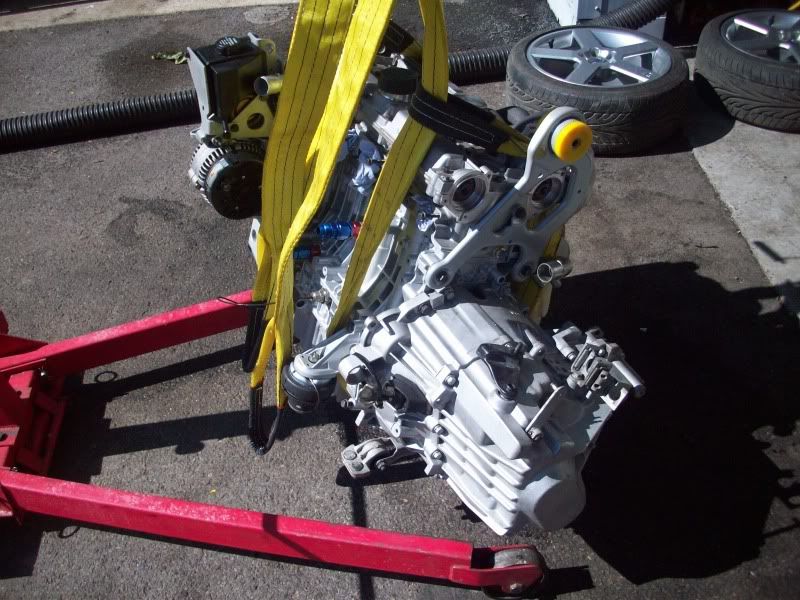
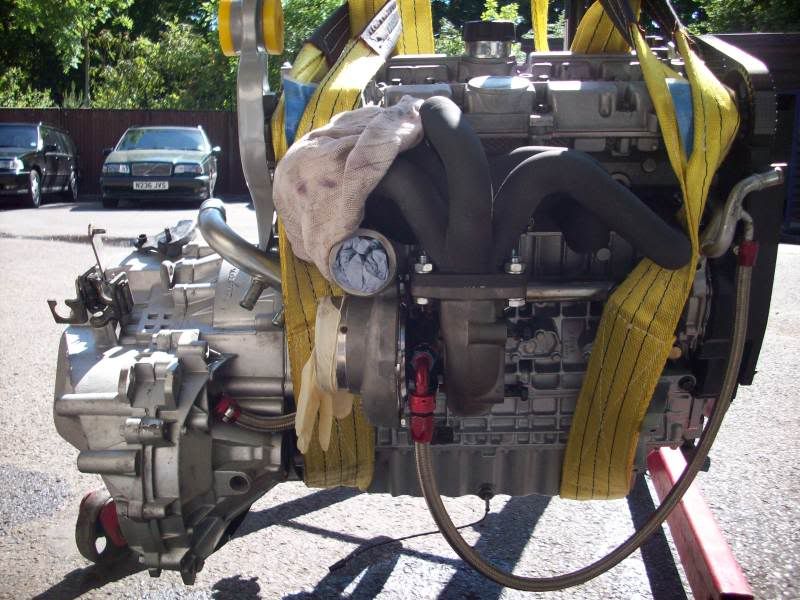

I covered the wings etc just in case !!
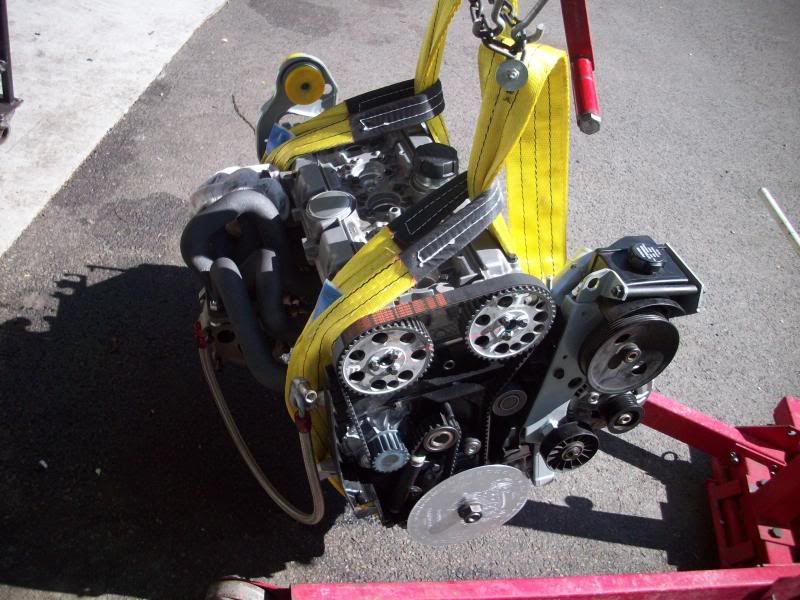
And added the front pipe before it goes in
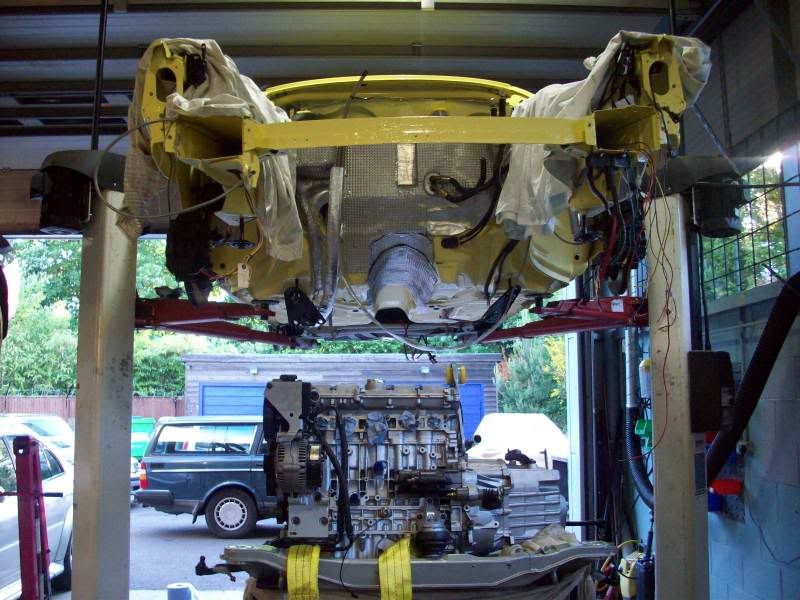
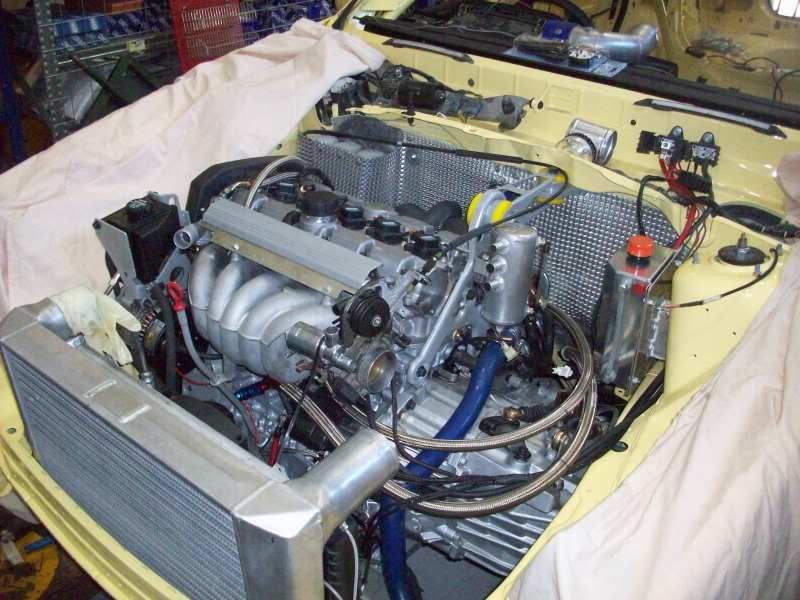
Its in and not one scratch.
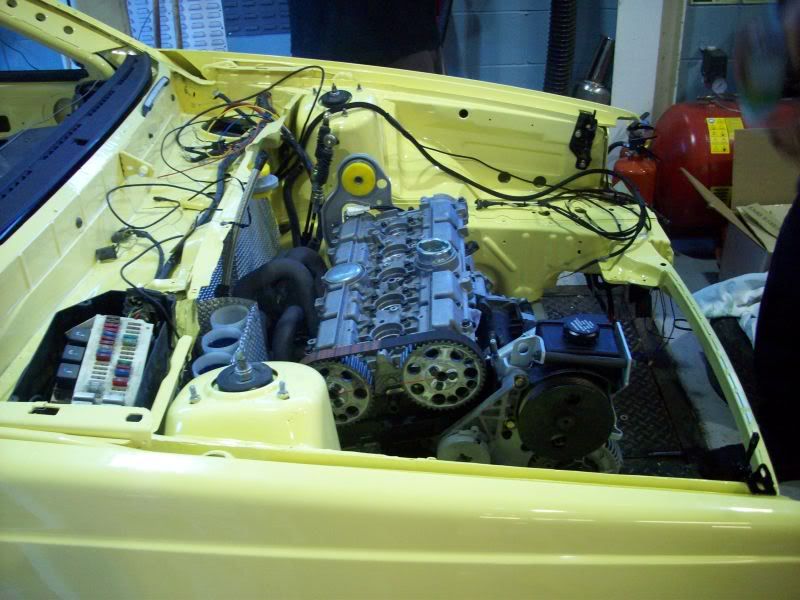
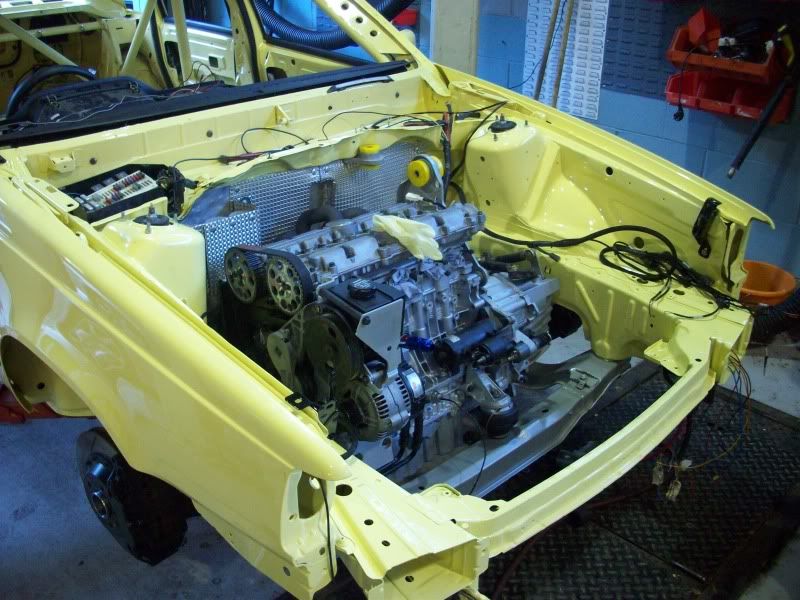
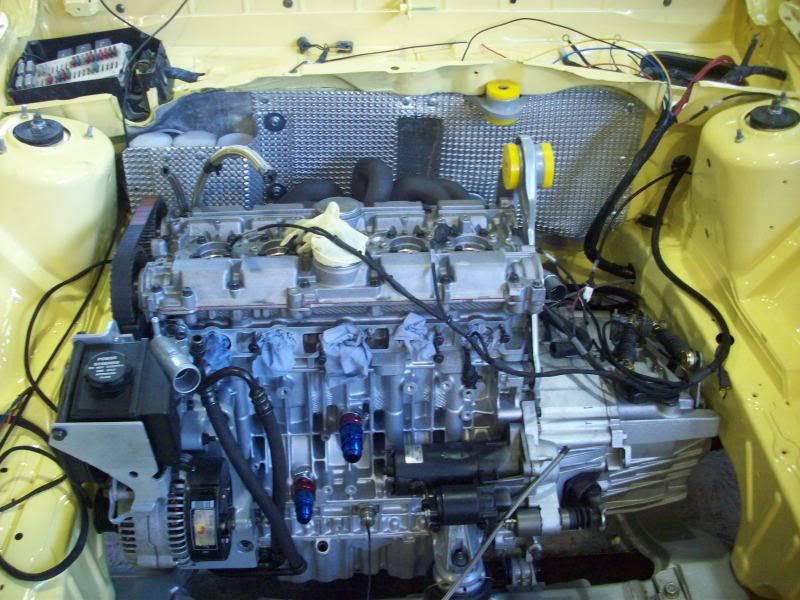

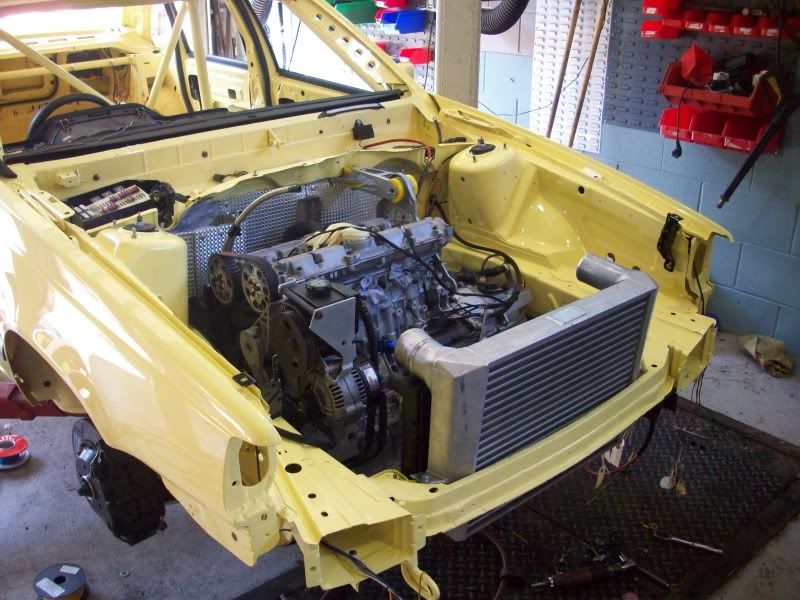
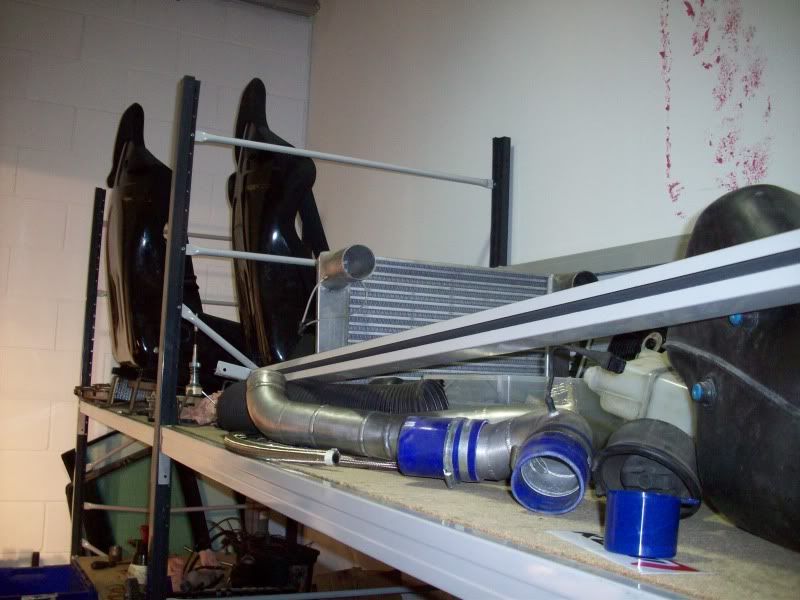
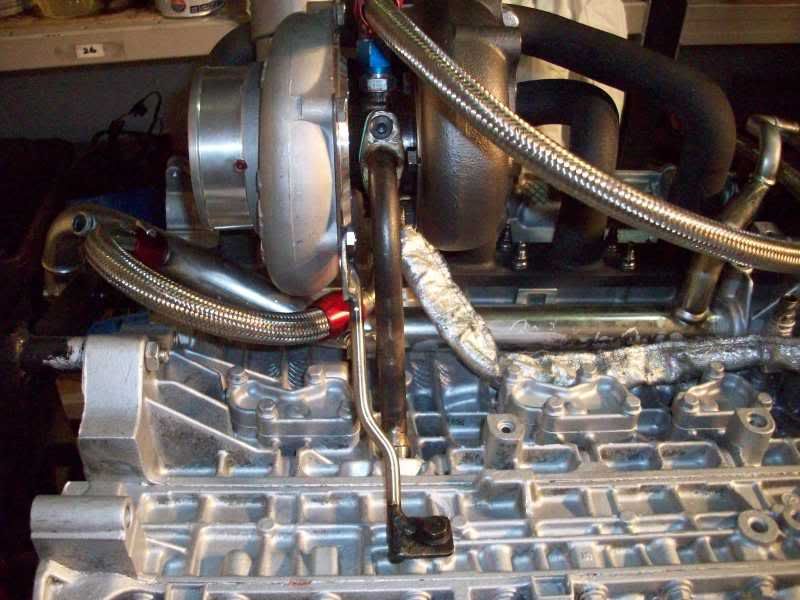
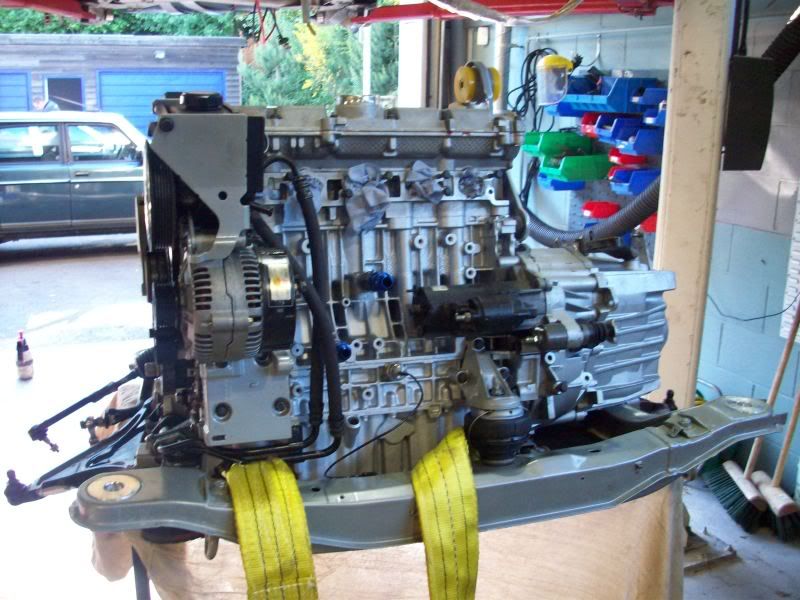
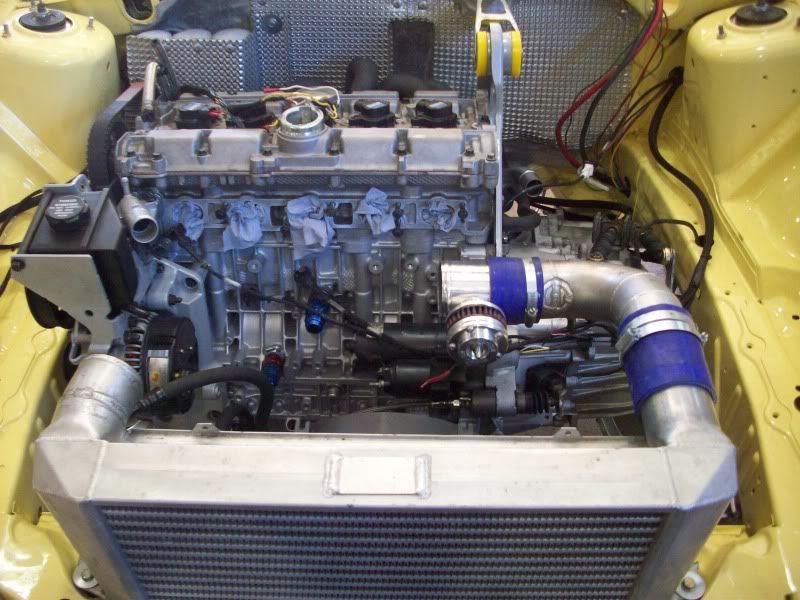
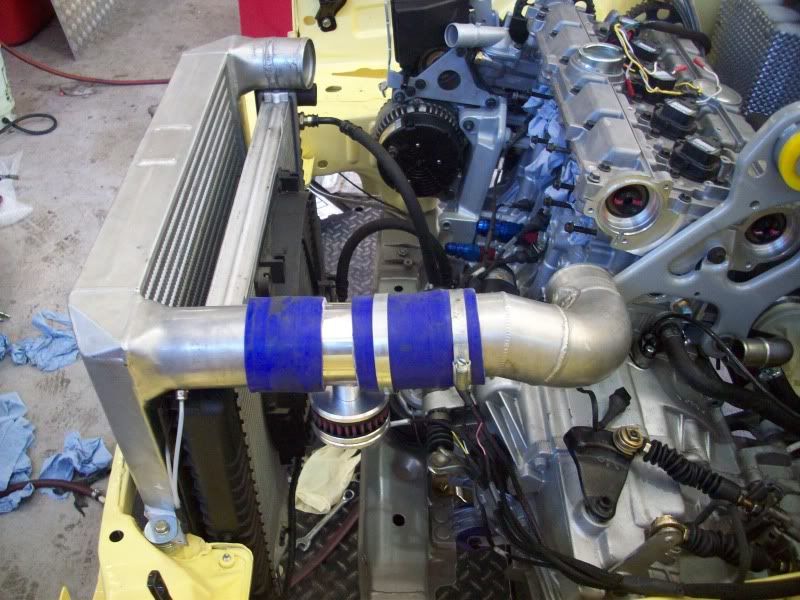
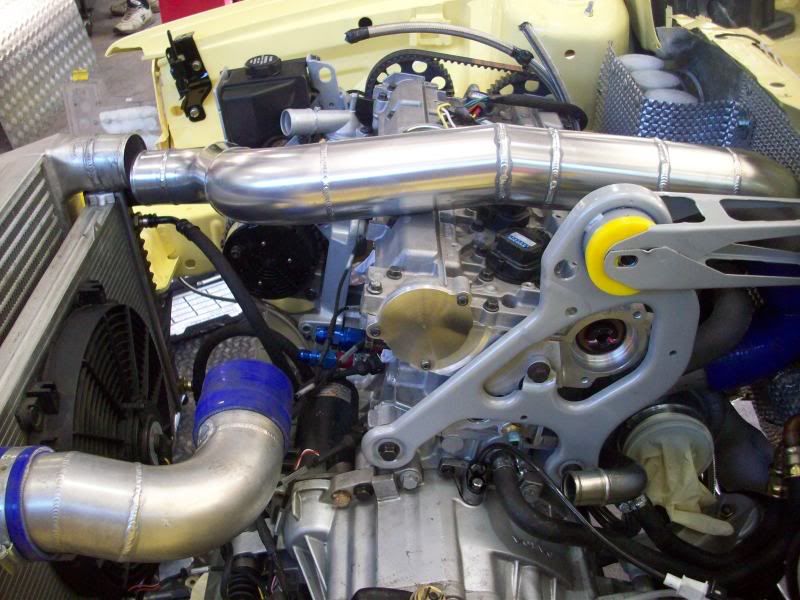
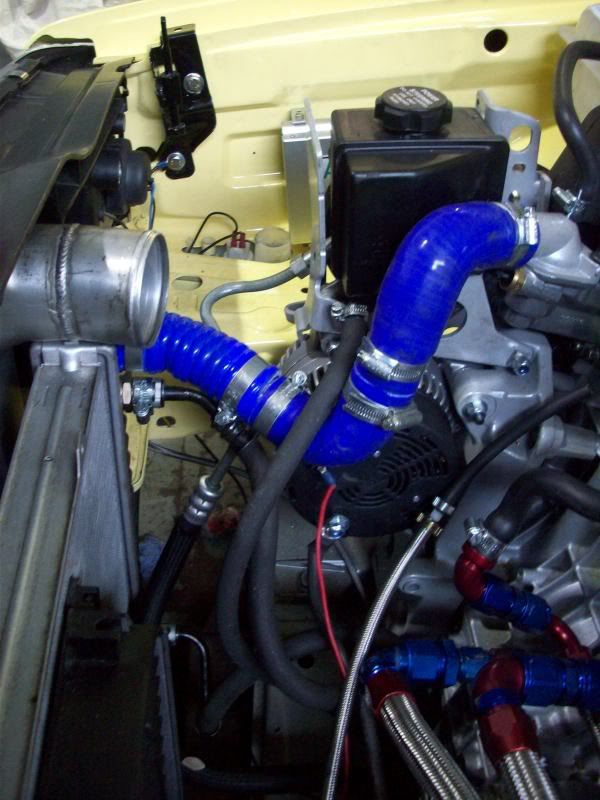
Once bolted up I started to install and check the fitment of the intercooler rad etc etc and all the pipes to check all is ok
I also have to work out where I want my dump valve to fit as I don’t really want in on view
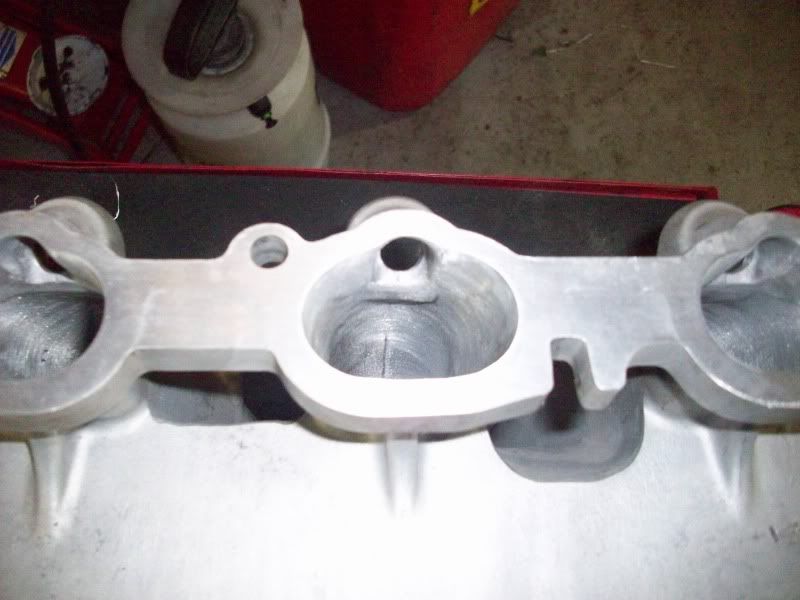
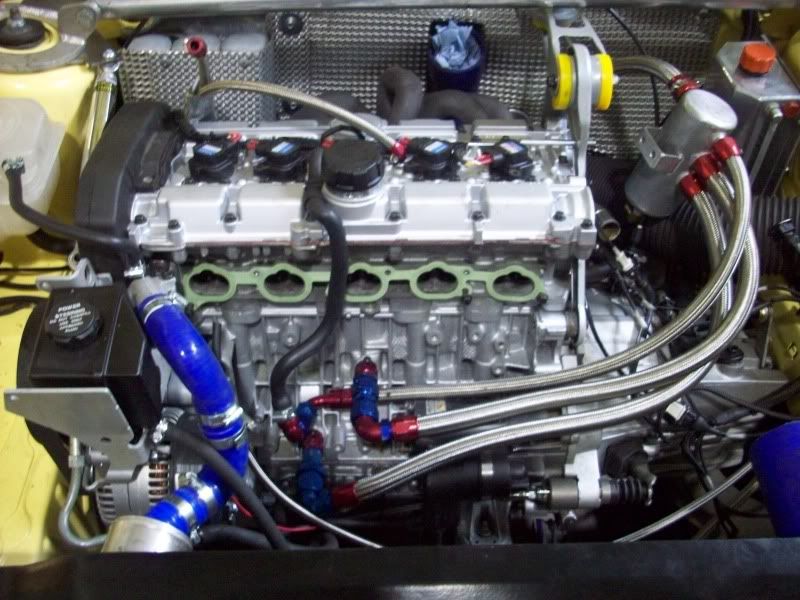
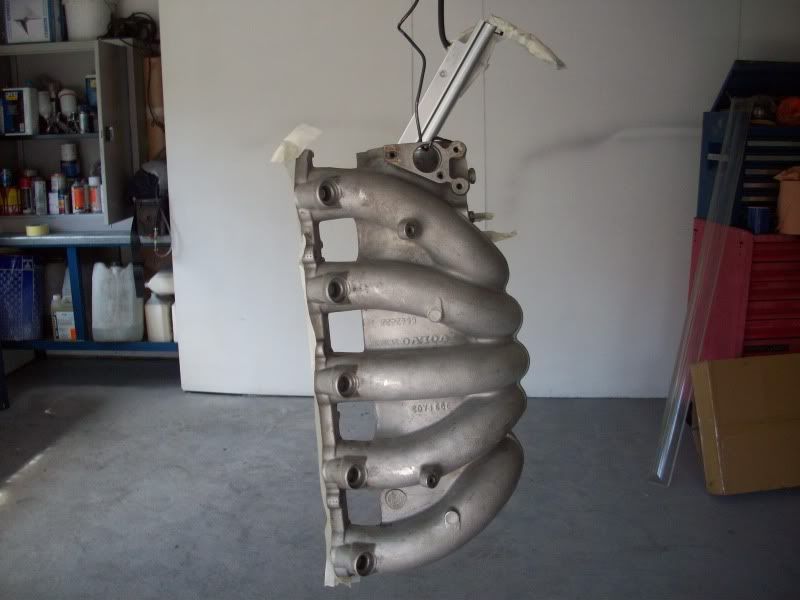
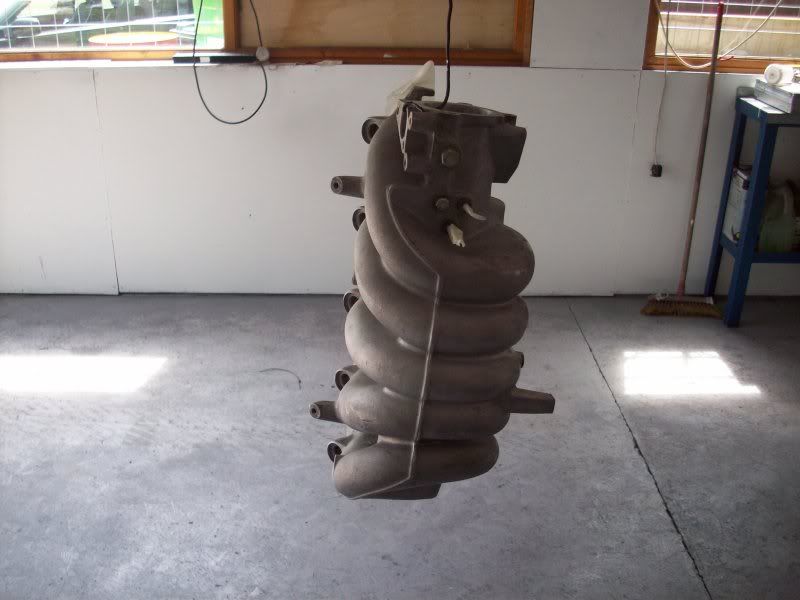
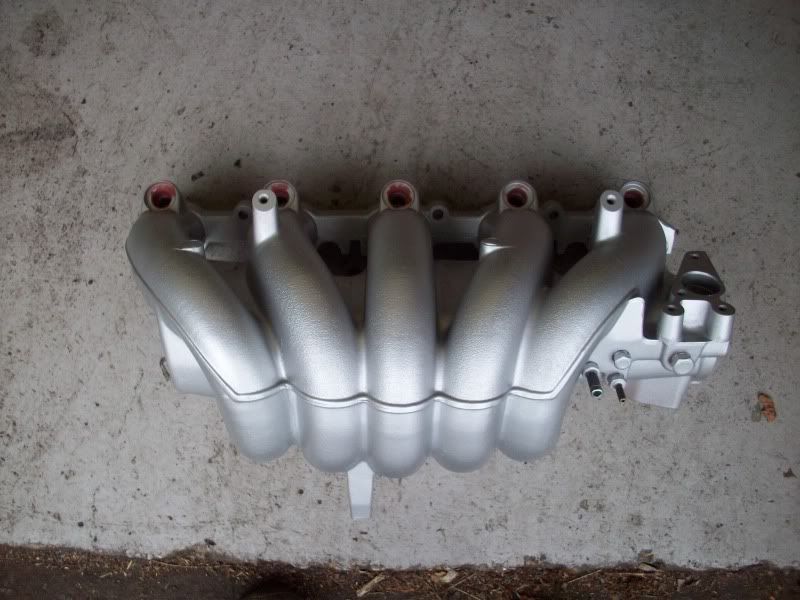
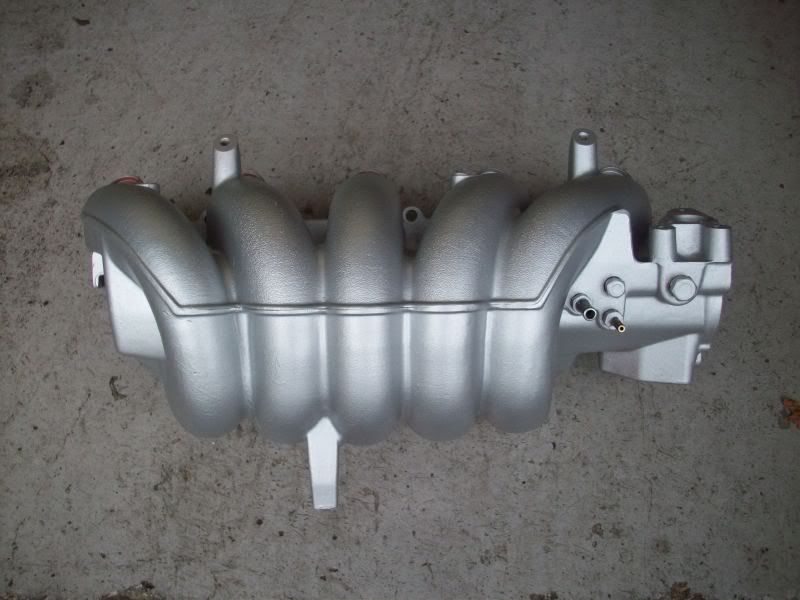
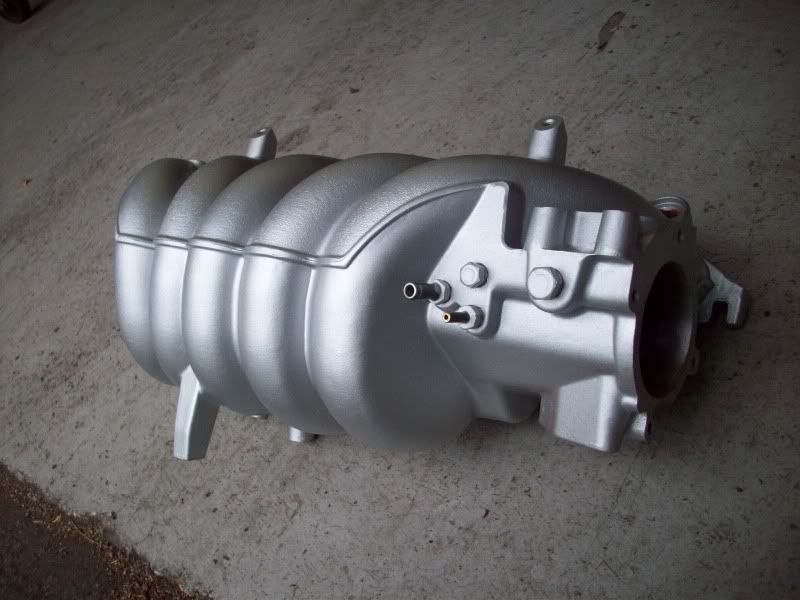
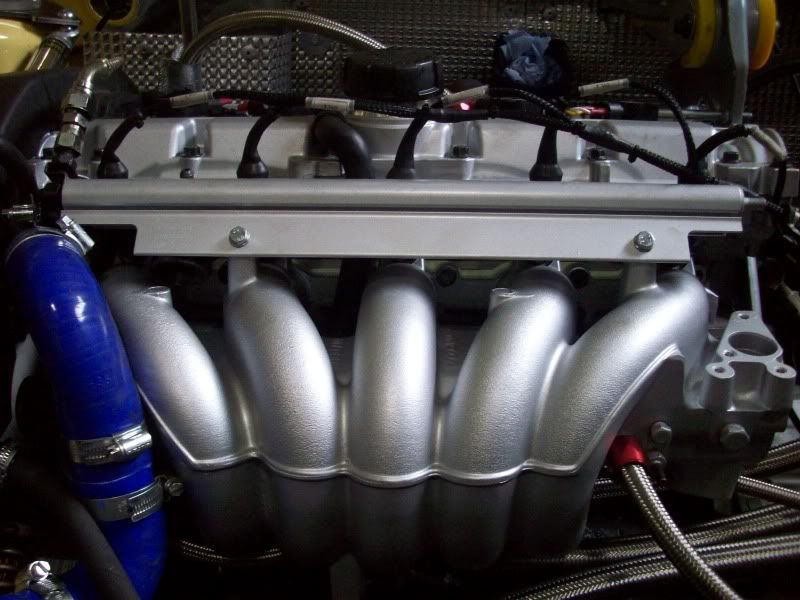
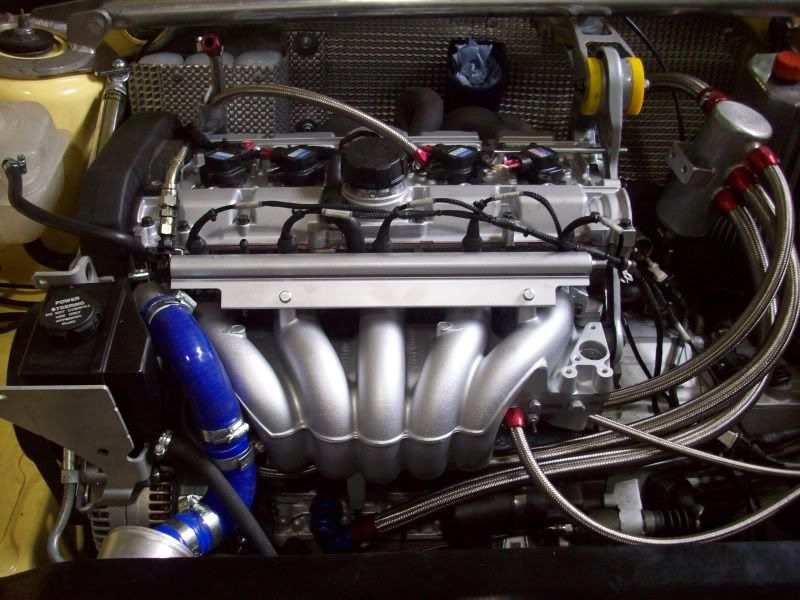
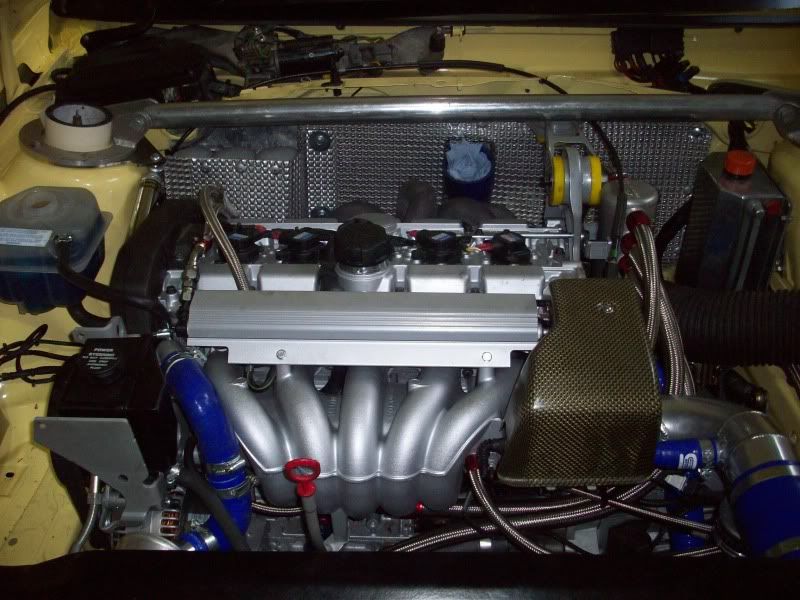
I washed and cleaned my inlet manifold ready for a test fit
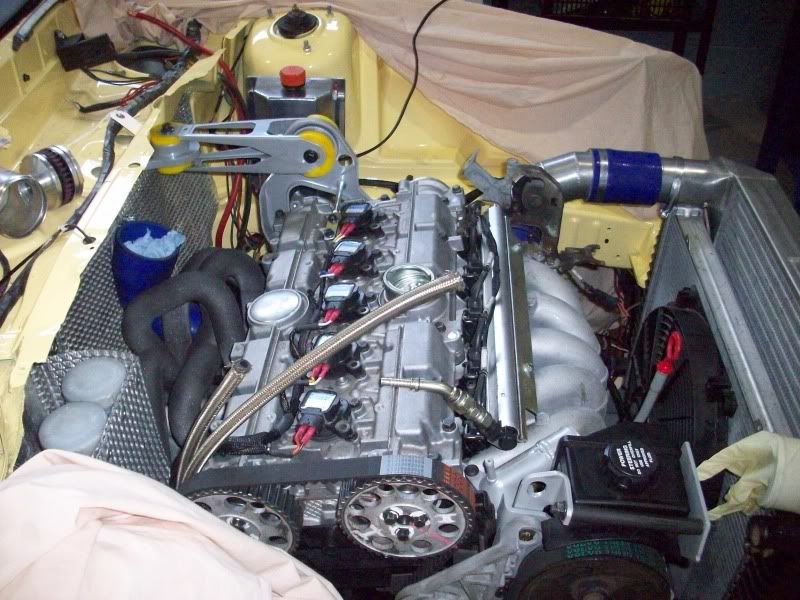
I started to sort out my new loom I had made to see if any changes are needed
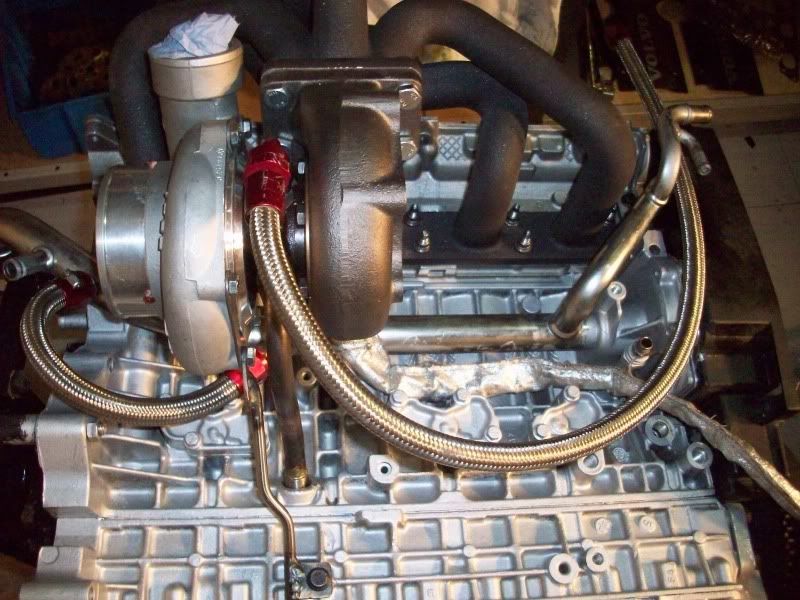
I fitted my water injection tank and Spec R breather tank:
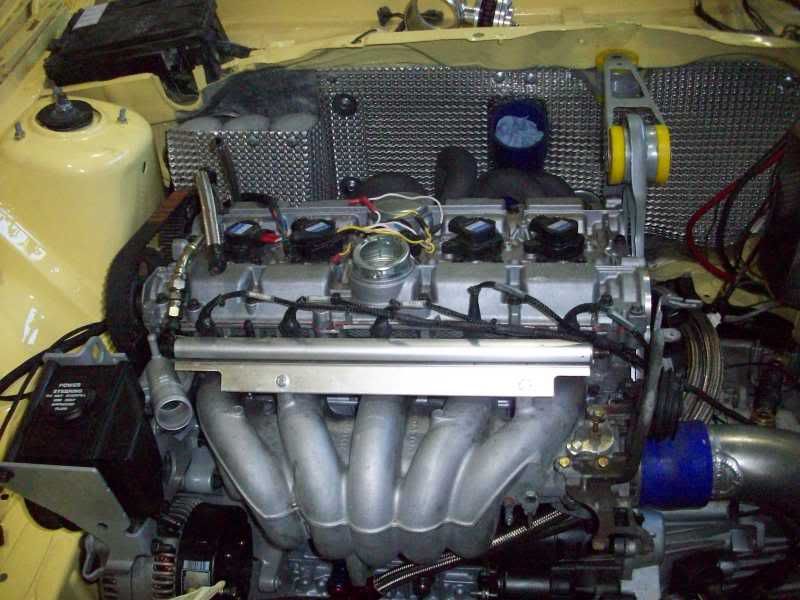
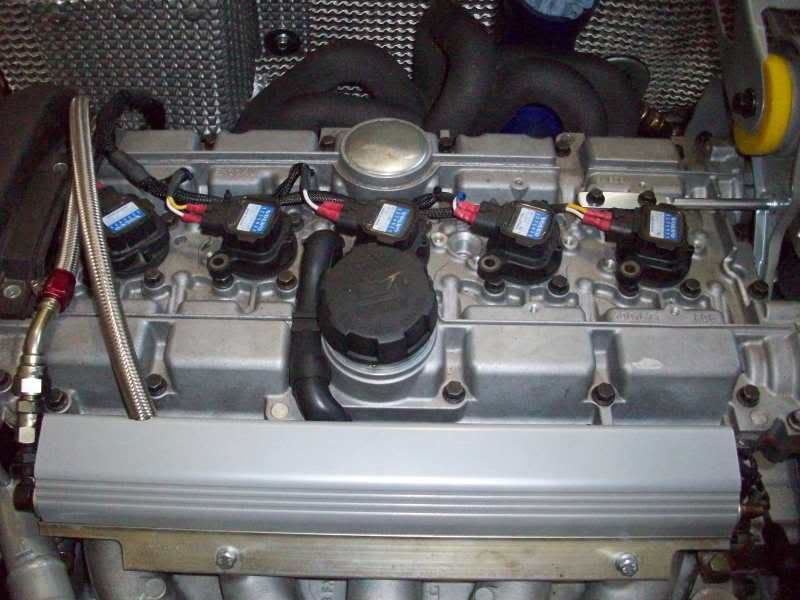
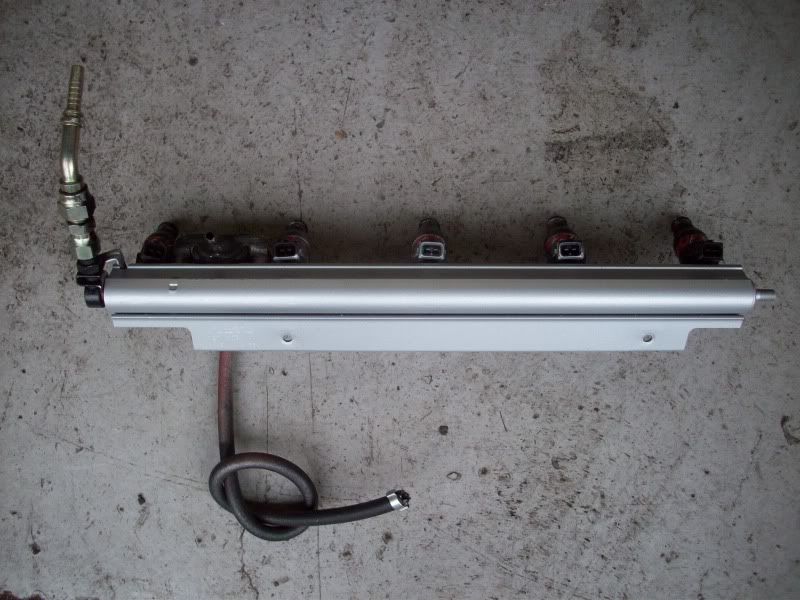
And the fuel rail cover I had powder coated and added the ignition coils
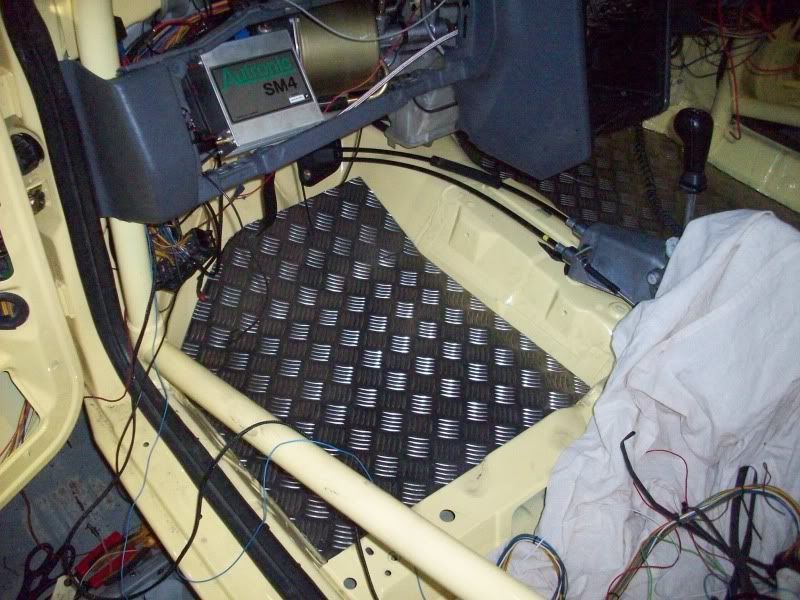
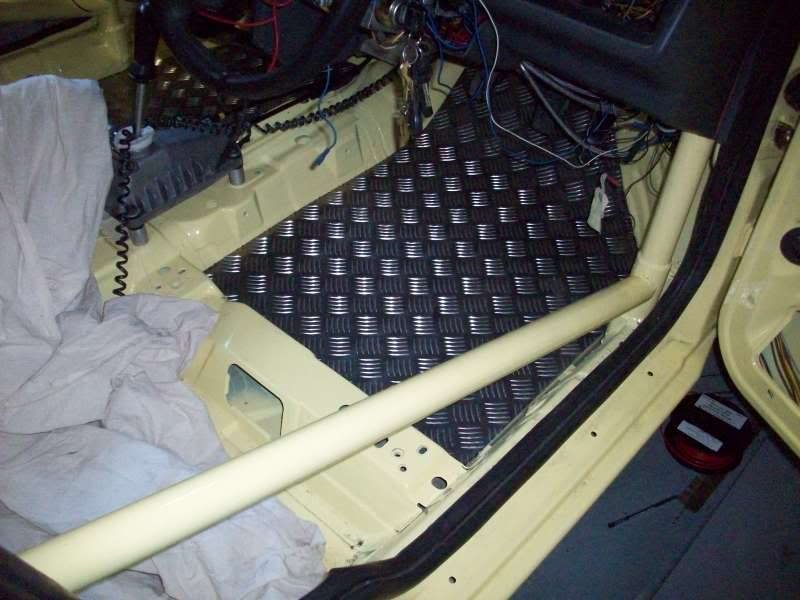
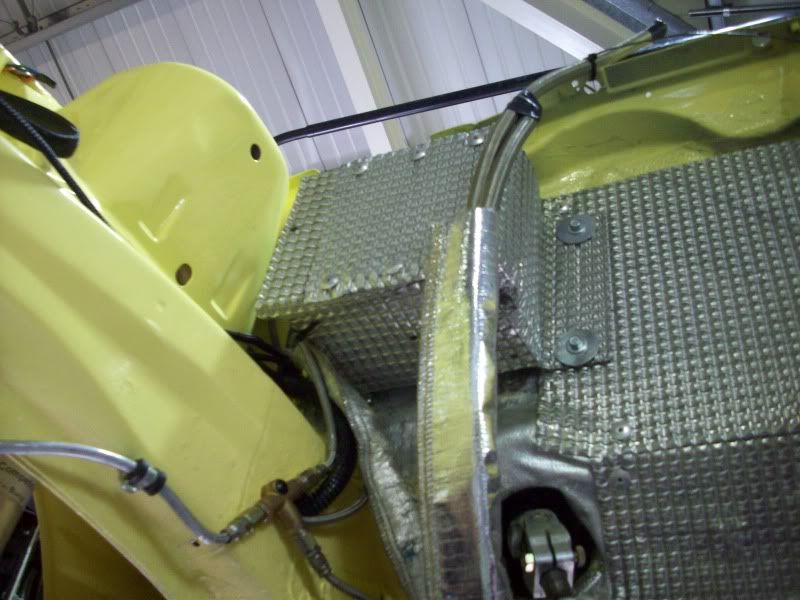
I decided to have a rest from the engine bay while I waited for my wiring man to arrive and check all is ok for the sensors etc and finish the coil wires so started to cut and install checker plate in the drivers and passengers footwell’s
I am very lucky to have a very good mate who does the wiring looms for the Peril he is MAD ROD the owner of a very famous Sapphire Cosworth here in the uk (it’s the only sapphire cossy to do over a genuine 200 mph) he is a very clever man so am glad to have his help on board

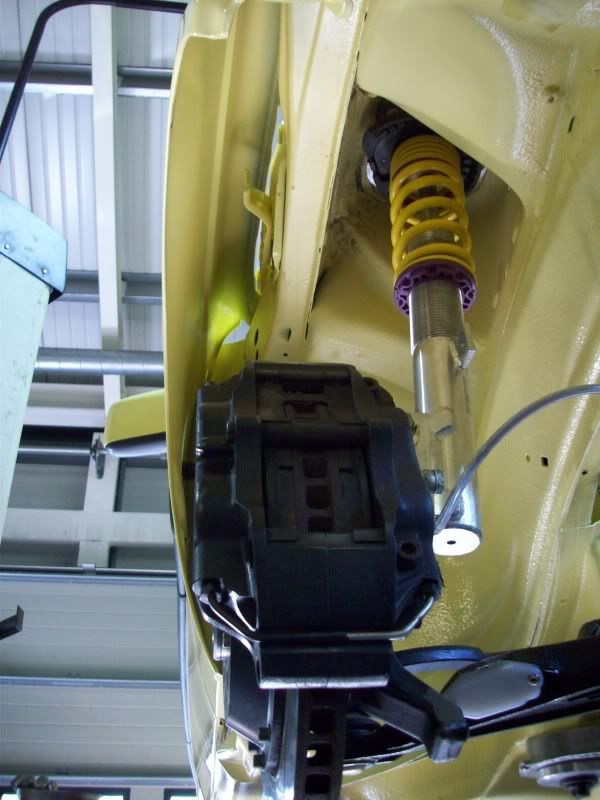
I also fitted the AP brakes back on the car and fitted my new servo setup this took some time
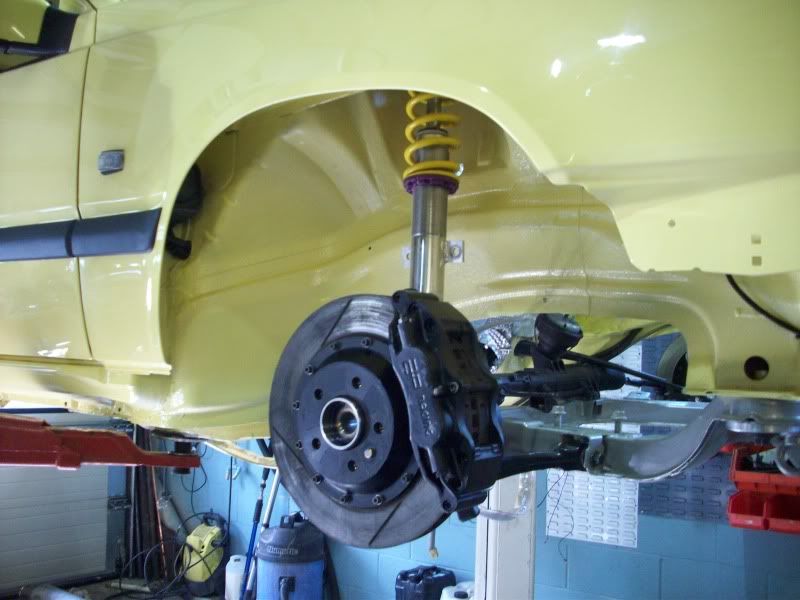
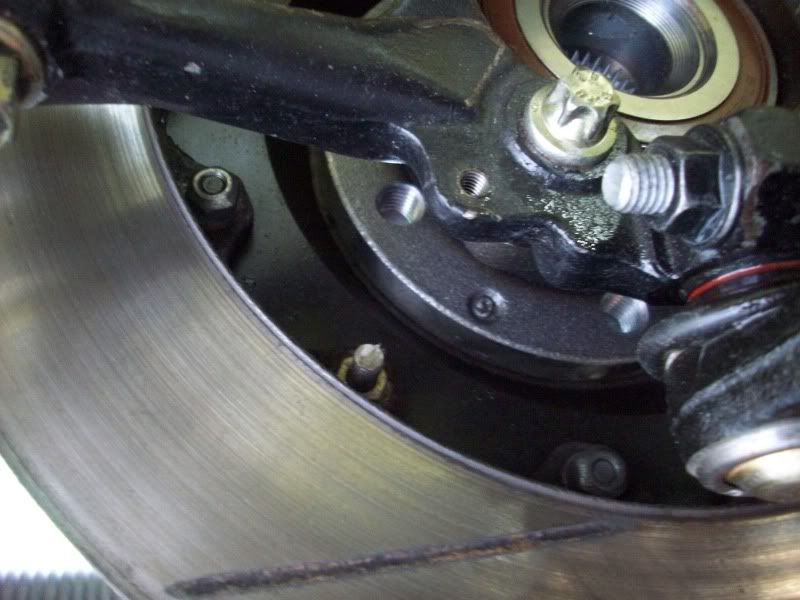
After fitting the brakes I sorted out the pick up for the traction control on the Autronic Sm4 I fitted a longer bolt to the disc to bell mounting to use
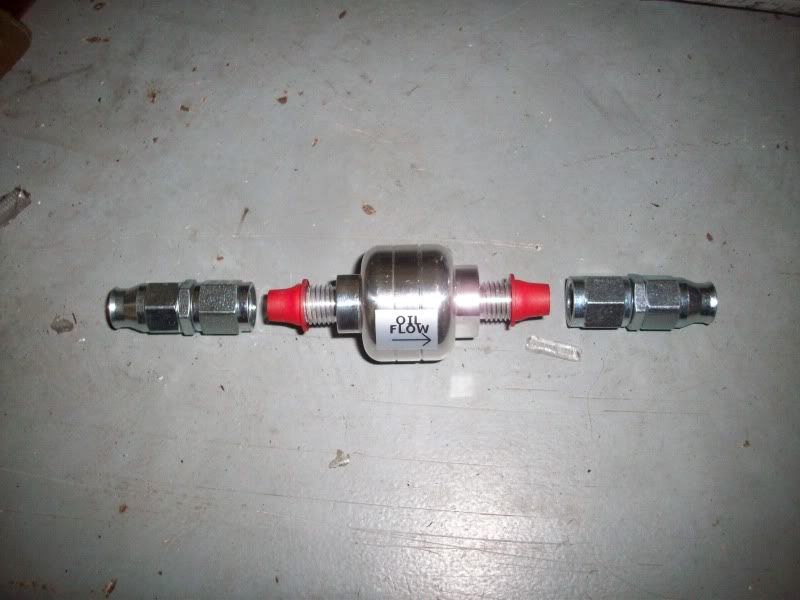
Fitted a turbo oil filter as well this time
I covered the wings etc just in case !!
And added the front pipe before it goes in
Its in and not one scratch.
Once bolted up I started to install and check the fitment of the intercooler rad etc etc and all the pipes to check all is ok
I also have to work out where I want my dump valve to fit as I don’t really want in on view
I washed and cleaned my inlet manifold ready for a test fit
I started to sort out my new loom I had made to see if any changes are needed
I fitted my water injection tank and Spec R breather tank:
And the fuel rail cover I had powder coated and added the ignition coils
I decided to have a rest from the engine bay while I waited for my wiring man to arrive and check all is ok for the sensors etc and finish the coil wires so started to cut and install checker plate in the drivers and passengers footwell’s
I am very lucky to have a very good mate who does the wiring looms for the Peril he is MAD ROD the owner of a very famous Sapphire Cosworth here in the uk (it’s the only sapphire cossy to do over a genuine 200 mph) he is a very clever man so am glad to have his help on board
I also fitted the AP brakes back on the car and fitted my new servo setup this took some time
After fitting the brakes I sorted out the pick up for the traction control on the Autronic Sm4 I fitted a longer bolt to the disc to bell mounting to use
Fitted a turbo oil filter as well this time
Holst said:
I only just found this thread 
Fantastic project Russ
Have you made any changes to the engine since the first posts?
Also, how does the traction control feel?
Hi Holst Fantastic project Russ
Have you made any changes to the engine since the first posts?
Also, how does the traction control feel?
Many thanks i have really had to be totally dedicated to get this far i have split a liner in the block when i got to 591 hp so a lot of work has been done since to stop the problem but its all development for me....I will let you know hoe well the TC works once i have tested it
Russ
GreatGranny said:
Fantastic project, I remember the thread when you first started it.
What power are you hoping for with the improved engine?
Hi GreatGranny What power are you hoping for with the improved engine?
Many thanks i am nearly getting towards the end of the project which feels quite strange after all the hours and time i have spent to be honest i dont have a power figure in mind i have gone my own way with the custom cams i have had made so time will tell,the main changes i have made are to make it strong since last time
Russ
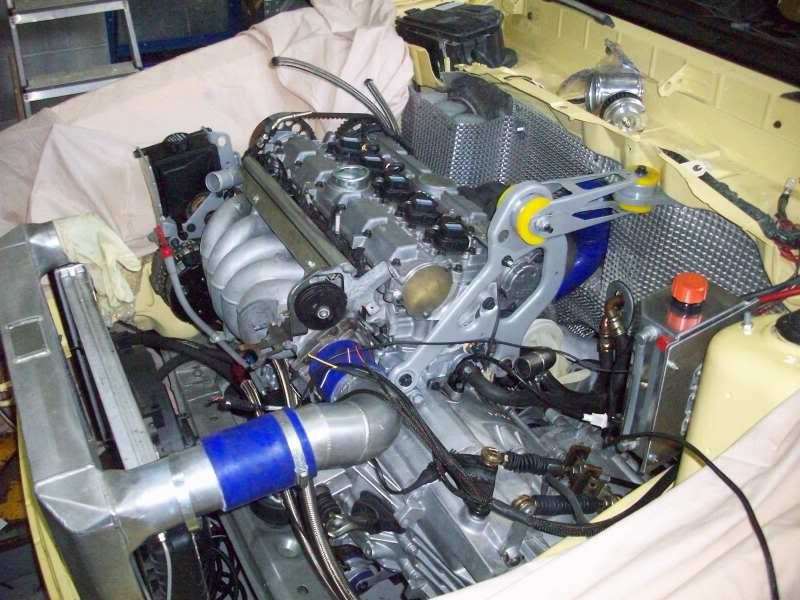
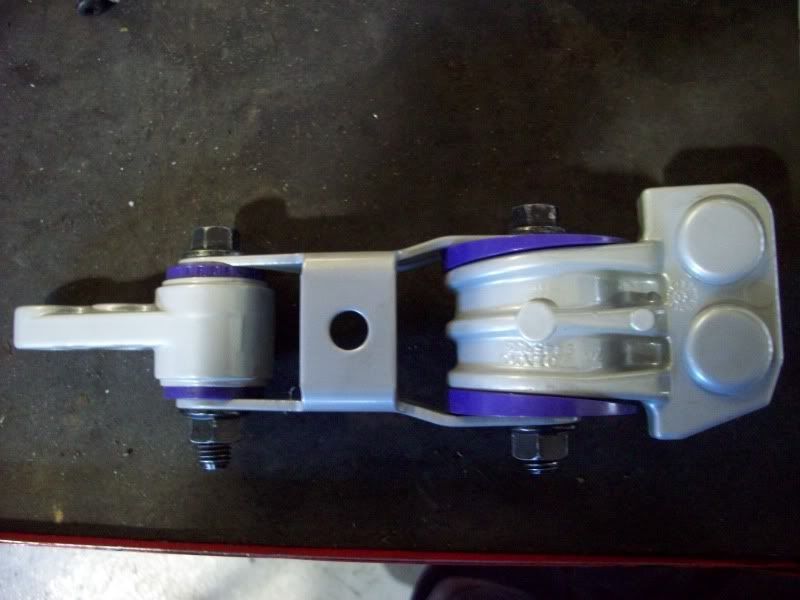
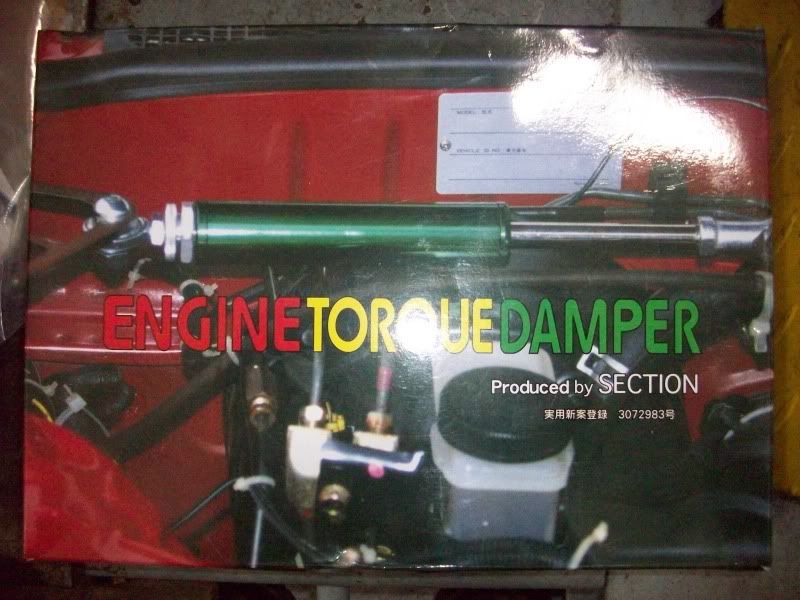
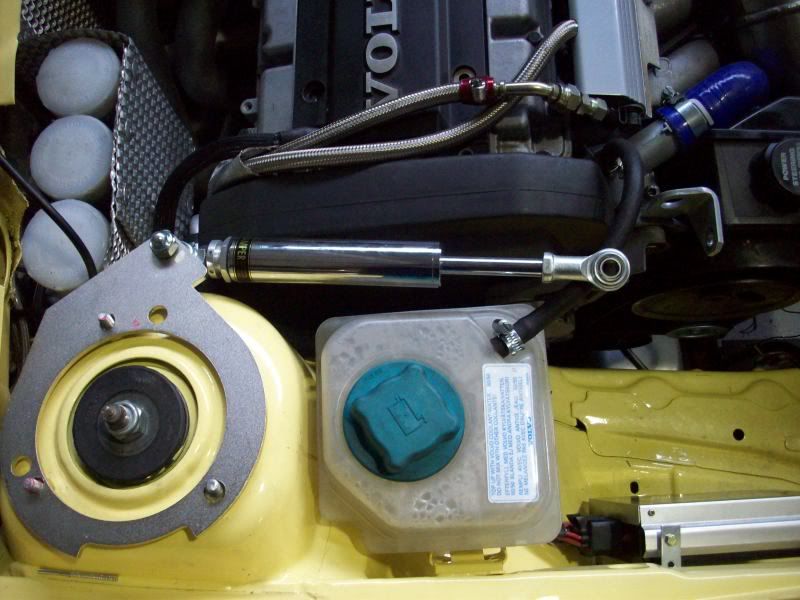
Time for a few more updates I have for some time wanted to address a problem I have been having with the engine mount under the cambelt doing its best to destroy its self every 200 miles or so which is not too much of a surprise as 524 ft lbs is not what it was designed for, I had seen on quite a few high hp Evo¡¦s at Ma developments workshop have a type of engine damper set up so looked into making one of these fit my car I thought even if it could not be done I could fit it to my own Evo 6 so brought this :
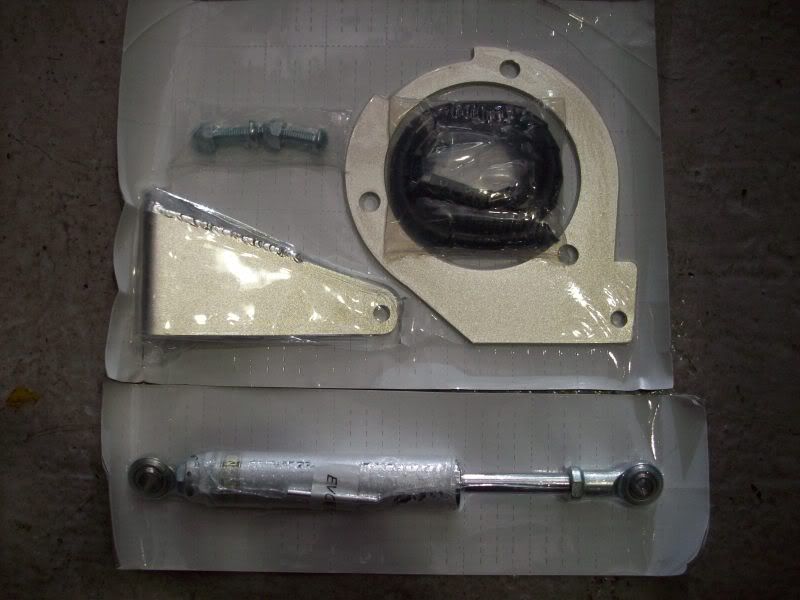
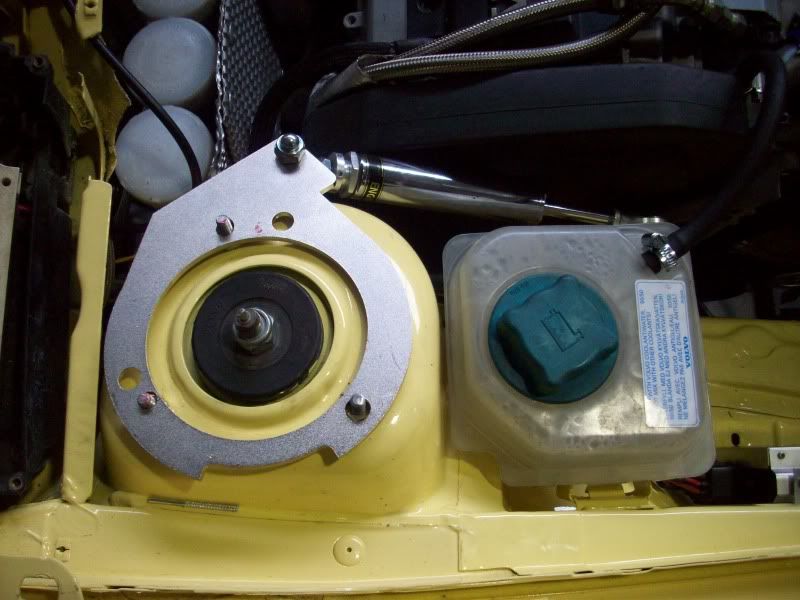
And started to work out how to fit it I would still keep the Volvo mount in place but run this as well I got my bro Andy on the case as he loves a bit of cutting and grinding so this is what we came up with I know have an engine that will not twist so much as before so hope the engine mounts and driveshaft¡¦s will last
I started to re fit other items bonnet sound deadening( not sure its staying) wired up my lights (not sure they are staying too as I have brought brand new standard lights
I also made a few more changes to the breather system while the inlet was off
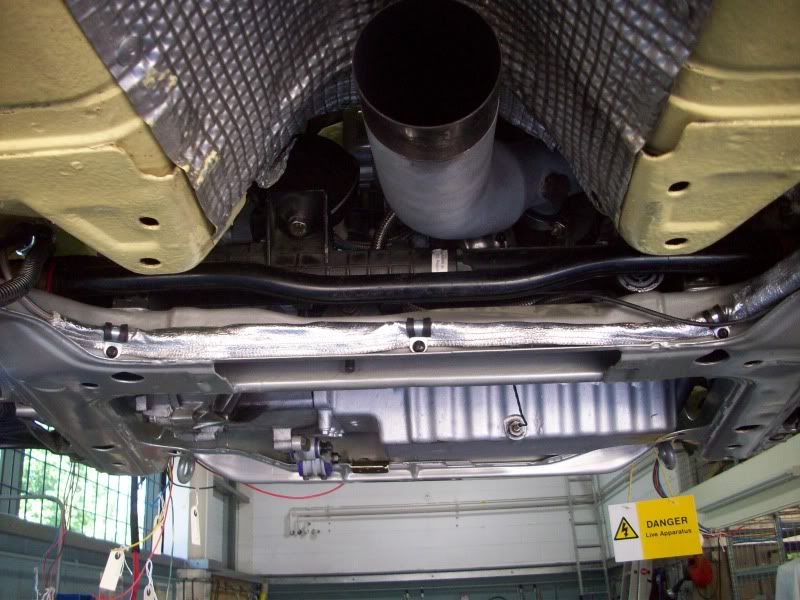
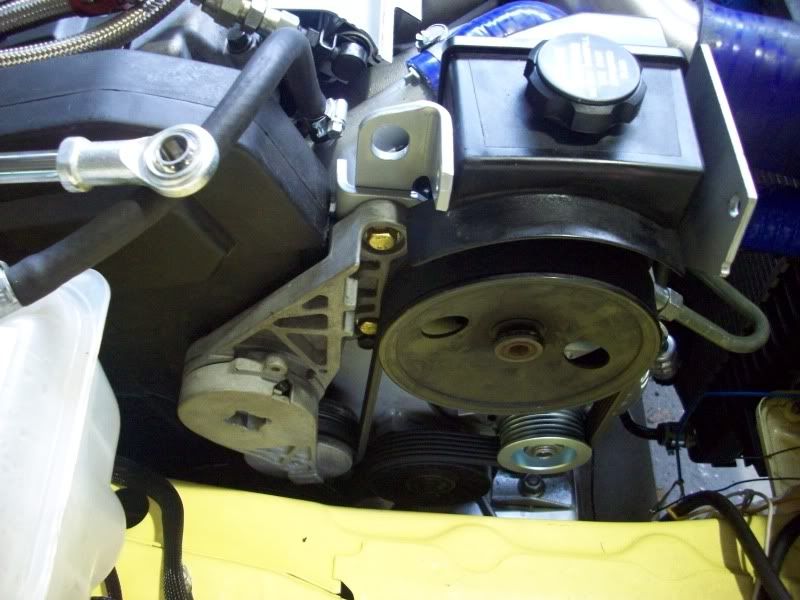
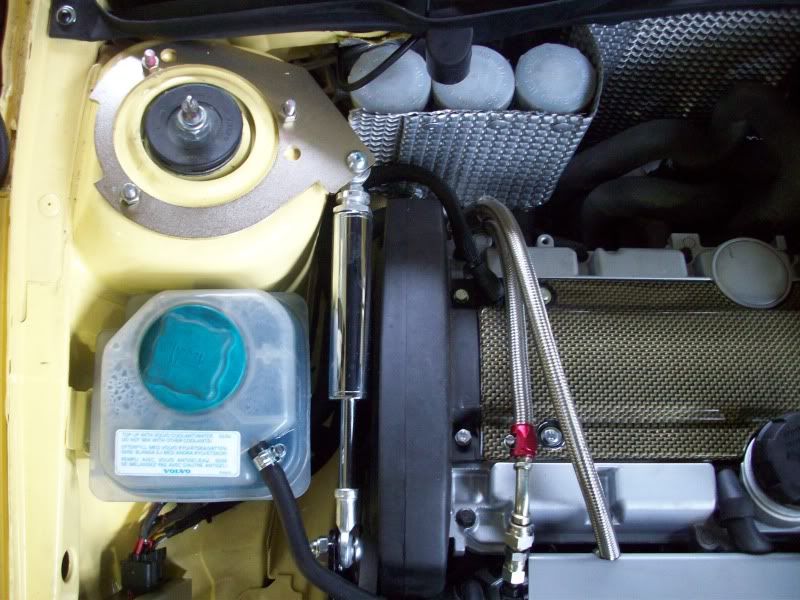
I also managed to sort out another problem I have had with the top radiator hose being so close to the pas pipe to the pump that it had to be moved so I managed to work out a new design with the help of silicon hoses.com and a few angled pipes and joiners so now the problem is solved
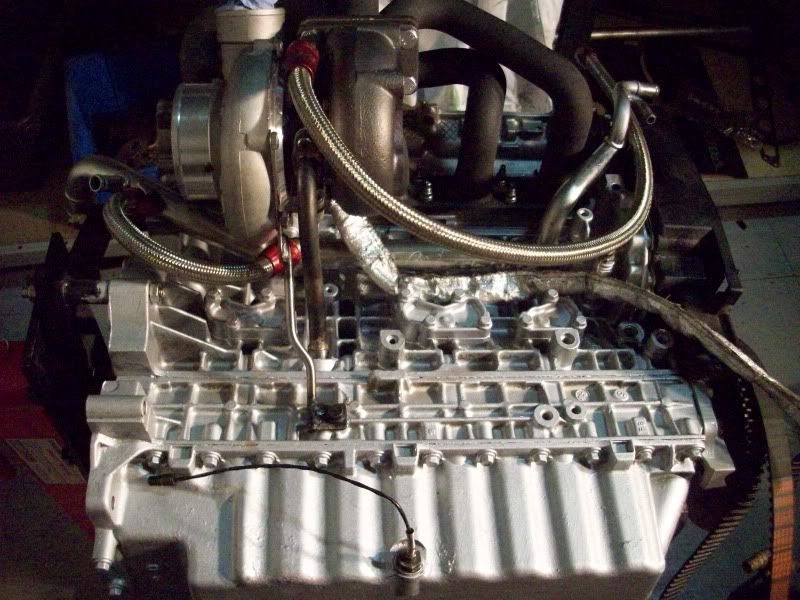
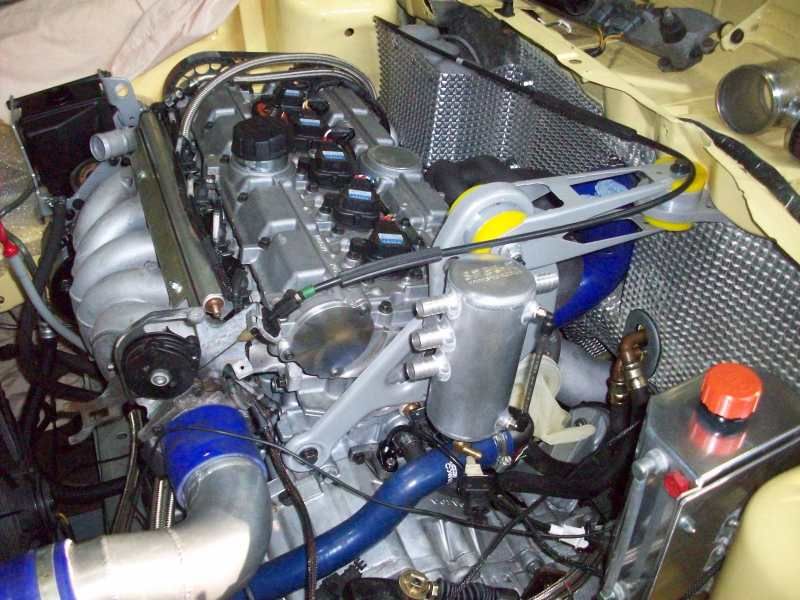
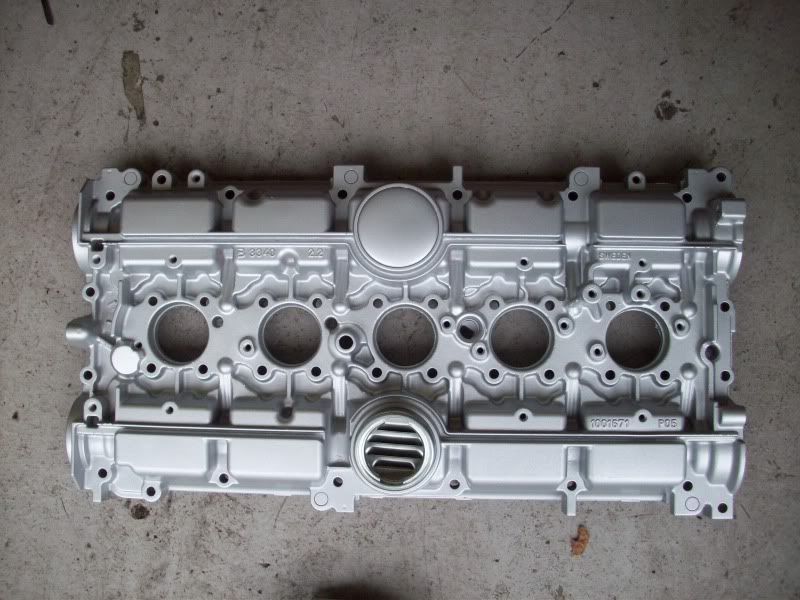
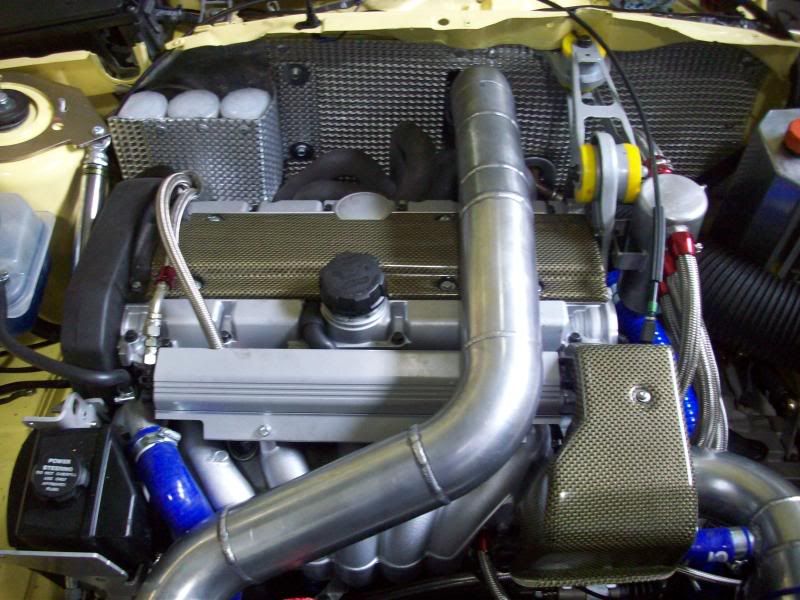
I had for some time wanted to have a few items under the bonnet re painted once a few adjustments had been made and a few items checked so off came the inlet manifold/cam cover/fuel rail and the various brackets etc I wanted to smarten up
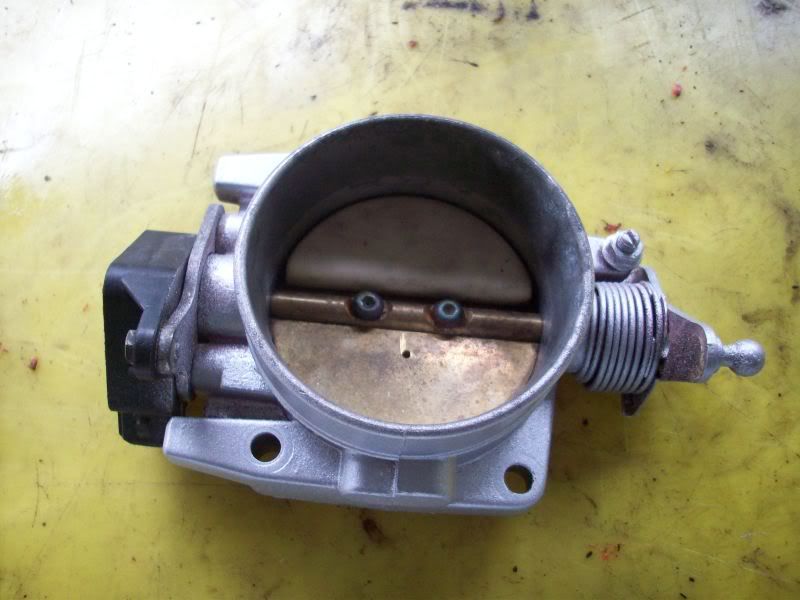
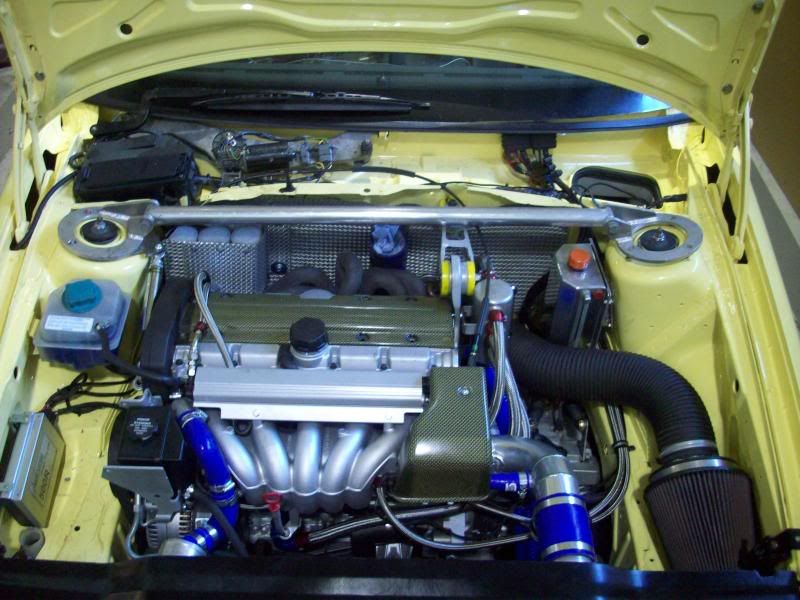
Too years ago I brought a few carbon fibre parts to fit on the Peril and thought I would leave them to when I would call the car finished !! the spark plug cover in yellow weave and also a throttle body cover in yellow weave too

And also added the sound deadening which may not stay :
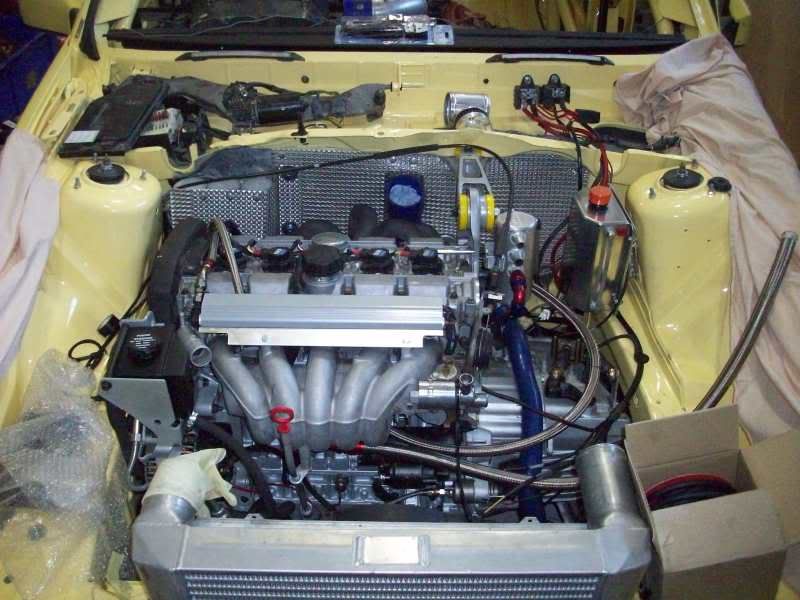
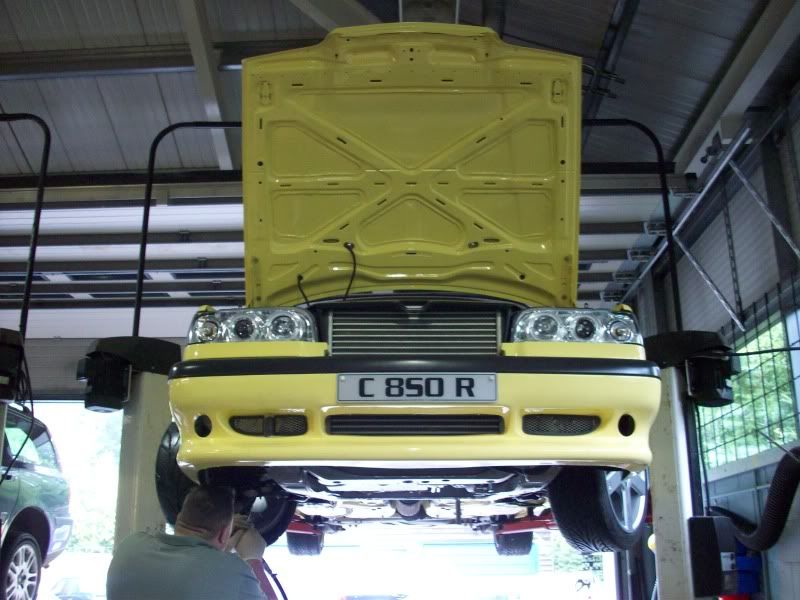
With the bonnet fitted but not lined up correctly because I ran out of patience I took a few pics The Peril is almost alive ļ


Also had a chance at a quick spin around our car park no brake or reverse lights working but wanted to turn a wheel again after 9 months the video was taken by my part time helper and great friend Mark using my camera I did not even think to bring the camcorder so sorry for the poor quality give you all an idea of the sound of the beast¡K.
[URL=http://s79.photobucket.com/albums/j152/500bhpvolvo/The%20Peril/?action=view¤t=100_3819.flv] [/URL]
And started to work out how to fit it I would still keep the Volvo mount in place but run this as well I got my bro Andy on the case as he loves a bit of cutting and grinding so this is what we came up with I know have an engine that will not twist so much as before so hope the engine mounts and driveshaft¡¦s will last
I started to re fit other items bonnet sound deadening( not sure its staying) wired up my lights (not sure they are staying too as I have brought brand new standard lights
I also made a few more changes to the breather system while the inlet was off
I also managed to sort out another problem I have had with the top radiator hose being so close to the pas pipe to the pump that it had to be moved so I managed to work out a new design with the help of silicon hoses.com and a few angled pipes and joiners so now the problem is solved
I had for some time wanted to have a few items under the bonnet re painted once a few adjustments had been made and a few items checked so off came the inlet manifold/cam cover/fuel rail and the various brackets etc I wanted to smarten up
Too years ago I brought a few carbon fibre parts to fit on the Peril and thought I would leave them to when I would call the car finished !! the spark plug cover in yellow weave and also a throttle body cover in yellow weave too
And also added the sound deadening which may not stay :
With the bonnet fitted but not lined up correctly because I ran out of patience I took a few pics The Peril is almost alive ļ
Also had a chance at a quick spin around our car park no brake or reverse lights working but wanted to turn a wheel again after 9 months the video was taken by my part time helper and great friend Mark using my camera I did not even think to bring the camcorder so sorry for the poor quality give you all an idea of the sound of the beast¡K.
[URL=http://s79.photobucket.com/albums/j152/500bhpvolvo/The%20Peril/?action=view¤t=100_3819.flv]
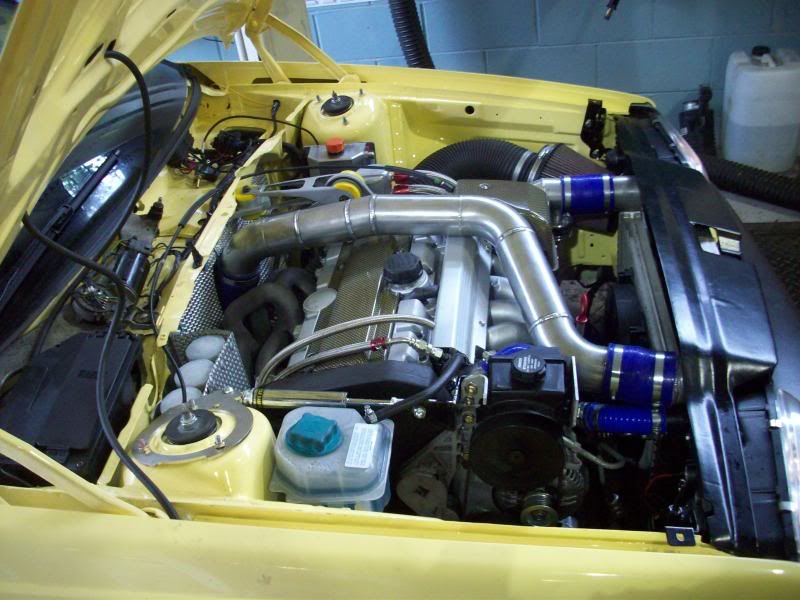
[/URL]A few pics of the week i have run the Peril engine in and as of today is up to 2.5 bar to say it goes well is a bit of an understatement .......

Added a fire ex in as well
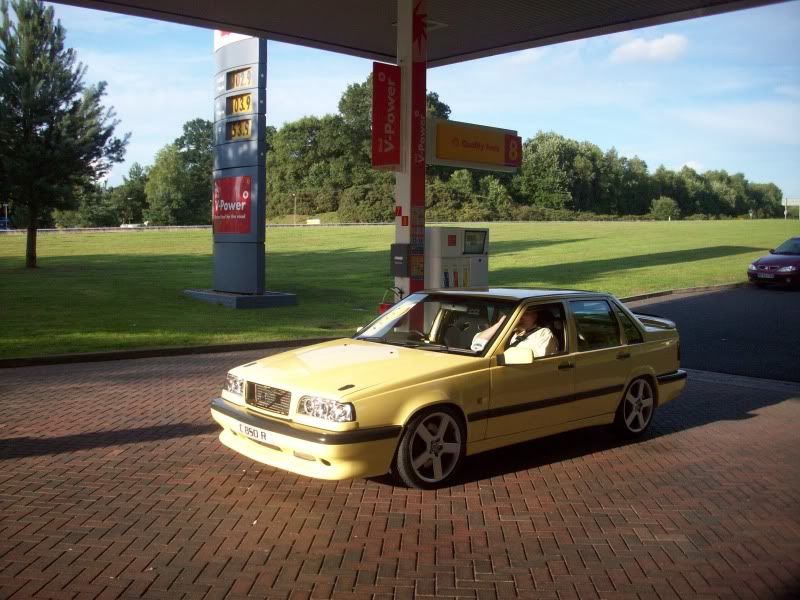
I am sure the girl at our local shell thinks i am after her...
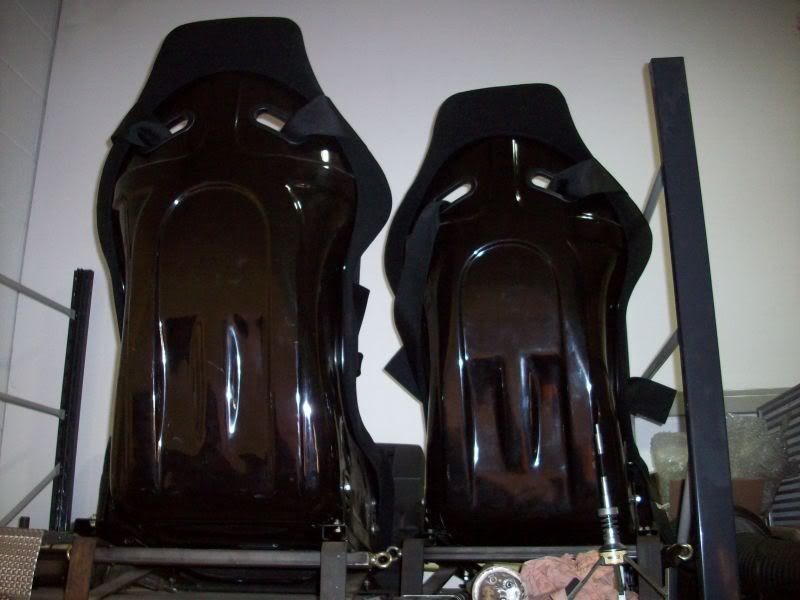
Took the Q who is the official test rider to have in on board i need a Q spec seat to get him in...
I even managed to get The Peril on the top gear cool wall

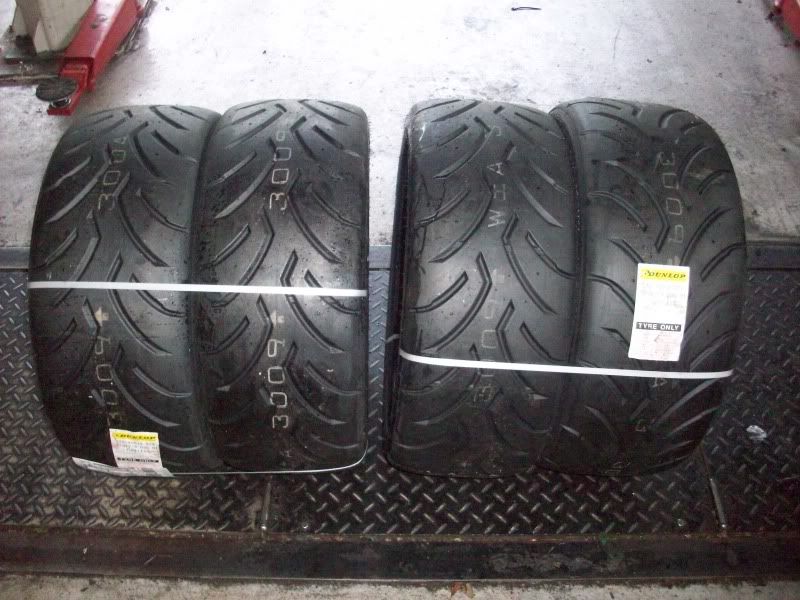
I should have some sort of grip later next week once these bad boys go on
I even managed to spend a bit of time making my dash look how i want it still more to do though
Russ
Added a fire ex in as well
I am sure the girl at our local shell thinks i am after her...
Took the Q who is the official test rider to have in on board i need a Q spec seat to get him in...
I even managed to get The Peril on the top gear cool wall
I should have some sort of grip later next week once these bad boys go on
I even managed to spend a bit of time making my dash look how i want it still more to do though
Russ
T5R+ said:
Watched with amazement across the forums we frequent - all I have to say is ................
Hi T5R+
Thanks very much your very kind i am not sure if i know you are you the same username on the other forums i use ?
Its been a massive amount of work to get this far but i did enjoy a few runs yesterday at 2.5 bar
Russ
 ......................... "jealousy, is so underrated"
  . You sir have raised the benchmark.
Hi T5R+
Thanks very much your very kind i am not sure if i know you are you the same username on the other forums i use ?
Its been a massive amount of work to get this far but i did enjoy a few runs yesterday at 2.5 bar
Russ
......................... "jealousy, is so underrated" . You sir have raised the benchmark.Gassing Station | Volvo & Polestar | Top of Page | What's New | My Stuff