3" Scale Marshall Traction Engine
Discussion


Holy thread resurrection batman; but I'm so glad it has been - great read.
Can't believe I missed this thread initially, it looks like a great thing to own, hard work but rewarding. I love looking at steam powered vehicles/static engines at shows etc. the highlight this year was a couple of Stanley steam cars something which you don’t see very often.
Thread bookmarked
Can't believe I missed this thread initially, it looks like a great thing to own, hard work but rewarding. I love looking at steam powered vehicles/static engines at shows etc. the highlight this year was a couple of Stanley steam cars something which you don’t see very often.
Thread bookmarked
Catweazle said:
airbrakes said:
Well, thats it for tonight I'm afraid as its 2am and I'm rather tired! Stay tuned though for a missive on the gears, and a build log of my lovely new period-look scale riding trailer
How about modelling one of these as a riding trailer?
So, to recap - I was using a £40 ebay garden utility thingy - no prizes for guessing where it originated from, suffice to say it was a "super high quarity garden tlolley" and it took some assistance from large hammers to make all the bits line up when assembling it!

Looks smart enough, doesnt it? Well, looks can be deceiving:

It worked well enough - once I'd replaced 2 wheels. Despite being rated for 300kg, on the first outing last year I loaded it with 20kg of water, 10kg of coal, and 90kg of human cargo. Within 30 yards, one of the front wheel bearings turned into mush:
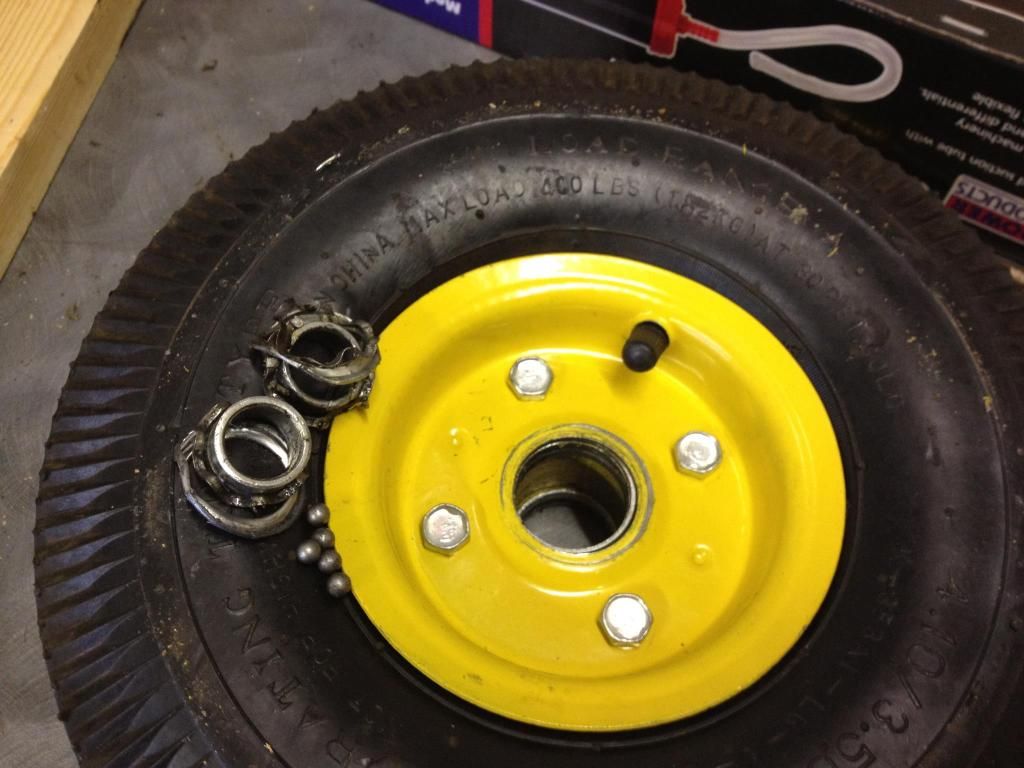
The problem was, whereas the back wheels merely had to trundle along, the front wheels were a steerable axle and thus a considerable amount of sideways shear was put on each bearing when being dragged around a corner. The thin, poor quality side channels couldn't cope, and soon burst and released all the balls.
"No problem" I thought, I'll buy some nice Timken bearings or similar and put them in. Slight problem - the bearings appear to have been inserted with a huge press whilst the wheel was red hot, as they were well and truly "interference fitted". Increasing the level of force in an attempt to drive the old races out succeeded only in distorting the pressed wheel rim. Oh well... I gave up, and asked a favour of a fellow local miniature engine enthusiast, who had some spare heavy-duty wheels from a decent sack barrow (pneumatic sack barrows use exactly the same wheels, but of much better manufacturing quality).
So, problem solved - the HQ front wheels have been brilliant and have stood up to some serious rally field abuse with very heavy loads.
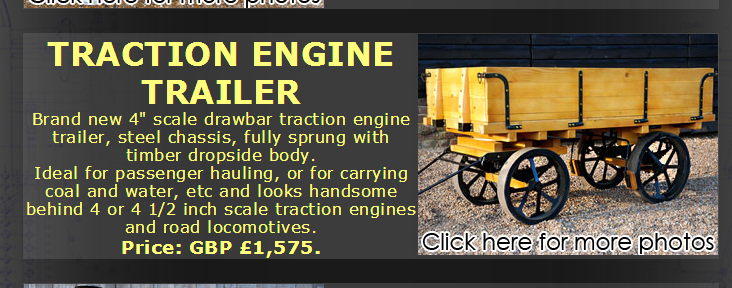
But.... the trailer still looked like a garden trolley. it didnt look very scale-model like, and it certainly did not look like the period Dyson drawbar trailers or "traction wagons" of old, that were the preferred choice of full-size engine drivers for supplies hauling:

It is possible to buy scale replica kits made by the same people that produce to castings kits for the engines themselves. They do look fabulous:
...but then so they f
 king well should be, at that price!
So, time for me to get cracking and build my own. Ok, by the time I'd finished with my trailer, it still wouldnt look quite like a perfect scale representation, but for several very good reasons:
1)Complexity - mine would be built on the existing garden trolley chassis that already had perfectly functions wheels, axles, steering and a frame to work with. I'd also be omitting the hinged dropsides - they werent neccessary for my design plan, and having the sides solidly screwed to each other would massively increase structural integrity.
2)Timescale - by the time I stopped procrastinating and making endless plans and drawings, I had a week to get it made before the first show of the season
3)Wheels - retaining the existing pneumatic wheels of the garden trolley doesnt look great, but then have you ever seen a solid-wheeled vehicle attempt to traverse a soft, wet field?
4)Cost - total budget was £100, including the £40 cost of the original trolley
So, fingers were pulled out and a plan was drawn up:
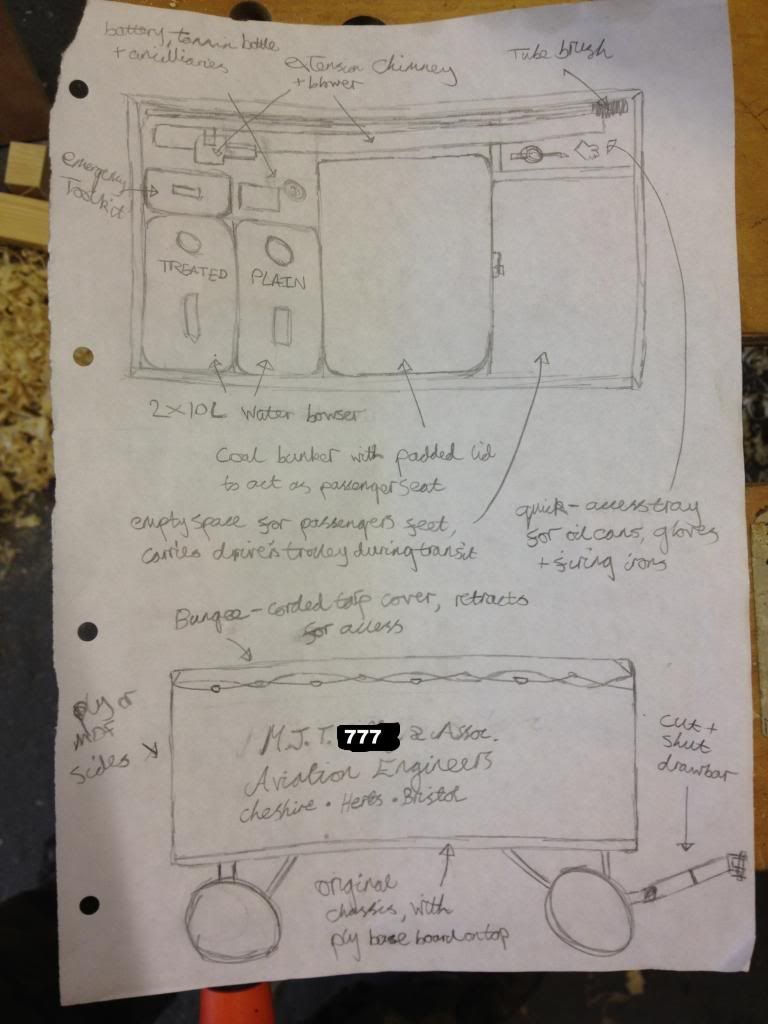
The trailer would be a simple baton frame construction on a sheet wood floor, with plank sides. The interio would be split into 4 sections - the rearmost section to hold water tanks and my emergency toolkit, the middle section as a coal bunker that would double as a passenger seat, and the front as an empty space for the passengers legs, that would hold the driving stool when packed up for transport in the back of my truck. the 4th section would be a channel down one side for the extension chimney (used to get the fire going - see previous posts).
One visit to Potter's Lumber Yard of Nantwich (a very well-stocked, well-run and friendly timber yard) resulted in the exchange of £50 of my pounds for an alarming amount of PAR pine baton and planks:

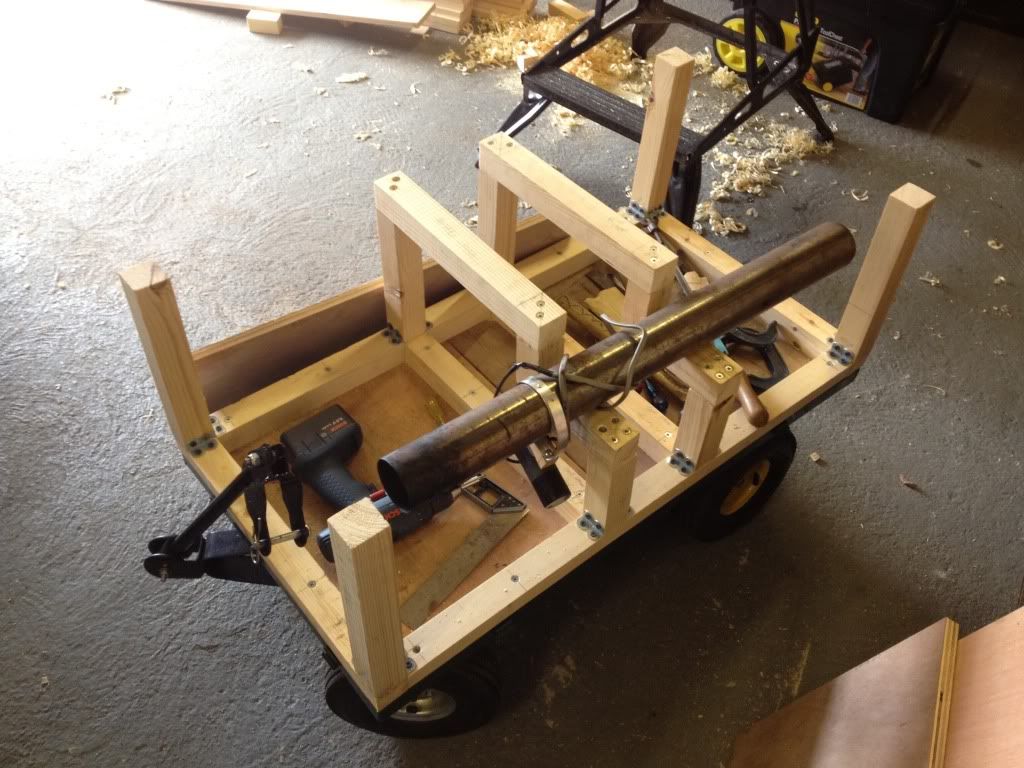
The first job was to put a proper floor over the existing mesh floor in the trolley. Luckily, I already had a large amount of spare 3/4" plywood, and found enough bits large enough to make a complete floor. This was secured from underneath with some corner reinforcing brackets left over from a shelving job, laid horizontally and self-tapped through the mesh:
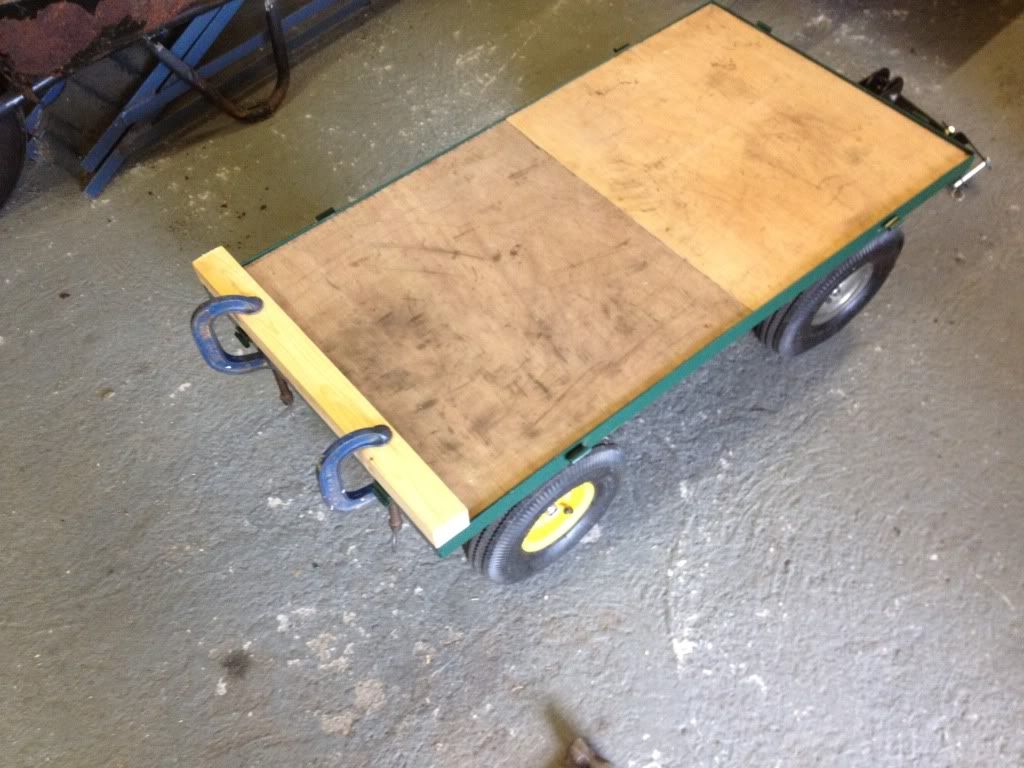

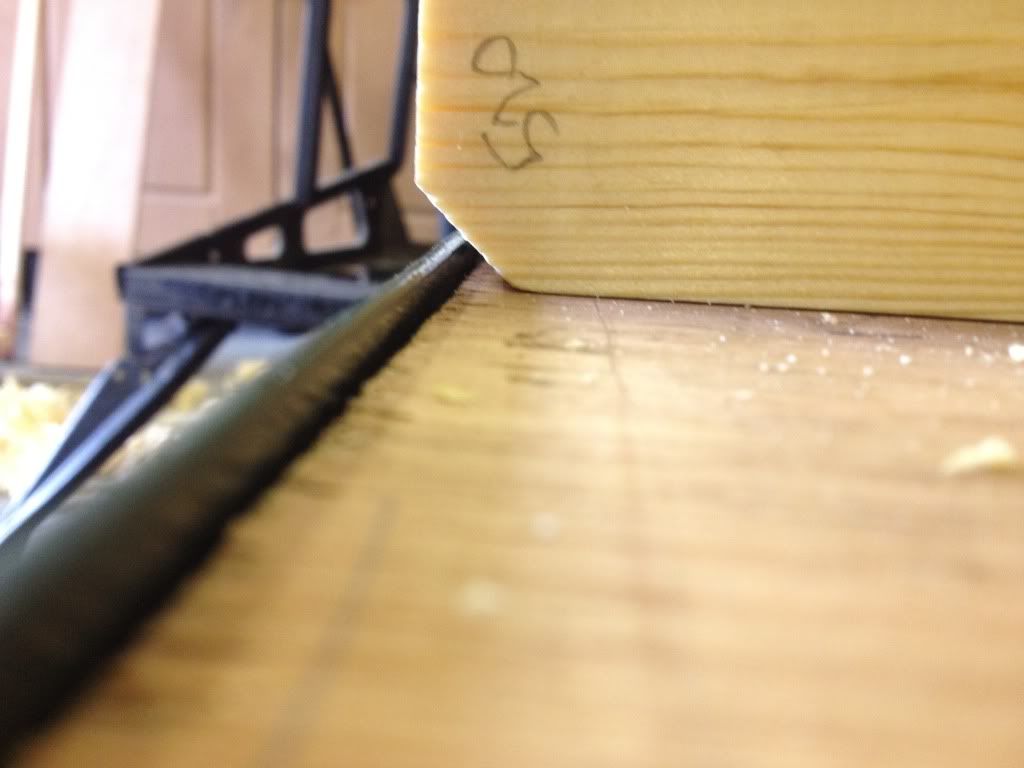
This was all well and good, but immediately threw up a problem. The corners of the trolley frame were fractionally deeper than 3/4", meaning that the baton I had intended to border the floor with to create a frame (see the bit clamped to the floor in the pictures above) would have to be sat inside this 3mm thick lip. This would put the kibosh on having flush planking all the way down the sides to hide metal chassis, as the bottom plank would have to stand proud to clear the lip.
Not to be deterred, I broke out the biggest plane in my arsenal and got to work:
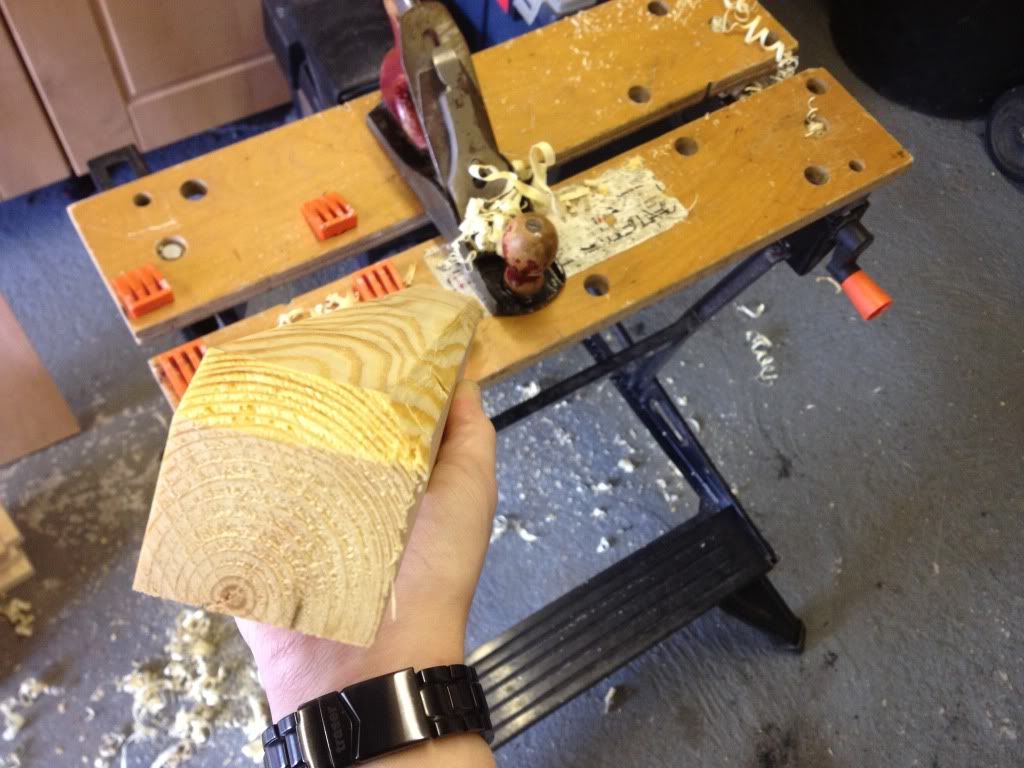
Success - the baton frame could now sit inside the metal channels, but overhang outwards to form a flush side:
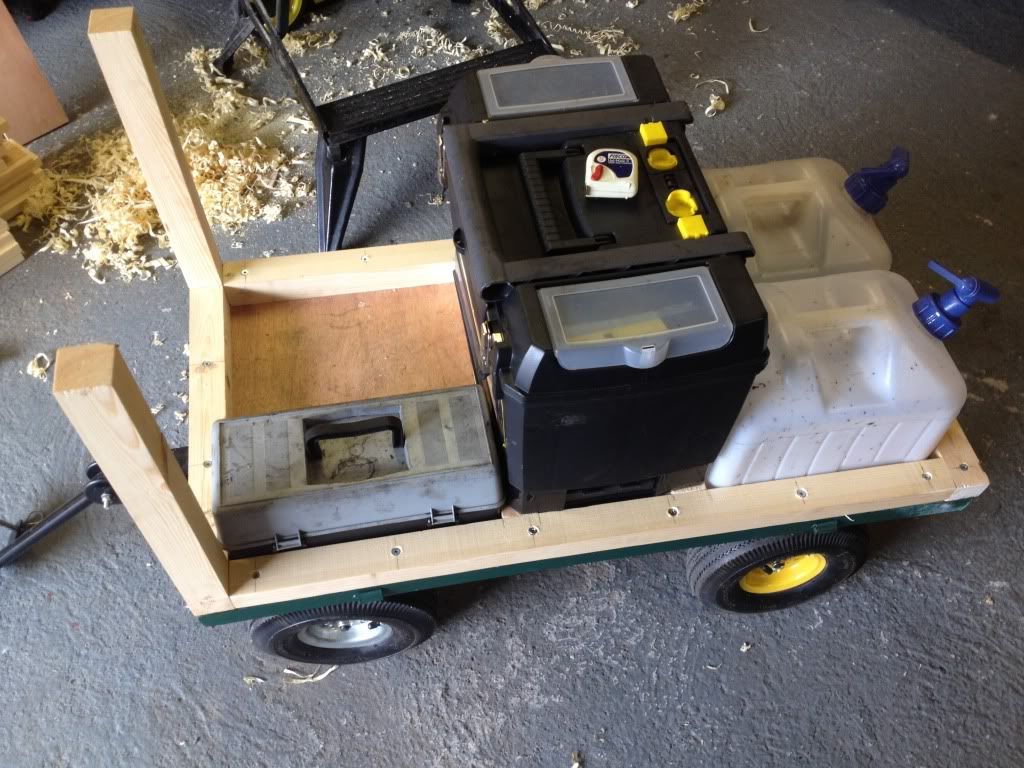
With the rest of the bottom of the baton frame cut to length, planed, test-fitted, clamped in place, drilled and finally screwed down, I could then begin to trial fit some of the interior components inside to visualise the interior. This was to work out the exact dimensions of the coal bunker - as the water tanks at the back had known dimensions, and the toolbox at the front had known dimensions, and the overall interior length was fixed by the trailer chassis, then I could work out the difference to size up the coal bunker and begin making the front and back of that. In this pic, the big toolbox is being used to gauge what height to make the bunker lid to make it comfy to sit on. This in turn determined the height of the trailer, as shown by the vertical batons. IT was a bit of a tricky balance, as if the seat was too low then passengers would have their knees round their ears. If it was too high, the trailer would look ridiculously tall for its proportional length:
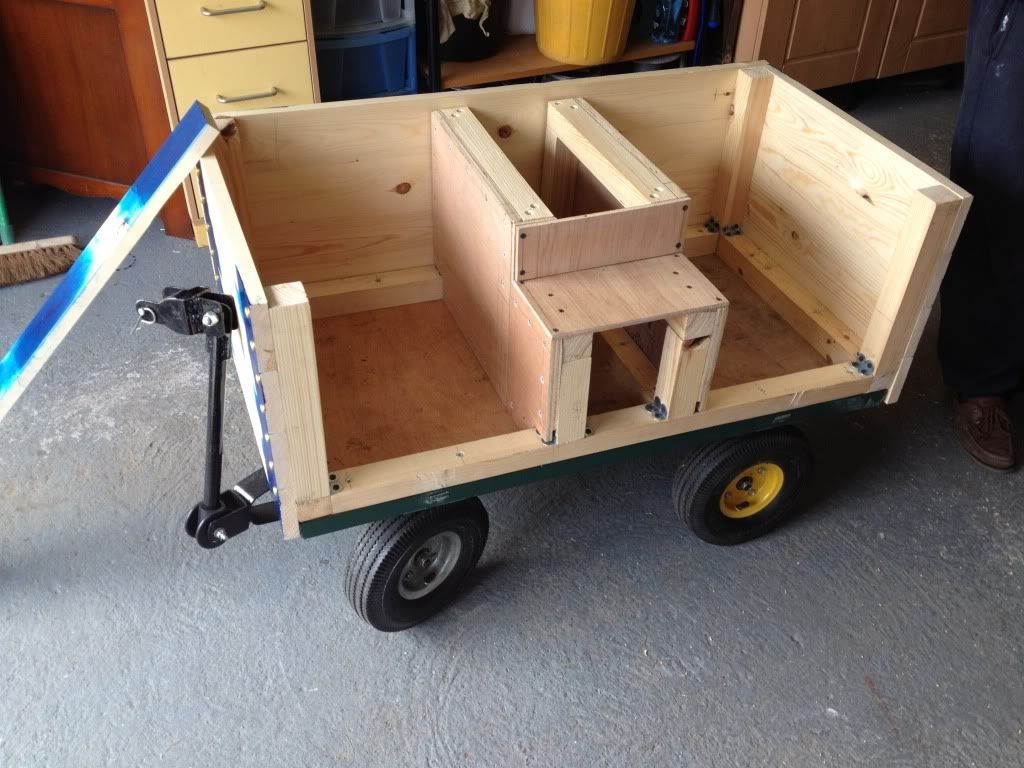
With this all determined, the vertical construction could begin:
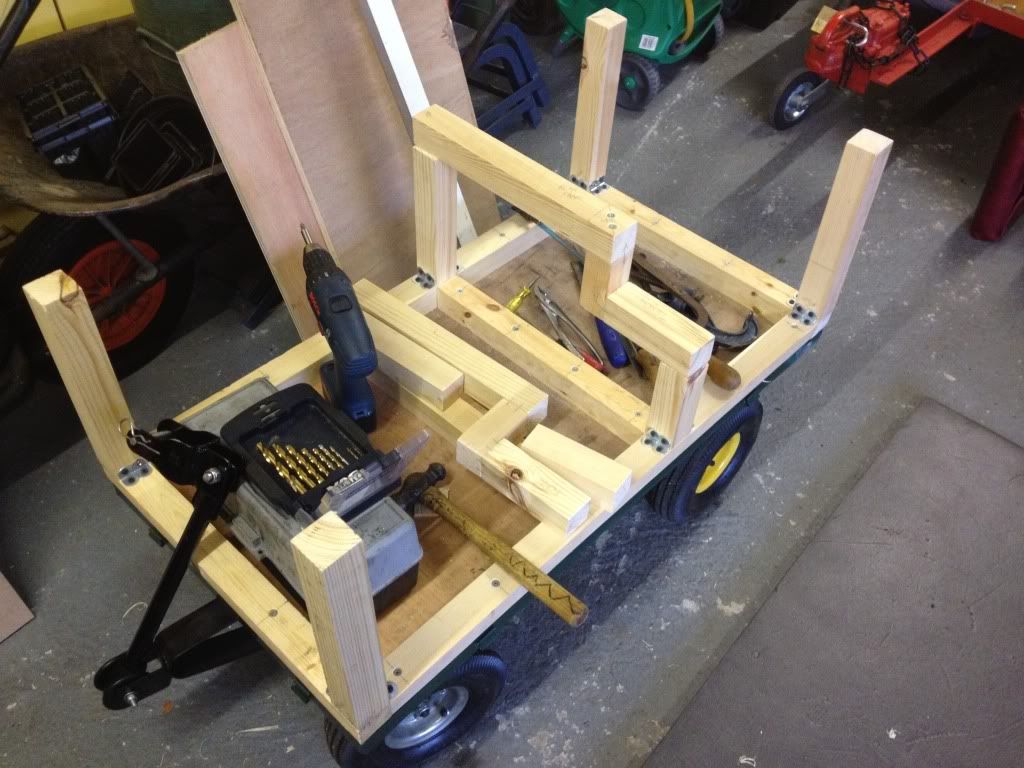
You may note that the vertical batons are attached by the slightly shonky method of lots of self-tapping right-angle brackets. Ideally, they should be screwed through from the underside of the base horizontal frame. However, as I was making this build up as I went along, and I didnt know what length (height) the verticals had to be, I couldnt do it at the time. And I certainly wasnt going to muck about taking out the many huge screws holding the base in. Another point to consider was the fact that with the metal bracket attachment, there was a very slight degree of play in each upright that I could use to my advantage. using the flexibility of the bracket meant I could tweak each post if it was slightly off vertical - and indeed, all of them were. This is because a) despite my best efforts, some of them werent cut perfectly perpendicular, and b) some of them were actually bowed or warped slightly along their length, having obviously absorbed some moisture since being made.
So, I hear you asking, why do I have a big step down one side? Well - remember I mentioned the chimney:
From an engineering point of view, a cantilever structure such as that would horrify me considering it has to support fully grown adults sitting on it. However, in this case, it was all ok. Firstly, those cantilevered sections were put together with the biggest screws I could find - some 6" monsters.
Secondly, most of the weight of the passengers would in fact be taken in shear by the front and back face panels of the coal bunker, this stepped frame merely being something to screw the faces to:
As you can see, I used more 3/4" ply for the faces, combined with a lot of screws. I dont think that step-frame is going anywhere soon, no matter who sits on it. In the above picture, you can also see I'd begun panelling the outside of the trailer. A clear demonstration of my earlier point can be seen, of how the planks come right down over the chassis, and thus how the baton frame had to be flush - and hence the fancy planing. The observant amongst you might also notice how, in the intervening period, the lugs for the dropside hinges have also been hacksawed off to enable this flush planking.
Before fitting, each plank also had 2 or 3mm planed off each longitudinal edge to make them look like scaled-down large size planks with the slightly rounded rough-hewn corners. Had I not done so, the perfectly planed planks would have just stacked neatly and looked like solid sides, completely defeating the point of using planks instead of more sheet ply.
The 4th side was then fitted, and a lid was made for the coal bunker seat. The rather substantial brass door hinges came from my big box of random spare wood fittings, and took a fair amount of skilled chiselling to make them sit flush in both the frame and the lid!! All the seams on the inside of the coal bunker were also lined with a bead of silicone, to prevent coal dust working its way out of the joins and getting everywhere.
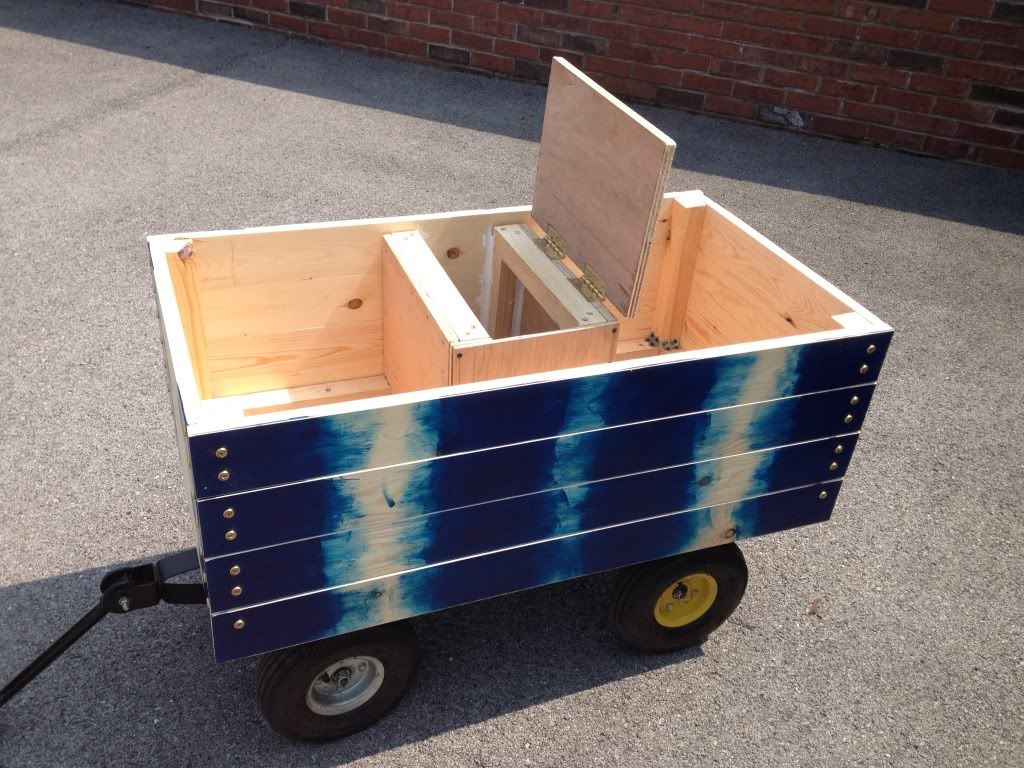
You can also see I'd pre-painted the ends of the planks before fitting them. This was because I had elected to use ornamental screws and cups rather to represent the exposed bolts and rivets on a real traction wagon trailer, and it would have been a hell of a job to paint around them once it was all assembled - it was enough of an effort just putting them all in at perfect spacing and level-ness! Originally, I had intended to put a line of screws down the middle of each plank as well, to hold them to the coal bunker uprights for extra rigidity, hence the paint in the middle too. However, once assembled, it was perfectly rigid enough and I really didn't fancy putting in another 32 screws (bear in mind that it was also Friday afternoon at this point, and the show was on Saturday).
All that remained was to paint the rest of the trailer properly, and pack everything in it:

I think you'll agree it has turned out rather well
After several coats of paint, the blend of the pre-painted bits into the unpainted parts is no longer noticeable. It certainly looks a helluva lot better than the old mesh trolley body, and it worked perfectly on the first show out with it. many appreciative comment were made on how well-done it was too:
All the remains is for me paint the wheel rims black, so the trailer no longer resembles one of the harlequin Volkswagens......
At some point, I will also utilise the 20ft roll of curtainsider canvas I have (don't ask) to make a heavy duty, weatherproof scale canvas cover for the trailer. this will also served the dual purpose of making the engine look like it is hauling a trailer full of goods just like in period, rather than the current situation of being able to peer in and see nothing but tools and water tanks everywhere.
A final touch will be to signwrite the sides, as per the original drawings. However, since I am now a chemist and not an engineer, I am thinking of the name of a period local chemical supply company. Current favourite is:
The United Alkali Company Ltd.
Liverpool, England
(Formed 1890, merged into ICI in 1926, for the history buffs).
So overall, it took me 5 days of 10-7pm graft (with lunch and tea breaks) to make the bugger in the end. However, as i've said, this was very much built on the fly - most of that time was standing around, scratching my head, measuring things and trying to work out how to best make and fit the next bit. I reckon that, now I know exactly what to do, and in what order with no endless test fitting and trial and error, I could make another one in 2 days flat.
As for cost, well the trolley was £40, the pine wood was £50, and the paint and ornamental screw cups came to £12 from B&Q. The screws, hinges and plywood sheet was all stuff I had already but would probably add another £40 to the materials cost. I think you will agree though, its still not bad at all for the end result, especially when one goes back and looks at the price of a perfect scale one!
Coming soon - fun and games with a gear mechanism....
Edited by Justagreenbadge on Wednesday 6th November 21:32

Gassing Station | Scale Models | Top of Page | What's New | My Stuff