First kit in 22 years !
Discussion


nick heppinstall said:
dr_gn said:
I've had Klear that doesn't dry for ages too.
Ok. Whats Klear, Vallejo Model Air Steel, Future and Alcald II !http://alclad2.com/
Vallejo Model Air Steel is just the metallic steel shade of Vallejo's acrylic paint range, 'model air' that is designed for airbrushing. Not to be confused with 'model color' which is for brush painting.
http://www.acrylicosvallejo.com/esp/productos-mode...
Klear, also known as Future, is a floor polish used by modellers as a gloss varnish.
http://www.swannysmodels.com/TheCompleteFuture.htm...
Up until about two years ago, Johnson's Klear was readilly available through all supermarkets. The original product has now been withdrawn and replaced with a new formula, also called Klear - which does not seem to have the same properties as the original and is generally regarded as not being suitable as a varnish for plastic models. I am pretty sure that the last stocks of old Klear were bought up by model builders rather than floor polishers (including me  )
)
There are some alternatives to the old Klear available but I haven't had call to buy them yet as I am still working through the bottles of old Klear I hoarded prior to its withdrawl.
Ironically, the US/Australian version of Klear (i.e. Future) is still available in those countries in the old formula.
)There are some alternatives to the old Klear available but I haven't had call to buy them yet as I am still working through the bottles of old Klear I hoarded prior to its withdrawl.
Ironically, the US/Australian version of Klear (i.e. Future) is still available in those countries in the old formula.
Sorry this is taking so long but I've had a chest infection and a weeks hols ! Just doing a little bit when I feel like it.
Today done some filling on the wing roots, fuselage and a few other places. It's every bit as messy as I remember it !
Is it just me or does the filler go everywhere apart from where you want it for everyone ?
No handy tool to apply so ripped the end of the cardboard filler packet and used that !
Today done some filling on the wing roots, fuselage and a few other places. It's every bit as messy as I remember it !
Is it just me or does the filler go everywhere apart from where you want it for everyone ?
No handy tool to apply so ripped the end of the cardboard filler packet and used that !
Hi Nick, I mentioned previously on this thread the importance that I place on wooden cocktail sticks in my modelling- and I think they are the answer to your problem.
I use them as an alternative to brushes when applying media such as fillers as they can easily place the correct amount to the right places- as well as removing excess. Other than trying to place filler directly on to where it's needed via the container, use a cocktail stick to pick some from the tube and then apply directly. You can then use the stick to neatly fill the gap(s) and scrape the excess away.
Oh, and of course, they're cheap and dispossable.
I always use Milliput filler becasue it's water soluble. You mix it together as a paste (thin it as necessary with a bit of spit) then apply it to the gap with a plastic spatula or screwdriver tip, then wipe all the excess away with a damp glasses cleaning cloth. There's then no (or very little) subsequent cleanup to do at all, so theres no risk of damaging the surrounding plastic when sanding. It's sets rock hard in 24 hours, so there's plently of time to work with it. If you need to sculpt it it sands very nicely too.
Some people don't get on with it, but I think it's becasue they don't thin it when mixing. If you don't do this it tends to be chalky and difficult to get to 'stick' into whatever you're working on.
I can't use the Squadron putty - it dries far too quickly and is impossible to remove by anything other than sanding, scraping or filing, which invariably damages surrounding areas.
I'm one of those who never manage to get Milliput to work properly. I have used Squadron Green putty but I don't like it much for the reasons mentioned.
Good old Humbrol filler still works for me but in more recent years I have used some of the Mr Hobby liquid filler range (which is excellent), superglues of various sorts and Tippex.
Good old Humbrol filler still works for me but in more recent years I have used some of the Mr Hobby liquid filler range (which is excellent), superglues of various sorts and Tippex.
nick heppinstall said:
dr_gn said:
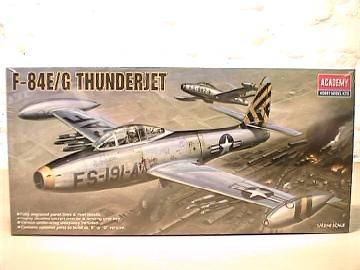
Prompted by this thread (and because I'm waiting for the oil paint to dry on the SE5a) I made a start on my Academy Thunderjet. I bought it for £4.99 purely to try out Alclad II, so it'll be straight OOB.
Fantastic ! Step by step guide to painting please ! h to mask up too.
Alclad 2 is the only stuff I have used that actually looks like metal. It does take some getting used to though. As ever with paint, preparation and not over-doing the application is the key. Humbrol Metal-Cote always just seems to look like silver paint in comparison. Maybe that's just me though.
Zad said:
Alclad 2 is the only stuff I have used that actually looks like metal. It does take some getting used to though. As ever with paint, preparation and not over-doing the application is the key. Humbrol Metal-Cote always just seems to look like silver paint in comparison. Maybe that's just me though.
Getting a smooth metal-like finish is trivial, you just have to flat the base coats well as you'd do with a car model, but pre- and post- shading to actually make it look 'real' and weathered is far more difficult. If you pre-shade with it, subsequent light coats don't cover the preshading very well. In other words, the stuff is so thin (it's actually a lacquer) that any weathering becomes far more onerous than when using normal paint. Getting different panels to look different shades is also more difficult. I've settled on masking surrounding panels and misting 'jet exhaust' on the exposed areas. A tiny amount of this 'filter' makes a huge difference to appearance though.Next trial and error will be decals and whether it reacts with MicroSol and Klear. I got some Alclad satin varnish, but whether this will work over Klear is another matter.
Finished my 747 400 and thought it was Ok until I saw the photo's.
Interesting how modelling has changed since I was a lad and in future I'll spray larger surfurces rather than paint. Better decals than I remember, and more detail but that doesn't matter if you're not very good at it! Clearly a model to the eye looks better than on a camera!
anyway, here's a couple and the plane is hanging from the ceiling of my 2 year old who's chuffed to bits.....now onto XH558 I bought at Wings & Wheels.
Oh, and yes, I know the belly colour is wrong - couldn't find the correct colour, this looked closest until I painted it!

Lufthansa 747 400 by Martin_Bennett, on Flickr

Lufthansa 747 400 by Martin_Bennett, on Flickr

Lufthansa 747 400 by Martin_Bennett, on Flickr

Lufthansa 747 400 by Martin_Bennett, on Flickr

Lufthansa 747 400 by Martin_Bennett, on Flickr
still, the first for me for a long, long time and I'll live and learn!
Interesting how modelling has changed since I was a lad and in future I'll spray larger surfurces rather than paint. Better decals than I remember, and more detail but that doesn't matter if you're not very good at it! Clearly a model to the eye looks better than on a camera!
anyway, here's a couple and the plane is hanging from the ceiling of my 2 year old who's chuffed to bits.....now onto XH558 I bought at Wings & Wheels.
Oh, and yes, I know the belly colour is wrong - couldn't find the correct colour, this looked closest until I painted it!
Lufthansa 747 400 by Martin_Bennett, on Flickr
Lufthansa 747 400 by Martin_Bennett, on Flickr
Lufthansa 747 400 by Martin_Bennett, on Flickr
Lufthansa 747 400 by Martin_Bennett, on Flickr
Lufthansa 747 400 by Martin_Bennett, on Flickr
still, the first for me for a long, long time and I'll live and learn!
Halfords spray can acrylic white primer as the base coat. Halfords spray can Appliance White as the top coat.
If you plan on doing any more airliners, you might want to search out the Hannants Xtracolor range. They have a number of airline specific shades - such as Boeing Grey, Lufthansa Blue, BEA Red etc.
Really, if you aren't planning on doing so already, you should be looking at moving to using an airbrush.
Gassing Station | Scale Models | Top of Page | What's New | My Stuff