Academy F-84 E Thunderjet (1:72) Completed
Discussion


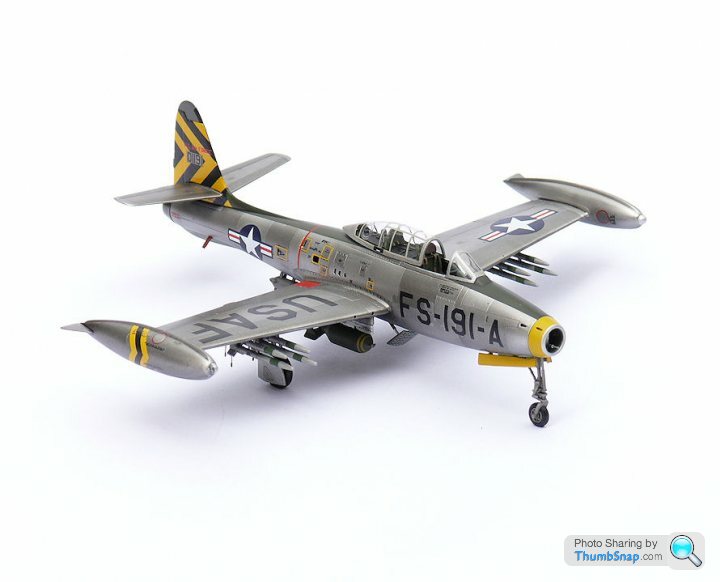
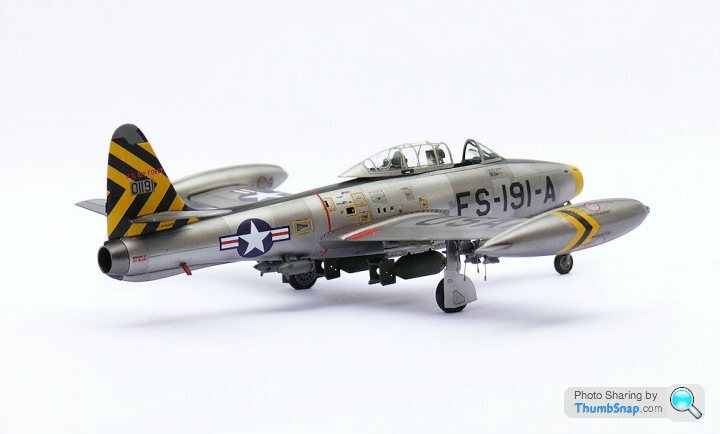
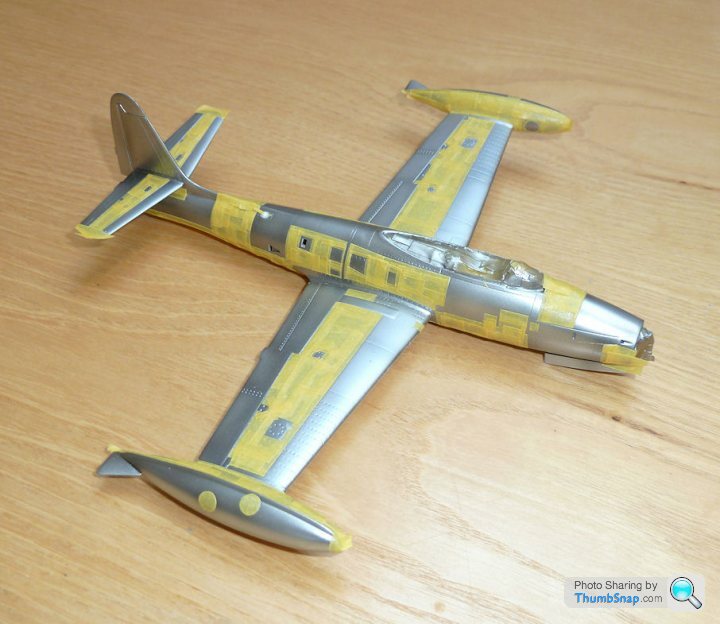
This is the Academy F-84 E Thunderjet in 1:72 scale. As usual with Academy it's a very nicely engineered kit. I bought it to try out the Alclad II rance of metal finish lacquers. I'm pleased with the end result although it took a lot of trial and error to get a realistic finish.
It's OOB with the exception of:
Drilled out airbrake grid holes.
Home made seatbelts from Tamiya tape.
Missile pigtails from lead wire/brass tube.
Pitot tube from brass tube (I broke the plastic one off during the extensive masking required).
Flatted tyres.
Drilled out RATO pack baskets.

Cheers!
It's OOB with the exception of:
Drilled out airbrake grid holes.
Home made seatbelts from Tamiya tape.
Missile pigtails from lead wire/brass tube.
Pitot tube from brass tube (I broke the plastic one off during the extensive masking required).
Flatted tyres.
Drilled out RATO pack baskets.
Cheers!
Edited by dr_gn on Sunday 30th September 15:18
HoHoHo said:
Wow, just wow 
When you said entensive masking you weren't wrong!
Love the finish and it was worth the effort 10/10
10/10 
How do you get such good masking on the cockpit?
Thanks!When you said entensive masking you weren't wrong!
Love the finish and it was worth the effort
10/10 How do you get such good masking on the cockpit?
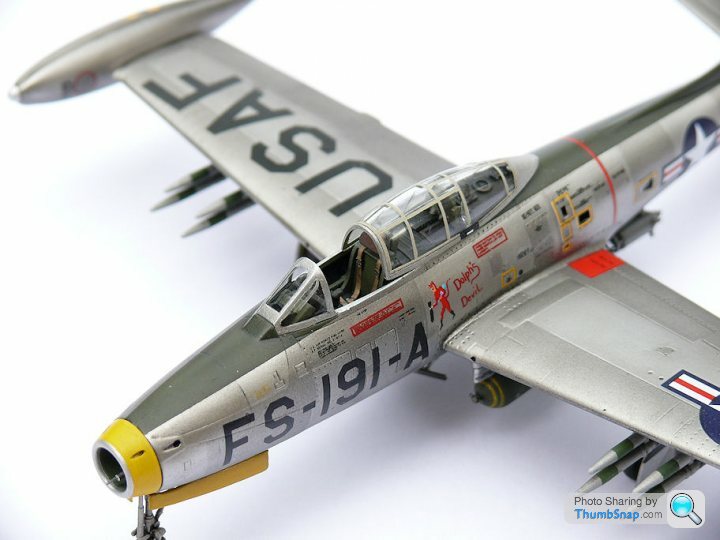
Canopy masking. I must admit this was my second attempt. I always use Tamiya masking tape cut into c. 1mm thick strips. Then, using tweezers apply the strips to the periphery of the glazed areas. Use the newly cut edge on the outside becasue the old edge sometimes isn't as sticky due to age/dust etc. You can use a brand new #11 scaplel blade to trim the ends if necessary. Then patch in the middle bits of the glazing with squares of tape. Make sure the tape is well bedded at the edges using a cocktail stick. Apply tape the entire inside of the canopy to prevent overspray. Then spray a light coat of interior green (obviously this will be visible on the inside of the glazing), followed by the external colour, in this case Tamiya Deck Tan. On this model I then had to mask again to get the silver canopy frame edging and applied a dark wash/decals then stain varnish overcoat. Remove the tape and rub over lightly with a duster to break any raised ridges and that's it. In total, canopy masking for this model took around 3 hours. Always use matt paint in thin coats and dry with a hairdrier at frequent intervals to reduce the risk of bleeding.
Simple as that!
Simple
Yeah like!
A very close to perfect rendition of the bare metal
What did you paint the darker areas over? Black or dark grey? Or did you simply paint the lighter areas over white?
Scope for a "woddidya do there" lesson if you wouldn't mind.
I've a couple of Alclad2 paints already and will be adding to my collection (Frog/Hasegawa Lightning crying out to be built soon ) it would be great to have hands on lessons.
You really did this one justice, I have heard all sorts of tales about Academy and this has put my mind at rest.
Bloody nice model dr_gn, very.
Yeah like!
A very close to perfect rendition of the bare metal
What did you paint the darker areas over? Black or dark grey? Or did you simply paint the lighter areas over white?
Scope for a "woddidya do there" lesson if you wouldn't mind.
I've a couple of Alclad2 paints already and will be adding to my collection (Frog/Hasegawa Lightning crying out to be built soon
) it would be great to have hands on lessons.You really did this one justice, I have heard all sorts of tales about Academy and this has put my mind at rest.
Bloody nice model dr_gn, very.
perdu said:
Simple
Yeah like!
A very close to perfect rendition of the bare metal
What did you paint the darker areas over? Black or dark grey? Or did you simply paint the lighter areas over white?
Scope for a "woddidya do there" lesson if you wouldn't mind.
I've a couple of Alclad2 paints already and will be adding to my collection (Frog/Hasegawa Lightning crying out to be built soon ) it would be great to have hands on lessons.
You really did this one justice, I have heard all sorts of tales about Academy and this has put my mind at rest.
Bloody nice model dr_gn, very.
Ta Perdu.Yeah like!
A very close to perfect rendition of the bare metal
What did you paint the darker areas over? Black or dark grey? Or did you simply paint the lighter areas over white?
Scope for a "woddidya do there" lesson if you wouldn't mind.
I've a couple of Alclad2 paints already and will be adding to my collection (Frog/Hasegawa Lightning crying out to be built soon
) it would be great to have hands on lessons.You really did this one justice, I have heard all sorts of tales about Academy and this has put my mind at rest.
Bloody nice model dr_gn, very.
I read a lot about Alclad and how to use it, but in the end (after a failed first attempt) I made my own rules.
I used just two shades: Polished Aluminium and Jet exhaust.
1) I first primed the model with gloss black, then applied overall Polished Aluminium. Preshade with Jet exhaust (be VERY subtle - it takes loads of top coats to cover - this stuff is thin...)
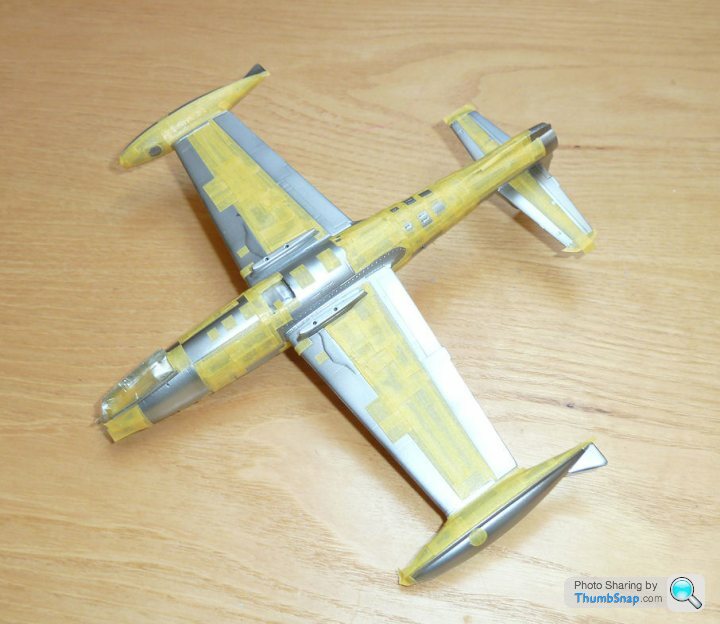
2) Then mask up roughly 50% of the surface area as accurately and intricately as possible with Tamiya tape. This took 3 evenings.
3) Spray mist coat of Jet Exhaust over the entire airframe.
4) Remove masking and be amazed at the chequered flag effect of the mist coat of jet exhaust.
5) Tome down the contrast by overspraying mist coats of Polished aluminium until you're happy.
6) Klear.
7) Dark wash.
8) Klear.
9) Decals.
10) Tamiya Satin Varnish.
Job done. BTW the jet exhaust tailpipe is painted in 100%...Jet Exhaust.
There were lots of unkonwns for me here: would the extensive carrier film of the decals silver without a Klear coat? Would Klear react with Alclad? Would Tamiya satin be too matt? In the end it turned out OK, but I'm not convinced that using Citadel Mirthyl Silver shades would have been much different. For a polished 'new' airframe, then Alclad would undoubtedly be best.
When it works, it's great stuff. When it decides to not work, blimey it's a pain. I'm just glad that there aren't many models that I build that require the sort of coverage that aircraft do. It's one of those paints/finishes that is so thin that it lures you into putting more on than you really need.
HoHoHo said:
thanks for your input dr_gn
Have to say, they're good photo's as well showing all the detail
No problem. Have to say, they're good photo's as well showing all the detail
I ended up using my tried and tested construction/paining/wethering methods and it turned out OK, even with a new paint type.
Believe it or not, I painted the bombs about 6 times. I wanted to use the masking fluid method for paint chipping (bombs were commonly left in dumps and got pretty worn before they were used). It worked, but the chips were too coarse for the scale. I'm a bit frustrated about this, but it just didn't look right. I ended up painting normally, adding the yellow stripes by hand and using gunmetal coloured powder to give a bit of wear.
My camera is nothing special, you really just use good light, a nice background and a tripod/self timer.
Red Firecracker said:
When it works, it's great stuff. When it decides to not work, blimey it's a pain. I'm just glad that there aren't many models that I build that require the sort of coverage that aircraft do. It's one of those paints/finishes that is so thin that it lures you into putting more on than you really need.
Yeah, and it's so thin that you use tons of it too - it gets expensive! Pain in the arse to clean the airbrush too, it's cellulose thinners. So yet another thinners bottle to remember (Tamiya, IPA, Enamel, Water and now Cellulose). Ah well no pain, no gain.
Eric Mc said:
I've found that the aerosol airbrusher cleaners, such as the one sold by Badger, clears all paint residue - of any sort - from my airbrush.
I keep my thinners for thinning.
Little Cars' airbrush cleaner is good (might be Badger), but my current aerosol cleaner doesn't touch Alclad II. Luckily I've got 5 litres of cellulose thinners in the garage.I keep my thinners for thinning.
In your order of service for using Alclad, did you mean to put the dark wash before the decals?
I'm intrigued because almost everywhere else, it is suggested that decals go on before the wash to weather them in consistently with the rest of the airframe.
I'm assuming that if you chose the wash-before-decals order, there was a very good reason behind it...
I'm intrigued because almost everywhere else, it is suggested that decals go on before the wash to weather them in consistently with the rest of the airframe.
I'm assuming that if you chose the wash-before-decals order, there was a very good reason behind it...
Marshdweller said:
In your order of service for using Alclad, did you mean to put the dark wash before the decals?
I'm intrigued because almost everywhere else, it is suggested that decals go on before the wash to weather them in consistently with the rest of the airframe.
I'm assuming that if you chose the wash-before-decals order, there was a very good reason behind it...
Yes, dark wash before decals. I'm intrigued because almost everywhere else, it is suggested that decals go on before the wash to weather them in consistently with the rest of the airframe.
I'm assuming that if you chose the wash-before-decals order, there was a very good reason behind it...
I chose that sequence because from experience it's very difficult to get a wash to stay in surface detail once it's covered with a decal. Because the decals on this model had a lot of clear carrier film (the large USAF ones and many of the stencils were grouped on a fairly big carrier film base) it would have left large areas with no wash visible.
ETA and obviously since the decals I mentioned are black, you wouldn't see that the wash is underneath and not on top.
Edited by dr_gn on Friday 5th October 20:49
Your detailed "how I dunnit" is getting saved dr_gn
I have used Alclad for the Wessex jetpipes before now
I sprayed the topcoats over the Tamiya Mica Blue I painted the Sauber in and I could see the "metal" grow before my very eyes as it built up
Remarkable stuff to me, coming back to a brave new world of paints and finishes.
I will even have a use for the light burnt steel colour with my scratch build in USAFE one camo, there's a passivated engine loading trolley that is going to be ripe for Alclad as well as four PT26A jetpipes
perdu said:
Your detailed "how I dunnit" is getting saved dr_gn
I have used Alclad for the Wessex jetpipes before now
I sprayed the topcoats over the Tamiya Mica Blue I painted the Sauber in and I could see the "metal" grow before my very eyes as it built up
Remarkable stuff to me, coming back to a brave new world of paints and finishes.
I will even have a use for the light burnt steel colour with my scratch build in USAFE one camo, there's a passivated engine loading trolley that is going to be ripe for Alclad as well as four PT26A jetpipes
I think fundamentally, if you spray a base colour, mask about 50% of panels (and don't cheat and just do easy to mask ones!) then overspray with a darker or lighter shade you're pretty much there.I have used Alclad for the Wessex jetpipes before now
I sprayed the topcoats over the Tamiya Mica Blue I painted the Sauber in and I could see the "metal" grow before my very eyes as it built up
Remarkable stuff to me, coming back to a brave new world of paints and finishes.
I will even have a use for the light burnt steel colour with my scratch build in USAFE one camo, there's a passivated engine loading trolley that is going to be ripe for Alclad as well as four PT26A jetpipes
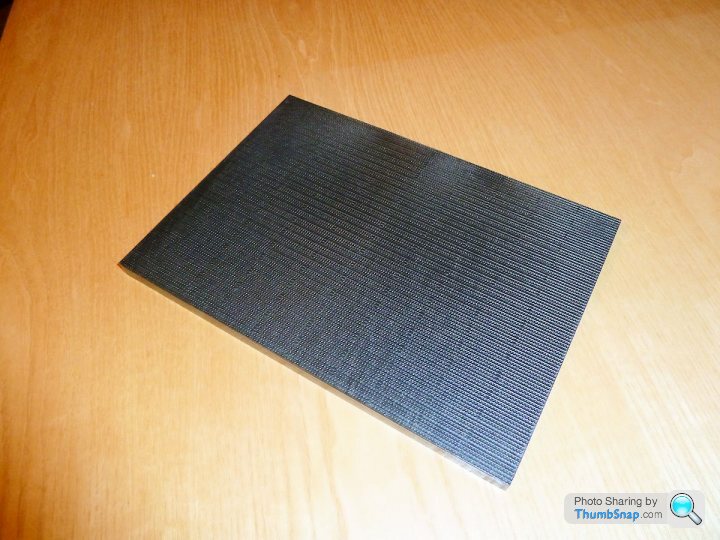
Thought I'd try to make a bit of a diorama for this model: got the Eduard PSP diorama base (£2.99):
and scratchbuilt a ladder out of plastic card, brass wire and scrap photoetch:

Then added the Academy Jeep & ammo boxes plus some wheel chocks made out of matchsticks:
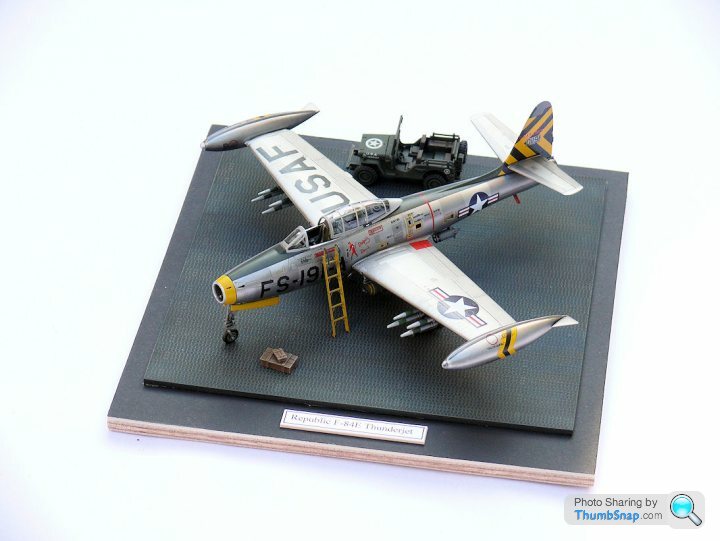
Could do with a pilot figure really. Maybe there will be a good one at Telford.
and scratchbuilt a ladder out of plastic card, brass wire and scrap photoetch:
Then added the Academy Jeep & ammo boxes plus some wheel chocks made out of matchsticks:
Could do with a pilot figure really. Maybe there will be a good one at Telford.
Gassing Station | Scale Models | Top of Page | What's New | My Stuff