1:72 MPM Boulton Paul Defiant Mk.1
Discussion


dr_gn said:
Eric Mc said:
It must have been awfully claustrophobic in that turret.
And did anybody ever successfully bale out of the turret?
I think they did. I e-mailed the Boulton Paul Association to see if they had any better details images of the turret than there are online. The archivist (also a keen modeller and IPMS member) sent me a ton of reference material and drawings (and other info). What I didn't realise was that there was another way out of the turret by moving it into the "guns forward" position, lifting the seat and kicking out an access panel in the rear fuselage. The gunner could then (in theory) drop out that way. Defiants apparently always took off and landed with the turret forward so that the gunner had a chance of getting out underneath in the event of the aircraft overturning. Looking at the drawings and photographs I still can't figure out how there was room to do that. This fuselage panel was also used for groundcrew to re-arm and empty the cartridge collector bags.And did anybody ever successfully bale out of the turret?
I think it is a fascinating aircraft.
The archivist, is it my old friend Les still?
If so he is a truly great modeller too, I have fond memories of his work back in the seventies and eighties.
perdu said:
dr_gn said:
Eric Mc said:
It must have been awfully claustrophobic in that turret.
And did anybody ever successfully bale out of the turret?
I think they did. I e-mailed the Boulton Paul Association to see if they had any better details images of the turret than there are online. The archivist (also a keen modeller and IPMS member) sent me a ton of reference material and drawings (and other info). What I didn't realise was that there was another way out of the turret by moving it into the "guns forward" position, lifting the seat and kicking out an access panel in the rear fuselage. The gunner could then (in theory) drop out that way. Defiants apparently always took off and landed with the turret forward so that the gunner had a chance of getting out underneath in the event of the aircraft overturning. Looking at the drawings and photographs I still can't figure out how there was room to do that. This fuselage panel was also used for groundcrew to re-arm and empty the cartridge collector bags.And did anybody ever successfully bale out of the turret?
I think it is a fascinating aircraft.
The archivist, is it my old friend Les still?
If so he is a truly great modeller too, I have fond memories of his work back in the seventies and eighties.
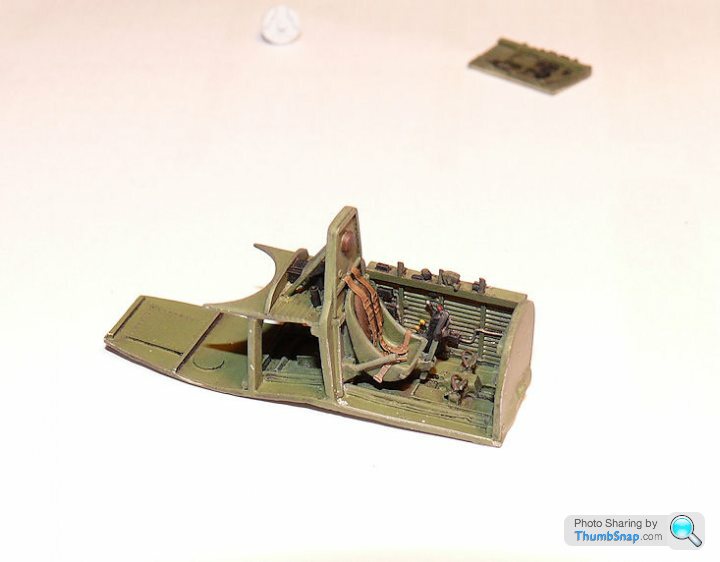
Here's the instrument panel:

OK, it looks a bit flaky, and the photo reveals that the top edge needs a bit of sanding level, but it is smaller than my thumbnail!
Same with the cockpit sidewalls: They look rubbish at this stage with indistinct colour boundaries and blotchy matt/gloss bits. This is just the first stage though. After a coat of Klear, a dark wash, some dry brushing and matt varnish they will look much more subdued and consistent:
Eric Mc said:
Yes - total rubbish 
Do you REALLY believe that?
Of course they are not rubbish - given that they are 1/72. And will be mainly invisible once installed. They look jolly good to me.
What I mean is that they'll look better when they're done. It doesn't show up in the photo very well but the satin black dried blotchy (as usual).Do you REALLY believe that?
Of course they are not rubbish - given that they are 1/72. And will be mainly invisible once installed. They look jolly good to me.
A number of things dictates how much cockpit detail I will put into a 1/72 kit -
how much is going to be visible?
is the canopy going to be open or closed?
if closed, is the canopy clear enough to show the detail?
will I be putting the pilot into the cockpit?
is there good enough detail supplied with the kit?
have I got an after market detail set in my stash?
how much is going to be visible?
is the canopy going to be open or closed?
if closed, is the canopy clear enough to show the detail?
will I be putting the pilot into the cockpit?
is there good enough detail supplied with the kit?
have I got an after market detail set in my stash?
So here are the fuselage internals ready for fitting:

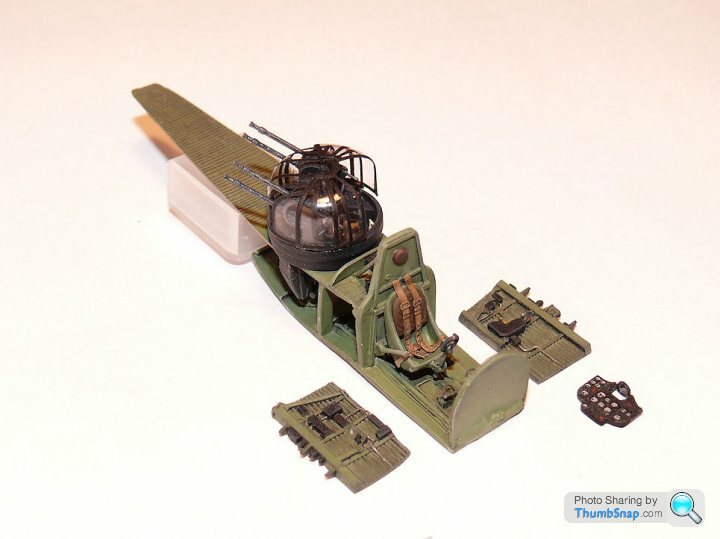
I've treated them to a dark wash and weathering powders, followed by Humbrol matt varnish.
I've added:
Head armour supports (plastic rod)
Circular plate next to headrest (photoetch rivet)
Rear fairing air cylinder body (brass tube)
Radio box retaining strap (Tamiya tape)
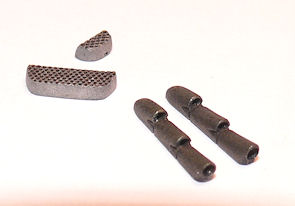
Correct spade grip (from spares box)
Wheel brake lever (scrap photo etch)
Throttle lever knobs (PVA)
And I omitted the rear deck support (doesn't fit and not needed anyway)
I've treated them to a dark wash and weathering powders, followed by Humbrol matt varnish.
I've added:
Head armour supports (plastic rod)
Circular plate next to headrest (photoetch rivet)
Rear fairing air cylinder body (brass tube)
Radio box retaining strap (Tamiya tape)
Correct spade grip (from spares box)
Wheel brake lever (scrap photo etch)
Throttle lever knobs (PVA)
And I omitted the rear deck support (doesn't fit and not needed anyway)
The wheel wells are totally wrong, with moulded-in stiffeners. The reality is that the wells were pretty much flat with the odd stiffening crease, plus a fair amount of hydraulics.
I'm attempting to correct this, the simplest method appearing to be to cover the majority of the wells with plastic card plates. I scraped the heaviest details away with a blade:
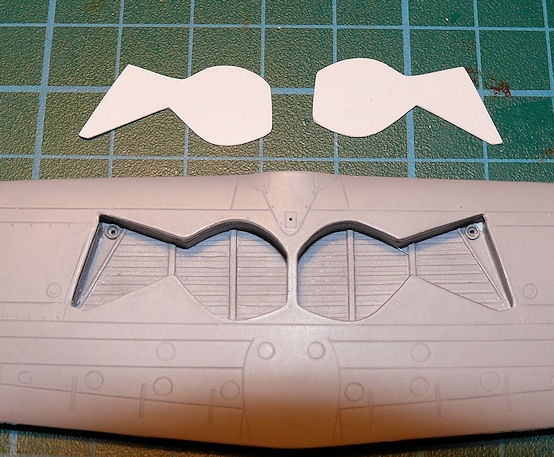
I've drawin on the position of the main features and will build these up with scrap photo etch and plastic before fitting the whole lot and adding the undercarriage leg assemblies:

The holes I drilled for the legs will remain, and also visible is a hole I drilled for the forward aerial mast.
I'm attempting to correct this, the simplest method appearing to be to cover the majority of the wells with plastic card plates. I scraped the heaviest details away with a blade:
I've drawin on the position of the main features and will build these up with scrap photo etch and plastic before fitting the whole lot and adding the undercarriage leg assemblies:
The holes I drilled for the legs will remain, and also visible is a hole I drilled for the forward aerial mast.
Edited by dr_gn on Sunday 13th October 11:53
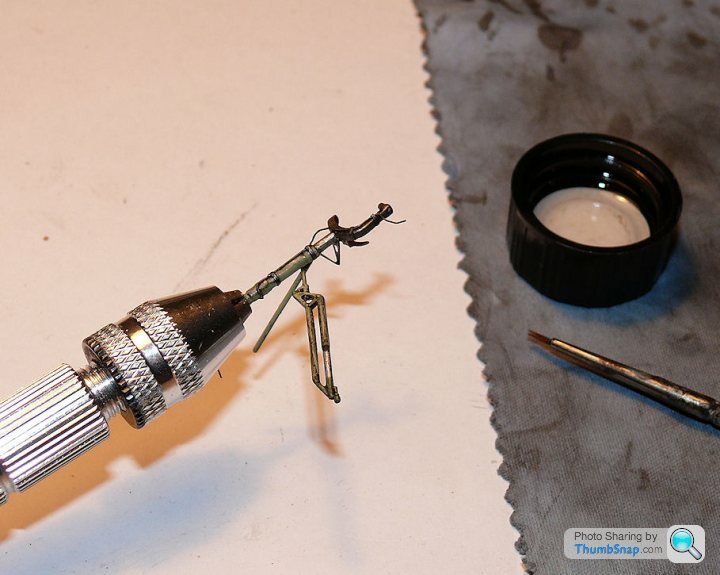
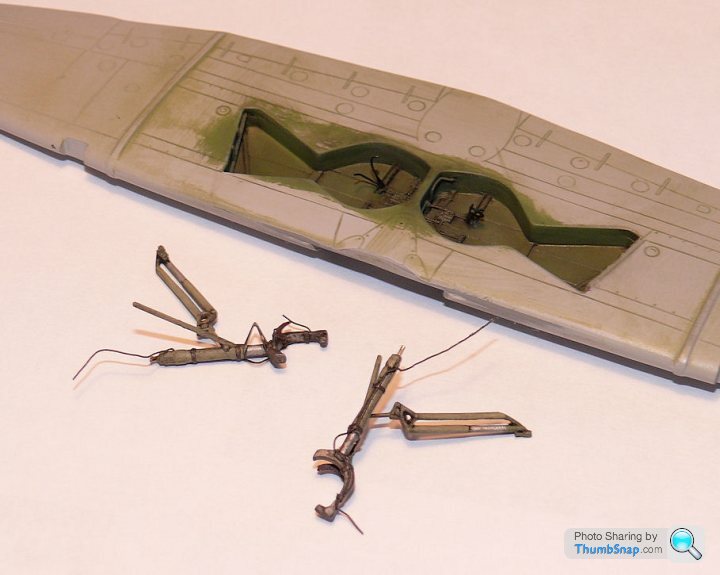
So bar a bit of cleaning up, overcoating in interior green and doing the usual wash/weathering, the wheel wells and u/c legs are done:

I scratchbuilt everything in the wheel wells including hydraulic valve blocks (plastic rod and p/e nuts) pipes (lead wire), well bulges (sliced the ends off a couple of spare Airfix Gladiator gun pods), U-stiffeners (scrap p/e) and plastic rod stiffening braces. The stiffeners in the roofs are scribed lines. The legs are complex structures, and I added a valve block (plastic off-cut), tension spring (scrap resin) and main leg extension (brass tube) to each one. The tyre brushes and scissor joints were from the original kit - nice touches that make all the diffeence:

As ever, not perfect, but better than the original:

I scratchbuilt everything in the wheel wells including hydraulic valve blocks (plastic rod and p/e nuts) pipes (lead wire), well bulges (sliced the ends off a couple of spare Airfix Gladiator gun pods), U-stiffeners (scrap p/e) and plastic rod stiffening braces. The stiffeners in the roofs are scribed lines. The legs are complex structures, and I added a valve block (plastic off-cut), tension spring (scrap resin) and main leg extension (brass tube) to each one. The tyre brushes and scissor joints were from the original kit - nice touches that make all the diffeence:
As ever, not perfect, but better than the original:
Edited by dr_gn on Wednesday 23 October 23:08
The Defiant had two access steps on the stbd. side: one pull-out spigot step in the fuselage, and another pull and drop section in the wing root. I've not seen them on many other Defiant models (none that I can find in fact). It was a simple matter of folding some scrap photo-etch and shaping some plastic strip for the wing root step, and a bit of brass tube with a p/e rivet stuck on the end formed the fuselage spigot. There was a bit of work required to form the tapered cut-out in the root fillet, and there is a corresponding recess under the wing for the back of the step.


Finished the u/c legs and wells now. After overcoating everything with Klear, I add a dark wash making sure it gets into all the nooks and crannies, then allow to dry for an hour:

Then the tricky bit - what I can only describe as "reverse painting" the excess was away:
Then a quick brush over with Tamiya powders to highlight some raised detal, followed by matt varnish:
And how they will look fitted (bar a bit of fettling and attaching the hydraulic lines:

Also completed the radiator matrices and the exhaust stubs (drilled out of course...)
Then the tricky bit - what I can only describe as "reverse painting" the excess was away:
Then a quick brush over with Tamiya powders to highlight some raised detal, followed by matt varnish:
And how they will look fitted (bar a bit of fettling and attaching the hydraulic lines:
Also completed the radiator matrices and the exhaust stubs (drilled out of course...)
Edited by dr_gn on Sunday 27th October 13:53
I usually glue the cockpit sides to the fuselage, but in this case it's easier to assemble them to the floor before fitting. Reason is the pronounced overhang of the cockpit sides on this aircraft - you can't see any potential gap between the resin and the plastic. Note the control column is pushed slightly forward...
I've got this thing about having propellers free to spin. On this kit its all a bit DIY, so I modded the propeller boss to take a spigot, and made said spigot out of - I think - an Airfix Mk1a Spitfire propeller plate. Strange how these crappy bits of Airfix kits keep coming in handy.

I scratch built the radiator flap out of old photo-etch so I could pose it open:

And finally, separated the elevators from the tailplane so I can droop them (remember the control column is pushed forward slightly?)...it's the little things that make the difference!

I've got this thing about having propellers free to spin. On this kit its all a bit DIY, so I modded the propeller boss to take a spigot, and made said spigot out of - I think - an Airfix Mk1a Spitfire propeller plate. Strange how these crappy bits of Airfix kits keep coming in handy.
I scratch built the radiator flap out of old photo-etch so I could pose it open:
And finally, separated the elevators from the tailplane so I can droop them (remember the control column is pushed forward slightly?)...it's the little things that make the difference!
dr_gn said:
Eric Mc said:
Did anybody ever successfully bale out of the turret?
I think they did. Gassing Station | Scale Models | Top of Page | What's New | My Stuff