1:72 Tornado GR4, Dambusters70th Anniversary
Discussion


dr_gn said:
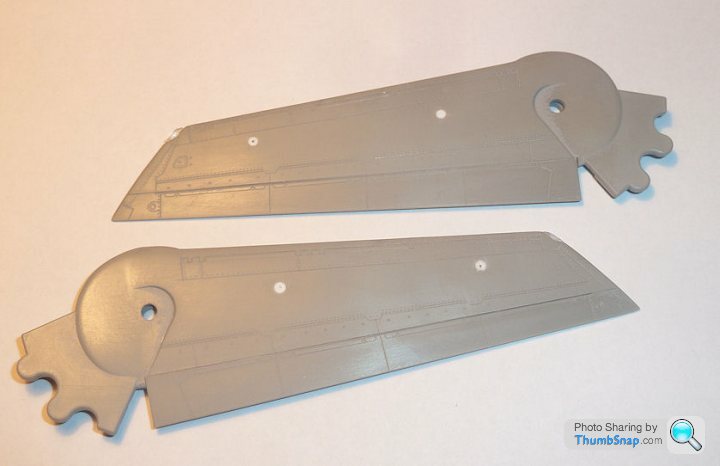
Did some mods to the wings yesterday: The pylons, as fitted looked wrong when assembled to the fuselage with the correct anhedral. They were designed to pivot, but unfortunately when the wings were straight they were distinctly angled inwards towards the fuselage, and there was no way of making them hang more vertically without over stressing the pivots. I decided to snap the pylons off, and fill the holes with plastic:
That's a bugger, you'd have thought a simple pivot/groove thing would be easy enough to mould in.Really slow progress on this one, mainly due to the Aires resin stuff which never quite seems to fit, usually by a few microns.
This was the third attempt at the wheel bays, legs and doors. They may still be a little bit over weathered, but it seems to depend on an individual aircraft:
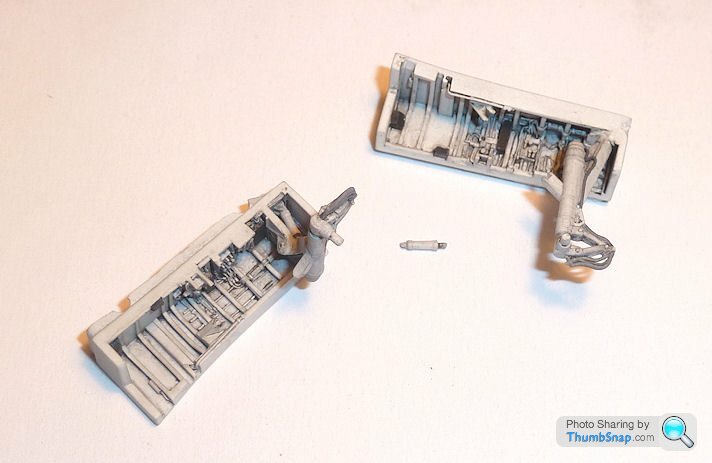

I added some brake pipes, and I still have to make some main door rams. The wheel lamps are almost ready for fitting too.
There are a couple of small vanes in each intake, which I made from some spare plastic strip:
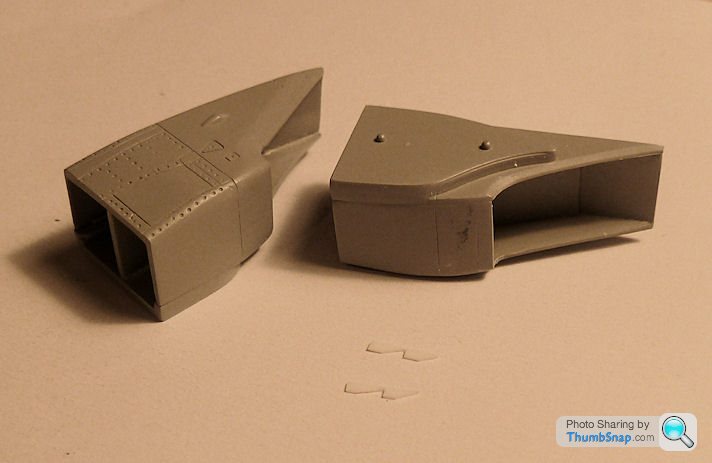
Here they are fitted:
The intakes are not that great, but in the end they won't be too visible.
There were a couple of sink marks on the exhaust fairings which needed a bit of filler:
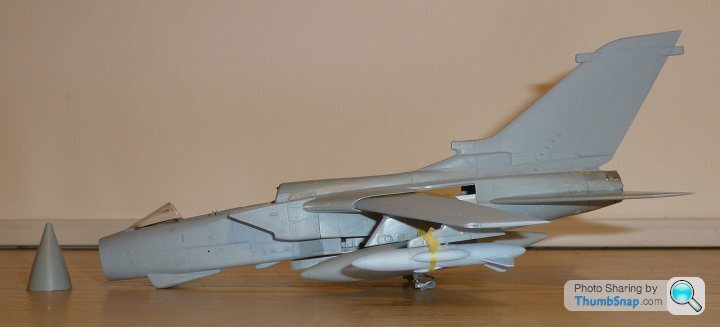
Now do do battle fitting the cockpit and wheel bays.
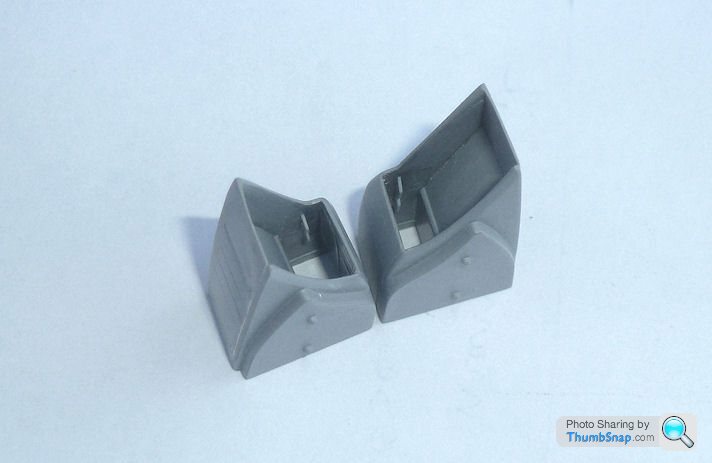
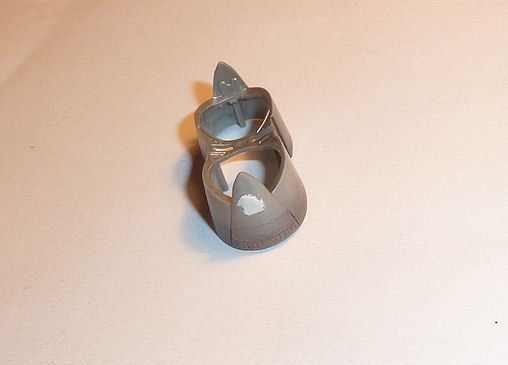
Can anyone gues what this is:

This was the third attempt at the wheel bays, legs and doors. They may still be a little bit over weathered, but it seems to depend on an individual aircraft:
I added some brake pipes, and I still have to make some main door rams. The wheel lamps are almost ready for fitting too.
There are a couple of small vanes in each intake, which I made from some spare plastic strip:
Here they are fitted:
The intakes are not that great, but in the end they won't be too visible.
There were a couple of sink marks on the exhaust fairings which needed a bit of filler:
Now do do battle fitting the cockpit and wheel bays.
Can anyone gues what this is:

Not sure how far you've got with this project, but unless you've finished it's fairly prototypical according to to todays headlines!
http://www.bbc.co.uk/news/uk-30338659
http://www.bbc.co.uk/news/uk-30338659
Boatbuoy said:
Not sure how far you've got with this project, but unless you've finished it's fairly prototypical according to to todays headlines!
http://www.bbc.co.uk/news/uk-30338659
Yeah I saw that.http://www.bbc.co.uk/news/uk-30338659
No it's not finished yet!
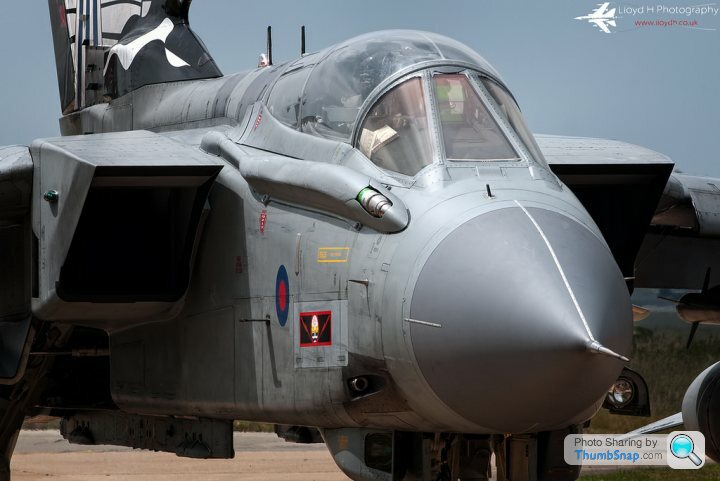
So now I've got a problem. Concensus was that the GR4 is painted in Medium Sea Grey, and this seemed to be right according to the sample pics I took at Duxford (MSG, Neutral Grey, maybe a bit of light grey in the mix too, but basically Vallejo MSG was close enough):
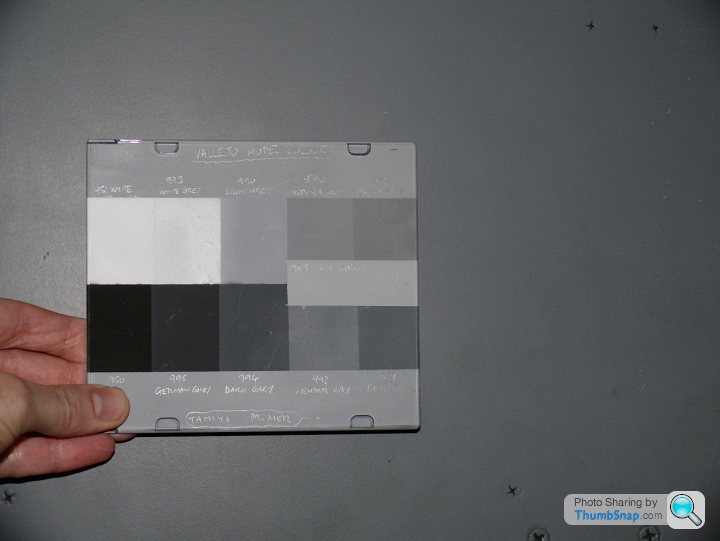
So I used the MSG from the sample, and mixed in 30% sky grey to lighten it to compensate for the dark preshading I intended to use, and also to lessen the scale effect which tends to make colours on small models look darker.
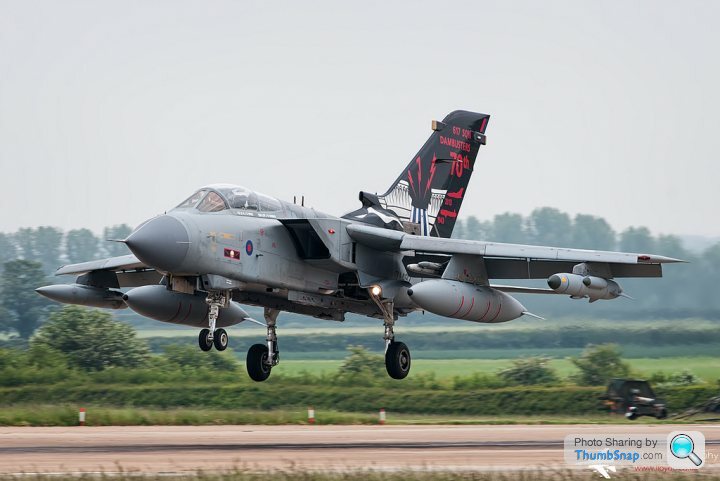
Problem is, it's way too dark. Here are the stores compared with a photo (LloydH's photo actually):
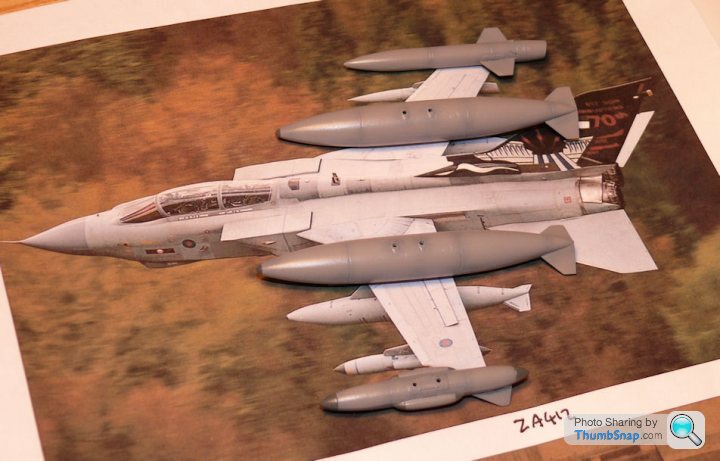
Obviously the comparison is a colour balance nightmare, but based on the contrast between the nose of the Skyshadow pod and the body, the grey is way, way too dark; the tail graphics will look totally wrong in terms of contrast next to MSG.
I don't think the GR.4 in the photo is anything like Medium Sea Grey, and to be honest, I've now got no idea what it should be, so I'm stuck.
So I used the MSG from the sample, and mixed in 30% sky grey to lighten it to compensate for the dark preshading I intended to use, and also to lessen the scale effect which tends to make colours on small models look darker.
Problem is, it's way too dark. Here are the stores compared with a photo (LloydH's photo actually):
Obviously the comparison is a colour balance nightmare, but based on the contrast between the nose of the Skyshadow pod and the body, the grey is way, way too dark; the tail graphics will look totally wrong in terms of contrast next to MSG.
I don't think the GR.4 in the photo is anything like Medium Sea Grey, and to be honest, I've now got no idea what it should be, so I'm stuck.
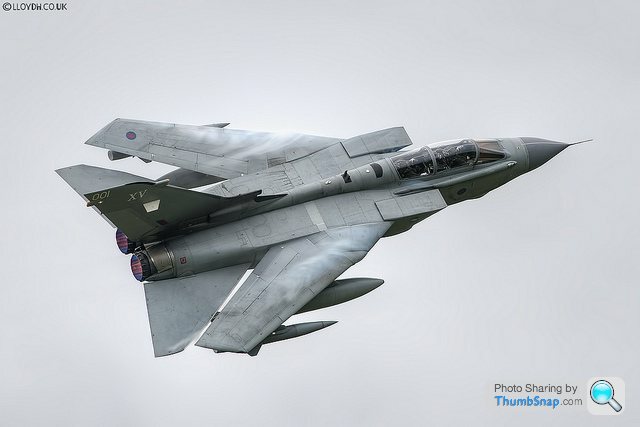
G here's another one of Lloyd's and showing a grey far closer to MSG as your sample, how dark was the photo at the dams? I think colour bias is turning your one too light.
Mind you the next model I'm making along with a scratch build Hansom Cab is a grey Jaguar GR3
Most of my pictures seem mighty light too
Mind you the next model I'm making along with a scratch build Hansom Cab is a grey Jaguar GR3
Most of my pictures seem mighty light too
I dont have many paint 'makes' available but I have a pretty comprehensive array of Tamiya acrylics courtesy of a welcome gift forty years or so ago
Nearest I can get to the two later shots and mine is XF-25, Light Sea Grey and that is what I'm anticipating using on the Jag
Similar hues to your picture are J.A Grey XF-14 and J.N.Grey XF-12
I'm not in a position to run a test set tonight but may be able to tomorrow, I wonder if the airframe you tested against has been in the paint shop recently
New paint is notoriously different to 'used' after all
For 'like to like' on your image I'd go XF-12 I think
I have Model Air 71050 light grey but that is different again
Made a sample wing up, brush painted only I'm afraid but hue is hue anyway
Left to right Tamiya colours XF-14 J.A.Grey; XF-12 J.A.Grey; XF-83 Medium Sea Grey 2 (RAF); XF-25 Light Sea Grey
several shots for changing conditions afternoon light through window one poor coat first
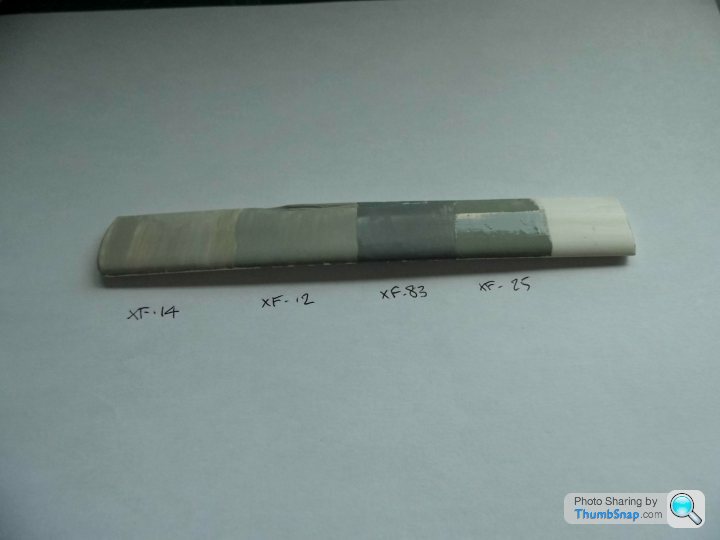
same poor coat with flash
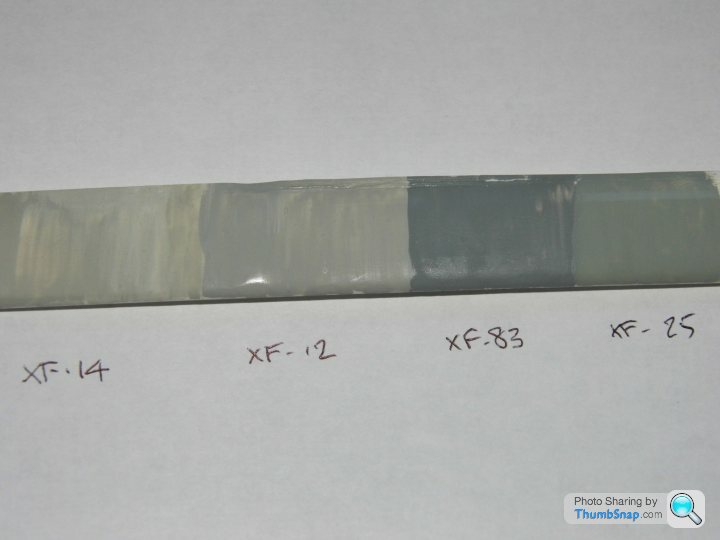
second coat on XF-14 daylight
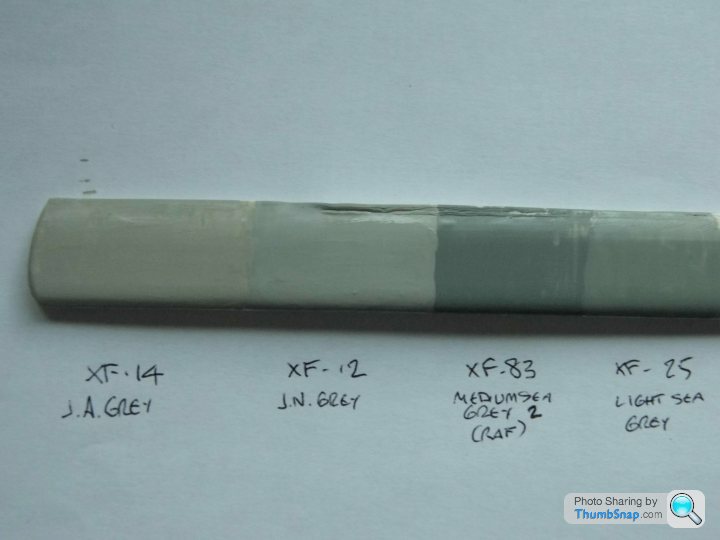
second coat XF-14 flash

Depending on the level of pre and after colouring you use I would be using XF-14 with overpanel detailing with XF-12 myself
Add white to taste too
Hope this helps a bit G
Left to right Tamiya colours XF-14 J.A.Grey; XF-12 J.A.Grey; XF-83 Medium Sea Grey 2 (RAF); XF-25 Light Sea Grey
several shots for changing conditions afternoon light through window one poor coat first
same poor coat with flash
second coat on XF-14 daylight
second coat XF-14 flash
Depending on the level of pre and after colouring you use I would be using XF-14 with overpanel detailing with XF-12 myself
Add white to taste too
Hope this helps a bit G


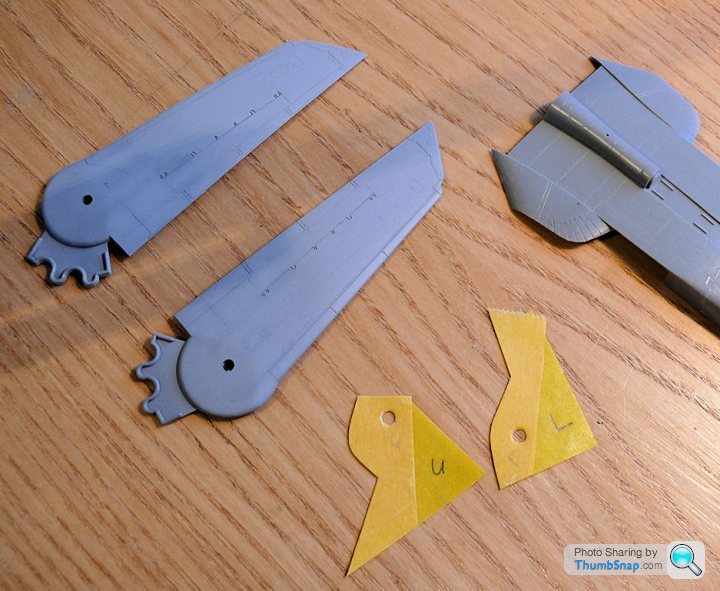
I made the masks for the swept parts of the wing roots, and glued the wings in place in the unswept position. I added some bits of plasticard behind where the intake openeings are, to cover up all the mess that's in the fuselage:
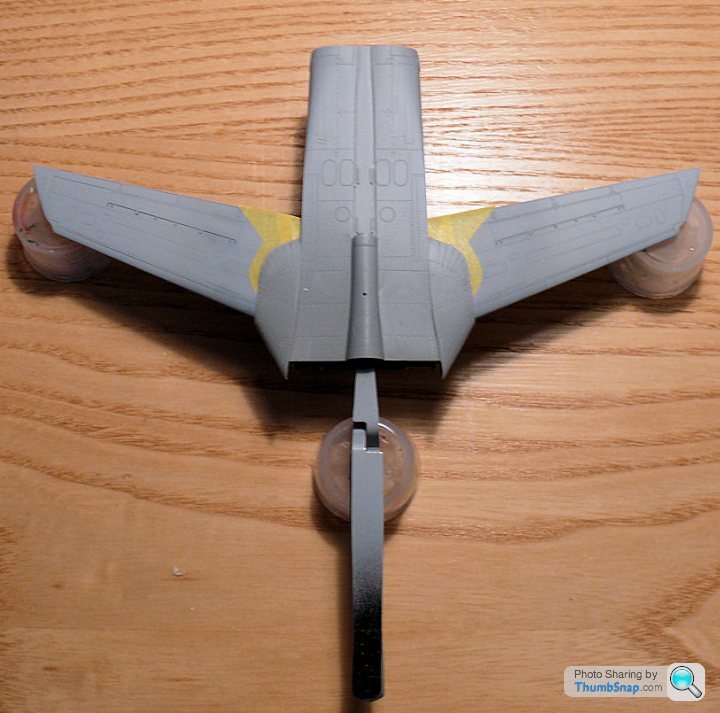
Next job is to attach the top fuselage, forward fuselage/nosecone (with ballast) and fin.
Next job is to attach the top fuselage, forward fuselage/nosecone (with ballast) and fin.
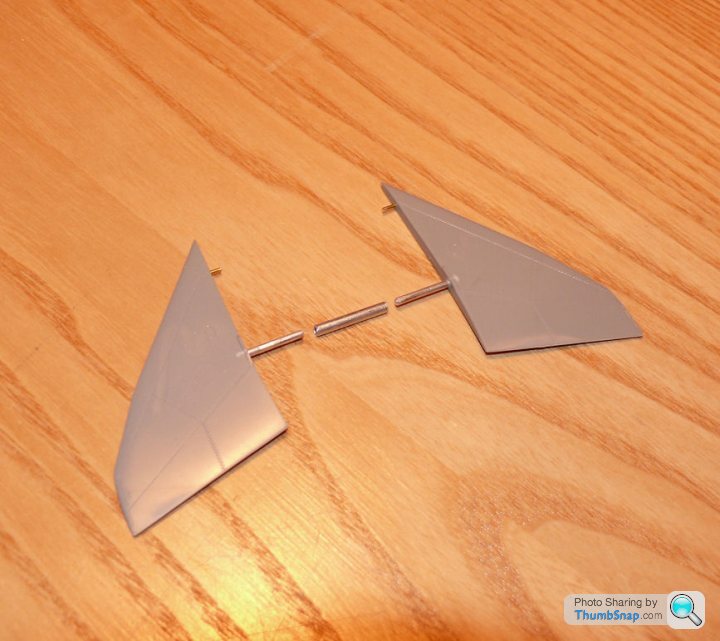
I've substituted a much more sturdy tailplane pivot/fixing out of aluminium tubes and brass pins for incidence pegs. This will allow me to paint them seperately and fix them on after the fuselage is complete:
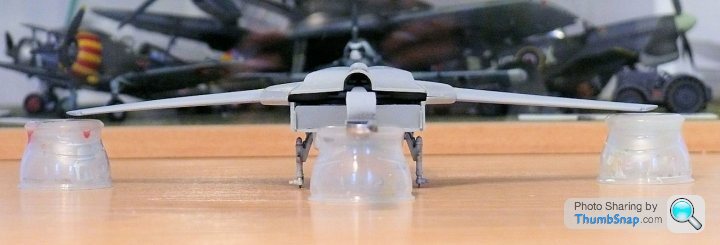
Who'd have though after all these months, it would look something like a Tornado when all the bits are put together:
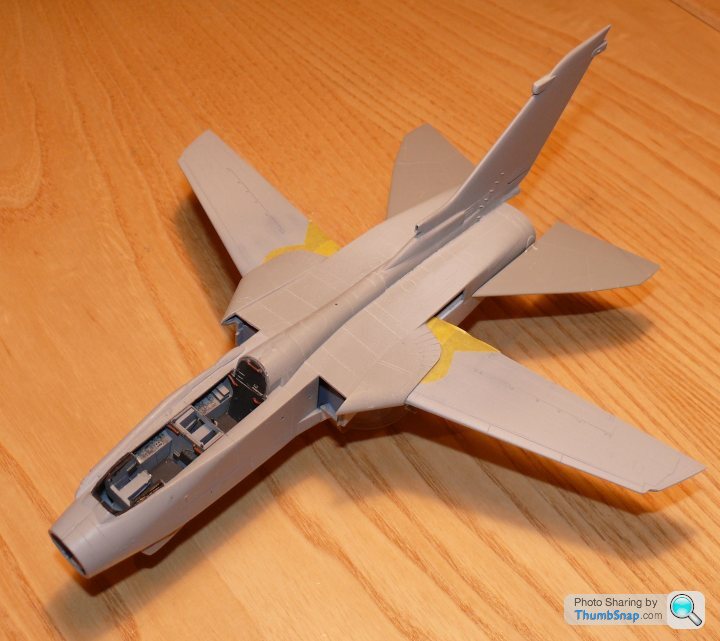
Who'd have though after all these months, it would look something like a Tornado when all the bits are put together:
Gassing Station | Scale Models | Top of Page | What's New | My Stuff