1:72 Tornado GR4, Dambusters70th Anniversary
Discussion


mcdjl said:
It looks good. You get the back ground right with that and I reckon you could make it hard to spot the difference between the model and real thing.
Ta, that's something I wanted to try at some point: Use a high resolution photo of an airfield or whatever and photograph a model in front of it. Trouble is I don't know where to get high resolution images of suitable backgrounds.dr_gn said:
Ta, that's something I wanted to try at some point: Use a high resolution photo of an airfield or whatever and photograph a model in front of it. Trouble is I don't know where to get high resolution images of suitable backgrounds.
You could always try asking in the cool photo graphs of planes thread. One of them might have a suitable airfield shot of some bunkers/ hangers. You might want them slightly fuzzy to get depth of focus sort of thing, or just use your garden as a back ground out of focus greenery beside the hangers.mcdjl said:
dr_gn said:
Ta, that's something I wanted to try at some point: Use a high resolution photo of an airfield or whatever and photograph a model in front of it. Trouble is I don't know where to get high resolution images of suitable backgrounds.
You could always try asking in the cool photo graphs of planes thread. One of them might have a suitable airfield shot of some bunkers/ hangers. You might want them slightly fuzzy to get depth of focus sort of thing, or just use your garden as a back ground out of focus greenery beside the hangers.
dr_gn said:
Ta, that's something I wanted to try at some point: Use a high resolution photo of an airfield or whatever and photograph a model in front of it. Trouble is I don't know where to get high resolution images of suitable backgrounds.
The MOD's Defence Imagery site might have some decent high resolution photos you could use.BertieWooster said:
dr_gn said:
Ta, that's something I wanted to try at some point: Use a high resolution photo of an airfield or whatever and photograph a model in front of it. Trouble is I don't know where to get high resolution images of suitable backgrounds.
The MOD's Defence Imagery site might have some decent high resolution photos you could use.Doc, perhaps the top ones on page 8? (there are 358 pages!)
dr_gn said:
Thanks very much for the link. I've not looked too closely, but which page - Stock images or Downloadable images? Neither page 8's look like airfield backdrops, but the page numbers might be different depending on how you're viewing them I guess?
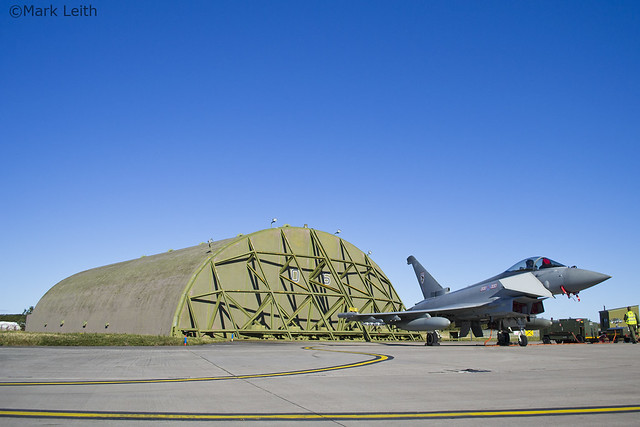
I was looking at Stock images, in particularly this one, Shelter as a backdrop?Edited by Mutley on Thursday 19th March 13:23

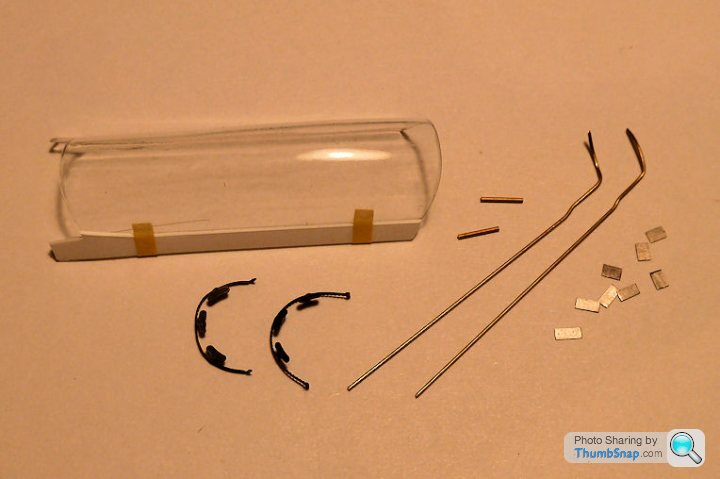
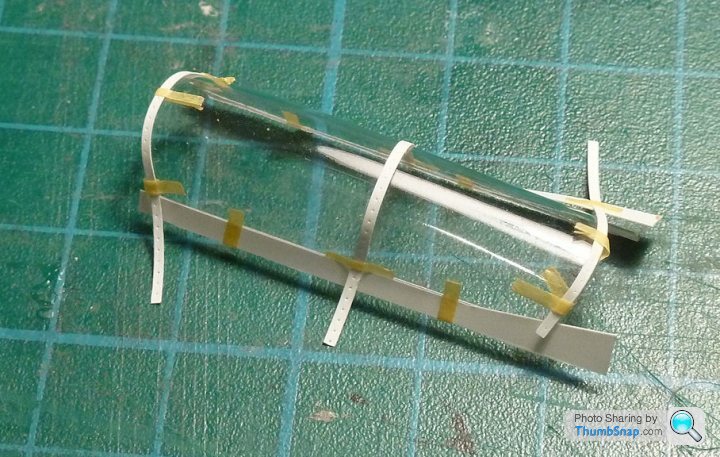
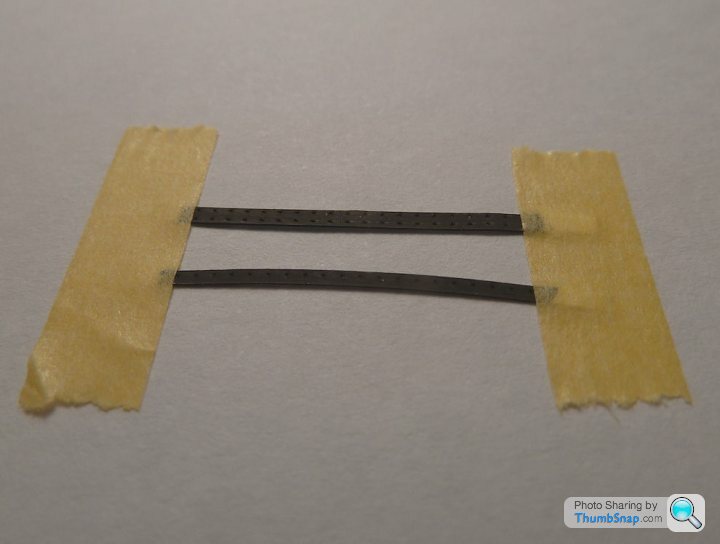
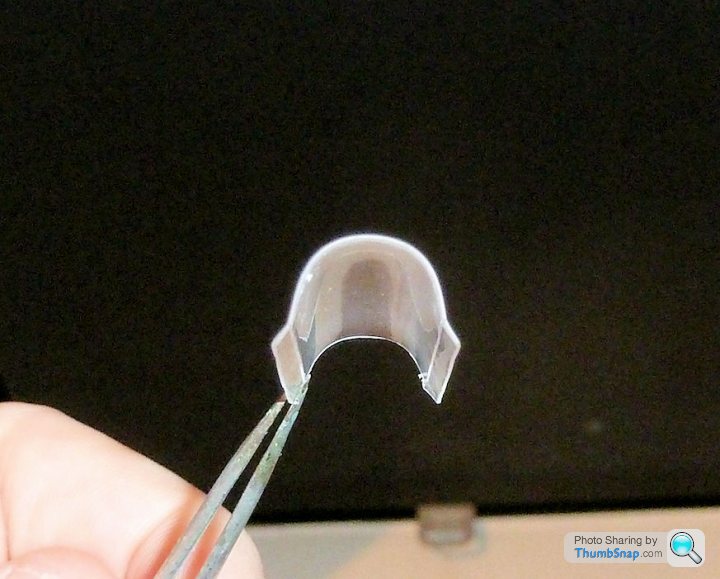
I went with the Tamiya Pla-Paper suggestion for the frames. I got the 0.1mm version, and it looks spot-on in terms of thickness for framing, plus the riveting tool works well on it (I think the middle hoop should have 2 rows of rivets on it). Here are a few test strips taped onto a spare canopy to get a feel for how to work with it. The hoops are partially glued with Formula 560 as an experiment:
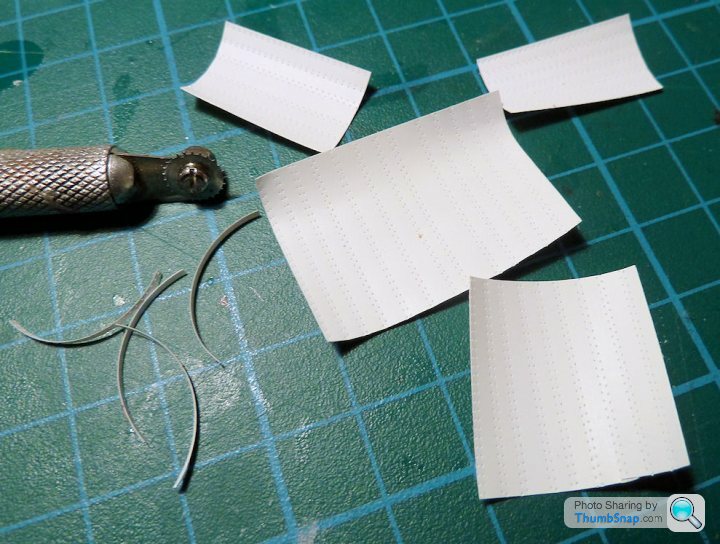
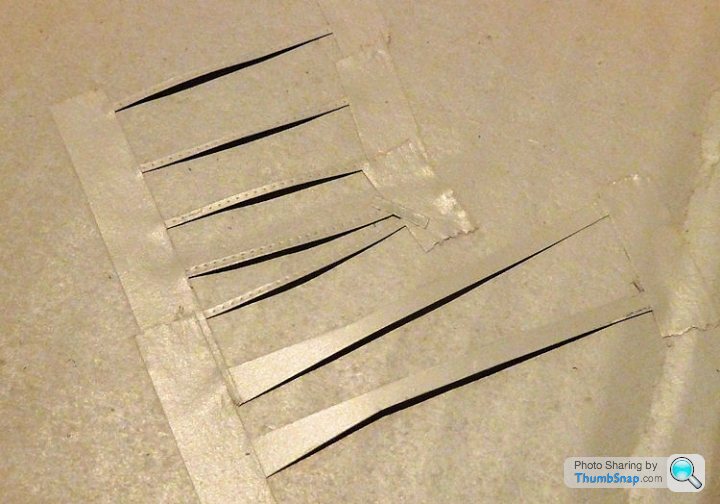
The middle frame should have double rivets. I found the best way to get closely spaced lines with matched rivets was to make loads of pairs of lines and pick the ones that matched the best. About every fifth set seemed to be in the right ballpark. Sometimes it's better to let probablility work for you:
I've painted all the inner faces black. The outer faces will be painted grey before attaching to the canopy:

I painted the outside of some of the frames black by mistake, but at least it confirms that the rivets should look OK:
I've painted all the inner faces black. The outer faces will be painted grey before attaching to the canopy:
I painted the outside of some of the frames black by mistake, but at least it confirms that the rivets should look OK:
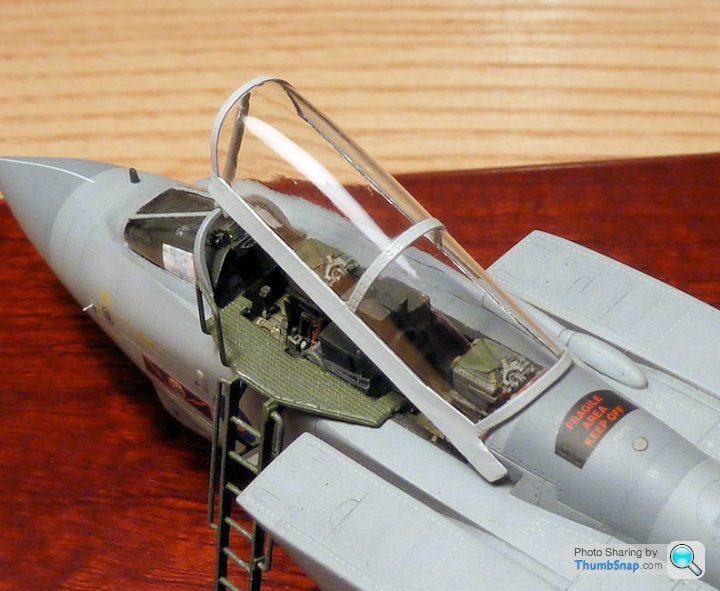
Outer framing primed. I think I'll roll the strips with a scalpel handle to reduce the rivet dimples slightly before fixing:
Also made a start on the rear cockpit frame handles. They are a bit long at present, and need a bit of rounding with a ocat of PVA. I think they are there for the navigator to brace from, and have buttons on them for chaff or flares. Not 100% sure about that though.
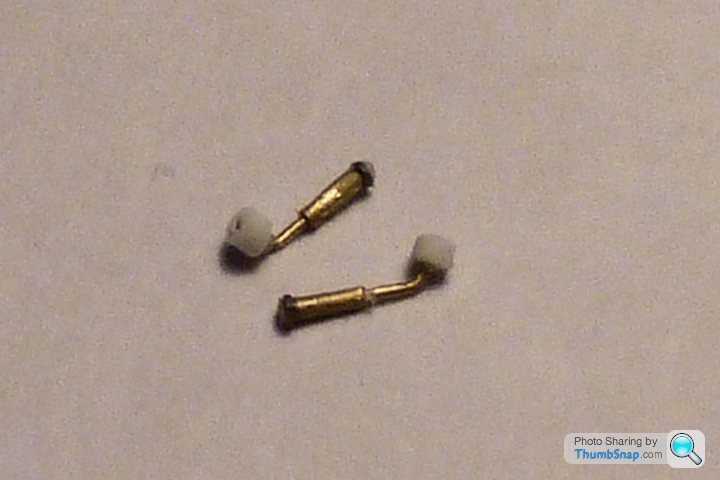
Also made a start on the rear cockpit frame handles. They are a bit long at present, and need a bit of rounding with a ocat of PVA. I think they are there for the navigator to brace from, and have buttons on them for chaff or flares. Not 100% sure about that though.
dr_gn said:
Also made a start on the rear cockpit frame handles. They are a bit long at present, and need a bit of rounding with a ocat of PVA. I think they are there for the navigator to brace from, and have buttons on them for chaff or flares. Not 100% sure about that though.
Yup - active grab handles.I had to add some flare to the lower frames, so I marked a score line with tape, scoerd and bent outwards:
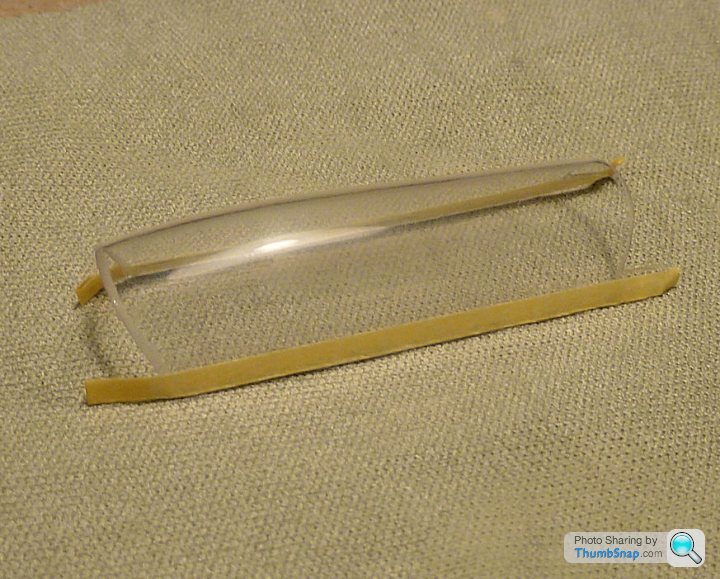
The lower frames were too flat, so I tried to give them a bit of concave-ness by drawing a scalpel handle along them. It kind of worked, but it's difficult to tell. Dipped in Klear, there is at least not quite as much distortion as the orginal:
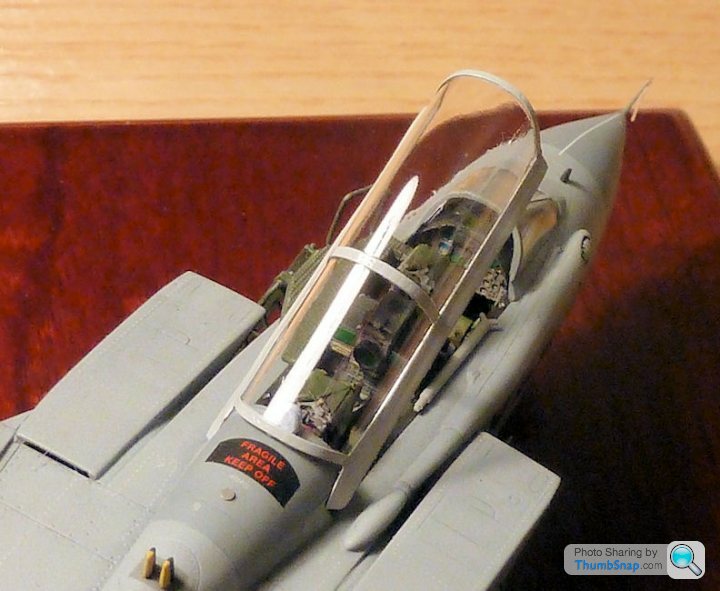
I'm still undecided about this. I have a spare canopy, which, after a bit of polishing might look better than this home made one. I'm pissed off with the whole thing to be honest.
The lower frames were too flat, so I tried to give them a bit of concave-ness by drawing a scalpel handle along them. It kind of worked, but it's difficult to tell. Dipped in Klear, there is at least not quite as much distortion as the orginal:
I'm still undecided about this. I have a spare canopy, which, after a bit of polishing might look better than this home made one. I'm pissed off with the whole thing to be honest.
Gassing Station | Scale Models | Top of Page | What's New | My Stuff