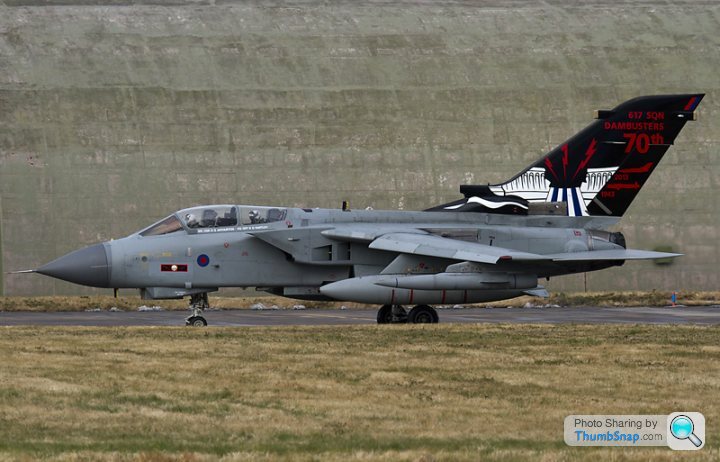
1:72 Tornado GR4, Dambusters70th Anniversary
Discussion


I just flipped through the current Airfix catalogue and to be fair to them there's precious few of the old friends left, looks like they've stripped out a huge number of models. I guess they sustain a few older models to plug a gap in their range for bestsellers, where new tooling is yet to come along. I suppose that's slightly cynical but they are a business afterall. To balance that dr–gn's argument would be that such models could put people off the hobby altogether, or Airfix in particular. Having had a good look at the big Typhoon I think what they're doing with the new models is outstanding BTW.
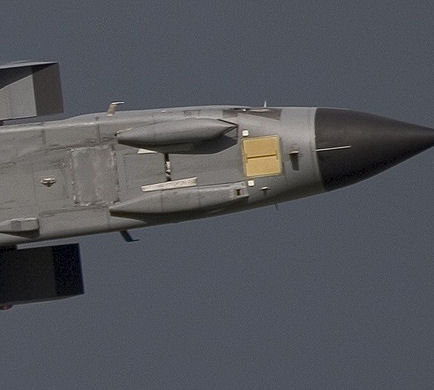
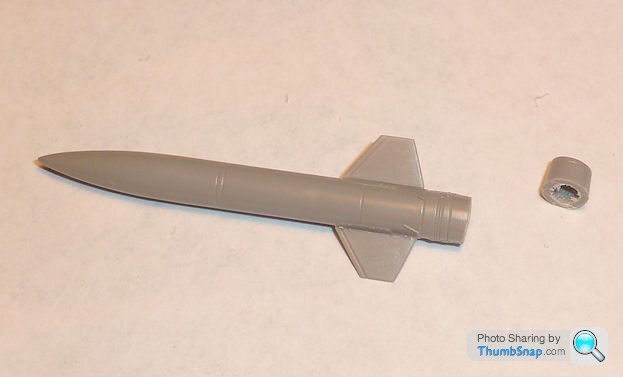
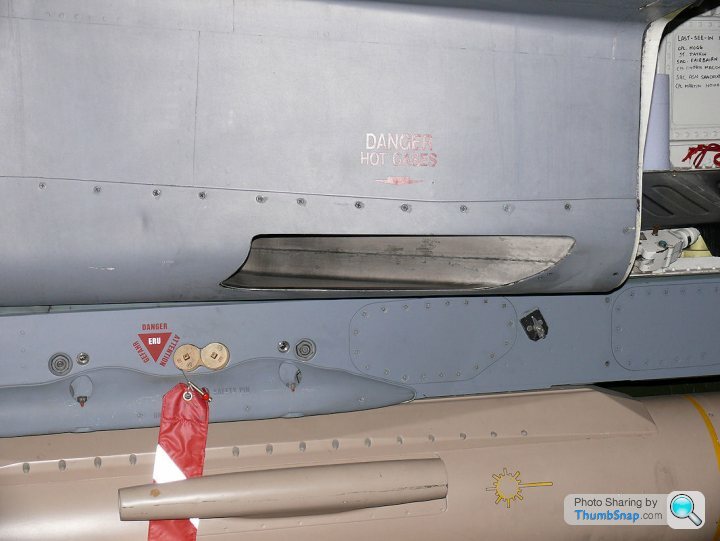
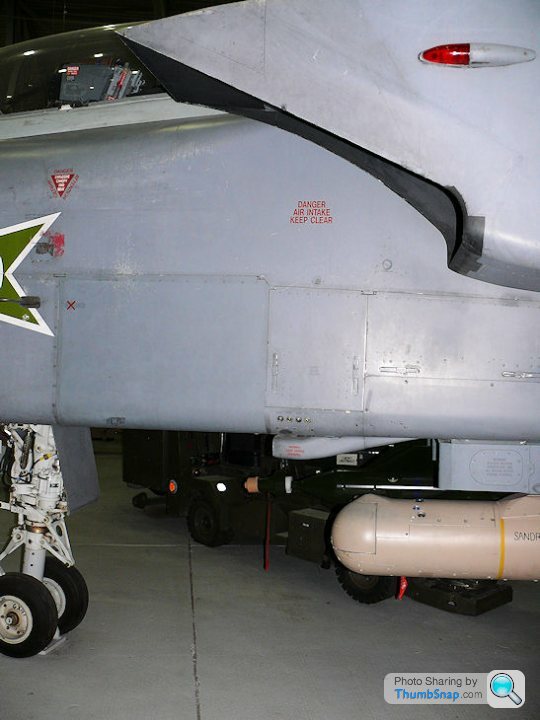
The LRMTS pod is a distinctive feature of this aircraft (stbd. side under the cockpit here):
and detail here:
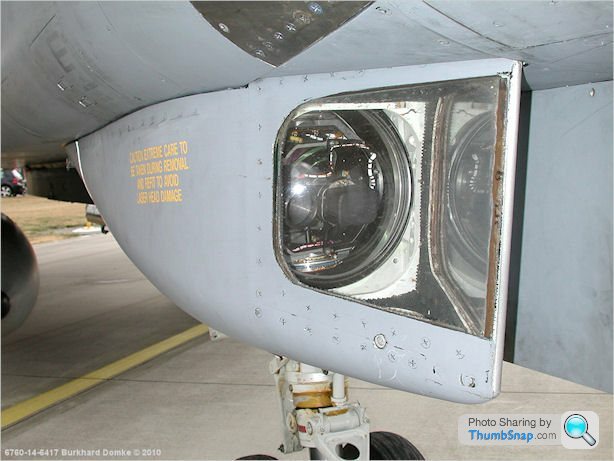
(photo credits to whoever took them)
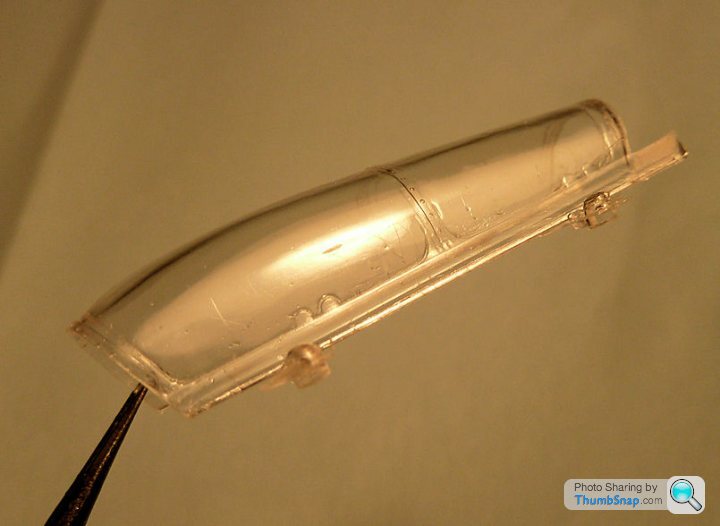
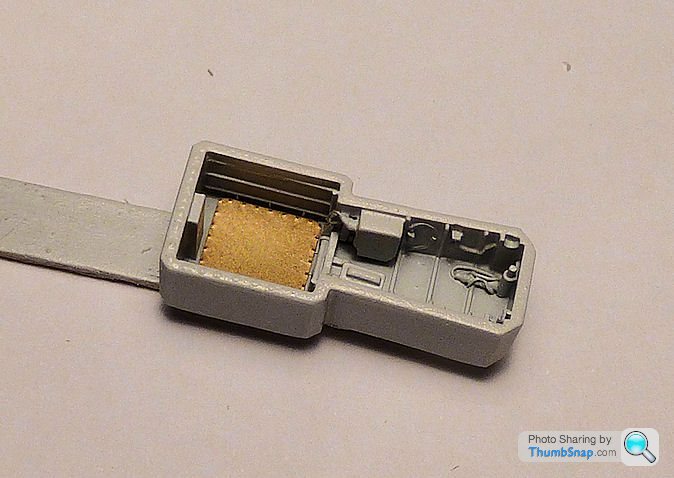
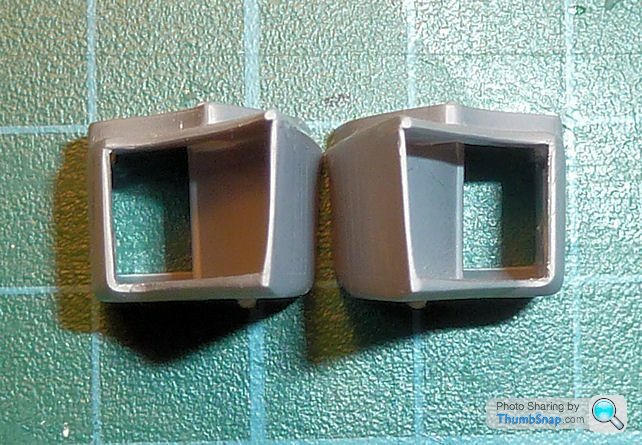
Unfortunately it's not particularly well moulded in the kit; the windows appear to be little more than an amorphous blob of clear plastic to be stuck to the front of the fairing:
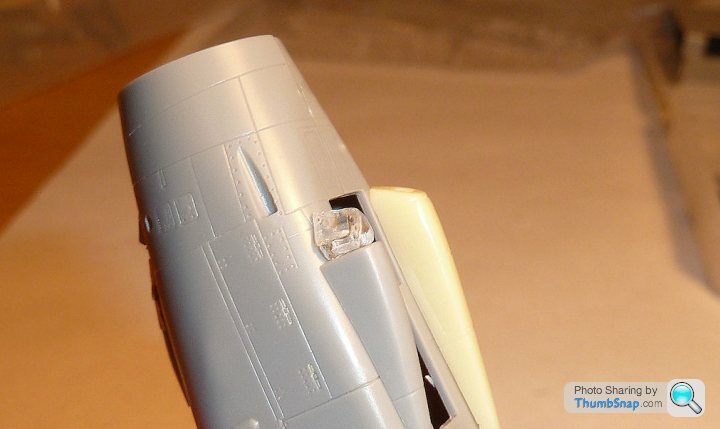
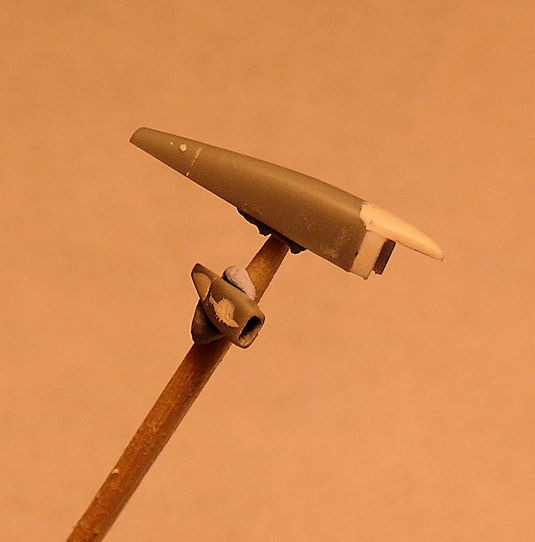
I'm attempting to improve this by using scrap acetate sheet, scored and bent for the windows. this requires some further work in terms of adding a plastic card 'chin' to the fairing, and a tiny wedge of plastic to the fuselage to form a socket for the acetate:

The windows need shortening slightly, which I will do by cutting and shimming with plastic card strips to maintain the overall length of the pod. It will need some filler all around and smoothing off, but will hopefully look OK. I'll add a clear lens behind the windows to represent the laser aperture.
The Resin FLIR pod fits OK with a bit of filing and drilling to reinforce with brass rods. Both pods contour around the fuselage sides slightly, which is incorrect in reality, but not too noticable:
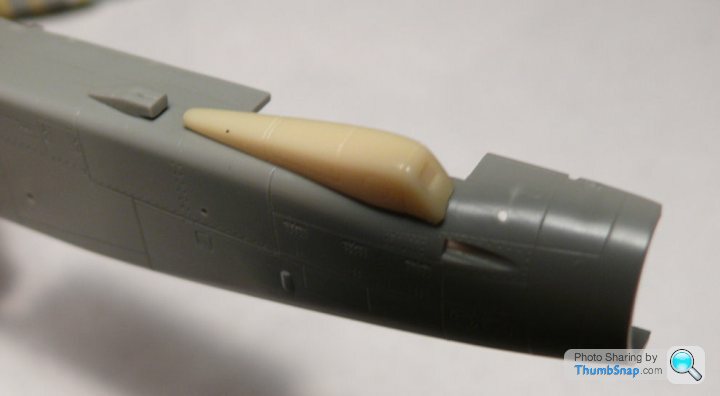
The intake behind the FLIR pod appears to be too far forward, so I will reposition that (see first image)
and detail here:
(photo credits to whoever took them)
Unfortunately it's not particularly well moulded in the kit; the windows appear to be little more than an amorphous blob of clear plastic to be stuck to the front of the fairing:
I'm attempting to improve this by using scrap acetate sheet, scored and bent for the windows. this requires some further work in terms of adding a plastic card 'chin' to the fairing, and a tiny wedge of plastic to the fuselage to form a socket for the acetate:
The windows need shortening slightly, which I will do by cutting and shimming with plastic card strips to maintain the overall length of the pod. It will need some filler all around and smoothing off, but will hopefully look OK. I'll add a clear lens behind the windows to represent the laser aperture.
The Resin FLIR pod fits OK with a bit of filing and drilling to reinforce with brass rods. Both pods contour around the fuselage sides slightly, which is incorrect in reality, but not too noticable:
The intake behind the FLIR pod appears to be too far forward, so I will reposition that (see first image)
Doc I trawled my large collection of (mostly Lloyd's) Tonka pitchas to see if I could find evidence of changed position for that intake and it was no go 
Here's a couple that confirm the need to change the kit's intake, they confirm LAG for the undercart too IMO
(Couldn't post them over on BM, they are not in photobucket)

Here's a couple that confirm the need to change the kit's intake, they confirm LAG for the undercart too IMO
(Couldn't post them over on BM, they are not in photobucket)
Thanks Perdu. It's a simple matter of filling two holes and cutting two location pins off the intake.
The second picture looks like ZA412 judging by the upper spine panel shadings, but the BOZ pod has been moved to the port wing at some point. I wonder why the only option for the kit is for fitment to the stbd. wing (judging by its rear fairing chamfer)? It could easily have been made as a separate section to be rotated for either position. Ah well, the razor saw will be seeing some action again.
The second picture looks like ZA412 judging by the upper spine panel shadings, but the BOZ pod has been moved to the port wing at some point. I wonder why the only option for the kit is for fitment to the stbd. wing (judging by its rear fairing chamfer)? It could easily have been made as a separate section to be rotated for either position. Ah well, the razor saw will be seeing some action again.
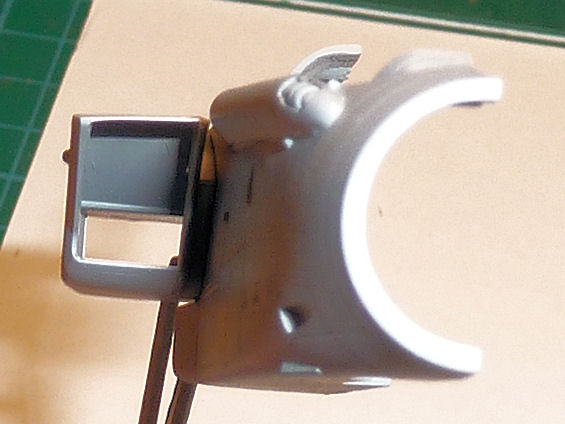
This is the modded LRMTS pod after adding plasticard sides and profiling the filler on the underside. The intake is also in this pic; I've drilled and scraped out an opening and filled the sink marks:
This is it behind the plasticard strake I added to the fuselage:
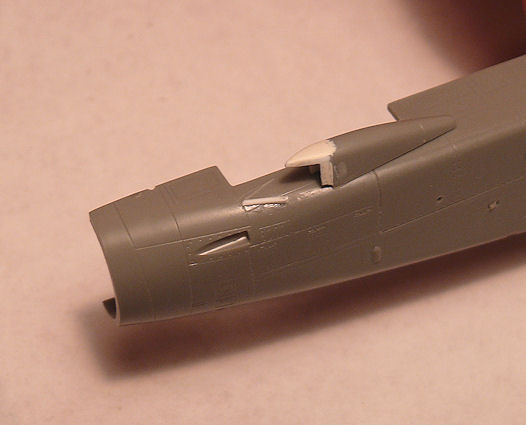
And in approximate place. Obviously it needs a bit of profile refinement, and the whole thing will need filling along the join lines after fitting:

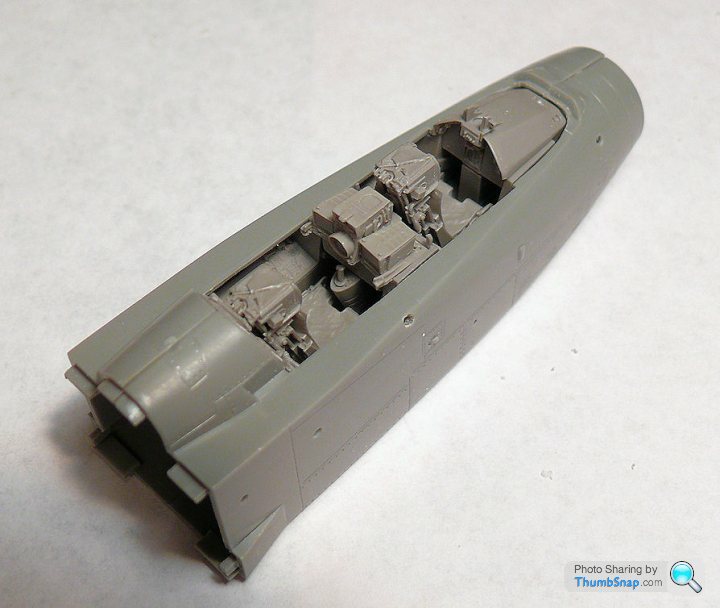
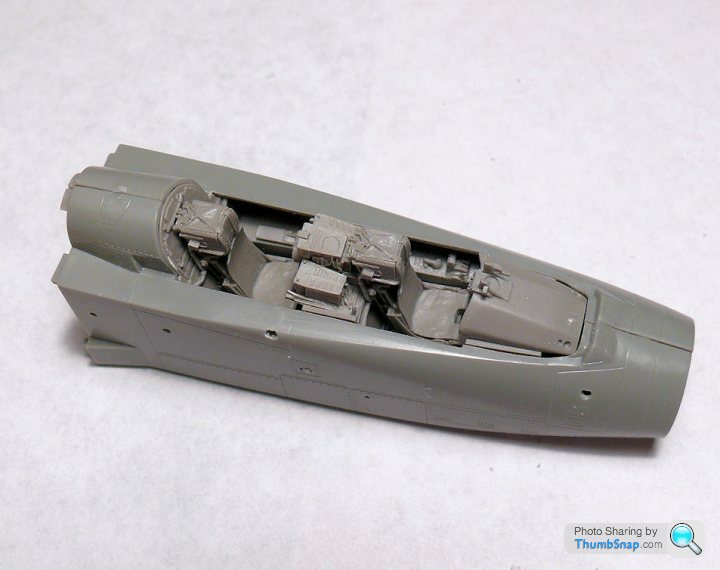
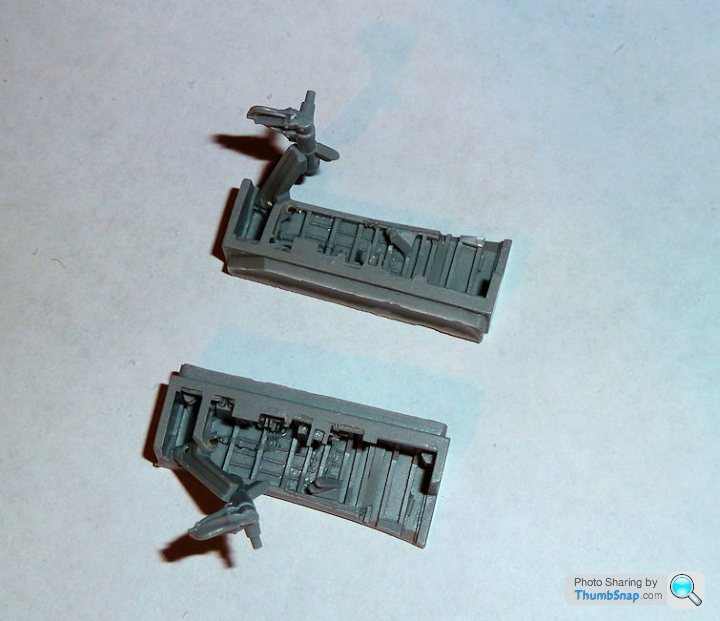
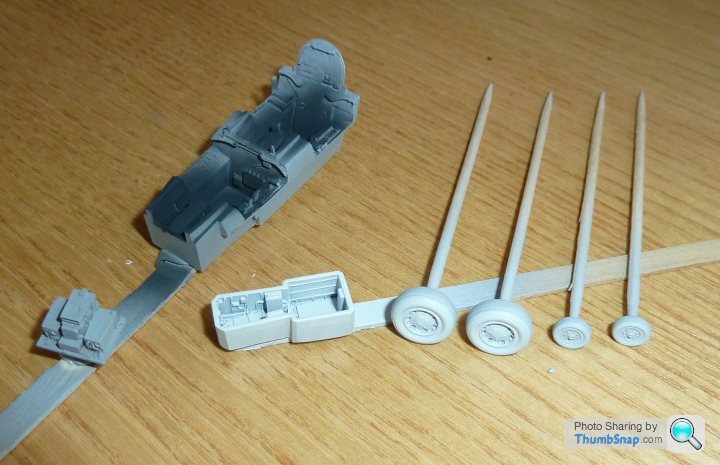
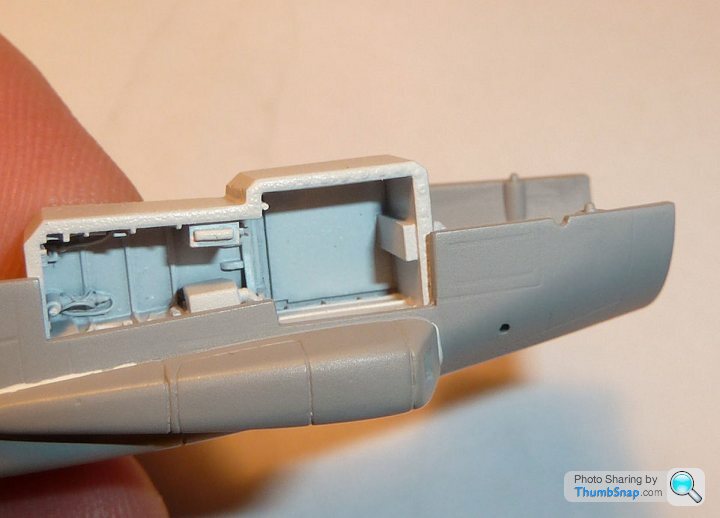
Also fettled the fuselage to suit the Aires cockpit and front wheel well. I'm convinced Aires deliberately make their parts just too big to fit the kits they are designed for. There is no other explanation for having to thin parts so much they become transparent; this is the underside of the cockpit tub:
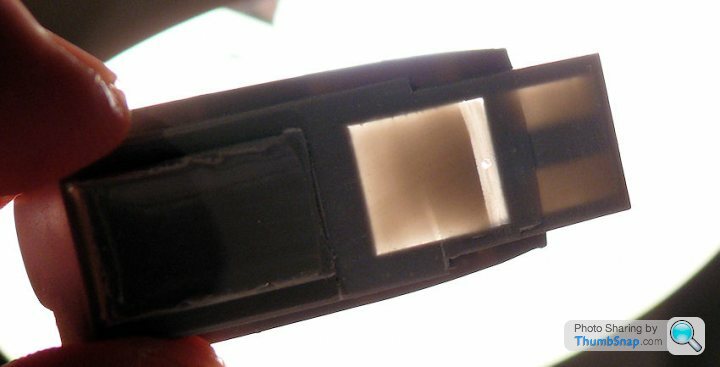
Having said that, the outline of the wheel well insert is too small, so the edges of the kit opening will need a few strips of plasticard to make a perfect fit. If you look carefully you can see the flat I accidentally razor-sawed on my fingertip during a particularly heavy resin fettling session.
And the tub and well in place:

The original cockpit surround, particularly the front instrument coaming, had to be heavily cut and profiled to fit the tub. It will still need a smidge of filler around the edges, although the windscreen framing hides most of the gaps, and it's all matt black anyway. I couldn't resist balancing the instrument housings and seats in place to see how it looked:
This is it behind the plasticard strake I added to the fuselage:
And in approximate place. Obviously it needs a bit of profile refinement, and the whole thing will need filling along the join lines after fitting:
Also fettled the fuselage to suit the Aires cockpit and front wheel well. I'm convinced Aires deliberately make their parts just too big to fit the kits they are designed for. There is no other explanation for having to thin parts so much they become transparent; this is the underside of the cockpit tub:
Having said that, the outline of the wheel well insert is too small, so the edges of the kit opening will need a few strips of plasticard to make a perfect fit. If you look carefully you can see the flat I accidentally razor-sawed on my fingertip during a particularly heavy resin fettling session.
And the tub and well in place:
The original cockpit surround, particularly the front instrument coaming, had to be heavily cut and profiled to fit the tub. It will still need a smidge of filler around the edges, although the windscreen framing hides most of the gaps, and it's all matt black anyway. I couldn't resist balancing the instrument housings and seats in place to see how it looked:
Edited by dr_gn on Saturday 26th July 00:03
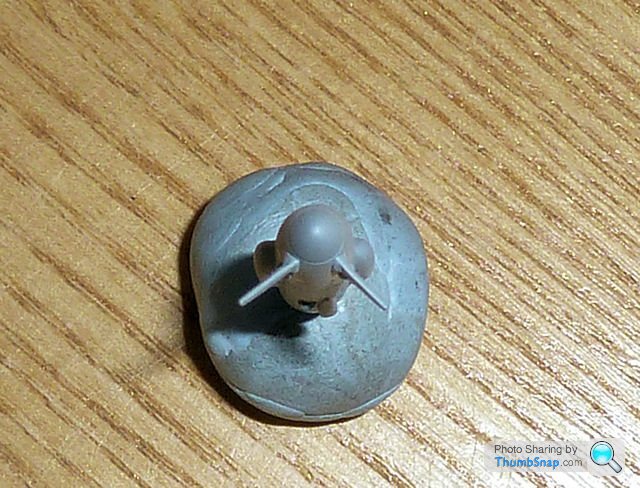
Did some cutting and shutting tonight. First off, the nose gear was moulded in the unloaded position so I cut off the stanchion, shortened it and then drilled and pinned it with some brass rod for strength:

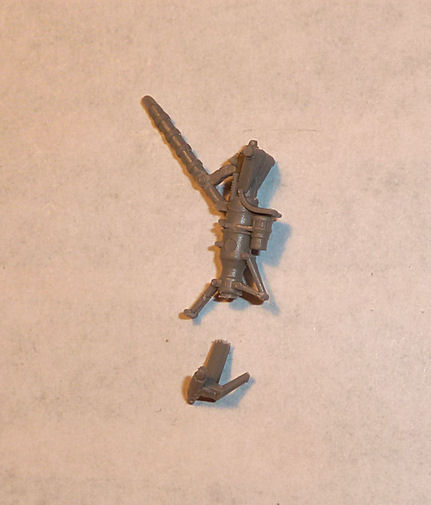
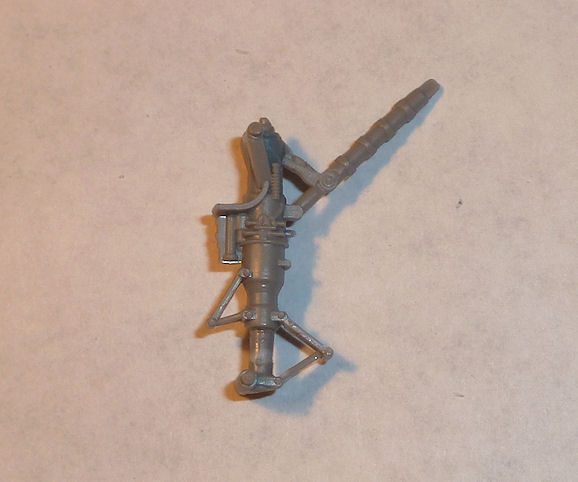
Still needs some flash cleaning off by the look of it.
Then the BOZ pod rear chamfer was cut off and replaced rotated 180 degrees:

I used liquid cement applied to both cut surfaces and squidged them together, squeezing out a bead of dissolved plastic. This is then very easy to sand back when set.
Then I drilled and pinned the main gear trunnions with brass rod. I can see that aligning these with the main legs is going to be fun to get them vertical:

Then some simple assembly of wing halves, intakes/ramps and the refuelling probe:
The canopy moulding in my kit looks a bit tired and has some strange features on it. I'll have to source a replacement I think:
Still needs some flash cleaning off by the look of it.
Then the BOZ pod rear chamfer was cut off and replaced rotated 180 degrees:
I used liquid cement applied to both cut surfaces and squidged them together, squeezing out a bead of dissolved plastic. This is then very easy to sand back when set.
Then I drilled and pinned the main gear trunnions with brass rod. I can see that aligning these with the main legs is going to be fun to get them vertical:
Then some simple assembly of wing halves, intakes/ramps and the refuelling probe:
The canopy moulding in my kit looks a bit tired and has some strange features on it. I'll have to source a replacement I think:
Bit of filling tonight: Centreline bomb rack holes, port gun er...port and around the refuelling probe fairings:

And test fitted the unfathomably complicated compound angles of the main gear. This is going to be tricky to get everything vertical and level:
Also scraped out the housings for where the main gear bays will fit.
And test fitted the unfathomably complicated compound angles of the main gear. This is going to be tricky to get everything vertical and level:
Also scraped out the housings for where the main gear bays will fit.
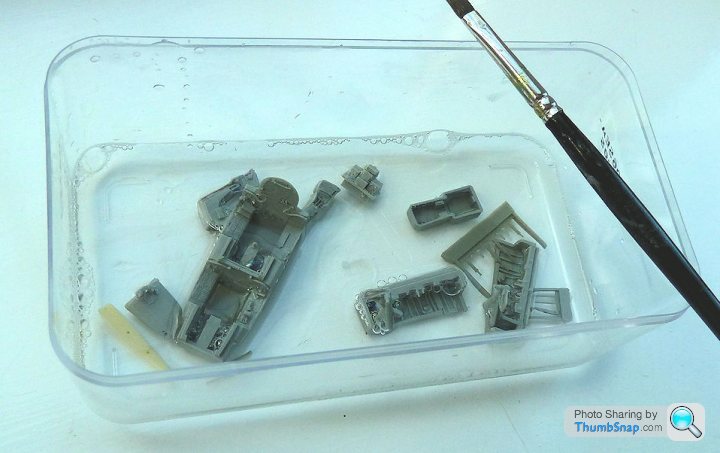
This one got a bit neglegted recently with holidays and then starting the paper ship etc. Anyway, resumed by washing the resin parts in detergent to remove the release agent:
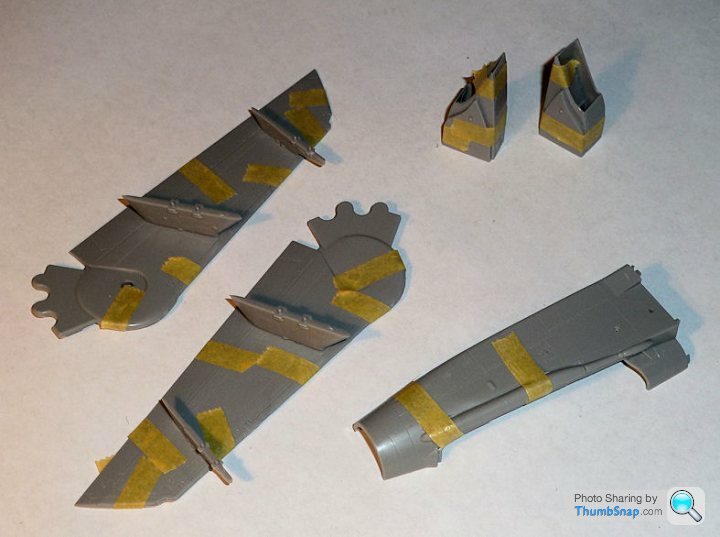
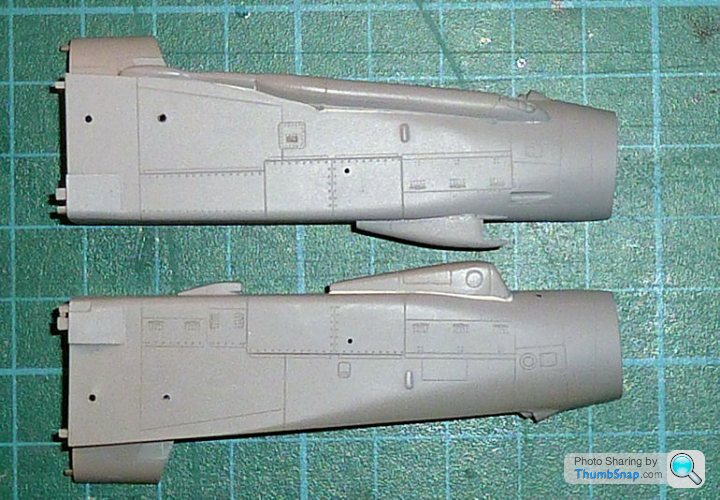
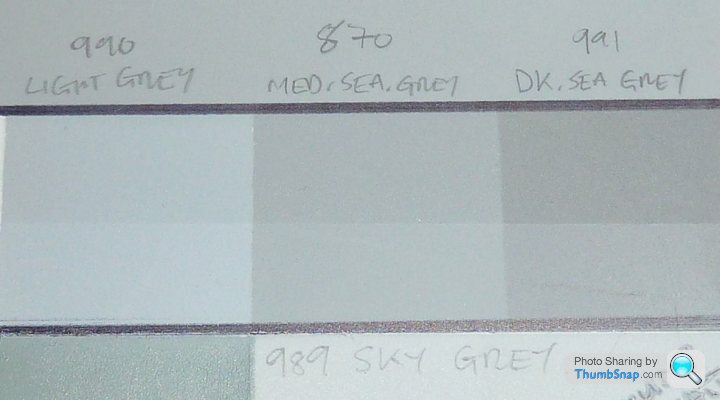
And am now trying to figure out the 50 shades of grey used on this aircraft and where they all go. the Airfix instructions are confusing the matter somewhat, since they clearly state a two-tone finish on this aircraft with darker upper surfaces (matching the radome colour) and lighter undersides:
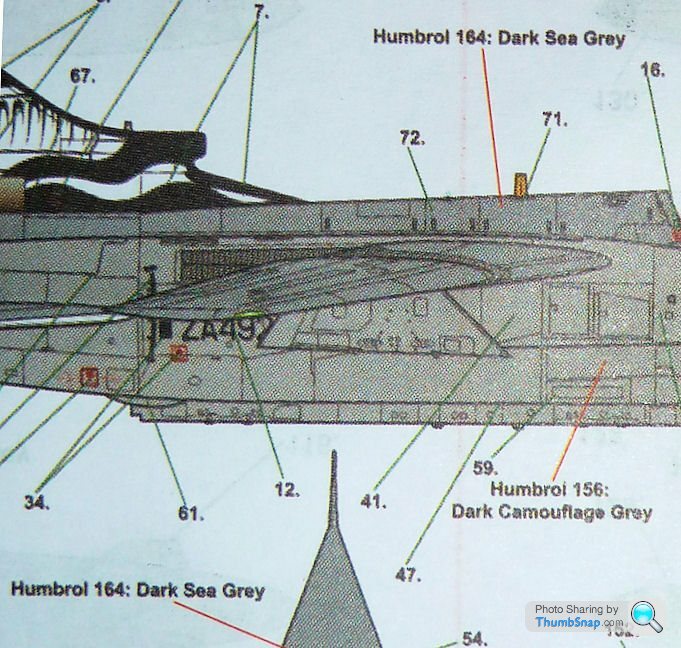
From the photos of the real aircraft I'd say that's wrong. Then again if they can't get the aircraft type correct for thier own model, then I guess other errors can be expected.
And am now trying to figure out the 50 shades of grey used on this aircraft and where they all go. the Airfix instructions are confusing the matter somewhat, since they clearly state a two-tone finish on this aircraft with darker upper surfaces (matching the radome colour) and lighter undersides:
From the photos of the real aircraft I'd say that's wrong. Then again if they can't get the aircraft type correct for thier own model, then I guess other errors can be expected.
Finished modding the fuelage, by adding the resin FLIR pod (drilled and pinned), and relocating the air intake further back. I also filled the redundant gun port on this side:

Also removed the odd raised rings from the 1500 litre fuel tanks and carefully rescribed them along with the BOZ and Skyshadow pods. The BOZ pod also had its rear fairing cut off and refitted with the chamfer on the correct side. They are all ready for final painting now.

Not convinced the anhedral angle on the Skyshadow pod is correct, but the fins are normal to the body so there's not much to be done with it now:
Made a start on the cockpit by spraying the floor German grey, and the wheel hubs and front gear bay with White Grey:
And sprayed the back of the acetate instrument films white:
Also removed the odd raised rings from the 1500 litre fuel tanks and carefully rescribed them along with the BOZ and Skyshadow pods. The BOZ pod also had its rear fairing cut off and refitted with the chamfer on the correct side. They are all ready for final painting now.
Not convinced the anhedral angle on the Skyshadow pod is correct, but the fins are normal to the body so there's not much to be done with it now:
Made a start on the cockpit by spraying the floor German grey, and the wheel hubs and front gear bay with White Grey:
And sprayed the back of the acetate instrument films white:
Took some reference pics at Duxford yesterday. I think this is a GR.1, but the grey seems to be the same as a current GR.4. Sad, but here's my colour sample; FWIW 992 Neutral Grey was the best match in reality.
There is an exhaust in front of the left gear bay which is a bit vague on the kit, but looking at it in reality it isn't too bad:

Colours of the boxes in the front wheel bay:
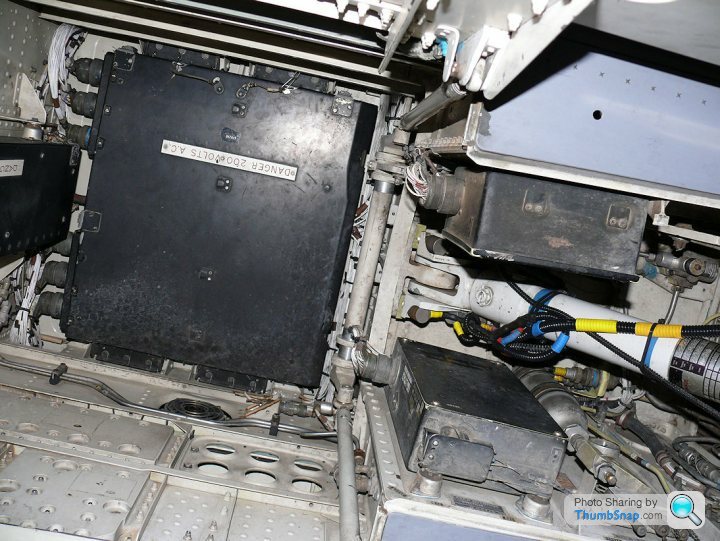
At least it confirms my re-placement of the fuselage intake:
There is an exhaust in front of the left gear bay which is a bit vague on the kit, but looking at it in reality it isn't too bad:
Colours of the boxes in the front wheel bay:
At least it confirms my re-placement of the fuselage intake:
Fitted my modified LRMTS pod and did some filling around the resin FLIR pod and refuelling prope fairing joints:
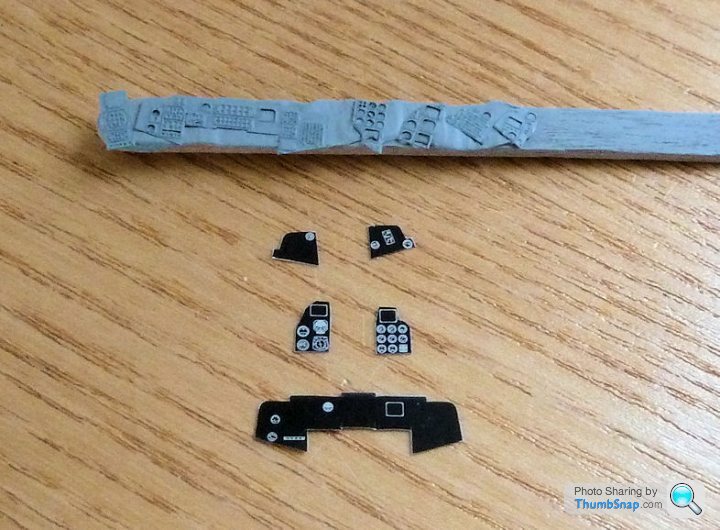
Puzzled over how to accurately paint the black electronics box in the roof of the front gear bay for a while. I decided to make things simple by using an old bit of etched brass from a BF109 which I'll paint separately before attaching to the roof. This will give a perfect demarcation and a bit of depth with virtually no effort:
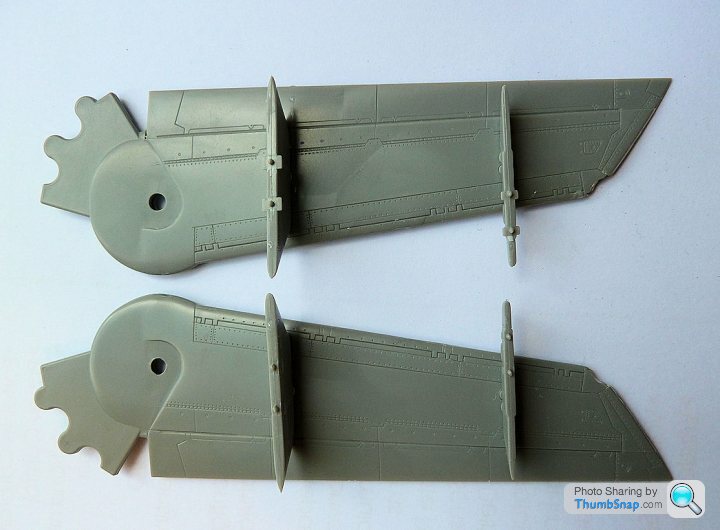
The intakes are a different story. Very fine, thin mouldings with good external detail, but the intake ramps are a wierd fit, being twisted such that they have to be glued in two stages; first the rear part, then clamp with twweezers and apply liquid cement to the front edge. There are also large sawtooth pockets on the inner sides which should be smooth. The strakes for the inner doors are also wrong since I think they should be in two parts:

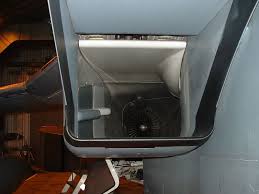
photo credit: Julien, Britmodeller.
Anyhow I filled the gaps with Milliput and smoothed then by shoving a damp cloth through a few times with some tweezers. They'll do after a bit of micromeshing:

Also noticed that the top edges are distinctly anhedral. Not a result of the ramp twist either:
It's not too noticable when fitted unless you look head-on and slightly low; there's a lot of angularity going on in that area. I'm surprised I couldn't find any comments on this, since it's a popular kit:
Puzzled over how to accurately paint the black electronics box in the roof of the front gear bay for a while. I decided to make things simple by using an old bit of etched brass from a BF109 which I'll paint separately before attaching to the roof. This will give a perfect demarcation and a bit of depth with virtually no effort:
The intakes are a different story. Very fine, thin mouldings with good external detail, but the intake ramps are a wierd fit, being twisted such that they have to be glued in two stages; first the rear part, then clamp with twweezers and apply liquid cement to the front edge. There are also large sawtooth pockets on the inner sides which should be smooth. The strakes for the inner doors are also wrong since I think they should be in two parts:
photo credit: Julien, Britmodeller.
Anyhow I filled the gaps with Milliput and smoothed then by shoving a damp cloth through a few times with some tweezers. They'll do after a bit of micromeshing:
Also noticed that the top edges are distinctly anhedral. Not a result of the ramp twist either:
It's not too noticable when fitted unless you look head-on and slightly low; there's a lot of angularity going on in that area. I'm surprised I couldn't find any comments on this, since it's a popular kit:


dr_gn said:
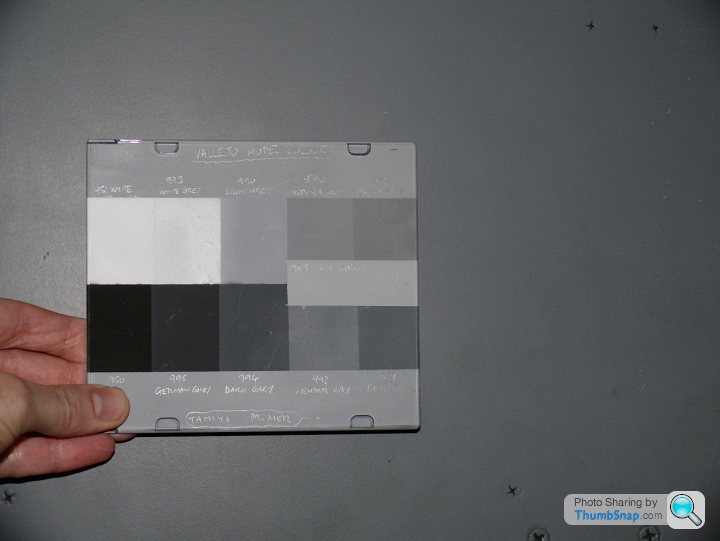
All the greys looked pretty much the same to me in their bottles, so I made a quick comparison. Still haven't decided which to go for:
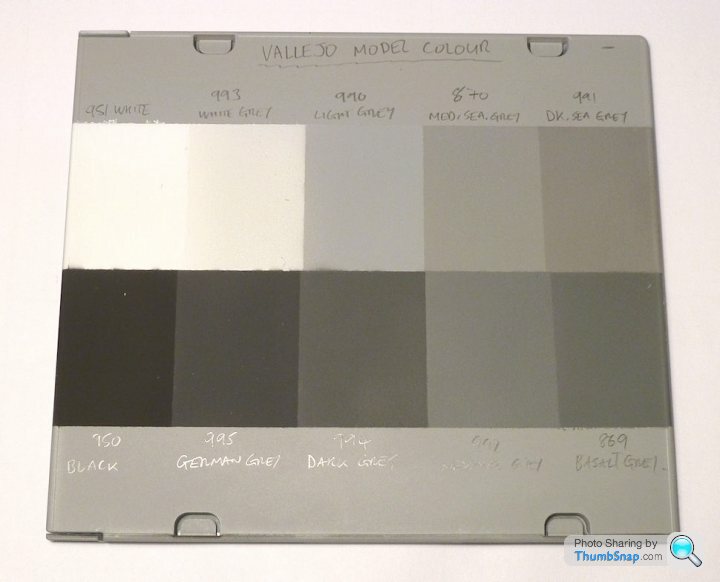
Background is Tamiya Grey Fine Surface Primer.
Just for reference, I thought I'd see what happend if I overcoated the samples with matt varnish (as per the completed model):Background is Tamiya Grey Fine Surface Primer.
Within the upper black lines, the top horizontal strip has been varnished, the lower uncoated. Obviously the coated greys are significantly darker now. Just goes to show the futility of trying to source exact colour matches! Throw in the scale darkening effect of 1:72 and a bit of weathering, and really you might as well draw a shade out of a hat.
Gassing Station | Scale Models | Top of Page | What's New | My Stuff