1:72 Tornado GR4, Dambusters70th Anniversary
Discussion


jamiem555 said:
This looks fantastic. I was an engineer on GR1's and GR4's and the detail you have is amazing. I'd love to do this but in 15 sqn livery. The intake ramps need to be flat. They are inhibited as the GR is not allowed to go supersonic anymore due to the laser and FLIR pods.
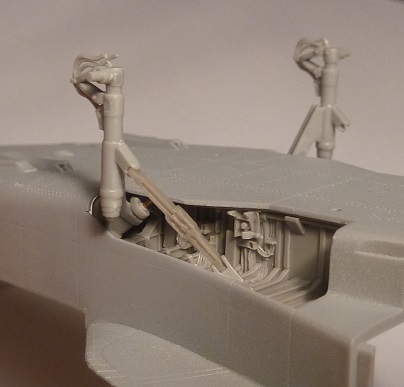
Thanks! I'm afraid there are some detials which will undoubtedly have to remain incorrect. I knew the ramps were disabled, but the kit representations are so unrealistic internally that the work involved in correcting them to be 100% correct wouldn't justify the result. The truth is I'm not sure whether they look right or not - in terms of the 'window' through which the compressor is visible, the overall proportions at least don't look too far off.Made a start on setting the main gear geometry. The main legs are split, and need sticking together at the correct angle. This is made more complicated by the fact that the main pivot is at a compound angle to the fuselage, and the leg stays are mounted obliqely. I temporarily attached the resin gear bays to the fuselage with Blu-Tac, and assembled the first part of the legs (the "I" section bits) to them using the brass pivots I'd made previously. I then lightly glued the lower (tubuar section) legs to them with liquid cement. Then added the braces and when satisfied with the angles, capillaried thin cement around the join with a paintbrush. Tomorrow I'll fix everything in place with the actuator rams and they will be ready for painting. Unfortunately they will have to remain fitted during main assembly, which is by no means ideal, but I can't see an alternatave method:
I also hollowed out the engine oil cooler intakes with a drill and square file.
I also hollowed out the engine oil cooler intakes with a drill and square file.
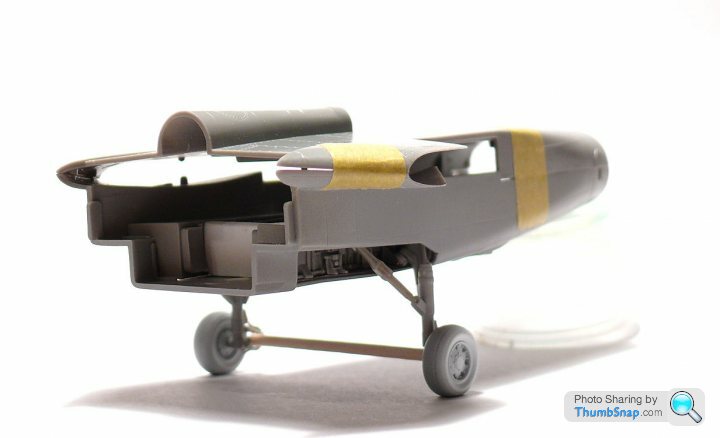
Got back to this after completing the Hurricane. I've fettled the apertures a bit more, and made some plasticard cross braces for the resin bays. Getting the wheels aligned in two axes is still proving tricky, especially when constrained by the braces and the skewed main pivot. I made a brace out of a cocktail stick to hold the legs at the right spacing while the glue sets (when I finally have the nerve to apply glue that is):
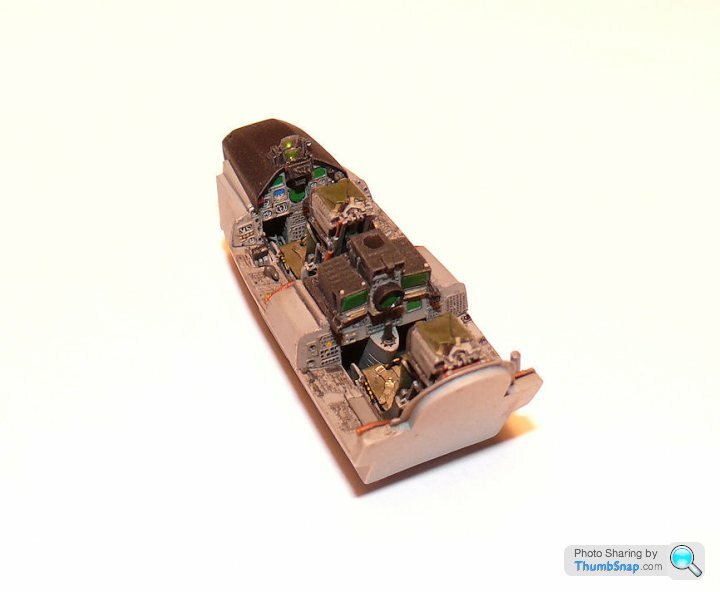
Also made a start on painting the seats and cockpit tub:
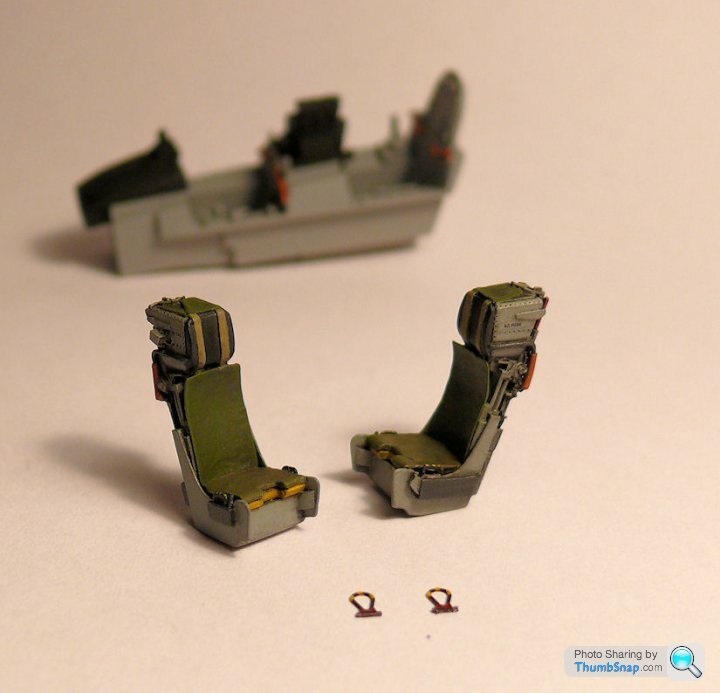
I added a random decal to the head rest bit, and used my usual wash/dry brush to highlight the detail in the resin. Unfortunately the seats, particularly the loop handles and belts are not very accurate, and I can't model them as 'stored'. There will have to be some modeller's license applied.
Also made a start on painting the seats and cockpit tub:
I added a random decal to the head rest bit, and used my usual wash/dry brush to highlight the detail in the resin. Unfortunately the seats, particularly the loop handles and belts are not very accurate, and I can't model them as 'stored'. There will have to be some modeller's license applied.
Pretty much finished the cockpit now - just a couple of stays to add to the rear cockpit. I struggled with some details, especially the seat harnesses which bear little resemblance to reality. I did the best I could with them, and added a crotch strap/buckle. I think the round display on the pilot's instrument panel should be rectangular, but not much I could do about that:

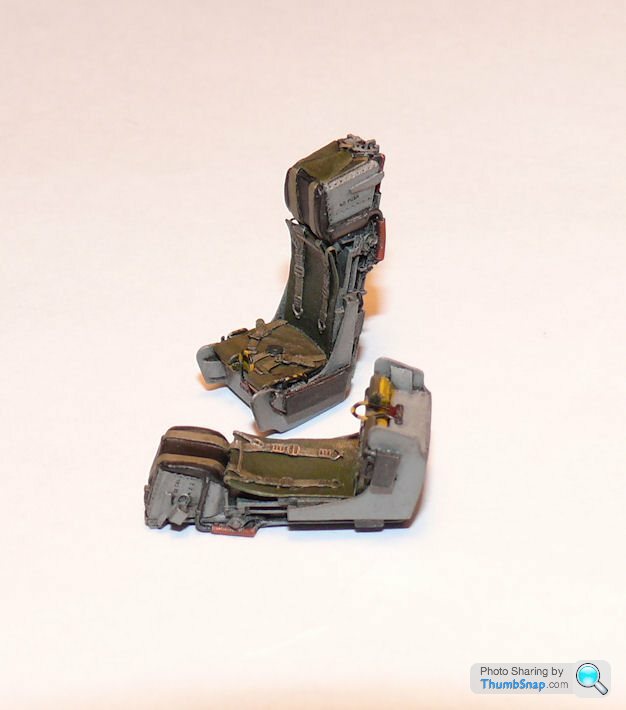
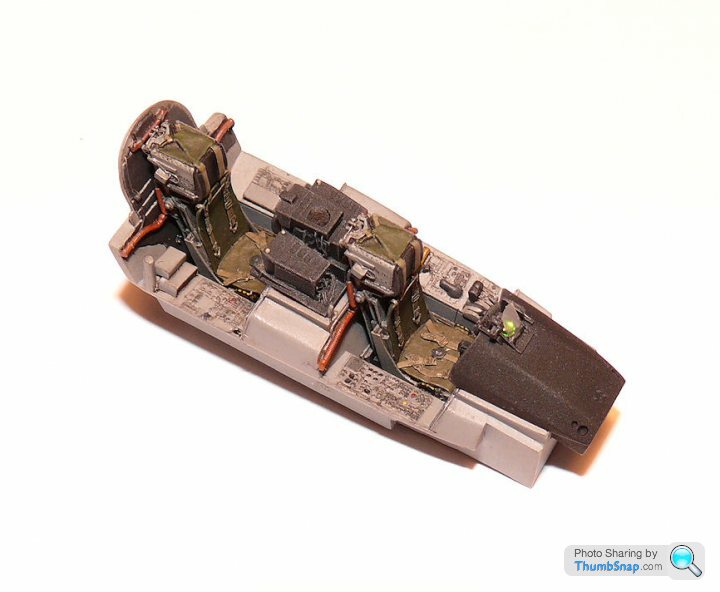

I'm sure anyone who is familiar with the GR4 will find numerous other inaccuracies, but at the end of the day it's better than the standard kit and I'm fairly happy with how it turned out. The seats, column and instrument panel housings are not glued in position yet so a few things may have moved around when I took the pics.
I'm sure anyone who is familiar with the GR4 will find numerous other inaccuracies, but at the end of the day it's better than the standard kit and I'm fairly happy with how it turned out. The seats, column and instrument panel housings are not glued in position yet so a few things may have moved around when I took the pics.
Edited by dr_gn on Sunday 16th November 22:56

dr_gn said:
perdu said:
I'm unfamiliar with GR4 Tornados but I am fairly proficient at spotting a good model
Just seen another one
looks great
Ha ha ta very much.Just seen another one
looks great
I hope you noticed the working HUD

but honestly...
A small bead of radium just to get that realistic glow

So very you doc

dr_gn said:
I think the round display on the pilot's instrument panel should be rectangular, but not much I could do about that:
Thats a pity - it is indeed rectangular on GR4 (the Pilot MultiFunction Display - PMFD). The cockpit you've got would appear to be a GR1 when it was the Repeat Projected Map Display (or something similar)(RPMD). But the entire thing is stunning - way more patience than I ever had building models!Ian Lancs said:
dr_gn said:
I think the round display on the pilot's instrument panel should be rectangular, but not much I could do about that:
Thats a pity - it is indeed rectangular on GR4 (the Pilot MultiFunction Display - PMFD). The cockpit you've got would appear to be a GR1 when it was the Repeat Projected Map Display (or something similar)(RPMD). But the entire thing is stunning - way more patience than I ever had building models!johnS2000 said:
That cockpit is amazing 
Just one question ?
How the hell do you do that ??
Basically a very small brush:Just one question ?
How the hell do you do that ??
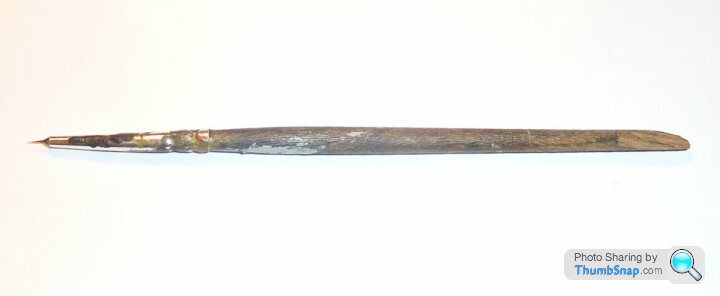
We've been through a lot together over the past 30 years or so. It started off - I think - as a Humbrol #000, but gradually lost it's bristles. I never seemed to get around to throwing it away. I also use it for applying tiny amounts of PVA to various bits, but despite the abuse it never seems to mind.
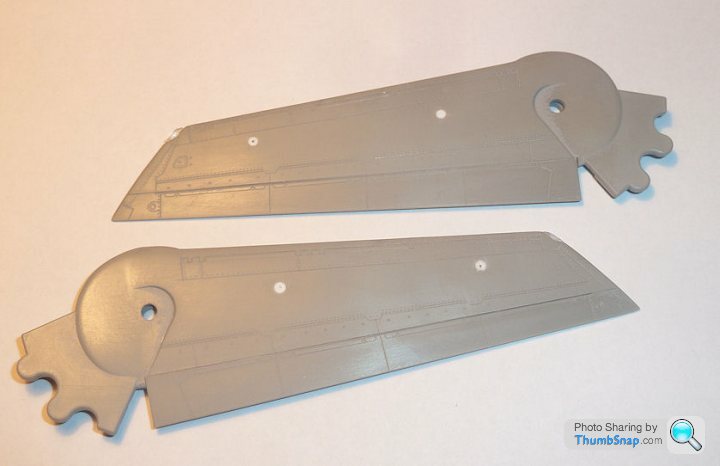
Did some mods to the wings yesterday: The pylons, as fitted looked wrong when assembled to the fuselage with the correct anhedral. They were designed to pivot, but unfortunately when the wings were straight they were distinctly angled inwards towards the fuselage, and there was no way of making them hang more vertically without over stressing the pivots. I decided to snap the pylons off, and fill the holes with plastic:
I've drilled some central witness marks which, after final painting, will be fully drilled out to fit the pylons, which I will fit with plastic spigots.
I also did some work on the wingtip lights. With the exception of the windscreen, all the clear parts in the kit are totally crap, and either need replacing or modifying. Revell already sent me a replacement canopy which is a slight improvement on the original. I temporarily attached the lenses and sanded them to profile, followed by polishing to bring back the transparency:
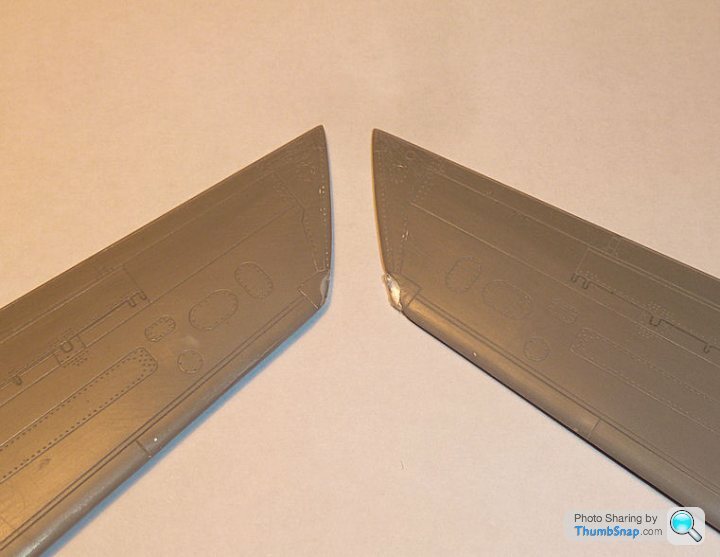
Left image modded, right original.
I've drilled some central witness marks which, after final painting, will be fully drilled out to fit the pylons, which I will fit with plastic spigots.
I also did some work on the wingtip lights. With the exception of the windscreen, all the clear parts in the kit are totally crap, and either need replacing or modifying. Revell already sent me a replacement canopy which is a slight improvement on the original. I temporarily attached the lenses and sanded them to profile, followed by polishing to bring back the transparency:
Left image modded, right original.
ecsrobin said:
You've used the wrong shade of colour on the 3rd switch in on the 2nd row at the front on the RH side.
I was enjoying this model build but now I just won't be able to bring myself to look at the progress because of the inaccuracy.
Great work. Will it be with or without crew?
Did you ever fly with Lager Lawson? Cannot remember what squadron he was but was based in Lossiemouth! I was enjoying this model build but now I just won't be able to bring myself to look at the progress because of the inaccuracy.
Great work. Will it be with or without crew?
The level of detail on this model is amazing.
Gassing Station | Scale Models | Top of Page | What's New | My Stuff