P-51B Mustang "Old Crow" Academy 1:72
Discussion


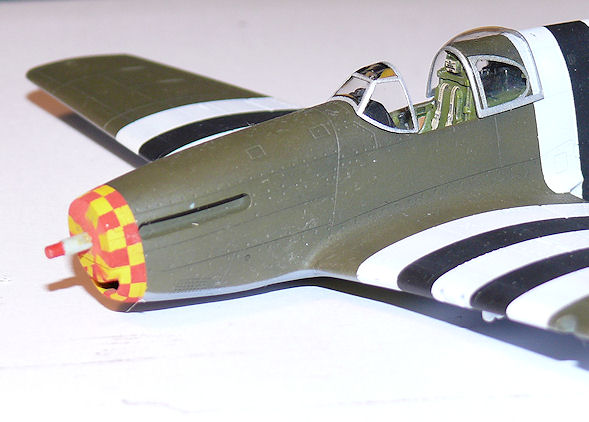
Even though I've got another spare set in the post, I resigned myself to accepting that if after two attempts at getting the nose chequer decals right, I probably wasn't ever going to get them right. So I decided to paint them instead. I masked the nose band and painted a base coat of yellow preshaded of course):
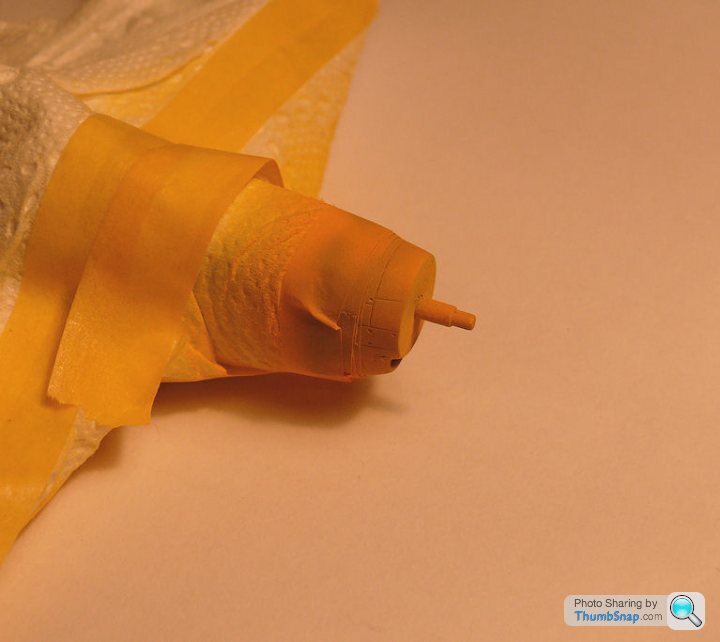
After a few calculations and some trial and error to get the geometry right, I cut some Tamiya tape rectangles to give an evenly spaced (or fairly evely spaced) chequer:
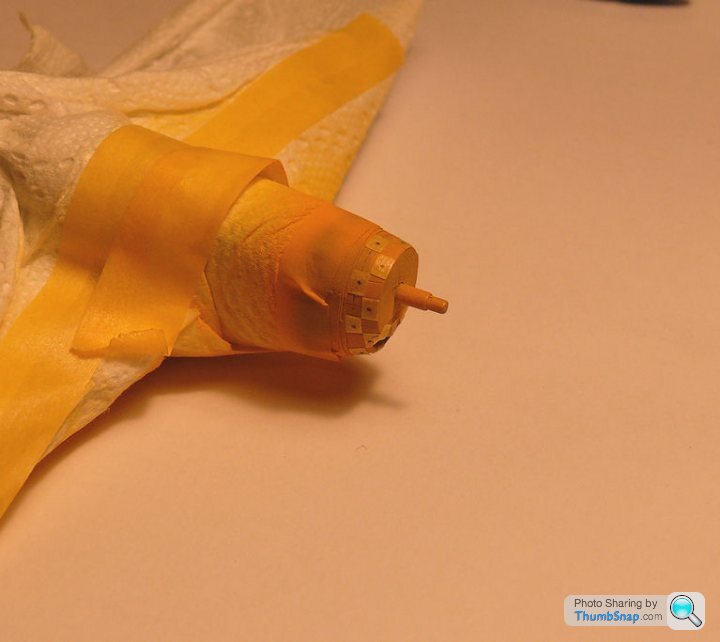
Then oversprayed with red, and removed the tape. I couldn't resist putting the spinner in place to see how it looked:

I think it looks better than decals because all the panel lines are still visible, and the paint extends into the supercharger intake (not possible with the decals). Also, the colours are a match for the previously painted spinner. All the above sounds easy, but in reality it took about 4 hours, and the final masking was the fourth attempt at getting the square geometry right to be evenly spaced both around the nose and longitudinally.
After a few calculations and some trial and error to get the geometry right, I cut some Tamiya tape rectangles to give an evenly spaced (or fairly evely spaced) chequer:
Then oversprayed with red, and removed the tape. I couldn't resist putting the spinner in place to see how it looked:
I think it looks better than decals because all the panel lines are still visible, and the paint extends into the supercharger intake (not possible with the decals). Also, the colours are a match for the previously painted spinner. All the above sounds easy, but in reality it took about 4 hours, and the final masking was the fourth attempt at getting the square geometry right to be evenly spaced both around the nose and longitudinally.
Yertis said:
Can I ask, do you do this work by naked eye or do you use some sort of magnification equipment?
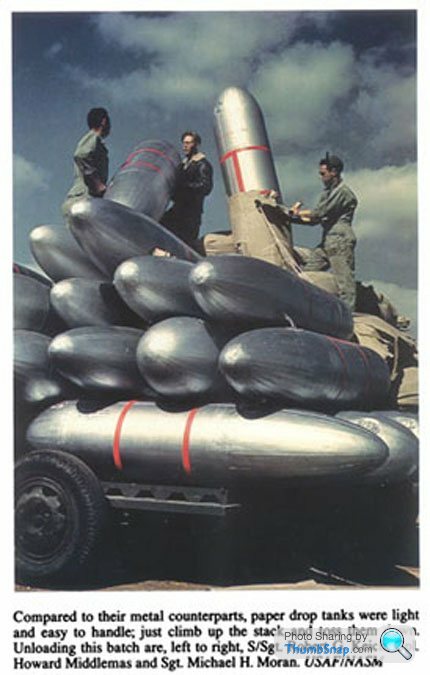
I used an eye loupe to make sure the corners were matched up after I'd applied the tape. Mainly becasue the tape is yellow and the background is yellow so it was difficult to get any contrast. The rest of it is unmagnified. I did try a mangifying lamp once, but obviously it magnifies the blade/brush/drill or whatever you're using, so there didn't seem much point. I think the most important thing is good lighting.Just wondering if the paper drop tanks should have red slinging bands around them, or what colour they should be. It looks like the tanks themselves definitely had red bands:
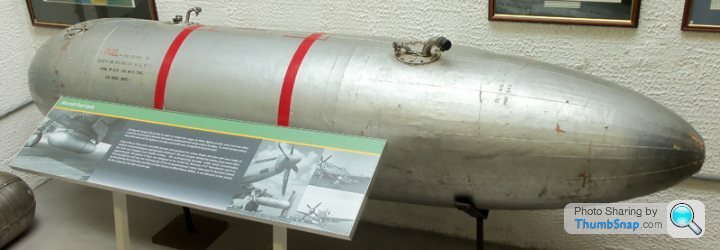
...but I'd have thought these were just alignment guides for the metal slinging hoops on the aircraft hard points, and that the red would be obscured by these hoops when fitted, like here on this restored example:

However, I've seen a lot of monochrome images of the tanks with dark bands around when fitted:

....so were the slinging hoops themselves also red, or some other colour, or what?
...but I'd have thought these were just alignment guides for the metal slinging hoops on the aircraft hard points, and that the red would be obscured by these hoops when fitted, like here on this restored example:
However, I've seen a lot of monochrome images of the tanks with dark bands around when fitted:
....so were the slinging hoops themselves also red, or some other colour, or what?
Thanks for the ideas. I put the question on BM too.
I think the red bands are there to give a visual indication the slings are in the right place, but I still can't believe they are natural metal finish in the b&w pictures.
The two original b&w pictures of Old Crow with the tanks must have been taken at different times - one has invasion stripes, the other doesn't
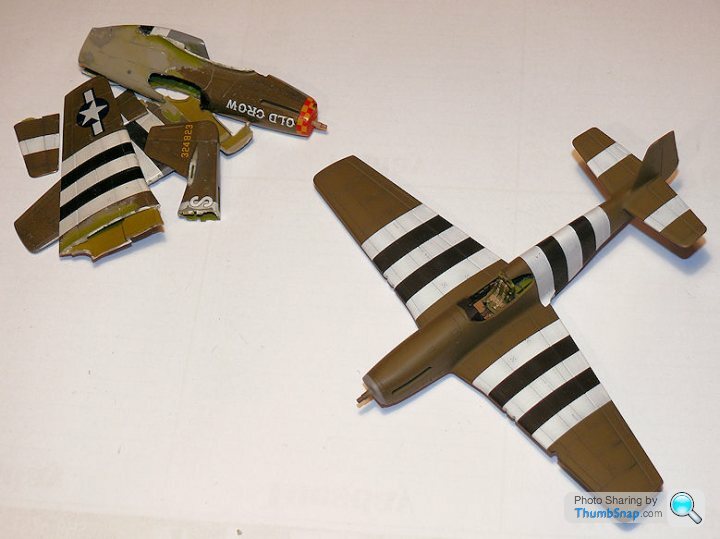
So there's always one random major screw up, usually in the later stages of a build, and here it is for this one:
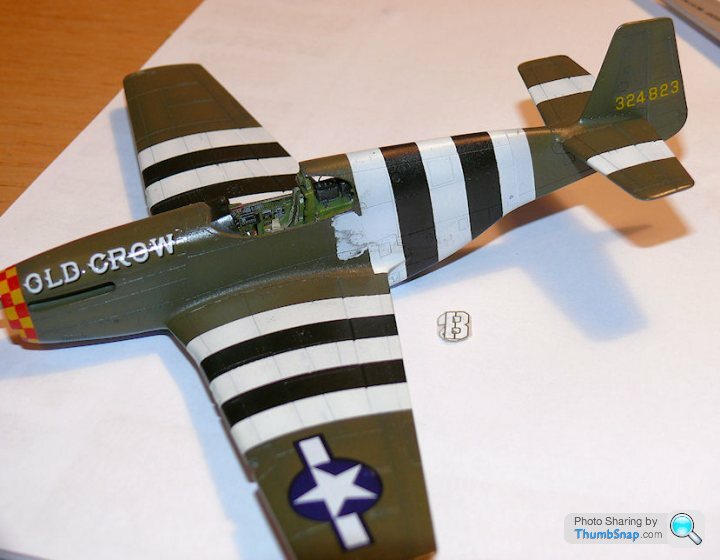
The lettering decals were in place with a bit of Klear and Microsol, so I dabbed them with a damp cloth to push them into the surface and they slipped, removing the green paint and smudging the white line. Never happened before, I have no idea what went wrong there. The white that is revealed is the previously covered overspray from the white lines.
Looks like more masking to correct it. good job I've got a spare set of decals.
The lettering decals were in place with a bit of Klear and Microsol, so I dabbed them with a damp cloth to push them into the surface and they slipped, removing the green paint and smudging the white line.
Never happened before, I have no idea what went wrong there. The white that is revealed is the previously covered overspray from the white lines.Looks like more masking to correct it. good job I've got a spare set of decals.
Ayahuasca said:
What colour was the fuselage? Seems to be two different shades of grey in the pic.
The Old Crow decal seems more perfect than the real thing, the top right serif on the W is not straight for one thing...
 t. I'll get another and start again, but I'm not looking forward to the nose chequer masking for a second time.
RichB said:
dr_gn said:
- I've scrapped it..
 What, because of the smudged invasion stripe? Surely that could have been recovered? Shame
perdu said:
Bugger
Sorry about this doc
I think YOU might have recovered the situation but when it's time to let go you simply have to.
I will enjoy it again when you get back at Old Crow, let's face it you have all the 'mined' info you'll need now.
(oh yes my take on the tank straps, steel reflects differently to paint and I think most of what you showed would have been plain steel straps covering the painted bands. Thus looking dark enough for a contrast with wartime, often ortho, film emulsions. I'd have painted the strap positions with a darkish metal finish, gunmetal with a spot of silver)
Ta Perdu.Sorry about this doc
I think YOU might have recovered the situation but when it's time to let go you simply have to.
I will enjoy it again when you get back at Old Crow, let's face it you have all the 'mined' info you'll need now.
(oh yes my take on the tank straps, steel reflects differently to paint and I think most of what you showed would have been plain steel straps covering the painted bands. Thus looking dark enough for a contrast with wartime, often ortho, film emulsions. I'd have painted the strap positions with a darkish metal finish, gunmetal with a spot of silver)
It's not often (in fact never!) that I'd give up on a kit, but as you say once you reach a certain point of compromise, that's it. I've broken it up now to salvage the interior and some other bits I'd added:
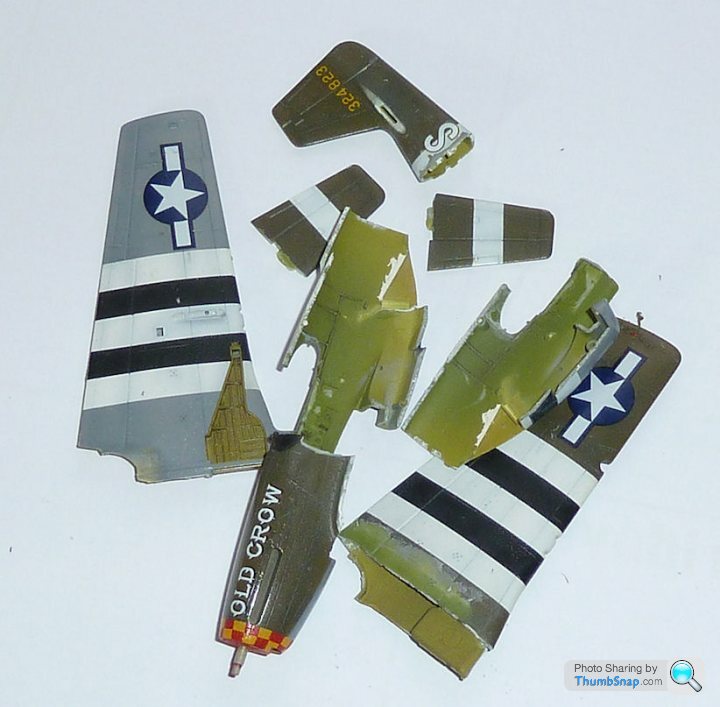
My motto in life seems to be "break even or make a small loss", and since this kit only cost £3 from Cosford, I'll take it as a small loss! Another one (£5) is on order now - No matter how long it tales, it will get finished, and it will be better than the scrapped one: There were some issues such as the "see through" fuselage, some locating pins visible inside the radiator duct and I'd also thinned the cockpit walls too much I think. The next one will have these corrected from the start.
I'm still working on the bits I needed to complete, such as the glazing masking and the drop tanks. All the u/c legs, wheels, propeller & spinner etc are OK. Luckily my digital calipers are still set to the correct chequer width for the nose band, so even that shouldn't take too long to do again. I came to same conclusion about the straps. I might even just mask them and use some gunmetal weathering powder to give them some contrast, then a dark wash either side.
Edited by dr_gn on Tuesday 24th June 23:20
HoHoHo said:
That picture looks better than my efforts once finished!
Shame it's scrapped, I've been watching this thread and waiting for the finished model
It'll be finished...hopefully before Flying Legends. I'd really like Bud Anderson to sign the base, assuming the model is good enough.Shame it's scrapped, I've been watching this thread and waiting for the finished model
Mutley said:
dr_gn said:
It'll be finished...hopefully before Flying Legends. I'd really like Bud Anderson to sign the base, assuming the model is good enough.
What day are you going? I'm there on the SaturdayThe participation list is a bit sparse up to now.

Now I do like that nice new style of box
 Ordered on Sunday from Creative Models via. EBay, arrived today. Can't complain at £5.24. + post.
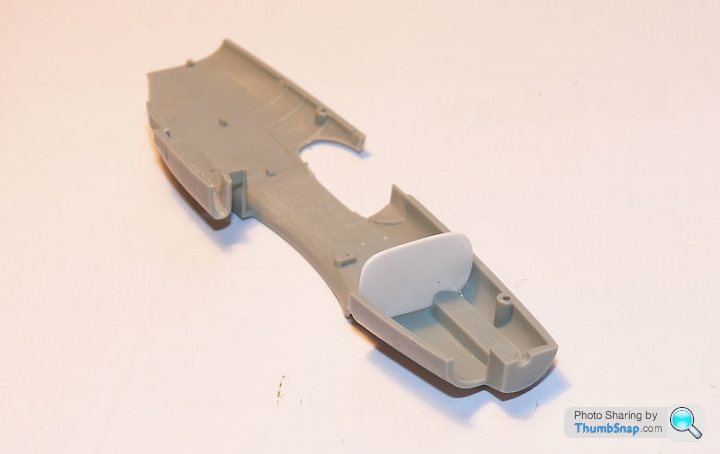
So I made another start. Removed all the parts I need and fettled them ready for assembly. I took the opportunity to correct some issues I missed first time around: The locating pin and socket and hole inside the radiator duct is clearly visible if you look from the front, so I filed id down so that it's now pretty much invisible. I also upened up the small outlet duct above the main outlet before joining the halves, much easier:
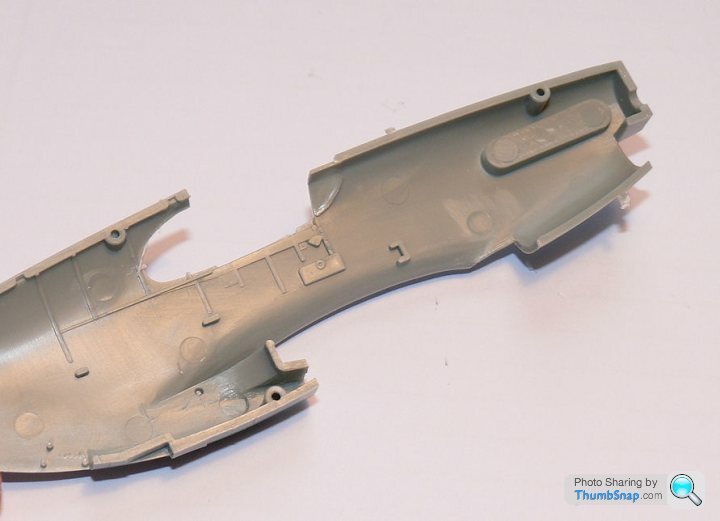
I also added a bulkhead out of plastic card to stop daylight from the cockoit opening being visible through the supercharger intake:
I mixed some more paint to match the salvaged cockpit and photo-etch cockpit sides. I also didn't thin the sides so much this time - previously I went too far with this and it resulted in them looking far too thin. Also sprayed the wheel wells and tail wheel well etc, and coated everything with Klear ready for a bit of light weathering and matt coat:
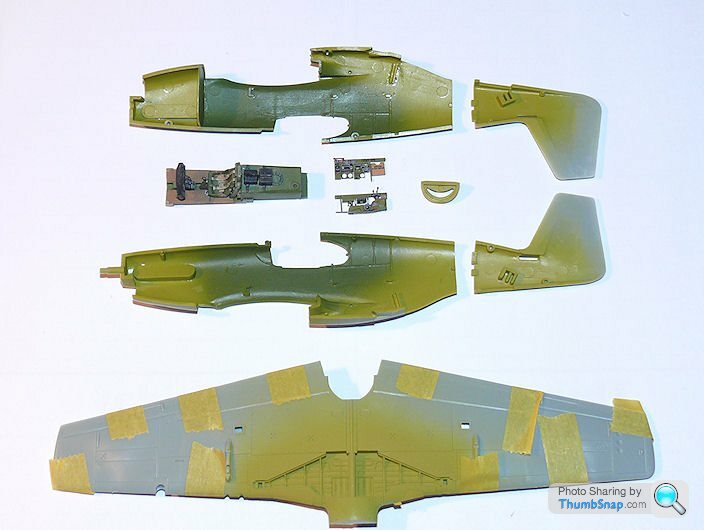
Tomorrow will hopefully see the fuselage closed and the wings and tailplane on.

couzens said:
Love your work Dr! Hows the f1 car rebuilds coming on?
On the off chance, have you completed any bigger aircraft? Lancaster etc.
Ta! The McLaren is an ongoing project, I do bits and pieces when I get chance. I need to get some materials for a repair on one of the cam cover teardrops on the body (one side got sanded off when I first built it), so I'm going to try casting a new one using the existing side as a pattern. Ive got the silicone mould material, just need some yellow resin.On the off chance, have you completed any bigger aircraft? Lancaster etc.
Exclusding a couple of 1/144 transports, and apart from an Airfix Sunderland I built for someone else, I've not built anything but single engined aircraft for many years - probably 30 years in fact. In the past I've built loads of 1:72 twin and multi-engined models, not to a very good standard, and most now long gone.
Got as far as painting and preshading the white bits of the invasion stripes this afternoon:
After always having had some trouble or other spraying very fine lines, I've also started using this stuff:
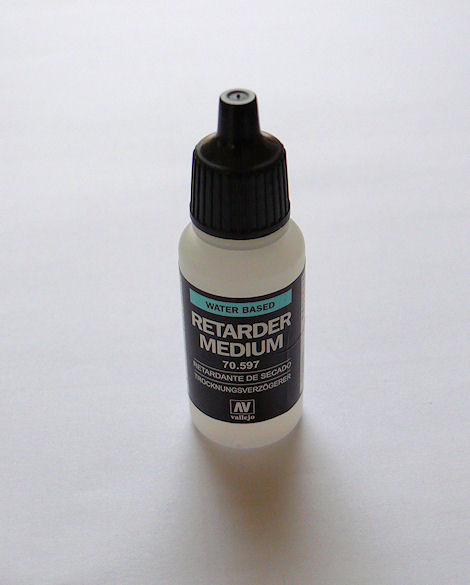
If you add a couple of drops to your thinned acrylic paint, it stops the needle constantly clogging and makes really fine work much easier (or in some cases, possible). It seems like pretty much the silver bullet for acrylic spraying issues.
After always having had some trouble or other spraying very fine lines, I've also started using this stuff:
If you add a couple of drops to your thinned acrylic paint, it stops the needle constantly clogging and makes really fine work much easier (or in some cases, possible). It seems like pretty much the silver bullet for acrylic spraying issues.
IIRC a definition of insanity is repeating an action and expecting a different result. So I thought I'd try a couple of mods; the black stripes were a bit too black, so this time I mixed in some brown, and it has taken the edge off a bit:
This is a deceptively difficult colour scheme, only four main colours, but each tricky to perfect in isolation. The irony is that the most difficult part is the still to come: The nose chequers and the canopy framing. Even more ironic is that I'd already done the chequers almost to perfection on th4e scrapped model, so it's doubtful this next time will be as good.
This is a deceptively difficult colour scheme, only four main colours, but each tricky to perfect in isolation. The irony is that the most difficult part is the still to come: The nose chequers and the canopy framing. Even more ironic is that I'd already done the chequers almost to perfection on th4e scrapped model, so it's doubtful this next time will be as good.
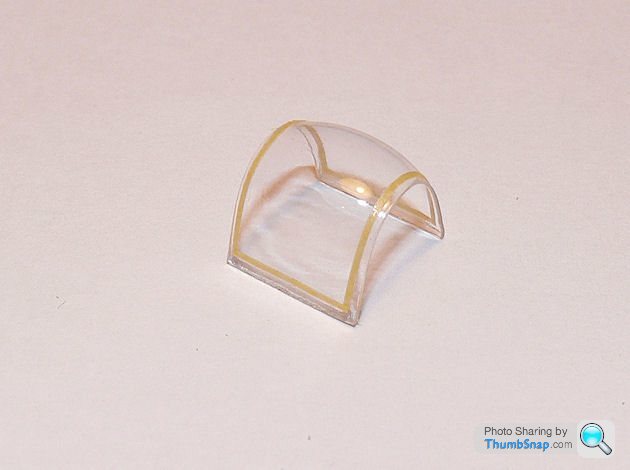
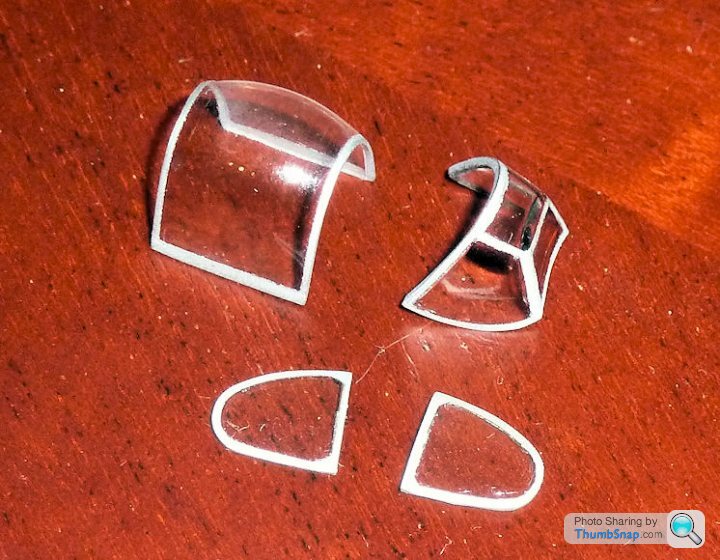
Canopy masking - another really tricky thing to do becasue of the curved rear panels. I used my usual technique:
Outline the framing with thin cut Tamiya tape. This allows bending around compound curves:
Fill in with a mosaic of tape squares:
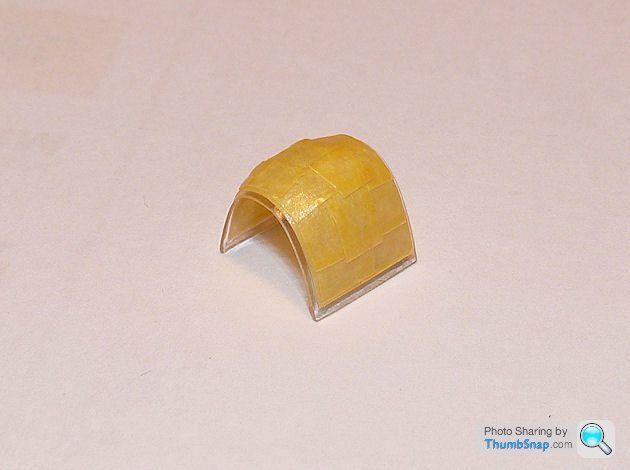
Mask the insides, leaving exposed framing where possible - this allows a matt finish to applied to any prominnet parts of internal exposed framing rather than the gloss overcoat of the canopy itself:
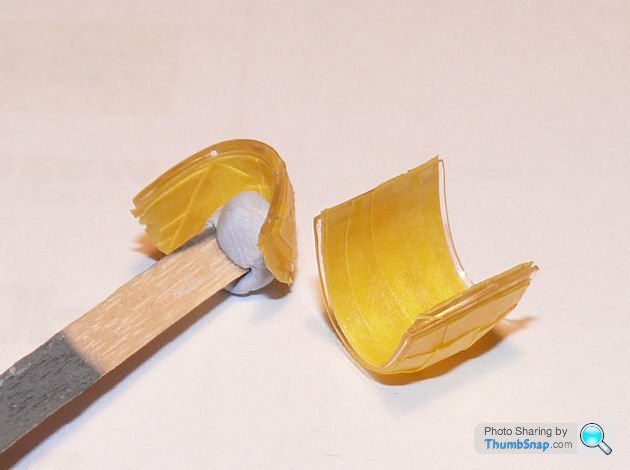
These are the finished items. Not 100% happy with the rear quarters, but the framing on the parts is a tad thick I think, so not much more I can do:
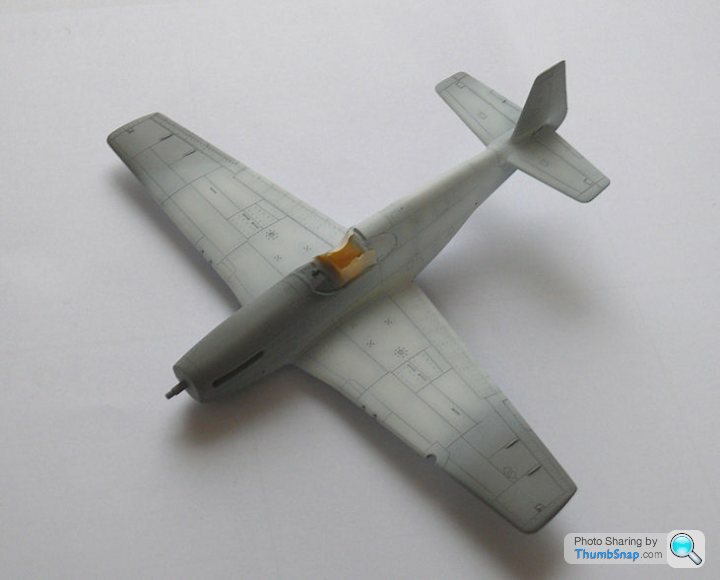
And finally test fitted to the fuselage. BTW the nose chequers came out OK again second time around. The red looks a bit pink, that's becasue it's not yet had a coat of Klear which tends to slightly darken matt colours:
Outline the framing with thin cut Tamiya tape. This allows bending around compound curves:
Fill in with a mosaic of tape squares:
Mask the insides, leaving exposed framing where possible - this allows a matt finish to applied to any prominnet parts of internal exposed framing rather than the gloss overcoat of the canopy itself:
These are the finished items. Not 100% happy with the rear quarters, but the framing on the parts is a tad thick I think, so not much more I can do:
And finally test fitted to the fuselage. BTW the nose chequers came out OK again second time around. The red looks a bit pink, that's becasue it's not yet had a coat of Klear which tends to slightly darken matt colours:

It's all a bit odd. Basically the decals are very thick, yet transparent and brittle, plus they 'grab' the surface, so if I try to move them around, they damage the paint. The upshot is that I've had to repair the fuselage stripes and apply some spare decals - again. The positioning of the decals isn't symmetrical side-to side becasue I can't adjust them. The original aircraft's lettering did look a bit oddly spaced, which also doesn't help with how the model looks!All very odd. The rest of the decals went on OK.
Currently all decals are on, but I've doubled-up some of them with spares where they fit over the stripes to try to get around the transparent issue. It's worked, but a couple of them I have no spares so they look lighter than the rest.
I'll finish it I suppose, but it looks a bit of a balls-up.
Currently all decals are on, but I've doubled-up some of them with spares where they fit over the stripes to try to get around the transparent issue. It's worked, but a couple of them I have no spares so they look lighter than the rest.
I'll finish it I suppose, but it looks a bit of a balls-up.
Gassing Station | Scale Models | Top of Page | What's New | My Stuff