1:250 Scale Paper Model: Fishing Boat "Wuppertal"
Discussion


I've been struggling with assembling the 'lids' of closed boxes, especially when they have compound curves around the edges. With the closure panles there is no way of pre-assembling with tape to get the fit right, then applying glue from the inside (which is what I've been doing). With the forecastle deck I decided to cut access holes in the waterline base through which I could apply glue to the back of the taped join. Not pretty, but it did the job and the bodge will be invisible when mounted on a base(if I get that far!).


The deck box structure is made up of interlocking sections of doubled paper. The paper is printed and cut so that the markings appear on both sides:
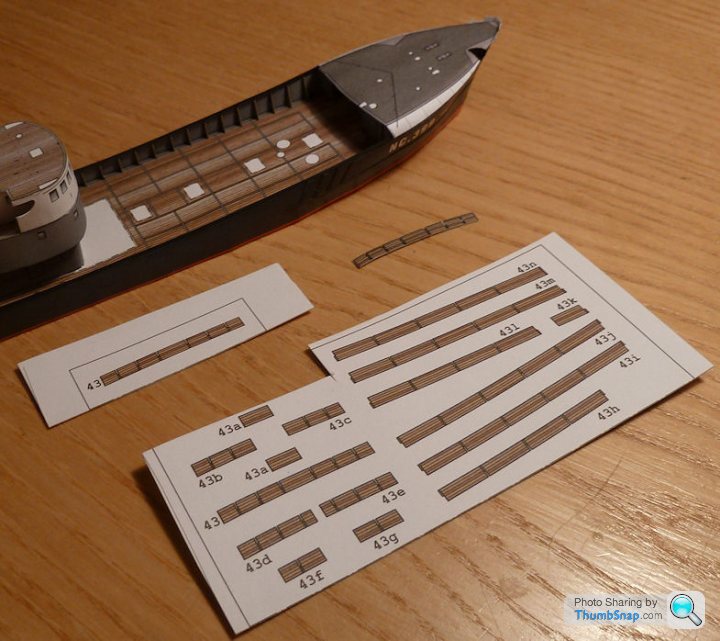
And here they are fitted to the deck:

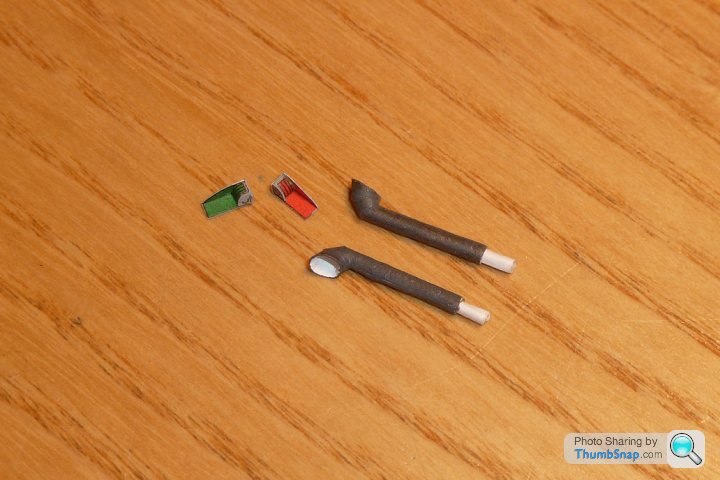
Here are some folded deck boxes and hatches, and the navigation lights for the top of the wheelhouse. Each light is made up of three parts; a reflector, lens and lid:

And here they are fitted to the deck:
Here are some folded deck boxes and hatches, and the navigation lights for the top of the wheelhouse. Each light is made up of three parts; a reflector, lens and lid:
dr_gn said:
Here are some folded deck boxes and hatches, and the navigation lights for the top of the wheelhouse. Each light is made up of three parts; a reflector, lens and lid:
are those reflectors curved?This kit is definitely a step (or 10) ahead of the free stuff i've done so far. Think I might have a look in my LMS today

shortar53 said:
dr_gn said:
Here are some folded deck boxes and hatches, and the navigation lights for the top of the wheelhouse. Each light is made up of three parts; a reflector, lens and lid:
are those reflectors curved?This kit is definitely a step (or 10) ahead of the free stuff i've done so far. Think I might have a look in my LMS today
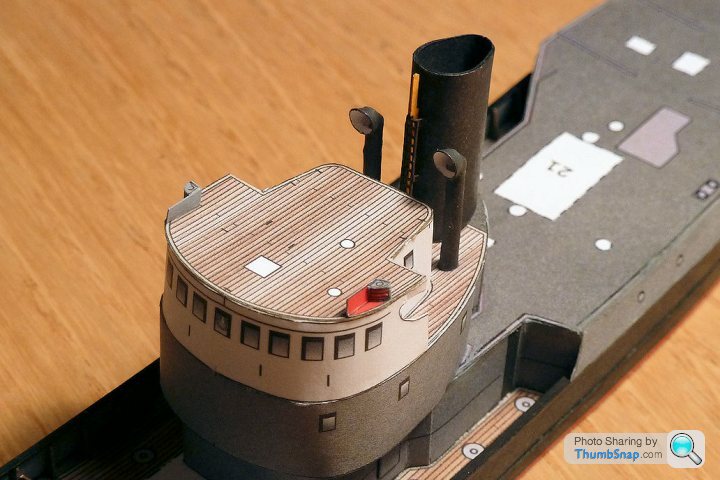
Completed both lights, and built up the wheelhouse ventilators. Each one is made up of three sections which aere rolled into shape and stuck to each other:
I made some spigots out of rolled paper and fitted them into holes drilled into the deck to give a strong join. Here they are in place along with the navigation lights:

I made some spigots out of rolled paper and fitted them into holes drilled into the deck to give a strong join. Here they are in place along with the navigation lights:
Just realised the insides of the ventilators should be red. Never mind I'll do them again later.
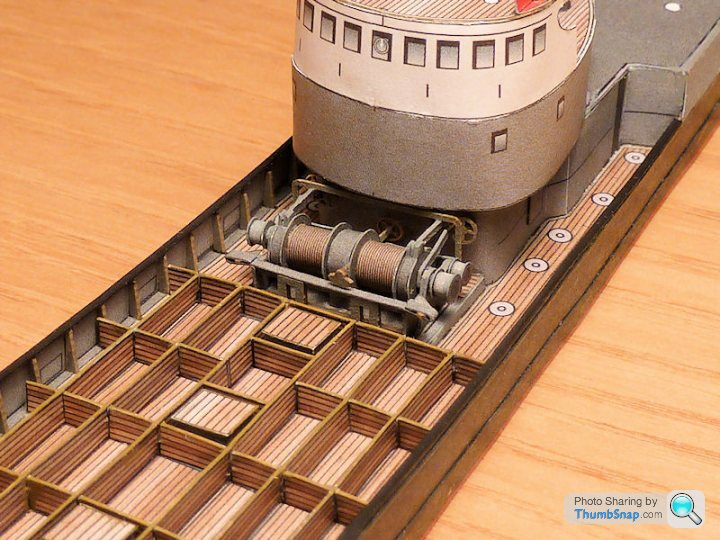
I think these things are called King Pulleys. They fit on the deck and lines go around them from the main winch to - I assume - the nets. Here they are in pieces:

And built up:

Currently building the main winch, which is probably the most complex assembly of the whole model.
I think these things are called King Pulleys. They fit on the deck and lines go around them from the main winch to - I assume - the nets. Here they are in pieces:
And built up:
Currently building the main winch, which is probably the most complex assembly of the whole model.
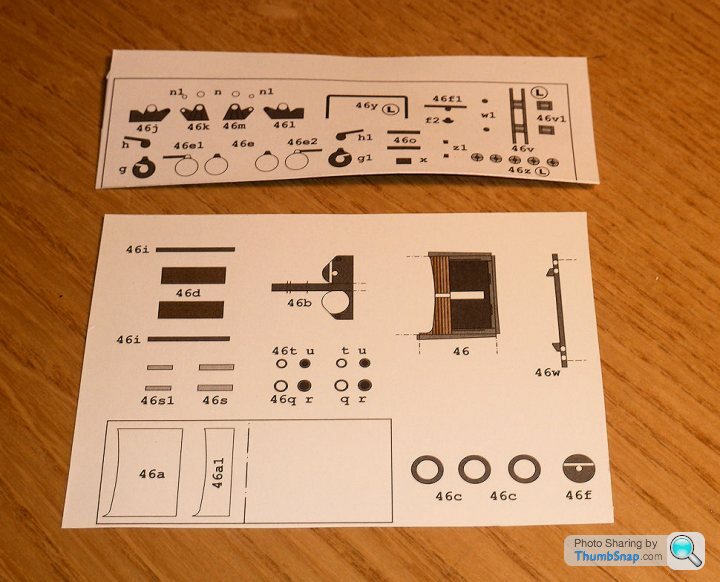
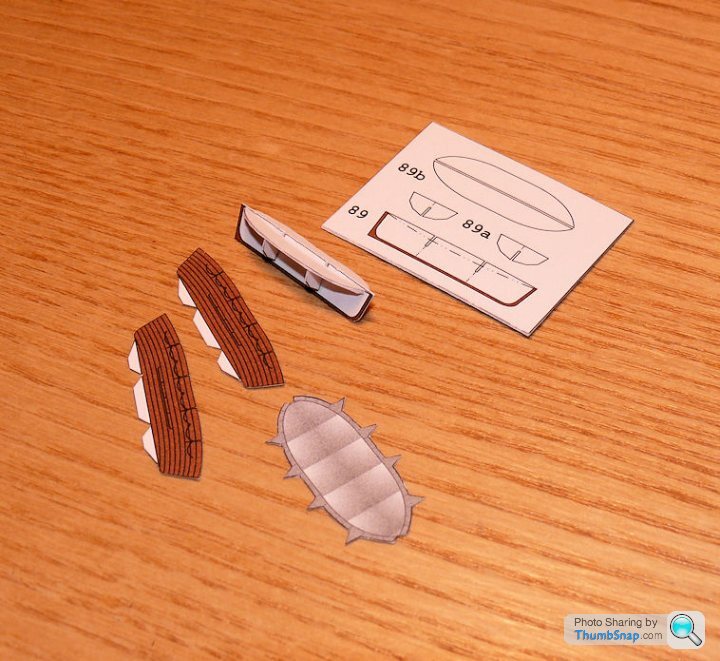
Here are the winch components on the sheet:
Which is doubled, and then the components cut out. Some are tiny:

I've already formed the winch drums into shape and applied glue, just need all edges painting then assembly. There is a bit of laser cut card to add too.
Which is doubled, and then the components cut out. Some are tiny:
I've already formed the winch drums into shape and applied glue, just need all edges painting then assembly. There is a bit of laser cut card to add too.
Edited by dr_gn on Friday 12th September 16:47


Gassing Station | Scale Models | Top of Page | What's New | My Stuff