1:250 Scale Paper Model: Fishing Boat "Wuppertal"
Discussion


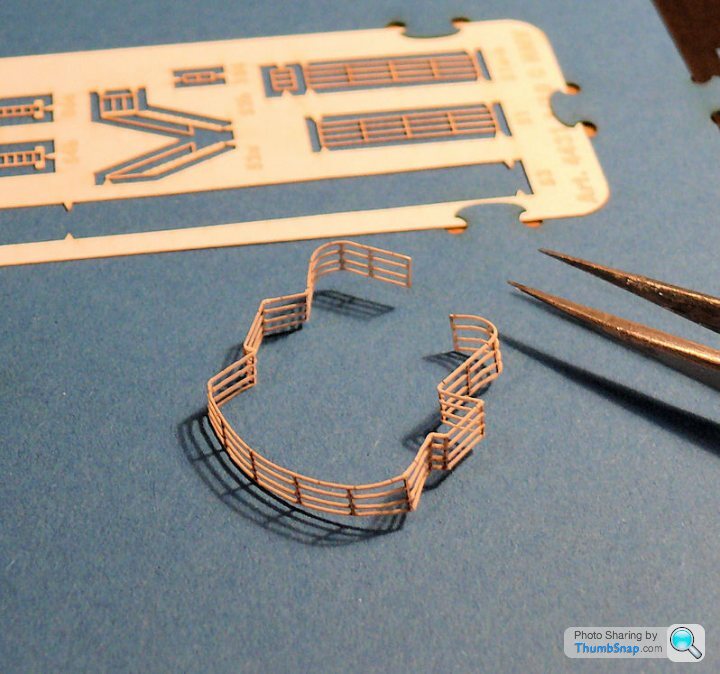
I thought the 0.5mm diameter tubes were fiddly...until I started on the laser-cut railings:
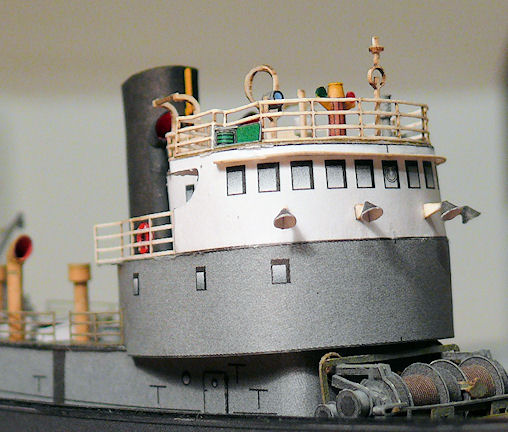
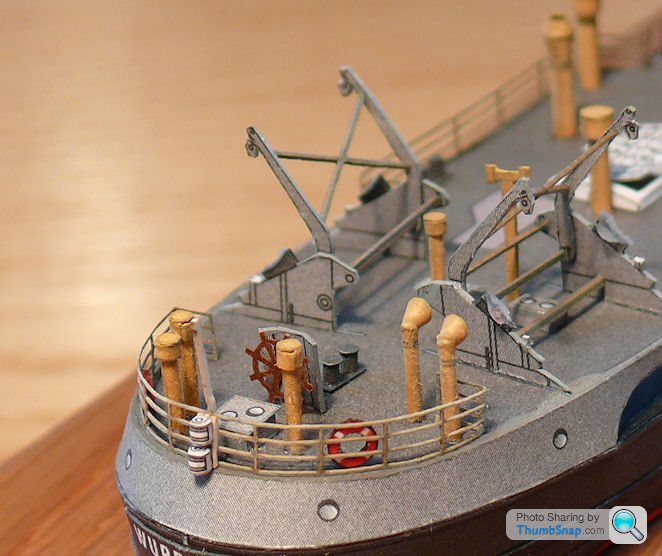
Anyhow, tweezers and diluted PVA made the job easier, and now the top of the wheelhose is almost complete with searchlight and various "things" I don't know waht they are, but they do at least look vaguely like thinkgs I've seen on boats. The curved water deflector above the windows is also now on:
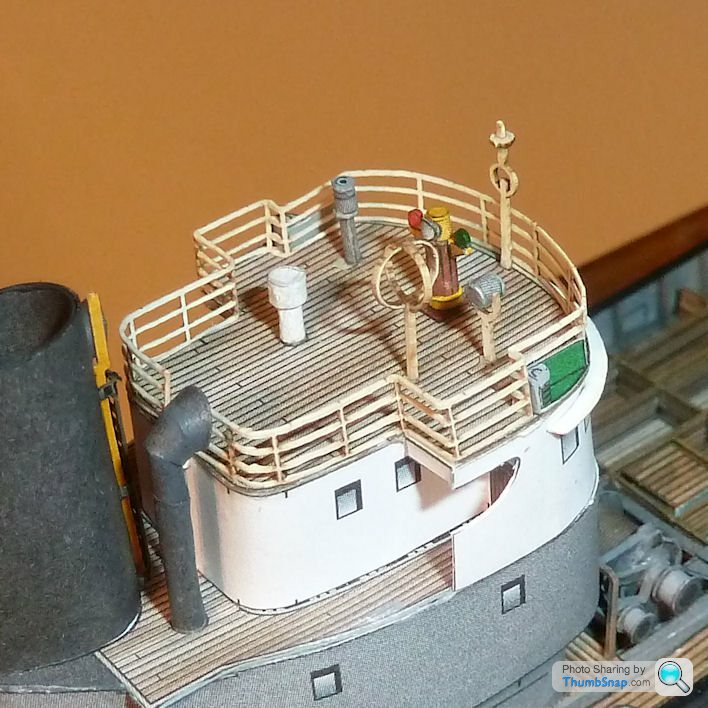
Anyhow, tweezers and diluted PVA made the job easier, and now the top of the wheelhose is almost complete with searchlight and various "things" I don't know waht they are, but they do at least look vaguely like thinkgs I've seen on boats. The curved water deflector above the windows is also now on:

Mutley said:
Doc, I am very impressed, this is an amazing build
I can't imagine getting I would get anywhere close to this point.
Ta!I can't imagine getting I would get anywhere close to this point.
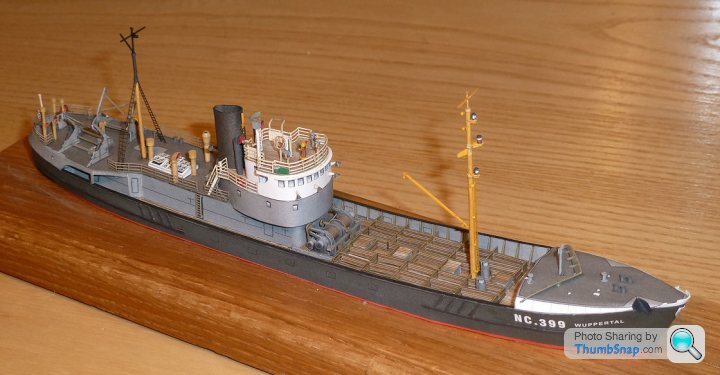
One thing is for sure - whoever designed this kit must have loved their job. Pretty much every tiny part is a perfect fit. The errors you can see are mine - although admittedly when you're not looking at enlarged photos, it looks much better!
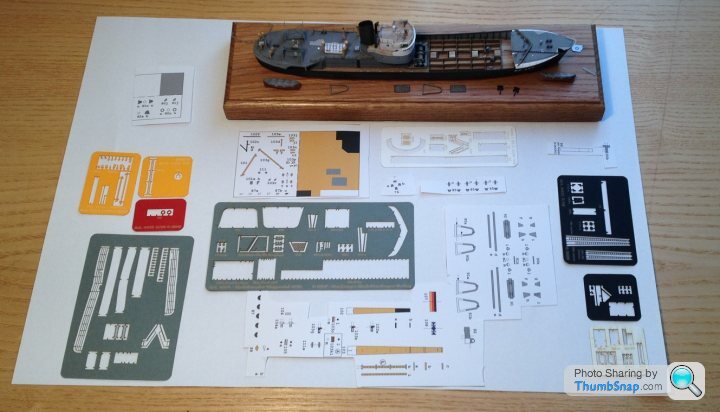
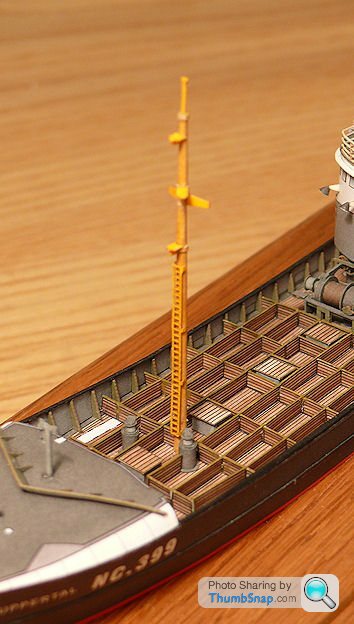
So now the Tornado is finished, I can concentrate on finishing this one too. Having looked at it again, it seems like the vast majority of remaining parts are from the laser-cut card set, so hopefully it shouldn't take too long now:
Assembled the Otter Boards last night, hopefully more progress this evening...
Assembled the Otter Boards last night, hopefully more progress this evening...
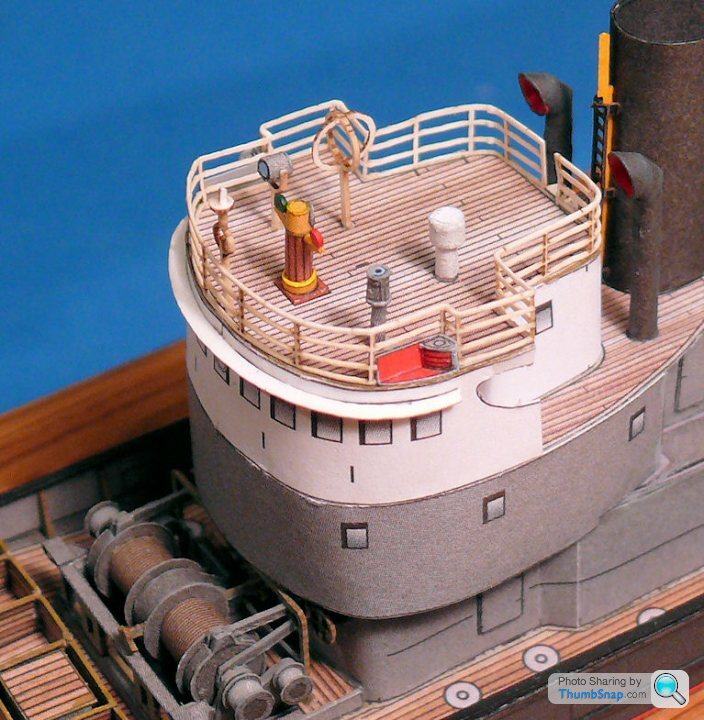
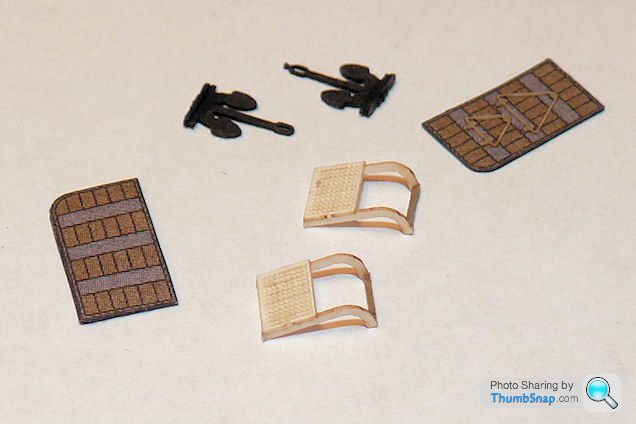
Few more detail bits and pieces assembled:
Also made and fitted the four wheelhouse lamps and brackets:
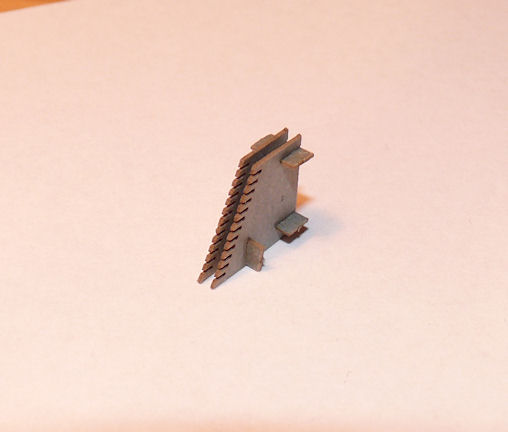
I was puzzling how to make the ladders, since the individual treads are in the laser-cut set. They are only about 1mm x 2mm. Then I noticed this thing on the same sheet, which when assembled, I assume is an alignment jig for the ladders:
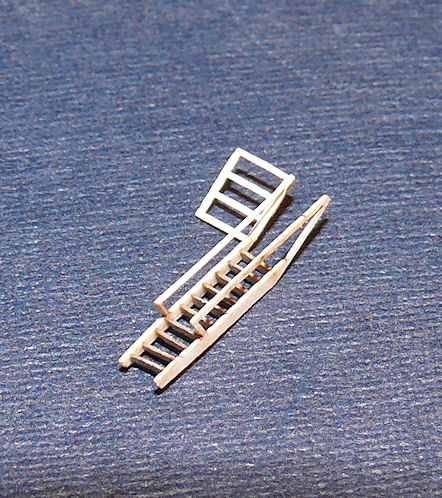
Trouble is, when you put the treads in place, there doesn't appear to be a way of glueing them to the ladder sides without glueing the jig to them too. I thought I could offset the treads to just make the edges stick out, but the jig is too narrow for that. Wierd.

Also made and fitted the four wheelhouse lamps and brackets:
I was puzzling how to make the ladders, since the individual treads are in the laser-cut set. They are only about 1mm x 2mm. Then I noticed this thing on the same sheet, which when assembled, I assume is an alignment jig for the ladders:
Trouble is, when you put the treads in place, there doesn't appear to be a way of glueing them to the ladder sides without glueing the jig to them too. I thought I could offset the treads to just make the edges stick out, but the jig is too narrow for that. Wierd.

Great work! Well done!
One suggestion. I've done several laser cut models for a model steelworks and coal mine I'm building. All the structures I built have extensive railings and stairways which are similar to those railings on your ship.
Over time those delicate card railings are easily damaged and fragile. I've replaced most of mine with etched brass which can be bought from several sources. If you Google for ship model supplies and etched brass. The etches are available in a variety of scales and styles so possibly a very close replacement for the dared ones. Detail is much finer and features such as open tread plate stairs look fantastic
fulgurex said:
Great work! Well done!
One suggestion. I've done several laser cut models for a model steelworks and coal mine I'm building. All the structures I built have extensive railings and stairways which are similar to those railings on your ship.
Over time those delicate card railings are easily damaged and fragile. I've replaced most of mine with etched brass which can be bought from several sources. If you Google for ship model supplies and etched brass. The etches are available in a variety of scales and styles so possibly a very close replacement for the dared ones. Detail is much finer and features such as open tread plate stairs look fantastic
Thanks, I've coated all the laser-cut card railings with diluted pva to stiffen them a bit. I really wanted the model to be as close to 100% paper/card as possible. So far the only deviations to that are plastic/wood internal stiffeners for the masts, and there will be stretched sprue/thread for the rigging. The paper stairs already have individual treads, and apart from section, I doubt the bow and stern railings could be significantly finer in brass.One suggestion. I've done several laser cut models for a model steelworks and coal mine I'm building. All the structures I built have extensive railings and stairways which are similar to those railings on your ship.
Over time those delicate card railings are easily damaged and fragile. I've replaced most of mine with etched brass which can be bought from several sources. If you Google for ship model supplies and etched brass. The etches are available in a variety of scales and styles so possibly a very close replacement for the dared ones. Detail is much finer and features such as open tread plate stairs look fantastic
On the other hand, for my next boat model I've always fancied the 1:72 Airfix RAF Rescue Launch, and will hopefully pick one up from Pembroke Dock Flying Boat Centre next weekend. I will be getting some brass parts for that no doubt.
Gassing Station | Scale Models | Top of Page | What's New | My Stuff