1:48 scale DH Mosquito T.III RR299
Discussion


dr_gn said:
Fiddly scope creep hmmm. Welcome to my world.
Your Tornado is nice though 
I started a 1:48 GR1 which I lost momentum with. I won a competition with a 43Sqn F.3 with dropped flaps and slats using Paragon Designs bits. I decided to do it again in green & grey wraparound GR1 flavour as I remember them as a kid but with more detail, so I have that huge Flightpath etched brass and resin detail & weapons set and again the Paragon Designs flaps and slats. It can be difficult to see how to proceed when projects become over complicated and too many construction sequence and painting conflicts arise. This was one such case. There's a Buccaneer in a similar state. I'll finish them one day.
jamieduff1981 said:
dr_gn said:
Fiddly scope creep hmmm. Welcome to my world.
Your Tornado is nice though I started a 1:48 GR1 which I lost momentum with. I won a competition with a 43Sqn F.3 with dropped flaps and slats using Paragon Designs bits. I decided to do it again in green & grey wraparound GR1 flavour as I remember them as a kid but with more detail, so I have that huge Flightpath etched brass and resin detail & weapons set and again the Paragon Designs flaps and slats. It can be difficult to see how to proceed when projects become over complicated and too many construction sequence and painting conflicts arise. This was one such case. There's a Buccaneer in a similar state. I'll finish them one day.
He'll never start it. I've offered him £20 for the lot but so far no luck...

Raise your offer to £25 
I came back from holiday to some surprise news about a close relative's late-stage cancer diagnosis so the modelling has been biffed again for the most part.
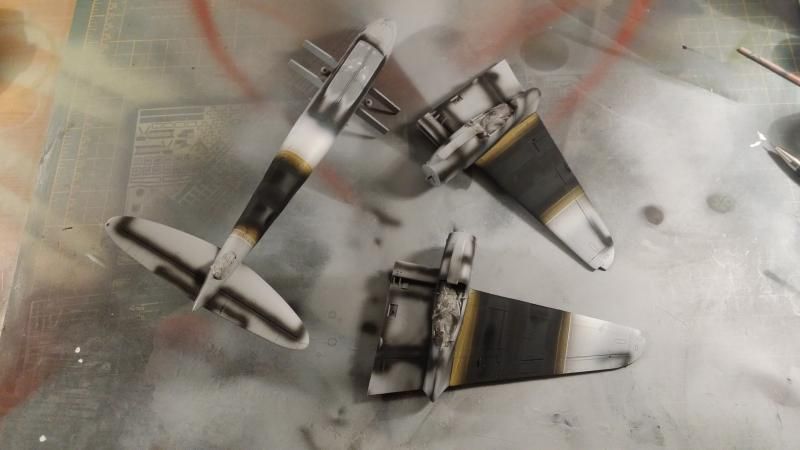
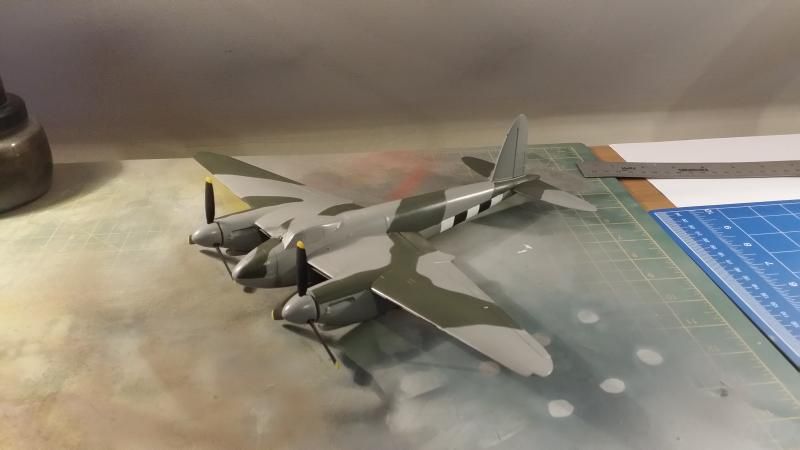
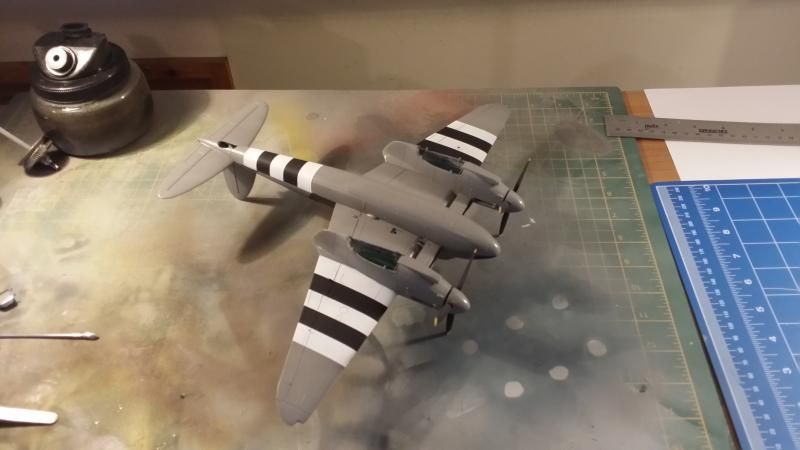
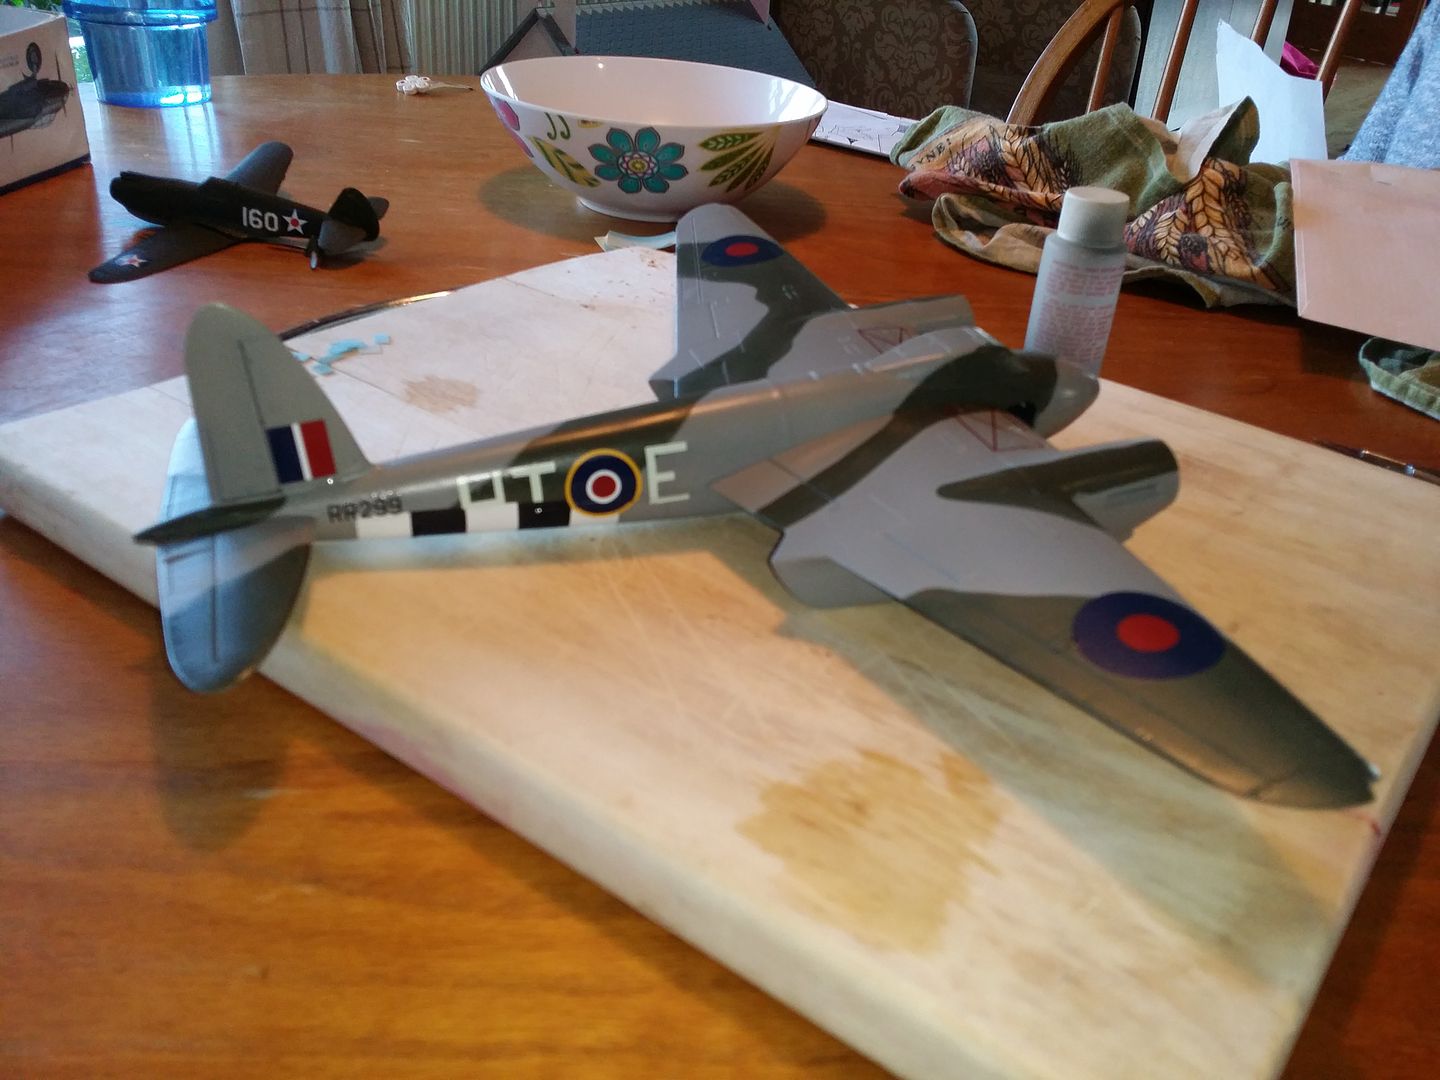
I did opt to start painting however, albeit as and when it suits. It was given a light coat of Tamiya surface primer because I had some handy. I did some very dark grey pre-shading (I think I tend to coat thicker than some as when using medium contrasts I've been unable to see anything at all when finished) around the cowlings and hinge lines. Humbrol enamel white was used to apply the white for the D-Day stripes worn by RR299 which were then masked and overpainted with Humbrol enamel black.
That all dried by around 2130 last night, so I marked out the camoflage pattern worn by RR299 with reference to all the photos I've downloaded from Google Images and applied the dark green, which was an Xtracrylic colour.
I then went to bed. Car parking is ridiculous now that the area around my work is over-run with multiple construction companies erecting new office blocks in very close proximity and coning off the roadsides all around and digging up carparks. In order to drive in 30 miles from the countryside to get parked, beating the obese pie-fuelled tobacco breathers who drive in from locations a 5 minute's walk away, I have the alarm clock set for 04:50, which is a little anti-social in my book! Still that's what the team-funded Nespresso machine is for!
I came back from holiday to some surprise news about a close relative's late-stage cancer diagnosis so the modelling has been biffed again for the most part.
I did opt to start painting however, albeit as and when it suits. It was given a light coat of Tamiya surface primer because I had some handy. I did some very dark grey pre-shading (I think I tend to coat thicker than some as when using medium contrasts I've been unable to see anything at all when finished) around the cowlings and hinge lines. Humbrol enamel white was used to apply the white for the D-Day stripes worn by RR299 which were then masked and overpainted with Humbrol enamel black.
That all dried by around 2130 last night, so I marked out the camoflage pattern worn by RR299 with reference to all the photos I've downloaded from Google Images and applied the dark green, which was an Xtracrylic colour.


I then went to bed. Car parking is ridiculous now that the area around my work is over-run with multiple construction companies erecting new office blocks in very close proximity and coning off the roadsides all around and digging up carparks. In order to drive in 30 miles from the countryside to get parked, beating the obese pie-fuelled tobacco breathers who drive in from locations a 5 minute's walk away, I have the alarm clock set for 04:50, which is a little anti-social in my book!
Still that's what the team-funded Nespresso machine is for! It's looking good. In fact I now want to start my 1:72 version...
Re. preshading: I do it a slightly different way, and I think you'd find it easier at the expense of slightly more time. I always apply the base colour first (rather than preshading the primer), then a high contrast, but fine preshade along the panel lines. Then I overspray the whole lot with base colour until I get a contrast I'm happy with. With your method, you're covering primer to get the base, plus partially covering the preshade as well (since you can't easily be accurate enough with the airbrush to miss the lines with the overcoat). With my method effectively you're only covering preshade. I outlined it here (post #72):
http://www.britmodeller.com/forums/index.php?/topi...
and here (post #51):
http://www.britmodeller.com/forums/index.php?/topi...
Obviously you have to repeat the process for every colour, so it takes longer, but it's much easier to control the results.
Other thing is that the preshade effect varies a lot depending on how dry the overcoated paint is. With acrylics you can flash it with a hairdryer and it will become apparent. With enamels, I don't know how long it would take to see the true effect. Matt varnish also affects things to a lesser degree.
Cheers.
Edited by dr_gn on Thursday 16th October 11:24
This model has suffered a series of setbacks in painting.
I regret choosing acrylics for this. In my break from modelling I'd forgotten just how badly I get on with them.
I made a bit of an impulse purchase and bought my favourite enamel paint brand a week ago and have been busy (well, my wife has) building a webstore and getting other stuff set up.
I may strip the Mossie back and start over with enamel.
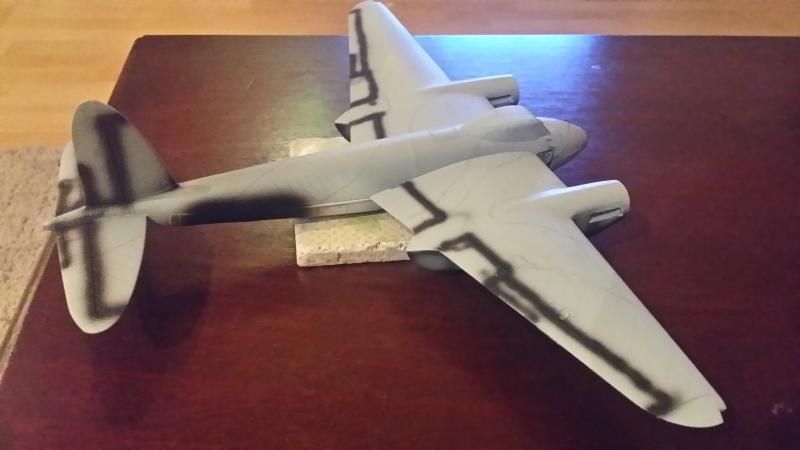
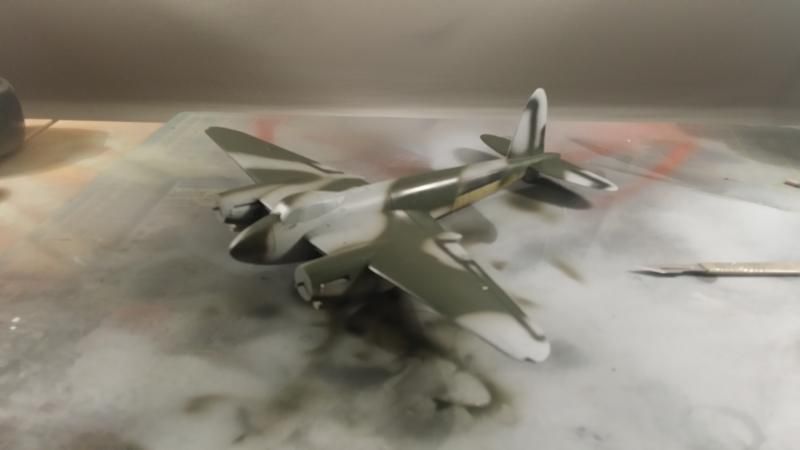
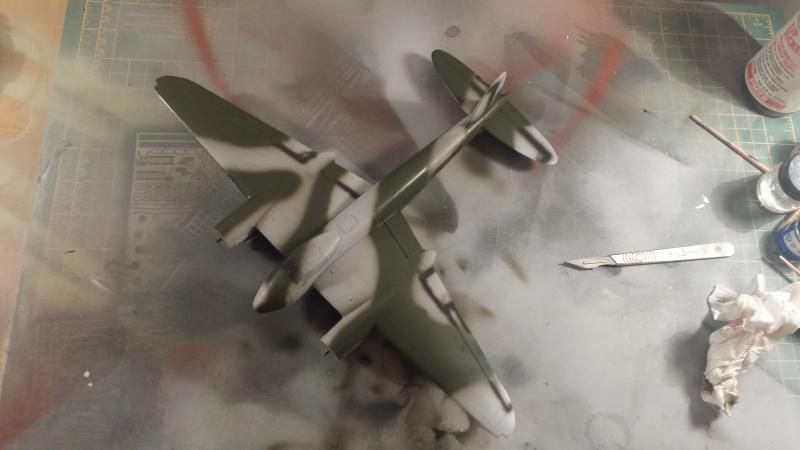
At first, yes. I sprayed the Dark Green first. It went on fine but lifted when masked. After mucho rubbing down I got a decent and robust coat on. Today I masked it up again with blu tac and Tamiya tape and sprayed the Medium Sea Grey. It got loads of mixing, even using my new electric mixer gadget. Consistency seemed spot on too but it just spat out of the airbrush, generally tried to clog and looks very uneven on the model.
I may give it a flat back, throw away that particular pot of paint and flash another coat from another pot over before getting too drastic!
I may give it a flat back, throw away that particular pot of paint and flash another coat from another pot over before getting too drastic!
jamieduff1981 said:
At first, yes. I sprayed the Dark Green first. It went on fine but lifted when masked. After mucho rubbing down I got a decent and robust coat on. Today I masked it up again with blu tac and Tamiya tape and sprayed the Medium Sea Grey. It got loads of mixing, even using my new electric mixer gadget. Consistency seemed spot on too but it just spat out of the airbrush, generally tried to clog and looks very uneven on the model.
I may give it a flat back, throw away that particular pot of paint and flash another coat from another pot over before getting too drastic!
FWIW I've started using flow improver (or retarder medium) with Vallejo acrylics. Helps prevent clogging a lot. I also usually give the surface a quick abrade with some micromesh to give a key and remove any grease.I may give it a flat back, throw away that particular pot of paint and flash another coat from another pot over before getting too drastic!
Sometimes my airbrush work goes fine, other times it's having none of it. I suppose it's preparation/ambient conditions, but it seems random and is demoralising especially when doing something "easy".
I hope you get it sorted - it's unfortuntae this problem usually happens after a lot of work has already been done on a model.
Can I ask what brand of flow improver you're using? I've never used any. It would be interesting to try though.
My modelling has taken a naval turn with a 1/350 collection starting. I have HMS King George V in 1941 fit on the go with a Pontos Models detail set which is lovely. I also acquired Hood recently, and have been given Bismarck and Admiral Graf Spee. I'm writing this in a hotel 10mins from Wonderland Models where I picked up an ex-Accurate Miniatures Dauntless and I may run back and spend some more before they close!
I have 26,000 tins of enamel in the house so my usual excuse of not having the right colour handy is no longer valid - so I've changed to not having detail sets
I'm using Vallejo retarder medium, with Vallejo Air and Model Colours (both of which need additional thinning). I've heard good things about Windsor & Newton flow improver, but haven't tried it yet.
I'm building a paper model boat at the moment, it won't be my last. I'm also going to get the Airfix RAF rescue launch next year too, and try to refine it a bit. I do like boat/ship models.
I'm building a paper model boat at the moment, it won't be my last. I'm also going to get the Airfix RAF rescue launch next year too, and try to refine it a bit. I do like boat/ship models.
tvrtuscans said:
Not hi jacking the thread...but...what's the view on the 1/24 Airfix Mosquito just appeared in the 2015 catalogue.....?
In terms of detail it has more in common with the old 1:24 Airfix range (i.e it's relatively crude). If you specifically want a huge Mosquito, then there is little choice. If you just want a good large scale WW2 aircraft kit, then I think the Airfix 1:24 Typhoon is better value.dr_gn said:
tvrtuscans said:
Not hi jacking the thread...but...what's the view on the 1/24 Airfix Mosquito just appeared in the 2015 catalogue.....?
In terms of detail it has more in common with the old 1:24 Airfix range (i.e it's relatively crude). If you specifically want a huge Mosquito, then there is little choice. If you just want a good large scale WW2 aircraft kit, then I think the Airfix 1:24 Typhoon is better value.The stash increased a tad more at Christmas:
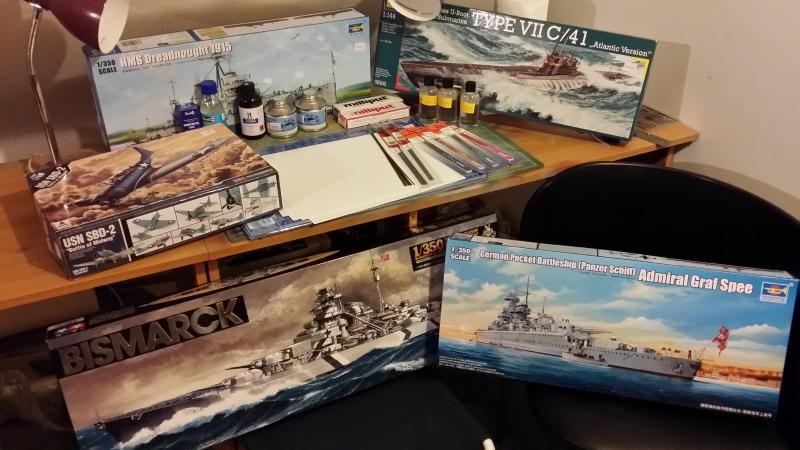
These are welcome additions which expand my collection of warships to 250% the current size. Here's an OT pic of HMS King George V that I'm currently working on:

HMS Hood has been mounted and will be started properly soon. I have to research who makes the best bits for the new ones at present.
Anyway - I think I've retrieved the situation with the Mosquito and am happy to move forwards with it now.
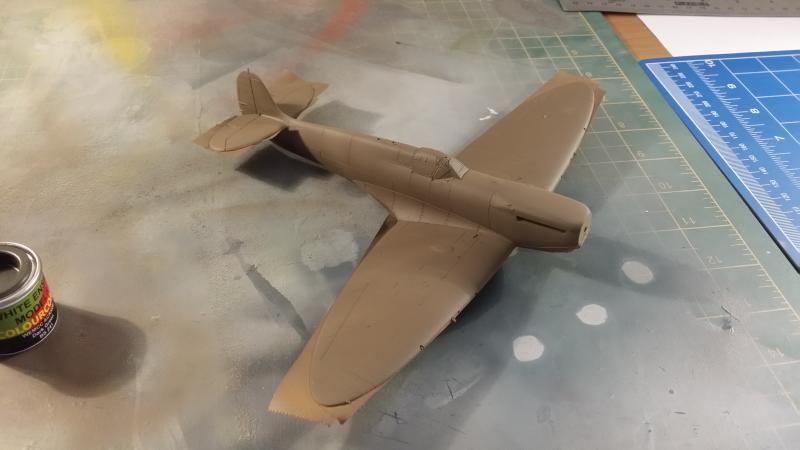
I've gone back to enamels which I prefer on this Spitfire Mk1A I've built with my daughter. I find them so much easier to use.

These are welcome additions which expand my collection of warships to 250% the current size. Here's an OT pic of HMS King George V that I'm currently working on:
HMS Hood has been mounted and will be started properly soon. I have to research who makes the best bits for the new ones at present.
Anyway - I think I've retrieved the situation with the Mosquito and am happy to move forwards with it now.


I've gone back to enamels which I prefer on this Spitfire Mk1A I've built with my daughter. I find them so much easier to use.

Edited by jamieduff1981 on Thursday 1st January 16:22
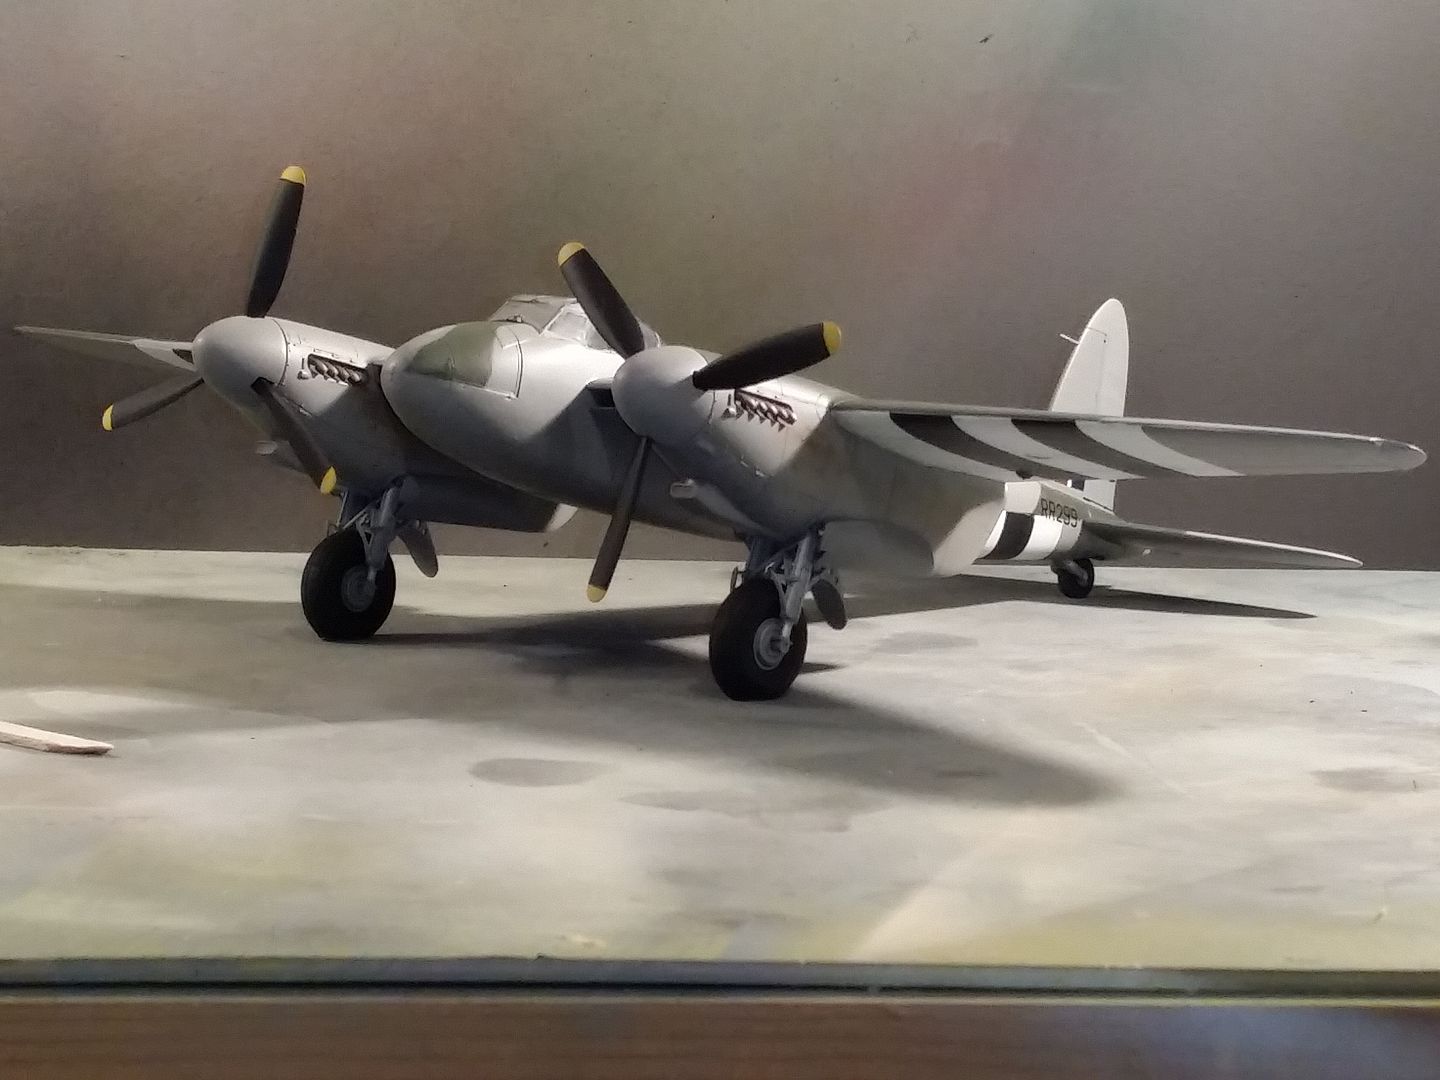
The Mosquito became a Shelf of Doom resident for a while, mostly due to paint problems.
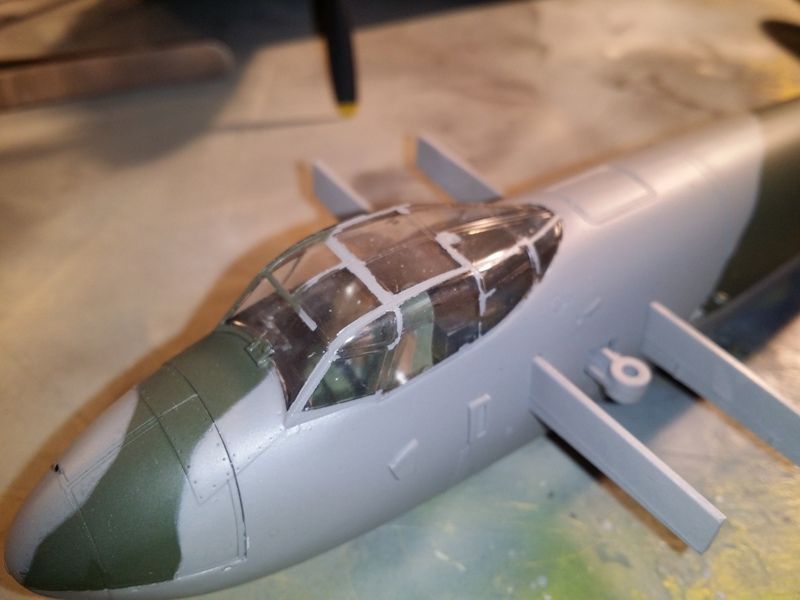
I decided to crack on and finish it, just accepting the poor quality paint. It continues to vex me though - the lovely pre-cut canopy masks were wasted since all the acrylic paint peeled and flaked off the canopy frames when the masking was removed. Never again ...
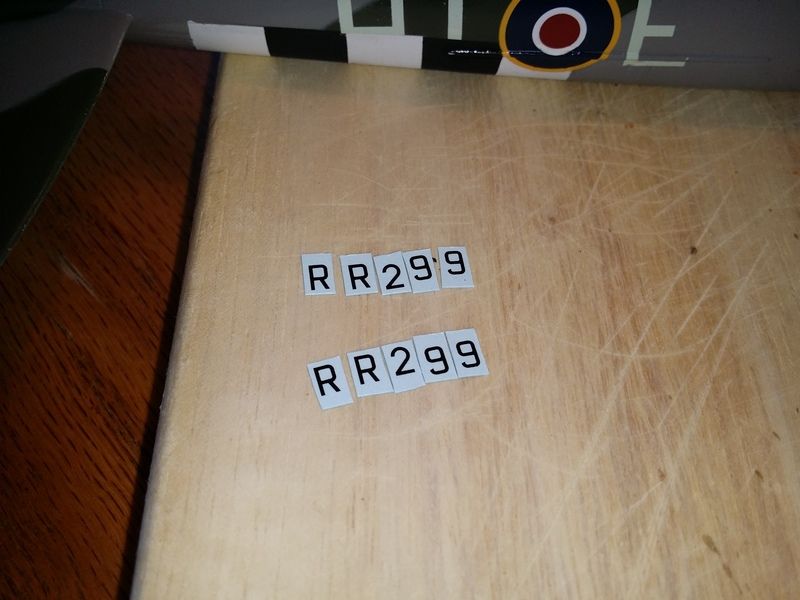
The decals are part Tamiya (although in retrospect the Tamiya roundel blue is far too dark. I had to touch up the roundel where it cracked when Microsol'd over the strengthening strip above the battery door on the fuselage and I had to mix 2/3 roundel blue (which I know is accurate) with 1/3 night bomber black to get a dark enough blue to match the decal) and part Xtradecal (i.e. the lettering and numbering).
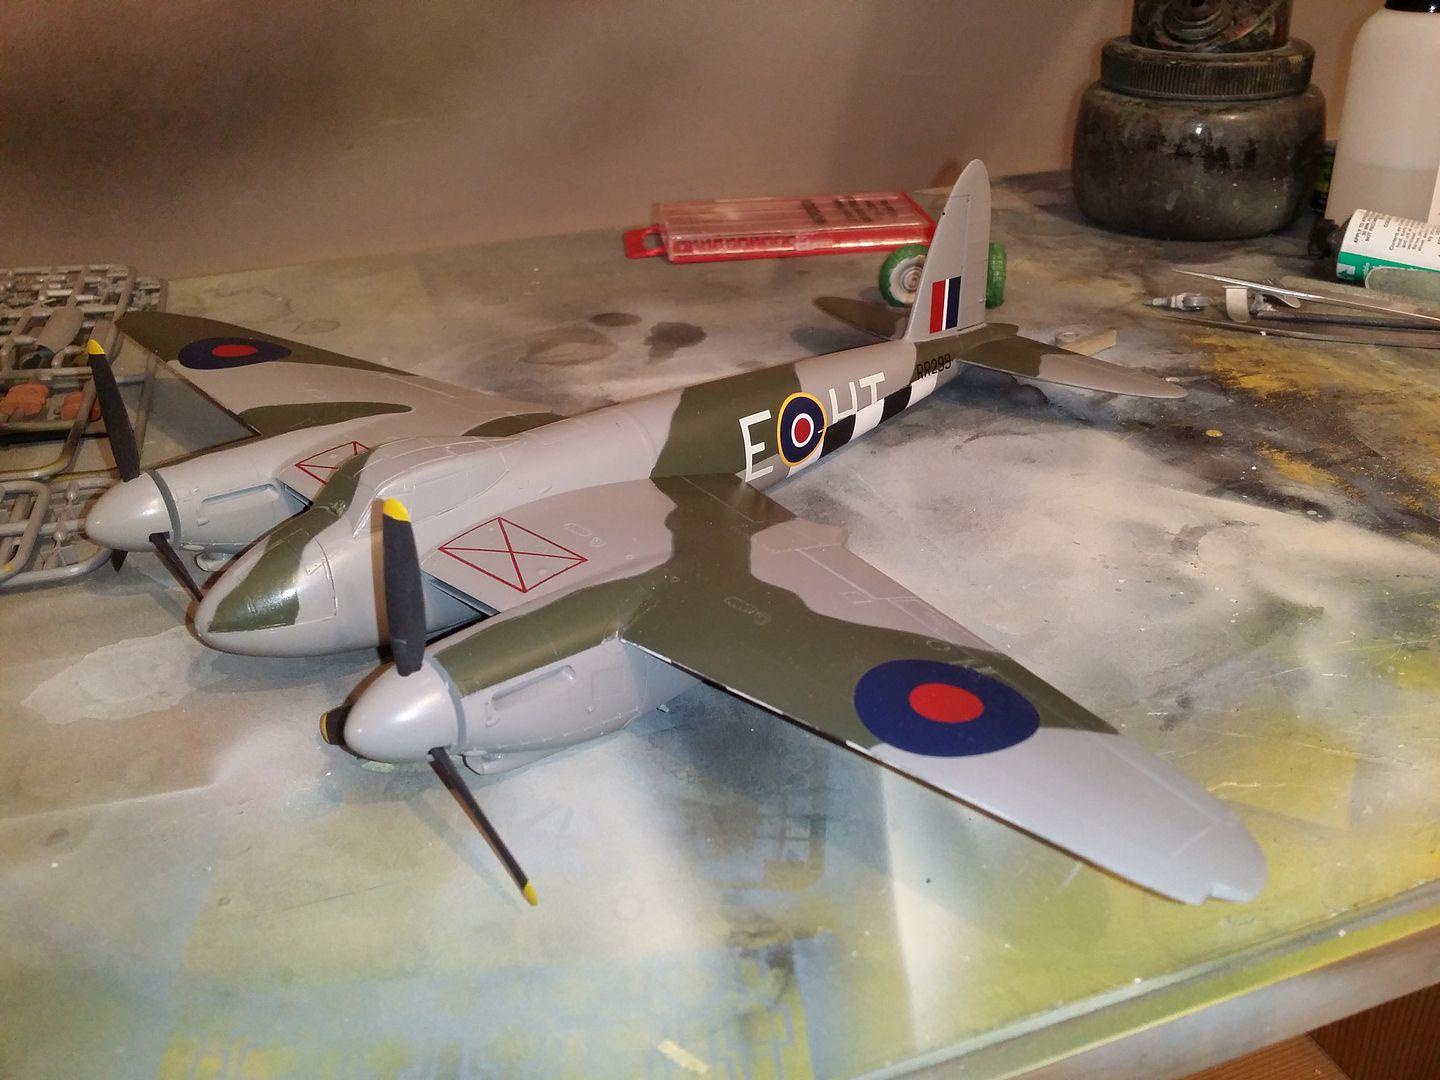
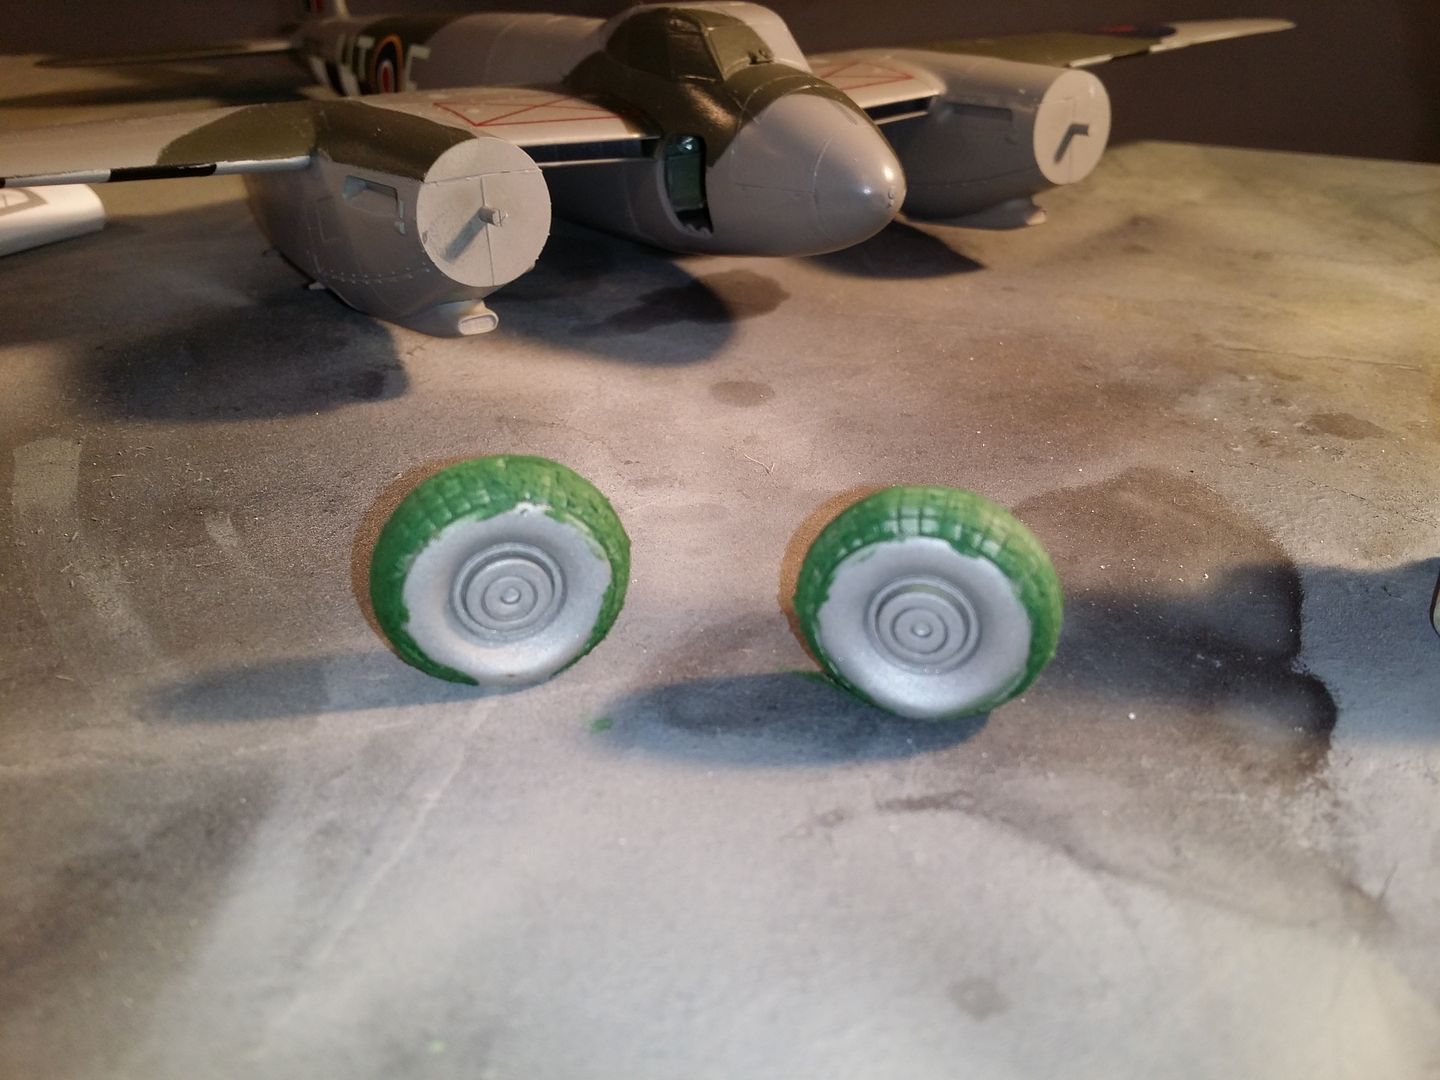
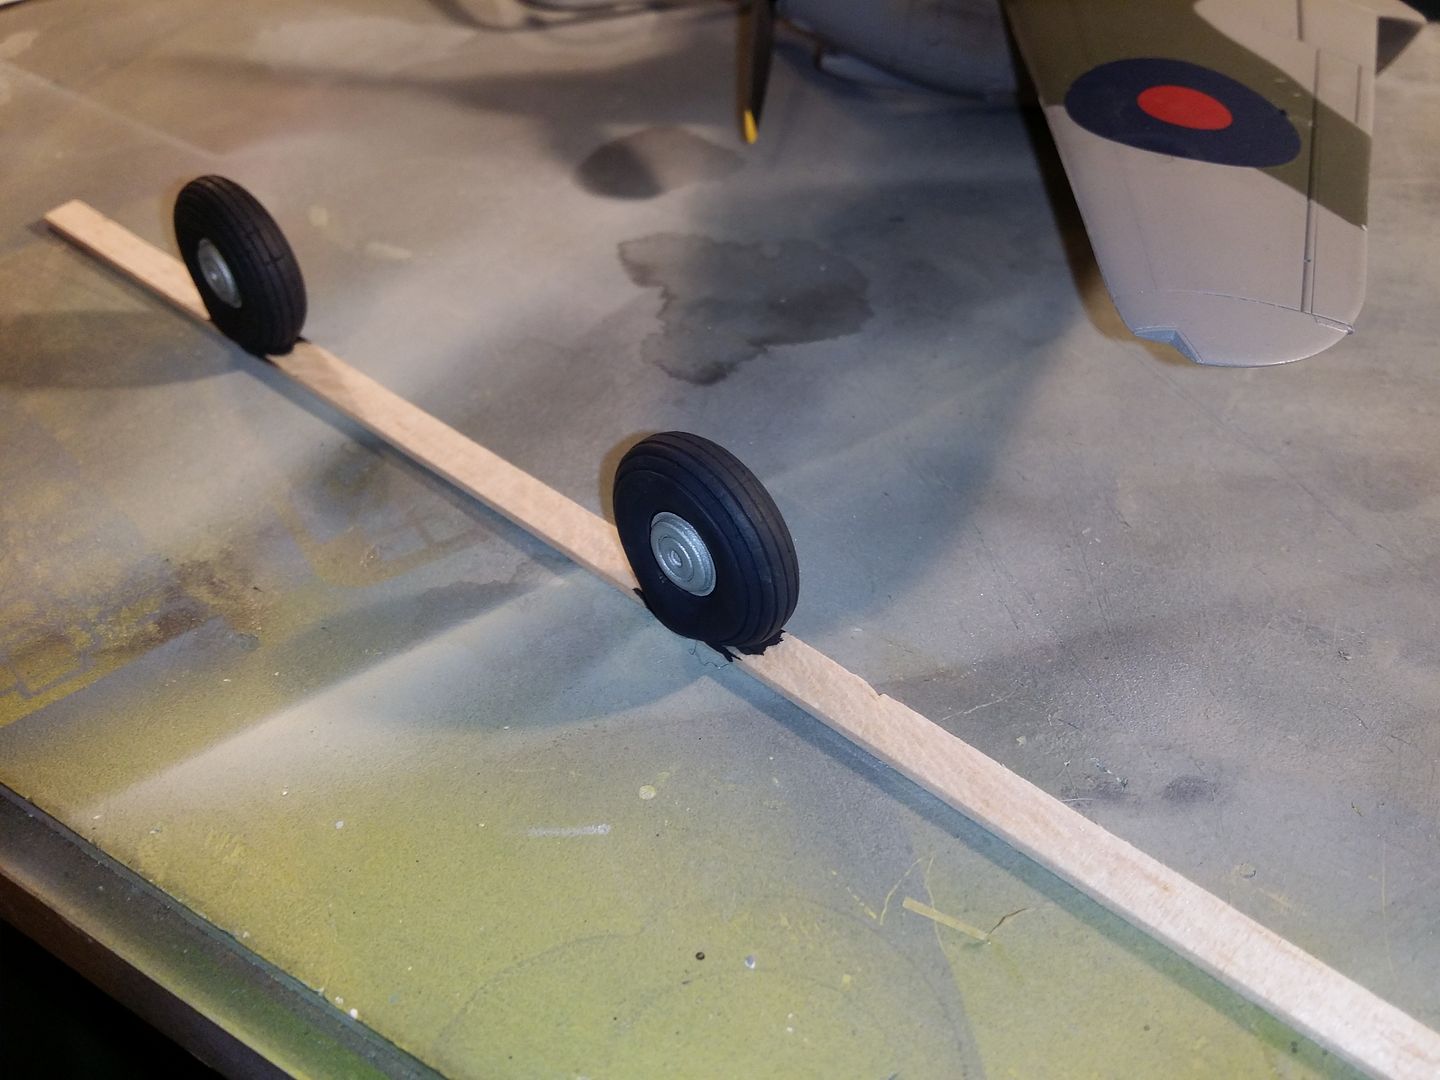
The wartime tyres had block pattern treads for operating from grass. RR299 being preserved aircraft operated by BAe from hard runways (but before the modern day preference for originality became de rigour - e.g. it had a black cockpit in line with very late war / post war RAF aircraft) had more circumferential treads only like a modern airliner. I filled the treads of some weighted resin wheels with dual brake drums and rescribed:
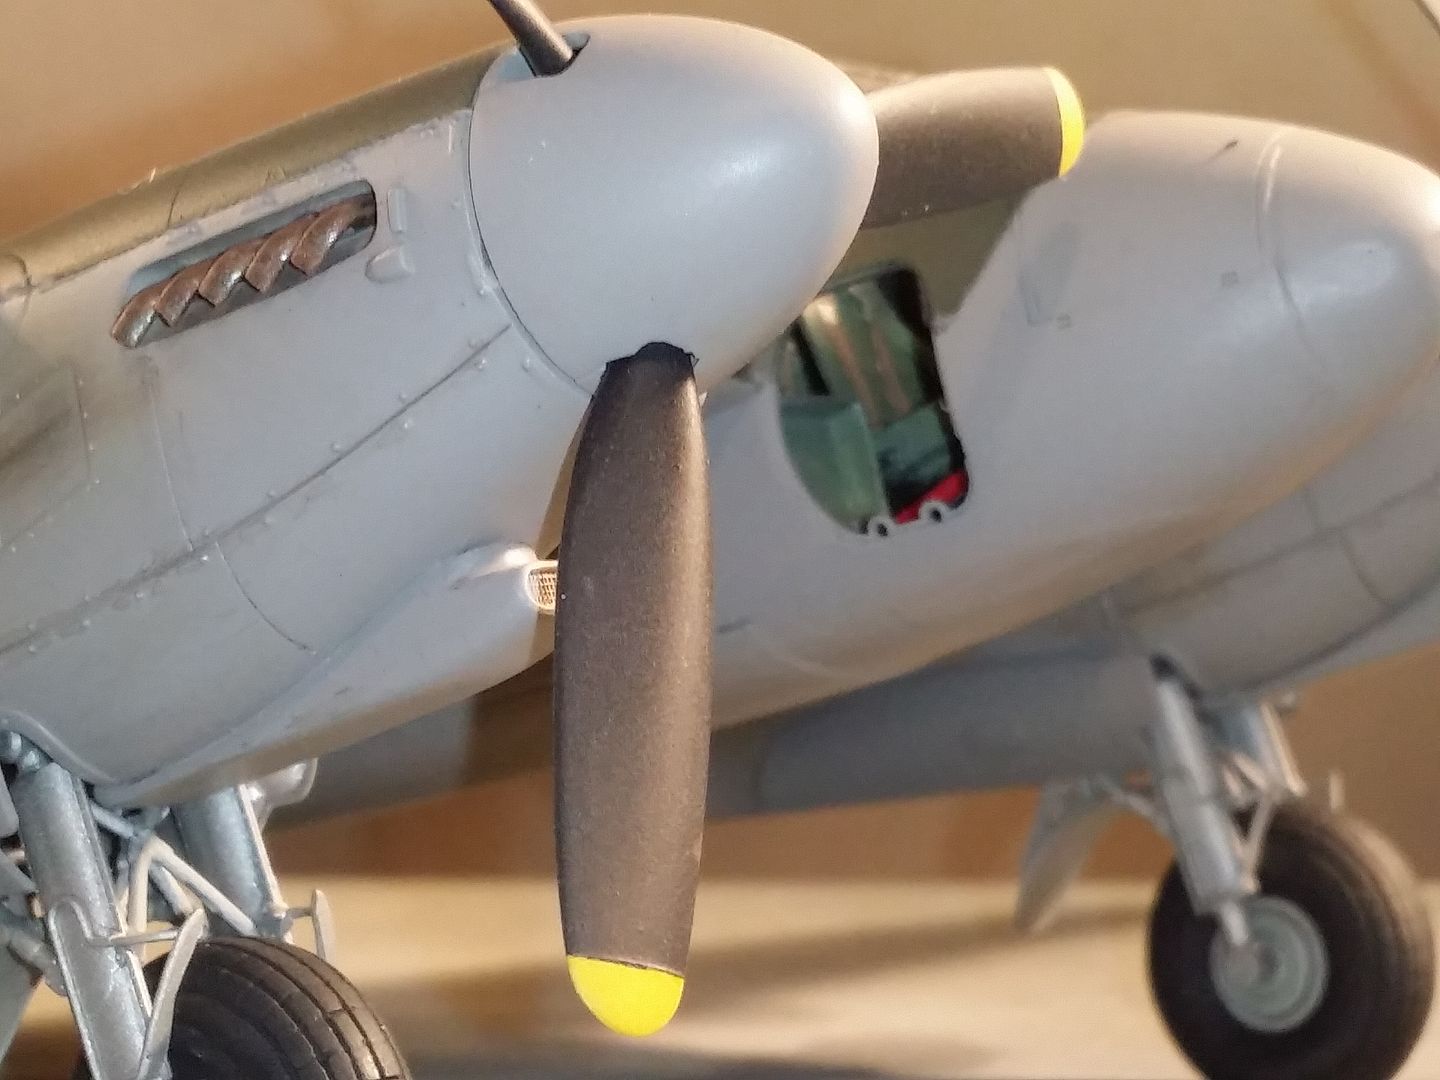
The exhaust stacks were replaced with Quickboost resin items which I had, and I applied some light exhaust staining visible on most reference photos (again common with well looked after preserved aircraft that transit distances to airshows over a season).
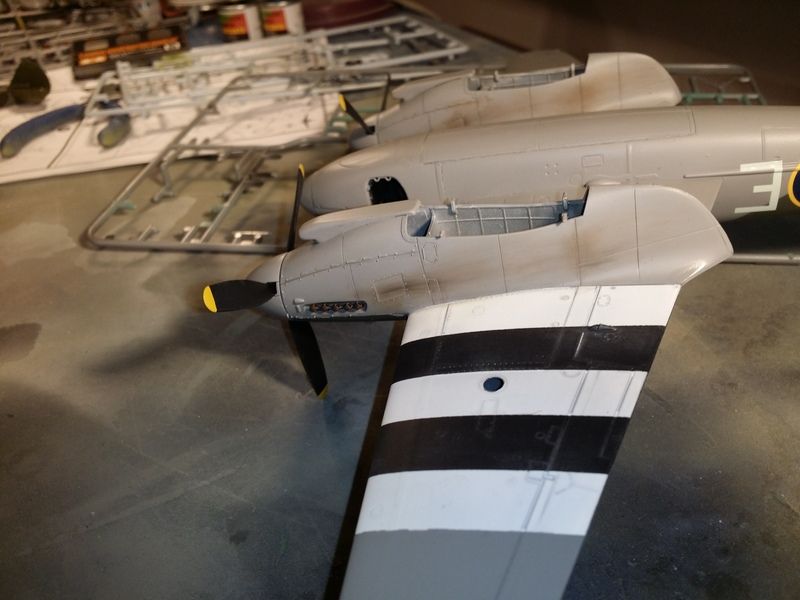
The undercarriage was assembled and the wings finally glued on.
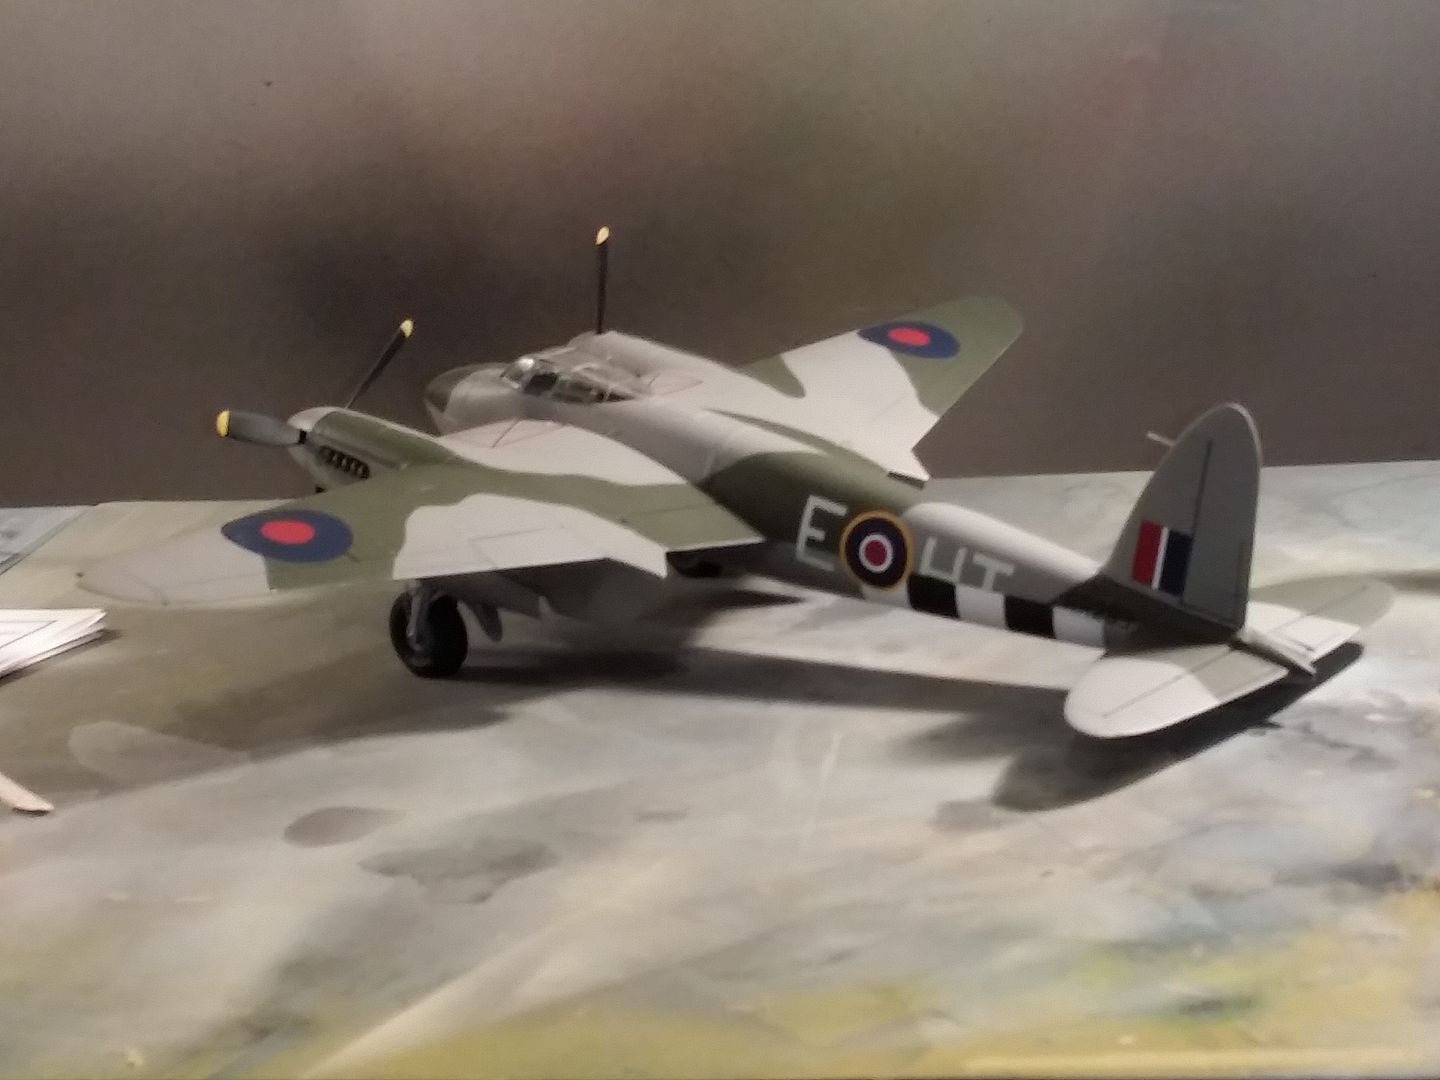

It still needs some finishing touches, plus of course that mess of a canopy sorted out.
I decided to crack on and finish it, just accepting the poor quality paint. It continues to vex me though - the lovely pre-cut canopy masks were wasted since all the acrylic paint peeled and flaked off the canopy frames when the masking was removed. Never again ...

The decals are part Tamiya (although in retrospect the Tamiya roundel blue is far too dark. I had to touch up the roundel where it cracked when Microsol'd over the strengthening strip above the battery door on the fuselage and I had to mix 2/3 roundel blue (which I know is accurate) with 1/3 night bomber black to get a dark enough blue to match the decal) and part Xtradecal (i.e. the lettering and numbering).


The wartime tyres had block pattern treads for operating from grass. RR299 being preserved aircraft operated by BAe from hard runways (but before the modern day preference for originality became de rigour - e.g. it had a black cockpit in line with very late war / post war RAF aircraft) had more circumferential treads only like a modern airliner. I filled the treads of some weighted resin wheels with dual brake drums and rescribed:


The exhaust stacks were replaced with Quickboost resin items which I had, and I applied some light exhaust staining visible on most reference photos (again common with well looked after preserved aircraft that transit distances to airshows over a season).

The undercarriage was assembled and the wings finally glued on.


It still needs some finishing touches, plus of course that mess of a canopy sorted out.
Gassing Station | Scale Models | Top of Page | What's New | My Stuff