Airfix 1:72 Hawker Hurricane Mk.1 (fabric wing)
Discussion


Since any chance of this being a quick build evaporated some time ago, I decided to correct the wings further and add some of the missing panel lines, and cut out the wingtip light apertures ready for adding some scratchbuilt covers:
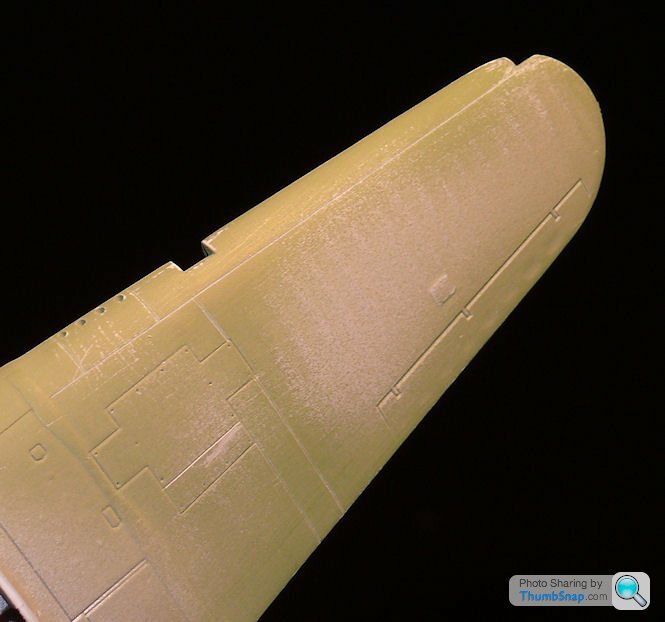
This invariably results in errors that in turn need correcting, in this case the scribed lines were slightly out of place, so were filled with Mr.Surfacer before flatting back and trying again:
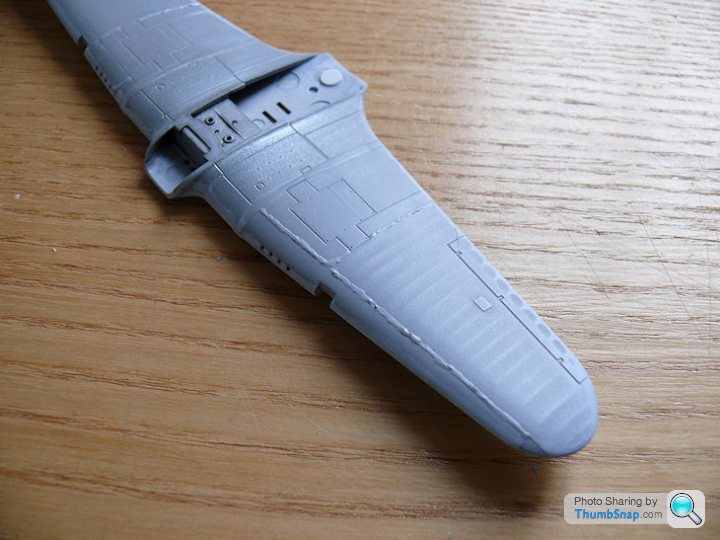
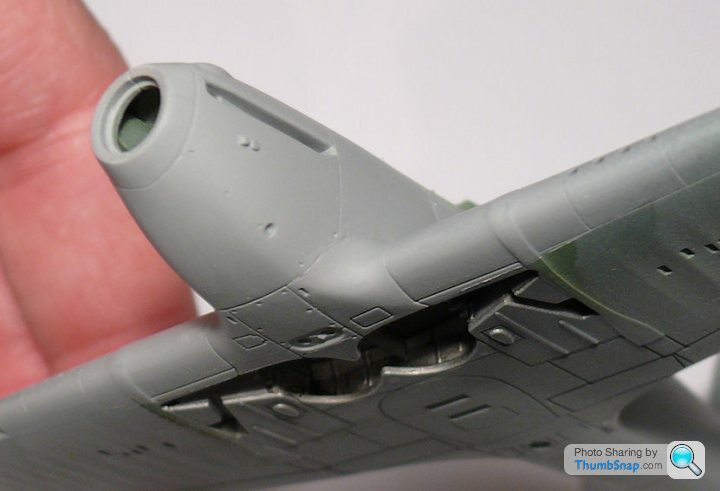
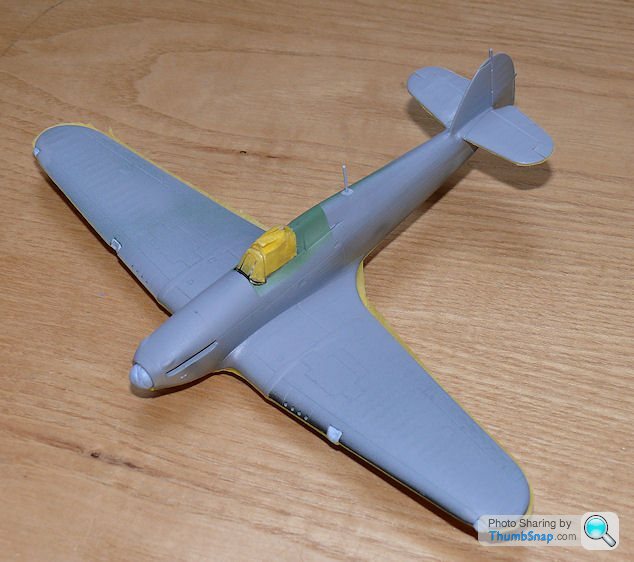
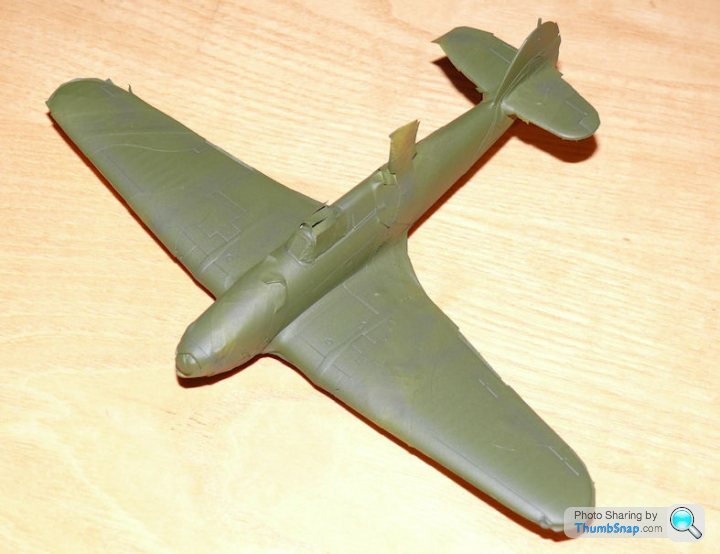
Finished that and fitted the wing. Or tried to - the fit to the fuselage is poor, particularly at the front, requiring a significantamount of sanding and filling the resulting steps:

Anyway, the wing is finally fitted and filled. the seams just need a final rubbing over with micromesh:

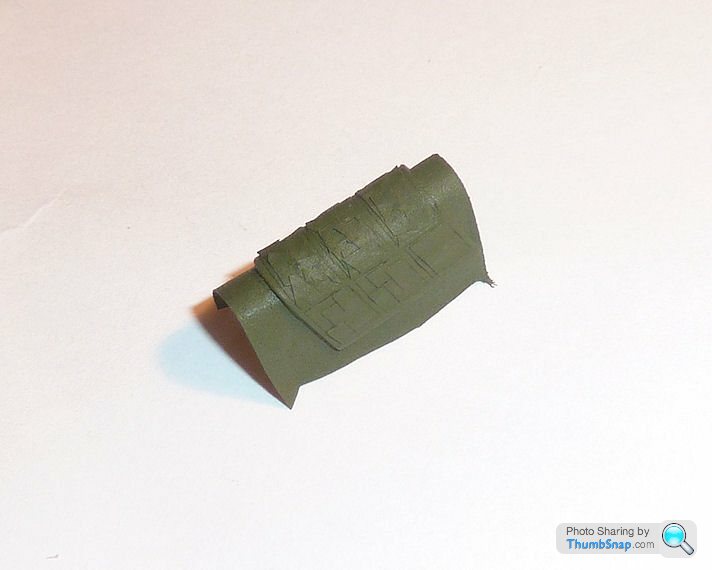
Engine cover still needs more filler to get rid of the remaining seam.
This invariably results in errors that in turn need correcting, in this case the scribed lines were slightly out of place, so were filled with Mr.Surfacer before flatting back and trying again:
Finished that and fitted the wing. Or tried to - the fit to the fuselage is poor, particularly at the front, requiring a significantamount of sanding and filling the resulting steps:
Anyway, the wing is finally fitted and filled. the seams just need a final rubbing over with micromesh:
Engine cover still needs more filler to get rid of the remaining seam.
Edited by dr_gn on Monday 6th October 23:35
shortar53 said:
Once again, your attention to detail is stunning!
you know it's never just going to be OOB, don't you? even when you start it as an OOB build
Thanks, but many of my models are OOB. This was was meant to be too, as a quick build while I'm fiddling with the Tornado. The scribing isn't really anything more than adding detail that should have been included by Airfix (although at least doing it myself has resulted in decent line widths), and the fit issues were unexpected for a 2014 new tool kit. If I'd have known the delay in getting a replacement canopy (still not arrived), I'd probably have gone with an open vacform version and added a photo etch set to the cockpit, but there you go. you know it's never just going to be OOB, don't you? even when you start it as an OOB build
johnS2000 said:
I've just got back from the Hornby Centre in Margate .
Managed to get a 1:72 Typhoon for £3-50 ,a FRS1 SeaHarrier 1:72 for a fiver and a 1:72 Spitfire /Messersmit 110 gift set for a tenner all look like new tooling .
So am hoping that Airfix kits are a bit better than previous posts depict.
They are what they are, the Hurricane is one of their latest offerings, and despite positive "in-box" reviews, IMO is a poor effort on several levels for a brand new kit if you actually build it. If you're a beginner and/or not looking for refinement then they're fine. Or, as I was with the Hurricane if you want a specific variant of aircraft that's unavailable elsewhere then you may have to put some extra work in.Managed to get a 1:72 Typhoon for £3-50 ,a FRS1 SeaHarrier 1:72 for a fiver and a 1:72 Spitfire /Messersmit 110 gift set for a tenner all look like new tooling .
So am hoping that Airfix kits are a bit better than previous posts depict.
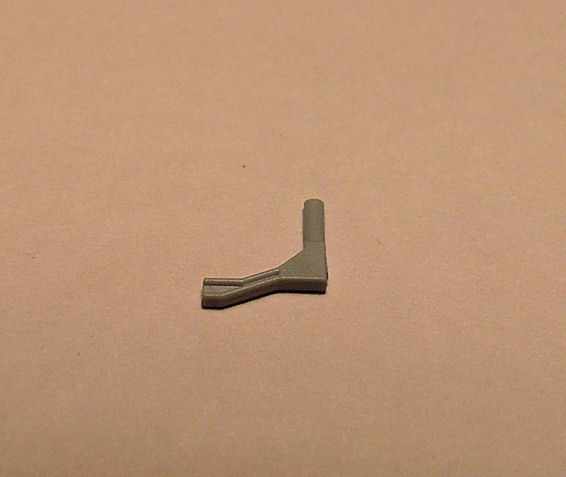
Sounds like I could be in for a long wait for a replacement canopy, so I messed about making a radiator duct stay out of a brass tube offcut:

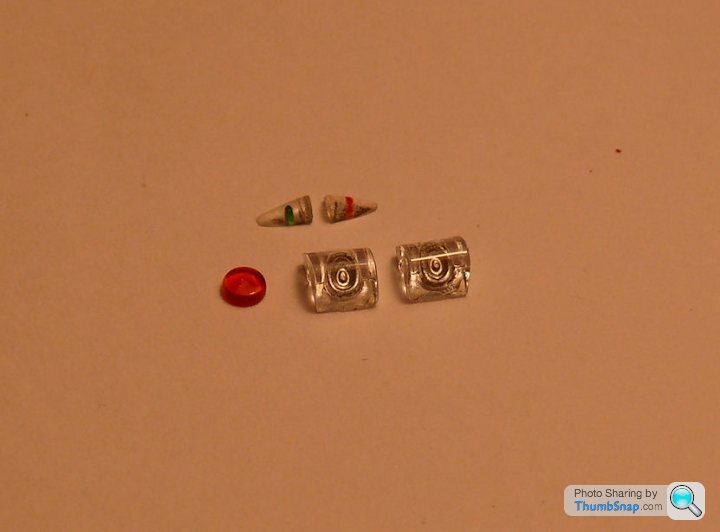
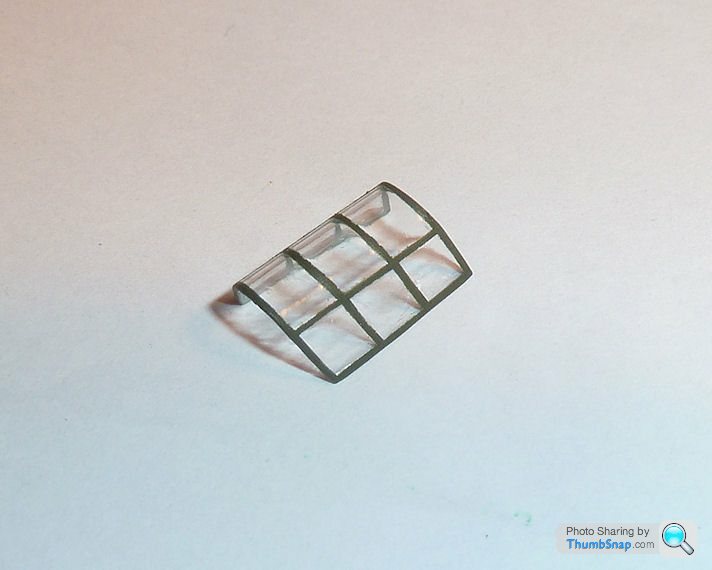
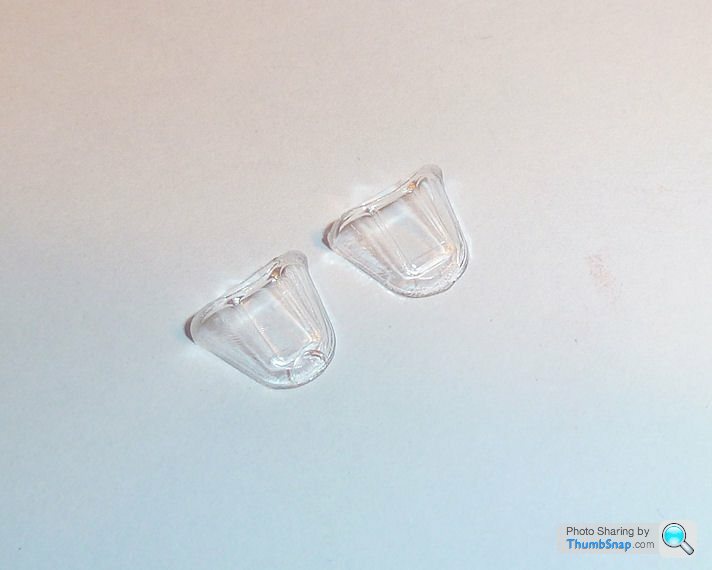
Also continued making the the wingtip lights by cutting out the plastic and pva'ing some clear sprue offcuts into the notches:
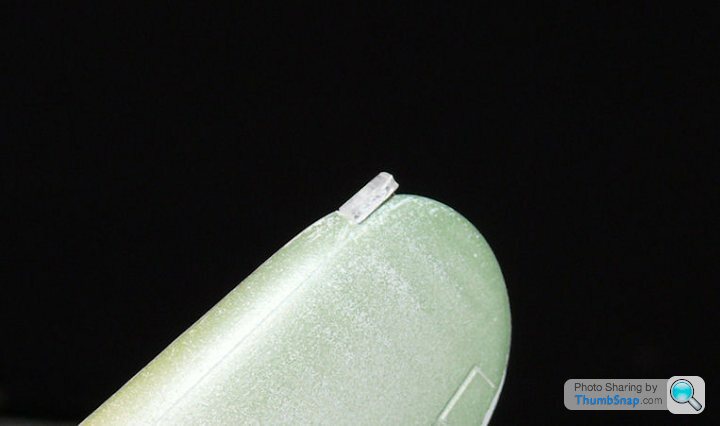
Then, when set, filing and polishing the sprue to the correct shape:
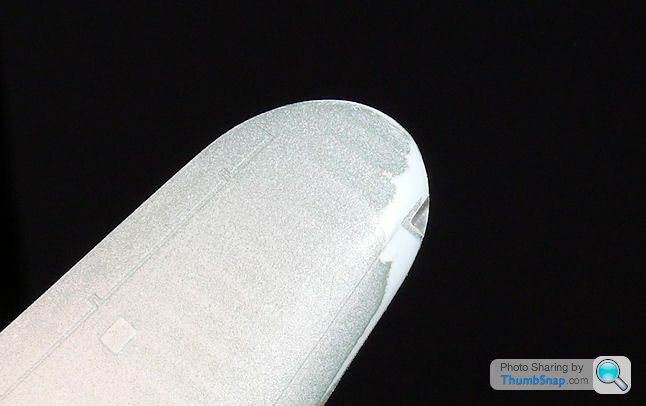
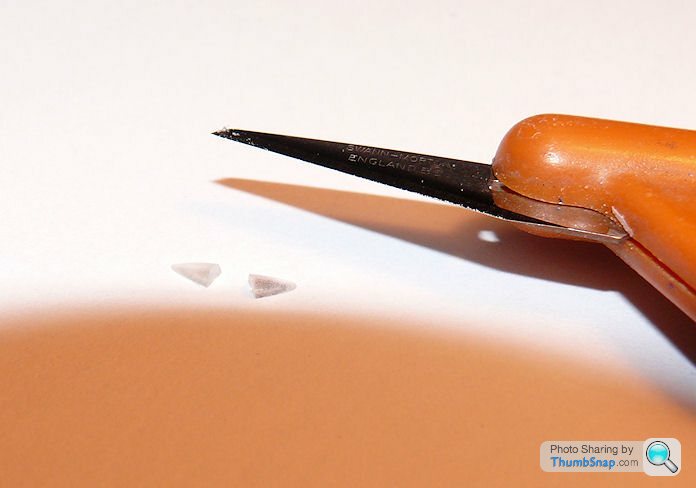
Then prise out the lenses to clean the surfaces up and drill them from the back to form bulb sockets which will be dotted with red and green paint; pva is surprisingly strong on plastic:
Also continued making the the wingtip lights by cutting out the plastic and pva'ing some clear sprue offcuts into the notches:
Then, when set, filing and polishing the sprue to the correct shape:
Then prise out the lenses to clean the surfaces up and drill them from the back to form bulb sockets which will be dotted with red and green paint; pva is surprisingly strong on plastic:
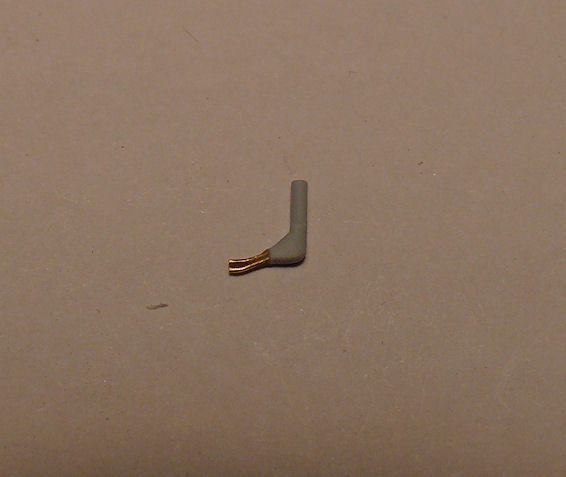
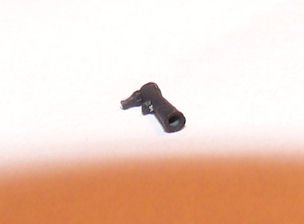
The pitot/static tubes on the early Hurricanes were larger and less refined than later versions, but even so, the kit part was pretty crude; too square and the tubes were moulded as one piece. I thought it was some kind of traction engine starting handle:
I cut the 'tubes' off and rounded the triangular fillet before drilling and fitting brass tubes. When finished a bit more and painted it will look much better than the original:
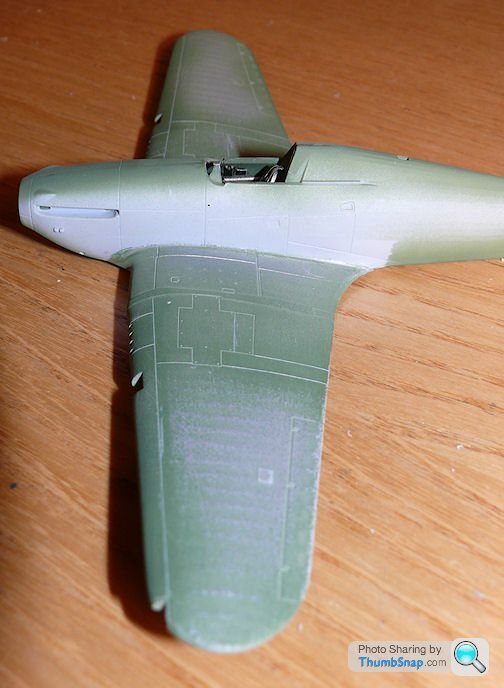
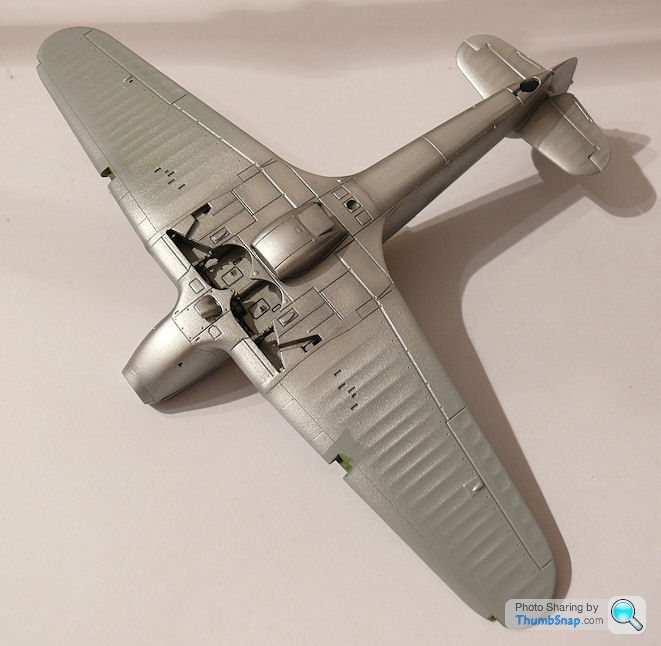
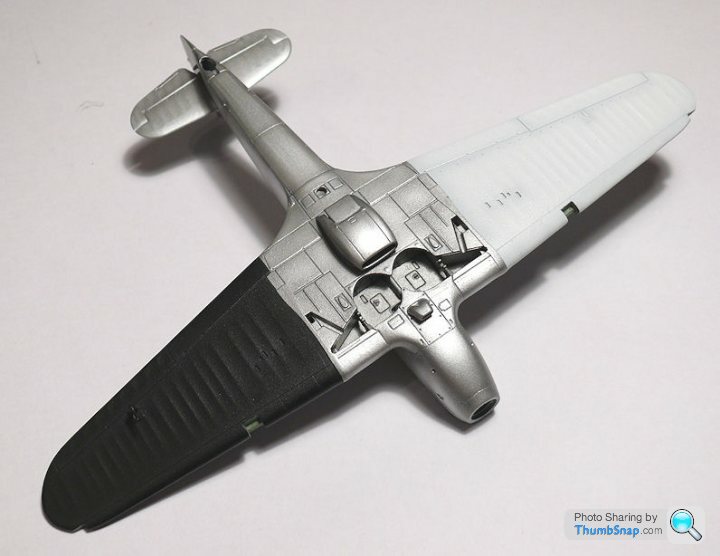
Also painted the centre fuselage with smooth silver and dark grey preshading:
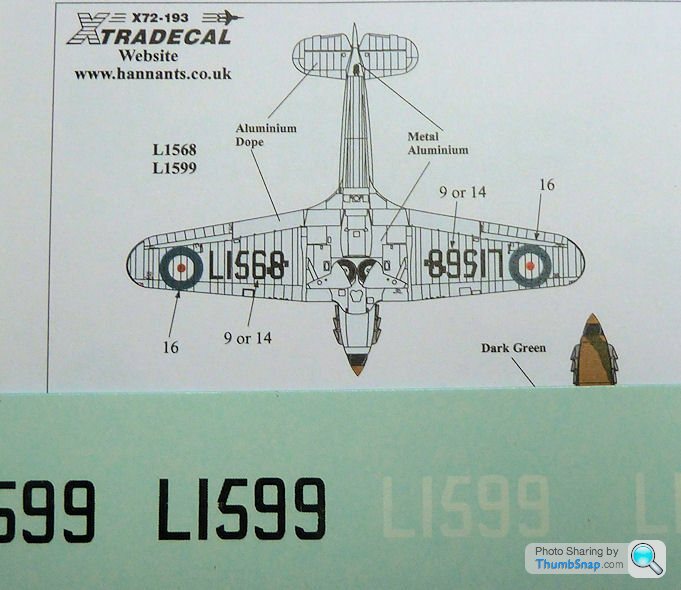
Hopefully tomorrow I'll be able to paint the black and white outer wing panels ready for applying RedFirecrackers custom made decals (the Xtradecal decals turned out to be wrong for this aircraft).
I cut the 'tubes' off and rounded the triangular fillet before drilling and fitting brass tubes. When finished a bit more and painted it will look much better than the original:
Also painted the centre fuselage with smooth silver and dark grey preshading:
Hopefully tomorrow I'll be able to paint the black and white outer wing panels ready for applying RedFirecrackers custom made decals
(the Xtradecal decals turned out to be wrong for this aircraft).Eric Mc said:
I have to say those kit pitots look very poor. 2 out of 10 Airfix.
Your replacements look spot on. I will bear this in mind when I build this kit myself.
I think this one was done by the intern. Strangely enough, the alternative pitot tube included in the kit is the conventional "L" type, and is absolutely fine.Your replacements look spot on. I will bear this in mind when I build this kit myself.
I did get an e-mail from Airfix just now saying they'd posted a new part (hopefully the canopy!) first class, which is pretty good. The service e-mails are a bit confusing, IIRC when I messed up the Gladiator top wing they said there were no spares available, so for the sake of a few quid I bought another kit, and a couple of days later I got a new top wing in the post...
Ayahuasca said:
Eric Mc said:
I find them eminently buildable - and good value. You got some good bargains there.
I cannot see the point worrying about getting bargain models when the amount saved on the kit is peanuts compared to the amount invested into paint, fillers, airbrushes, etc, etc. If you factor in an hourly labour rate the amount spent on the plastic kit is vanishingly small. Thus I would suggest it makes good financial sense to buy the best plastic kit you possibly can and not worry about its cost too much.The fact is that at least in my local model shop, Airfix kits are no longer 'cheap' compared with the latest Revell and existing Academy models.
Make your own judgement on relative quality...
New canopy arrived today wohoo. It's fine, but I did manage to scratch it removing it from the sprue...
Anyway, made some progress on details like the lamps - ventral signalling lamp painted amber/red, tip lights drilled and the holes filled with red/green to represent the coloured bulbs, and the leading edge lights had silver brushed into the lamp apertures to represent reflectors:
Also drilled out the instrument venturi (looks like it needs touching in with a bit of black paint, but it is only about 2mm long):
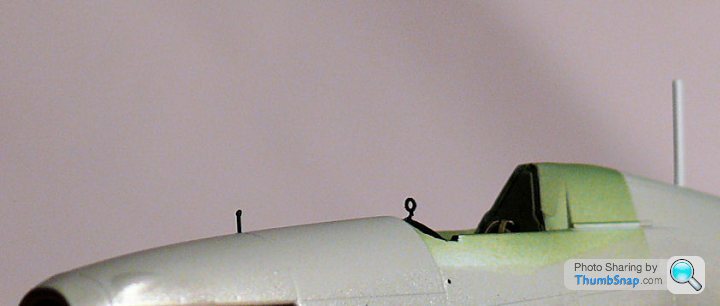
And made a ring and bead sight. The ring is the centre ring of the spare sight from my 1:32 Wingnut Wings SE.5a, the bead is just some brass tube with a blob of pva on top. I might get rid of the pva. both are a bit overscale, but at least they are now there.
Also added the unstreamlined aerial mast, and have since fitted the windscreen:
Anyway, made some progress on details like the lamps - ventral signalling lamp painted amber/red, tip lights drilled and the holes filled with red/green to represent the coloured bulbs, and the leading edge lights had silver brushed into the lamp apertures to represent reflectors:
Also drilled out the instrument venturi (looks like it needs touching in with a bit of black paint, but it is only about 2mm long):
And made a ring and bead sight. The ring is the centre ring of the spare sight from my 1:32 Wingnut Wings SE.5a, the bead is just some brass tube with a blob of pva on top. I might get rid of the pva. both are a bit overscale, but at least they are now there.
Also added the unstreamlined aerial mast, and have since fitted the windscreen:
Mutley said:
Doc, that is looking fantastic. What silver did you use - I have a P51 to build, and that looks just about right
Ta. After much trial and error trying to find a smooth silver, I settled on Vallejo Model Air Aluminium, Steel and/or Silver. There's a thread BM here:http://www.britmodeller.com/forums/index.php?/topi...
Alclad II lacquer still probably shades it for absolute smoothness, but it can be tricky to work with. For a start it really needs a glossy, dark base coat, and you can't use it on bare plastic because it dissolves the surface.
For a P-51 you might want to look at using slightly different shades of silver on different panels to represent the various grades and grain directions of the real metal.
I've masked and painted the canopy - this one is much better:
Unfortunately after glueing the original windscreen (on left) in place I realised it too has a flaw over the top edge. I'd assumed it was part of the framing, but after comparing it with the spare one on the canopy sprue (and some reference pics), it is indeed a moulding flaw. Luckily it was a simple matter to prise it off the fuselage and fit the new one:
Also today got the corrected underwing serials from RedFirecracker. The Xtradecal plans show L1599 to be all silver underneath, but according to my incredibly knowledgable source over the pond (thanks Tango98) it was delivered from the factory with a three tone finish. I therefore needed a white serial. Despite my best efforts to confuse things, RedFirecracker made some perfect matches which as usual appear to be spot-on at the first attempt, so that's sorted:
Thanks RF!
And finally, got the corrected 5-spoke wheels:
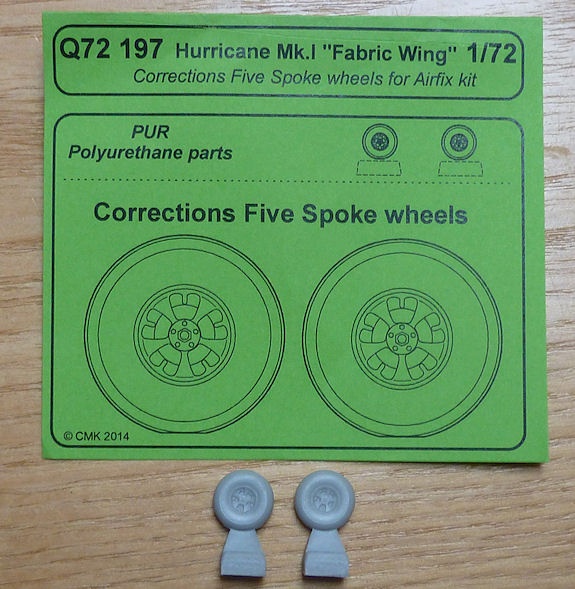
They do look a bit thin, and the rim detail isn't as well defined as the Airfix ones, but at least it's consistently absent:
Unfortunately after glueing the original windscreen (on left) in place I realised it too has a flaw over the top edge. I'd assumed it was part of the framing, but after comparing it with the spare one on the canopy sprue (and some reference pics), it is indeed a moulding flaw. Luckily it was a simple matter to prise it off the fuselage and fit the new one:
Also today got the corrected underwing serials from RedFirecracker. The Xtradecal plans show L1599 to be all silver underneath, but according to my incredibly knowledgable source over the pond (thanks Tango98) it was delivered from the factory with a three tone finish. I therefore needed a white serial. Despite my best efforts to confuse things, RedFirecracker made some perfect matches which as usual appear to be spot-on at the first attempt, so that's sorted:
Thanks RF!
And finally, got the corrected 5-spoke wheels:
They do look a bit thin, and the rim detail isn't as well defined as the Airfix ones, but at least it's consistently absent:
The finish on this one will be more important thaqnusual: I wanted a clean looking early spec. machine, and apart from roundels there are hardly any topside markings to draw the eye from any painting flaws.
Started by masking:
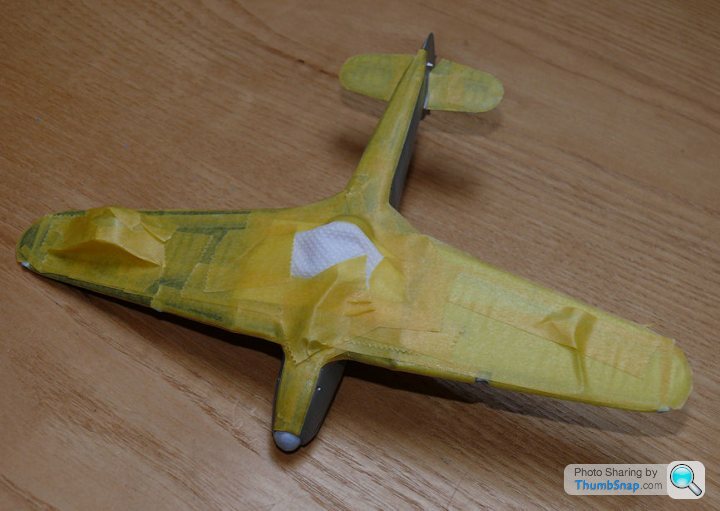
followed by a coat of Earth preshaded with German Grey:
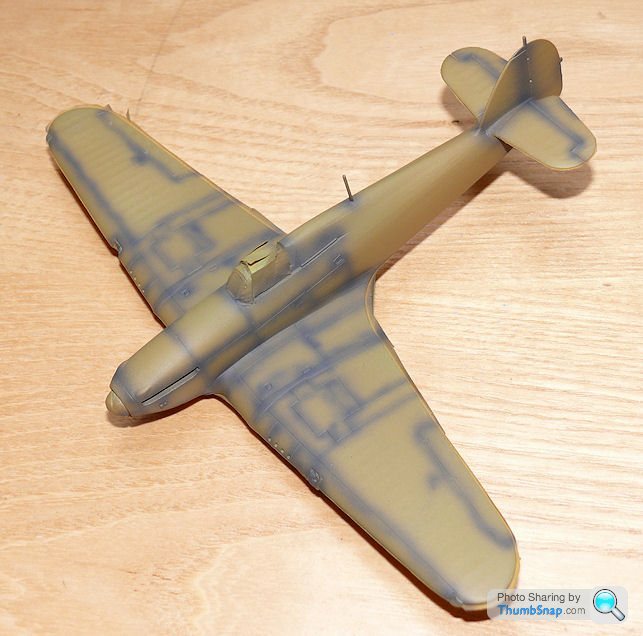
Then overcoated to leave just a hint of shading along the panel lines and control breaks:

Hopefully get the Reflective Green on this evening.
Started by masking:
followed by a coat of Earth preshaded with German Grey:
Then overcoated to leave just a hint of shading along the panel lines and control breaks:
Hopefully get the Reflective Green on this evening.

Perdu, no you can't rely on the preshading to show through after applying a new colour, it all has to be repeated. I've not decided what to do with the wheels yet, I'll see how it turns out.
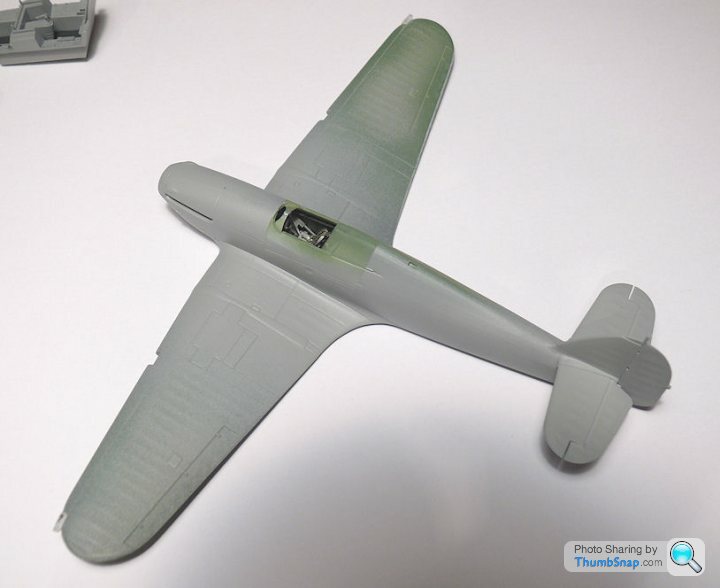
Masked my interpretation of an early "A" type camo pattern:
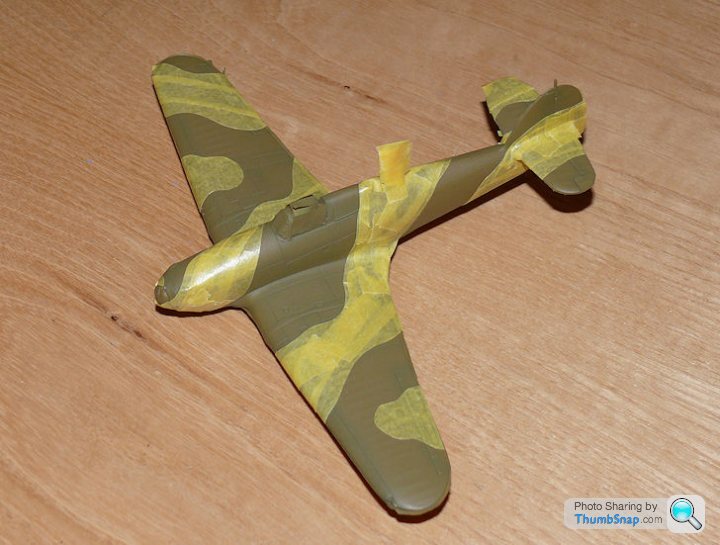
Green coat, preshade, green coat:
And my favourite part of modelling - removing masking on an early RAF scheme (flash has had a strange effect on the green - it's all one shade in reality):
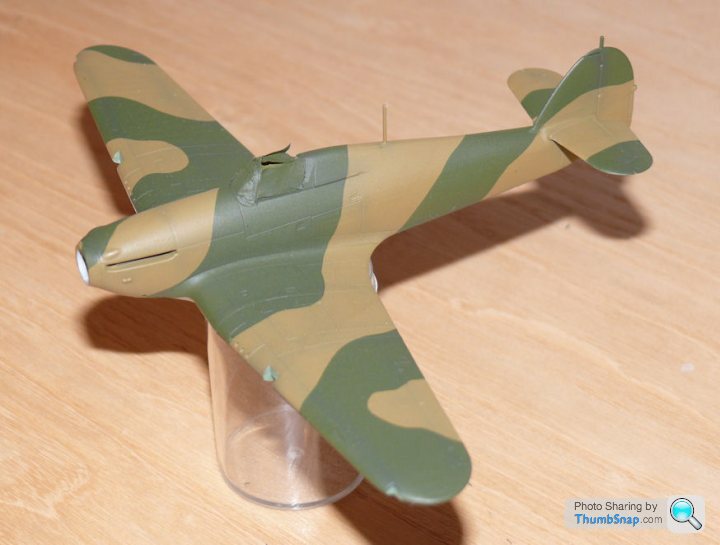
...course there's an error - I forgot to mask the top part of the stbd. side of the fin/rudder, so it has a straight line, and is green. Should be a simple matter to overspray with earth:
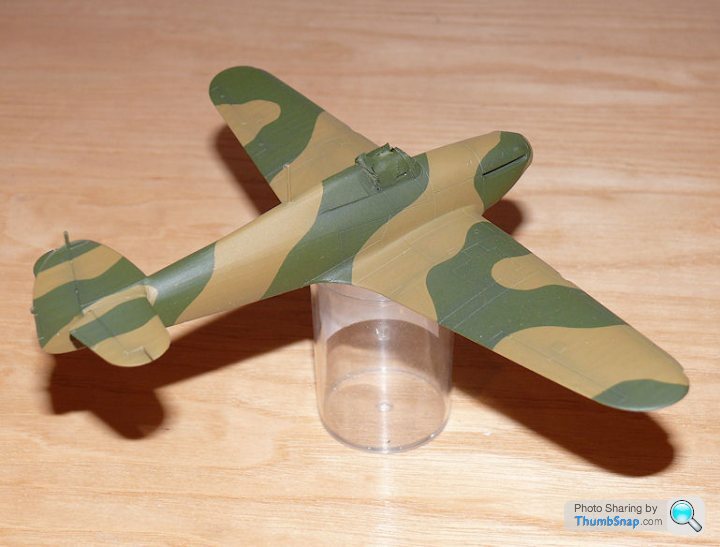
I'm happy with how the top/bottom side demarcations turned out. The white is a bit sudden, maybe I should have used white grey, but a coat of Tamiya smoke will soon tone it down:
You can see I drilled out the gun ports. I'll make a red decal for the canvas covers, and Microsol will hopefully make it sag into the holes.
Masked my interpretation of an early "A" type camo pattern:
Green coat, preshade, green coat:
And my favourite part of modelling - removing masking on an early RAF scheme (flash has had a strange effect on the green - it's all one shade in reality):
...course there's an error - I forgot to mask the top part of the stbd. side of the fin/rudder, so it has a straight line, and is green. Should be a simple matter to overspray with earth:
I'm happy with how the top/bottom side demarcations turned out. The white is a bit sudden, maybe I should have used white grey, but a coat of Tamiya smoke will soon tone it down:
You can see I drilled out the gun ports. I'll make a red decal for the canvas covers, and Microsol will hopefully make it sag into the holes.
After soem more masking for the walkway strip and a bit of camo fettling in light of some new reference material, I got the decals on:

They need an ovecoat of smoke to tone them down a bit, but apart from that that's all the markings there are on the topsides. Pure and simple.
The underside decals are still settling with some Microsol.
They need an ovecoat of smoke to tone them down a bit, but apart from that that's all the markings there are on the topsides. Pure and simple.
The underside decals are still settling with some Microsol.
RichB said:
dr_gn said:
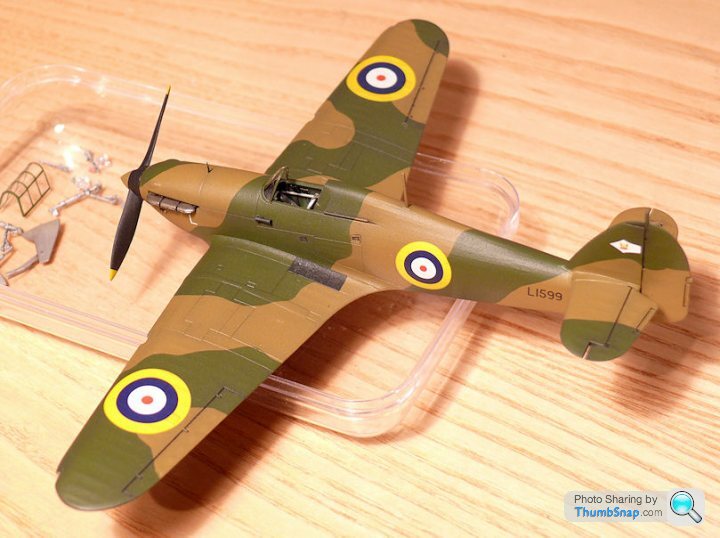
...Masked my interpretation of an early "A" type camo pattern...
I have seen use of the blue-tac sausage to get a softer edge between the colours, which you have not done. Is that because in 1:72 a sharper edge is fine or was it because this aircraft was actually painted with sharp edges to the camouflage? In the end, I decided that it would be nice if all three of my BoB models had similar paint, so that's why I went for hard edges. Here is a Mk1 Hurricane (although slightly later than mine):
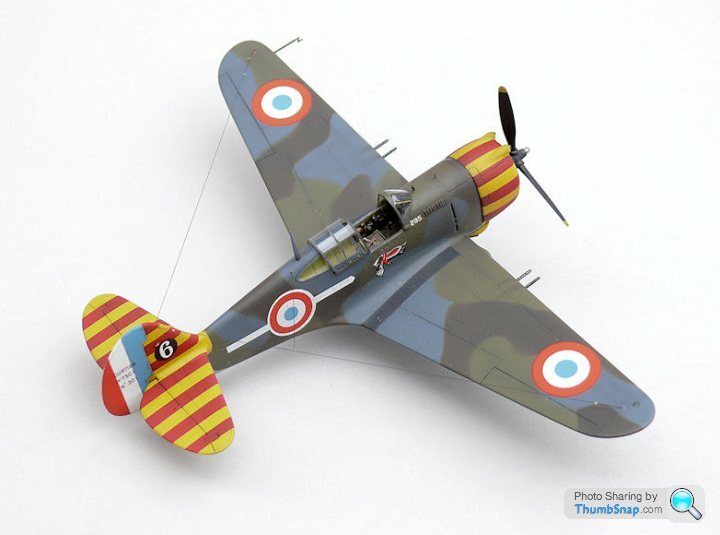
I used the Blu-Tac sausage method on teh 1:72 Curtiss Hawk, since they were hand sprayed in the field, and had a noticable feather edge to the camo:
Strangely enough, this evenings job is to add a bit more wavyness to the camo lines, they look a bit straight to me. I did do this before applying the decals on the port nose and fin areas, but it needs a bit more I think. I like to make things difficult for myself.
Ayahuasca said:
RichB said:
IroningMan said:
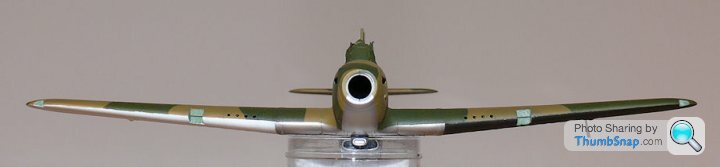
Is it me, or is there a big gap between spinner and cowling in that photo?
Indeed, certainly more than there would ever be on a well made model 

Sometimes you just have to go with what you think looks right. Even if you find an image of the aircraft you are building, the exact appearance and spec. could change anlmost day-to-day; old exhaust stubs replaced by newer ones, anti-slip paint on one side, then both sides, covers over the gun ports, yellow propeller tips, brown spinner etc, etc.
Eric Mc said:
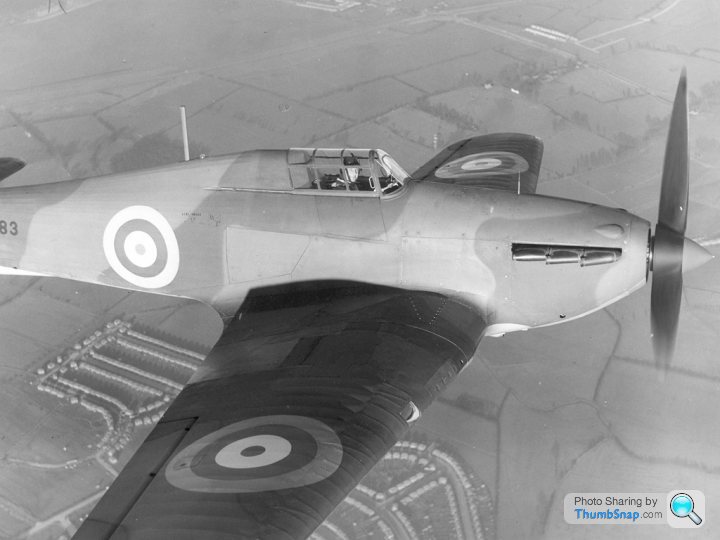
Without wishing to derail the thread, it is interesting to see that the use of the two bladed Watts propeller on the very early MkI Spitfires did not result in a small spinner -
-747929.jpg)
i'd suggest that the front of the propeller was removable and the Hurricane had a pointed nose piece, while the Spitfire (and Gladiator?) had more rounded versions?The camo on the Spitfires looks like it is pretty hard-edged too, but the patterns do vary on the A and B types, suggesting freehand painting.
Edited by dr_gn on Wednesday 22 October 13:20
Well whatever scheme it is, it's too late now! I've added some extra wavyness to a few of the lines and it looks better for it. Also made a better stepped bead sight out of brass tube.
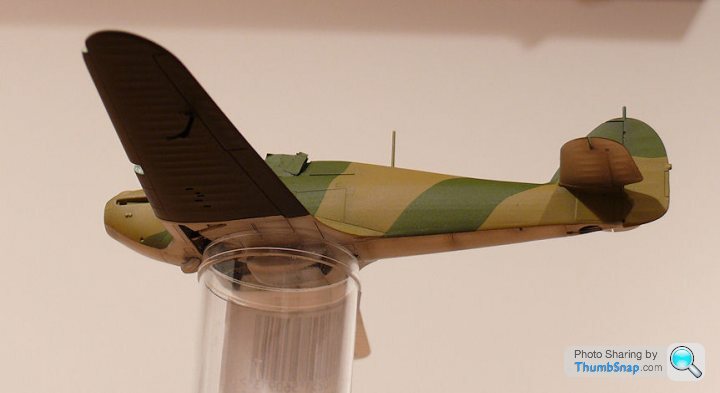
Very, very light weathering i.e. a dark wash for the control surface breaks, oil stain powder on the underside and a light brushing all over with a mixture of darker powders. With exhaust stains, sometimes they work fine (Mustang) other time (like this one) it just doesn't work out. So I left it at extremely lightly stained:
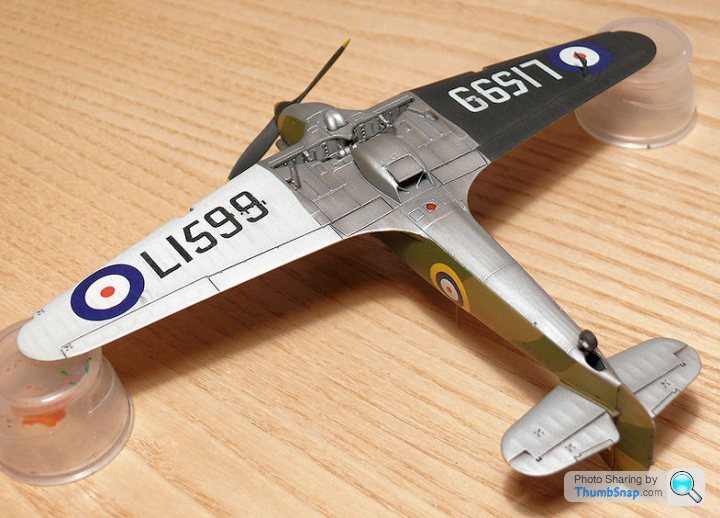
Here are the undersides nicely showing RedFirecrackers pretty much perfect new codes to replace the incorrect Xtradecal ones. I also made some radiator flap actuators & fairing stiffeners out of stretched sprue, just visible inside the rear of the fairing. I'm glad I found the Vallejo Air silvers...witha coat of matt the grain is almost invisible::
Still needs the lights, undercarriage, control & aerial wires and canopy fitting and that'll do. Still not decided whether to use the new wheels, or turn the originals in the lathe to remove the blobs. I'd live with the missing spoke...
Very, very light weathering i.e. a dark wash for the control surface breaks, oil stain powder on the underside and a light brushing all over with a mixture of darker powders. With exhaust stains, sometimes they work fine (Mustang) other time (like this one) it just doesn't work out. So I left it at extremely lightly stained:
Here are the undersides nicely showing RedFirecrackers pretty much perfect new codes to replace the incorrect Xtradecal ones. I also made some radiator flap actuators & fairing stiffeners out of stretched sprue, just visible inside the rear of the fairing. I'm glad I found the Vallejo Air silvers...witha coat of matt the grain is almost invisible::
Still needs the lights, undercarriage, control & aerial wires and canopy fitting and that'll do. Still not decided whether to use the new wheels, or turn the originals in the lathe to remove the blobs. I'd live with the missing spoke...
Edited by dr_gn on Wednesday 22 October 22:27
Gassing Station | Scale Models | Top of Page | What's New | My Stuff