This airbrushing lark.....tips and advice please
Discussion
Thought it might be a good idea to share ideas and tips to help those of us improve our skills 
I've got mine last week and have had a good play with it and on the whole understand the principle of how it works, now I have to learn to use it!
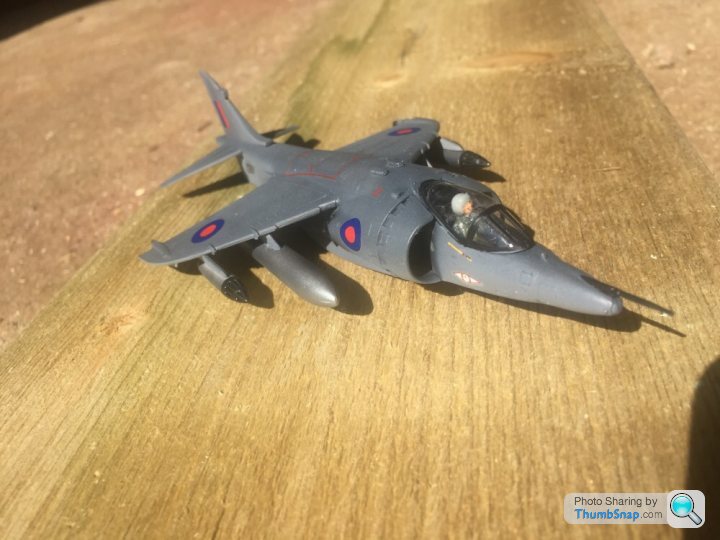
My first subject was a Harrier that's been lying around for ages and I was always going to rush in and spray away to have a play rather than take my time and produce a model worthy of fronting a collection, I was on tis occasion quite impatient to say the least.
So, I've got some questions and I know I'll get answers however it would also be good if contributors who have experience can share any tips/stories they have to help others.
First question and ignoring the paint scheme as I know it's not correct!
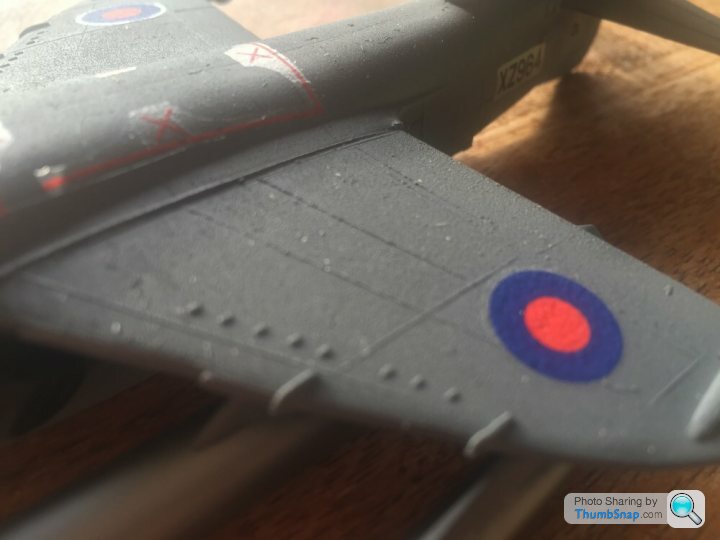
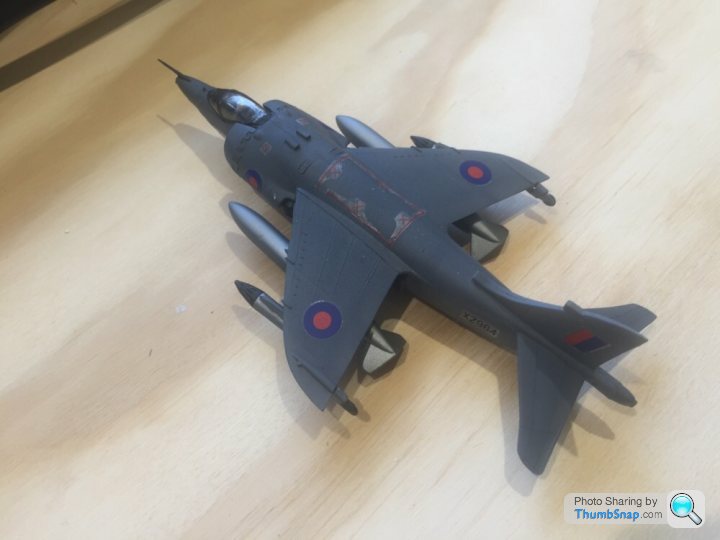
Is this dust or paint splatter?

I had more success with the bombs, they were really smooth and the paint seemed to apply in exactly the same fashion, but with no muck


Next
If you have for example exhaust outlets similar to the Harrier which need to be fitted prior to the fuselage, on the assumption it is at the very least difficult to mask a painted part as you prime etc., how the hell do you get around that type of scenario?
Next
What's the best match or reference using Vallejo Air for a green cockpit interior?
Next
Should I always spray satin, matt or gloss coat the model with varnish when it's finished or simply leave as is (obviously if it's an airliner can I get a gloss airbrush colour?)
Next
How do you make decals appear better on the model and not see the clesr decal surround?

I've got mine last week and have had a good play with it and on the whole understand the principle of how it works, now I have to learn to use it!
My first subject was a Harrier that's been lying around for ages and I was always going to rush in and spray away to have a play rather than take my time and produce a model worthy of fronting a collection, I was on tis occasion quite impatient to say the least.
So, I've got some questions and I know I'll get answers however it would also be good if contributors who have experience can share any tips/stories they have to help others.
First question and ignoring the paint scheme as I know it's not correct!
Is this dust or paint splatter?

I had more success with the bombs, they were really smooth and the paint seemed to apply in exactly the same fashion, but with no muck


Next
If you have for example exhaust outlets similar to the Harrier which need to be fitted prior to the fuselage, on the assumption it is at the very least difficult to mask a painted part as you prime etc., how the hell do you get around that type of scenario?
Next
What's the best match or reference using Vallejo Air for a green cockpit interior?
Next
Should I always spray satin, matt or gloss coat the model with varnish when it's finished or simply leave as is (obviously if it's an airliner can I get a gloss airbrush colour?)
Next
How do you make decals appear better on the model and not see the clesr decal surround?
It's actually quite difficult to answer a whole string of questions because they disappear off the screen when you start typing answers.
I'll limit my reply to how I tackle paint finishes and decals.
On finishes, it doesn't really matter what type of paint you use (matt, gloss or satin) when spraying the actual paint itself. Most "authentic" paints (i.e. paints supposedly matched to official air force/military/civil colours) these days tend to be semi-matt or satin in their sheen.
After spraying on the primer, you can then apply your chosen colours. Once these are applied to your satisfaction, it is usually advisable to either spray on or brush paint a gloss coat over the underlying pain. I have used Johnson Clear for this for years but this is no longer available in its original formula so I am using up old stock.
The gloss coat will ensure that the decal carrier film will not show up. Once the decals are applied and after leaving them for (usually) 24 hours or so, what I tend to do is then spray on a satin or gloss varnish over the entire model. This helps to blend the decals into the underlying paint and also ensures they stay put on the model.
When that coat has hardened of, you can spray a coat of satin, matt or gloss for the final finish depending on what is required.
1) I think it's a combination of dust - you can see small fibres in the paint on the rear fuselage, and spatter. It may be exacerbated by the paint not been thin enough. It looks to me like the paint has dried before hitting the surface (common issue with some acrylics/colours), which is why it looks like sandpaper. Did you use Vallejo retarder medium? The fuel tanks are a different colour, which probably took longer to dry, hence the better finish.
Did you clean the airbrush or model with a tissue before painting? If so, small fibres will get into the paint. Use a lint-free glasses cleaning cloth or soft paintbrush for cleaning or dusting.
2)Masking of exhausts: Are you sure you can't paint separately and add them later from the outside? You don't necessarily have to follow the instructions.
If you do have to assemble them first, paint them before assembly, then mask with a mosaic of Tamiya tape. Remove tape on completion of the model. If I had to do this, before assembly I would also locally spray around the fuselage exhaust apertures with camo colour, to make masking less critical.
3)Vallejo Air Interior Green 71.010 is OK in general, but I'd assume a Harrier would have a dark grey or black cockpit. Different aircraft from different eras have different colours e.g. USAAF had a more yellowish chromate green, WW2 RAF was darker, modern stuff is often medium grey.
4) / 5)I use Klear which is no longer available, however, Humbrol do "Clear" which is a good substitute. Here is a video on how to use it:
https://www.youtube.com/watch?v=ByMhacC5vAE
Personally I only spray a couple of light coats on a matt paint finish to seal/protect the surface i.e. not a high gloss. I prefer to use Klear locally as required for decalling, because a build-up of varnish reduces surface detail. Some decals will always silver, no matter what surface you put them on. To eliminate any risk of this, you need to fill the decal/surface interface with liquid to fill any microscopic air pockets (which is what causes the silvering):
I usually apply the decals using a drop of detergent and water, and get them positioned correctly. The detergent helps to wet matt surfaces. Then, I lift an edge of the decal with a scalpel blade and wick a small amount of Klear underneath using a small brush. This fills the underside of the decal and has the effect of drawing it to the surface when set. Gently brush over and around to distribute any excess Clear. At this stage I usually apply a bit of Microsol to soften the decal and make it look 'painted on'. Then overspray Klear again once complete to make the finish more uniform. After a day or so, overspray with whatever finish varnish you need. For matt, I always use Humbrol Acrylic spray can #49. obviously you need to have the canopy masked for this, but it would usually still be masked anyway at this stage for the best finish on an airbrushed model.
Good Luck!
Edited by dr_gn on Monday 13th April 11:46
I would recommend getting some plastic drink bottles, priming them from a can and using that as a testbed for trying out the airbrush. Saves ruining a model while you (we) get the mix correct; there's so many things to adjust it's going to be some time before the finish works reliably.
I get it right sometimes now using an external mix Badger single-action airbrush, the dual-action iwata neo is a disaster. I can get it to spray water, but not paint. However, the Badger is the siphon type, so needs a lot of paint in the jar to work; I came up with a cunning plan using old pipette bulbs to act as a liner. This has saved me a lot of paint.
Your first picture looks like the paint was too thick and is sputtering (not flowing cleanly off the needle).
It's not dust, its too much air pressure sprayed too far away so the paint is semi dry as it hits the model. You want to polish the surface before spraying so it lands on as clean a surface as possible, drop your pressure and try and get the paint to land on wetter so it self levels. Once dry spray with clear or Alclad clear gloss (or any of the other gloss varnishes) before decaling. Once these are on ( using a softener and setter to get them to conform nicely) regloss to seal them and then you can weather. The gloss makes its easier to add and remove the weathering before you are happy with the result. Finish with a matt varnish. Have a look on britmodeller, especially the works in progress, loads of tips and good advice on there.
hope this helps
hope this helps
Gassing Station | Scale Models | Top of Page | What's New | My Stuff


