Tamiya 1:72 Mosquito FB Mk.VI
Discussion


Yertis said:
Nice images, thanks. I've not seen most of them, but the woman working on the fuselage I've already got. It shows the bias of the outer skins of the rear fuselage very nicely. Also the shot of the fitters working on the tailplane confirms that the fin root fairing was metallic. I think they are coloured versions of b&w originals, but still great to see.
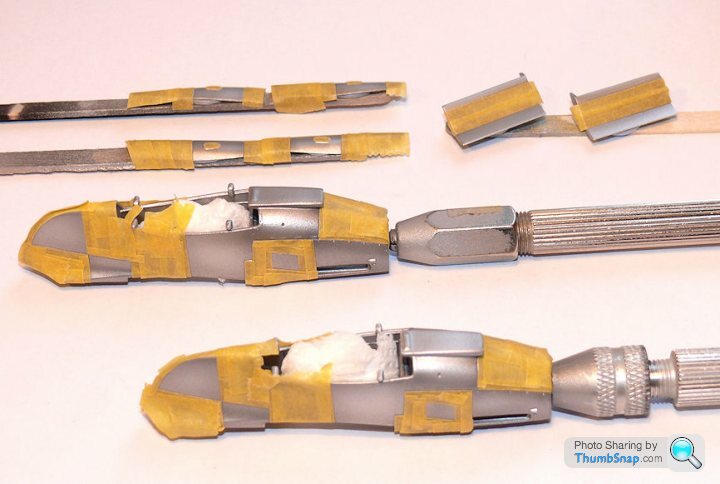
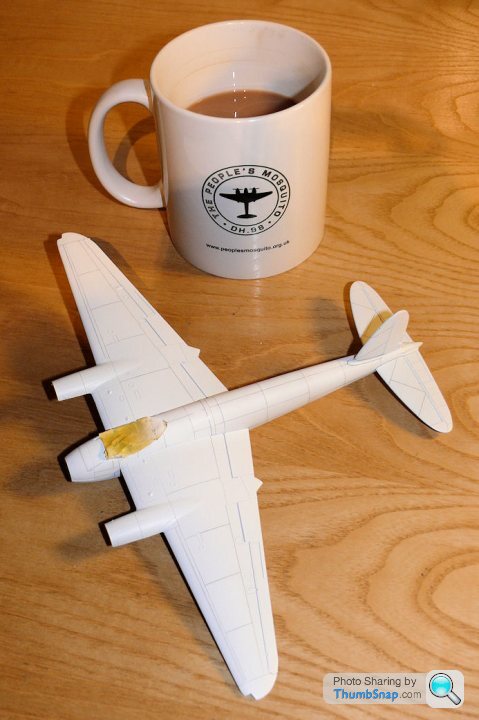
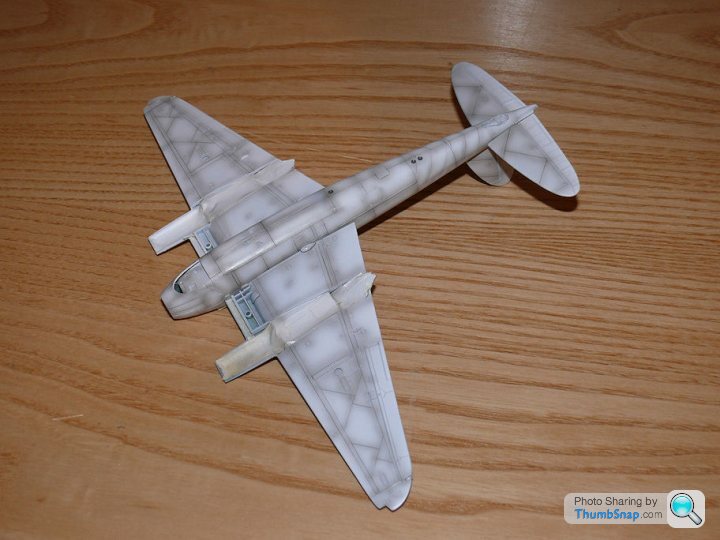
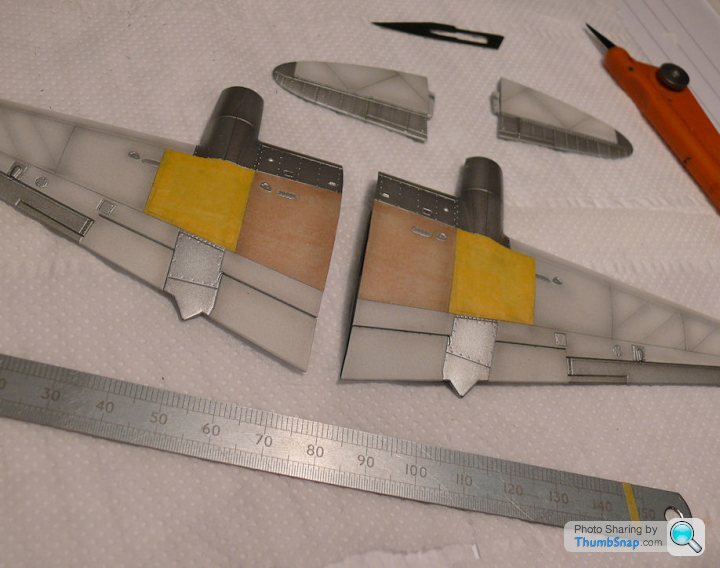
Anyway, tonight I applied some Tamiya Smoke to the nacelles etc., to give a bit of contrast to the panels. I then overcoated with Mr.Colour Gloss + 10% Tamiya Flat Base to give a satin finish:
Ideally, I'd like it all a bit more matt, so for the final coat of the finished model, I'll probably go to 20% Flat Base.
dr_gn said:
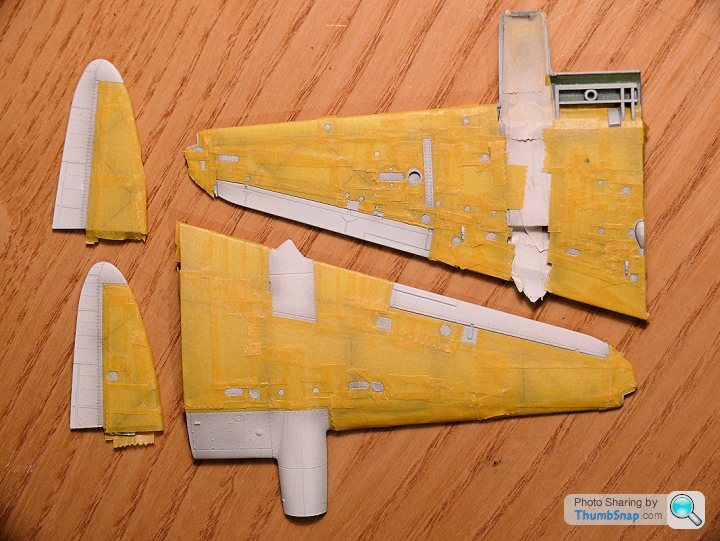
I've masked the aluminium nacelles ready for overspraying with a slightly darker shade, or maybe clear "smoke" to give a bit of contrast between the panels:
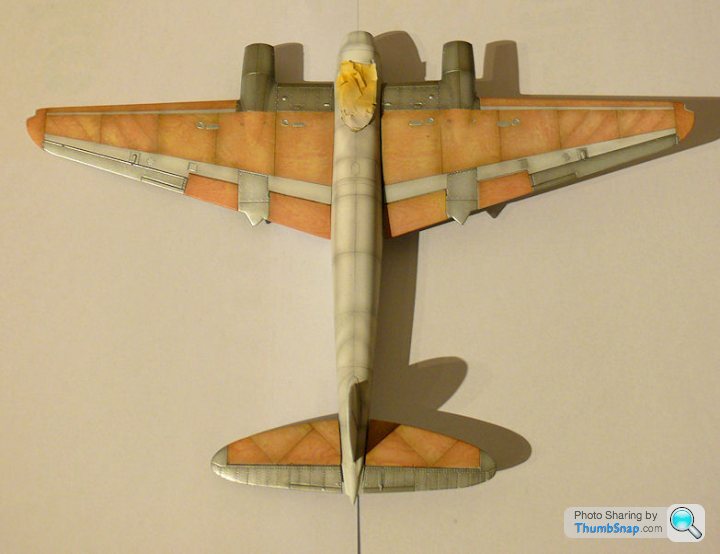
Also made a start on drawing the main wood skin demarcations on the wings and tailplanes:
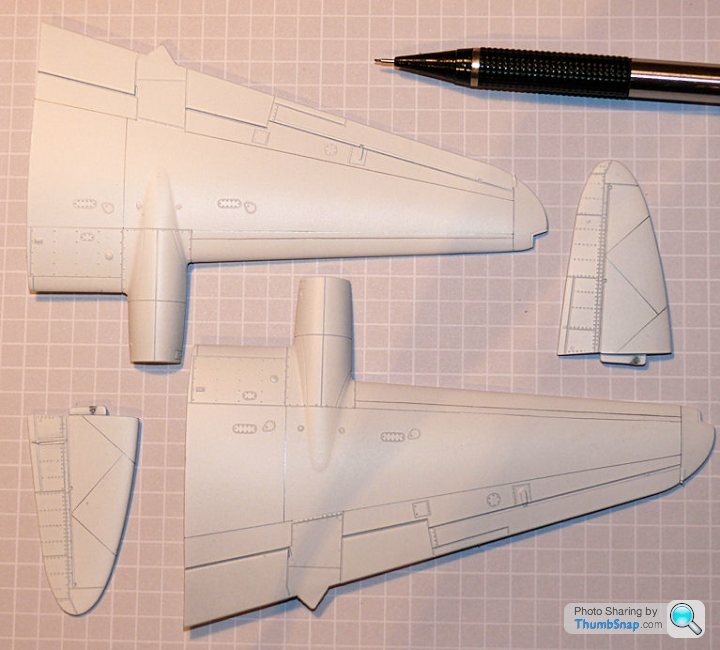
At least these are my best guess based on studying photographs. Another couple of chord-wise lines on the wings, and they'll be done.
You did some lovely work with the hatch G but I wouldnt be tempted to put any more chordwise lines on the mainplanesAlso made a start on drawing the main wood skin demarcations on the wings and tailplanes:
At least these are my best guess based on studying photographs. Another couple of chord-wise lines on the wings, and they'll be done.
Too much would look like a 'cartoon' rather than a wing
I tend to shy away from overdetail as you know, what you have here is nice AND believable

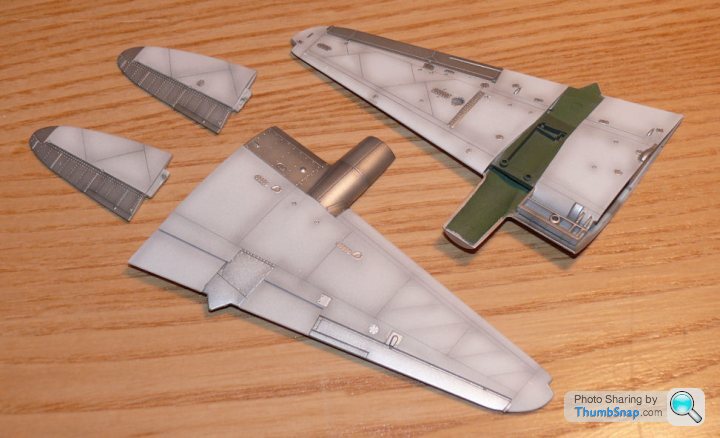
The main panel demarcations are pencilled in now:
Difficult to judge these because they appear to be slightly different on different aircraft. Even the two images of the new-build Mosquitos I've seen have different skin boundaries. Had a bit of help on the smaller details via. The People's Mosquito, so I thought I'd make a small contribution to their efforts:
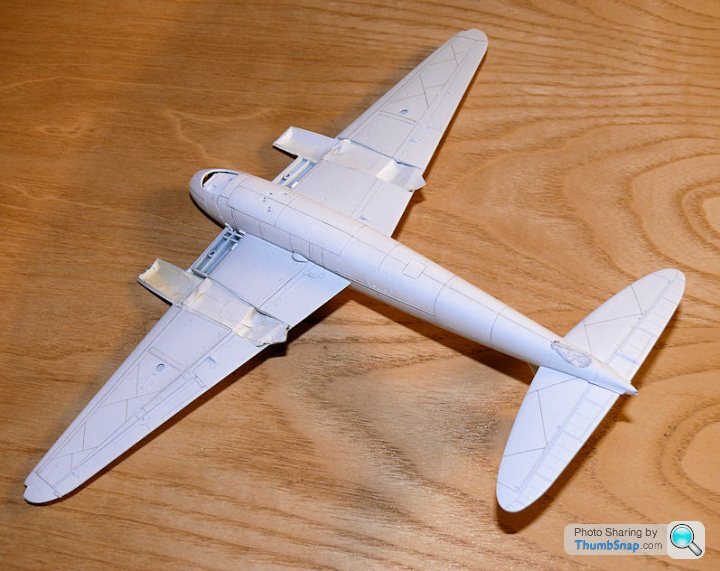
I still need to draw some very fine demarcations for the herringbone sub-panels on the rear fuselage and outer wing panels. They are very obvious on the real thing, but unfortunately the linear grain on the decals isn't obvious enough to replicate the effect.
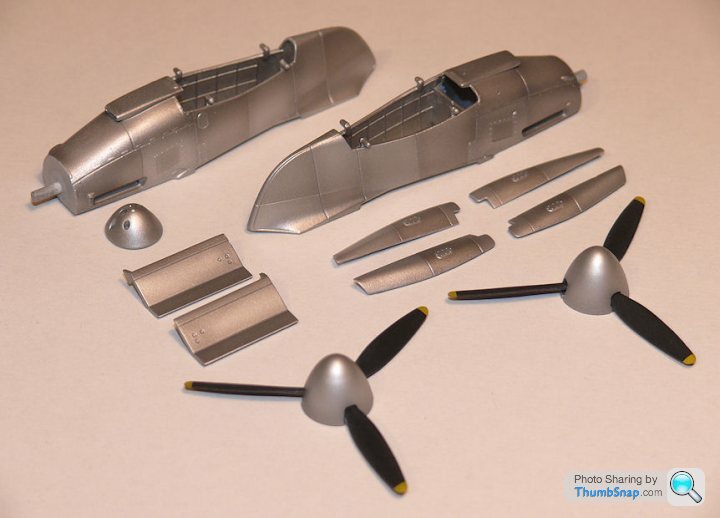
Also got a couple of new toys in the post today:
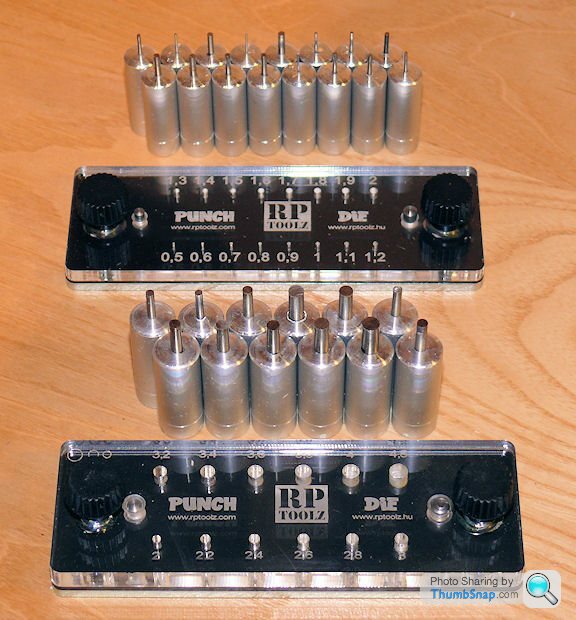
These will be pretty much essential for cutting masks for all the inspection panels on the airframe.
Difficult to judge these because they appear to be slightly different on different aircraft. Even the two images of the new-build Mosquitos I've seen have different skin boundaries. Had a bit of help on the smaller details via. The People's Mosquito, so I thought I'd make a small contribution to their efforts:
I still need to draw some very fine demarcations for the herringbone sub-panels on the rear fuselage and outer wing panels. They are very obvious on the real thing, but unfortunately the linear grain on the decals isn't obvious enough to replicate the effect.
Also got a couple of new toys in the post today:
These will be pretty much essential for cutting masks for all the inspection panels on the airframe.

HoHoHo said:
Looks brilliant so far 
Fingers crossed for the next post Dr_Gn .............
Appreciated Fingers crossed for the next post Dr_Gn .............

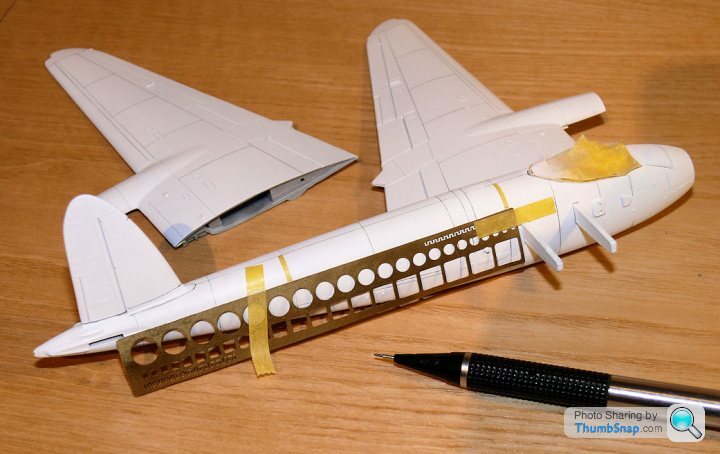
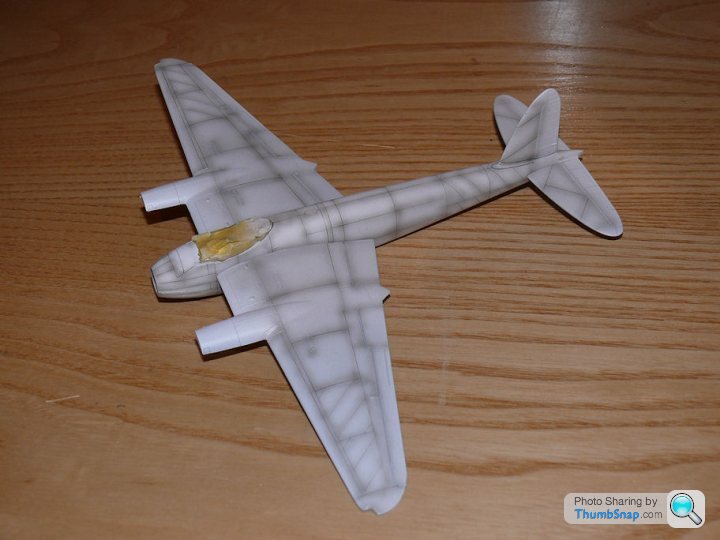
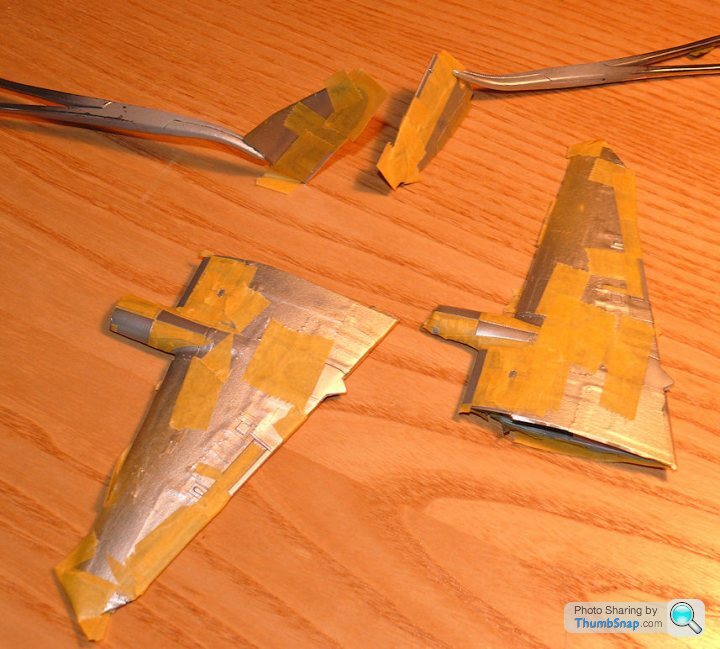
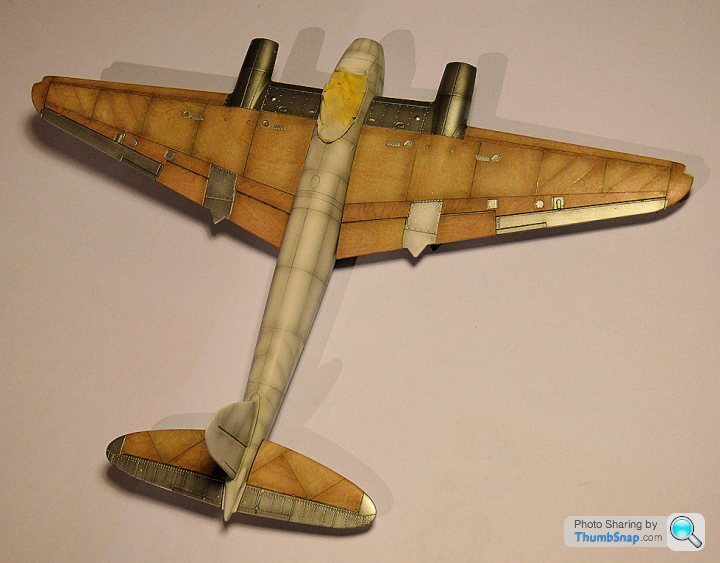
So here we go with the first templates:
They didn't look right...
Close of play:
It's a strange process: Adding adjacent panels makes the existing ones look totaly different. The variation in grain on the same sheet also makes a big difference to the results. I'm not even suer of the effect I want to end up with, I'm just trying different decals and seeing which looks best.
Applying the decals is fairly straightforward; cutting them around small details in-situ is surprisingly easy.
Mutley said:
Doc, that is looking grand
Thanks, the preshading is a bit more than normal for me, but then again it's not a conventional finish. I think there's a way of reducing the effect with an oil paint glaze (filter) somehow. Alex from UvderR explained it to me at Telford, but I forgot the details of what he said.Plus I'm nearly out of decals.
Wow
If this was from anyone else I'd be more impressed G but TBH I expected no less
Time to buy more woodgrain then is it?
I'd be tempted to darken, probably unrealistically, the spanwise graining.
At this stage artistic impression is key
Looks blo**y great mon ami, outstanding model in the offing...
If this was from anyone else I'd be more impressed G but TBH I expected no less
Time to buy more woodgrain then is it?
I'd be tempted to darken, probably unrealistically, the spanwise graining.
At this stage artistic impression is key
Looks blo**y great mon ami, outstanding model in the offing...
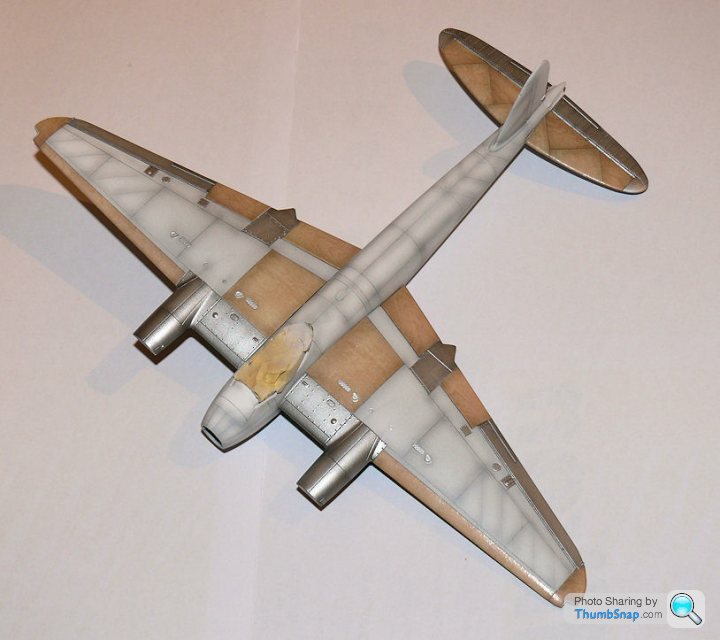
Ta very much Perdu. It's very difficult to get a decent photo of it that shows what it really looks like. For example, these two are of the model with the upper wings fully decalled, but different lighting makes them look like different models:
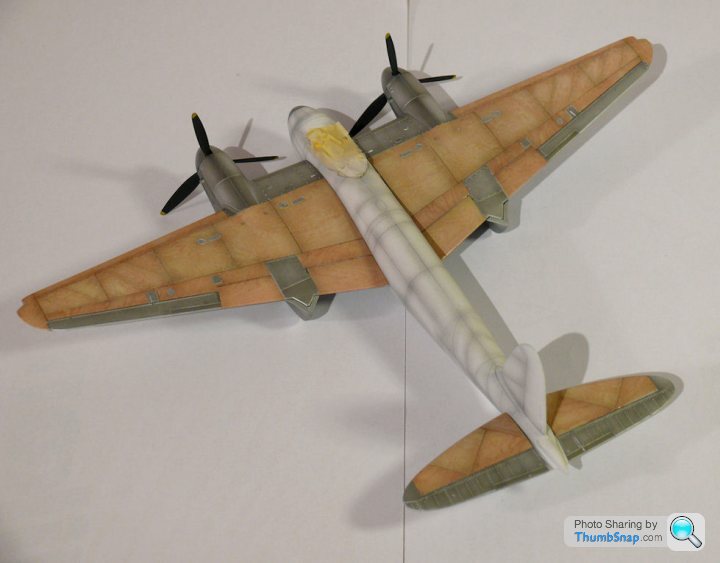
The latter is closer to reality, although the darker port wing is not really like that, I think it must be slightly in shadow.
Yes, I agree that the pale woodgrain needs deepening a bit to reduce the contrast of the preshading. In fact if it looked more like the first image in reality, I'd be happy with the effect.
Gassing Station | Scale Models | Top of Page | What's New | My Stuff