Tamiya 1:72 Mosquito FB Mk.VI
Discussion


Thanks guys.
No, I've not tried any filters (a.k.a "glaze") on my test pieces yet, but I will when the decals are comlete.
There won't be any RAF insignia at all on the airframe. Nothing to hide any errors, which is always unfortunate. I did consier making some thin black outlines for the markings, but I think it would look too fussy.
Because of the way the original aircraft was assembled - with the completed wing along with it's protective coatings fitted to the completed fuselage, it's unlikely, or probably impossible, for a Mosquito to ever have looked like this. The idea was to "simply" make a stylised representation of the different materials used in the airframe, and of course to hone a few new modelling skills. I've also got a 1:72 Revell Horten 229 which will get the same treatment, but will hopefully incorporate the lessons learned!
Edited by dr_gn on Wednesday 2nd December 22:14
Hope the link works, its the facebook page of the Canadian Historic Aircraft Association group who are building up a mozzie, and the images in the group nicely back up Docs efforts
https://facebook.com/photo.php?fbid=10153730235091...
https://facebook.com/photo.php?fbid=10153730235091...
Since the wings weren't a total disaster, I went ahead and masked the fuselage:
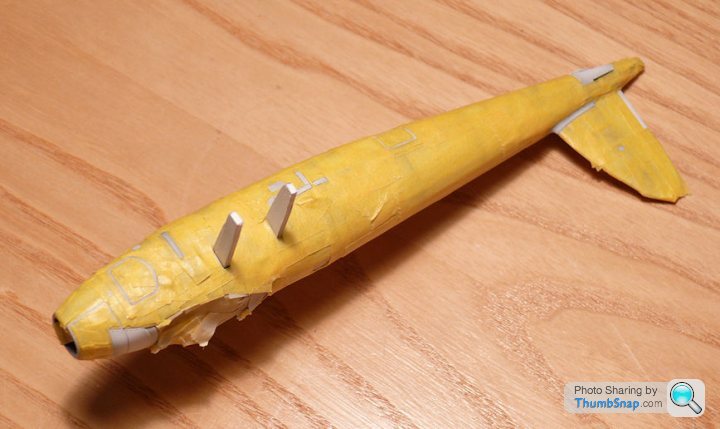
Plenty of hole punch action again.
Then sprayed Vallejo silver, preshaded and Tamiya Smoke, as per the wings. Couldn't resist putting the canopy in place:

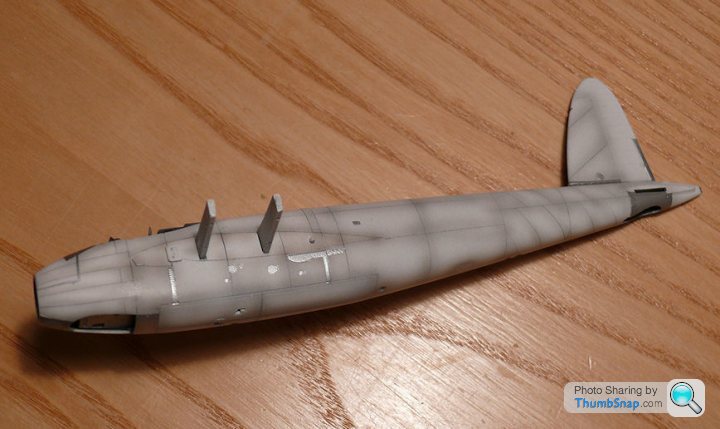
The hatch framings were a particular pain in the arse.
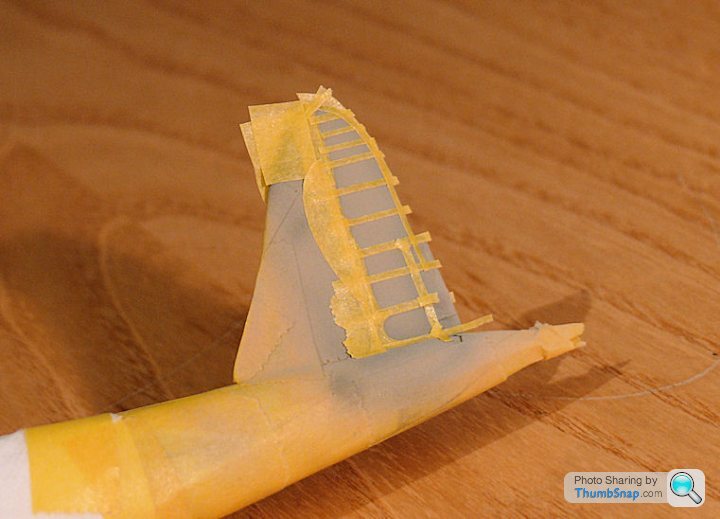
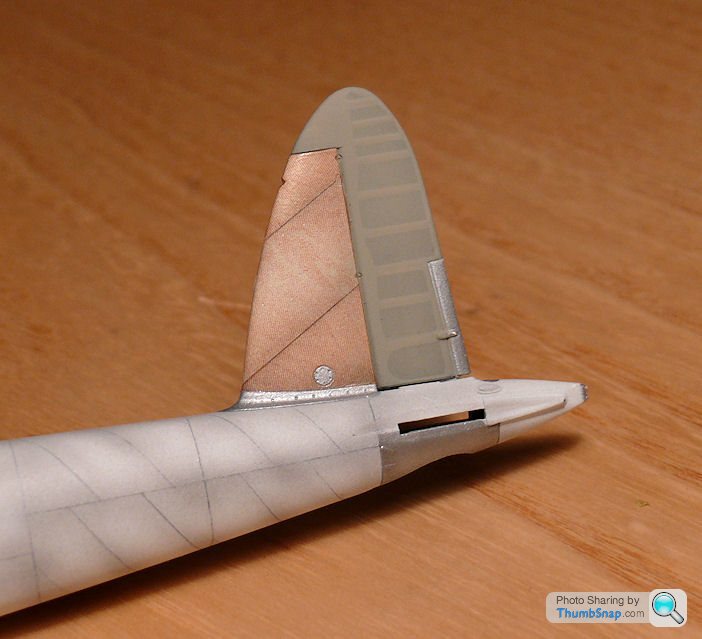
Now for the fabric rudder...
Plenty of hole punch action again.
Then sprayed Vallejo silver, preshaded and Tamiya Smoke, as per the wings. Couldn't resist putting the canopy in place:
The hatch framings were a particular pain in the arse.
Now for the fabric rudder...
Thanks guys - bit more progress tonight: I painted the fabric rudder in the same colour (Tamiya Deck Tan) than I used for the 'clear doped linen' parts of my SE.5a model. Then masked the solid parts:
And sprayed a slightly darker mix to give the effect of a 'hollow' substucture. I also sprayed in a couple of aluminium inspection panels I missed first time around:
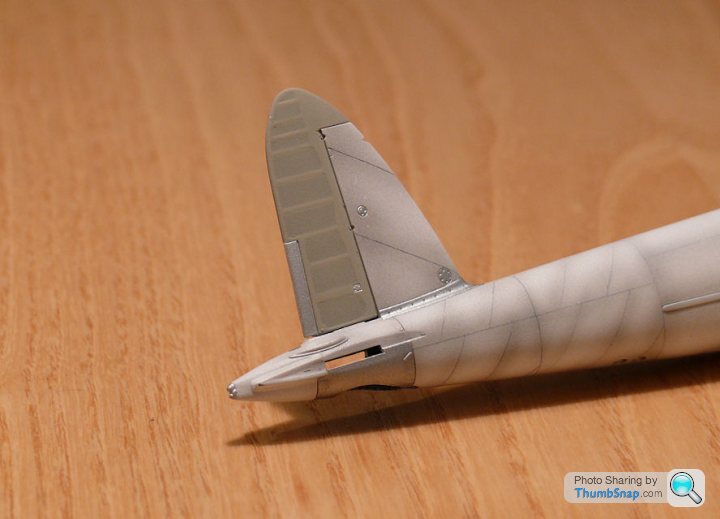
The tailcone is usually assumed to be aluminium judging by the other 'woodgrain' Mosquitos I've seen, but only the lower tailwheel shroud is metallic. I can't find references for the material of the two blisters on top of the cone (presumably fairings for control horns or linkages), but I'm going to assume they are aluminium, and I'll hand paint them. Because of the rather complex geometry, the rest of the tailcone will be finished with oil paint woodgrain. Otherwise, I think the fuselage asembly is now pretty much ready for decalling.
And sprayed a slightly darker mix to give the effect of a 'hollow' substucture. I also sprayed in a couple of aluminium inspection panels I missed first time around:
The tailcone is usually assumed to be aluminium judging by the other 'woodgrain' Mosquitos I've seen, but only the lower tailwheel shroud is metallic. I can't find references for the material of the two blisters on top of the cone (presumably fairings for control horns or linkages), but I'm going to assume they are aluminium, and I'll hand paint them. Because of the rather complex geometry, the rest of the tailcone will be finished with oil paint woodgrain. Otherwise, I think the fuselage asembly is now pretty much ready for decalling.
Fins ain't what they used to be:
Continued with the fuselage - the nose is similar to a barrel, with narrow sections forming the compound curves:
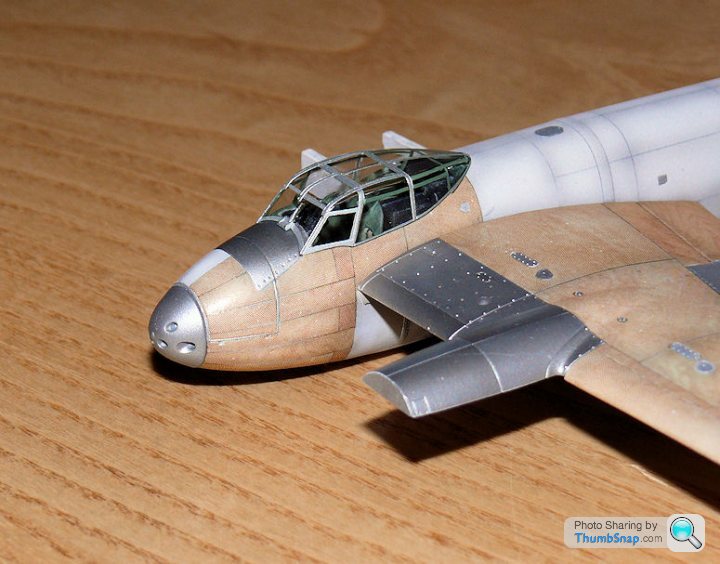
And the underside with the cannon shroud dropped in place:

the nose and the herringbone tail sections will be the most time consuming bits, so I thought I'd get them done first.
Also started to experiment with an oil paint "glaze" or filter. This is a strip of Raw Sienna, very thin, mixed with Blitz Dry to speed up the curing process:
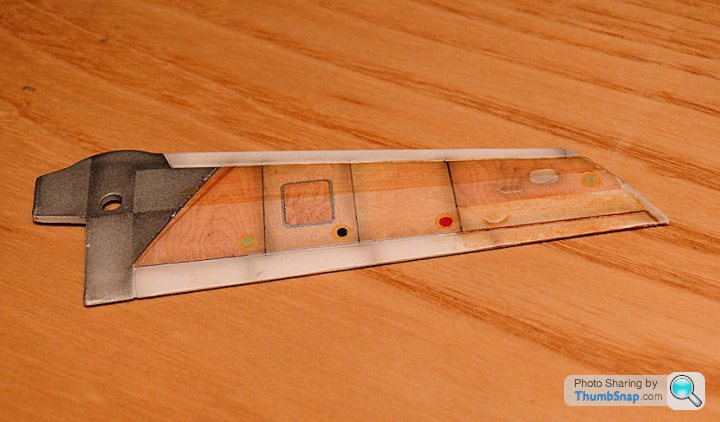
It gives a bit of depth to the colour, and gives the grain more definition. You can also play tunes with the shades of individual panels if necessary.
Continued with the fuselage - the nose is similar to a barrel, with narrow sections forming the compound curves:
And the underside with the cannon shroud dropped in place:
the nose and the herringbone tail sections will be the most time consuming bits, so I thought I'd get them done first.
Also started to experiment with an oil paint "glaze" or filter. This is a strip of Raw Sienna, very thin, mixed with Blitz Dry to speed up the curing process:
It gives a bit of depth to the colour, and gives the grain more definition. You can also play tunes with the shades of individual panels if necessary.
Edited by dr_gn on Monday 14th December 00:00
This is absolutely outstanding! I have to admit I was in awe of the Dambusters Tornado you did, but this looks like it'll blow that out of the water! I made model planes in my teens and wasn't very good then to be honest, your models are absolutely amazing!
I cannot wait to see the finished product!

I cannot wait to see the finished product!
Thanks guys - personally I'm not passing judgment until it's done - still a long way to go with various processes, but so far so good.
Finished the other side of the forward fuselage tonight:
I'll do the door when the PVA has fully cured on the surrounding decals. I'll aply it oversize, then trim around the panel lines to get a perfect profile. Hopefully.
Finished the other side of the forward fuselage tonight:
I'll do the door when the PVA has fully cured on the surrounding decals. I'll aply it oversize, then trim around the panel lines to get a perfect profile. Hopefully.
Nick_MSM said:
Looking good 
Thanks Nick!So this evening there was more cutting templates, cutting decals and PVA-ing them to the fuselage:


I've found that cutting the decals slightly oversize to the templates is best: I can always trim the decals freehand with a #11 blade along the pencil panel lines if they are too big. If they are too small, it's game over for the entire panel...
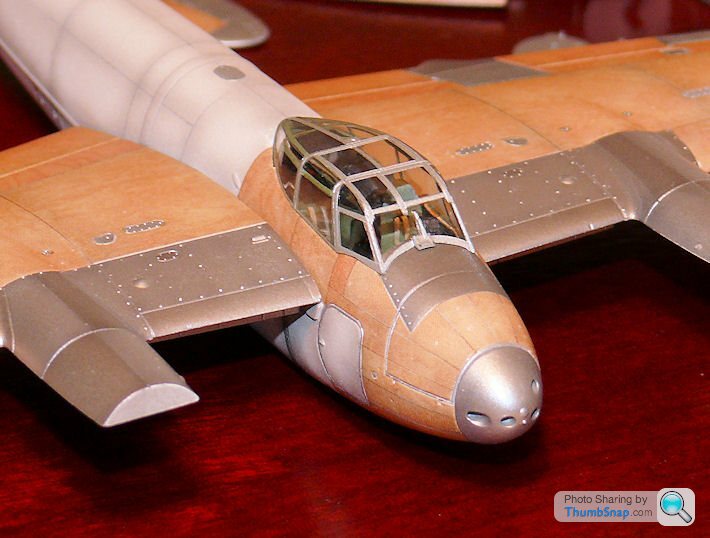
Fuselage finished (more or less):

And most of the wing undersides. I've used a slightly finer and darker grain for the fuel tank covers. Most of the models I've seen have these in aluminium, and it's an easy mistake to make becasue they have loads of fasteners and features within them and around their edges, but a bit of research confirms they are wood:
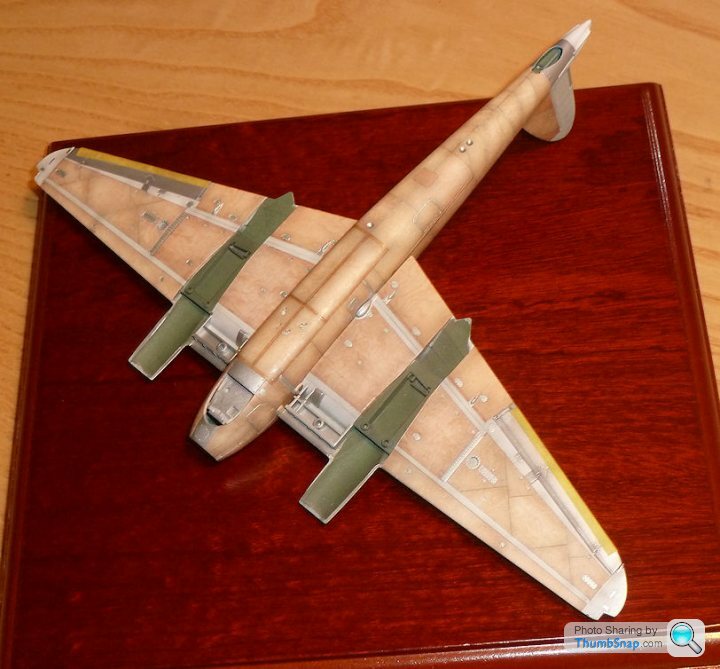
The bomb door edges were made darker by applying a second strip of decal over the first. The ejection ports still need their surrounds darkening like this.
And most of the wing undersides. I've used a slightly finer and darker grain for the fuel tank covers. Most of the models I've seen have these in aluminium, and it's an easy mistake to make becasue they have loads of fasteners and features within them and around their edges, but a bit of research confirms they are wood:
The bomb door edges were made darker by applying a second strip of decal over the first. The ejection ports still need their surrounds darkening like this.
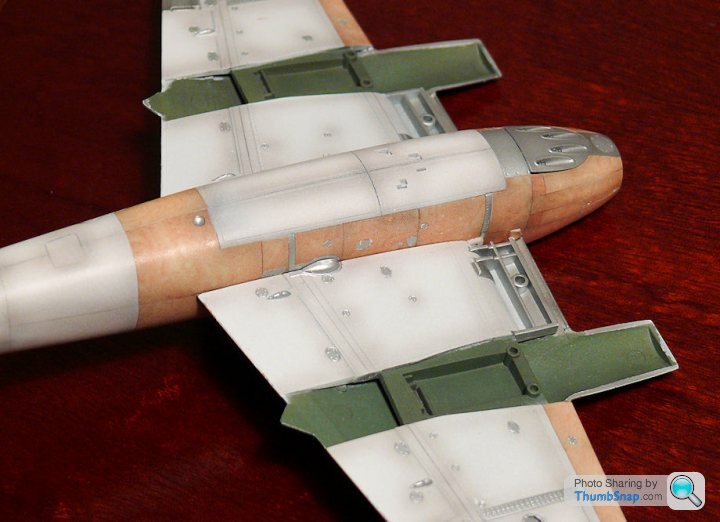
So the wing undersides are done, or at least all the decals ore on. Just the undersides of the tailplanes to go now:

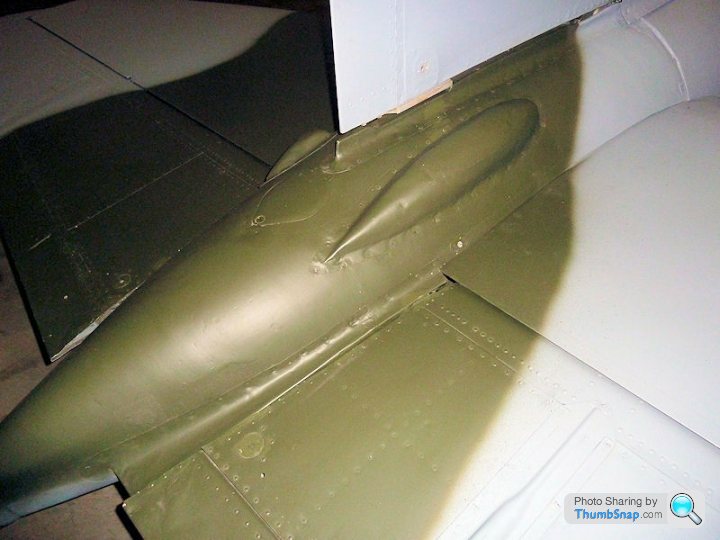
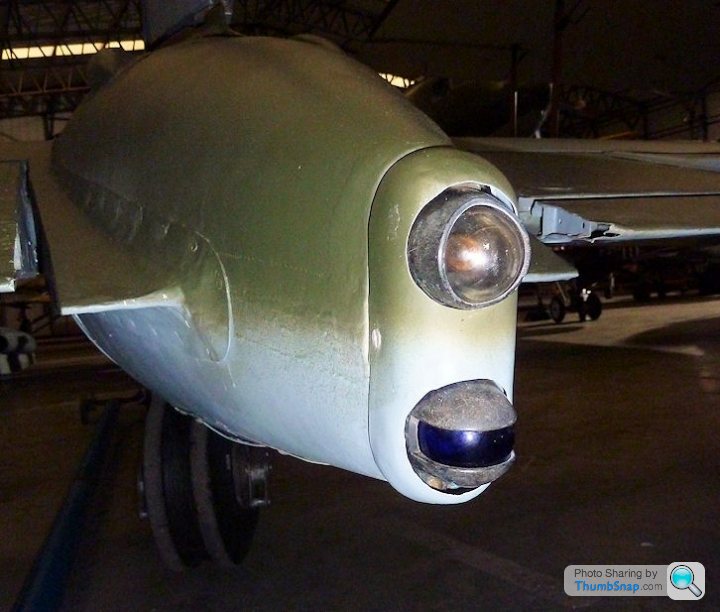
Had a trip to the Yorkshire Air Museum at Elvington today. Really nice place, and they have Mosquito HJ711, which is slowly being restored to taxi-able condition by owner Tony Agar. I asked one of the staff if I could get a closer look, and he was happy to oblige. I was able to put the last pieces of the jigsaw into place i.e the tailcone teardrop/elevator fairings are indeed aluminium:
And the rear lamp colours:
And the mysterious "thing" mounted on the roof of the canopy:

...is a flare pistol.
I also found out the bomb doors are edged in aluminium, not hardwood - a day after I edged them with hardwood decals. Dammit.
Anyway I got quite a few more detail picures of the aircraft. I did ask if I could open the cockpit door, but the guy immediately saw where that line of enquiry was going and politely declined It was worth a try though.
Had a trip to the Yorkshire Air Museum at Elvington today. Really nice place, and they have Mosquito HJ711, which is slowly being restored to taxi-able condition by owner Tony Agar. I asked one of the staff if I could get a closer look, and he was happy to oblige. I was able to put the last pieces of the jigsaw into place i.e the tailcone teardrop/elevator fairings are indeed aluminium:
And the rear lamp colours:
And the mysterious "thing" mounted on the roof of the canopy:
...is a flare pistol.
I also found out the bomb doors are edged in aluminium, not hardwood - a day after I edged them with hardwood decals. Dammit.
Anyway I got quite a few more detail picures of the aircraft. I did ask if I could open the cockpit door, but the guy immediately saw where that line of enquiry was going and politely declined
It was worth a try though.

Gassing Station | Scale Models | Top of Page | What's New | My Stuff