Tamiya 1:72 Mosquito FB Mk.VI
Discussion


Hard-Drive said:
So I assume all this is in aid of ultra realistic "pre-graining" and you'll camo this model shortly safe in the knowledge that under very close inspection you'll just be able to make out the subtle differences in the plywood underneath the paint? 
Strange you should say that...I was looking at a "How to model the DH Mosquito" book at the Yorkshire Air Museum, and there was a model of one that had flown through the fireball of the aircraft (or flying bomb or whatever) that it had just destroyed. Most of the paint had been burned off. The modeller had fully woodgrained the model, then applied camo and selectively removed large areas of it to simulate the burned-off paint.
It looked OK, but I doubt pristine looking wood would have been exposed rather than the protective over coatings.

There are a few images similar to this of Mosquitos.
Tried oil painting the tailcone, but it didn't really work, so I tried agiain using decals. very fiddly, but it looks better than paint. Maybe needs a bit of fettling, but it will have to do:

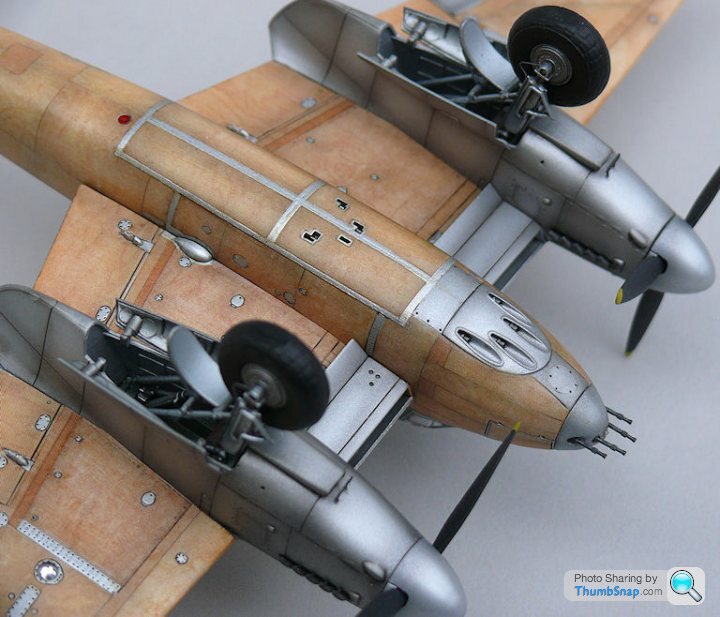
Also corrected the bomb door surrounds from hardwood to aluminium:

I used off-cuts of the woodgrain carrier film border, sliced into strips and sprayed aluminium. The ejector hole surrounds were hand painted with aluminium.
Also corrected the bomb door surrounds from hardwood to aluminium:
I used off-cuts of the woodgrain carrier film border, sliced into strips and sprayed aluminium. The ejector hole surrounds were hand painted with aluminium.
That scorched one had just shot down a V1 at about 100 yards, I gather. They were exceedingly lucky that the elevators weren't fabric covered too, or they wouldn't have made it back.
Your work on this model is fascinating and beautiful.
Your work on this model is fascinating and beautiful.
Edited by Lowtimer on Wednesday 30th December 09:41
Lowtimer said:
That scorched one had just shot down a V1 at about 100 yards, I gather. They were exceedingly lucky that the elevators weren't fabric covered too, or they wouldn't have made it back.
Your work on this model is fascinating and beautiful.
Thanks for the info. I think the elevators were also fabric on early versions.Your work on this model is fascinating and beautiful.
Edited by Lowtimer on Wednesday 30th December 09:41
Drilled out the wing tip lamp covers and dotted some Tamiya clear red and green/blue in the holes to represent the coloured bulbs:

And added some brake lines to the u/c legs. The thick lead wire will form a couple of oil pipes from the tanks through the bulkheads:

Also painted the brass machine guns for the nose. I wrapped bits of tamiya tape around the barrels to help centre them in the oversized holes in the nose cone:

Started final assembly tonight. I used Araldite to fix the wings - I'd thinned the spars down to give a bit of wiggle room to get a tight fit against the fuselage, and so I needed some adhesive with gap filling properties:

And fitted the u/c:

Quick check that everything was square (nothing worse than a wonky undercarriage):

Hopefully get it finished this week.
And fitted the u/c:
Quick check that everything was square (nothing worse than a wonky undercarriage):
Hopefully get it finished this week.
Matt172 said:
Amazing, your models are stunning 
Agreed, they are indeed inspiring. I was given the Airfix Gladiator for Christmas, and have now re-read that entire thread, conducted initial research into the 'Hal Far Fighter Flight', planned trips to Yeovilton and Old Warden, sourced EzLine etc... I might even find the time to make the model.
Yertis said:
Matt172 said:
Amazing, your models are stunning
Agreed, they are indeed inspiring. I was given the Airfix Gladiator for Christmas, and have now re-read that entire thread, conducted initial research into the 'Hal Far Fighter Flight', planned trips to Yeovilton and Old Warden, sourced EzLine etc... I might even find the time to make the model.
BTW, the Airfix Gladiator is a very nice kit.
From one kit builder to another, that is some awesome work there. Fitting all the wood effect panels and airbrushing the individual aluminium parts, requiring a lot of careful masking. Would have been so easy to cut corners somewhere (excuse the pun). Where do you get the patience from and can I have some!
EagleMoto4-2 said:
From one kit builder to another, that is some awesome work there. Fitting all the wood effect panels and airbrushing the individual aluminium parts, requiring a lot of careful masking. Would have been so easy to cut corners somewhere (excuse the pun). Where do you get the patience from and can I have some!
Thanks for the nice comments. There are about 160 individual pieces of decal paper on the model, and yes, a lot of masking!I love this model.
For sure it in part because it takes me back to my days of making balsa and tissue paper flying planes when I was younger, and carving my own gliders.
As a designer, I also really like the visibility of the design & manufacture of the aircraft as well - particularly on this plane, as it was distinct from the majority of metal constructions of the time...
I'm making the 1/32nd Mosquito from tamiya, and I am seriously considering using this thread as inspiration - for that is what it is - to do the same thing - if that was ok with the Doc!!
caterhamnut said:
I love this model.
For sure it in part because it takes me back to my days of making balsa and tissue paper flying planes when I was younger, and carving my own gliders.
As a designer, I also really like the visibility of the design & manufacture of the aircraft as well - particularly on this plane, as it was distinct from the majority of metal constructions of the time...
I'm making the 1/32nd Mosquito from tamiya, and I am seriously considering using this thread as inspiration - for that is what it is - to do the same thing - if that was ok with the Doc!!
Thanks! It would be great to see a similar thing in 1:32. It would be easier to do, and would probably look better too: Even after a lot of experimentation on scrap parts, I'm still not 100% sure about the amount of preshading that remains along the panel lines. Too much and it looks terrible, not enough, and it just doesn't look right. Trouble is, until you apply the decals you can't tell. You would possibly need different types of decal, but again it would take experimentation.For sure it in part because it takes me back to my days of making balsa and tissue paper flying planes when I was younger, and carving my own gliders.
As a designer, I also really like the visibility of the design & manufacture of the aircraft as well - particularly on this plane, as it was distinct from the majority of metal constructions of the time...
I'm making the 1/32nd Mosquito from tamiya, and I am seriously considering using this thread as inspiration - for that is what it is - to do the same thing - if that was ok with the Doc!!
Feel free to copy the panel lines. Again, there are lots of different interpretations about what's right, but this is as close as I can get to being consistent with most of my references. The only significant error I've made - I think - is that the access door should be planked, not a single panel.
dr_gn said:
I'm still not 100% sure about the amount of preshading that remains along the panel lines. Too much and it looks terrible, not enough, and it just doesn't look right. Trouble is, until you apply the decals you can't tell. You would possibly need different types of decal, but again it would take experimentation.
It all looks perfectly fine to me, especially when you see some of the "Spanish School" over pre-shaded abominations that appear in some mags. 
So here are the finished pictures:
Decals were Uschi van der Rosten WGSF48-C (Fine Veneer Plywood), WGSF48-B "Knotless Birch) and Ho-229 Special Edition (1 of 6). There were more than 160 individual pieces in total.
Metallic parts were Vallejo Air Silver, Aluminium & Steel.
Eduard belts, radiators & intake mesh.
Master Model brass machine gun barrels.
Little Lenses in various positions.
Acetate reflector gunsight.
Lead wire brake pipes.
Brass tube pitot head.
A bit of scratchbuilding in the cockpit.
Apart from that OOB. It's another great Tamiya kit.
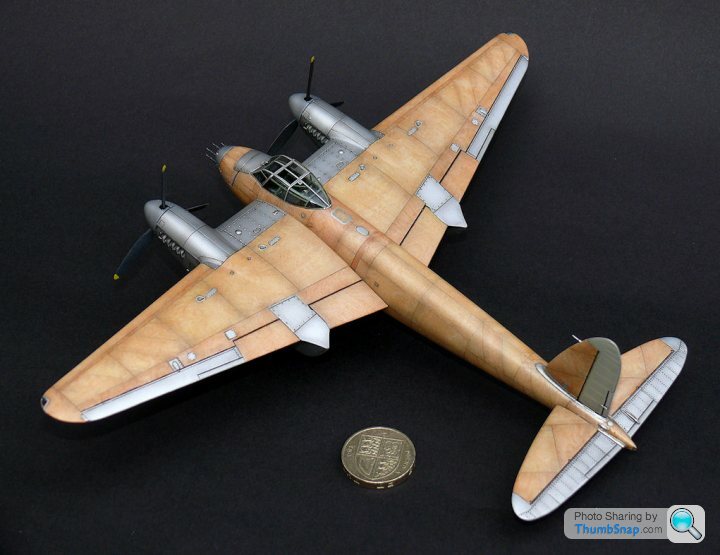


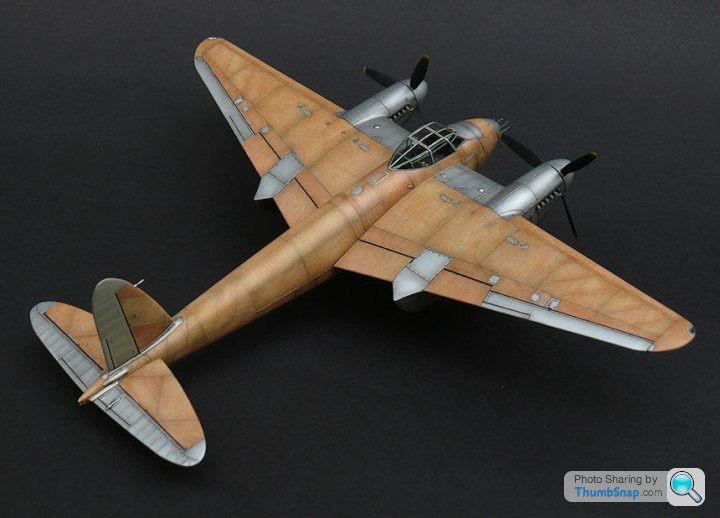


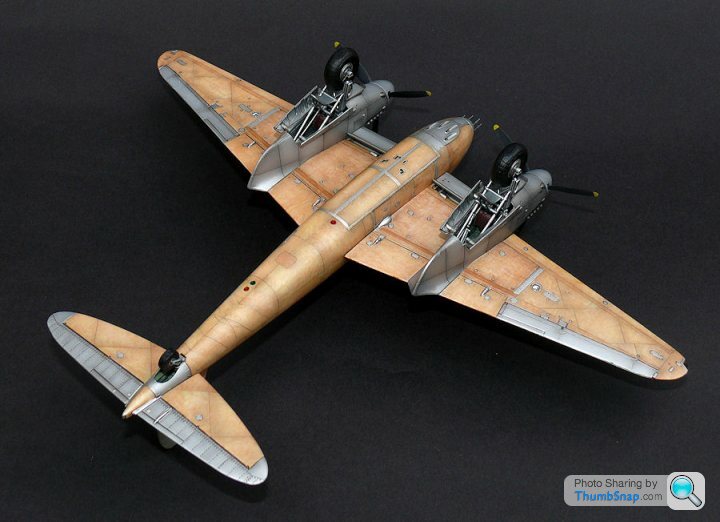


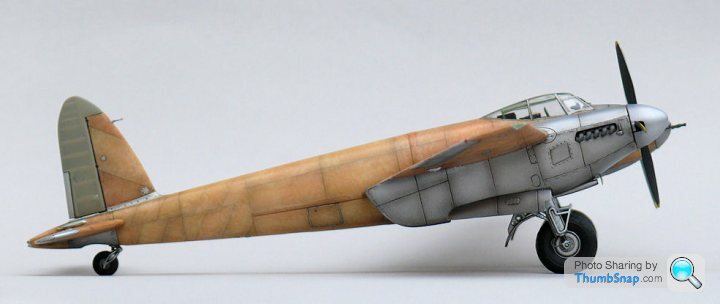
Thanks for looking!
Decals were Uschi van der Rosten WGSF48-C (Fine Veneer Plywood), WGSF48-B "Knotless Birch) and Ho-229 Special Edition (1 of 6). There were more than 160 individual pieces in total.
Metallic parts were Vallejo Air Silver, Aluminium & Steel.
Eduard belts, radiators & intake mesh.
Master Model brass machine gun barrels.
Little Lenses in various positions.
Acetate reflector gunsight.
Lead wire brake pipes.
Brass tube pitot head.
A bit of scratchbuilding in the cockpit.
Apart from that OOB. It's another great Tamiya kit.
Thanks for looking!


Gassing Station | Scale Models | Top of Page | What's New | My Stuff