Tamiya 1:72 Mosquito FB Mk.VI
Discussion


Fabulous modelling skills!
You may have seen this already but if not it might be of interest.
Kermit Weeks gives a tour of his Mosquito. This is the first of three parts:
https://www.youtube.com/watch?v=yd2M21nlw0w
You may have seen this already but if not it might be of interest.
Kermit Weeks gives a tour of his Mosquito. This is the first of three parts:
https://www.youtube.com/watch?v=yd2M21nlw0w
Voldemort said:
Fabulous modelling skills!
You may have seen this already but if not it might be of interest.
Kermit Weeks gives a tour of his Mosquito. This is the first of three parts:
https://www.youtube.com/watch?v=yd2M21nlw0w
Thanks - those are a great series of videos.You may have seen this already but if not it might be of interest.
Kermit Weeks gives a tour of his Mosquito. This is the first of three parts:
https://www.youtube.com/watch?v=yd2M21nlw0w
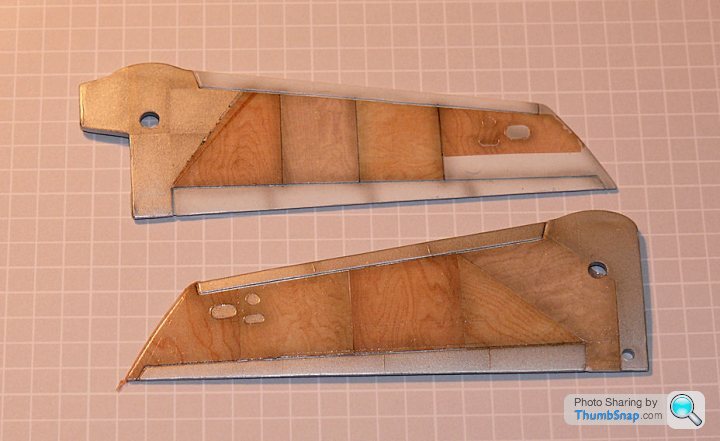
So having had a chat with Alex from UvanderR about his decals and my issues with them, I tried again following a slightly diffrent technique. The following is definitely not meant to be a "how to", rather a record for myself of my experiments so far!
First, spray with white - in this case Tamiya white primer. Then a bit of my own experimentaton - rather than scribe panel demarcarions, draw them on with a pencil. Then preshade with Tamiya Clear Smoke (preshading with a solid colour over white just means more overcoating to knock the effect back):
I've also experimented with the Vallejo Air Aluminium and Steel to give some metal panel contrast.
Next, cut Tamiya Tape to form templates for the woodgrain decals:
Then transfer the templates to the decal sheets, and cut out the decals:
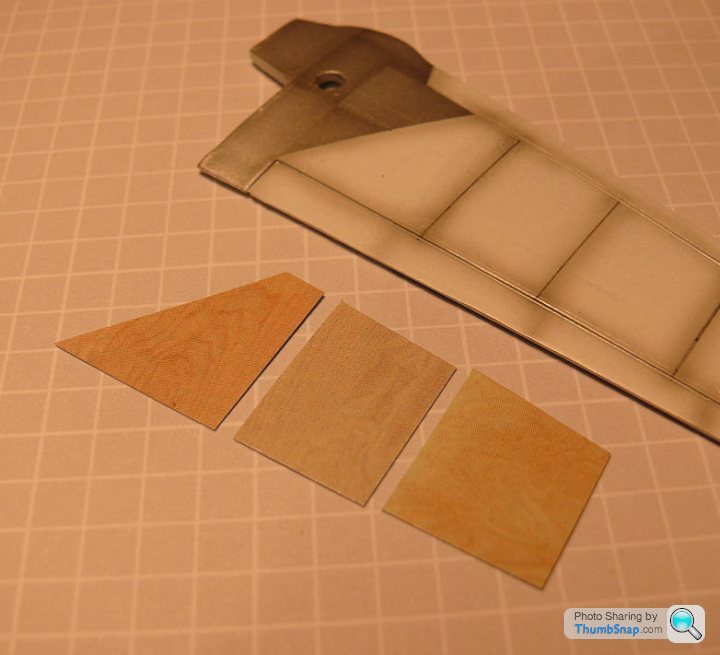
For the record, l-r:
"Horten 229 Special Edition 1 of 6"
"WSGF48B Knotless Pine"
"WSGF48B Knotless Rich"
These dcals are primarily intended for 1:48 scale, but since real woodgrain has a wide dimensional range, it makes little difference accross the smaller scales.
Then apply Klear (I will try Mr.Paint varnish next time since it is apparently more suited to these decals), and apply decals using diluted PVA (the decals themselves don't have enough residual adhesive once removed from their backing sheet):
No MicroSol was used this time, and I think this gave a smoother finish than previously. It has a coat of Humbrol matt applied (this will be replaced next time with Mr.Hobby Gloss + Tamiya Flat Base). Obviously the light base coat makes the woodgrain far more visible than when using light browns, and it all looks way better than the last experiment:
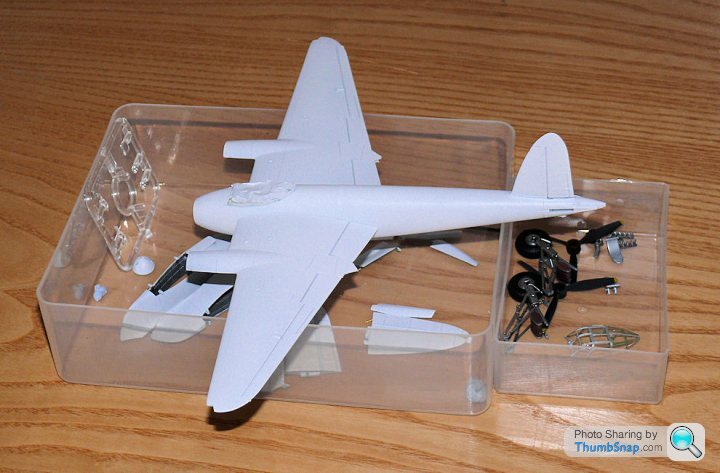
So I went ahead and completed the airframe in white primer, and will now draw the panel breaks on in pencil. In the end I did fill the dinghy hatch and a few other small panel lines, and will represent them with pencil lines:
As an aside regarding the Vallejo Air Aluminium/Steel: I saw the new Vallejo "Metal Colour" acrylics (think Alclad without the hassle) at Telford. They look OK, but to my eyes didn't seem a big enough step - if at all - from their "Air" counterparts to be worthwhile.
First, spray with white - in this case Tamiya white primer. Then a bit of my own experimentaton - rather than scribe panel demarcarions, draw them on with a pencil. Then preshade with Tamiya Clear Smoke (preshading with a solid colour over white just means more overcoating to knock the effect back):
I've also experimented with the Vallejo Air Aluminium and Steel to give some metal panel contrast.
Next, cut Tamiya Tape to form templates for the woodgrain decals:
Then transfer the templates to the decal sheets, and cut out the decals:
For the record, l-r:
"Horten 229 Special Edition 1 of 6"
"WSGF48B Knotless Pine"
"WSGF48B Knotless Rich"
These dcals are primarily intended for 1:48 scale, but since real woodgrain has a wide dimensional range, it makes little difference accross the smaller scales.
Then apply Klear (I will try Mr.Paint varnish next time since it is apparently more suited to these decals), and apply decals using diluted PVA (the decals themselves don't have enough residual adhesive once removed from their backing sheet):
No MicroSol was used this time, and I think this gave a smoother finish than previously. It has a coat of Humbrol matt applied (this will be replaced next time with Mr.Hobby Gloss + Tamiya Flat Base). Obviously the light base coat makes the woodgrain far more visible than when using light browns, and it all looks way better than the last experiment:
So I went ahead and completed the airframe in white primer, and will now draw the panel breaks on in pencil. In the end I did fill the dinghy hatch and a few other small panel lines, and will represent them with pencil lines:
As an aside regarding the Vallejo Air Aluminium/Steel: I saw the new Vallejo "Metal Colour" acrylics (think Alclad without the hassle) at Telford. They look OK, but to my eyes didn't seem a big enough step - if at all - from their "Air" counterparts to be worthwhile.
Edited by dr_gn on Sunday 8th November 11:44
perdu said:
Trying (almost) desperately to avoid over'awesoming' my comments lately G but here's an instant reason to revert
That is an extremely effective method of 'wooding' a model
Kinda awesome
Ta Perdu. Not 100% happy with the effect yet, but getting there. Then again I'd rather screw these bits of scrap up than the real thing.That is an extremely effective method of 'wooding' a model
Kinda awesome
perdu said:
I know what you mean
However I can't begin to understand how you got so many pieces of Tornado to play with
Oh
Ok yes I can begin to imagi...
They make excellent practice pieces
Ha ha - the wings are from the Airfix Tornado kits I bought just to get the 617 anniversary decals...However I can't begin to understand how you got so many pieces of Tornado to play with
Oh
Ok yes I can begin to imagi...
They make excellent practice pieces

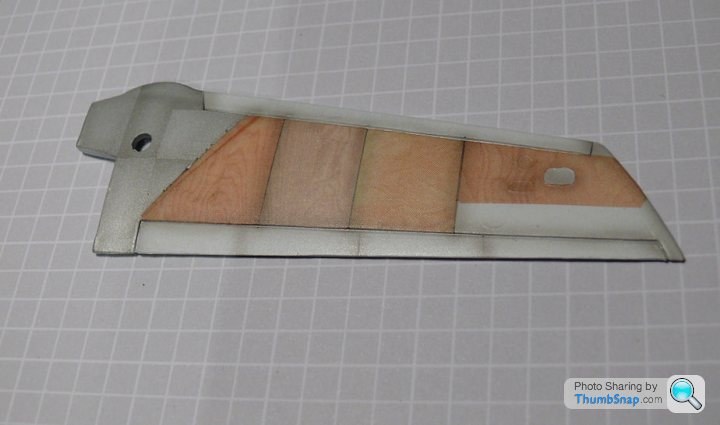
So this is a version (bottom wing) with thicker joint lines that the middle one, but no preshading at all, plus a couple of new grain decals:
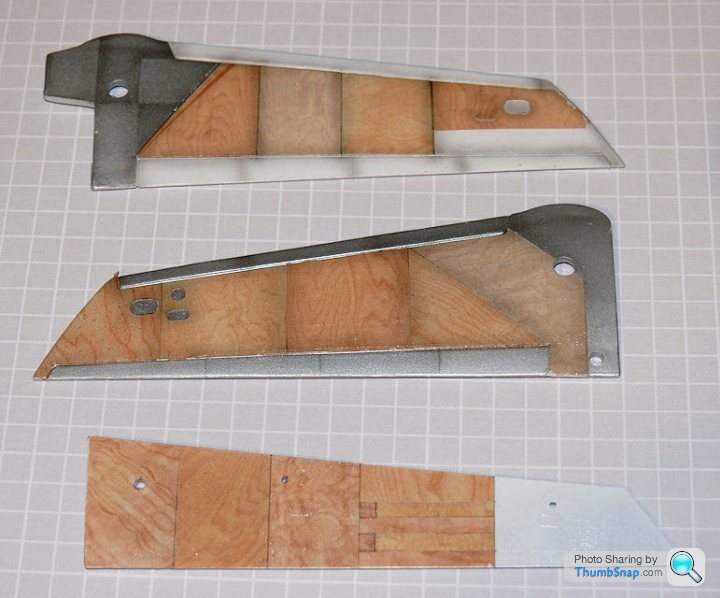
Far too MFI kitchen I think.
Looks like there are only two or three grain types that look right, plus it needs a smidge of preshading similar to the middle wing. I think the preshade also hides any slight edge errors - the pure white sticks out a mile.
Next job is to try matching some oil colours to the decals to get a match for the tailcone. I'll use the remaining white bits of wings for this. I've not seen that many woodgrain Mosquitos, but IIRC all of them assumed a metallic tailcone, which, surprisingly given it's complexity, is wrong. I doubt the decals will conform to it, so I'm left with brush painting the grain in that area.
At least doing these decal tests have reassured me that templating and applying them is actually very easy - at least on a flat panel!
One of the 'woodgrain' Mosquitoes that are going around lately won an award at Telford, did you see it?
We had one on the aircraft judging table at the Midland Expo, not sure if it's the same one
I wasn't judging Aircraft, I was allocated Dioramas
I think your conclusions are about on the mark
looking very interesting
I might need some of those decals when I scratch build my next(next) project after my Hansom Cab
perdu said:
One of the 'woodgrain' Mosquitoes that are going around lately won an award at Telford, did you see it?
We had one on the aircraft judging table at the Midland Expo, not sure if it's the same one
I wasn't judging Aircraft, I was allocated Dioramas
I think your conclusions are about on the mark
looking very interesting
I might need some of those decals when I scratch build my next(next) project after my Hansom Cab
Yes, I saw the Mosquito in the comp. I think it was 1:48? The effect was OK, but they'd got the panel materials (wood/aluminium)mixed up, particuarly on the wings. Surprising they'd go to so much trouble with the decals, but make so many errors in terms of which panels were actually wood.We had one on the aircraft judging table at the Midland Expo, not sure if it's the same one
I wasn't judging Aircraft, I was allocated Dioramas
I think your conclusions are about on the mark
looking very interesting
I might need some of those decals when I scratch build my next(next) project after my Hansom Cab
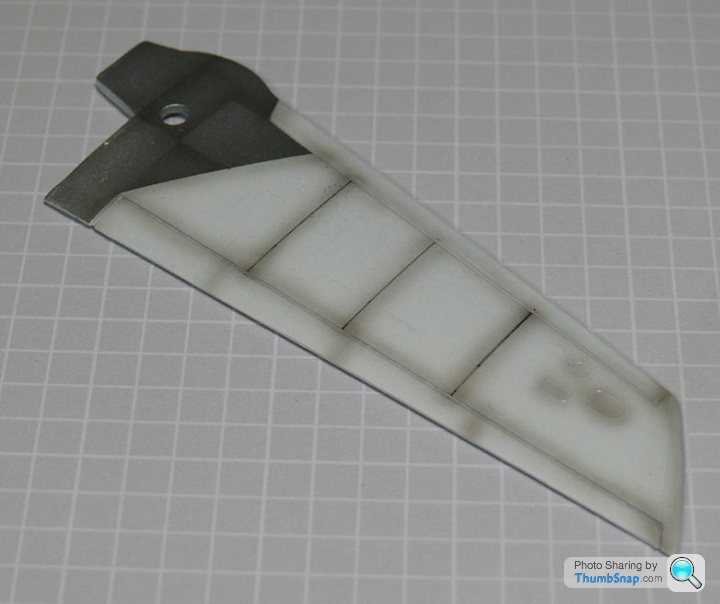
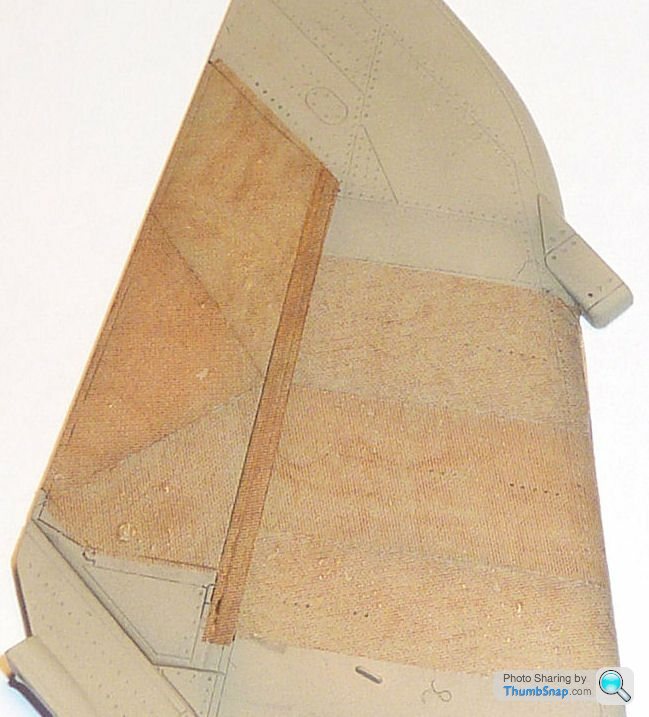
I've been puzzling over how to represent the dinghy hatch behind the canopy:

(image courtesy of "The People's Mosquito" project: http://www.peoplesmosquito.org.uk/)
It was moulded-in on the plastic, but the double lines (representing the metallic framing) around the fuselage joint line area were too fine to re-scribe, and basically I screwed it. I tried several times to re-scribe them, but then opted to simply draw the hatch and framing in pencil. This was also a disaster - trying to get concentric lines at this scale - even using templates - proved impossible.
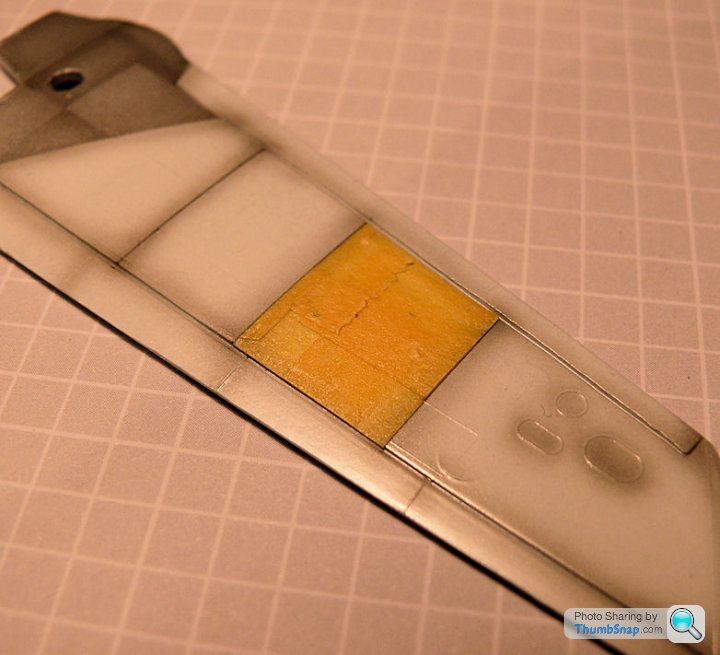
So I tried this: Forget scribing or drawing the lines on. Cut a rectangle of clear decal paper, and spray aluminium. using that as a guide, cut a slightly smaller rectangle and paint white, and preshade. Finally, cut some woodgrain to suit the white decal:
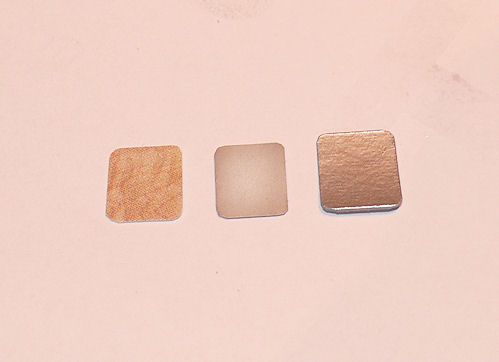
Then apply in sequence to existing plain woodgrain:
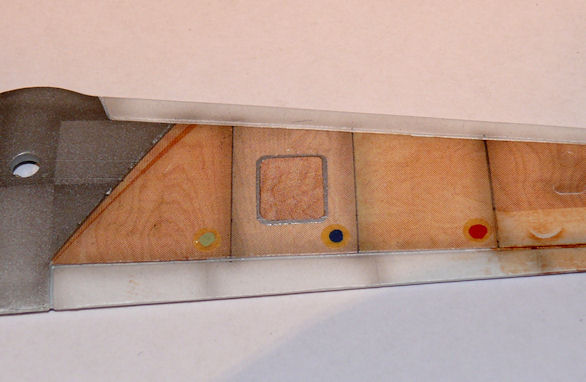
Difficult to get a photgraph to match reality, but it worked fine.:
Obviously the geometry on the final model will be much more accurate, and it still needs a small window forming in one corner, but it seems a fairly risk-free way of doing it.
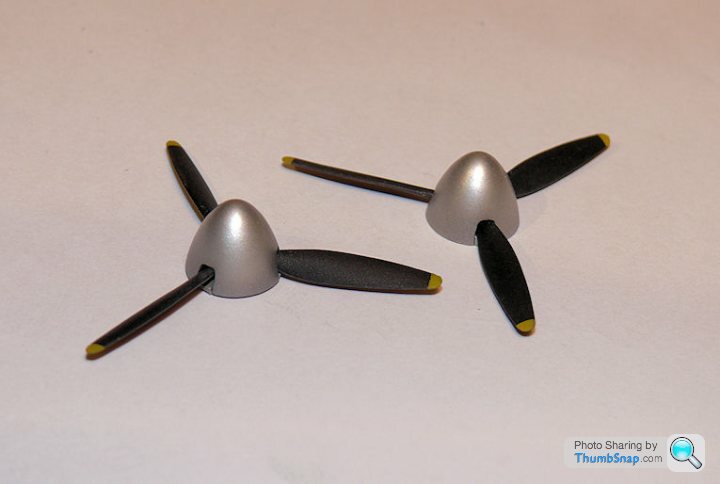
Also made a start on the metallic areas, and got the spinners done:
(image courtesy of "The People's Mosquito" project: http://www.peoplesmosquito.org.uk/)
It was moulded-in on the plastic, but the double lines (representing the metallic framing) around the fuselage joint line area were too fine to re-scribe, and basically I screwed it. I tried several times to re-scribe them, but then opted to simply draw the hatch and framing in pencil. This was also a disaster - trying to get concentric lines at this scale - even using templates - proved impossible.
So I tried this: Forget scribing or drawing the lines on. Cut a rectangle of clear decal paper, and spray aluminium. using that as a guide, cut a slightly smaller rectangle and paint white, and preshade. Finally, cut some woodgrain to suit the white decal:
Then apply in sequence to existing plain woodgrain:
Difficult to get a photgraph to match reality, but it worked fine.:
Obviously the geometry on the final model will be much more accurate, and it still needs a small window forming in one corner, but it seems a fairly risk-free way of doing it.
Also made a start on the metallic areas, and got the spinners done:
Edited by dr_gn on Saturday 14th November 22:10
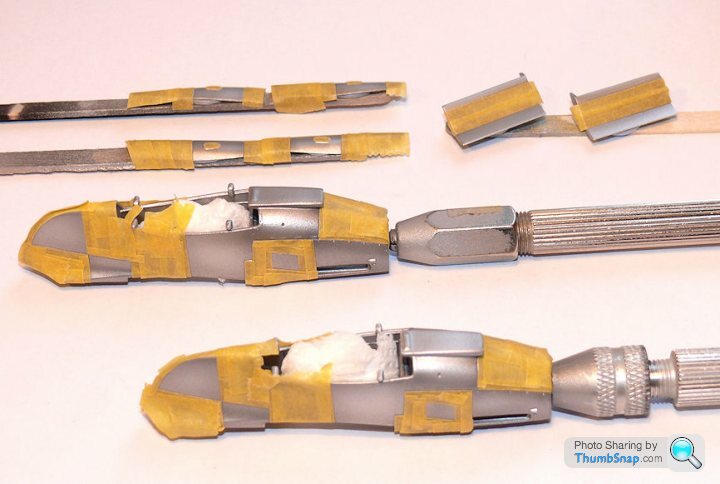
I've masked the aluminium nacelles ready for overspraying with a slightly darker shade, or maybe clear "smoke" to give a bit of contrast between the panels:
Also made a start on drawing the main wood skin demarcations on the wings and tailplanes:
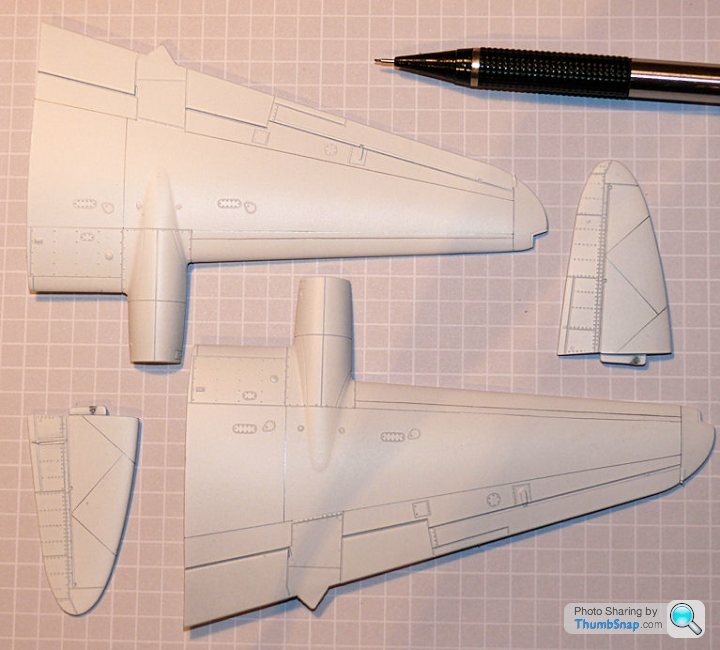
At least these are my best guess based on studying photographs. Another couple of chord-wise lines on the wings, and they'll be done.
Also made a start on drawing the main wood skin demarcations on the wings and tailplanes:
At least these are my best guess based on studying photographs. Another couple of chord-wise lines on the wings, and they'll be done.
EskimoArapaho said:
Loving this, dr! I wonder what the furniture makers would think of this painstaking effort to replicate their work in miniature.
Not sure - probably that it's all a bit silly. The more I find out about how these things were designed and built, the more I appreciate the skills of the people involved. It's a pretty amazing aircraft all things considered; in some ways archaic in terms of raw materials, in other ways quite advanced in terms of construction techniques. The performance of the end result says it all. I wonder what the furniture makers would think of this painstaking effort to replicate their work in miniature.Gassing Station | Scale Models | Top of Page | What's New | My Stuff