Model Railway - Digwell Junction
Discussion


Last Christmas I opened a large present from Mrs RacingPete and to my surprise it turned out to be this...
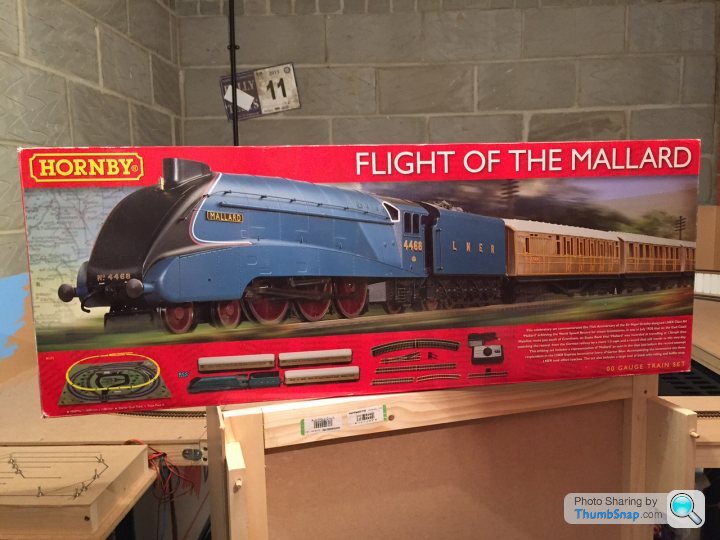
Having been a bit into model railways when younger this got me into thinking, and as I had a little bit of spare space in the garage I decided to get building. I have always liked the turn of steam into diesel (plus the cars and planes can still be interesting then too) so mid '60s for the theme of the layout.
So have built a couple of baseboards, stuck to 4' x 2' boards 9mm thick so that they don't warp as much (or hopefully none at all), the picture below shows before a middle brace was put in place.
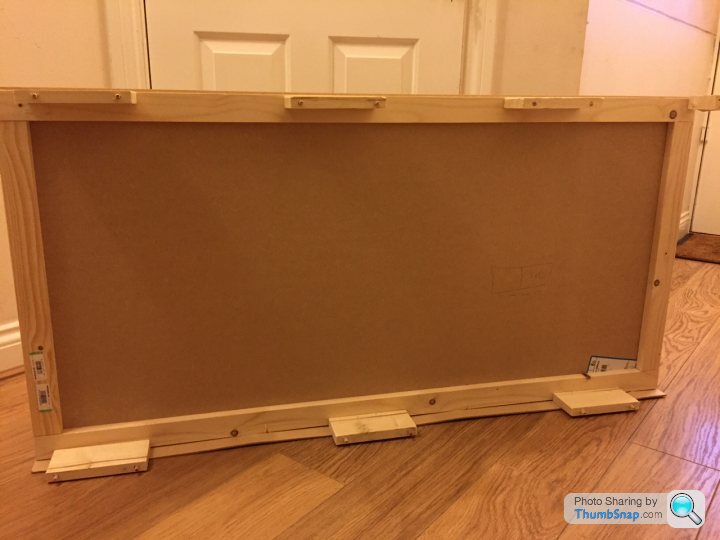
The idea is to have an oval (so the kids can at least drive a train round without running off the end of the track), and then to have an industrial area (a small brewery) and a branch line up to a town terminus.
This will hopefully allow for a bit of operational interest across the railway, as well as giving lots of opportunity to add different models into the scene (of cars and planes). The industrial area will be a variation of the shunting puzzle Inglenook Sidings, which is like a hanoi tower but with trucks. Then the branch will be an out and back line, to the oval below.
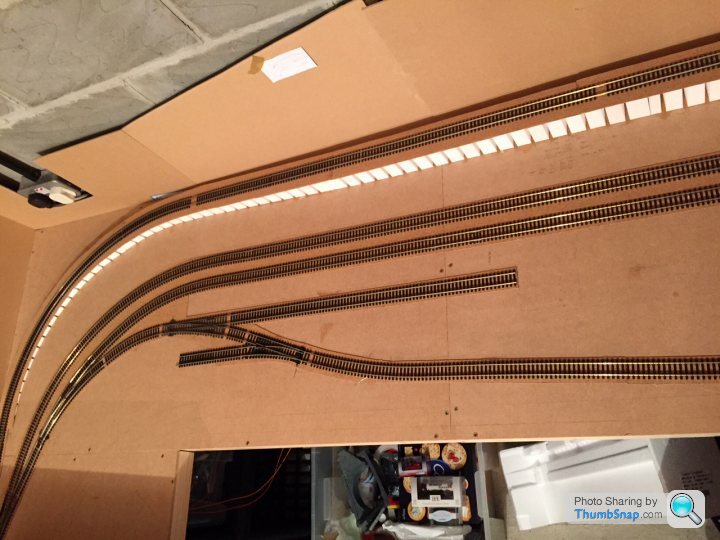
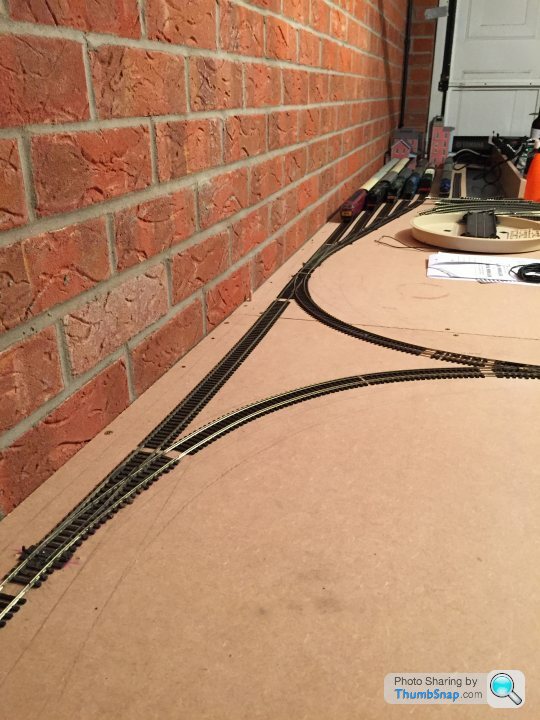
I toyed with having a twin line oval, but want the modelling to be key, and not just have a load of track and not space for the other stuff... so after a few spare evenings have laid the track for the lower level (just can't see the right hand side)
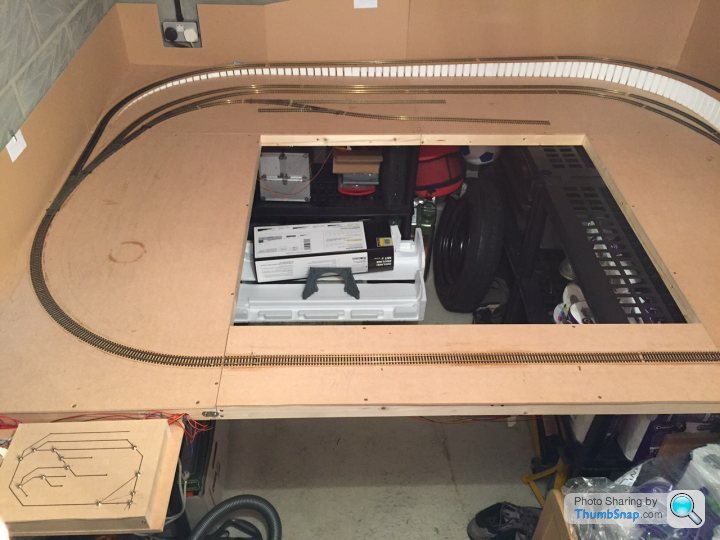
On the far side is a lower level station - I am not sure about this area, and may redo the track. The idea was to have a twin line station, with a goods area, and maybe some cattle/coal drops... need to mock it up to see if I really like it.
I have to get to the parents house to pick up some of the older models, but these are the current collection...
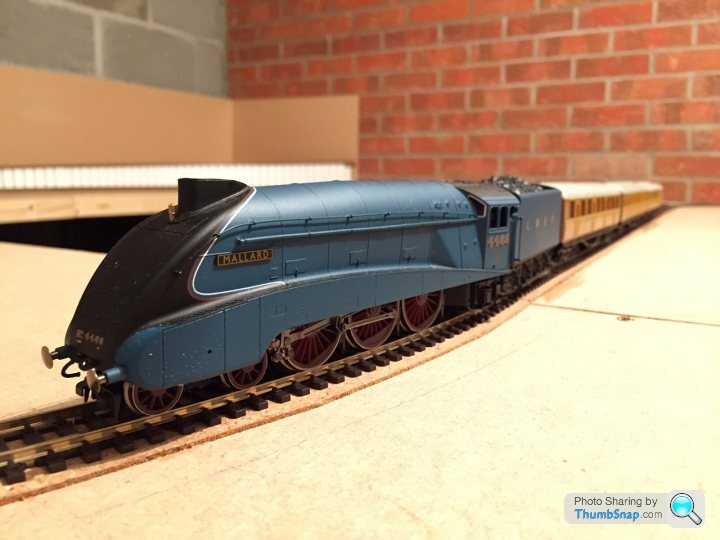
First the Hornby A4 Mallard that came in the set
My Dad, who grew up in the South got me a second hand finescale Hornby Merchant Navy Clan Line, which is a superb little model

At the moment I am going to leave them as they are, but will put some weathering on at a later date.
This is only the beginning and hopefully will keep this thread up to date as I go along.
Having been a bit into model railways when younger this got me into thinking, and as I had a little bit of spare space in the garage I decided to get building. I have always liked the turn of steam into diesel (plus the cars and planes can still be interesting then too) so mid '60s for the theme of the layout.
So have built a couple of baseboards, stuck to 4' x 2' boards 9mm thick so that they don't warp as much (or hopefully none at all), the picture below shows before a middle brace was put in place.
The idea is to have an oval (so the kids can at least drive a train round without running off the end of the track), and then to have an industrial area (a small brewery) and a branch line up to a town terminus.
This will hopefully allow for a bit of operational interest across the railway, as well as giving lots of opportunity to add different models into the scene (of cars and planes). The industrial area will be a variation of the shunting puzzle Inglenook Sidings, which is like a hanoi tower but with trucks. Then the branch will be an out and back line, to the oval below.
I toyed with having a twin line oval, but want the modelling to be key, and not just have a load of track and not space for the other stuff... so after a few spare evenings have laid the track for the lower level (just can't see the right hand side)
On the far side is a lower level station - I am not sure about this area, and may redo the track. The idea was to have a twin line station, with a goods area, and maybe some cattle/coal drops... need to mock it up to see if I really like it.
I have to get to the parents house to pick up some of the older models, but these are the current collection...
First the Hornby A4 Mallard that came in the set
My Dad, who grew up in the South got me a second hand finescale Hornby Merchant Navy Clan Line, which is a superb little model
At the moment I am going to leave them as they are, but will put some weathering on at a later date.
This is only the beginning and hopefully will keep this thread up to date as I go along.

Great stuff. We don't get enough model trains in this section.
I've got a very small collection of Hornby/Lima stuff although sold a bit off recently as I don't really have the space for it and it gets little use. Really would like to start a garden layout or something in the attic.
Hmmmmmm
I've got a very small collection of Hornby/Lima stuff although sold a bit off recently as I don't really have the space for it and it gets little use. Really would like to start a garden layout or something in the attic.
Hmmmmmm
I have been having a play with ballasting the track in the last few nights.
The process I am using is the standard one found online.... that is:
Both Woodland Scenic - but Ballast Grey Medium Blend (on the left) and Grey Fine Ballast (on the right)
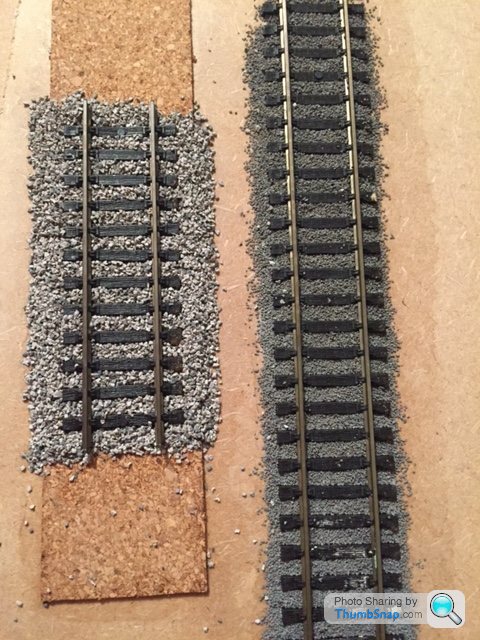
And a close up (a little blurred)

Now I did put the cork underlay on the medium ballast, as that is a better representation of what I have on the layout - but though I think the fine is more scale appropriate the medium looks better.
Also the colours can be weathered at a later date for heavier use lines, or at stations where the trains will be waiting for periods.
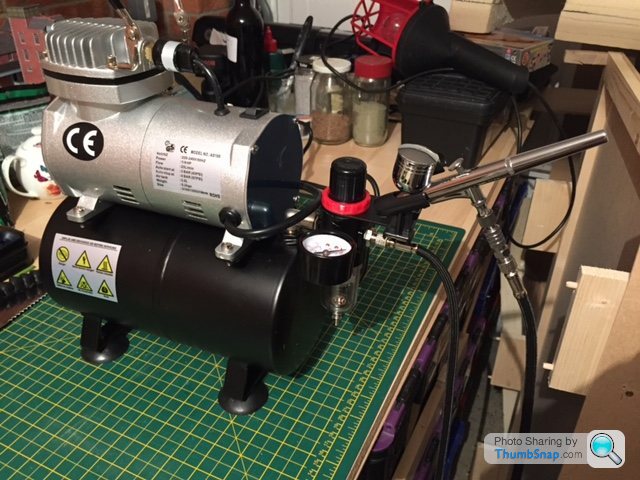
... and on to weathering and painting, this little thing turned up from Hong Kong (so hopefully) will get to play with it this weekend on some cheap test models I bought - first go at airbrushing so could be a complete disaster.
The process I am using is the standard one found online.... that is:
- Lay down the ballast on the track and move it using finger and brush so it is level, but not on the sleepers.
- Spray it with water (using a water spray container picked up from Tiger for 99p)
- Then once the ballast is soaking wet, add the glue
- For the glue, it is 50% PVA (Hobbycraft stuff, though Wickes wood glue equally good) and 50% water, and then a very small drop of washing up liquid, all mixed together.
- I use a shringe to pull the glue mix out of a bowl and place into the centre of the rails
- The wet ballast, and the washing up liquid help to reduce surface tension and draw it into the ballast
Both Woodland Scenic - but Ballast Grey Medium Blend (on the left) and Grey Fine Ballast (on the right)
And a close up (a little blurred)
Now I did put the cork underlay on the medium ballast, as that is a better representation of what I have on the layout - but though I think the fine is more scale appropriate the medium looks better.
Also the colours can be weathered at a later date for heavier use lines, or at stations where the trains will be waiting for periods.
... and on to weathering and painting, this little thing turned up from Hong Kong (so hopefully) will get to play with it this weekend on some cheap test models I bought - first go at airbrushing so could be a complete disaster.
Before you start airbrushing models, play around with it on some sturdy paper or cardboard, get used to what pressure you need to run and the paint mix (and of course the actual mechanics of wiggling the flow control around). Don't be surprised if you need lower pressure than the books etc recommend, and need thinner paint.
MysteryLemon said:
I much prefer the look of the ballast on the left. I think the right looks too fine and uniform. It may be more true to scale but just doesn't look right to me.
Maybe a better mix of colour for the stuff on the right would look better? But otherwise, left ballast all day long.
I agree... it does look much better.Maybe a better mix of colour for the stuff on the right would look better? But otherwise, left ballast all day long.
Doing some maths to see how big the ballast would be if scaled up to real life, the prototype standard gauge on British track is 1,435mm. On OO gauge the track width is 16.5mm (which is 1:86 - which is why HO is more accurate for models, but OO gauge is always at 1:76).
So there are probably 20 stones that would sit in between the rails if they were placed side by side, so each ballast stone is let's say 0.825mm in size.
So scaled up they would be:
HO - 71.0mm
OO - 62.7mm
As appose to the fine ballast on the right, with 40 stones in between and thus the following real size stone:
HO - 35.5mm
OO - 31.4mm
Having done some research, ballast on UK railways vary from 12.7mm to 50.8mm in prototypical form - so as I am using OO scale, the larger ballast is not that far off the top range of UK ballast.. so will go for that!
As I continue my learning across all the things needed to build a model railway I have been sorting out the electrics for the line.
The first thing I have tackled is to electrify all the points so that they can be controlled from a central control panel, which will save jumping into the middle of the track when operating and having to manually change them all. Even more important for the parts that are going to go underneath the upper level.
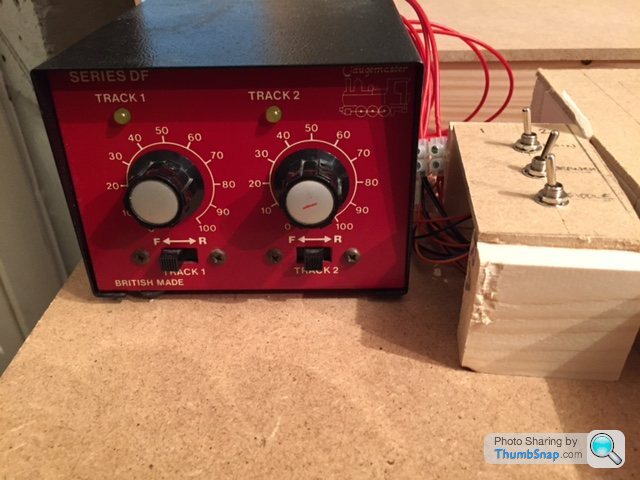
I have picked up my old controller from my parent's house, along with some more of the old rolling stock, so will get some pics of those up soon. The controller is a Gaugemaster dual controller, but has an additional AC power output separate to those controlled by the dials (for accessories).
Therefore I have bought a lot of these to work off the AC power, along with a CDU.
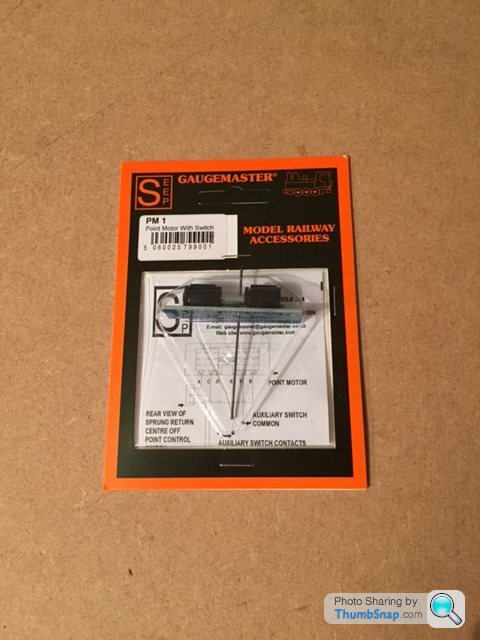
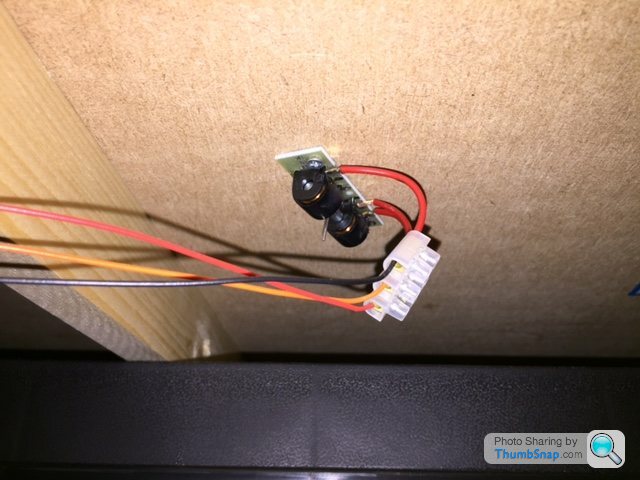
These then fit under the baseboard where the point is, and the wires go to a centre sprung on/off/on switch in my main control board. As I am using insulfrog points (this means the inside V part of the point is plastic to stop short circuiting when the point is changed) then I have not wired up the rest of the parts of the Point Motor. This is it fitted underneath.
So the box that then controls all these points I designed on a square grid to represent the track layout.
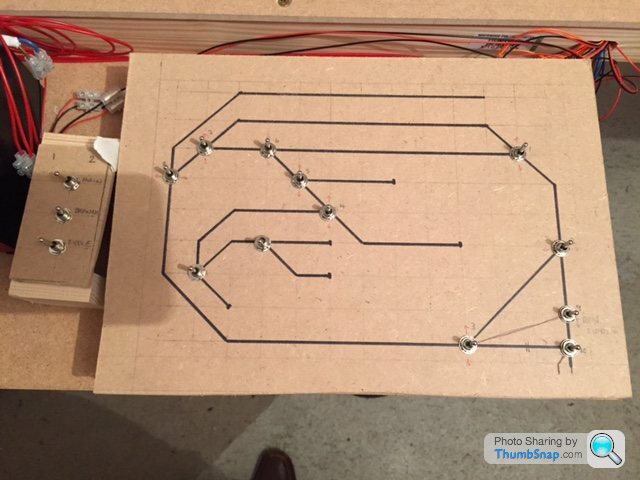
This is only representing the track on the lower level, and if you notice on the right I have got the points for the fiddle yard which I am building at the moment - as I designed this part after it has an extra switch, so might redo this box to make it a little neater at a later date.
The other part of the wiring was setting up what part of the track is powered by the controller. After visiting a model fair at the weekend I decided to look at having each section of the track (so currently set as main circle, branch line up the hill, fiddle yard) to all go through a central control box. This then decides which feed from the controller is active on that part of track.
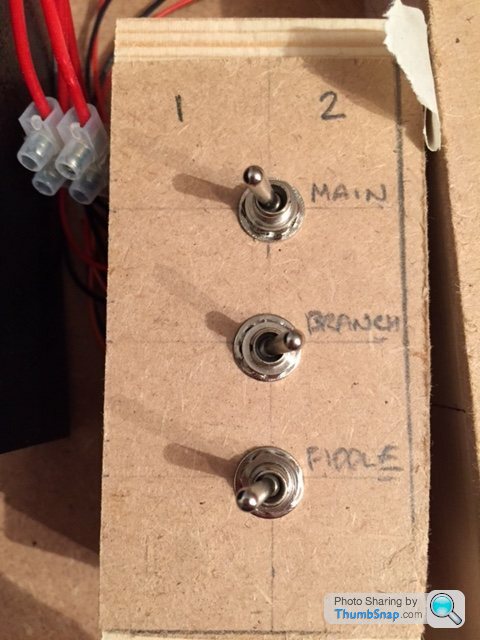
This then allows me to run a train around the main circle and up the branch line using the same controller all the way, or to allow me to run a train up and down the branch line, or move things around in the fiddle yard, without effecting a train circling on the main line.
All the control boxes are a little prototype, so once I am happy and have decided how many sections of the track I will operate I can then get the control boxes a bit better quality finish.
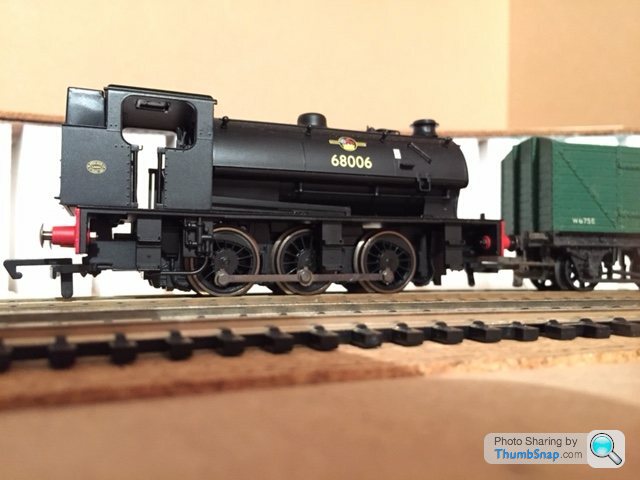
Also the wife has bought me another present for the line, a little LNER J94 tank engine... it is nicely geared so that you can't drive it round at stupid speeds and thus is very good at slow shunting - will be perfect for the inland industrial part that I will get onto.
The first thing I have tackled is to electrify all the points so that they can be controlled from a central control panel, which will save jumping into the middle of the track when operating and having to manually change them all. Even more important for the parts that are going to go underneath the upper level.
I have picked up my old controller from my parent's house, along with some more of the old rolling stock, so will get some pics of those up soon. The controller is a Gaugemaster dual controller, but has an additional AC power output separate to those controlled by the dials (for accessories).
Therefore I have bought a lot of these to work off the AC power, along with a CDU.
These then fit under the baseboard where the point is, and the wires go to a centre sprung on/off/on switch in my main control board. As I am using insulfrog points (this means the inside V part of the point is plastic to stop short circuiting when the point is changed) then I have not wired up the rest of the parts of the Point Motor. This is it fitted underneath.
So the box that then controls all these points I designed on a square grid to represent the track layout.
This is only representing the track on the lower level, and if you notice on the right I have got the points for the fiddle yard which I am building at the moment - as I designed this part after it has an extra switch, so might redo this box to make it a little neater at a later date.
The other part of the wiring was setting up what part of the track is powered by the controller. After visiting a model fair at the weekend I decided to look at having each section of the track (so currently set as main circle, branch line up the hill, fiddle yard) to all go through a central control box. This then decides which feed from the controller is active on that part of track.
This then allows me to run a train around the main circle and up the branch line using the same controller all the way, or to allow me to run a train up and down the branch line, or move things around in the fiddle yard, without effecting a train circling on the main line.
All the control boxes are a little prototype, so once I am happy and have decided how many sections of the track I will operate I can then get the control boxes a bit better quality finish.
Also the wife has bought me another present for the line, a little LNER J94 tank engine... it is nicely geared so that you can't drive it round at stupid speeds and thus is very good at slow shunting - will be perfect for the inland industrial part that I will get onto.
Interesting to see how you get on with the airbrush...I've only dabbled with non compressor jobs and gave up. I thoroughly recommend Valejo acrylics and their site has some great guides for airbrushing their paints.
Good luck with the ballasting (a job I HATE!). Don't know if you have seen these ballast spreaders but may help you along
http://www.green-scene.co.uk/Ballast%20Mate.html
A tip for the ballast as well (You may already know this) but when you come to 'stick it down' - if you spray water lightly over the ballast with a plant sprayer to damp it down and add some fairy liquid into the PVA mix (if thats what you are using) it takes away the surface tension of the water and prevents it pulling all the ballast up as the water is applied. Some people recommend using Johnsons Clear but people have found this to go glossy and is a total pain to lift if you need to at any time.
Edited by BristolRich on Wednesday 15th July 20:53
Edited by BristolRich on Wednesday 15th July 20:54

I haven't had much time in the garage over the last week, so not as much progress as I would like, but I have managed to get a few things done.
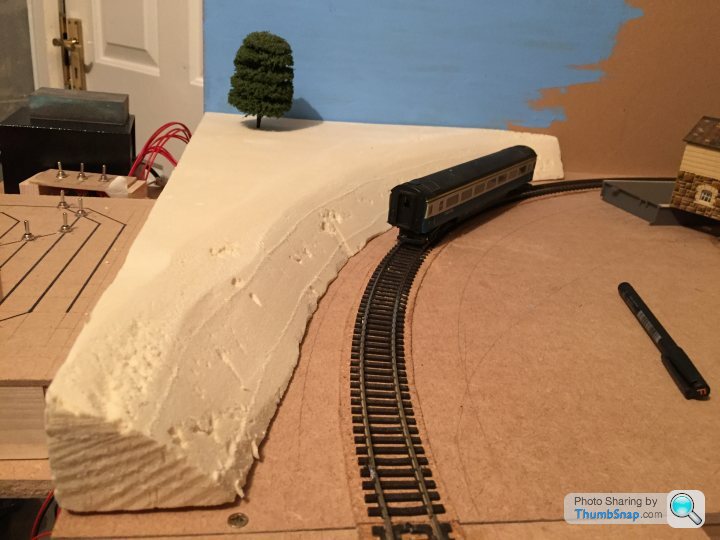
I continue to experiment with different techniques before applying to the layout, so this week I had a go at doing static grass. I picked up a static grass applicator at a model show a few weeks back, and also bought some 2mm long static grass (not sure on the colour of it though), but I do like the effect - much better than just normal grass scatter.

I have also started on some of the scenery as I don't want the track to be just a flat layout and have some contours in it.
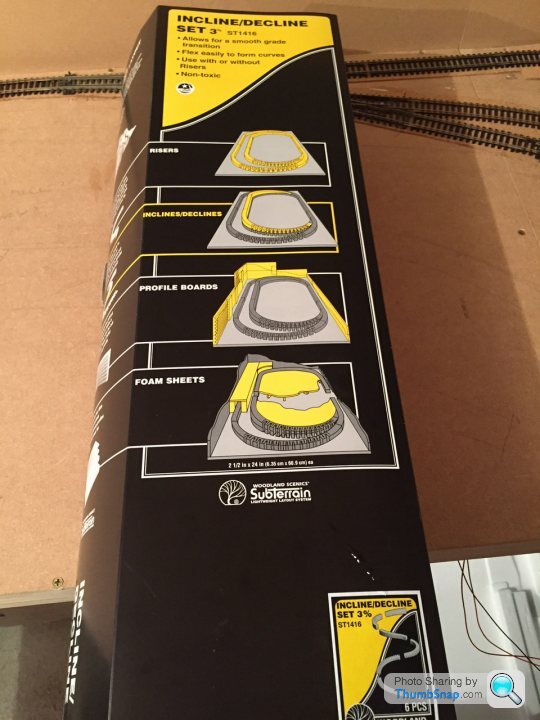
A few weeks back I put in the gradient up to the top section using Woodland Scenics incline, choosing 3% as that is the space I had to play with - testing with a few locos means all cope with 4 carriages on the back, with limited wheel spin, so happy with that... and if any issues then gives me chance to use a banker loco on it
This is the kit I used for the incline, which is just polystyrene cut so it can bend and comes in 6 parts... as shown on the box.
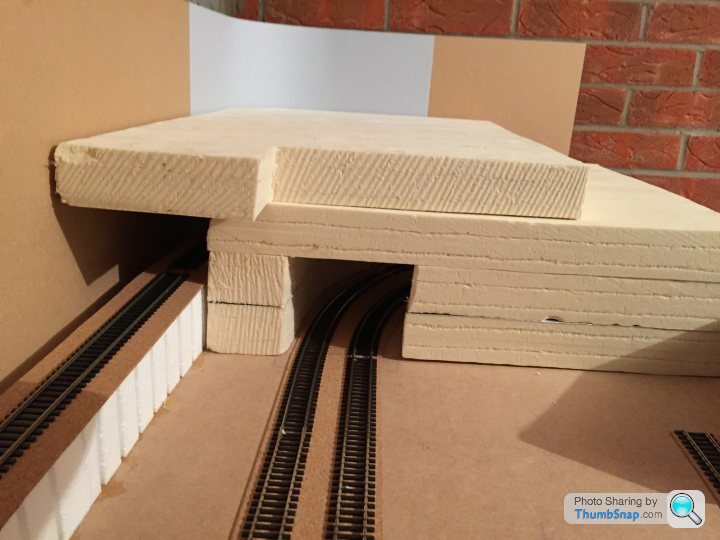
Now this is in place I have started on building up the hills around the edge, which links the top section to the ground level in a nice way. I am using Celotex in various layers and cut to shape to create the base for the lightweight hills and tunnels.
First the tunnels at the end of the station. The plan being to get the basic shape sorted and then chip off the celotex so that it is a smooth hillside with undulations, and the tunnel detailed underneath. Keeping it light means that I can remove it to still gain access, plus keeping it as one whole section to lift off.
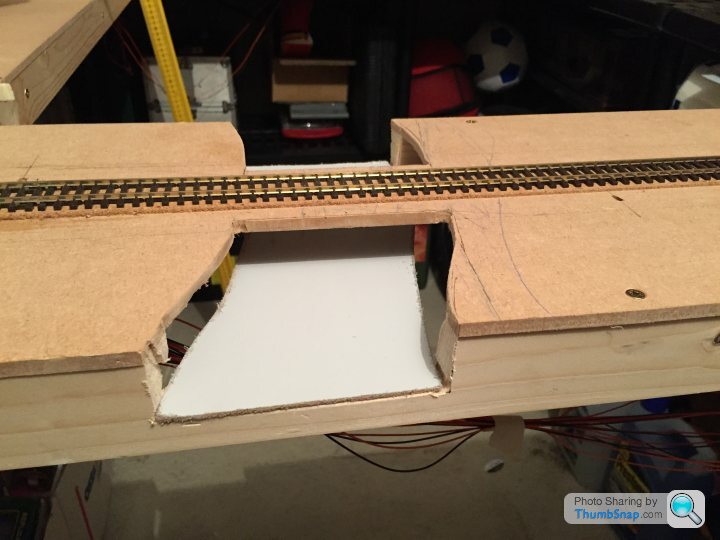
And then the other side of the track where it will be a cutting leading up to the tunnel.

Using Woodland scenics foam glue seems to do the job to stick the various layers of celotex together, but does take a little time to build them up.
I have also decided to put in a little river on the removable single track board section, so have cut out the baseboard and then added a new bit of wood to create the base for the river... which did let me have my first go with the airbrush - so much easier and nicer painting with an airbrush, can't wait to start using on other parts and models.
It is a bit rough, but will be covered up with the banking up to the main level.
Off to the parents this weekend, so hopefully will have a full stock roll call next week.... and thank you for all the comments so far (hopefully it will inspire)
I continue to experiment with different techniques before applying to the layout, so this week I had a go at doing static grass. I picked up a static grass applicator at a model show a few weeks back, and also bought some 2mm long static grass (not sure on the colour of it though), but I do like the effect - much better than just normal grass scatter.
I have also started on some of the scenery as I don't want the track to be just a flat layout and have some contours in it.
A few weeks back I put in the gradient up to the top section using Woodland Scenics incline, choosing 3% as that is the space I had to play with - testing with a few locos means all cope with 4 carriages on the back, with limited wheel spin, so happy with that... and if any issues then gives me chance to use a banker loco on it
This is the kit I used for the incline, which is just polystyrene cut so it can bend and comes in 6 parts... as shown on the box.
Now this is in place I have started on building up the hills around the edge, which links the top section to the ground level in a nice way. I am using Celotex in various layers and cut to shape to create the base for the lightweight hills and tunnels.
First the tunnels at the end of the station. The plan being to get the basic shape sorted and then chip off the celotex so that it is a smooth hillside with undulations, and the tunnel detailed underneath. Keeping it light means that I can remove it to still gain access, plus keeping it as one whole section to lift off.
And then the other side of the track where it will be a cutting leading up to the tunnel.
Using Woodland scenics foam glue seems to do the job to stick the various layers of celotex together, but does take a little time to build them up.
I have also decided to put in a little river on the removable single track board section, so have cut out the baseboard and then added a new bit of wood to create the base for the river... which did let me have my first go with the airbrush - so much easier and nicer painting with an airbrush, can't wait to start using on other parts and models.
It is a bit rough, but will be covered up with the banking up to the main level.
Off to the parents this weekend, so hopefully will have a full stock roll call next week.... and thank you for all the comments so far (hopefully it will inspire)
Yertis said:
Crikey – you're not hanging around are you? 
But won't this track configuration cause a short circuit?
This blog is making me do more on it so I can keep it updated, though I am mainly playing with techniques at the moment than putting anything permanent down But won't this track configuration cause a short circuit?
So the triangle is a run to the fiddle yard where I am going to put in 6 tracks off scene... It did require a bit of thinking on how to setup the electrics through the triangle, but I have a working solution now.
I have put isolated rail joints at the points on the main line circle to the fiddle yard, thus making sure that they do not short. Then have a separate feed to the whole of the fiddle yard at the beginning of the point on the right.
This means that if I run a train from the bottom I can set the main line feed, and the fiddle yard feed to the same controller and just drive them in and out.
If I need to drive a train in at the top of the triangle, then I set the mainline to one controller, and the fiddle yard to the other (and make sure that I have them set to opposite directions) - this then enables me to pass the mainline train to the fiddle yard.
The triangle will hopefully allow me to turn trains round to the opposite direction without having to touch them.
Has been a little slow progress during the last few weeks, with a mixture of summer holidays and family dos... but I have managed a little progress across the layout.
I have started on the fiddle yard area, which will sit under the main station across the right hand wall of the garage.
The first shot shows the triangle in place also, so that a train can leave on either direction - and also allows a train to be turned around without touching it
I have put 6 tracks in the fiddle yard and now wondering whether I need to put a run-around for the locos so that they can face the right way again, or just turn the whole train round using the triangle. The issue with using the whole triangle is that the train is not completely hidden when swapping directions (but I haven't decided if I care or not, as if I set up a running schedule I can always start with the trains the correct way round and reset at the end).
The 6 tracks (plus an extra one I was thinking about for where I could put the runaround.

If I extend the track to the right then I can get 5 coaches on the first two tracks, 4 coach trains on the next two and 3 coaches or goods trains on the last two.
I have also continued a bit more with the tunnel section under the top board (which I also have built and put in place). Firstly adding the tunnel portal using some Wills scenic series brick sheets and flexing them into shape, as per the below photo.
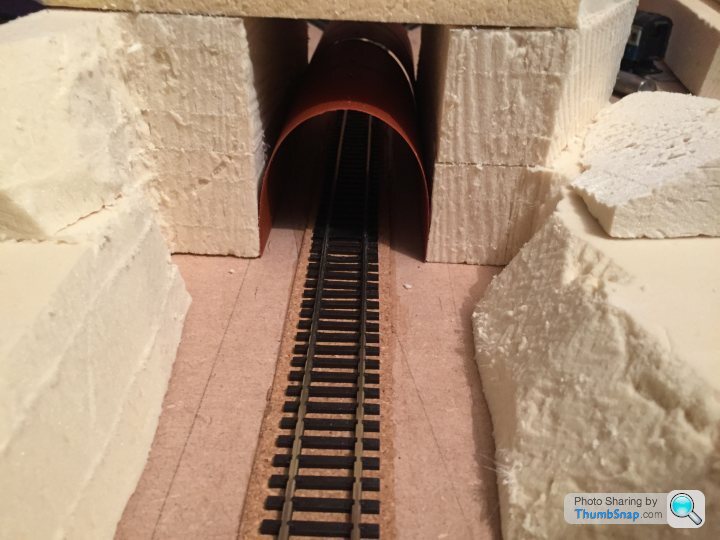
I then have carved out the Celotex a bit more and picked up a Gaugemaster tunnel portal to go on the front, though need to get a second one as the retaining wall on the right is the wrong way round (this won't be a waste as will use the same tunnel style on the other tunnels across the layout).
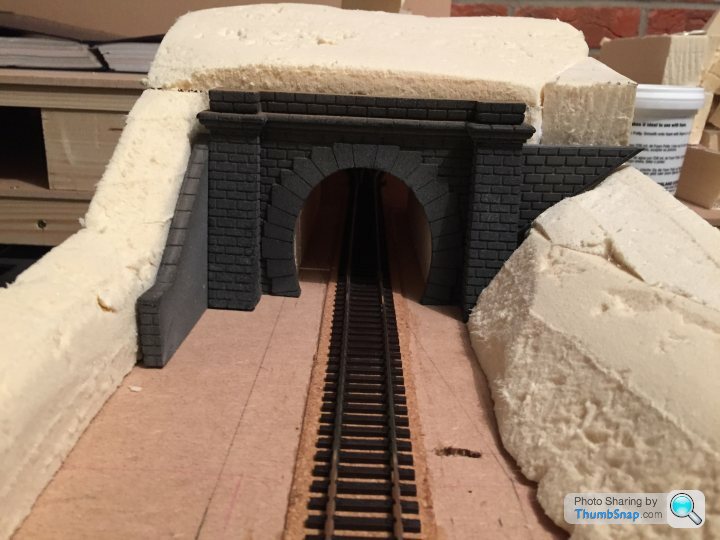
I will then cover the whole thing with plaster cloth to set hard and create the tunnel and cutting scene which leads down to the stream/canal (haven't quite decided on that yet)... and then the cutting will rise again the other side of the stream where I have put another scenic section with Celotex that will probably be the edge of a corn field (so I can stick in a harvest scene if I want).
As you can see from the fiddle yard shots above I have picked up some more of the trains from when I was younger from my parents, and will do something on the full stock list next.
I have started on the fiddle yard area, which will sit under the main station across the right hand wall of the garage.
The first shot shows the triangle in place also, so that a train can leave on either direction - and also allows a train to be turned around without touching it
I have put 6 tracks in the fiddle yard and now wondering whether I need to put a run-around for the locos so that they can face the right way again, or just turn the whole train round using the triangle. The issue with using the whole triangle is that the train is not completely hidden when swapping directions (but I haven't decided if I care or not, as if I set up a running schedule I can always start with the trains the correct way round and reset at the end).
The 6 tracks (plus an extra one I was thinking about for where I could put the runaround.
If I extend the track to the right then I can get 5 coaches on the first two tracks, 4 coach trains on the next two and 3 coaches or goods trains on the last two.
I have also continued a bit more with the tunnel section under the top board (which I also have built and put in place). Firstly adding the tunnel portal using some Wills scenic series brick sheets and flexing them into shape, as per the below photo.
I then have carved out the Celotex a bit more and picked up a Gaugemaster tunnel portal to go on the front, though need to get a second one as the retaining wall on the right is the wrong way round (this won't be a waste as will use the same tunnel style on the other tunnels across the layout).
I will then cover the whole thing with plaster cloth to set hard and create the tunnel and cutting scene which leads down to the stream/canal (haven't quite decided on that yet)... and then the cutting will rise again the other side of the stream where I have put another scenic section with Celotex that will probably be the edge of a corn field (so I can stick in a harvest scene if I want).
As you can see from the fiddle yard shots above I have picked up some more of the trains from when I was younger from my parents, and will do something on the full stock list next.
Gassing Station | Scale Models | Top of Page | What's New | My Stuff