Model Railway - Digwell Junction
Discussion


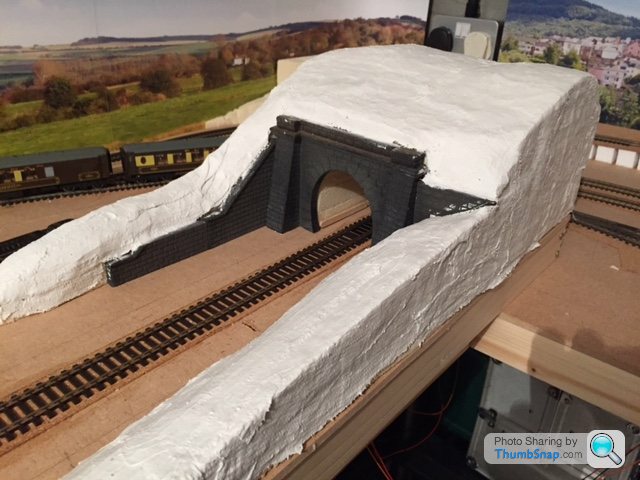
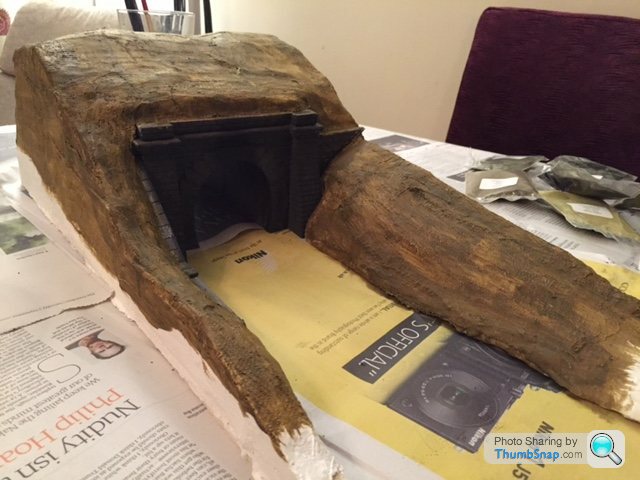
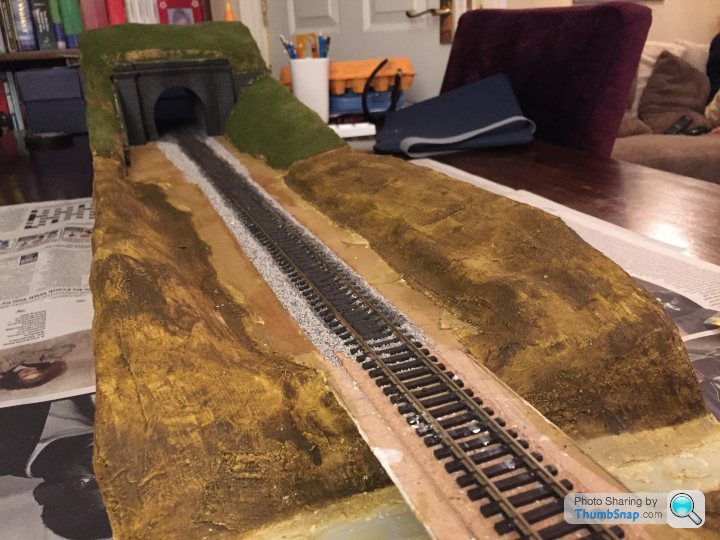
Manage to grab some time over the weekend to start work on the scenery - first task to sort out the tunnel on the removable track section.
I have had some Woodland Scenics plaster cloth hanging around for ages so thought I would give it a go over the Celotex foam. Laid on pretty easily (though from the instructions it said there was a bobbly side to the plaster, but that wasn't that obvious once off the roll), but needed to let it go off a little before applying to the vertical sides if not draping over the top.
Was a little niggly around the tunnel portal and supporting walls, but pretty pleased with it ahead of putting some paint on.
I also put the tunnel walls and roof in also, grabbing a printed pattern on to card and then flailing the edges to attach to the back of the tunnel portal.
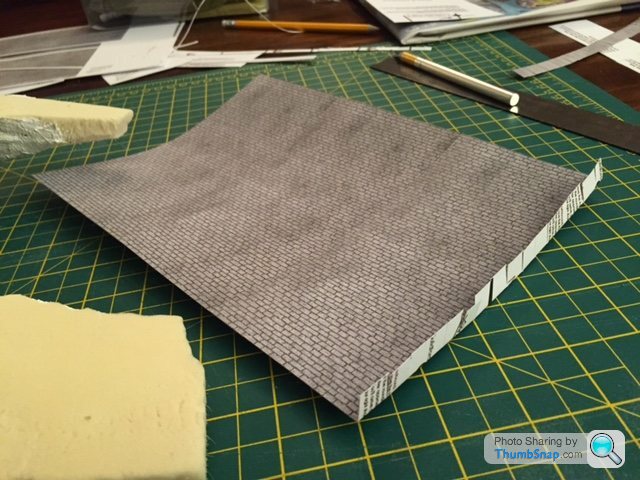
I had been thinking of using some brick walls from Will's for this, but with inspiration from MysteryLemon and printing them works great.
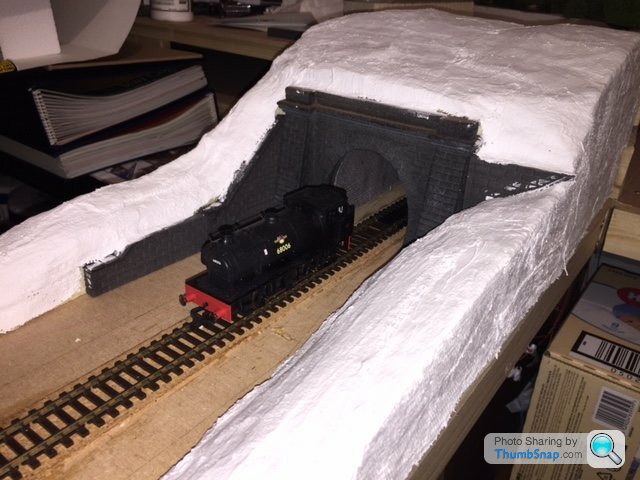
Here they are in place after gluing.

And finally the finished product ready for painting, grass and some weathering.
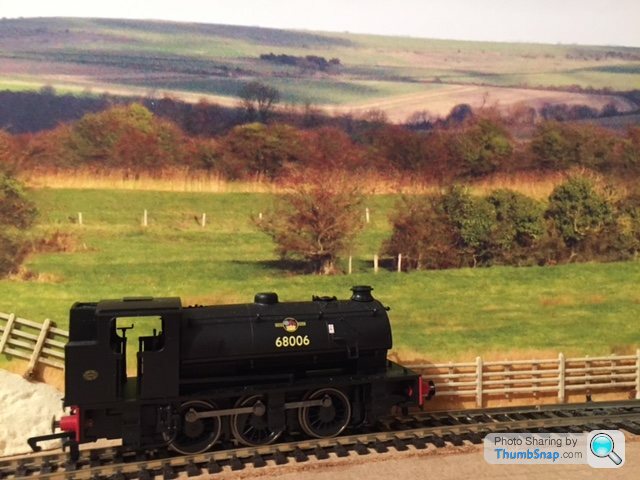
I have also been playing with the edges of the track near the backscenes. After being a little disheartened by them and thinking the scales didn't look correct and I might have to go back to the beginning and do some using my own images (thanks all for the advice on that) I am a little happier. After putting fencing in front of the backscenes then it starts to look more 3D and part of the railway. If I put some long static grass the same colour as the lower part of the wall in the fence then it will combine really well... as shown here.
I have had some Woodland Scenics plaster cloth hanging around for ages so thought I would give it a go over the Celotex foam. Laid on pretty easily (though from the instructions it said there was a bobbly side to the plaster, but that wasn't that obvious once off the roll), but needed to let it go off a little before applying to the vertical sides if not draping over the top.
Was a little niggly around the tunnel portal and supporting walls, but pretty pleased with it ahead of putting some paint on.
I also put the tunnel walls and roof in also, grabbing a printed pattern on to card and then flailing the edges to attach to the back of the tunnel portal.
I had been thinking of using some brick walls from Will's for this, but with inspiration from MysteryLemon and printing them works great.
Here they are in place after gluing.
And finally the finished product ready for painting, grass and some weathering.
I have also been playing with the edges of the track near the backscenes. After being a little disheartened by them and thinking the scales didn't look correct and I might have to go back to the beginning and do some using my own images (thanks all for the advice on that) I am a little happier. After putting fencing in front of the backscenes then it starts to look more 3D and part of the railway. If I put some long static grass the same colour as the lower part of the wall in the fence then it will combine really well... as shown here.
Messing around with wires and sanding down insulation pieces is not as fun as doing some scenery work... so have eventually got onto the fun stuff.
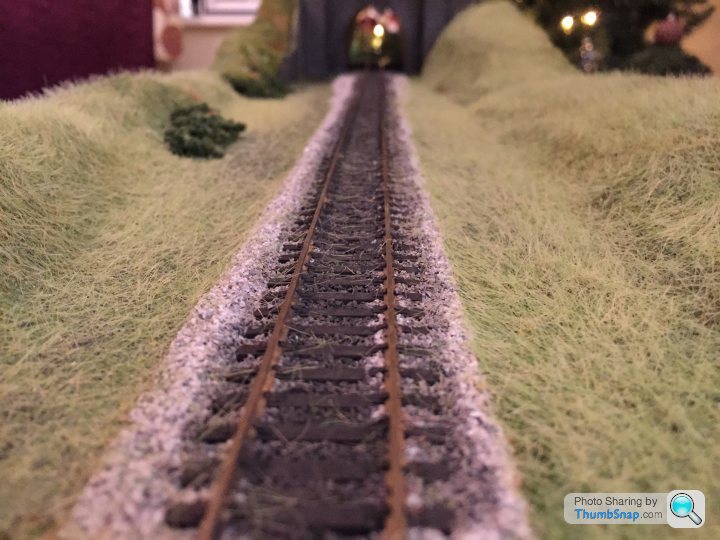
First up I started to ballast the track for the lift out section with the tunnel on.. it took ages to add the ballast and then work across every sleeper to remove the excess ballast, around 1 hours work just for the 4ft of track. I will be definitely looking at getting a ballast help tool for the rest of the track to hopefully speed up this process.
Once in place I used the standard 50/50 PVA/Water with a drop of washing up liquid technique... always amazed how much you can soak it in this stuff as the pic shows and it dries without trace - though adding lots on did make some of the ballast float away a little, so will have to watch out for that in future.

But once dried I am happy-ish with the results (get onto that later)...
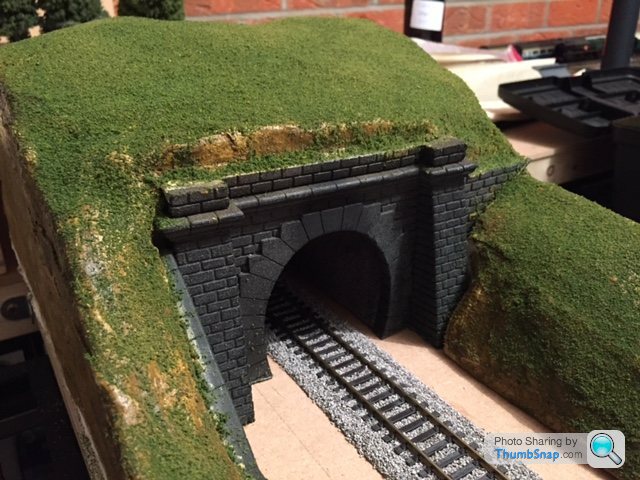
I then got onto the scenery on the hill I had plastered.... first starting with some Woodland Scenic Earth Undercoat painted in a mixture of patches across the hillside
Once this was dried then I started with a base of green fine turf, and then some highlighting with burnt grass in places.
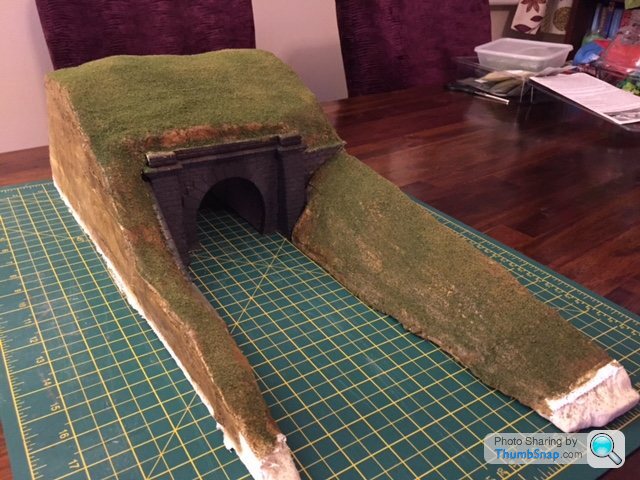
I have left some of the grass patchy in places and will add some shrubs, trees and static grass where I feel appropriate to complete the scene a bit more.
Also I decided to do some weathering on the tunnel portal and inside on the tunnel rood (I know most won't see it, but I like to make it as complete as possible).
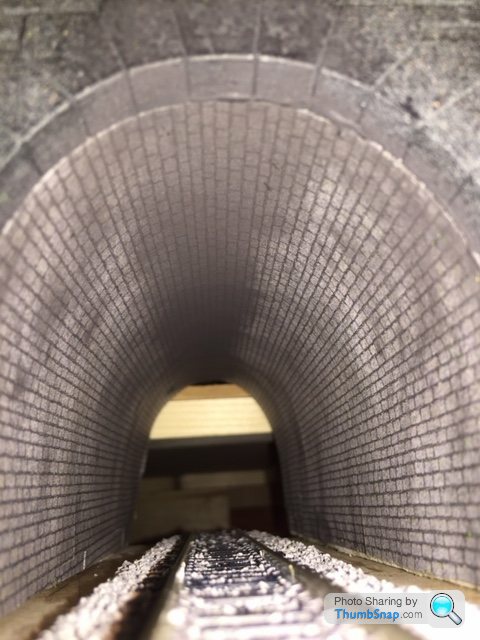
The picture above does show the bit of ballasting I am not too happy with - not sure if so much ballast should be showing above the sleepers as it does at eye level - I am hoping when I get round to doing some weathering on the track this will not be so obvious. And checking out some of the pictures I have taken of preserved lines the ballast is covering sleepers quite a lot... not sure if there is a technique I am missing to flatten it down a bit more though.
Anyway, with some moss, shrubs and static grass to go the overall effect is looking quite good I think, and am pleased with how the first attempt at scenery has gone.
Now need to finish up with what I will put between the ballast and the tunnel wall edges - trying to find some pics of how that looks like in real life, so any ideas welcome?
First up I started to ballast the track for the lift out section with the tunnel on.. it took ages to add the ballast and then work across every sleeper to remove the excess ballast, around 1 hours work just for the 4ft of track. I will be definitely looking at getting a ballast help tool for the rest of the track to hopefully speed up this process.
Once in place I used the standard 50/50 PVA/Water with a drop of washing up liquid technique... always amazed how much you can soak it in this stuff as the pic shows and it dries without trace - though adding lots on did make some of the ballast float away a little, so will have to watch out for that in future.
But once dried I am happy-ish with the results (get onto that later)...
I then got onto the scenery on the hill I had plastered.... first starting with some Woodland Scenic Earth Undercoat painted in a mixture of patches across the hillside
Once this was dried then I started with a base of green fine turf, and then some highlighting with burnt grass in places.
I have left some of the grass patchy in places and will add some shrubs, trees and static grass where I feel appropriate to complete the scene a bit more.
Also I decided to do some weathering on the tunnel portal and inside on the tunnel rood (I know most won't see it, but I like to make it as complete as possible).
The picture above does show the bit of ballasting I am not too happy with - not sure if so much ballast should be showing above the sleepers as it does at eye level - I am hoping when I get round to doing some weathering on the track this will not be so obvious. And checking out some of the pictures I have taken of preserved lines the ballast is covering sleepers quite a lot... not sure if there is a technique I am missing to flatten it down a bit more though.
Anyway, with some moss, shrubs and static grass to go the overall effect is looking quite good I think, and am pleased with how the first attempt at scenery has gone.
Now need to finish up with what I will put between the ballast and the tunnel wall edges - trying to find some pics of how that looks like in real life, so any ideas welcome?
Google image search seems to suggest pretty much ballasting the whole width of the tunnel, maybe a small border of unballasted, but not much.
http://www.google.co.uk/search?q=train+tunnel&...
http://www.google.co.uk/search?q=train+tunnel&...
So have continued work on the tunnel board, continuing the hills down to a river which the railway crosses.
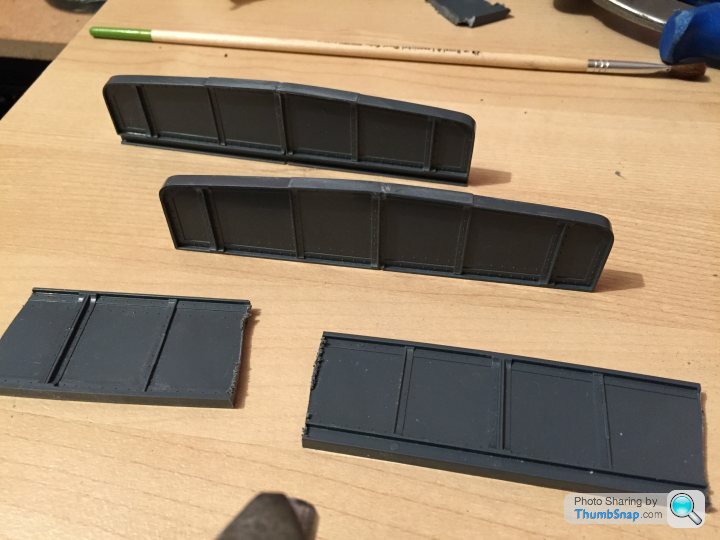
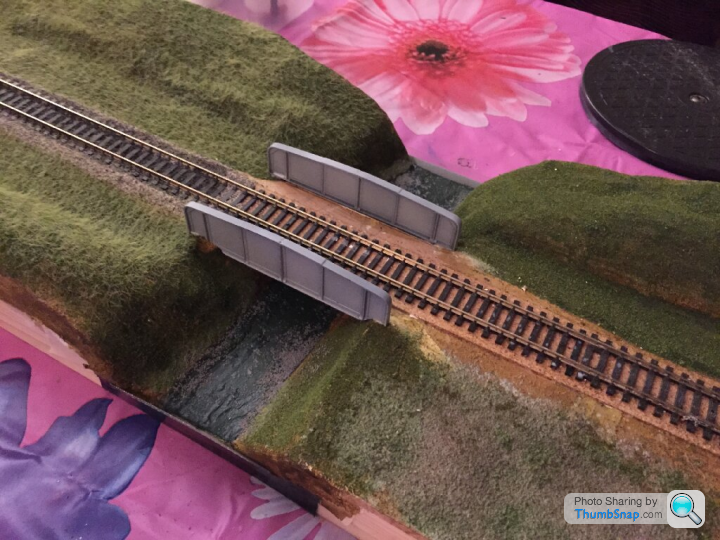
Started off cutting some girder bridge sides using a Peco kit - they were a bit longer than needed so sawed them in three and connected the two bits together using liquid poly, as well as filling gaps with left over spur plastic melted in liquid poly
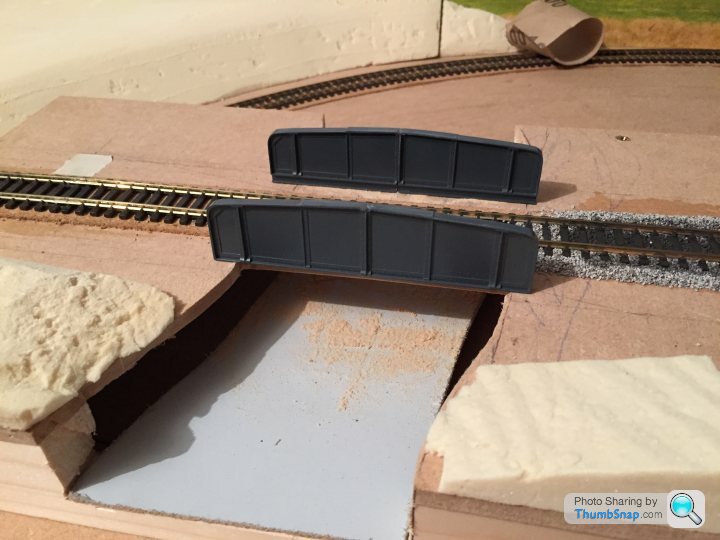
I then cut out the base board to create the river level and made sure the girder bridge sides fitted ok
I then continued the banking from the tunnel down to the river and covered with plaster moulding

This allowed me to do an initial covering of soil coloured paint and finish with static grass across the whole section, this needs a bit of work to finish off and remove some of the unnatural straight lines, but have managed to add some rust to the rails and slight weathering to the ballast along the track.
After painting with the undercoat colour, that will show through where no grass lies
The picture below is before I cleaned up the rail tops from the rust, but with the static grass applied
Started off cutting some girder bridge sides using a Peco kit - they were a bit longer than needed so sawed them in three and connected the two bits together using liquid poly, as well as filling gaps with left over spur plastic melted in liquid poly
I then cut out the base board to create the river level and made sure the girder bridge sides fitted ok
I then continued the banking from the tunnel down to the river and covered with plaster moulding
This allowed me to do an initial covering of soil coloured paint and finish with static grass across the whole section, this needs a bit of work to finish off and remove some of the unnatural straight lines, but have managed to add some rust to the rails and slight weathering to the ballast along the track.
After painting with the undercoat colour, that will show through where no grass lies
The picture below is before I cleaned up the rail tops from the rust, but with the static grass applied
My little modelling is put to shame by Simon's on another thread - but still, I have done a little bit more on the layout, concentrating around the bridge and river.
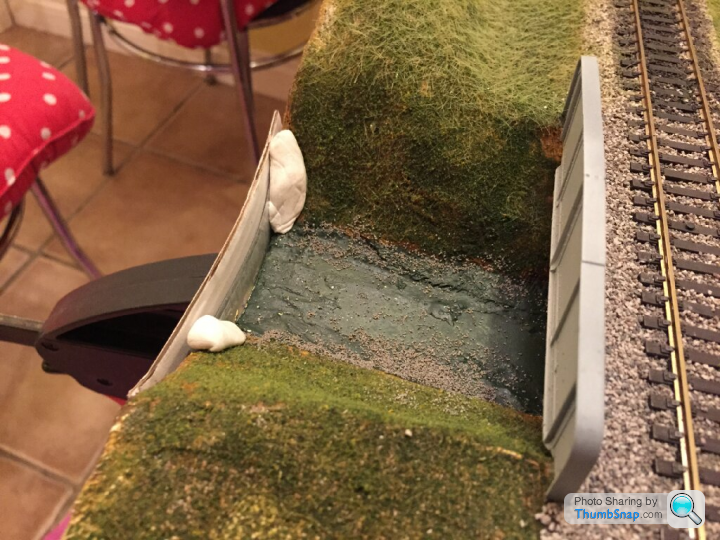
I have cut the bridge sides out a little better and given them a coat of primer ready for some weathering later and have painted the river bed, plus adding a base layer of grass on the banks... I dropped in a bit of fine stones to try and represent the river bed a bit better (all experimental).
Then using a bit of plastic from some packaging and a clamp, I sealed up both sides of the river and sealed the base several times with PVA glue, and then painted over again... ready to pour some Woodland Scenic EZ water.
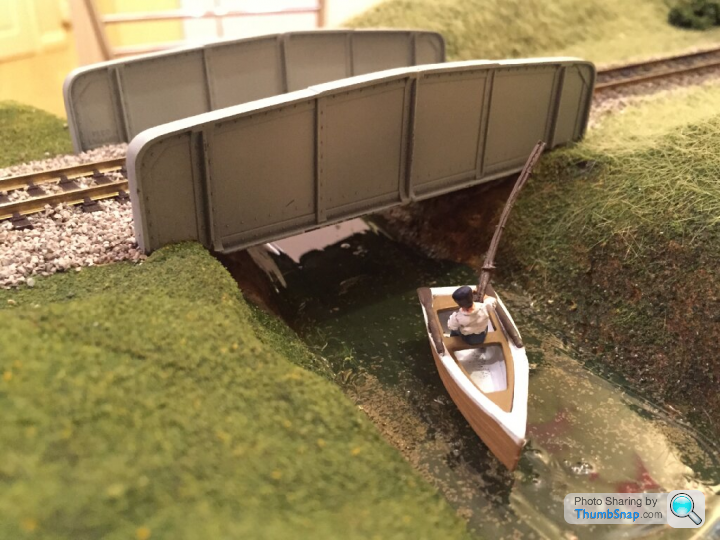
The EZ Water melts in a pan (it did destroy it so luckily didn't choose one of the wedding presents for this purpose), and once it is fully hot it is able to be poured out - the trick was making sure that it doesn't bubble as that is hard to get out)

Once poured in it dries pretty quickly so trying to manipulate it to all the corners (well banks) of the river was a race against time - also there was a little bit of the base that was not sealed, so some bubbles got into the EZ water too. Still needs some work on putting in some reeds (probably should have done this before the water, but will work out a way to add them after), and finishing off the banking with some bushes etc.
But here is the scene with a little cameo from a fisherman who looks to have caught something big...
Unfortunately I am moving house next week - but will probably work on this board as a practice/get good at scenery work till I find a place for the rest of the layout in the new house.
I have cut the bridge sides out a little better and given them a coat of primer ready for some weathering later and have painted the river bed, plus adding a base layer of grass on the banks... I dropped in a bit of fine stones to try and represent the river bed a bit better (all experimental).
Then using a bit of plastic from some packaging and a clamp, I sealed up both sides of the river and sealed the base several times with PVA glue, and then painted over again... ready to pour some Woodland Scenic EZ water.
The EZ Water melts in a pan (it did destroy it so luckily didn't choose one of the wedding presents for this purpose), and once it is fully hot it is able to be poured out - the trick was making sure that it doesn't bubble as that is hard to get out)
Once poured in it dries pretty quickly so trying to manipulate it to all the corners (well banks) of the river was a race against time - also there was a little bit of the base that was not sealed, so some bubbles got into the EZ water too. Still needs some work on putting in some reeds (probably should have done this before the water, but will work out a way to add them after), and finishing off the banking with some bushes etc.
But here is the scene with a little cameo from a fisherman who looks to have caught something big...
Unfortunately I am moving house next week - but will probably work on this board as a practice/get good at scenery work till I find a place for the rest of the layout in the new house.
Liking the look of your progress!
I always fancied giving that water stuff a try but never had a need yet. I think I'll probably go with a clear sheet of acrylic and a suitably coloured base coat to go under it. I suppose that stuff is just like hot glue that dried very clear. Is it very sticky?
I always fancied giving that water stuff a try but never had a need yet. I think I'll probably go with a clear sheet of acrylic and a suitably coloured base coat to go under it. I suppose that stuff is just like hot glue that dried very clear. Is it very sticky?
MysteryLemon said:
Is it very sticky?
I didn't dare touch it while it was drying for fear of not having a clear finish... but after it cooled it was more like melted plastic and smooth.Though the pan it was in is non-usable now and not sure how I would even get it out (well I could reheat and try and pour out)
Gassing Station | Scale Models | Top of Page | What's New | My Stuff