Eduard 1:72 F6F-3 Hellcat
Discussion


Added the p/e bracing struts to the inside of the rear canopy assembly:
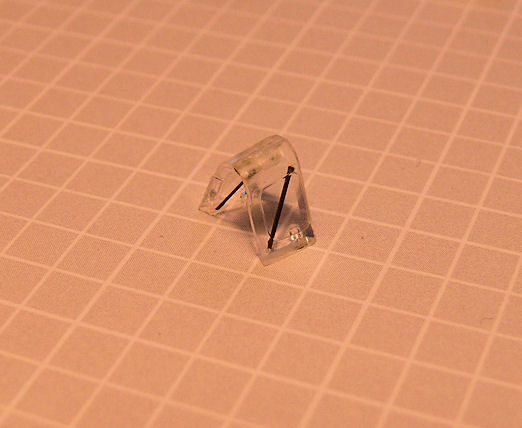
And the gunsight:
And fitted the front and rear screens with PVA:
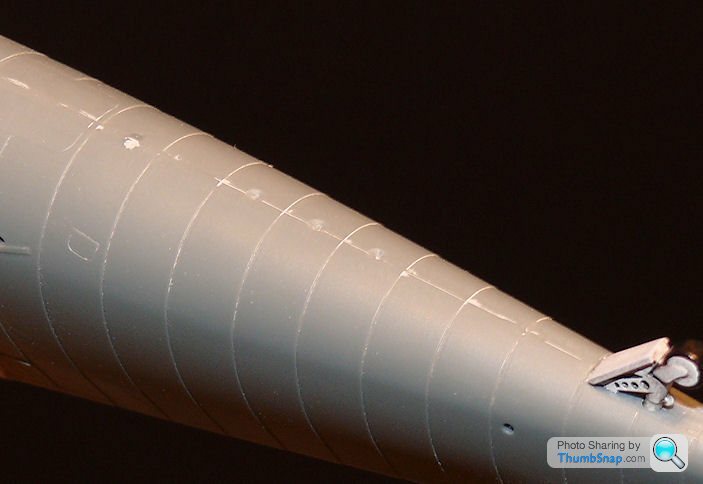
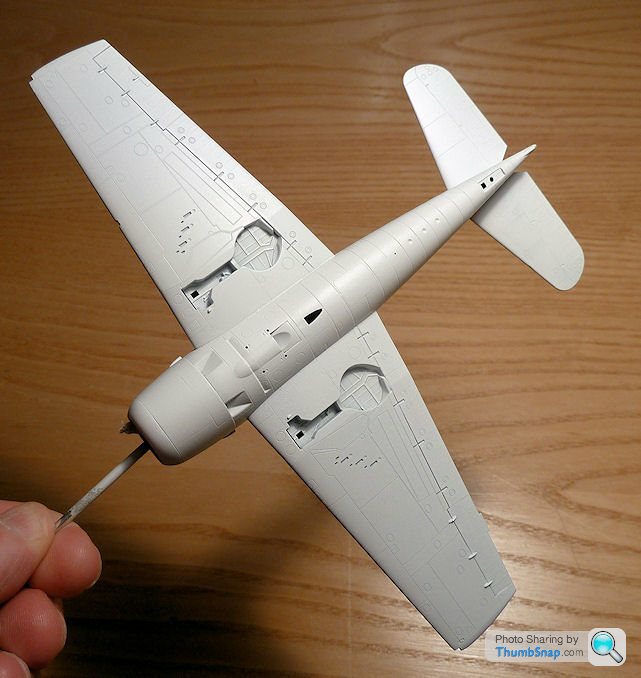
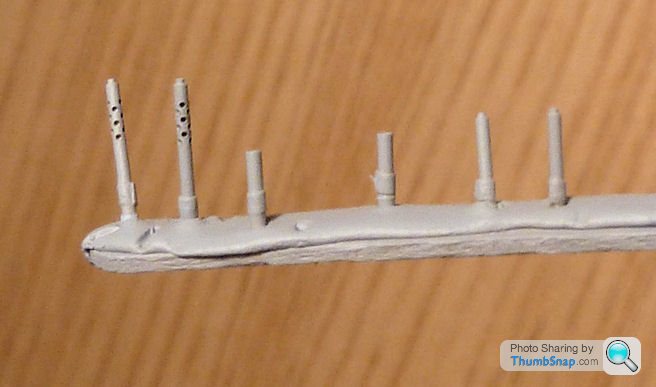
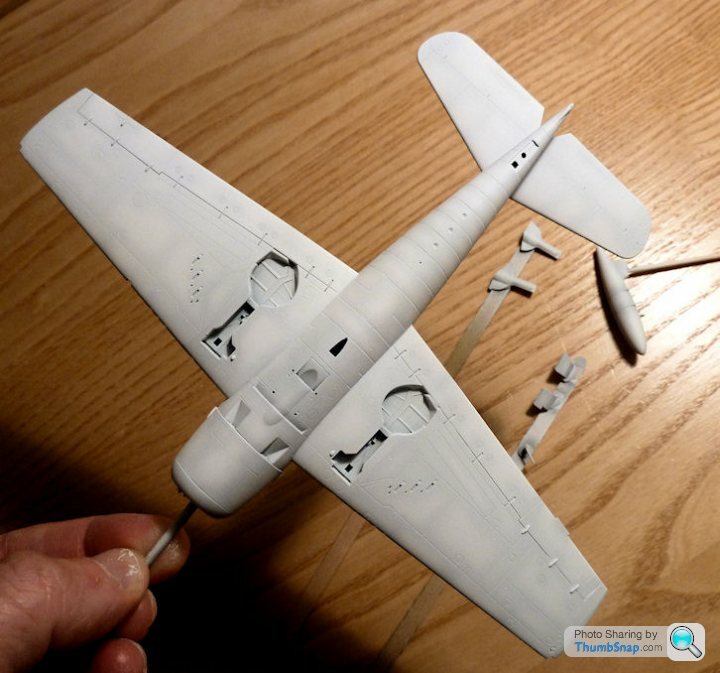
Also ended up snapping the gun barrels off and drilling the wing to accept brass tube to be fitted after painting (there is also a l/e landing light in the process of being opened out in preparation for a clear lens:
And filed out the solid wingtip lamp covers to replace with scrap clear styrene:

Here's one after profiling and polishing:
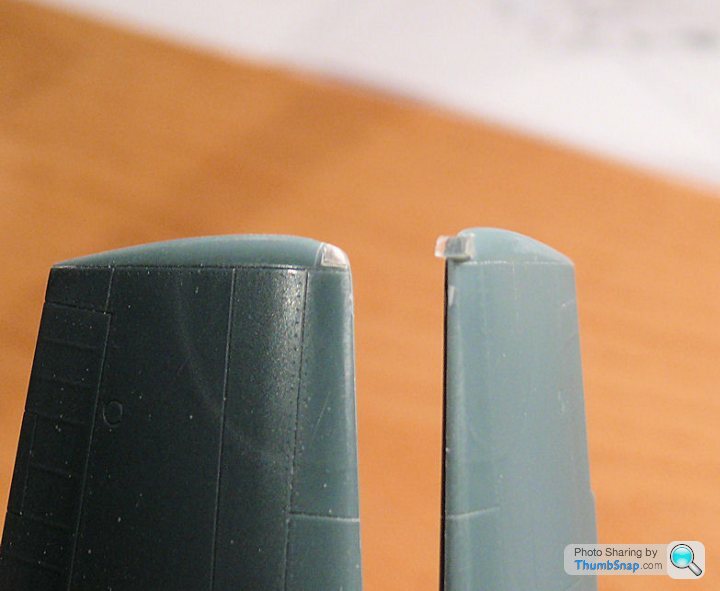
I'll snap them out and add them finally after main painting.
Small details, but they add up to make a big difference to the look of a model at this scale.
And the gunsight:
And fitted the front and rear screens with PVA:
Also ended up snapping the gun barrels off and drilling the wing to accept brass tube to be fitted after painting (there is also a l/e landing light in the process of being opened out in preparation for a clear lens:
And filed out the solid wingtip lamp covers to replace with scrap clear styrene:
Here's one after profiling and polishing:
I'll snap them out and add them finally after main painting.
Small details, but they add up to make a big difference to the look of a model at this scale.
Finished the main landing gear, just added some brake lines from lead wire:

It's great that the wheels and tyres are separate parts.
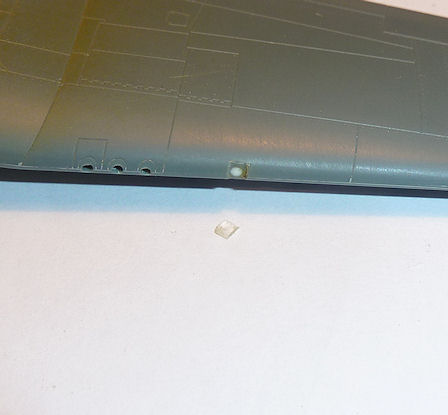
The ventral signalling lamps are shown on the plans, but aren't there on the plastic. I've drilled shallow indents that I will either dot with silver and then clear paint, or use 1mm Little Lenses:
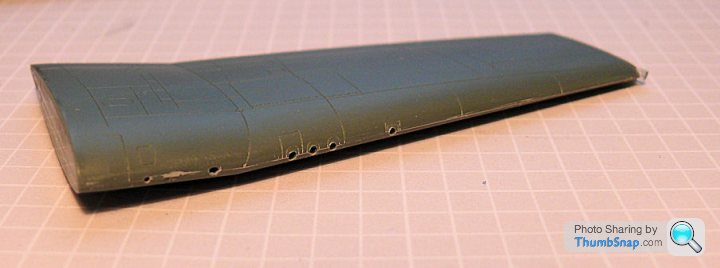
The overlapping fuselage construction is nicely represented, but there will be a lot of rescribing needed along the join lines.
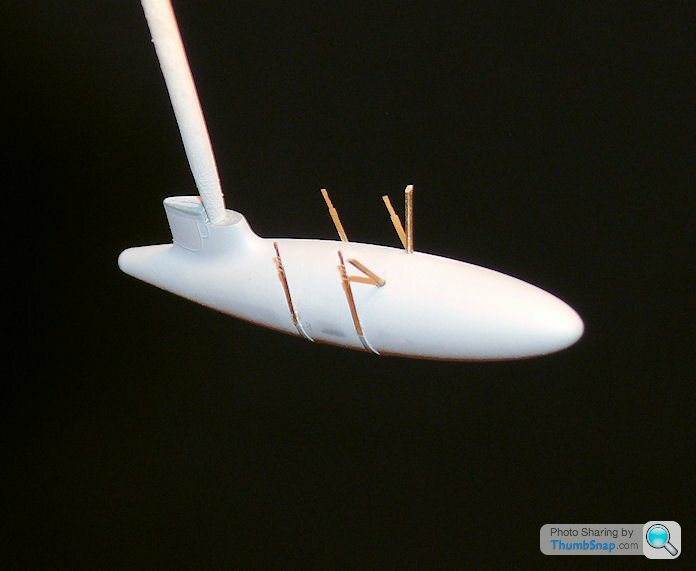
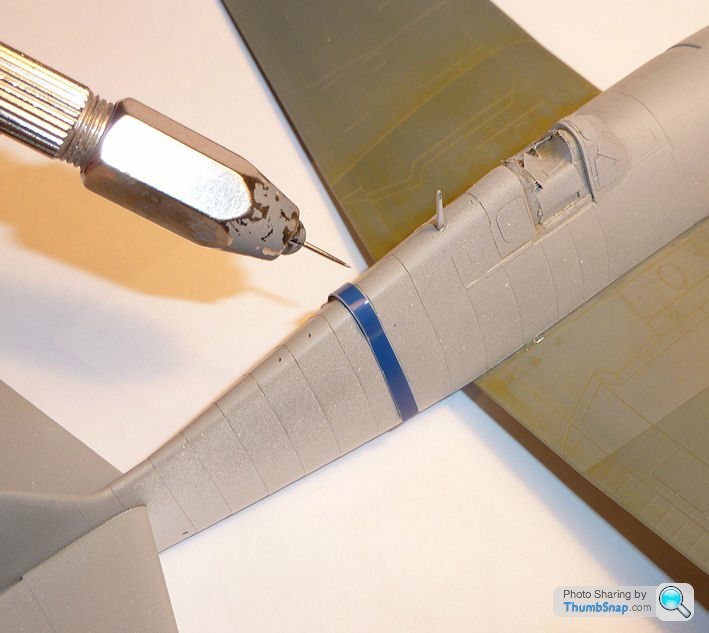
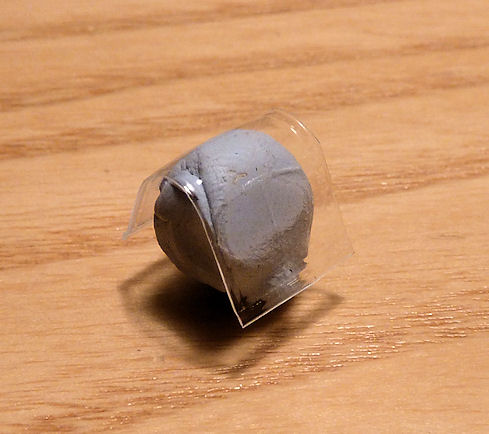
Quite a few bits of brass on the drop tank now:
It's getting to that demoralising stage where the airframe looks a disaster. Things usually improve a lot when everything is a uniform colour and all the corrections, filling and sanding is covered up.
It's great that the wheels and tyres are separate parts.
The ventral signalling lamps are shown on the plans, but aren't there on the plastic. I've drilled shallow indents that I will either dot with silver and then clear paint, or use 1mm Little Lenses:
The overlapping fuselage construction is nicely represented, but there will be a lot of rescribing needed along the join lines.
Quite a few bits of brass on the drop tank now:
It's getting to that demoralising stage where the airframe looks a disaster. Things usually improve a lot when everything is a uniform colour and all the corrections, filling and sanding is covered up.
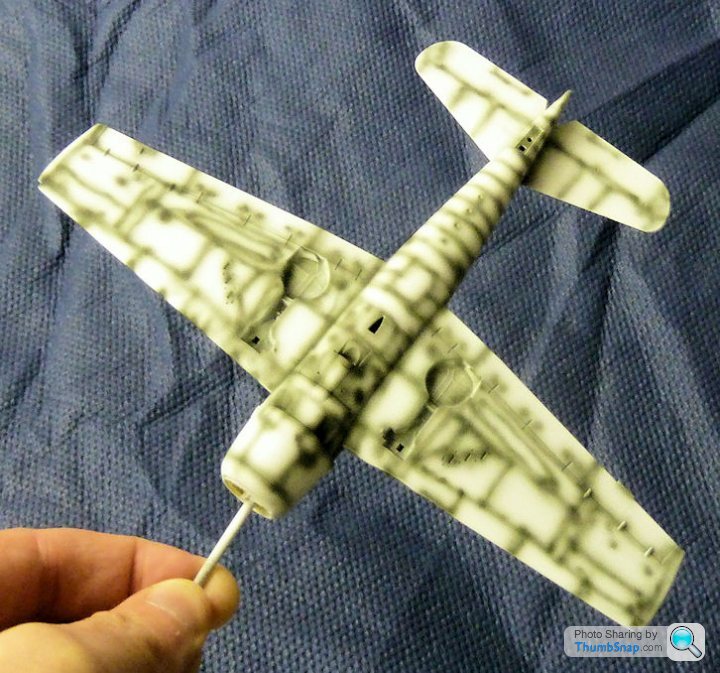
Masked the windscreen and rear screens using the pre-cut masks. As with the Mosquito, most of them weren't exactly right, but could be cut to fit pretty well - hopefully. Then sprayed interior green which will show through on the inside of the framing. I also used this colour as a guide coat to see where any rescribing and filling needs doing. I think it's just rescribing on this one:
Edited by dr_gn on Monday 12th October 22:52
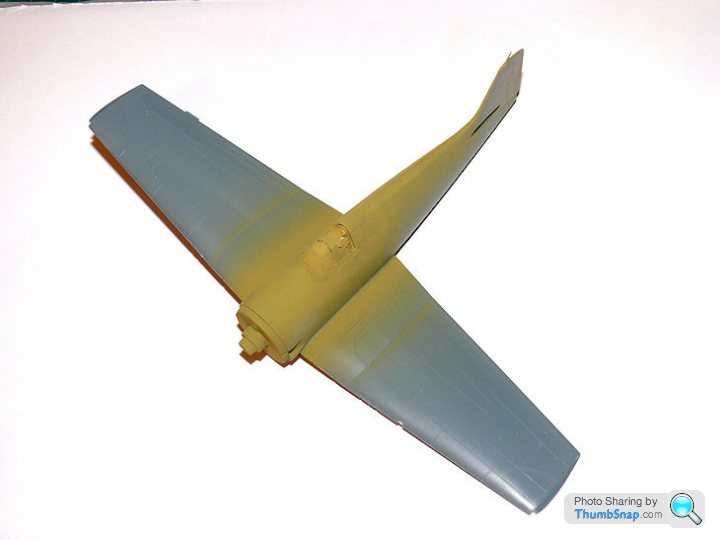
Rescribing done (pin and Dymo tape as a guide, followed by light flatting as usual these days), and wings fitted:
A bit of filler might be needed around the wing-fuselage joints, depends on how it looks in primer.
I got some 1mm "Little Lenses" to try out for te signalling lamps. I peeled the foil off the back of them to make them a bit less sudden. I think they will look good once the drilled indents they are located in are toned down a bit with some dark grey preshade:

Also made a landing light out of scrap clear styrene after filing the aperture in the wing:
Might put a clear "Little Lens" behind it to represent the lamp reflector.
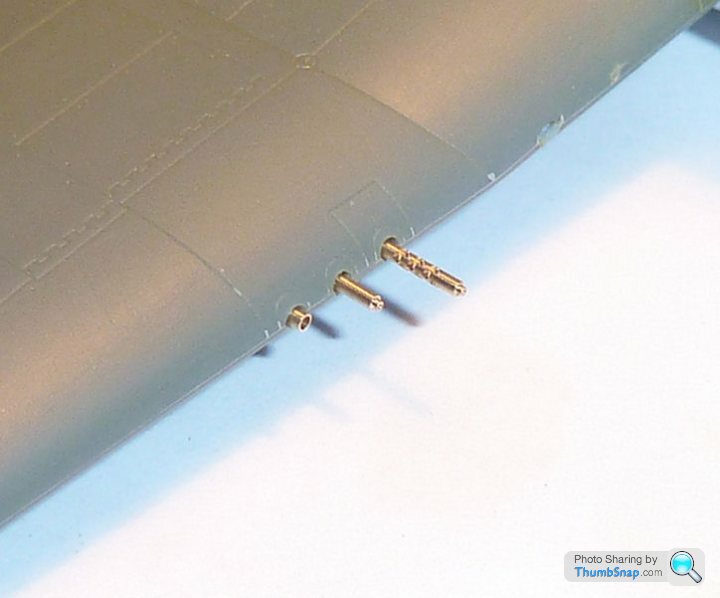
I also got some MasterModel turned brass barrels (OK so it's no quite OOB anymore, but they are awesome bits of kit for not much outlay):
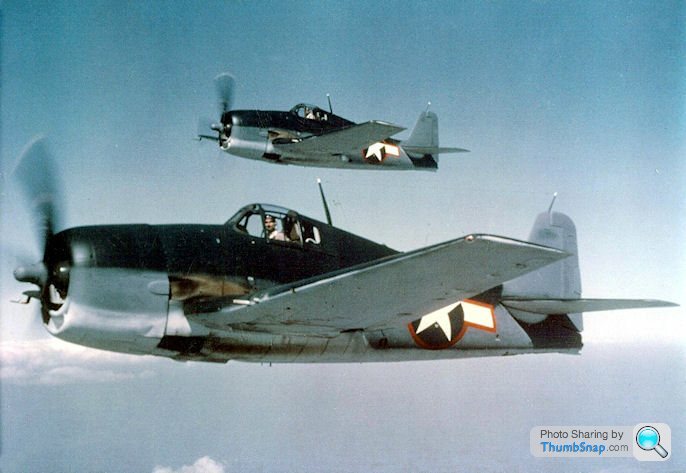
I'm still puzzling over the best way to get woodgrain on my Tamiya Mosquito, so it's still w.i.p., but it's interesting to compare it with the Hellcat:
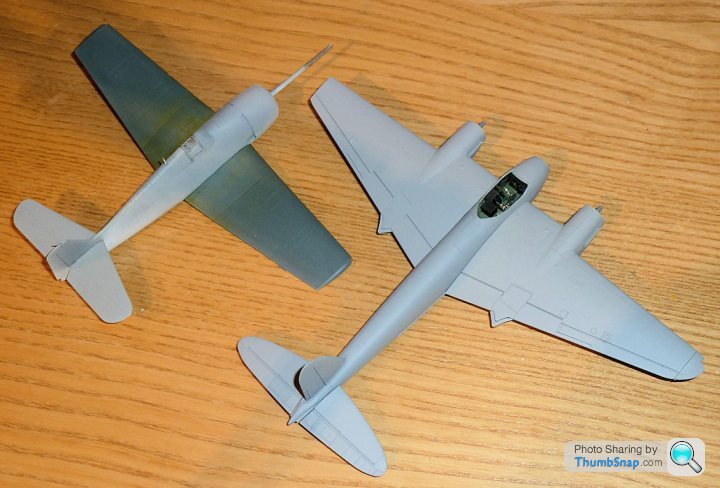
It's a big machine.
A bit of filler might be needed around the wing-fuselage joints, depends on how it looks in primer.
I got some 1mm "Little Lenses" to try out for te signalling lamps. I peeled the foil off the back of them to make them a bit less sudden. I think they will look good once the drilled indents they are located in are toned down a bit with some dark grey preshade:
Also made a landing light out of scrap clear styrene after filing the aperture in the wing:
Might put a clear "Little Lens" behind it to represent the lamp reflector.
I also got some MasterModel turned brass barrels (OK so it's no quite OOB anymore, but they are awesome bits of kit for not much outlay):
I'm still puzzling over the best way to get woodgrain on my Tamiya Mosquito, so it's still w.i.p., but it's interesting to compare it with the Hellcat:
It's a big machine.
dr_gn said:
I'm still puzzling over the best way to get woodgrain on my Tamiya Mosquito, so it's still w.i.p., but it's interesting to compare it with the Hellcat:
It's a big machine.
This is how the railway modellers do it. It's a big machine.
http://www.rmweb.co.uk/forum/viewtopic.php?f=86&am...
Hope this helps.
Catweazle said:
dr_gn said:
I'm still puzzling over the best way to get woodgrain on my Tamiya Mosquito, so it's still w.i.p., but it's interesting to compare it with the Hellcat:
It's a big machine.
This is how the railway modellers do it. It's a big machine.
http://www.rmweb.co.uk/forum/viewtopic.php?f=86&am...
Hope this helps.
http://www.pistonheads.com/gassing/topic.asp?h=1&a...
Ta.
Put a smidge of filler around the wing roots, and got some Tamiya Grey primer on the wings. The cowling is still temproarily PVA'd in place for camo painting:

I used Tamiya Fine White Primer on the undersides; Vallejo White covers about as well as milk, but the primer covers everything in a couple of coats and is still very thin. I'll preshade with NATO Black straight over this:
Also primed the brass gun barrels/blast tubes:
I've wrapped them in a narrow strip of Tamiya tape and cyano so that when they are fitted into the sockets I drilled, they are concentric with the openings in the wings.
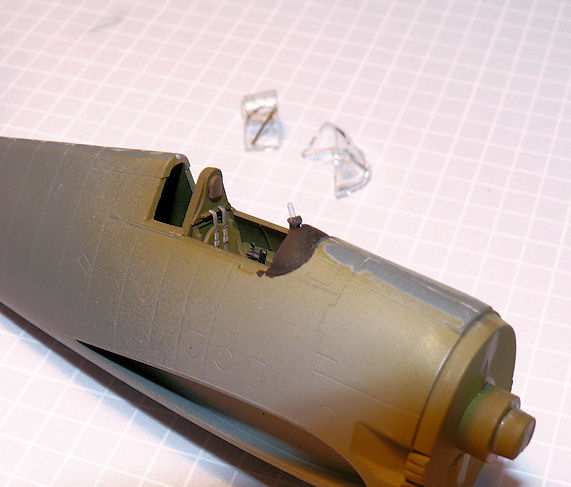
I thought a vacform canopy hood might look better than the overly thick plasitc version, so I got the Squadron item. It's designed to fit the Hasegawa Hellcat, but it will do. In the process of trimming the excess:
I used Tamiya Fine White Primer on the undersides; Vallejo White covers about as well as milk, but the primer covers everything in a couple of coats and is still very thin. I'll preshade with NATO Black straight over this:
Also primed the brass gun barrels/blast tubes:
I've wrapped them in a narrow strip of Tamiya tape and cyano so that when they are fitted into the sockets I drilled, they are concentric with the openings in the wings.
I thought a vacform canopy hood might look better than the overly thick plasitc version, so I got the Squadron item. It's designed to fit the Hasegawa Hellcat, but it will do. In the process of trimming the excess:
Edited by dr_gn on Friday 16th October 23:06
Masking for soft-edged Intermediate Blue:

Then for Dark Sea Blue - fuselage first because the Blu-Tac rolls obscure the wings:

Then mask the fuselage and spray the wing roots:

Then remove the masking:
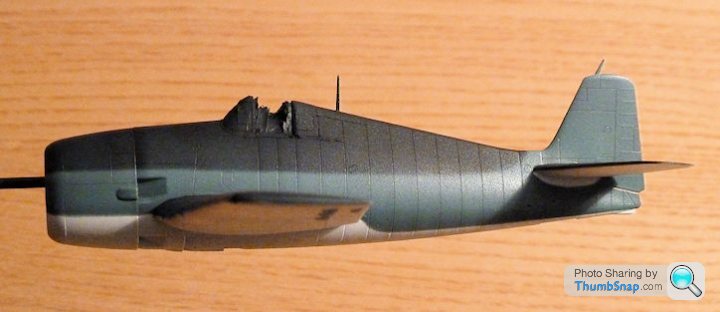
The preshading looks a bit odd or invisible on the photos, but in reality it shows up quite nicely. Needs a bit of corrective work along the leading edges, but apart form that and snapping the aerial mast off (I was wondering how close to completion I'd get before that happened) it looks OK.
Then for Dark Sea Blue - fuselage first because the Blu-Tac rolls obscure the wings:
Then mask the fuselage and spray the wing roots:
Then remove the masking:
The preshading looks a bit odd or invisible on the photos, but in reality it shows up quite nicely. Needs a bit of corrective work along the leading edges, but apart form that and snapping the aerial mast off (I was wondering how close to completion I'd get before that happened) it looks OK.
It's looking well 
I haven't started mine yet - I returned to a battleship and have been fiddling with bits of brass over the weekend.
I did spot a photo of my last Hellcat (Hasegawa IIRC - it was a while ago) on Photobucket when searching for something else and thought of this thread though
I haven't started mine yet - I returned to a battleship and have been fiddling with bits of brass over the weekend.
I did spot a photo of my last Hellcat (Hasegawa IIRC - it was a while ago) on Photobucket when searching for something else and thought of this thread though

jamieduff1981 said:
It's looking well
I haven't started mine yet - I returned to a battleship and have been fiddling with bits of brass over the weekend.
I did spot a photo of my last Hellcat (Hasegawa IIRC - it was a while ago) on Photobucket when searching for something else and thought of this thread though
Looks like an identical kit - but I suppose it should in theory!I haven't started mine yet - I returned to a battleship and have been fiddling with bits of brass over the weekend.
I did spot a photo of my last Hellcat (Hasegawa IIRC - it was a while ago) on Photobucket when searching for something else and thought of this thread though
I like the exhaust colours and the pale patches on the wings - how did you do it? I'm thinking of experimenting with pastels to fade the blue bits slightly, but I'll decide when the decals are on. Ta.
Thank you. That's high praise from yourself.
At this point in my modelling career I believe I was applying all weathering with artist's chalk pastels from the local art shop (long gone now) brushed on with a knackered old paint brush - it only worked on matt finishes and lifted if handled with sweaty fingers. It could be sealed in with a clear coat but either acrylic or enamel floated the powder and turned it into globules suspended in the varnish - but I can't remember which was a safe bet and which ruined everything!
I think this one was painted with those Polyscale acrylics which came in little glass jars. They were the first acrylics I ever used and the only ones I could use consistently and which adhered well.
jamieduff1981 said:
Thank you. That's high praise from yourself.
At this point in my modelling career I believe I was applying all weathering with artist's chalk pastels from the local art shop (long gone now) brushed on with a knackered old paint brush - it only worked on matt finishes and lifted if handled with sweaty fingers. It could be sealed in with a clear coat but either acrylic or enamel floated the powder and turned it into globules suspended in the varnish - but I can't remember which was a safe bet and which ruined everything!
I think this one was painted with those Polyscale acrylics which came in little glass jars. They were the first acrylics I ever used and the only ones I could use consistently and which adhered well.
Thanks - I was thinking of trying Tamiya weathering powders over Klear so that I can wipe them off it goes wrong.At this point in my modelling career I believe I was applying all weathering with artist's chalk pastels from the local art shop (long gone now) brushed on with a knackered old paint brush - it only worked on matt finishes and lifted if handled with sweaty fingers. It could be sealed in with a clear coat but either acrylic or enamel floated the powder and turned it into globules suspended in the varnish - but I can't remember which was a safe bet and which ruined everything!
I think this one was painted with those Polyscale acrylics which came in little glass jars. They were the first acrylics I ever used and the only ones I could use consistently and which adhered well.
Do you remember what the exhaust colour was? I'd like a subtle version of the light brown-ish over grey colour you often see with these aircraft.

The exhaust staining would have been a mix of black and a medium brown with some white applied over the top to give the leaded fuel effect. These old chalks went on really well by scraping a knife blade along and making a pile of dusty shavings which brushed on a treat.
By contrast the Tamiya powders on the right are a little waxy, more like makeup, and as far as I can tell (weathering grey warships) just don't brush on. You have to wipe them on pretty hard with the spongy end to get anywhere with them. I'm not that impressed with them to be honest and will be looking for chalks again.
Tamiya powders seem very sensitive to surface finish - gloss and they don't stick very well, matt and they do, at the expense of mottling rather than an airbrush type finish. If you get the perfect satin sheen they are great, if not...they're tricky. Then again, airbrushing weathering on a 99% finished model is always a risk.
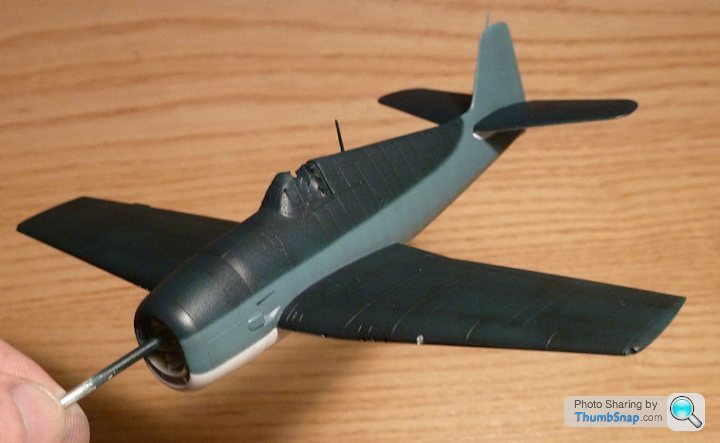
Anyhow, ready for decals now:
Anyhow, ready for decals now:
Norco said:
Really like that! Looks great so far. For an aircraft that was designed with little regard for aesthetics, I always thought it looked pretty good.
Thanks very much - I like all the Grumman 'Cats': Form through function.perdu said:
It's looking 'the nuts' G
I can just see the preshading
Just
very nice
Ta Perdu - that was the aim! Still needs some of the contrast between colours knocking back, probably with a few coats of Tamiya smoke plus maybe some powder weathering on the blues as per JD1981. Then again the three-tone scheme does seem pretty contrasty in reality:I can just see the preshading
Just
very nice

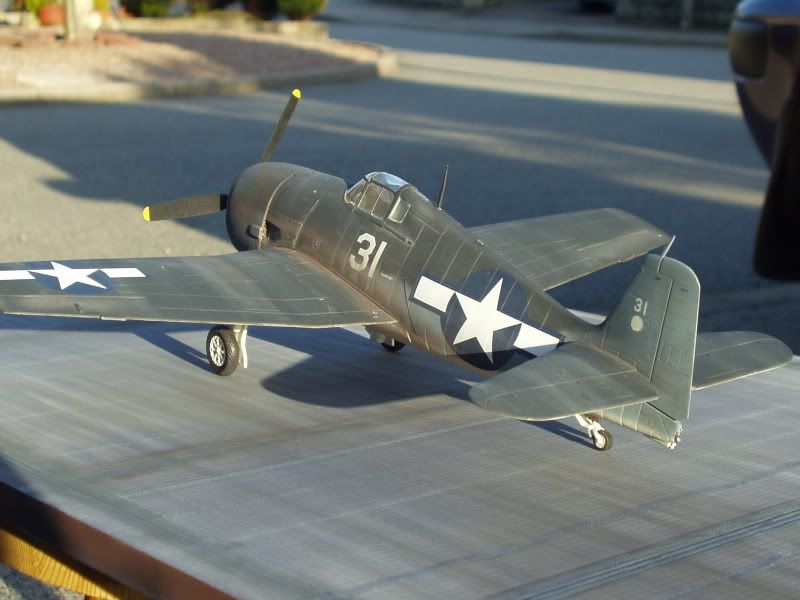
Decals on tonight:
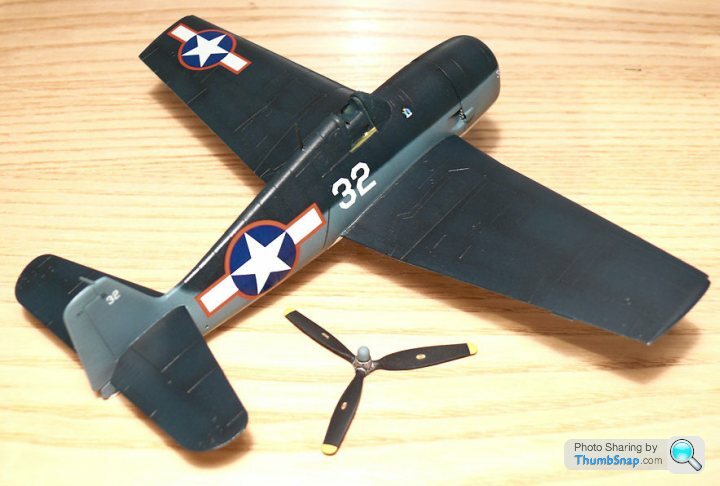
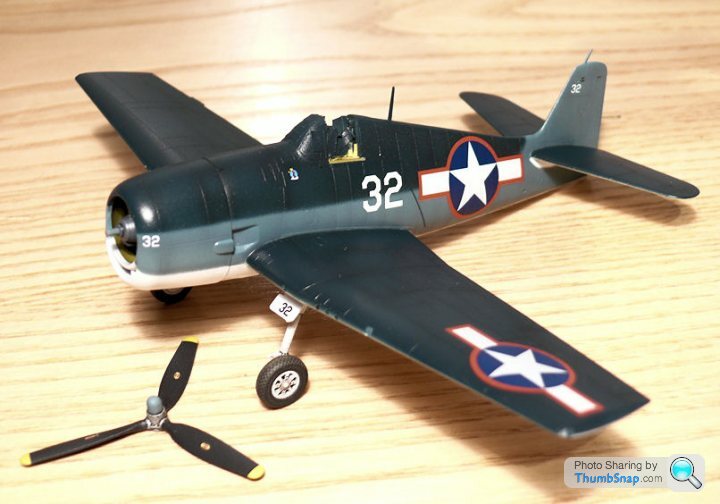
There aren't many of them, but they are big...
perdu said:
As youpointed out everything about them was big
I still have one of the Hasegawa ones kicking about from when I was a modeller back in the day, and there is almost enough left to rework
Yours is kinda tempting me
I think the Hasegawa kit is also very good from what I have read.I still have one of the Hasegawa ones kicking about from when I was a modeller back in the day, and there is almost enough left to rework
Yours is kinda tempting me
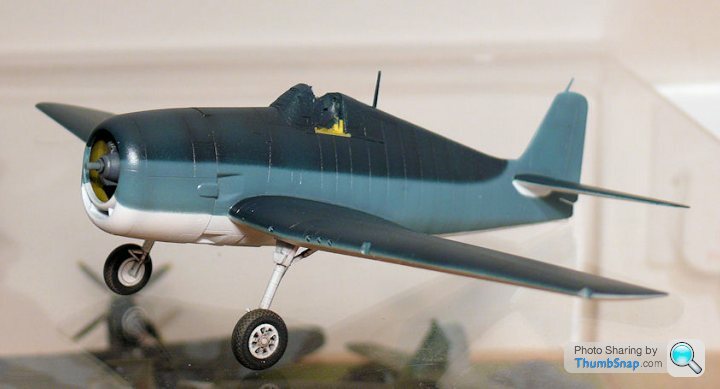
So the weathering is done; I went for MIG neutral wash all over, dark wash in the wheel bays, followed by three thinned coats of Tamiya Smoke to knock back the contrast a bit and give everything a bit of age. I used Tamiya powders for the exhaust and cordite stains, and dots of oil paint streaked back with a cloth in some areas. It still needs some very minor paint chips applying to areas of high wear. As ever, the discretion:valour ratio was high; I didn't have the confidence to do much more with the exhausts so I left them. At some point aircraft are new or get cleaned - that's my excuse...
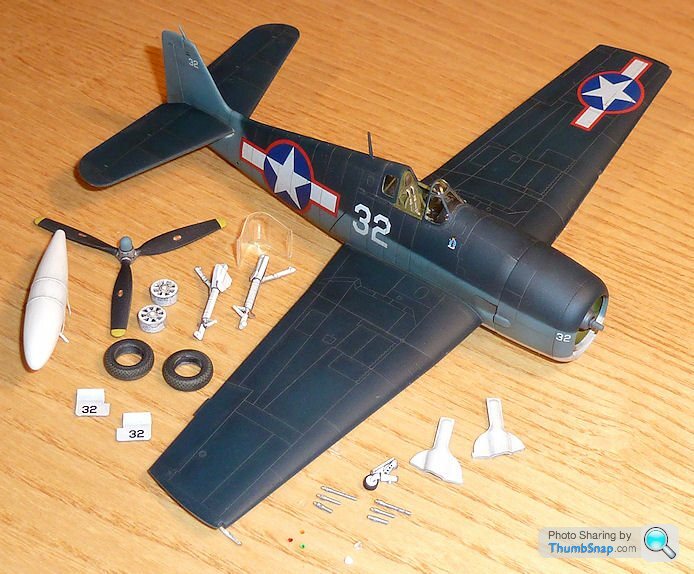

So now it's the best bit: Final assembly. The drop tank needs the weathering completing, and I've not yet trimmed or painted the vacform canopy, but the model is 90% there now.
Gassing Station | Scale Models | Top of Page | What's New | My Stuff